Watcher & Node-RED To Kafka Quick Start

Part 1.What is Kafka
Apache Kafka is a distributed event streaming platform designed for high-throughput, fault-tolerant data processing. It enables real-time data feeds by allowing producers to publish messages to topics, while consumers can subscribe to these topics to process the data. Kafka is widely used for building data pipelines, real-time analytics, and integrating various data sources. Its robust architecture ensures scalability and durability, making it a popular choice for modern data-driven applications.
Part 2.Build Kafka cluster in Docker
Why use Docker? Because Docker can simulate the environment of multiple computers on a single machine and deploy applications with great ease. Therefore, in this project, we will use Docker to set up the environment and improve efficiency.
Step 1. Download Docker
According to your computer to download different types of installer. Click here to jump.
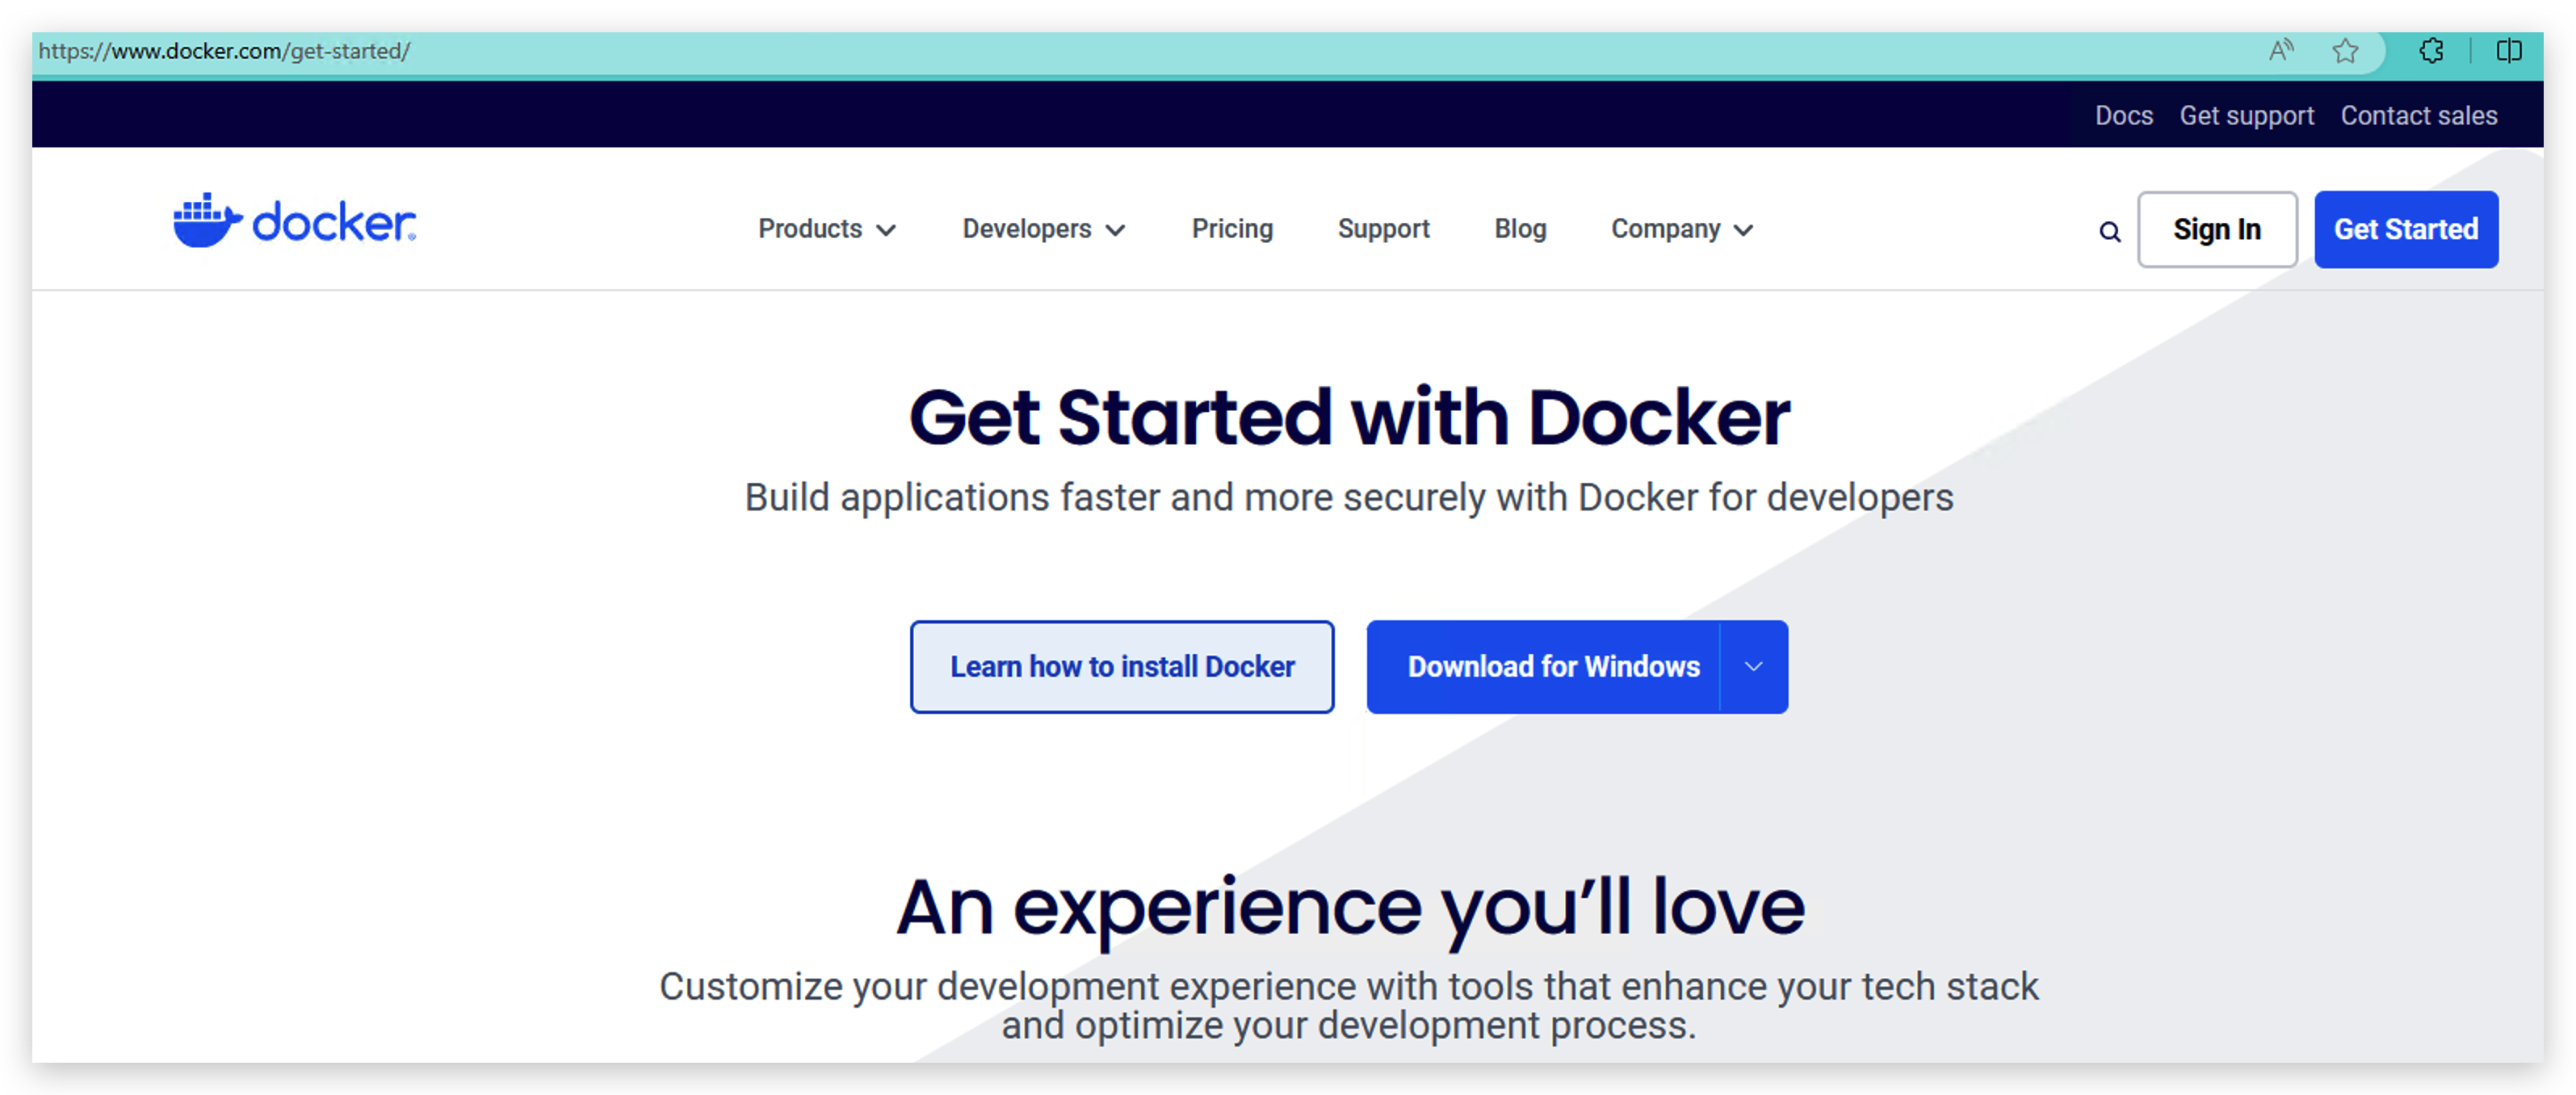
If your computer is Windows, please don't install docker until you finish Step 2.
Step 2. Install WSL(Windows Subsystem for Linux)
This step is for Windows. You can skip this step if you computer is Mac or Linux.
- Run the following code as an administrator.
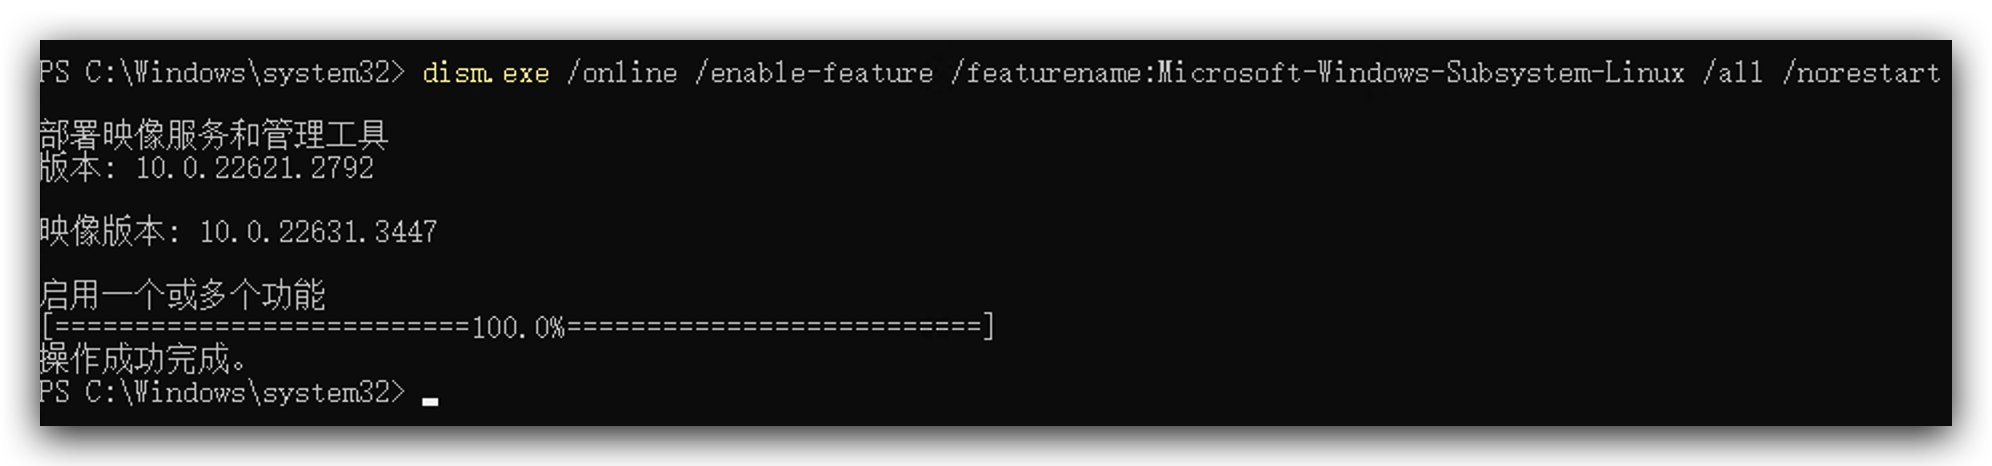
dism.exe /online /enable-feature /featurename:Microsoft-Windows-Subsystem-Linux /all /norestart
dism.exe /online /enable-feature /featurename:VirtualMachinePlatform /all /norestart
-
Download this tool from here and double click to install it.
-
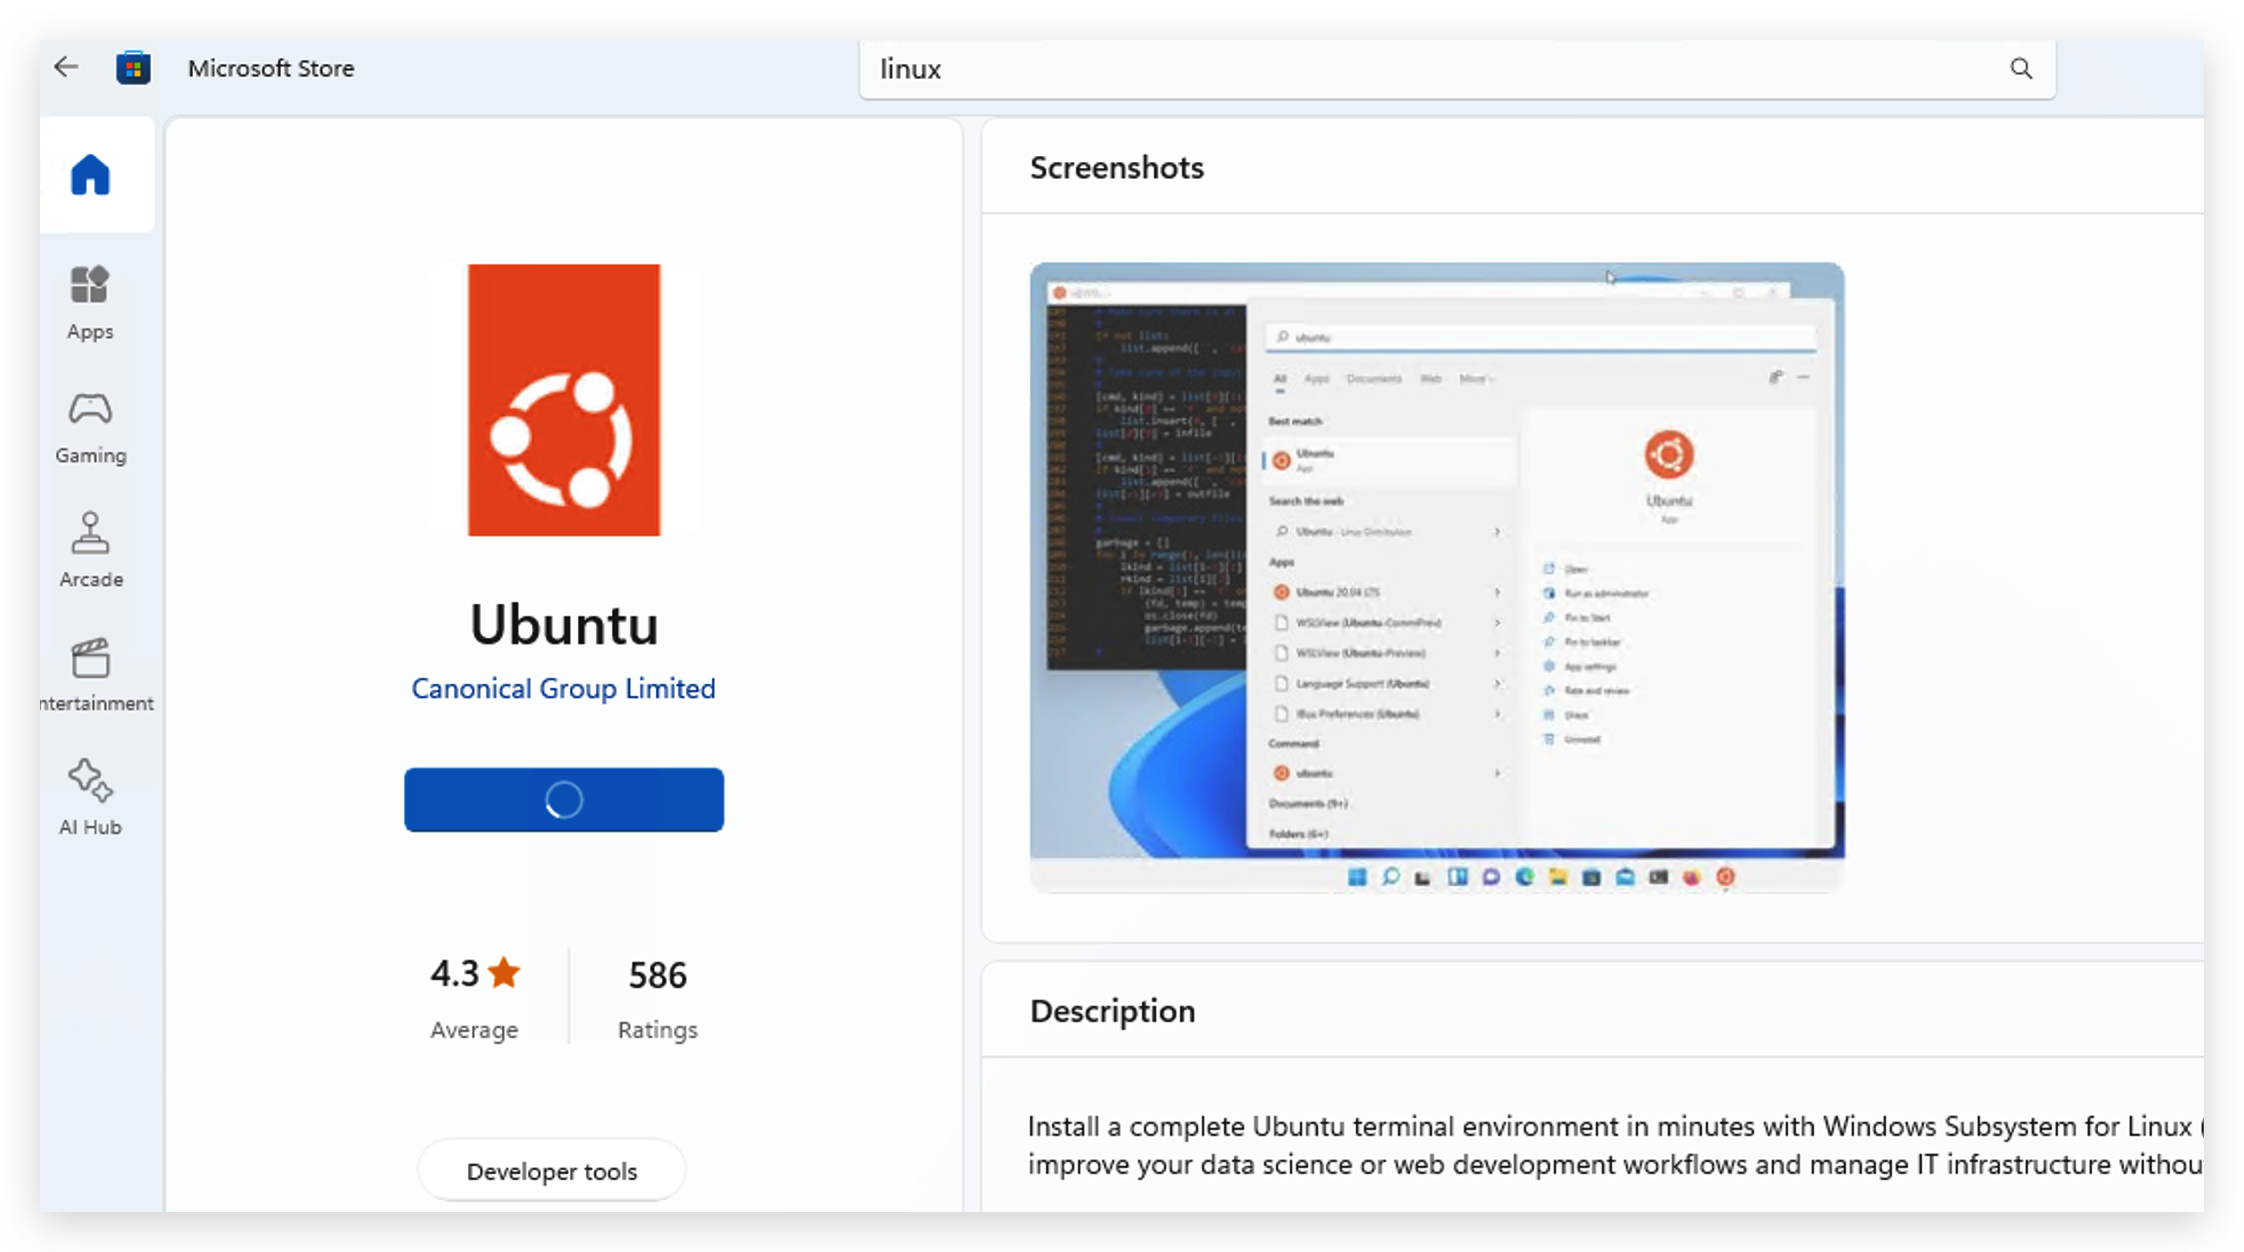
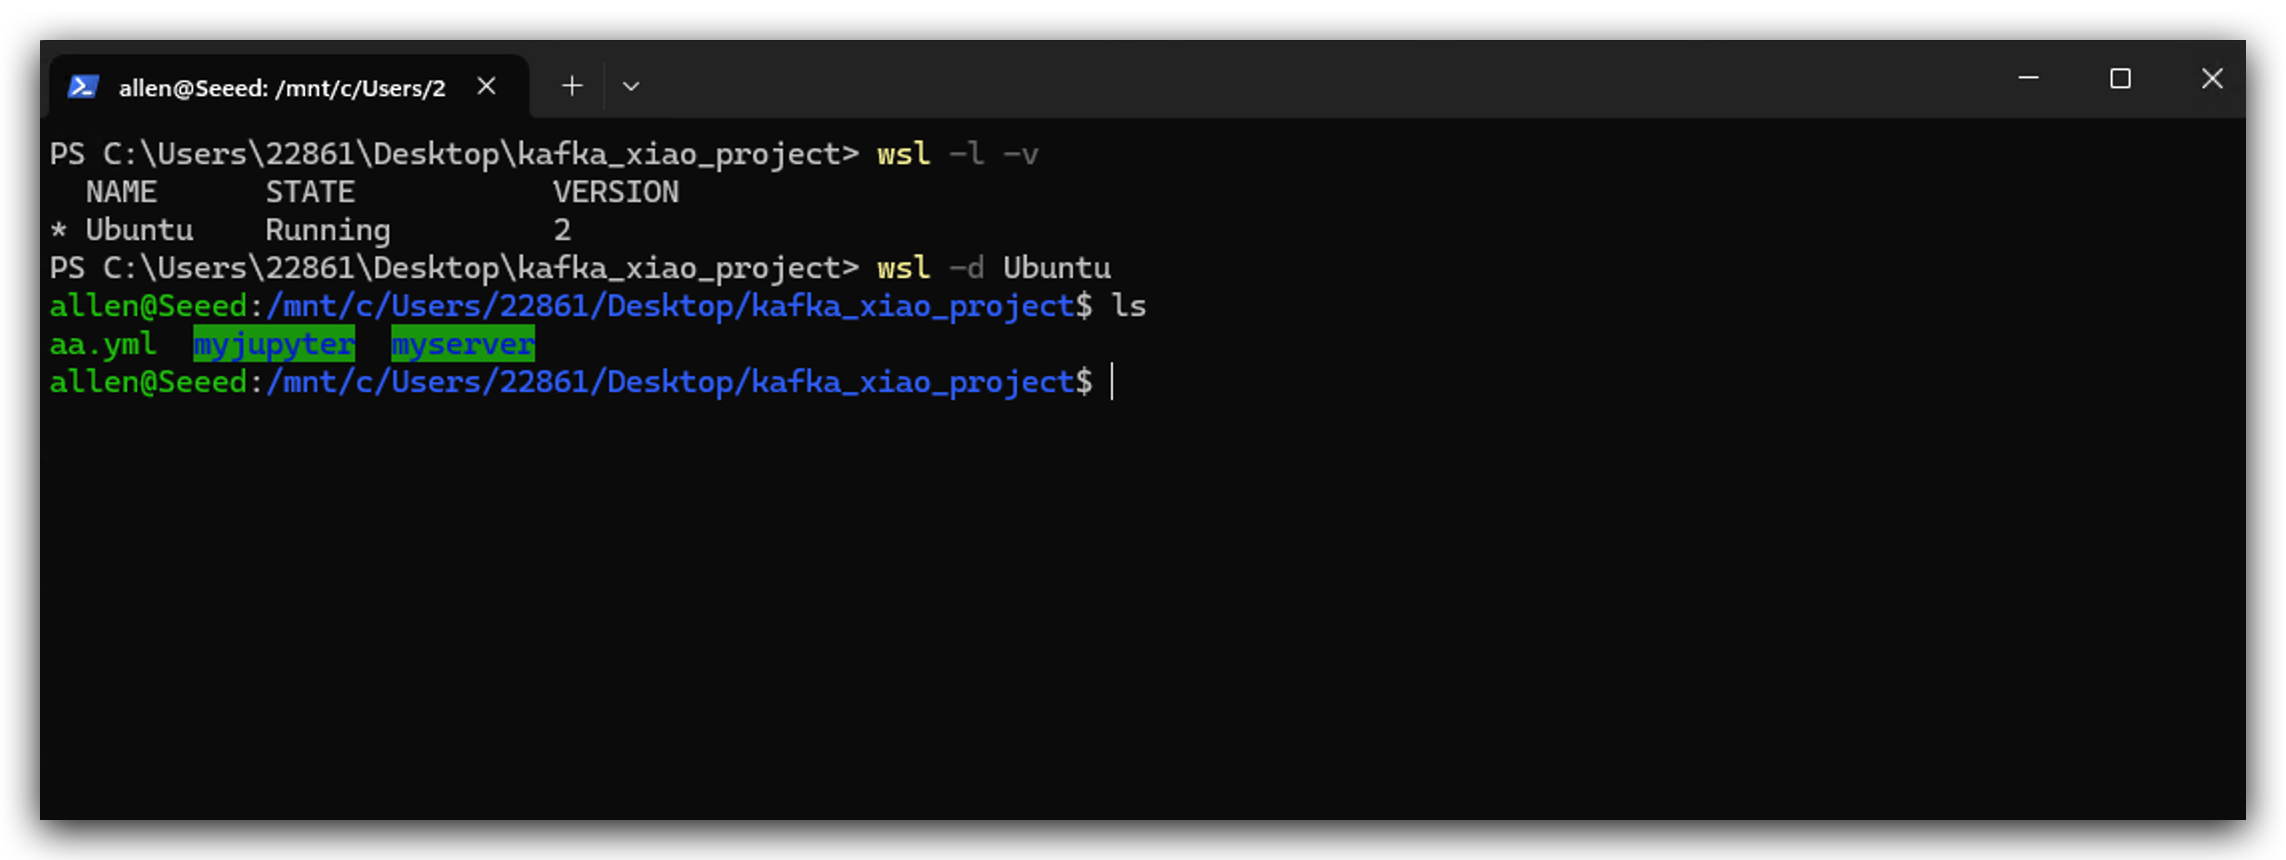
Go to your Microsoft Store to search and download linux version you like, here I installed Ubuntu.
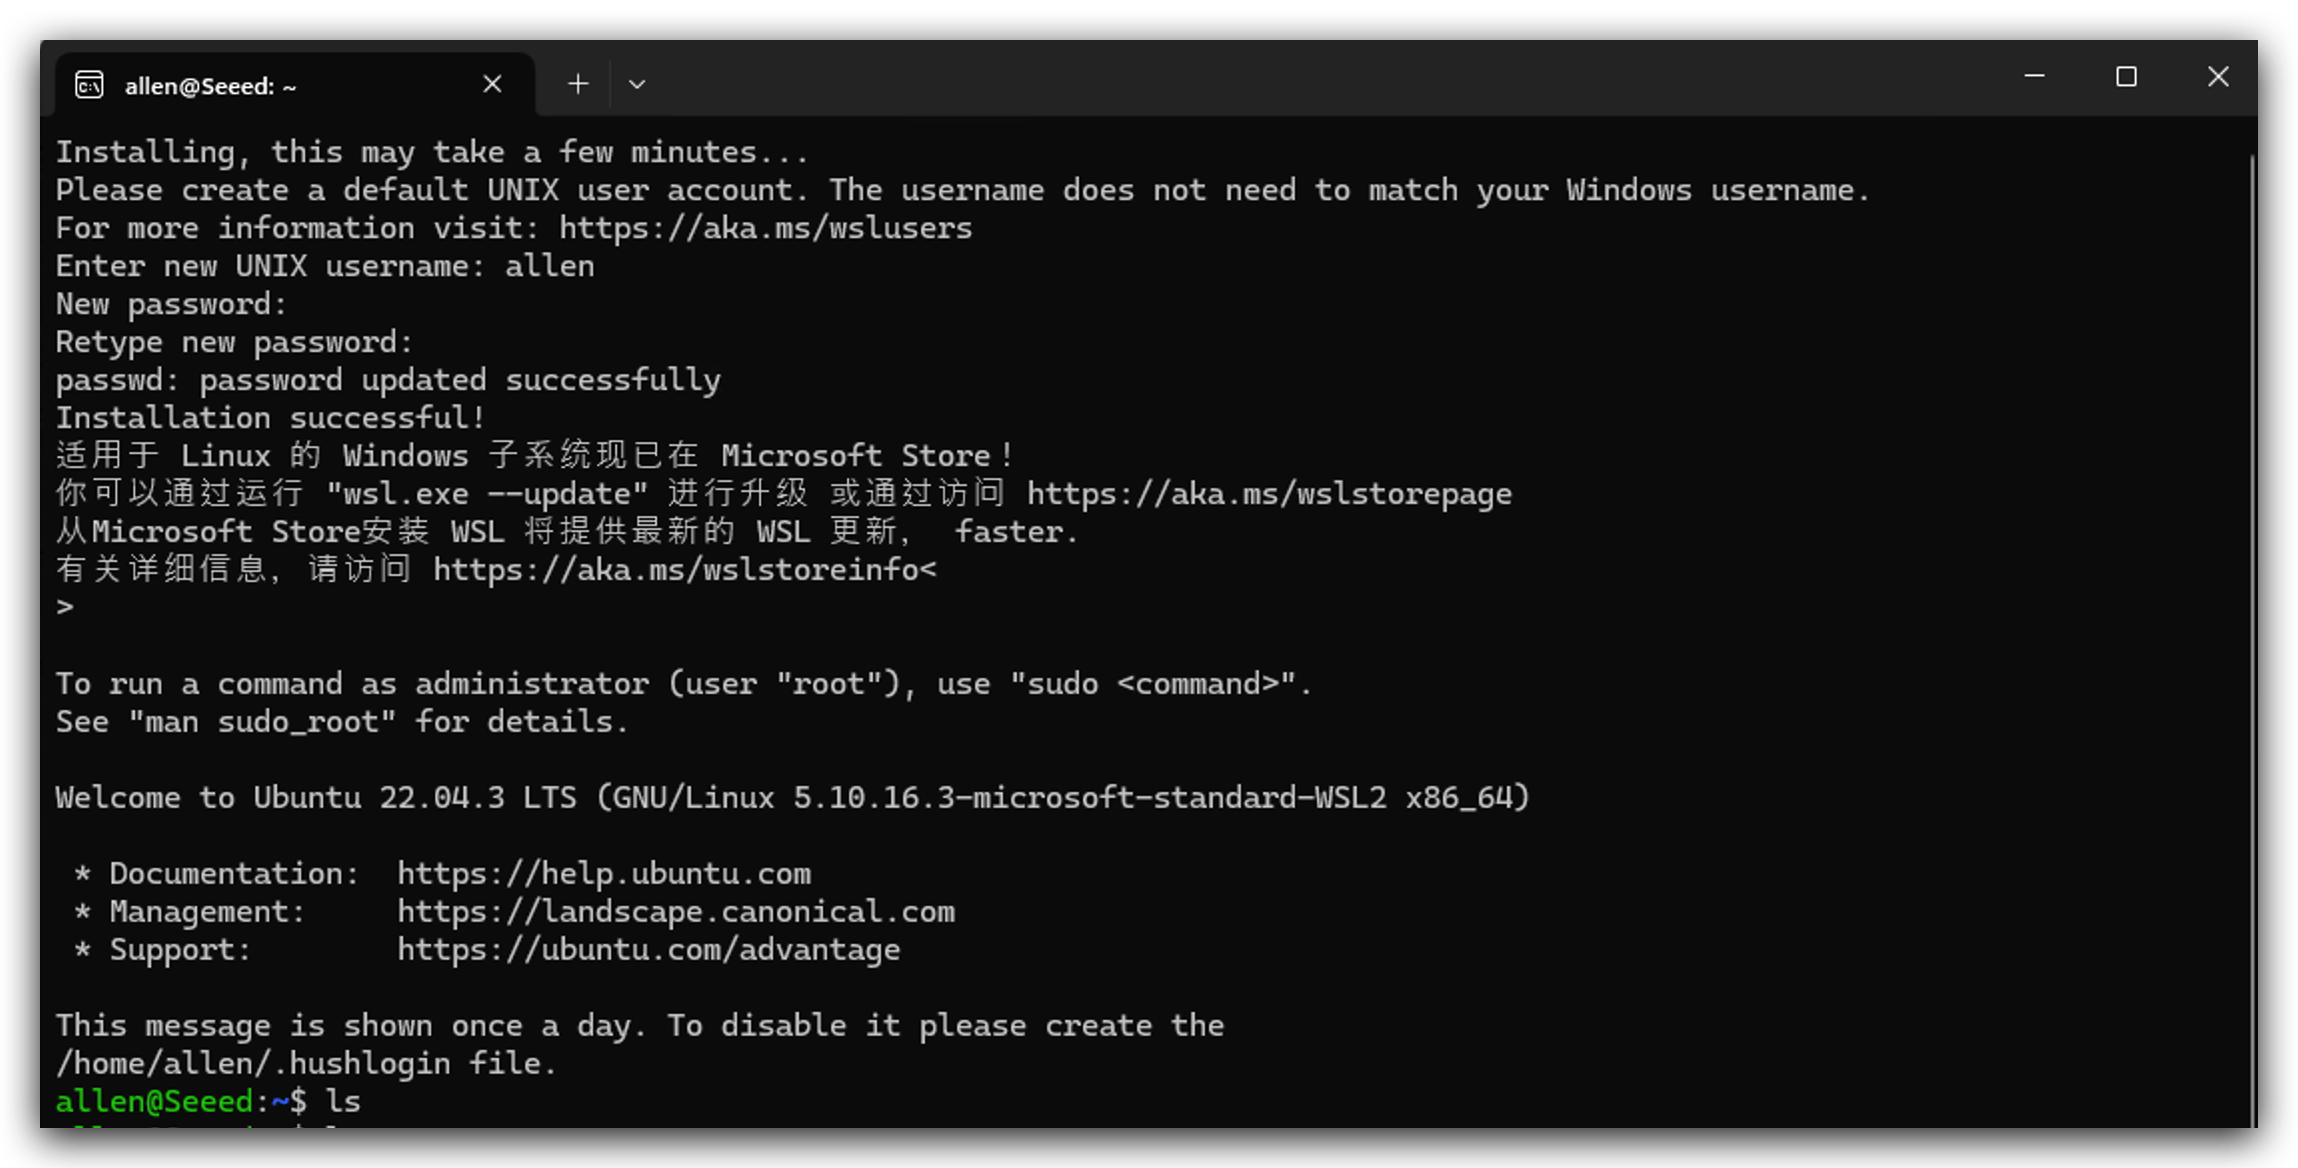
- After installing Linux, you need to open it and set your username and password, and then need to wait a minute to initialize.
- Run the following instructions to use WSL.
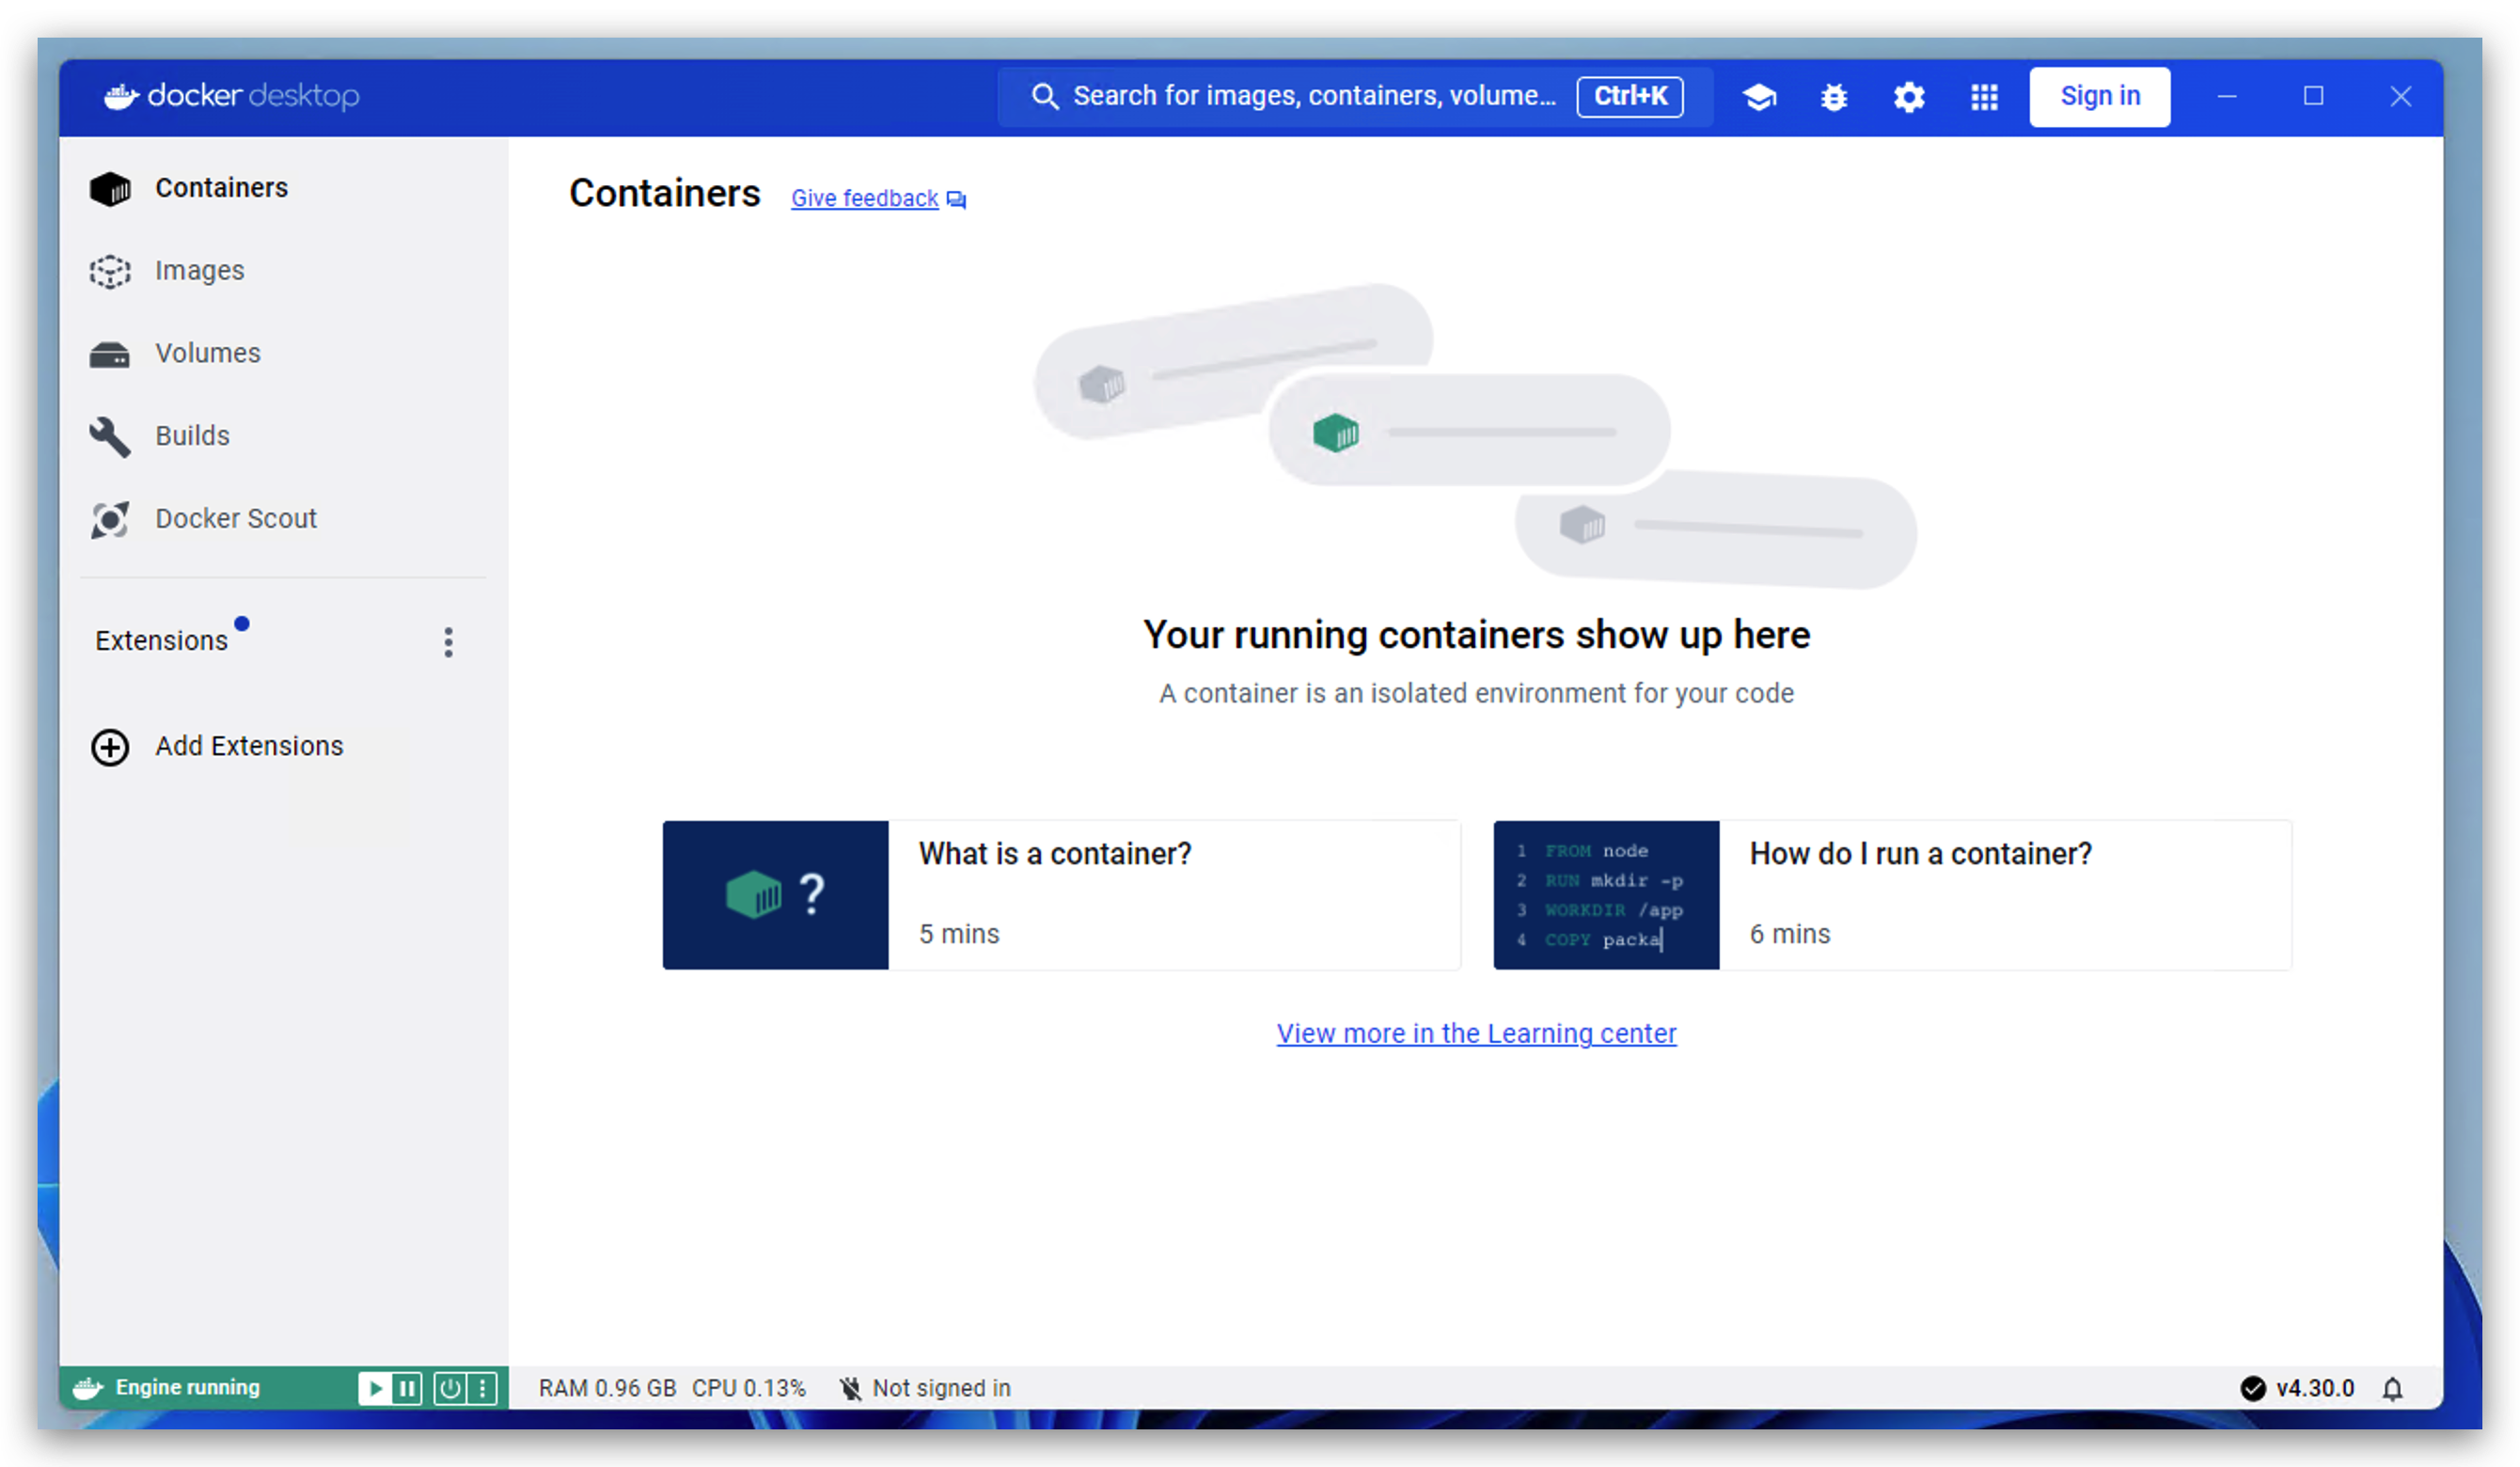
- After installing WSL, now you can double click you docker installer to install it. When you see the following image that means it work.
Step 3.Build Kafka image and run
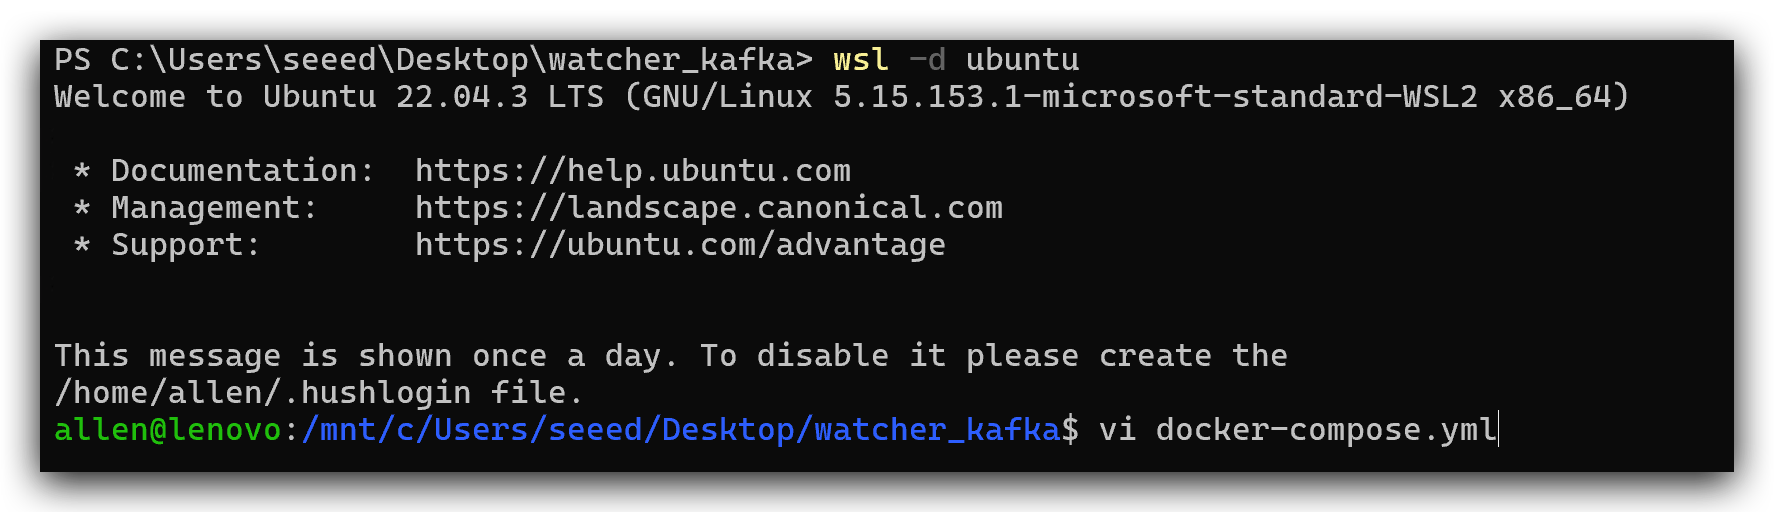
- Find a place to create docker-compose.yml file and copy the following codes into it.
services:
  zookeeper:
    image: wurstmeister/zookeeper   ## image
    container_name: zookeeper
    ports:
      - "2181:2181"                 ## Externally exposed port number
  kafka:
    image: wurstmeister/kafka       ## image
    container_name: kafka
    volumes:
        - ./volume:/volume ## Mounting location
    ports:
      - "9092:9092"
    environment:
      KAFKA_ADVERTISED_HOST_NAME: 127.0.0.1         ## Host machine IP
      KAFKA_ZOOKEEPER_CONNECT: zookeeper:2181       ## Running Kafka is base to zookeeper
      KAFKA_ADVERTISED_PORT: 9092
      KAFKA_LOG_RETENTION_HOURS: 120
      KAFKA_MESSAGE_MAX_BYTES: 10000000
      KAFKA_REPLICA_FETCH_MAX_BYTES: 10000000
      KAFKA_GROUP_MAX_SESSION_TIMEOUT_MS: 60000
      KAFKA_NUM_PARTITIONS: 3
      KAFKA_DELETE_RETENTION_MS: 1000
  kafka-manager:
    image: sheepkiller/kafka-manager                ## image: open source web manage interface about kafka cluster
    container_name: kafka-manager
    environment:
        ZK_HOSTS: 127.0.0.1                         ## host machine IP
    ports:
      - "9009:9000"                                 ## exposed port
- Run Kafka in container and get into it
docker-compose up -d

docker exec -it kafka /bin/bash

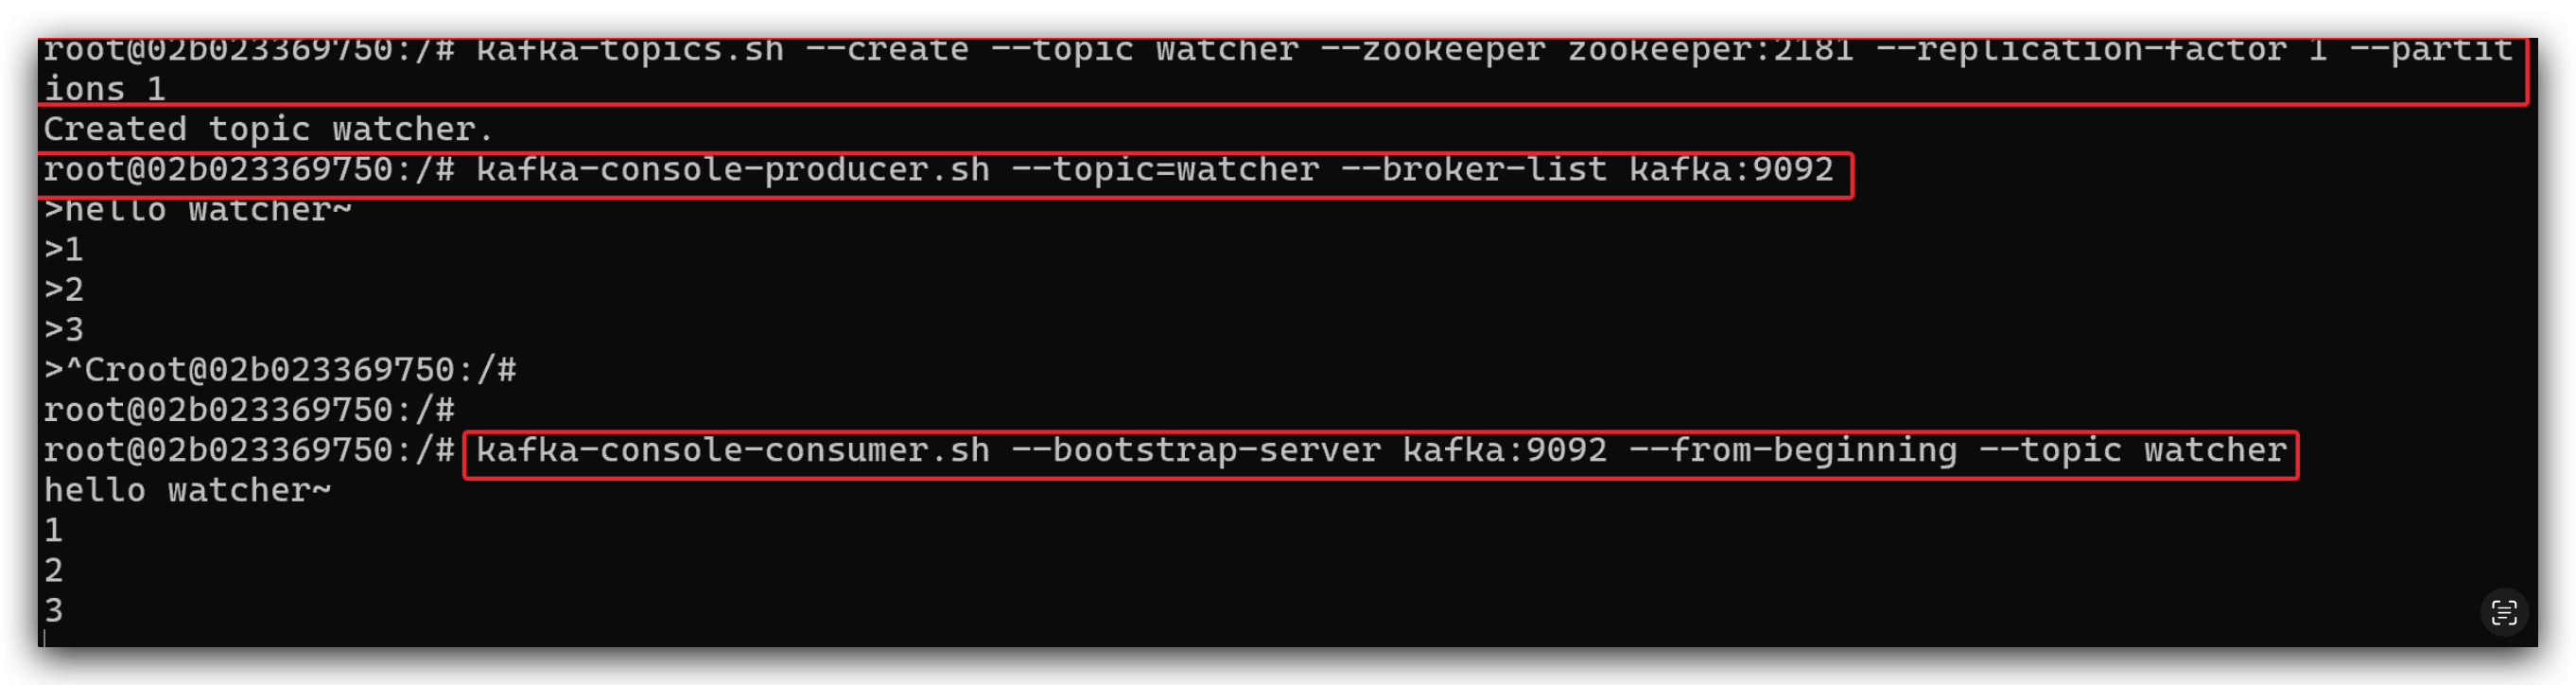
- Create a new topic, produce something and comsume something. To test if Kafka works well.
kafka-topics.sh --create --topic watcher --zookeeper zookeeper:2181 --replication-factor 1 --partitions 1

kafka-console-producer.sh --topic=watcher --broker-list kafka:9092

kafka-console-consumer.sh --bootstrap-server kafka:9092 --from-beginning --topic watcher
Part 3.Run Kafka message module in Node-RED
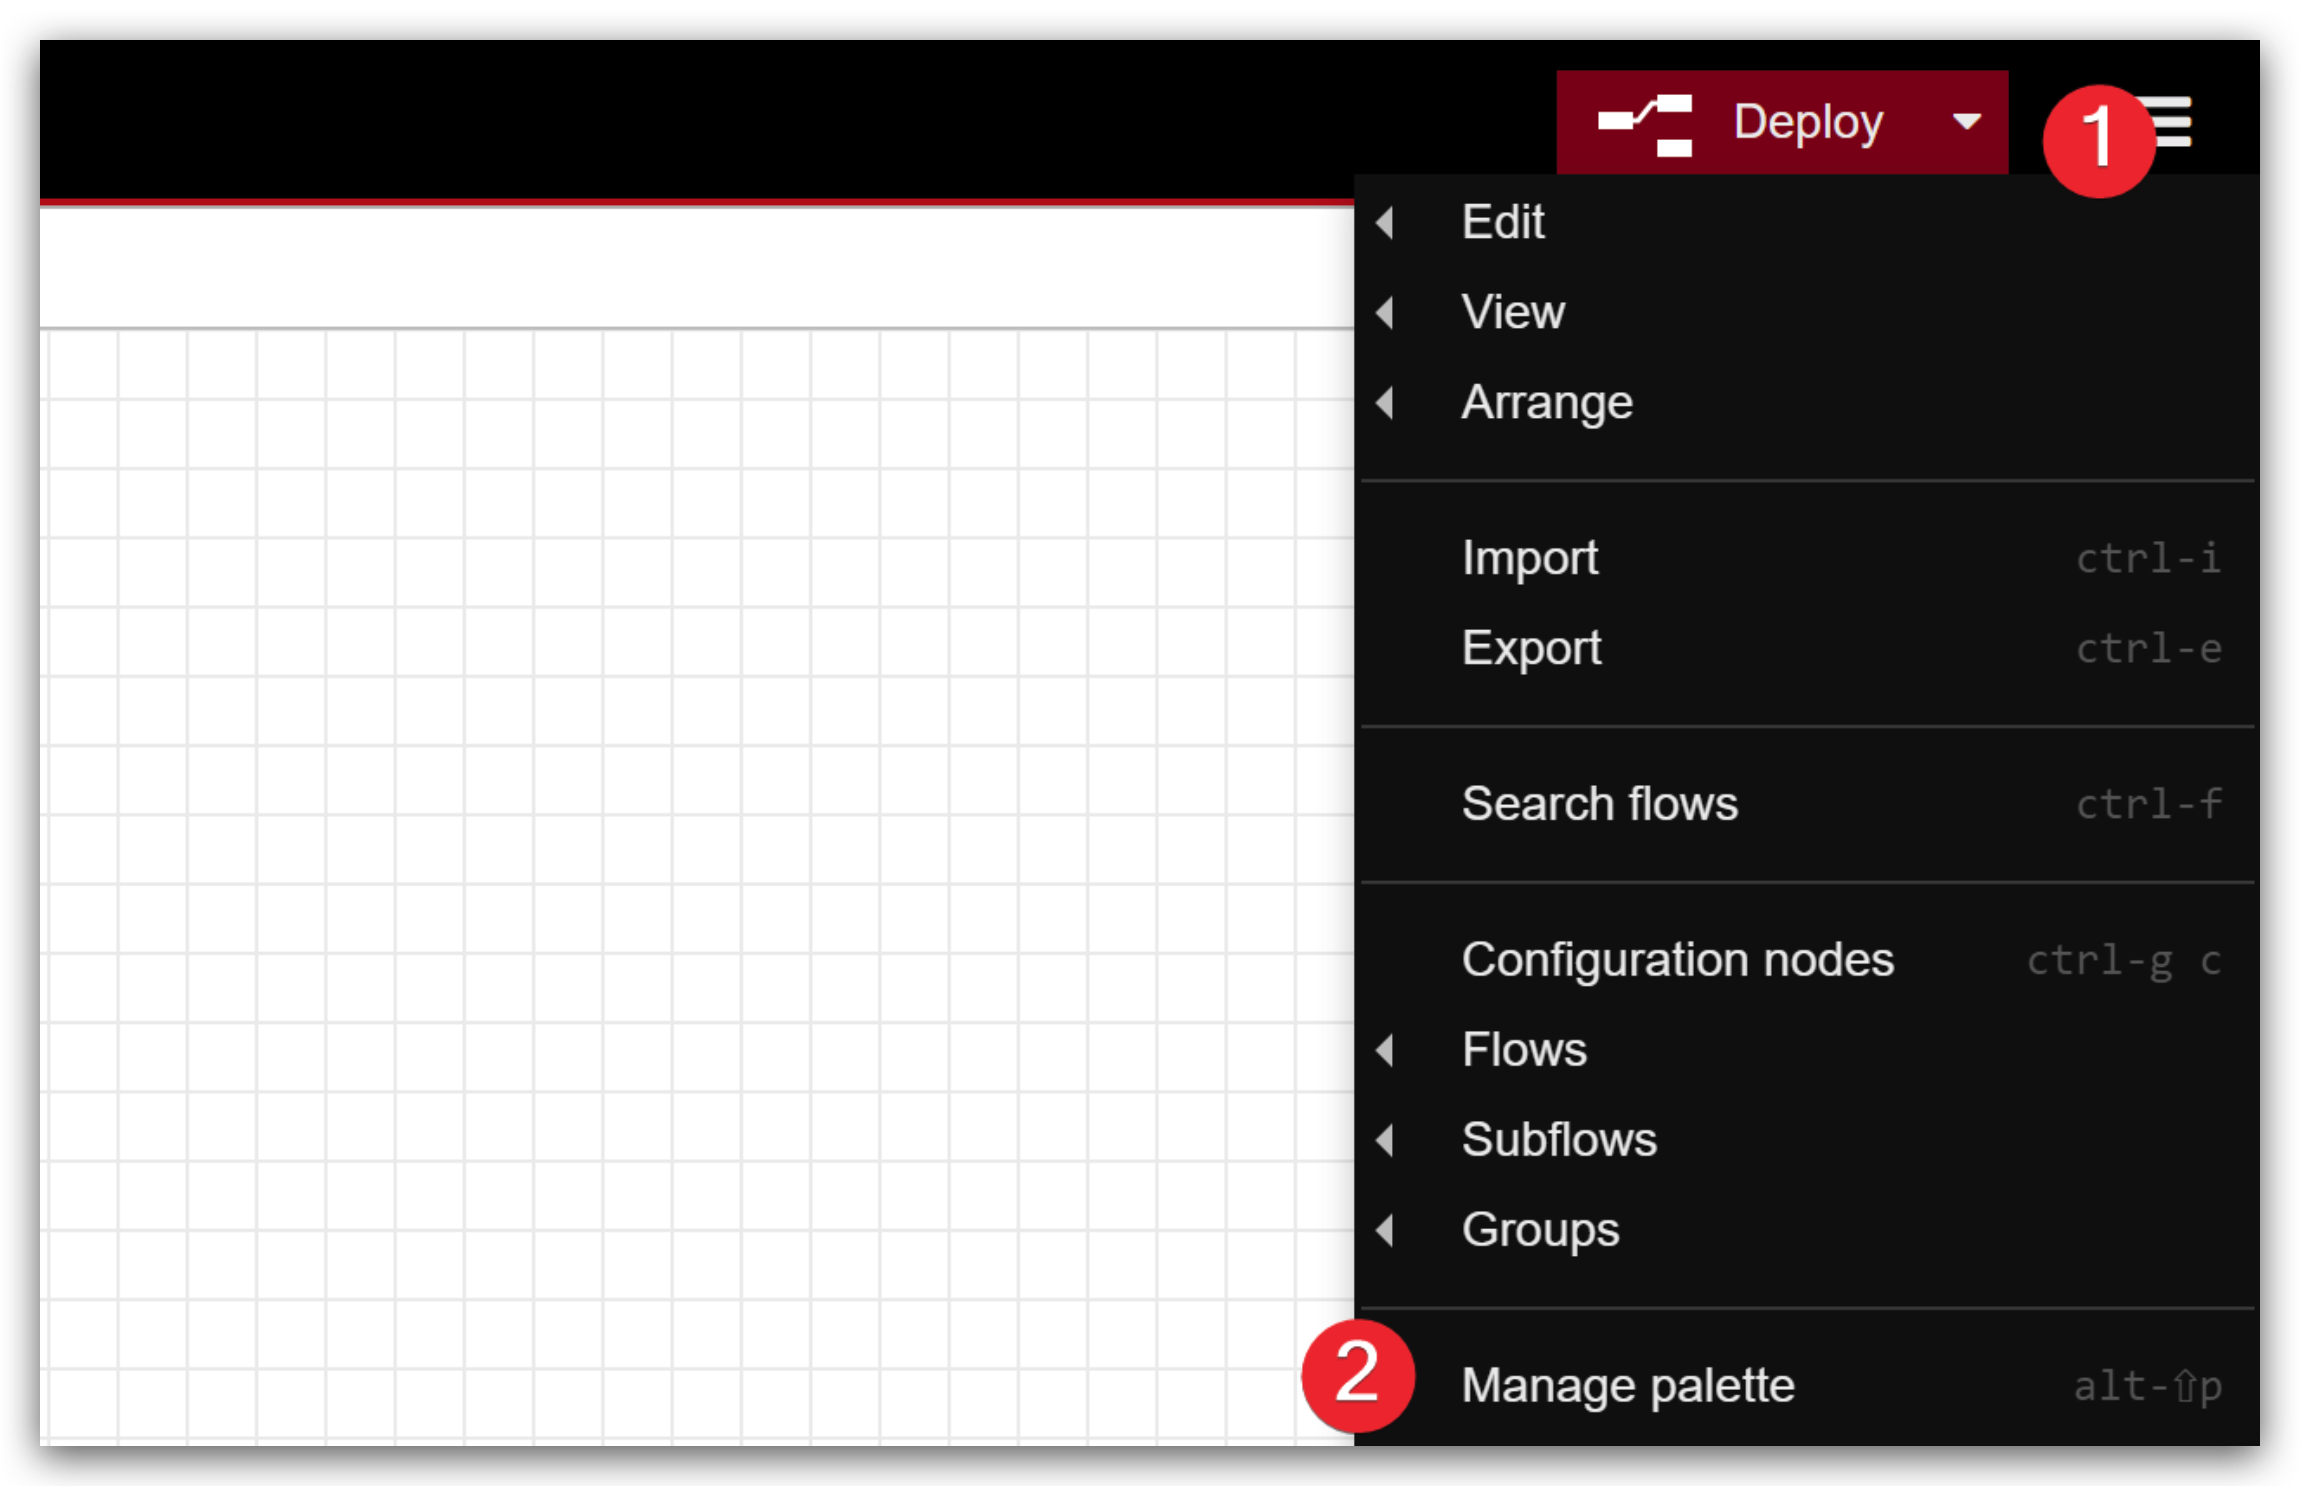
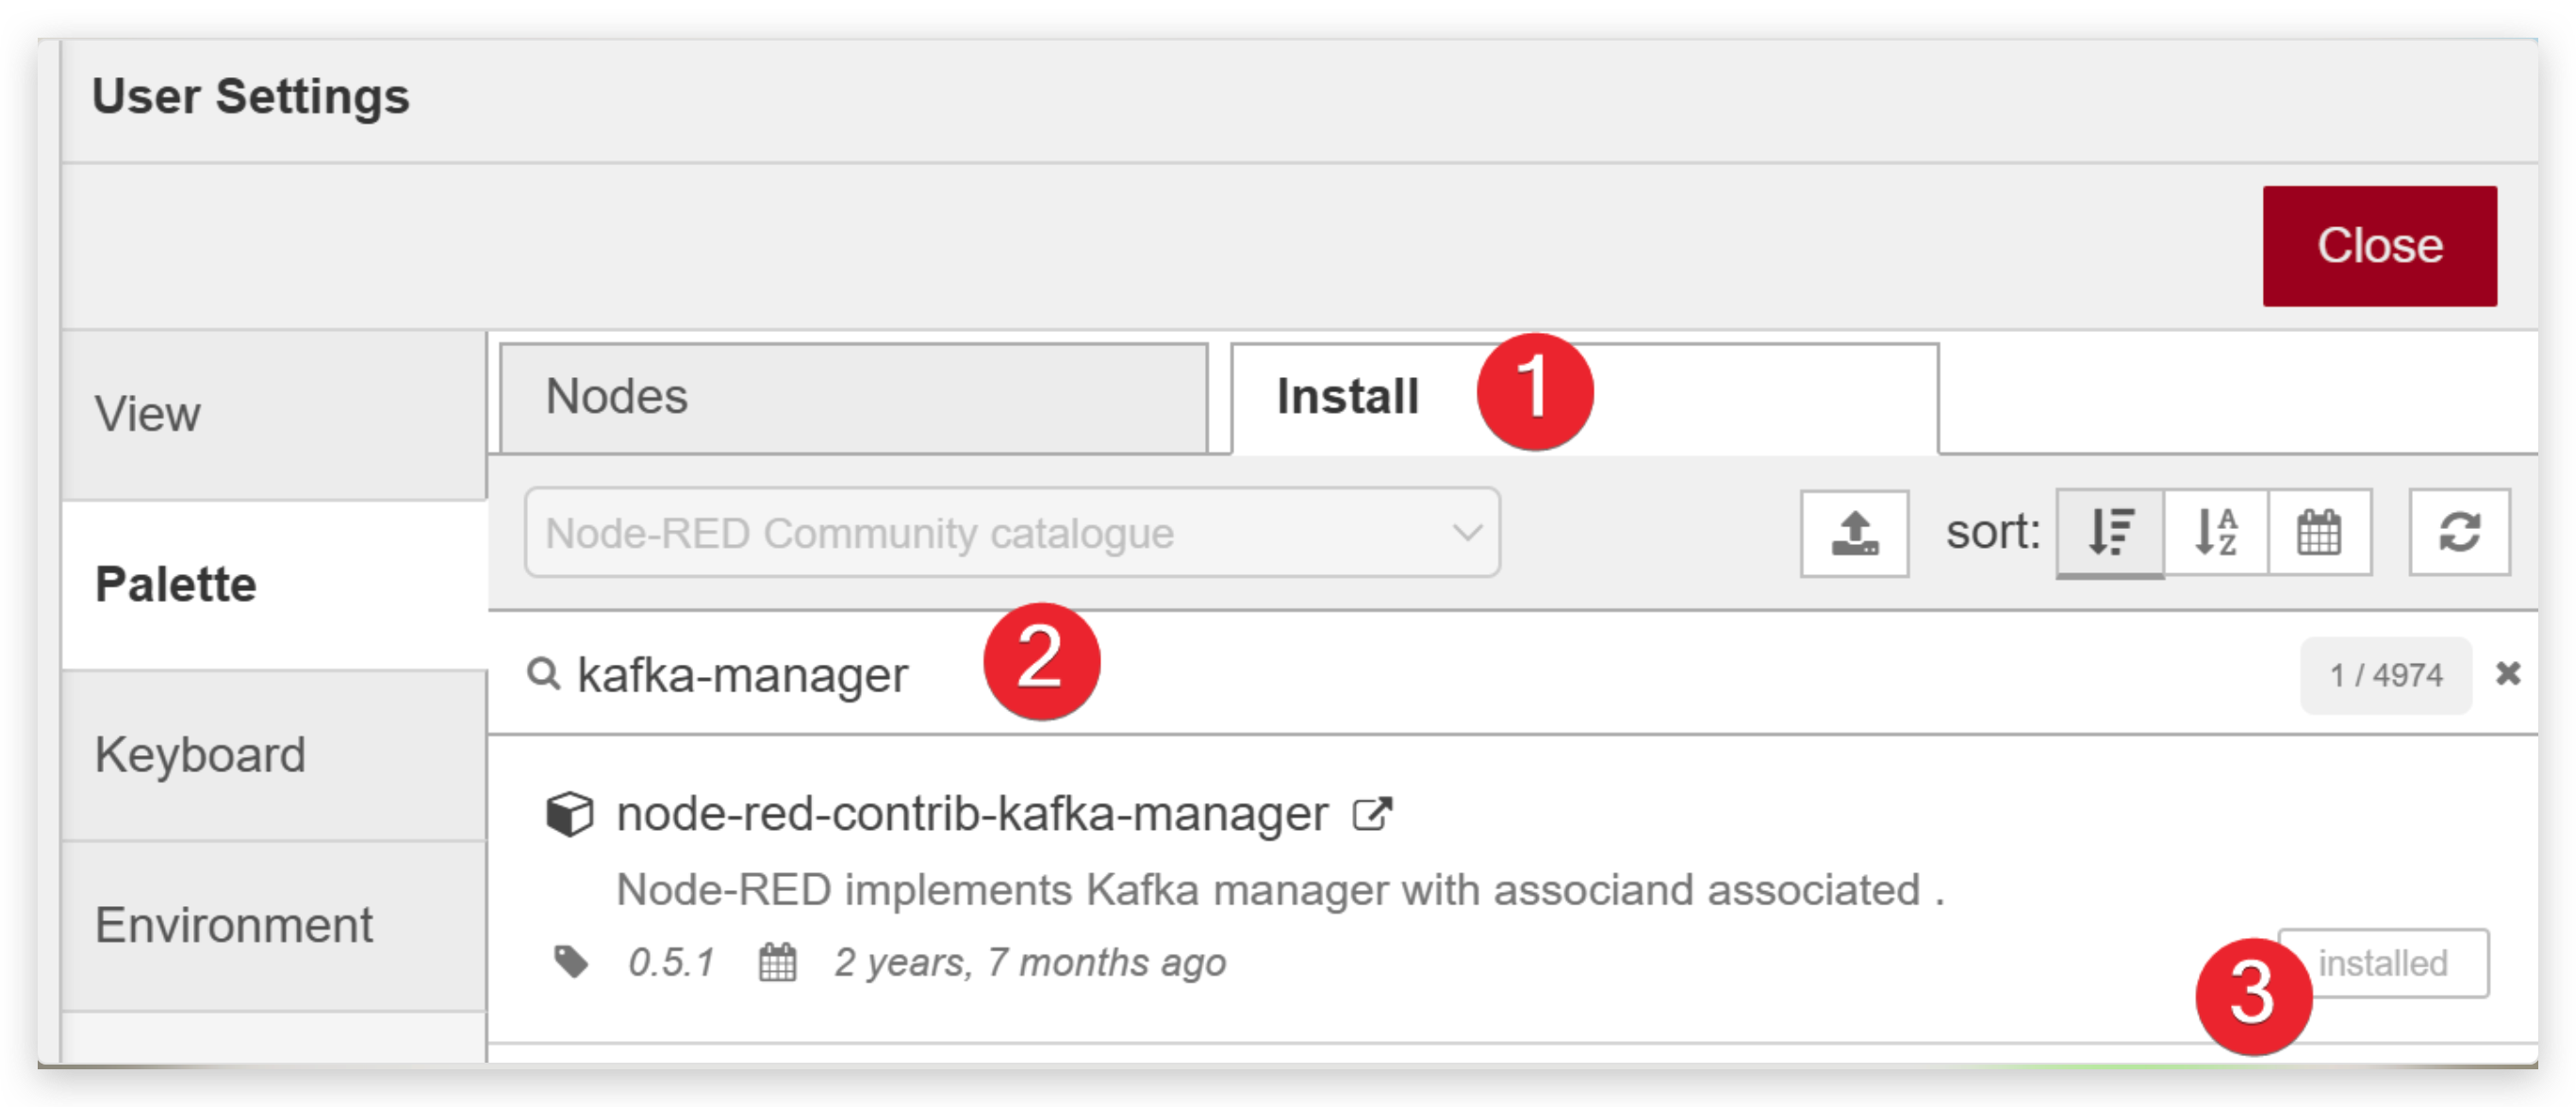
Step 4. Install Kafka message module
- Click Manage palette. If you don't install Node_RED yet, please click here.
- Search kafka-manager and install it
Step 5. Configure Kafka message module
- Drag those modules(inject, kafka producer, kafka consumer, debug) into workspace
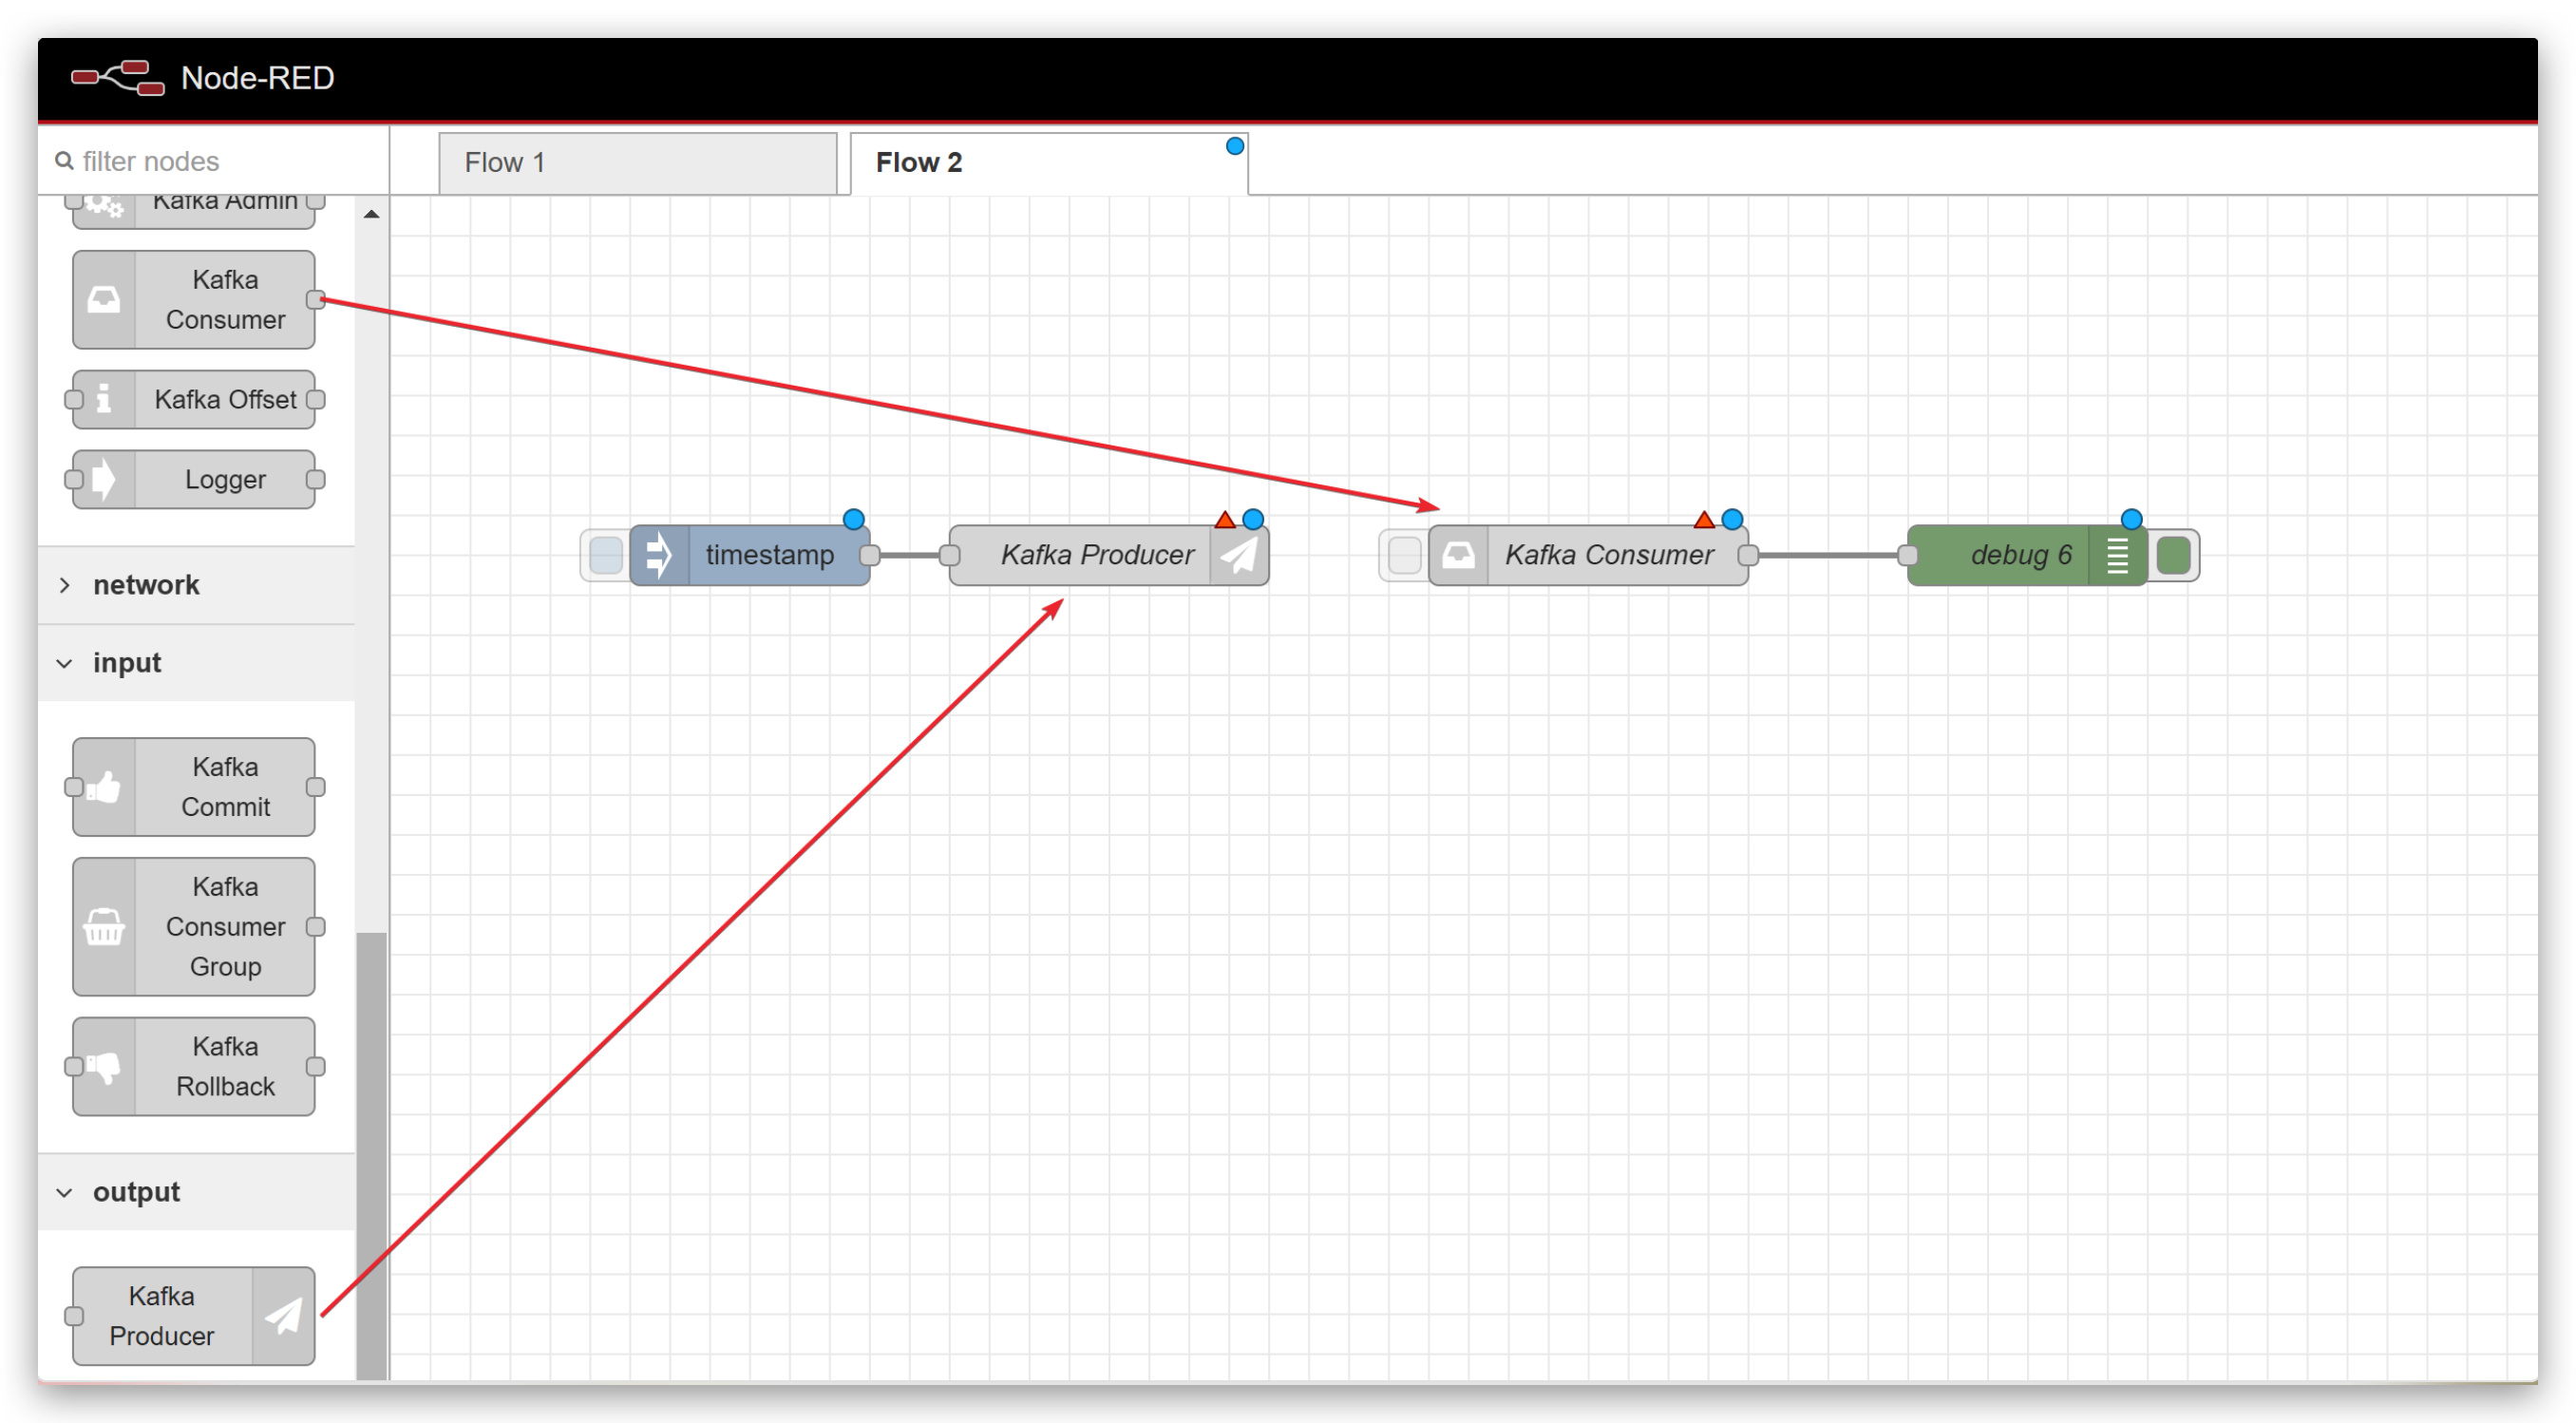
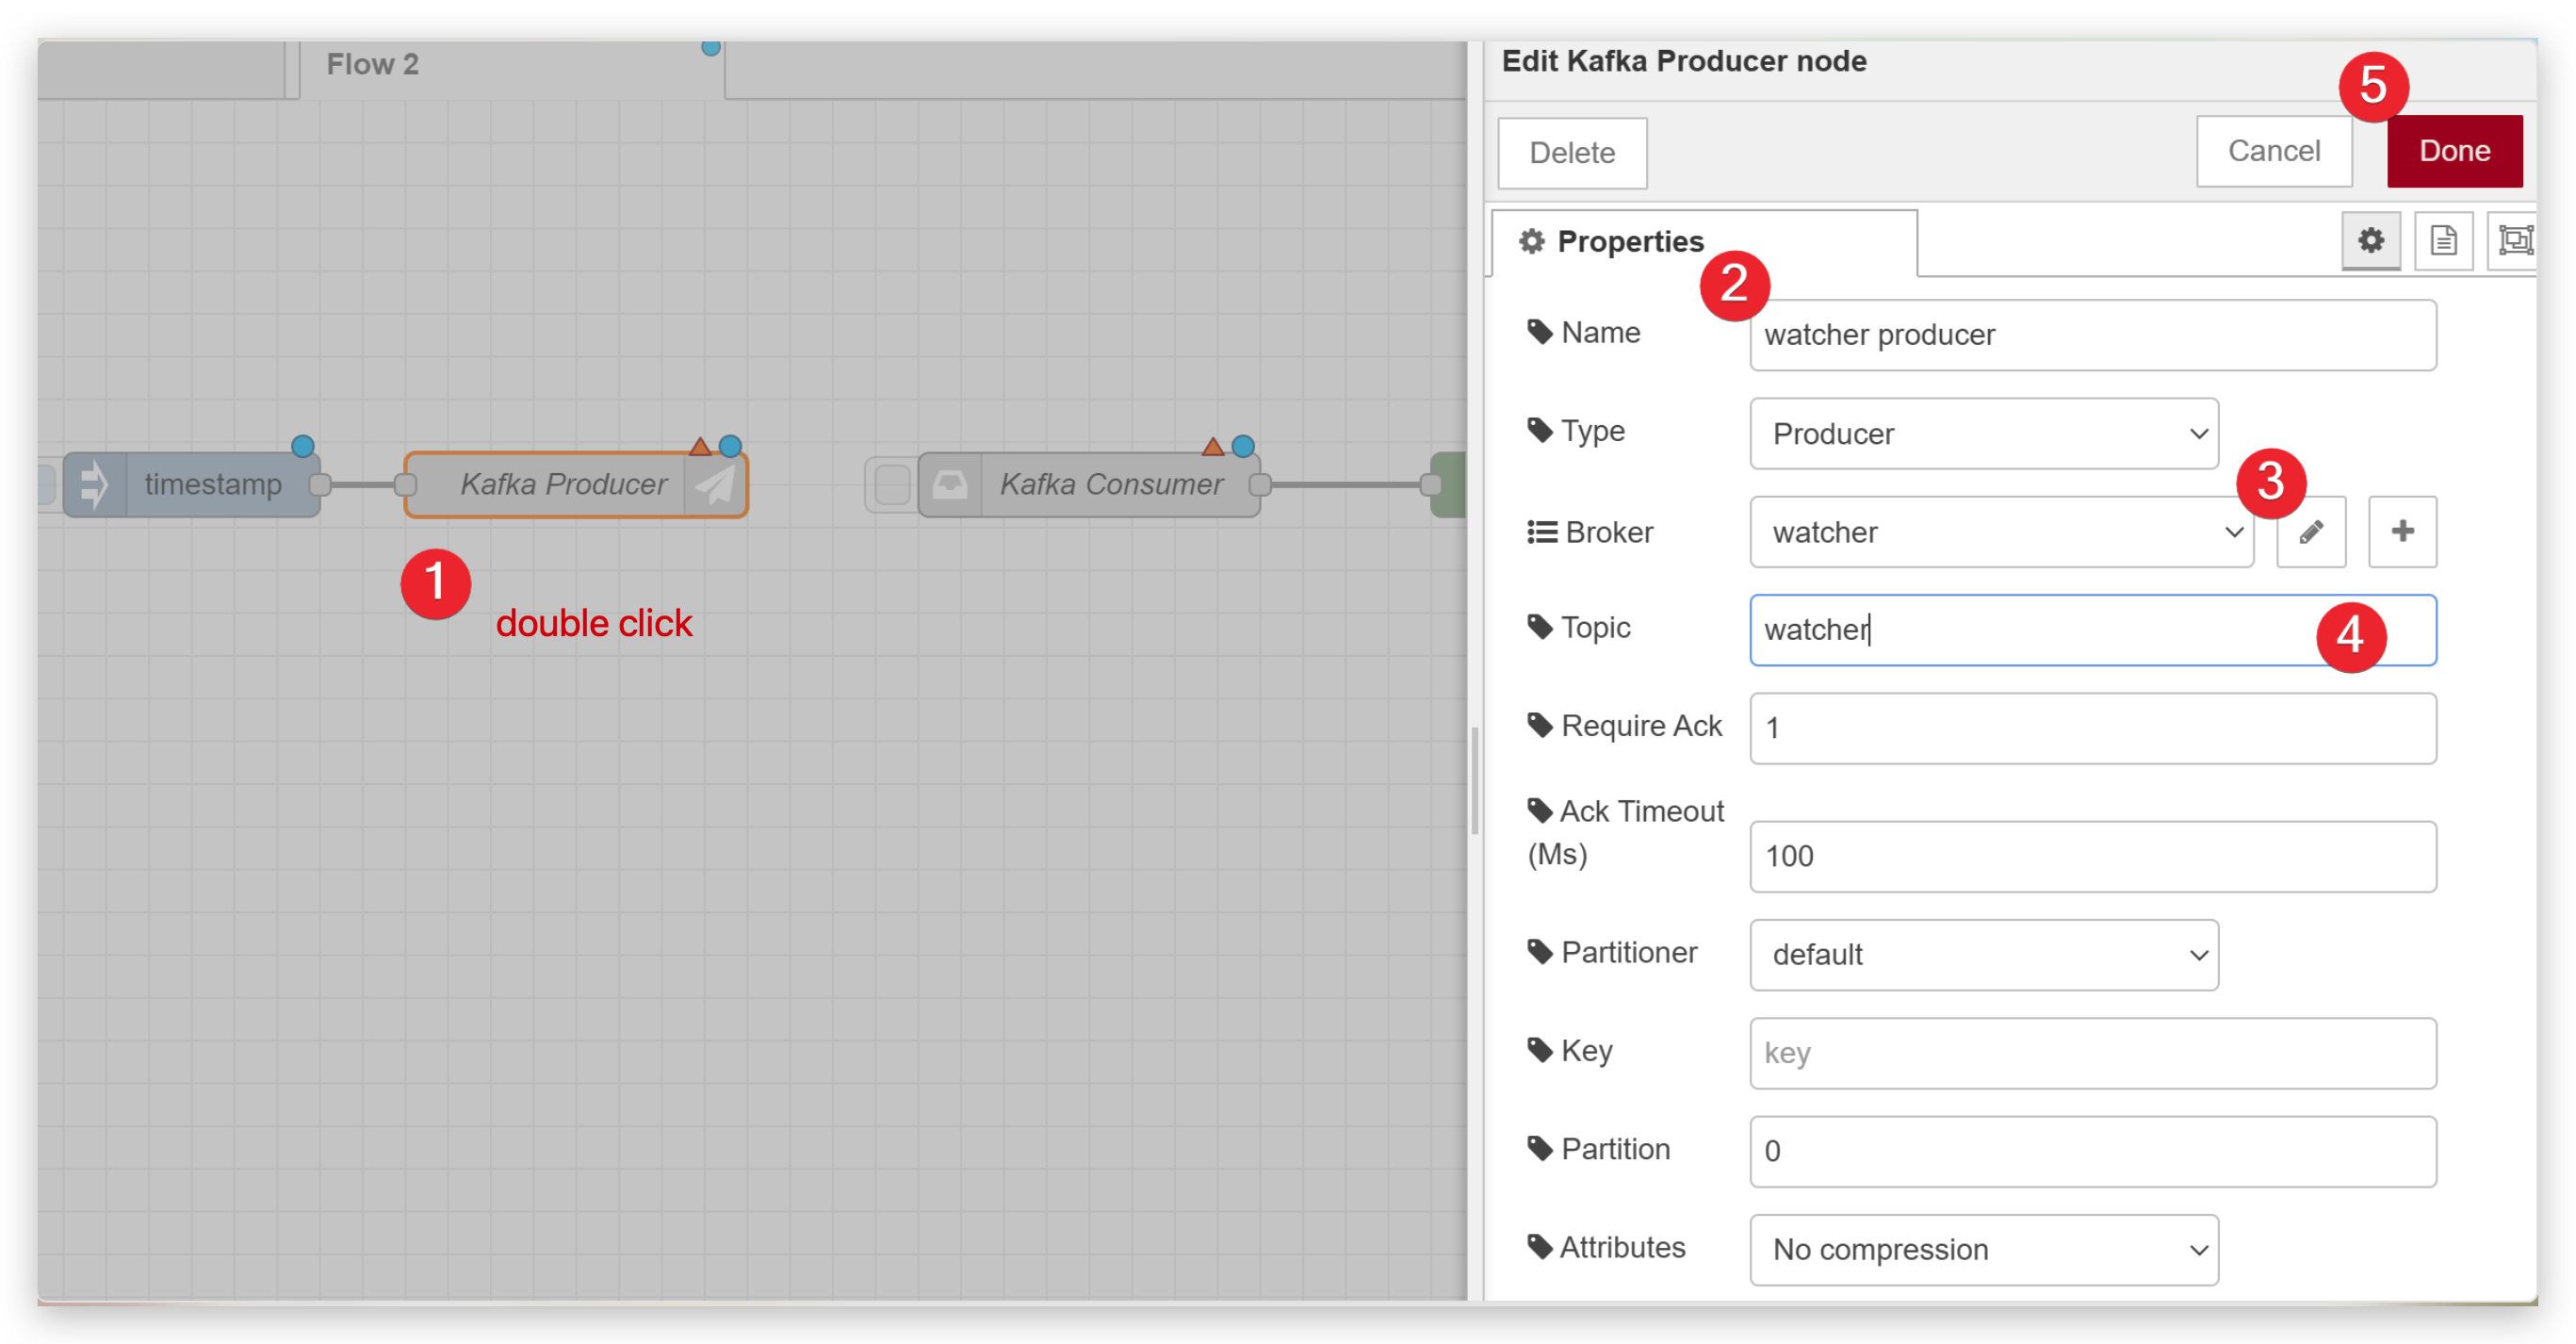
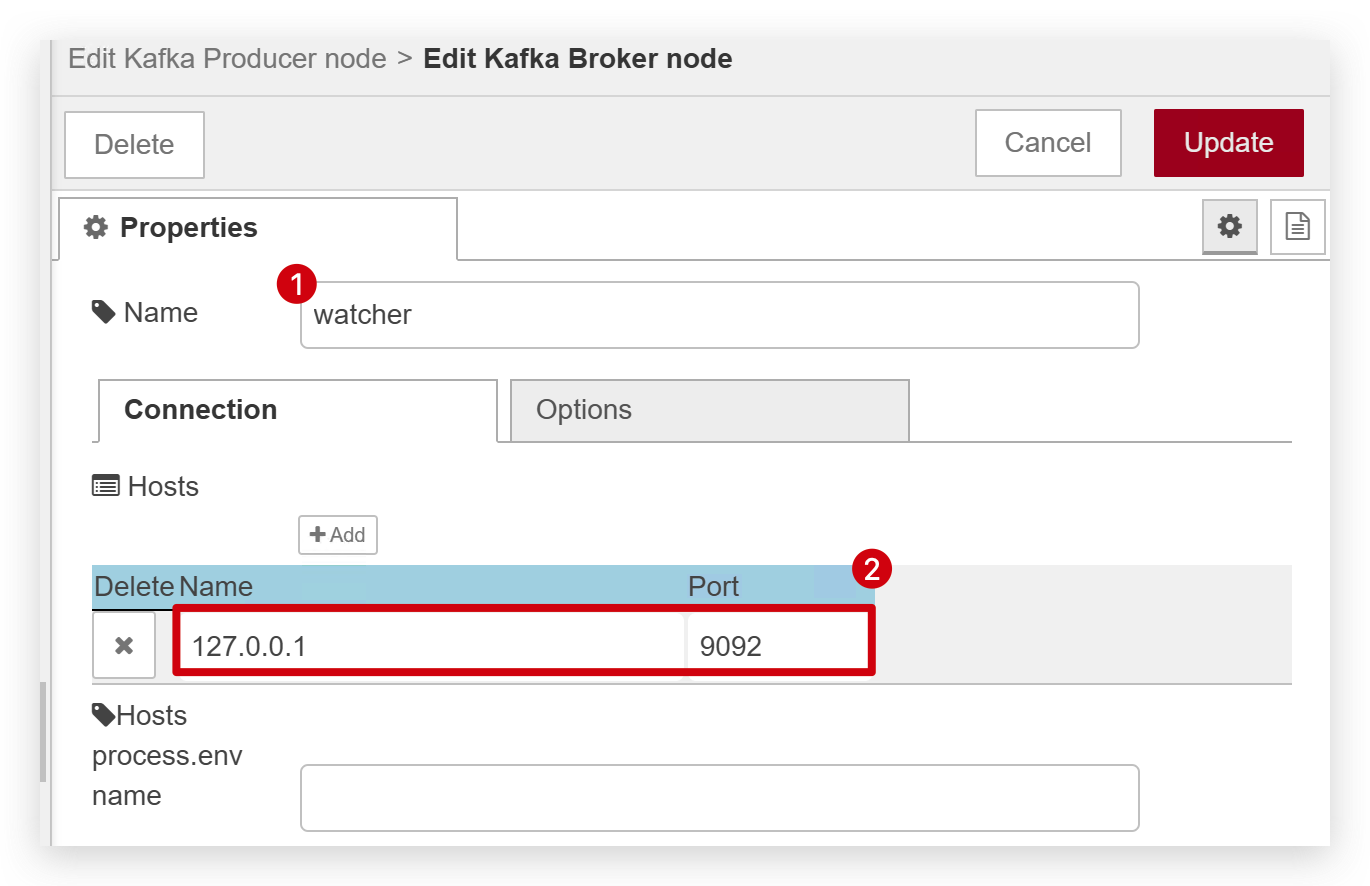
- Double click Kafka Producer to configure it. When you do step 3, you should add a new broker.
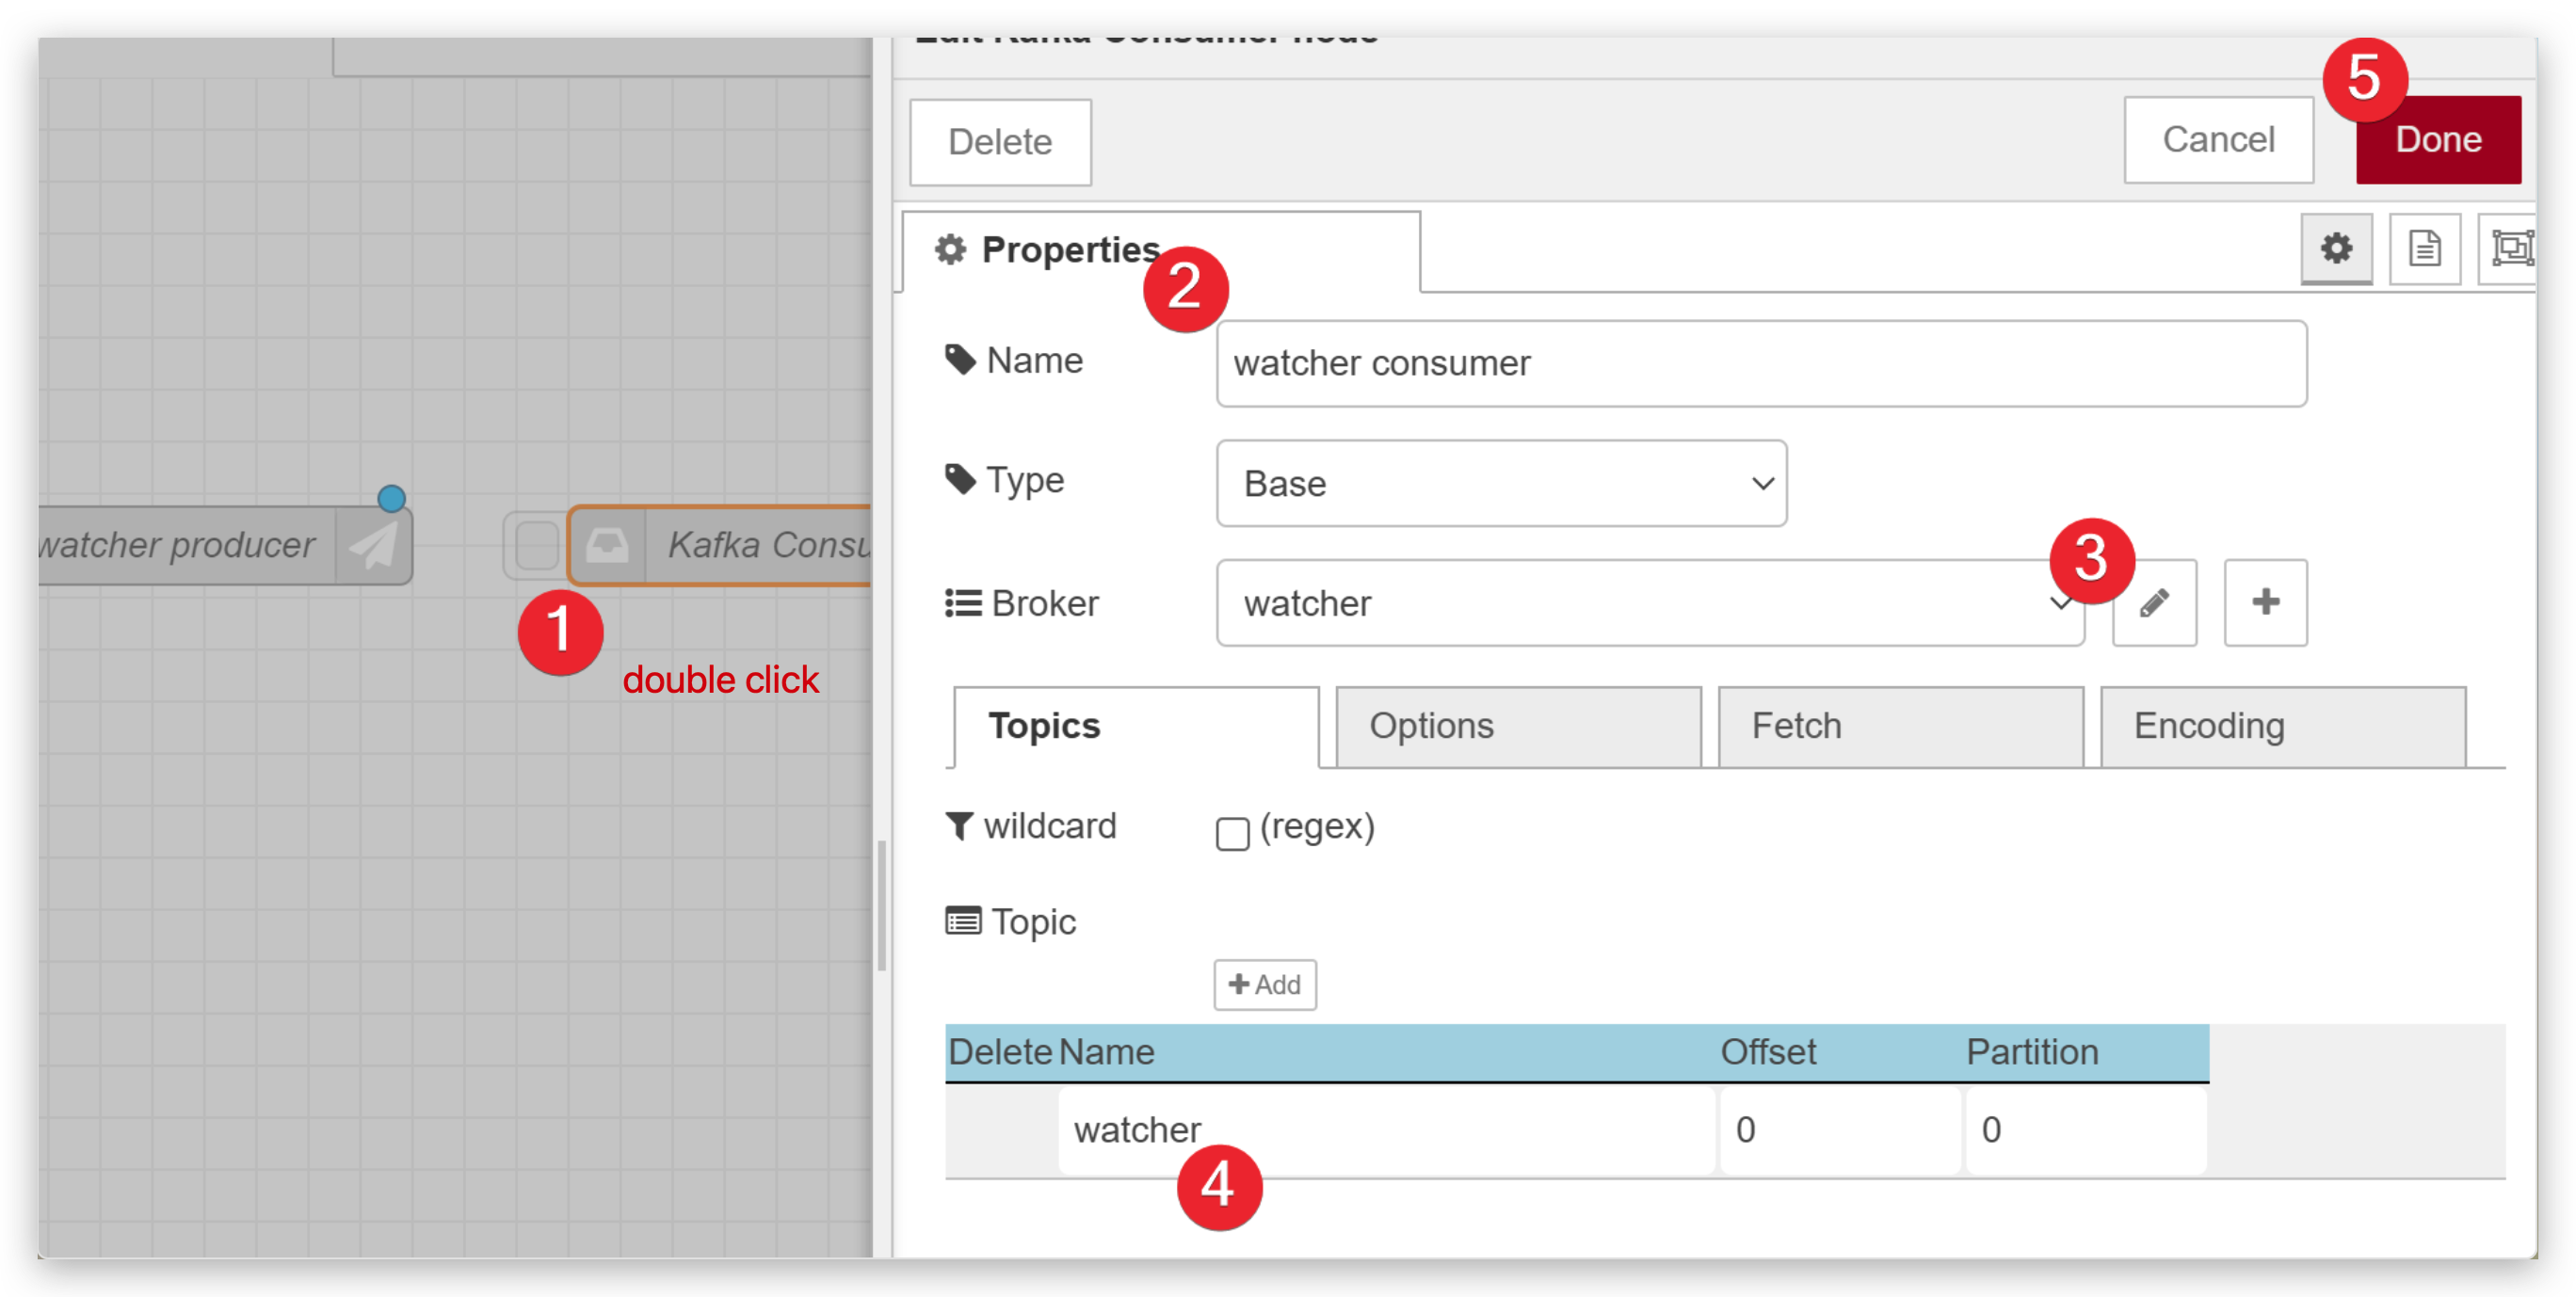
- Double click Kafka Consumer to configure it as below.
- When finish Configuration, click the Deploy botton to deploy it.
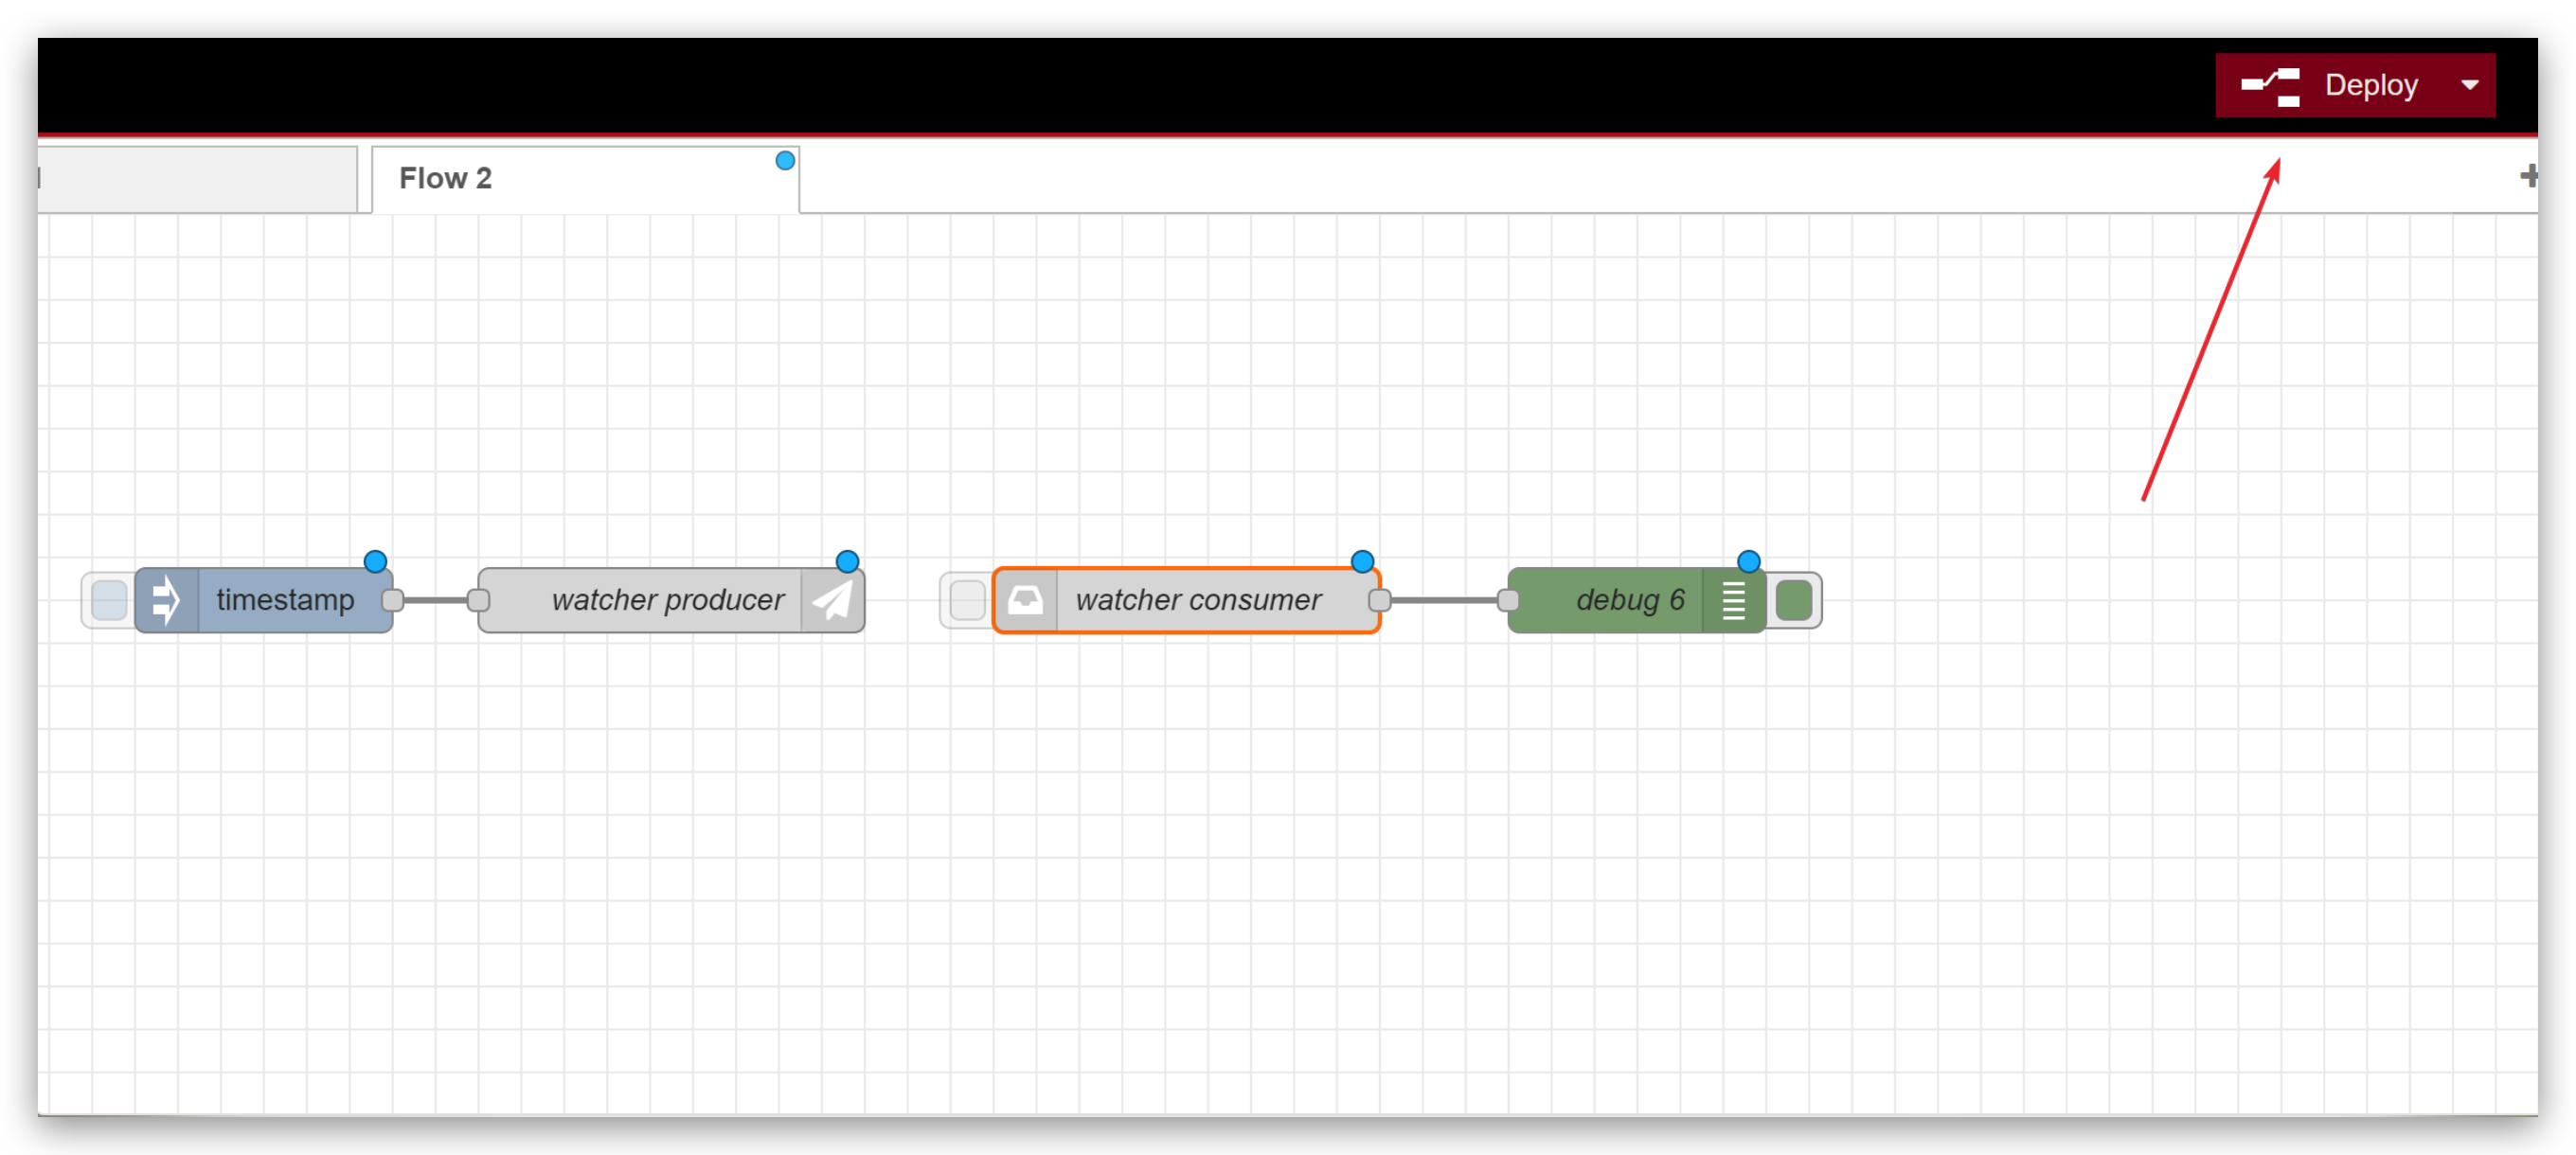
Any change, you should click the Deploy button.
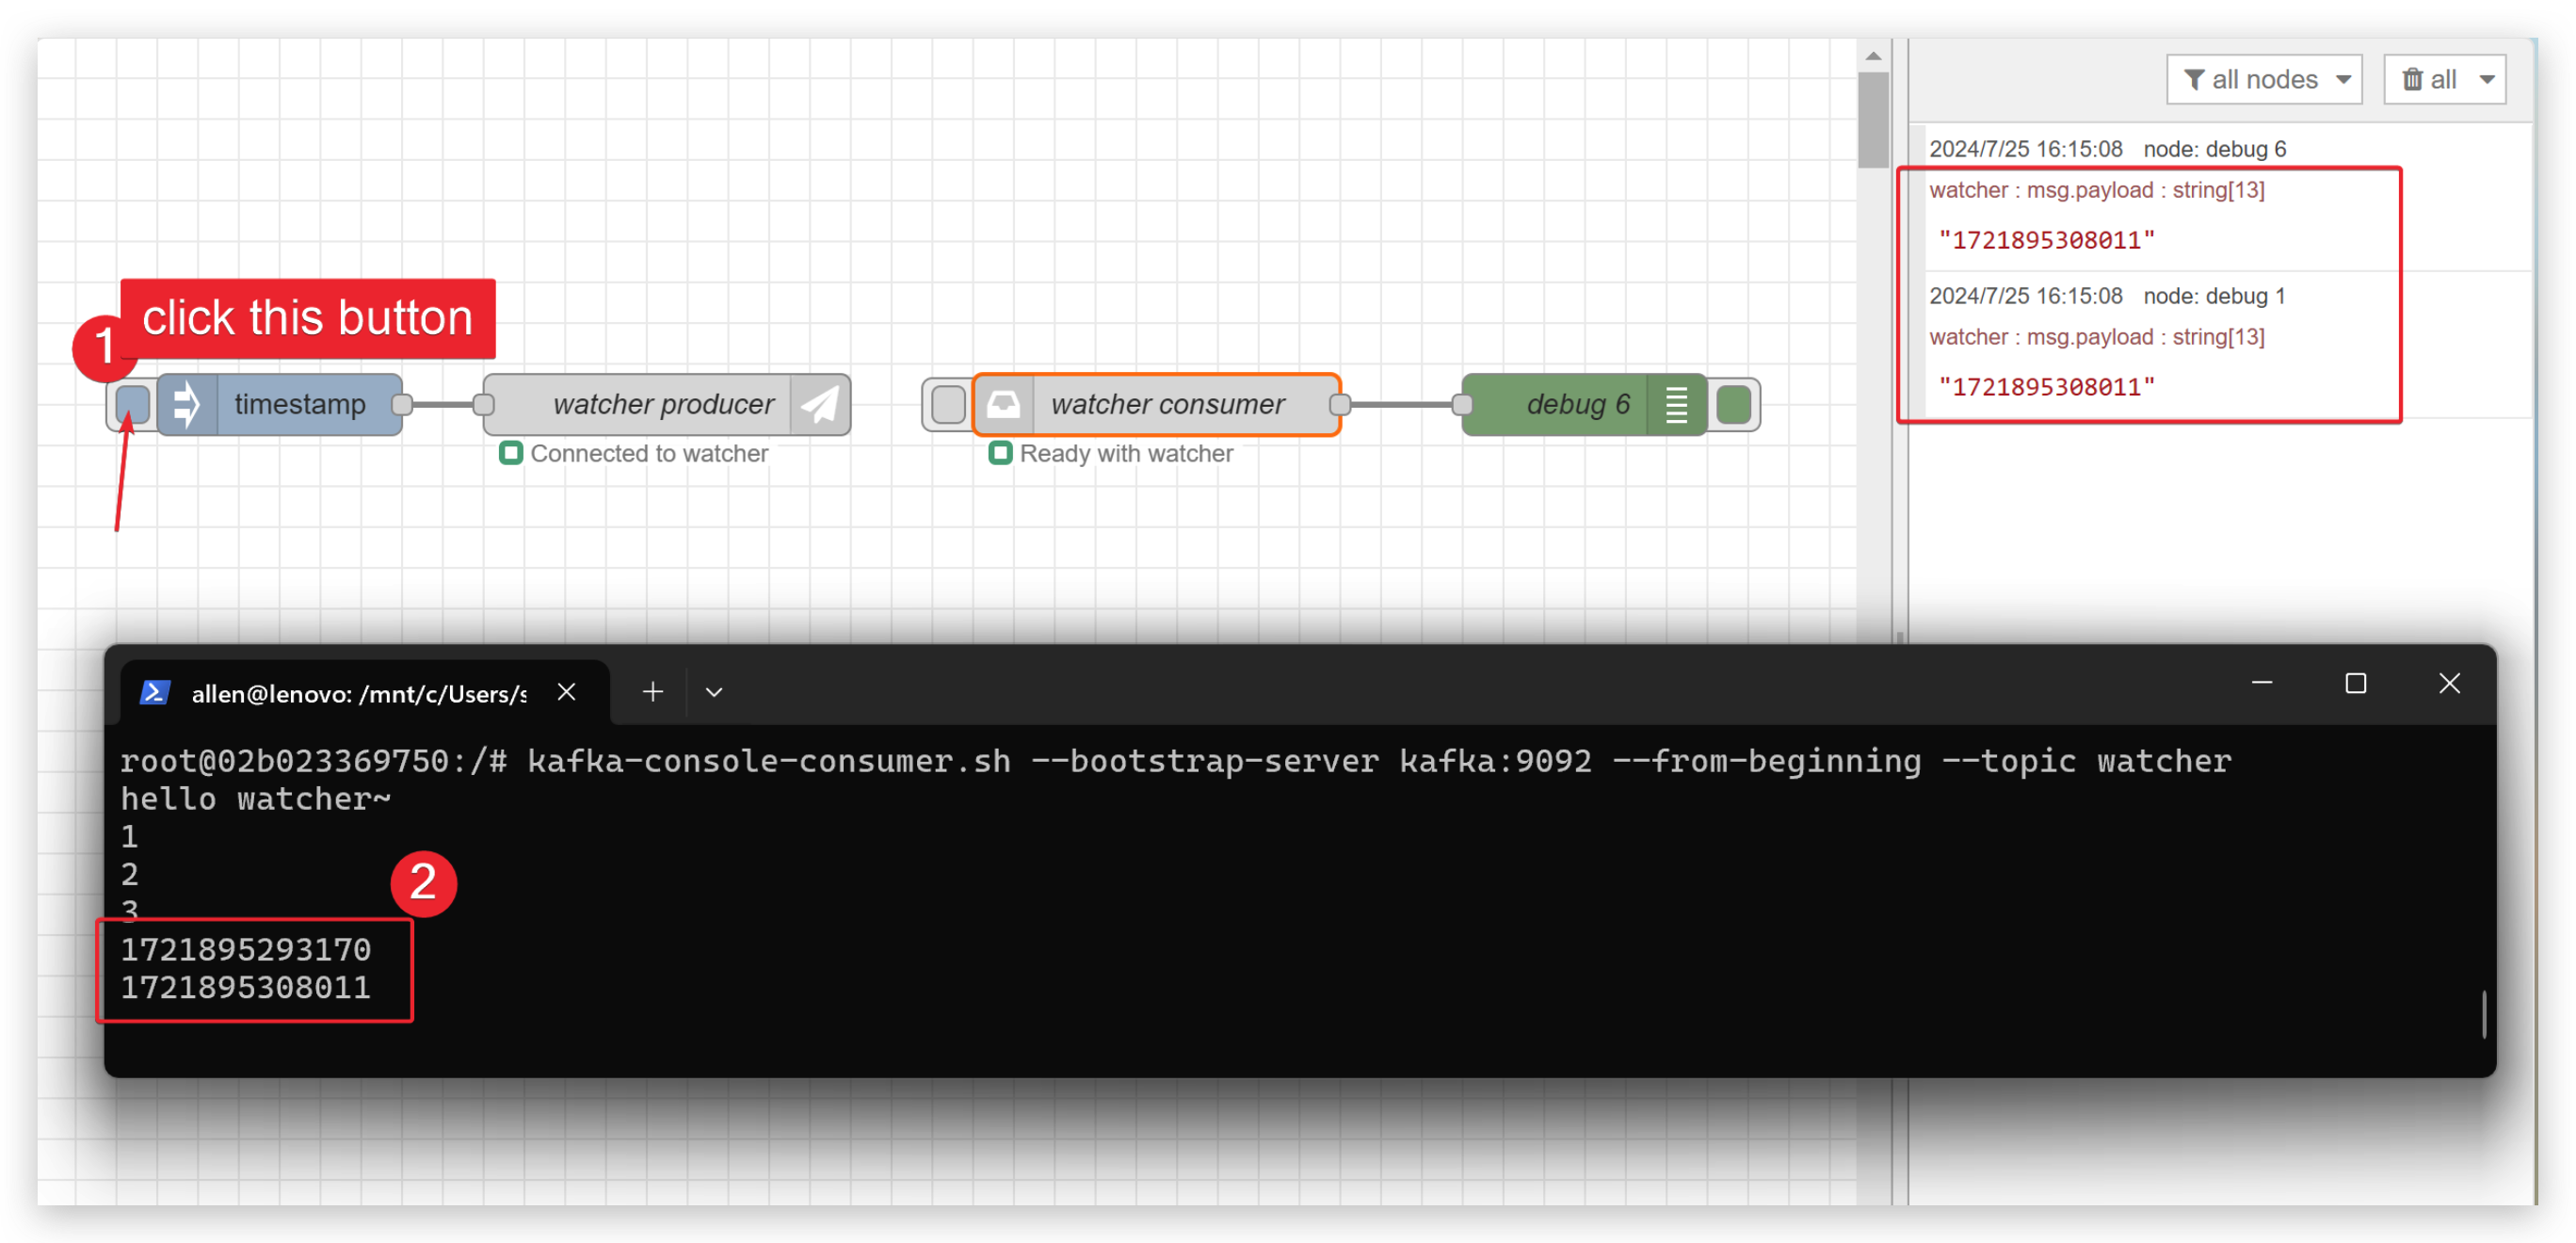
- Click the square button to send a timestamp to test if the whole process works. If it works well, you should receive timestamp in kafka consumer end.
Part 4.Run a task in Watcher
- First of all, you need to run a task in Watcher following the video below. If you want to know more please click here.
- When you finish running a task in watcher, you should refer this link to send watcher message to Node-RED.
Part 5.Receive data in Kafka
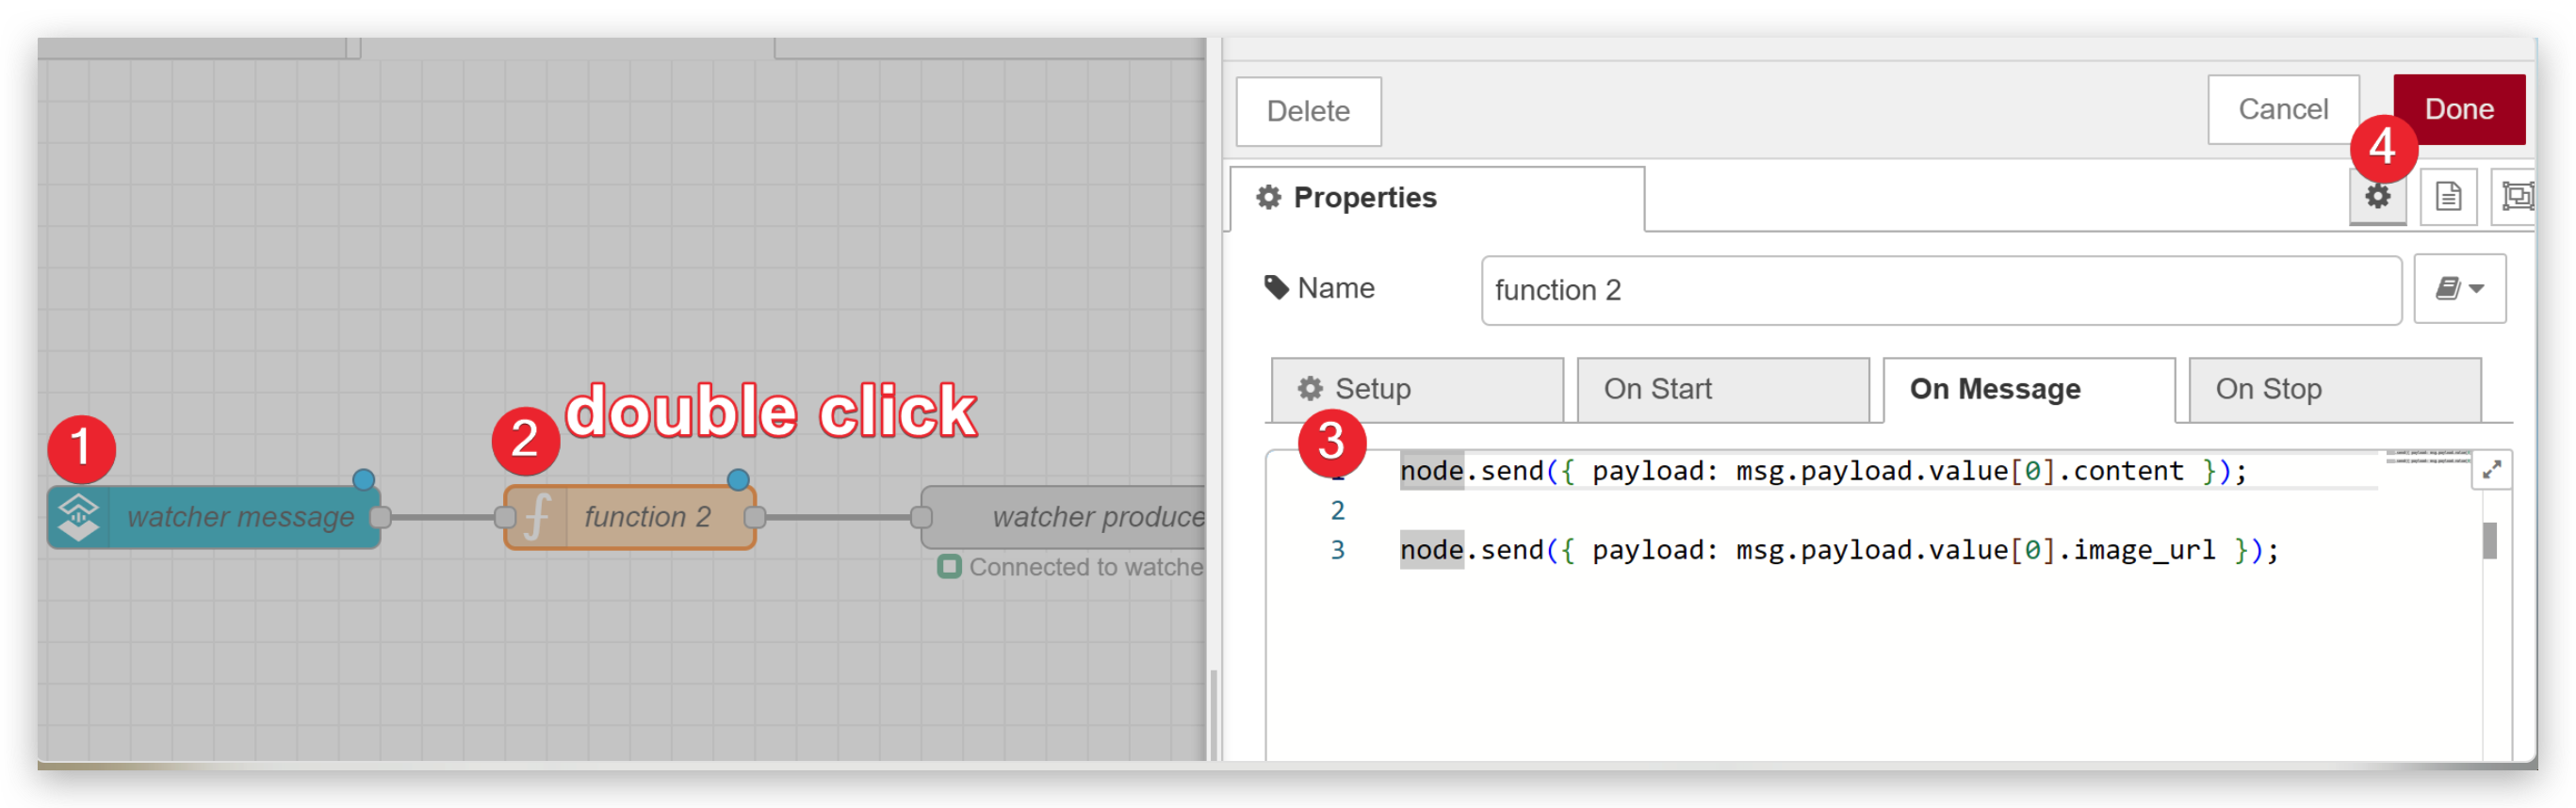
- Replace timestamp module to OpenStream and function module and double click to configure them. Remember to Deploy it.
node.send({ payload: msg.payload.value[0].content });

node.send({ payload: msg.payload.value[0].image_url });
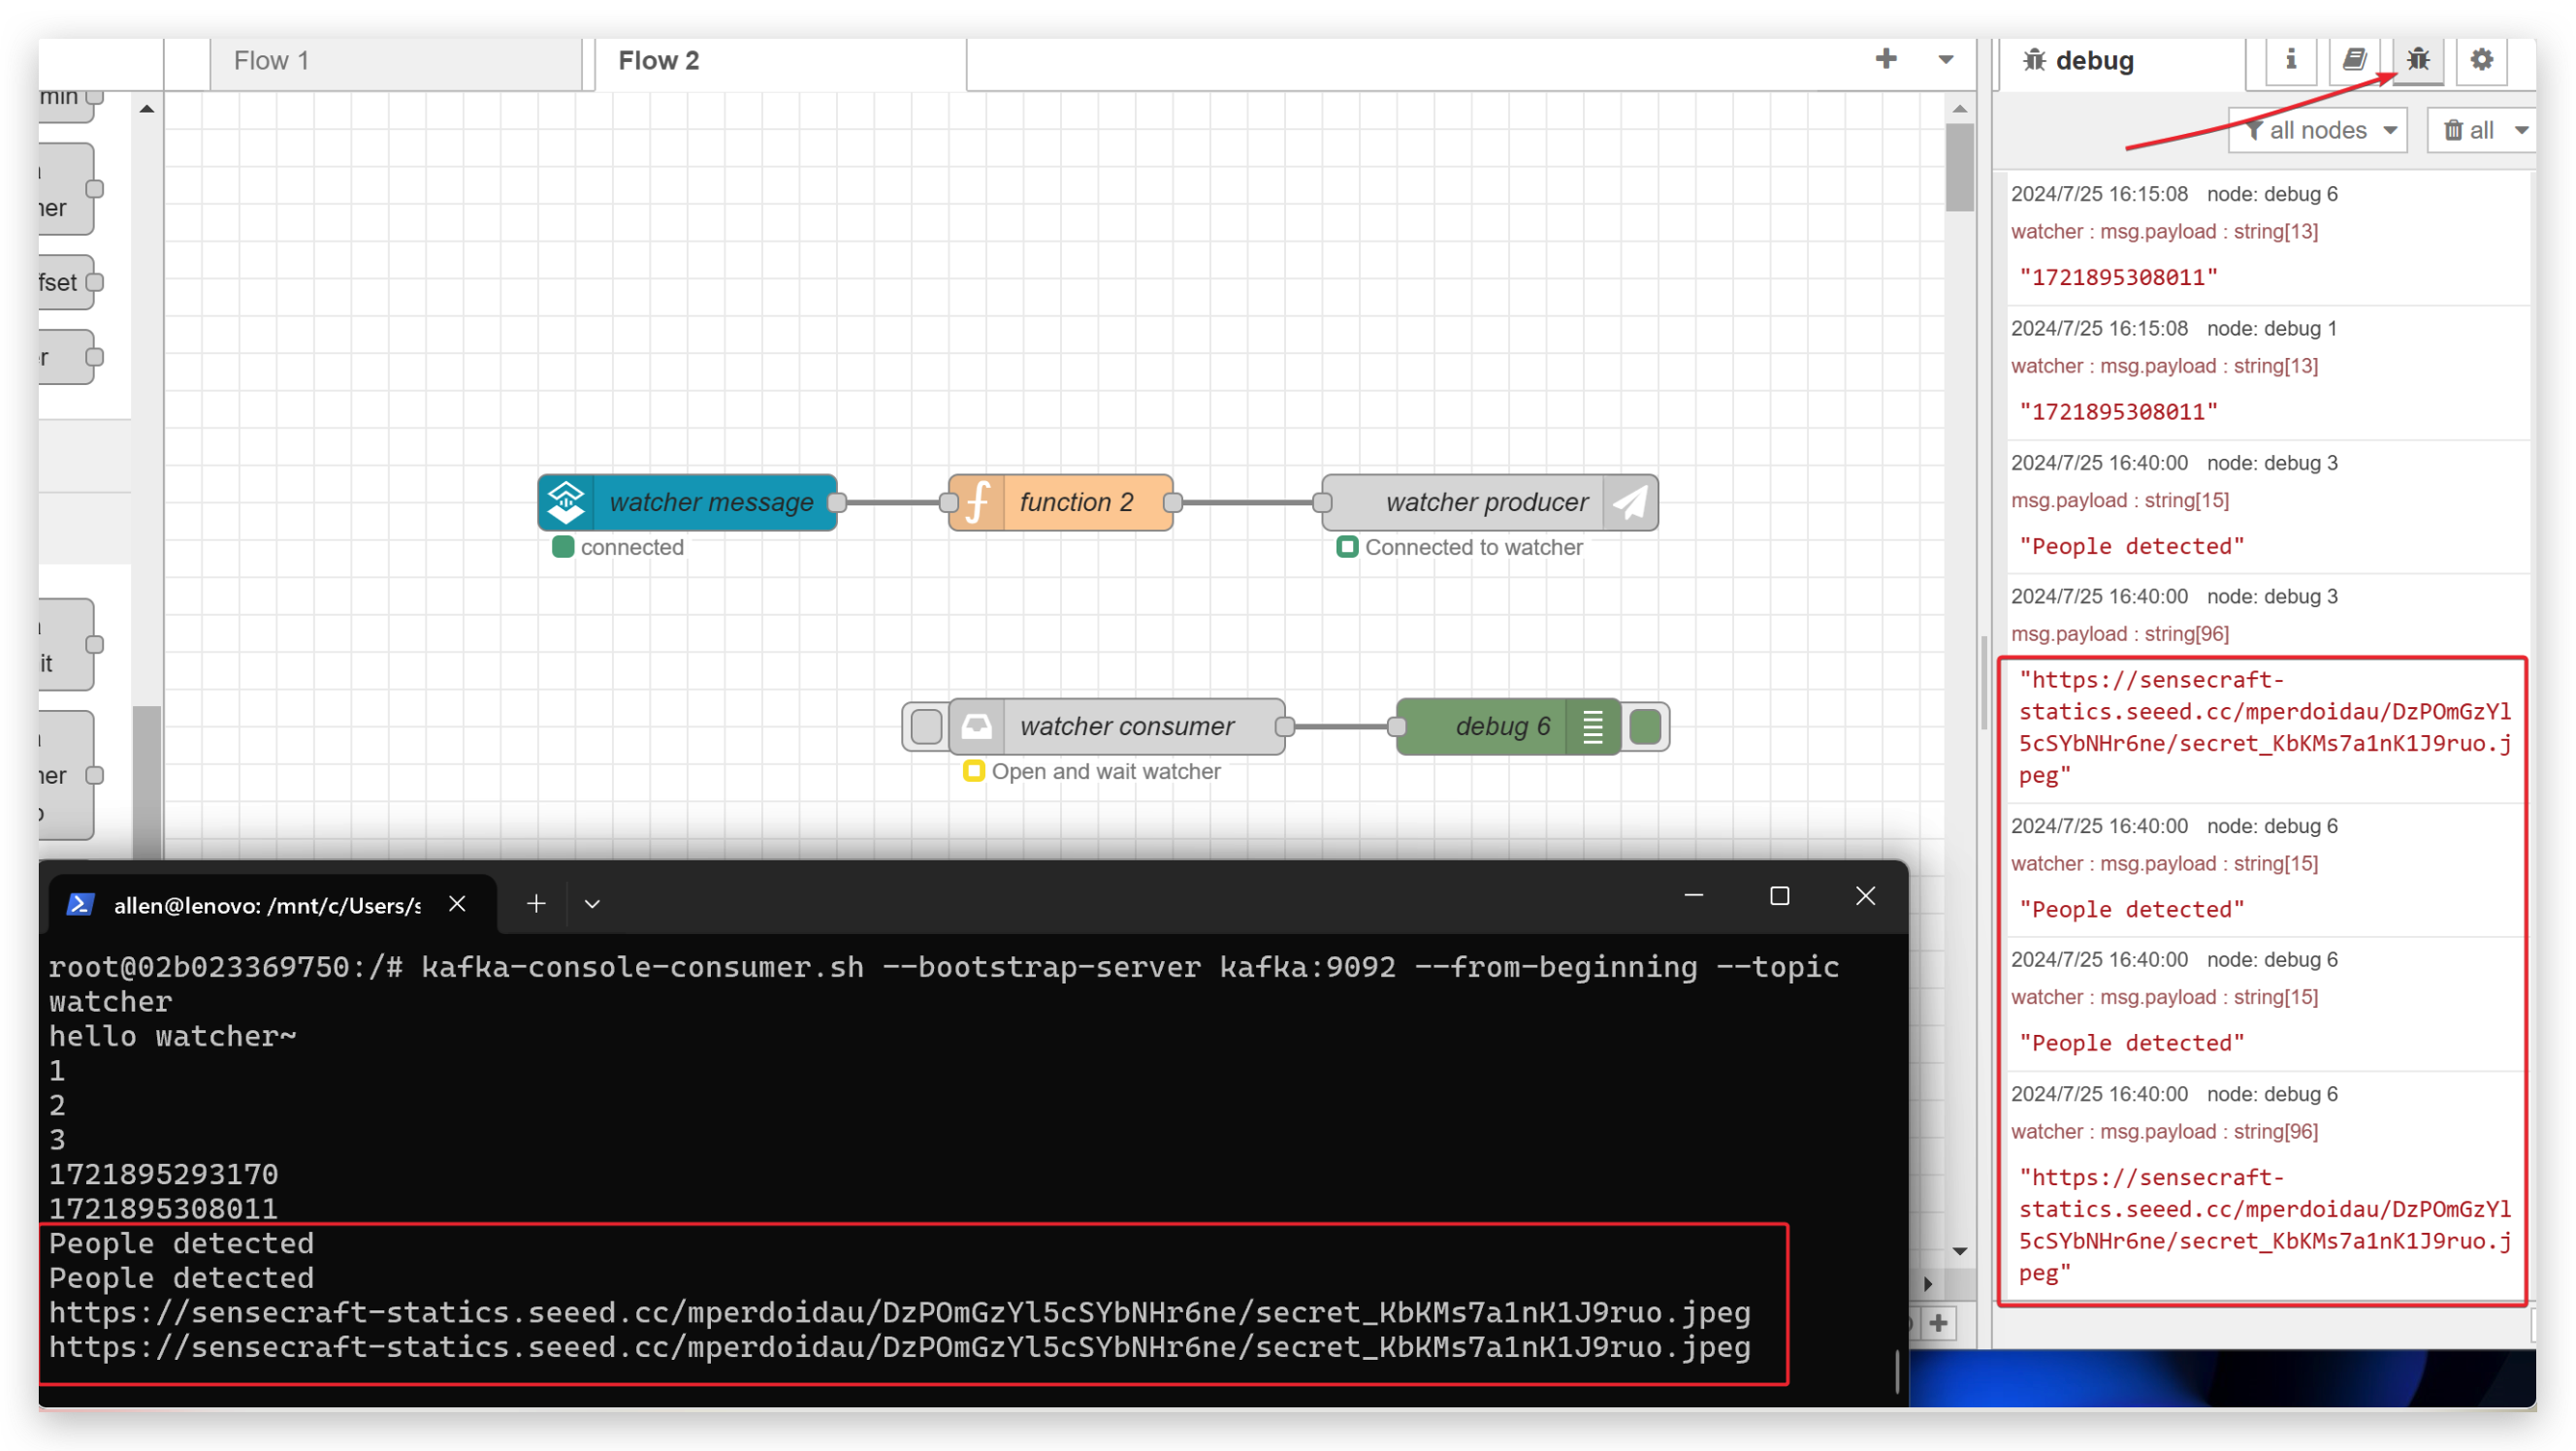
- I run a People Detection model in Watcher. So when Watcher will send message to Kafka when it detects people and you will see the photo when open the link.
Congratulations on completing the watcher to Kafka application! There's a wealth of useful features in Kafka waiting for you to explore. Keep up the great work and dive into the exciting possibilities ahead!
Tech Support & Product Discussion
Thank you for choosing our products! We are here to provide you with different support to ensure that your experience with our products is as smooth as possible. We offer several communication channels to cater to different preferences and needs.