Watcher To MongoDB Quick Start
MongoDB is a powerful, cross-platform document database that excels in handling both structured and unstructured data. Its flexible, schema-less data model is based on JSON-like documents, making it an excellent choice for dynamic applications requiring ad hoc queries and indexing.
Using MongoDB provides a straightforward method to store and utilize data from the Watcher for further processing or other project applications.
This tutorial will guide you through using the Watcher API and Node-RED to seamlessly send data to MongoDB, a setup perfect for projects that demand real-time data handling and persistence.
Part 1. Set up Watcher in Node-RED
Step 1. Install Node-RED
Fisrt of all, you need to run a task in Watcher following the video below. If you want to know more please click here.
Node-RED is required for this setup, along with the Watcher API. If you haven't installed Node-RED or connected it with the Watcher API, start here: Watcher to Node-RED Quick Start.
Step 2. Prepare data for MongoDB
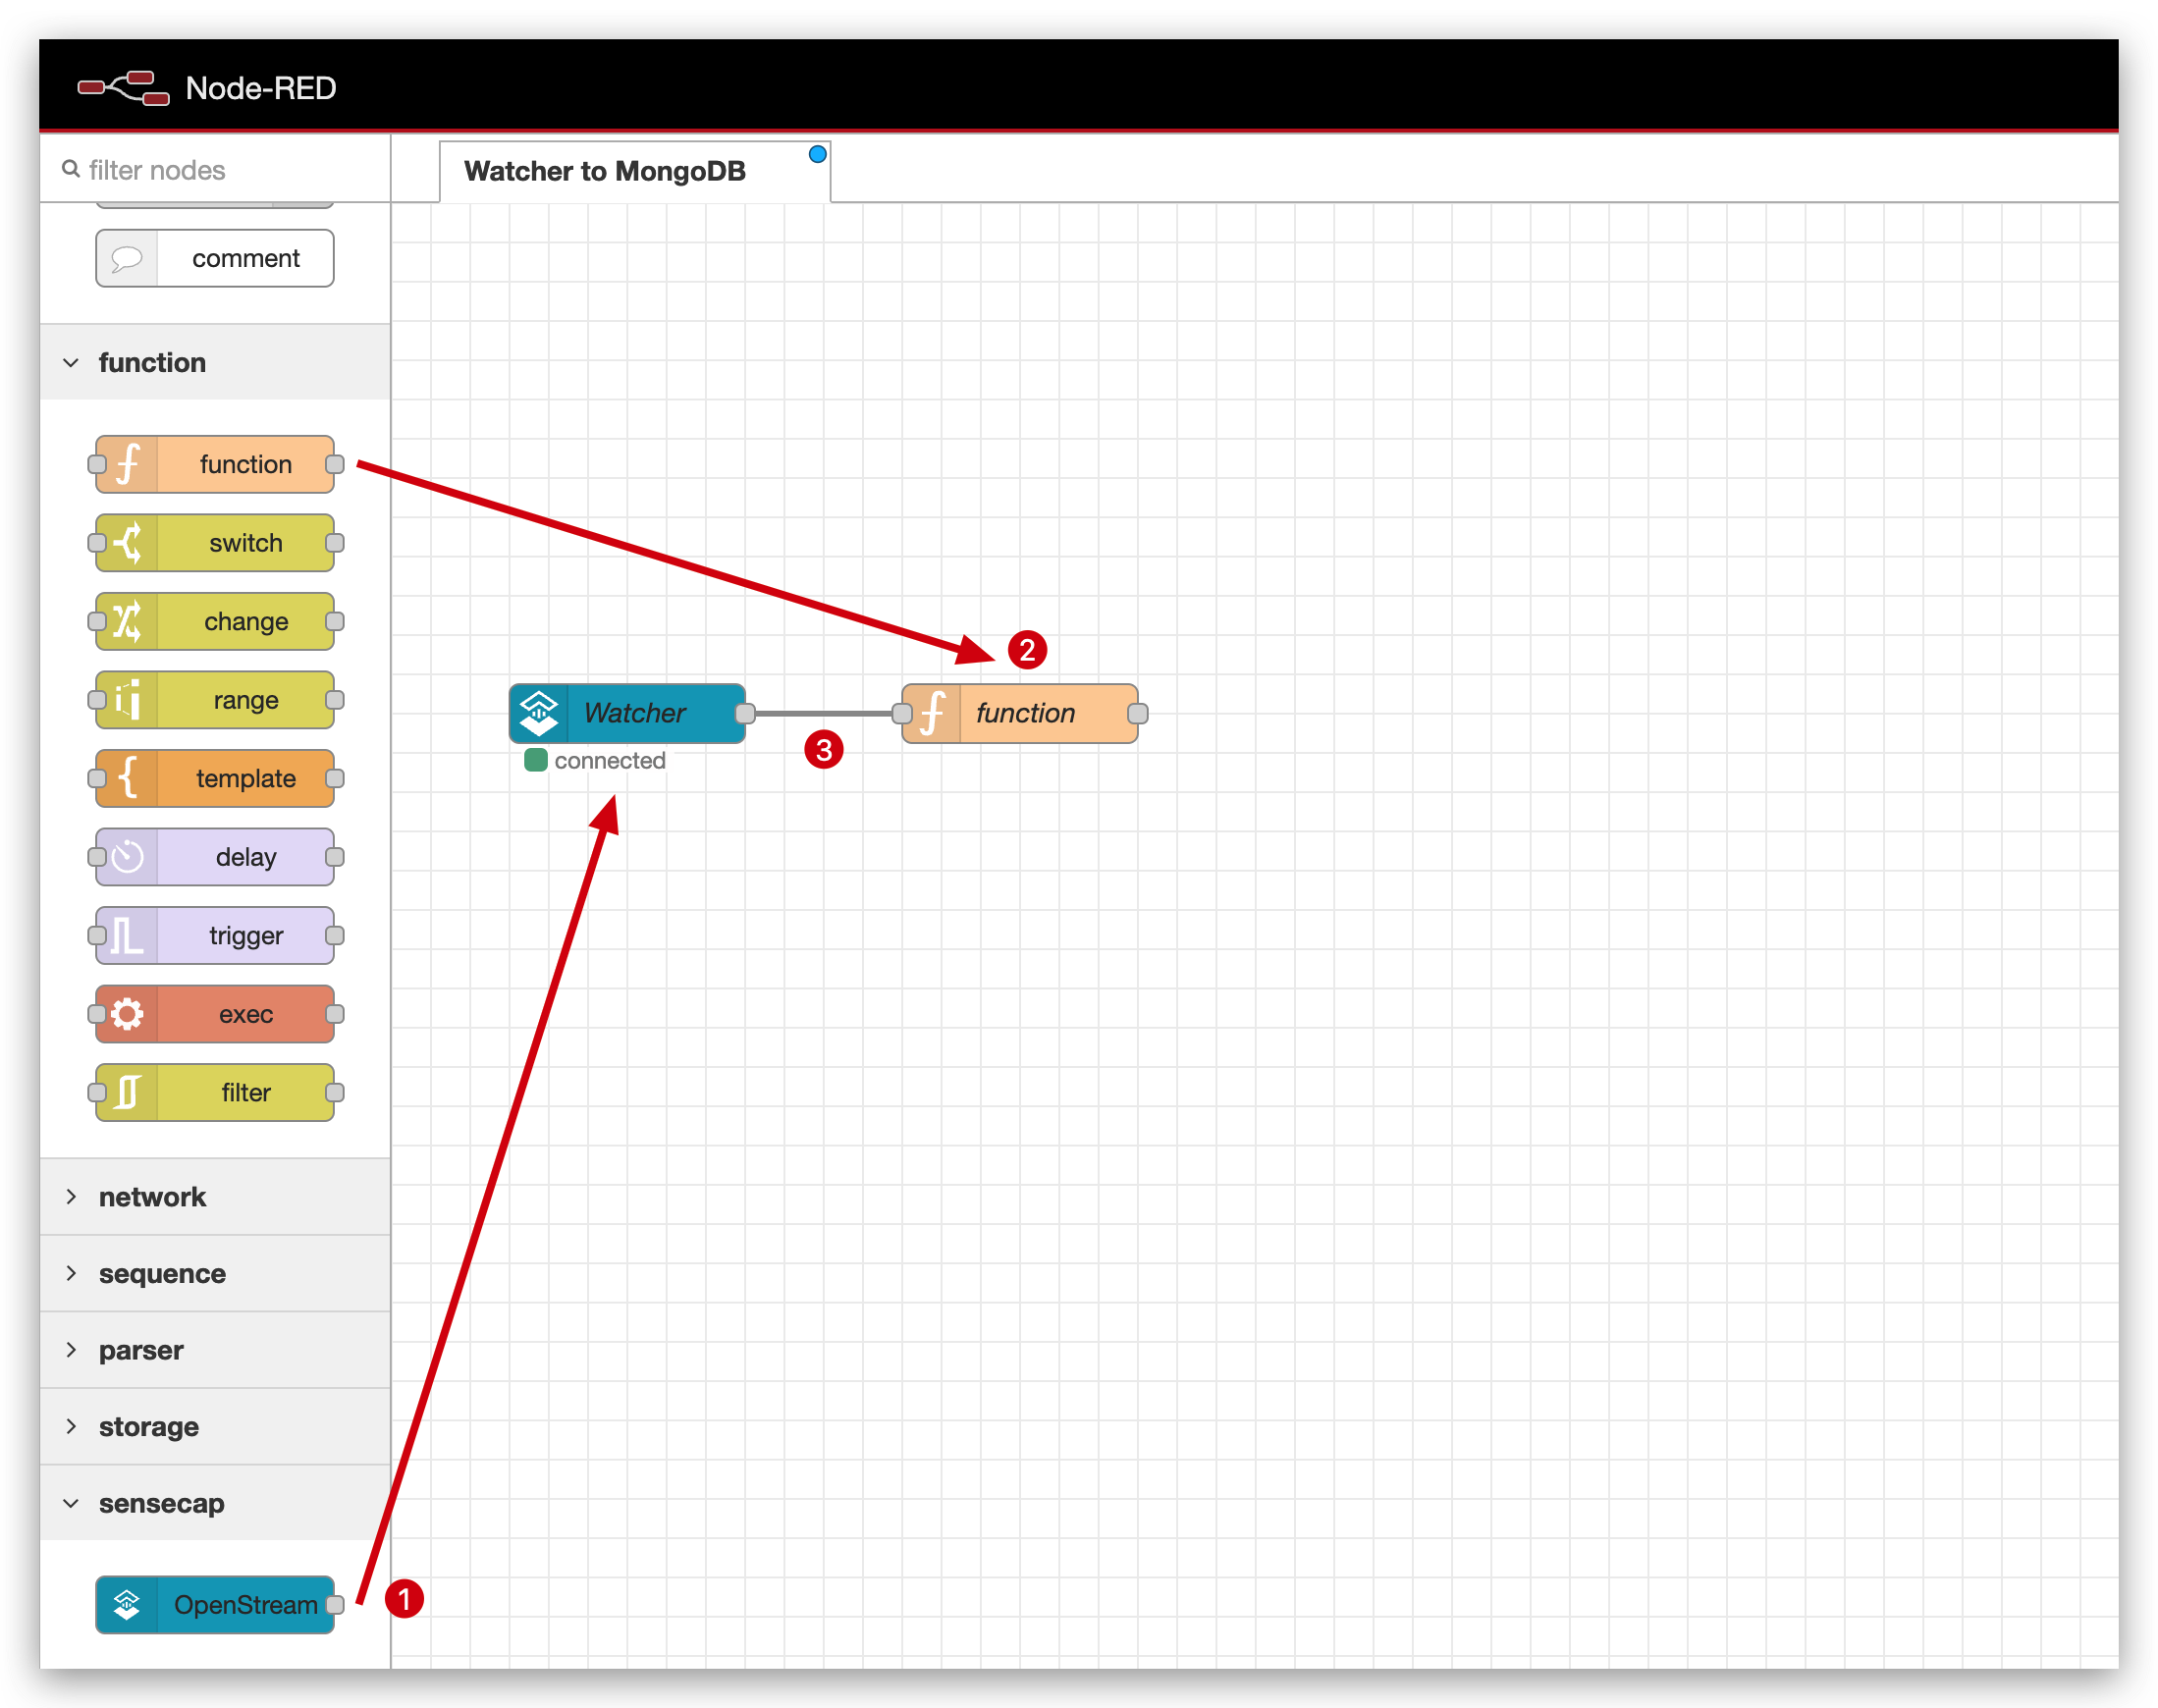
After integrating the Watcher with Node-RED, the next step is to prepare the data from the Watcher for MongoDB. Use a function node in Node-RED to format the data appropriately.
For the purpose of this tutorial, we will simply return all the Watcher data. However, you are encouraged to transform the data as needed for your application.
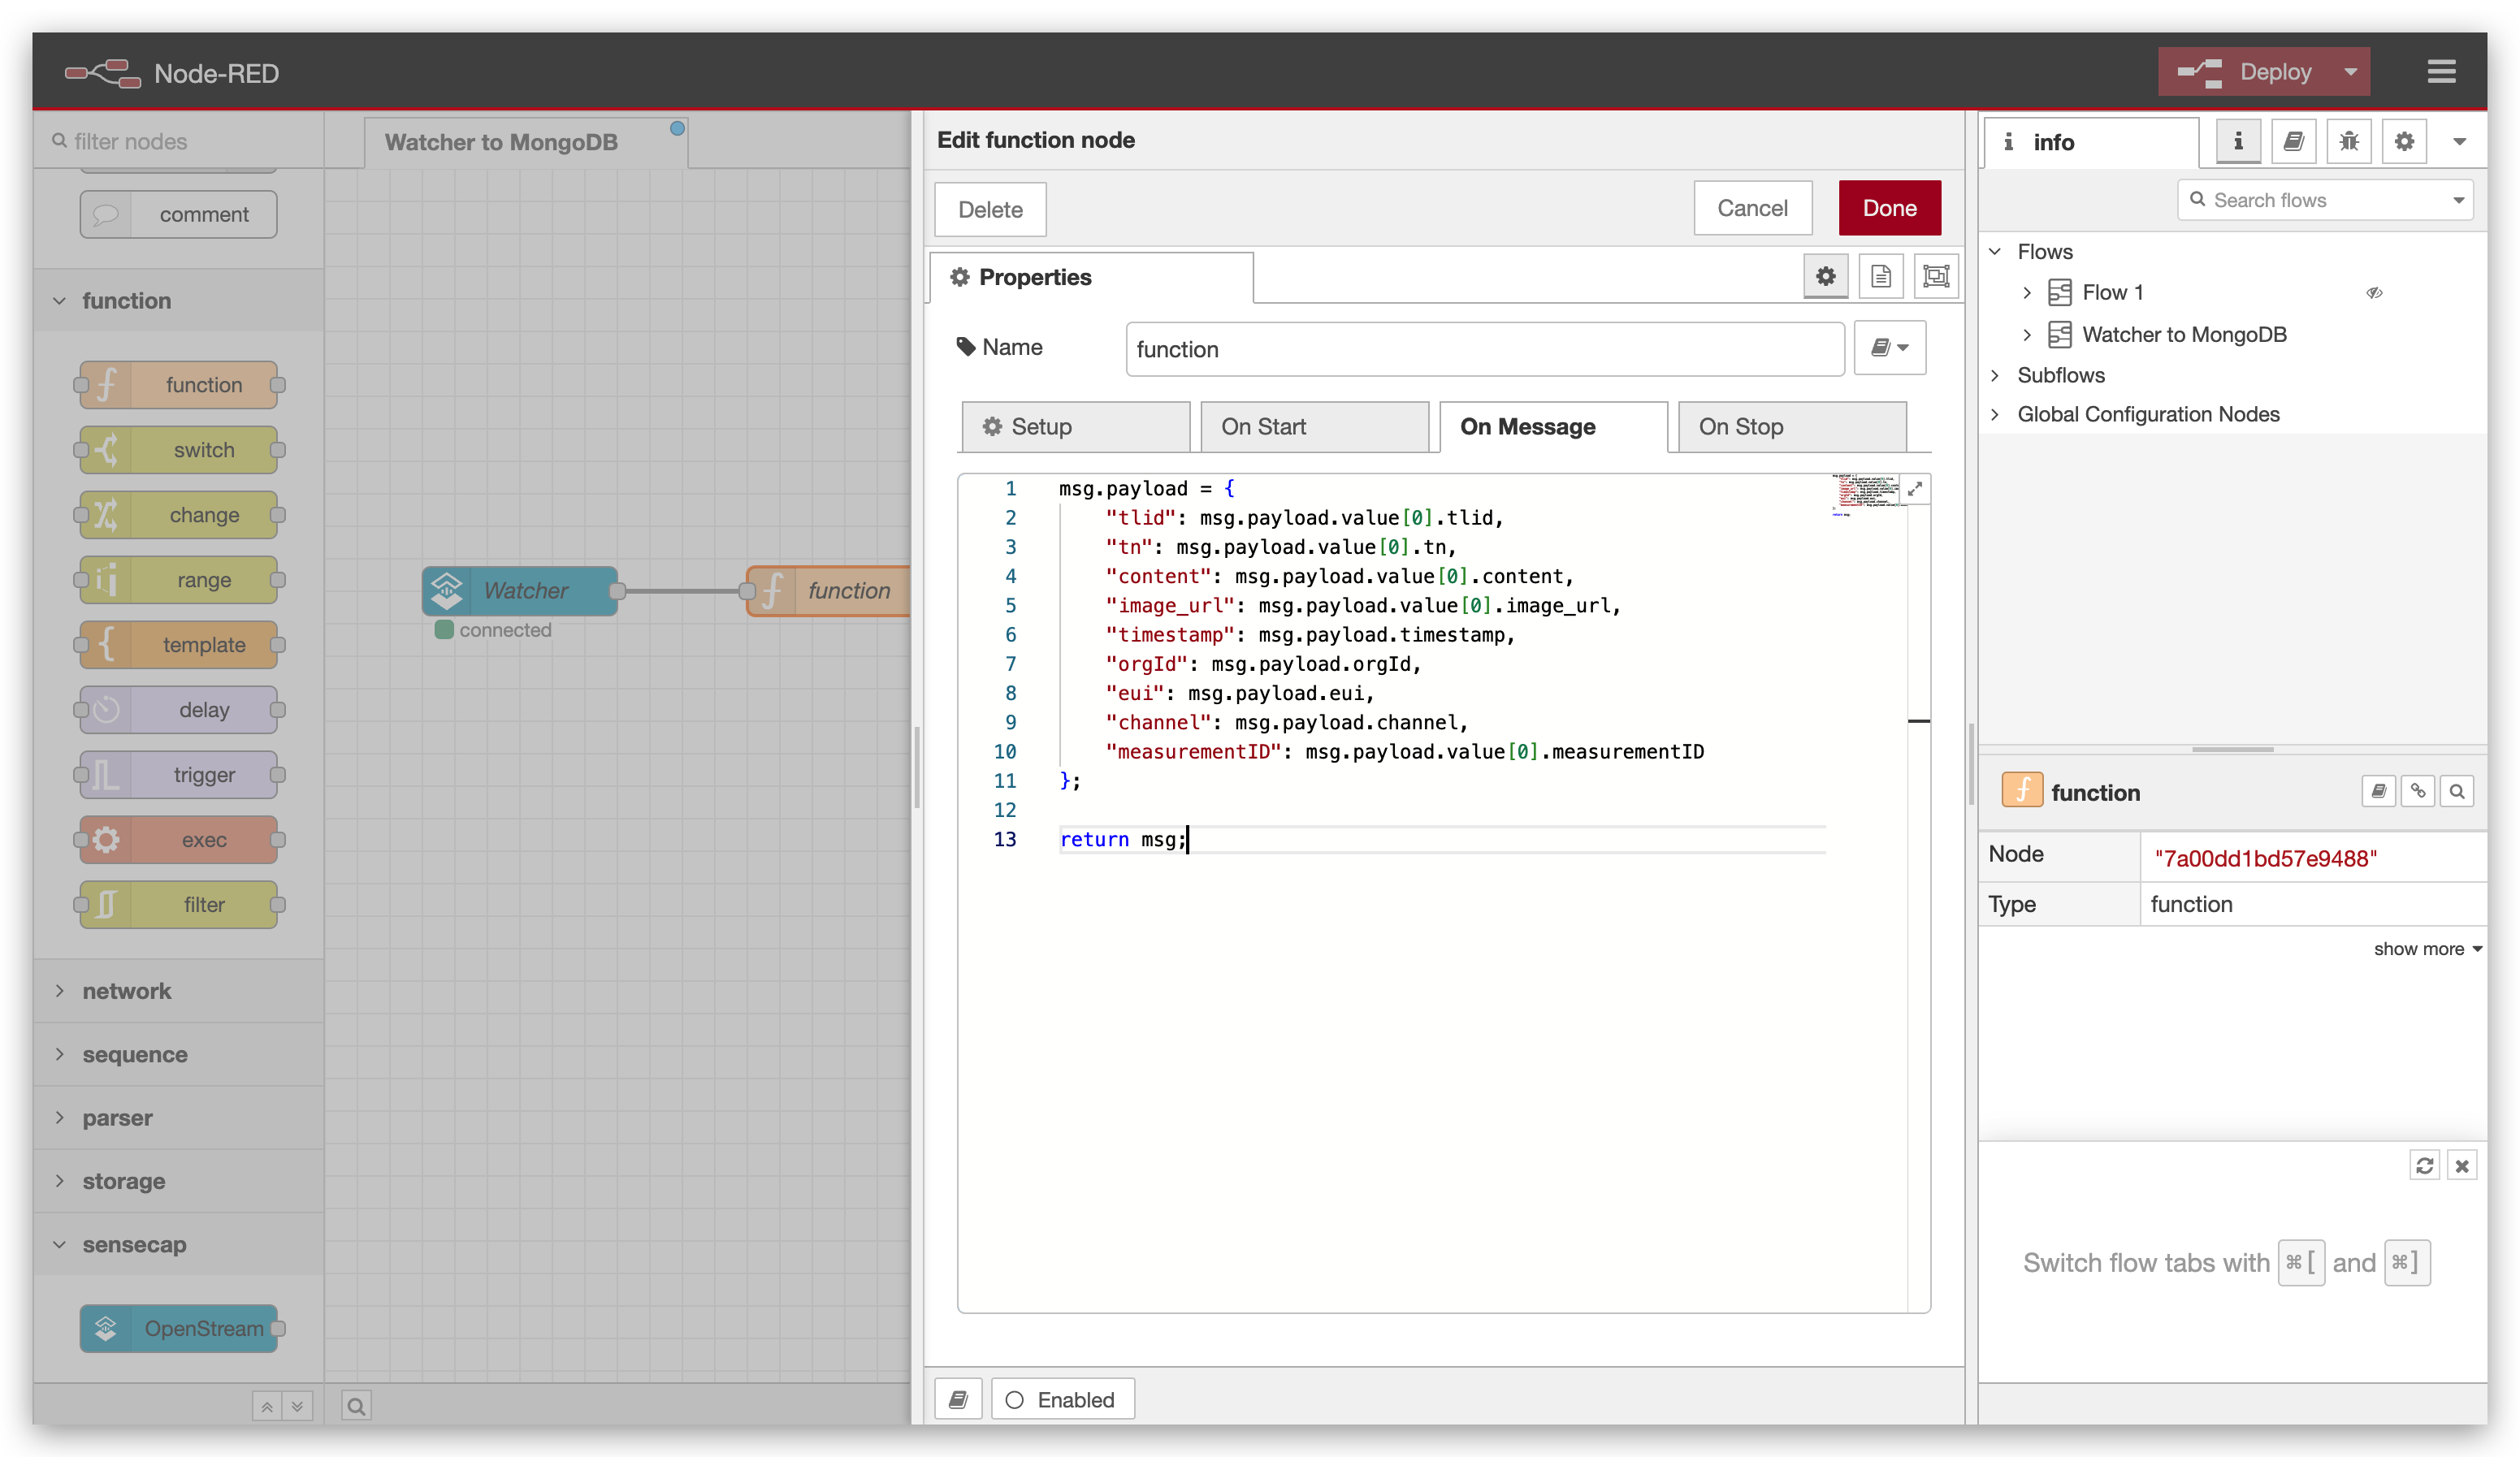
Example Node-RED Function to Format Data
msg.payload = {
    "tlid": msg.payload.value[0].tlid,
    "tn": msg.payload.value[0].tn,
    "content": msg.payload.value[0].content,
    "image_url": msg.payload.value[0].image_url,
    "timestamp": msg.payload.timestamp,
    "orgId": msg.payload.orgId,
    "eui": msg.payload.eui,
    "channel": msg.payload.channel,
    "measurementID": msg.payload.value[0].measurementID
};
return msg;
Part 2. Set up MongoDB
Step 3. Create an account
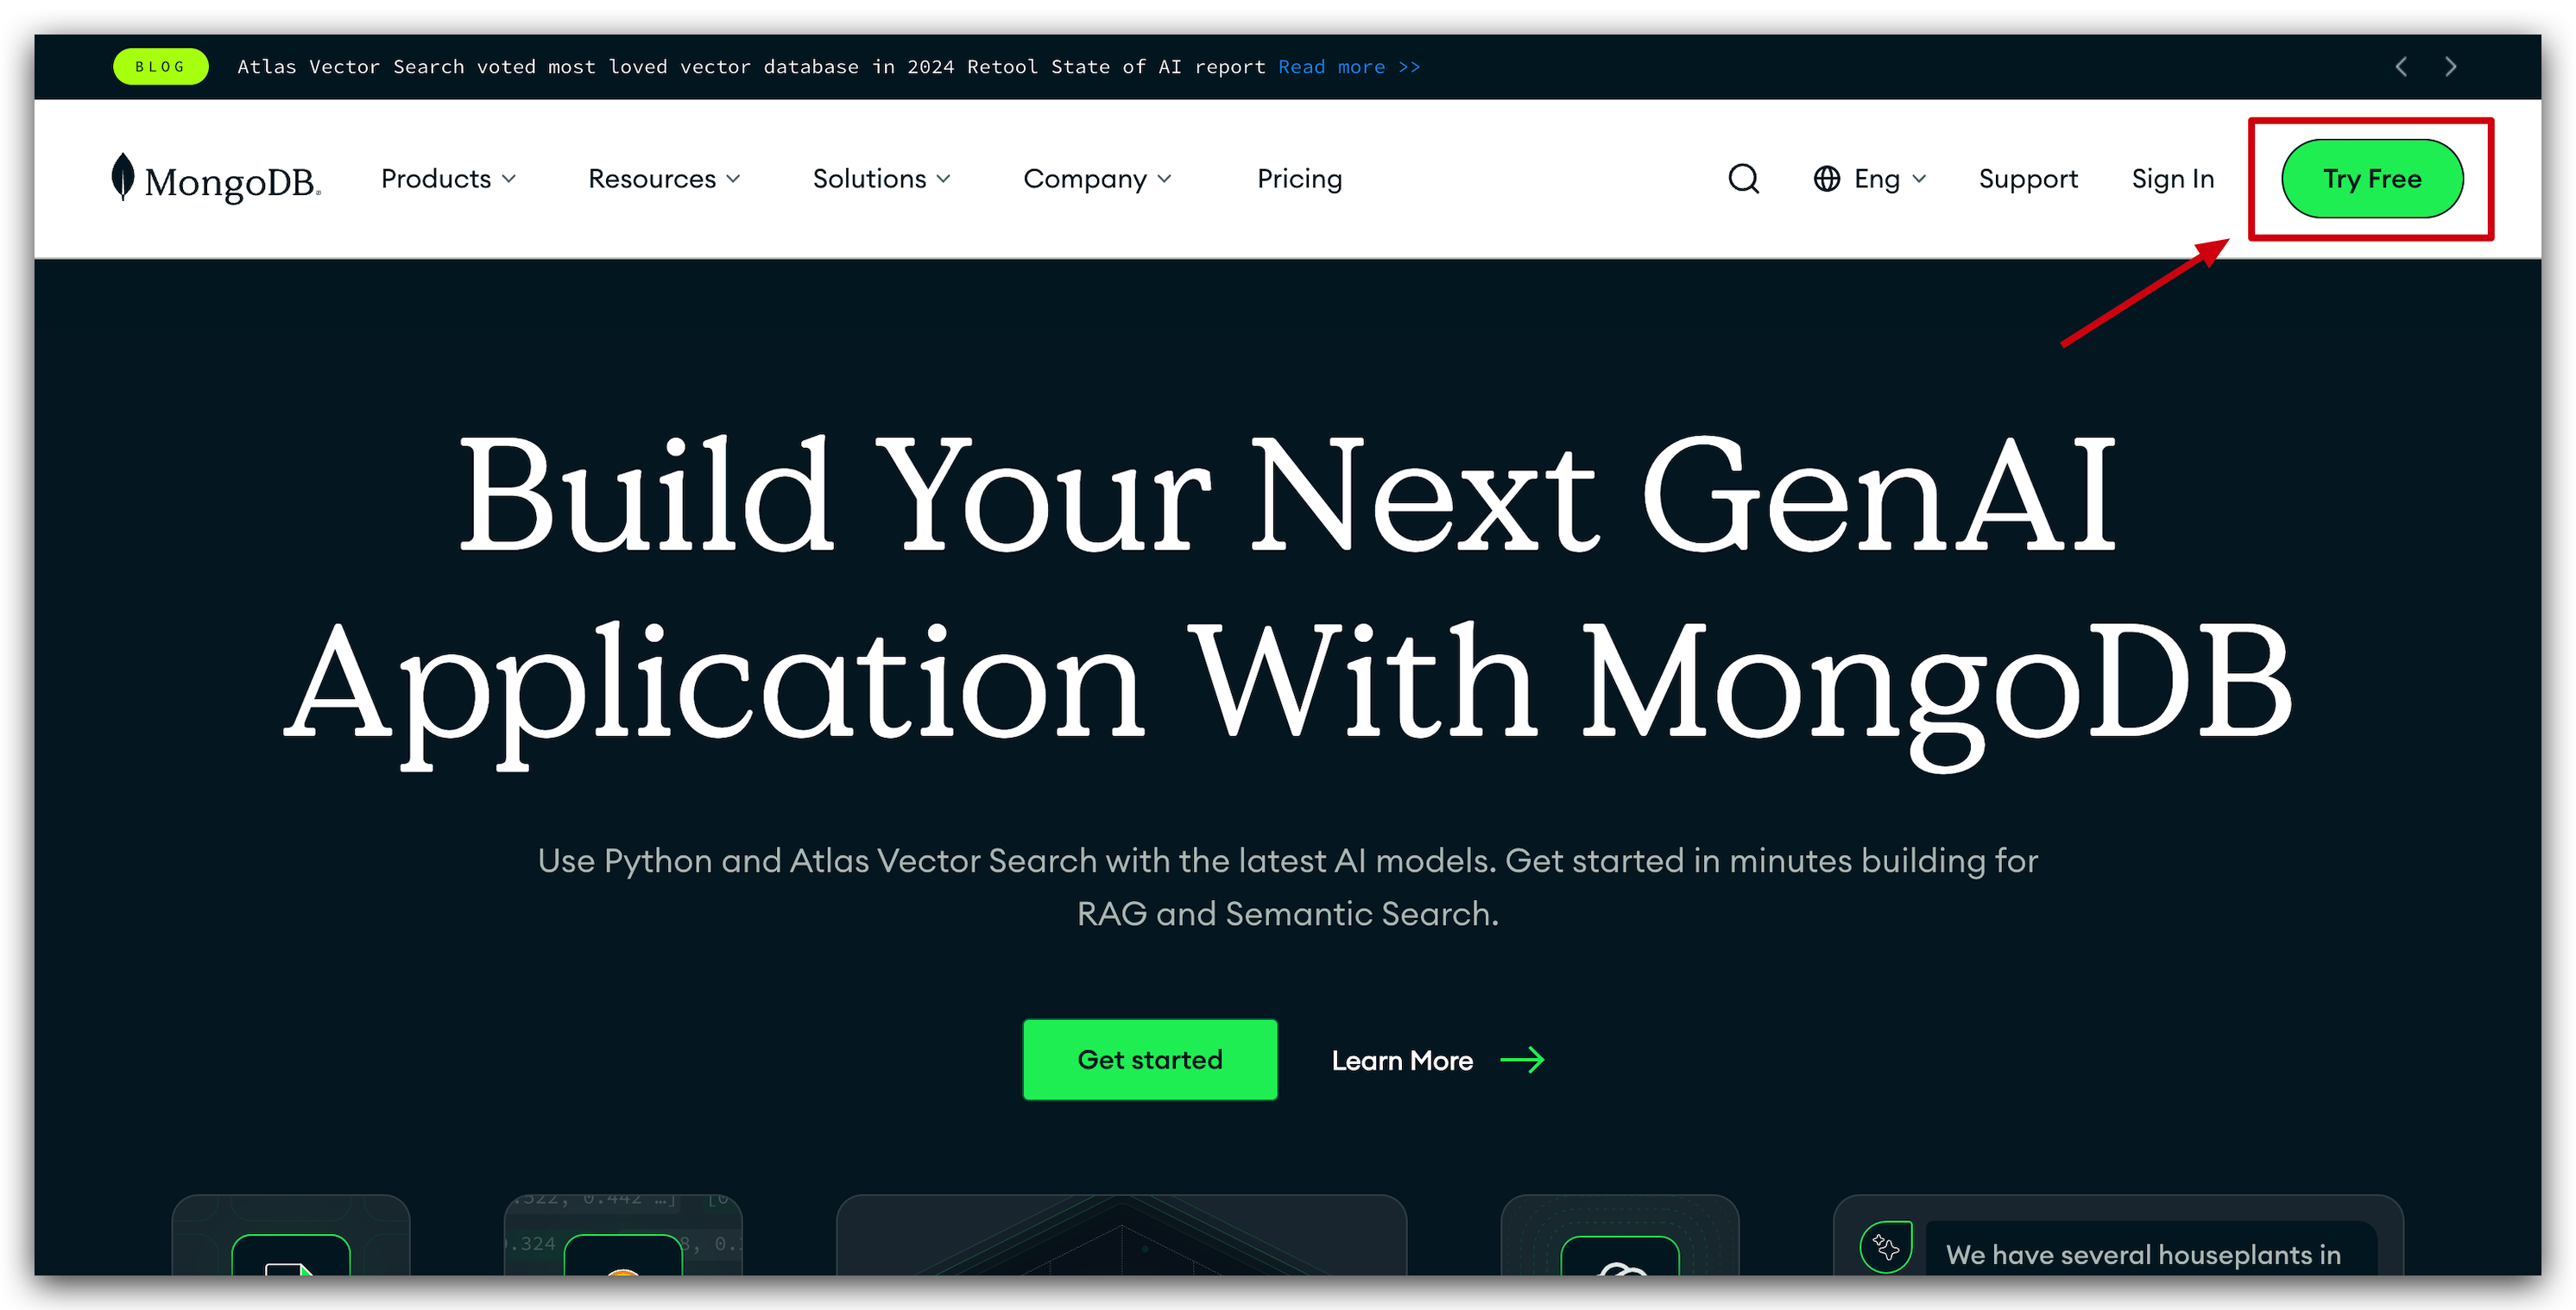
Next, create a MongoDB account or log in if you already have one. If you are new to MongoDB, start by visiting mongodb.com and signing up for a free account.
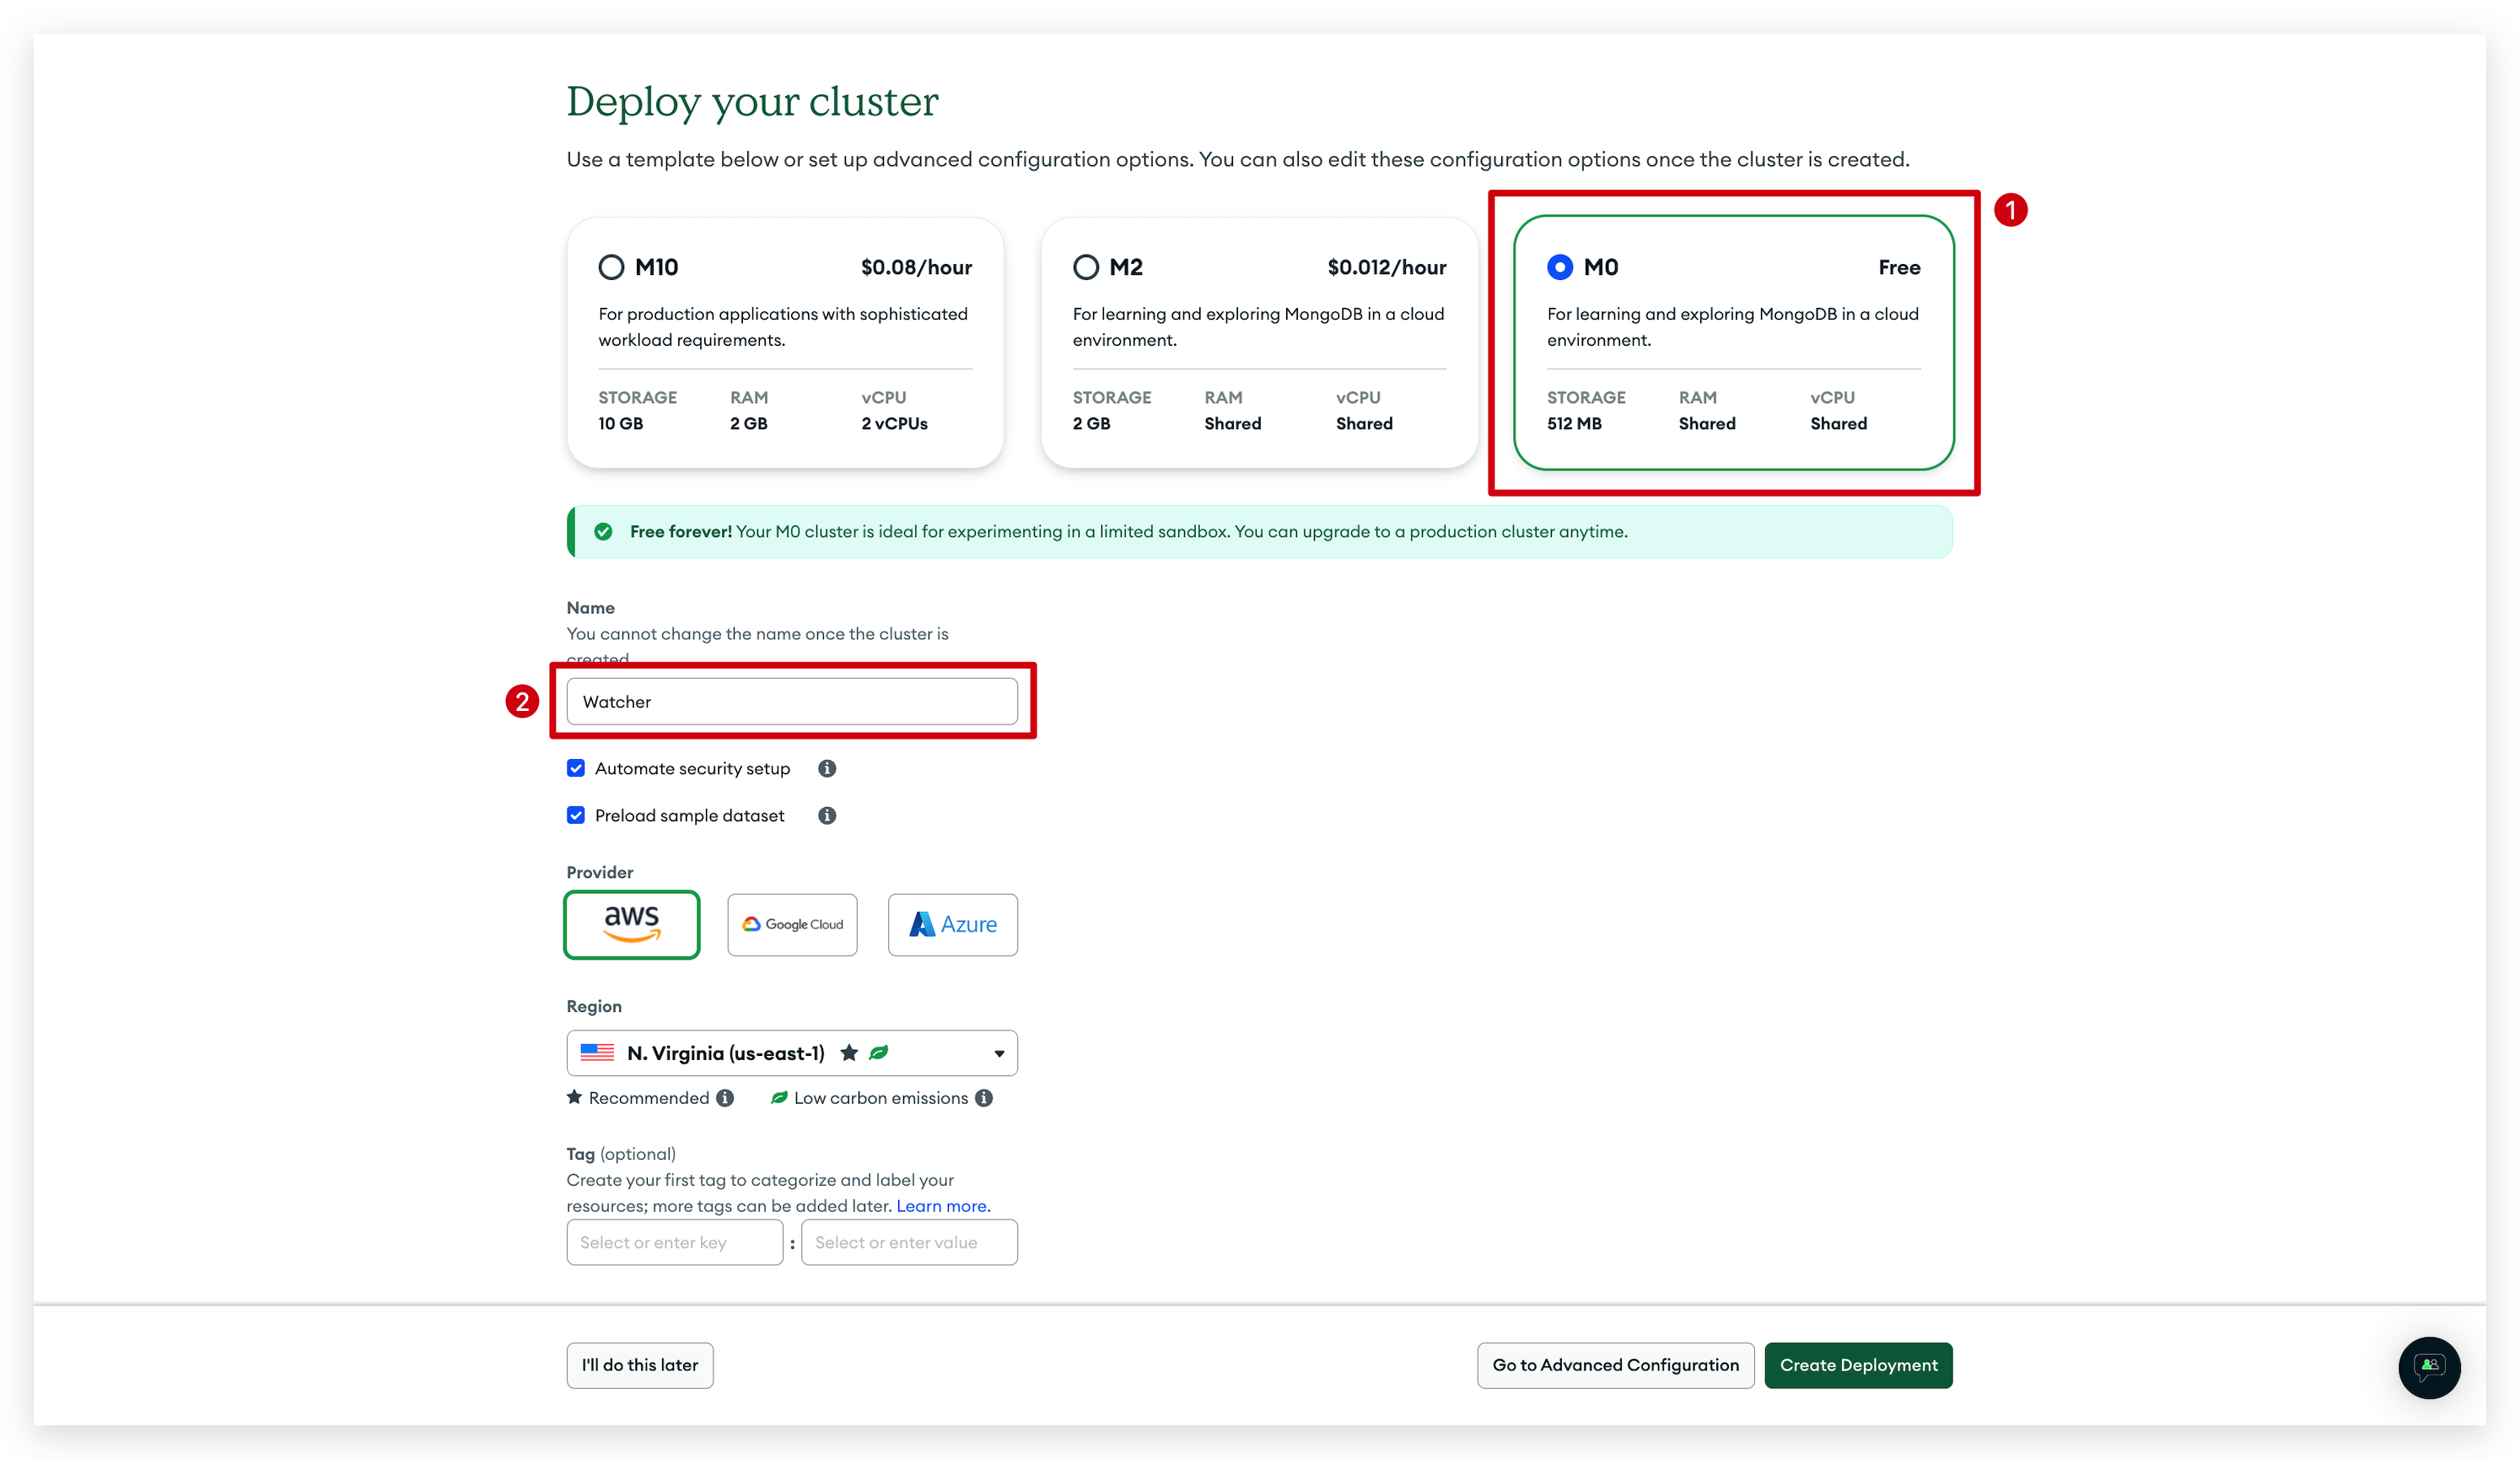
Step 4. Deploy a new Cluster
Once logged in, proceed to deploy a new cluster:
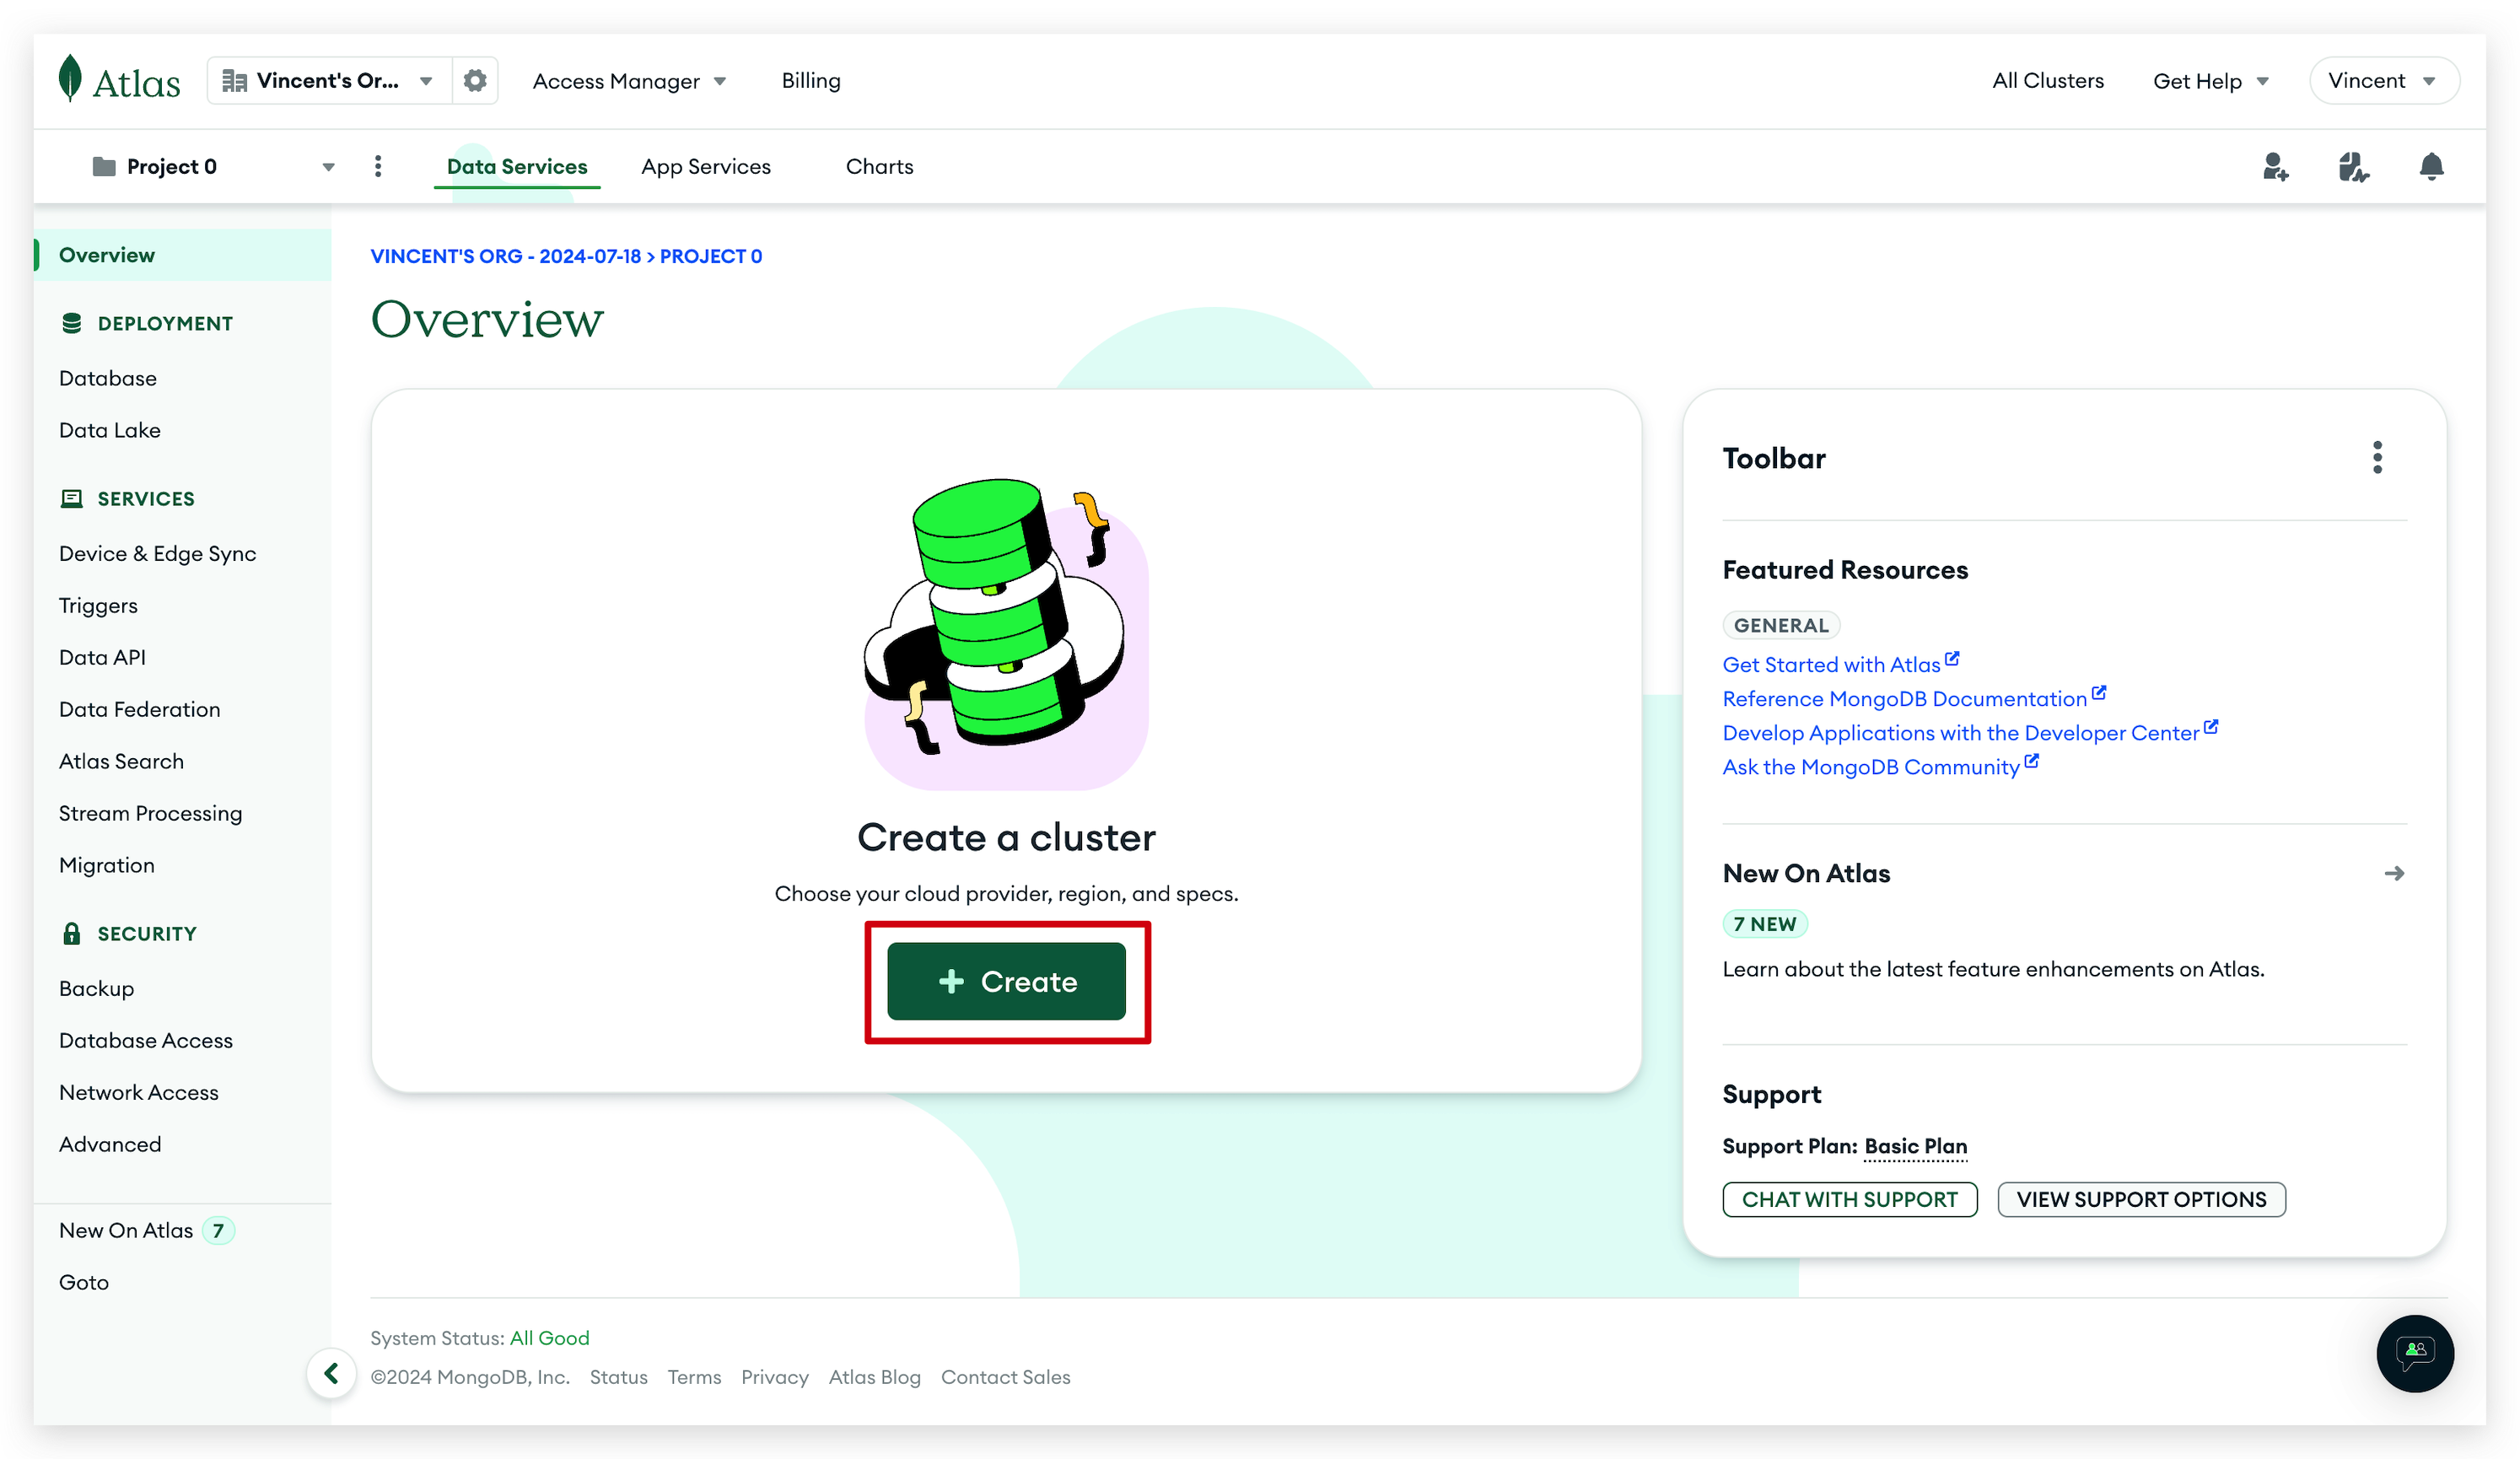
- Choose the Cluster Configuration: For development, we recommend using the M0 configuration because it is free and sufficient for small-scale testing. However, you are welcome to select a different configuration if it better aligns with your project's requirements.
- Select a Cloud Provider: We chose AWS due to its widespread availability and reliability, but other providers like Google Cloud or Azure are equally viable depending on your geographical or technical requirements.
- Select a Region: This should be the region closest to your primary user base to minimize latency and enhance performance.
Step 5. Configure your Database Security
Once your node is created, navigate to the Quickstart menu in the left-hand sidebar under Security. Here, you will create a database user by specifying a username and password.
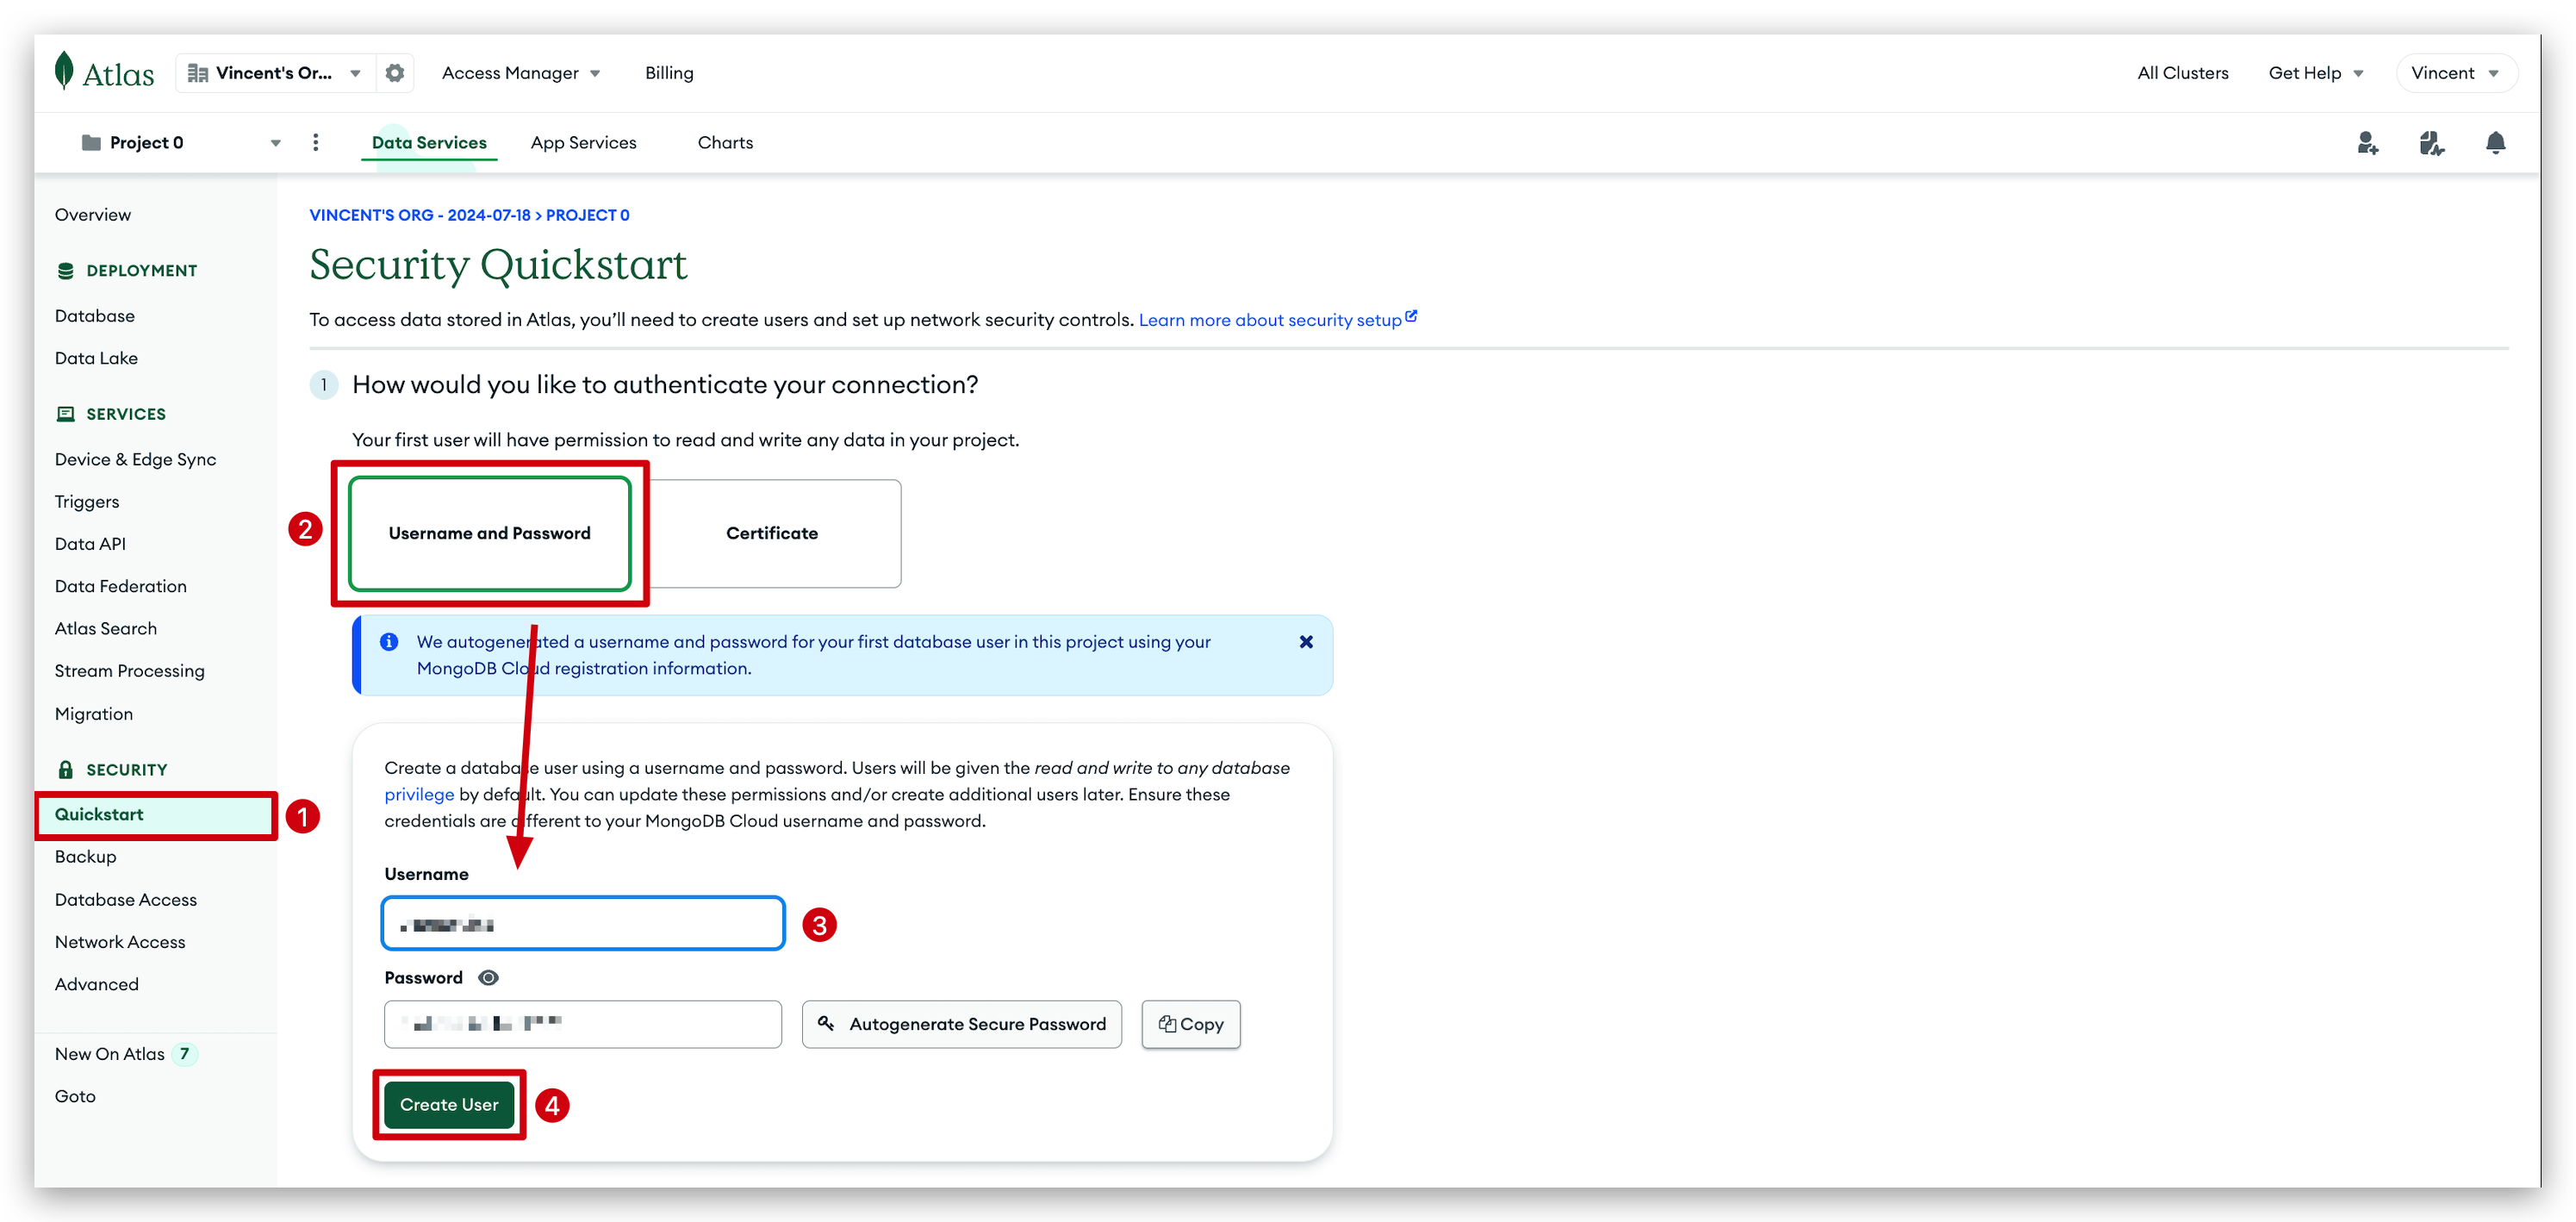
By default, users are granted the read and write privileges to any database. You have the option to update these permissions and/or create additional users at a later time.
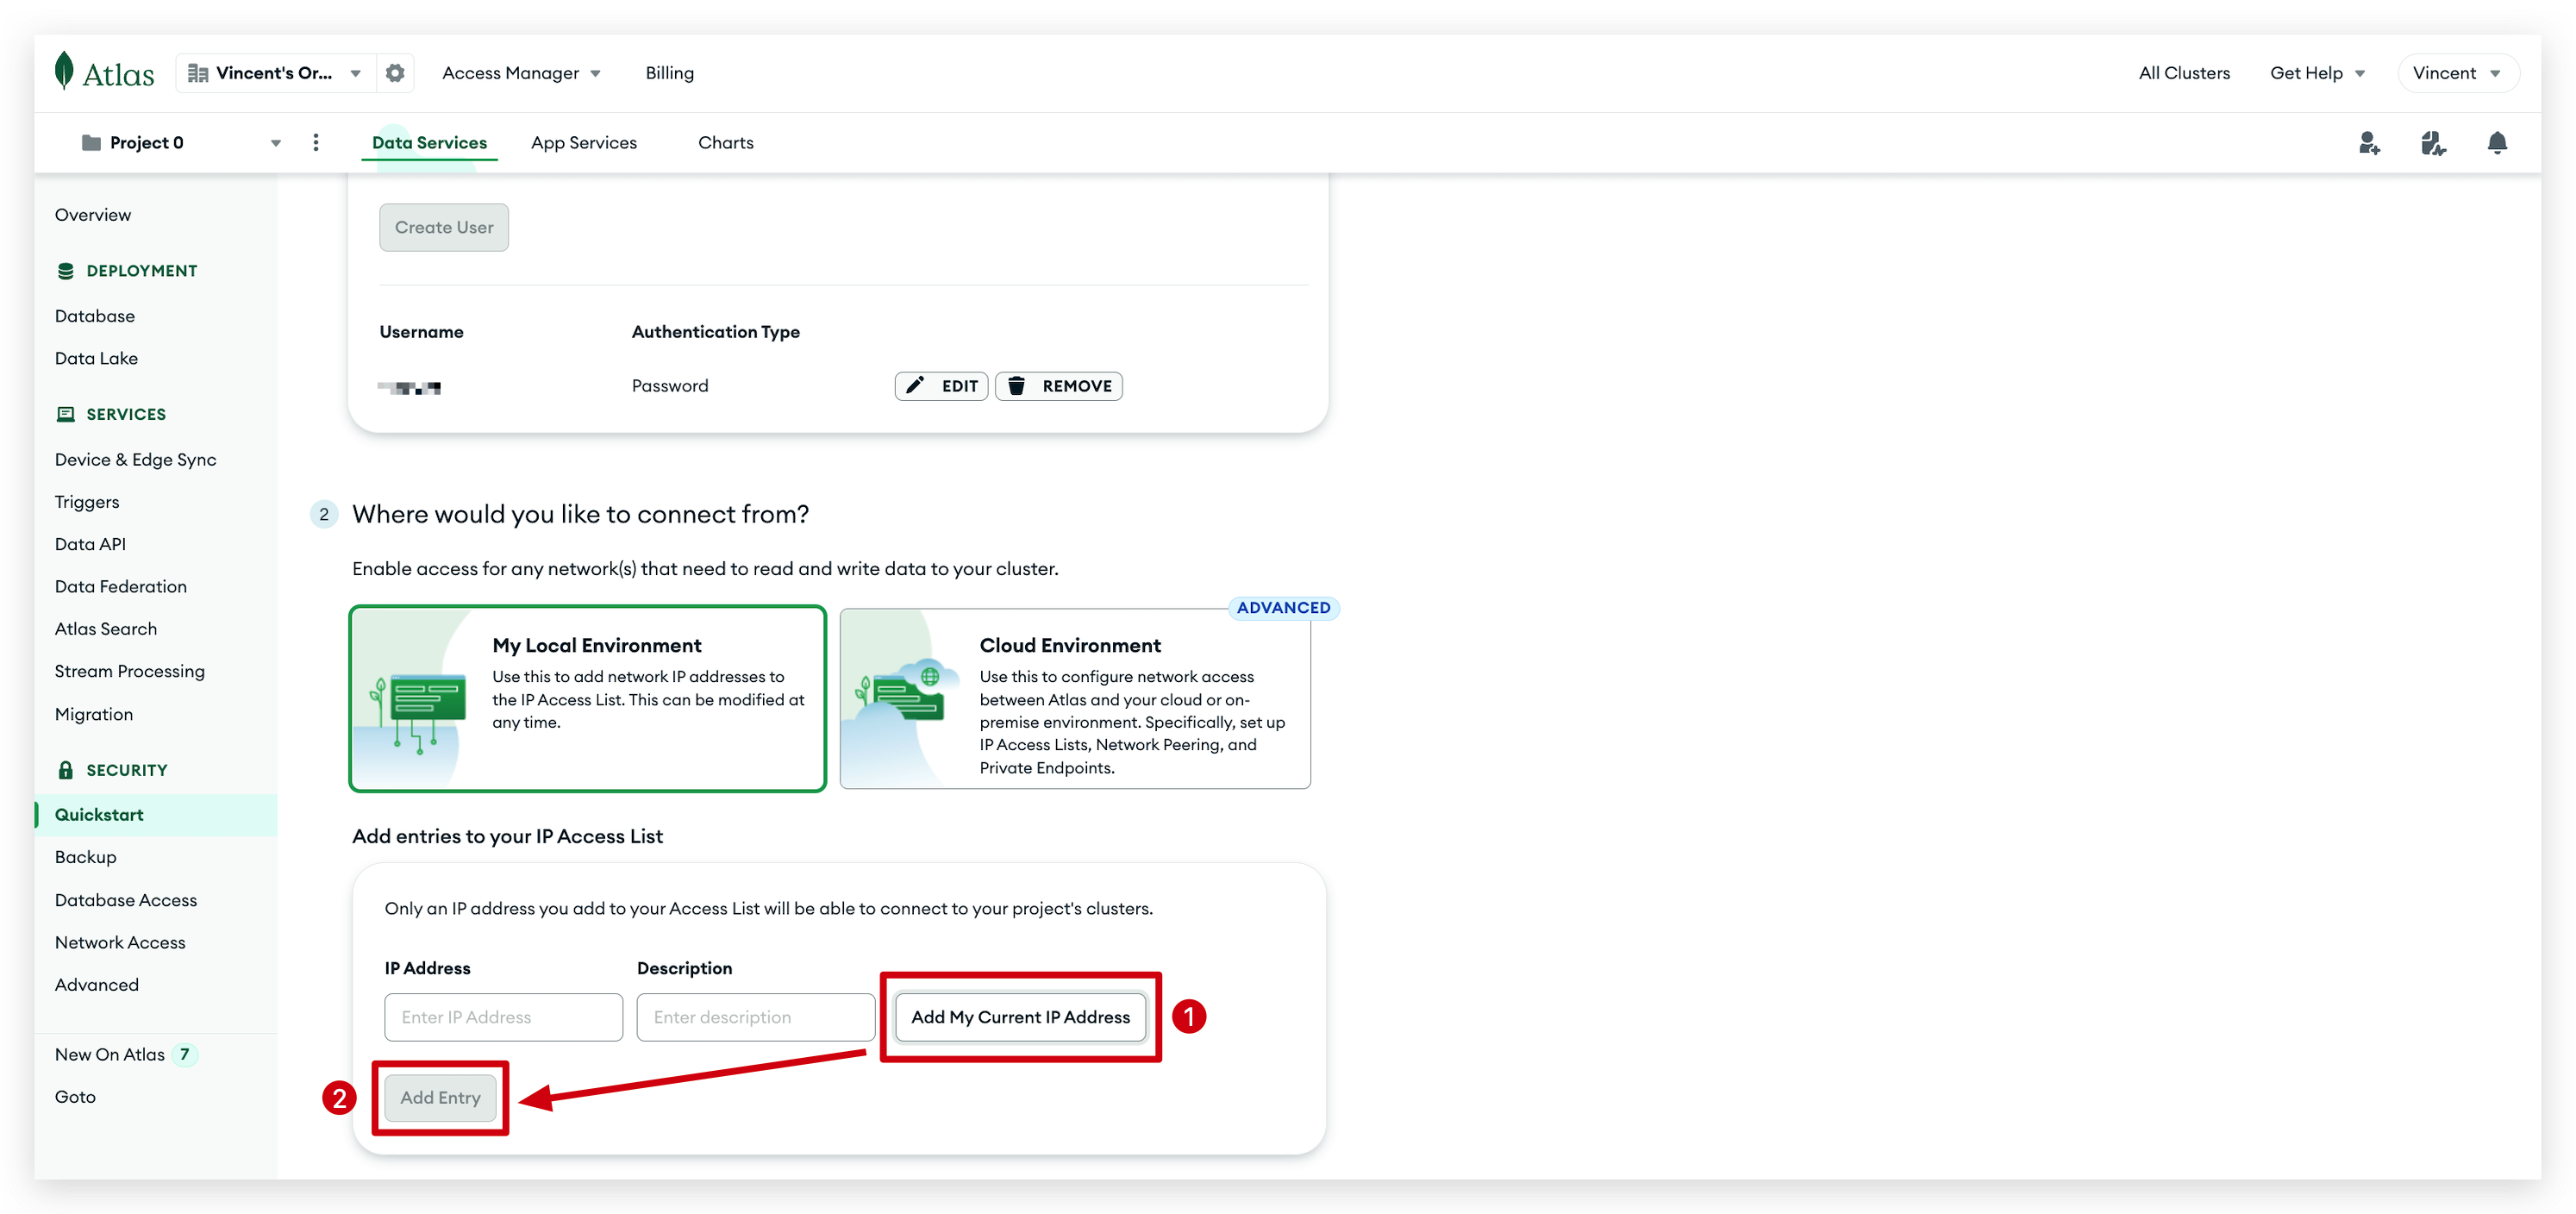
After setting up your user, stay on the Quickstart page and scroll down to add your current IP address to your IP Access List.
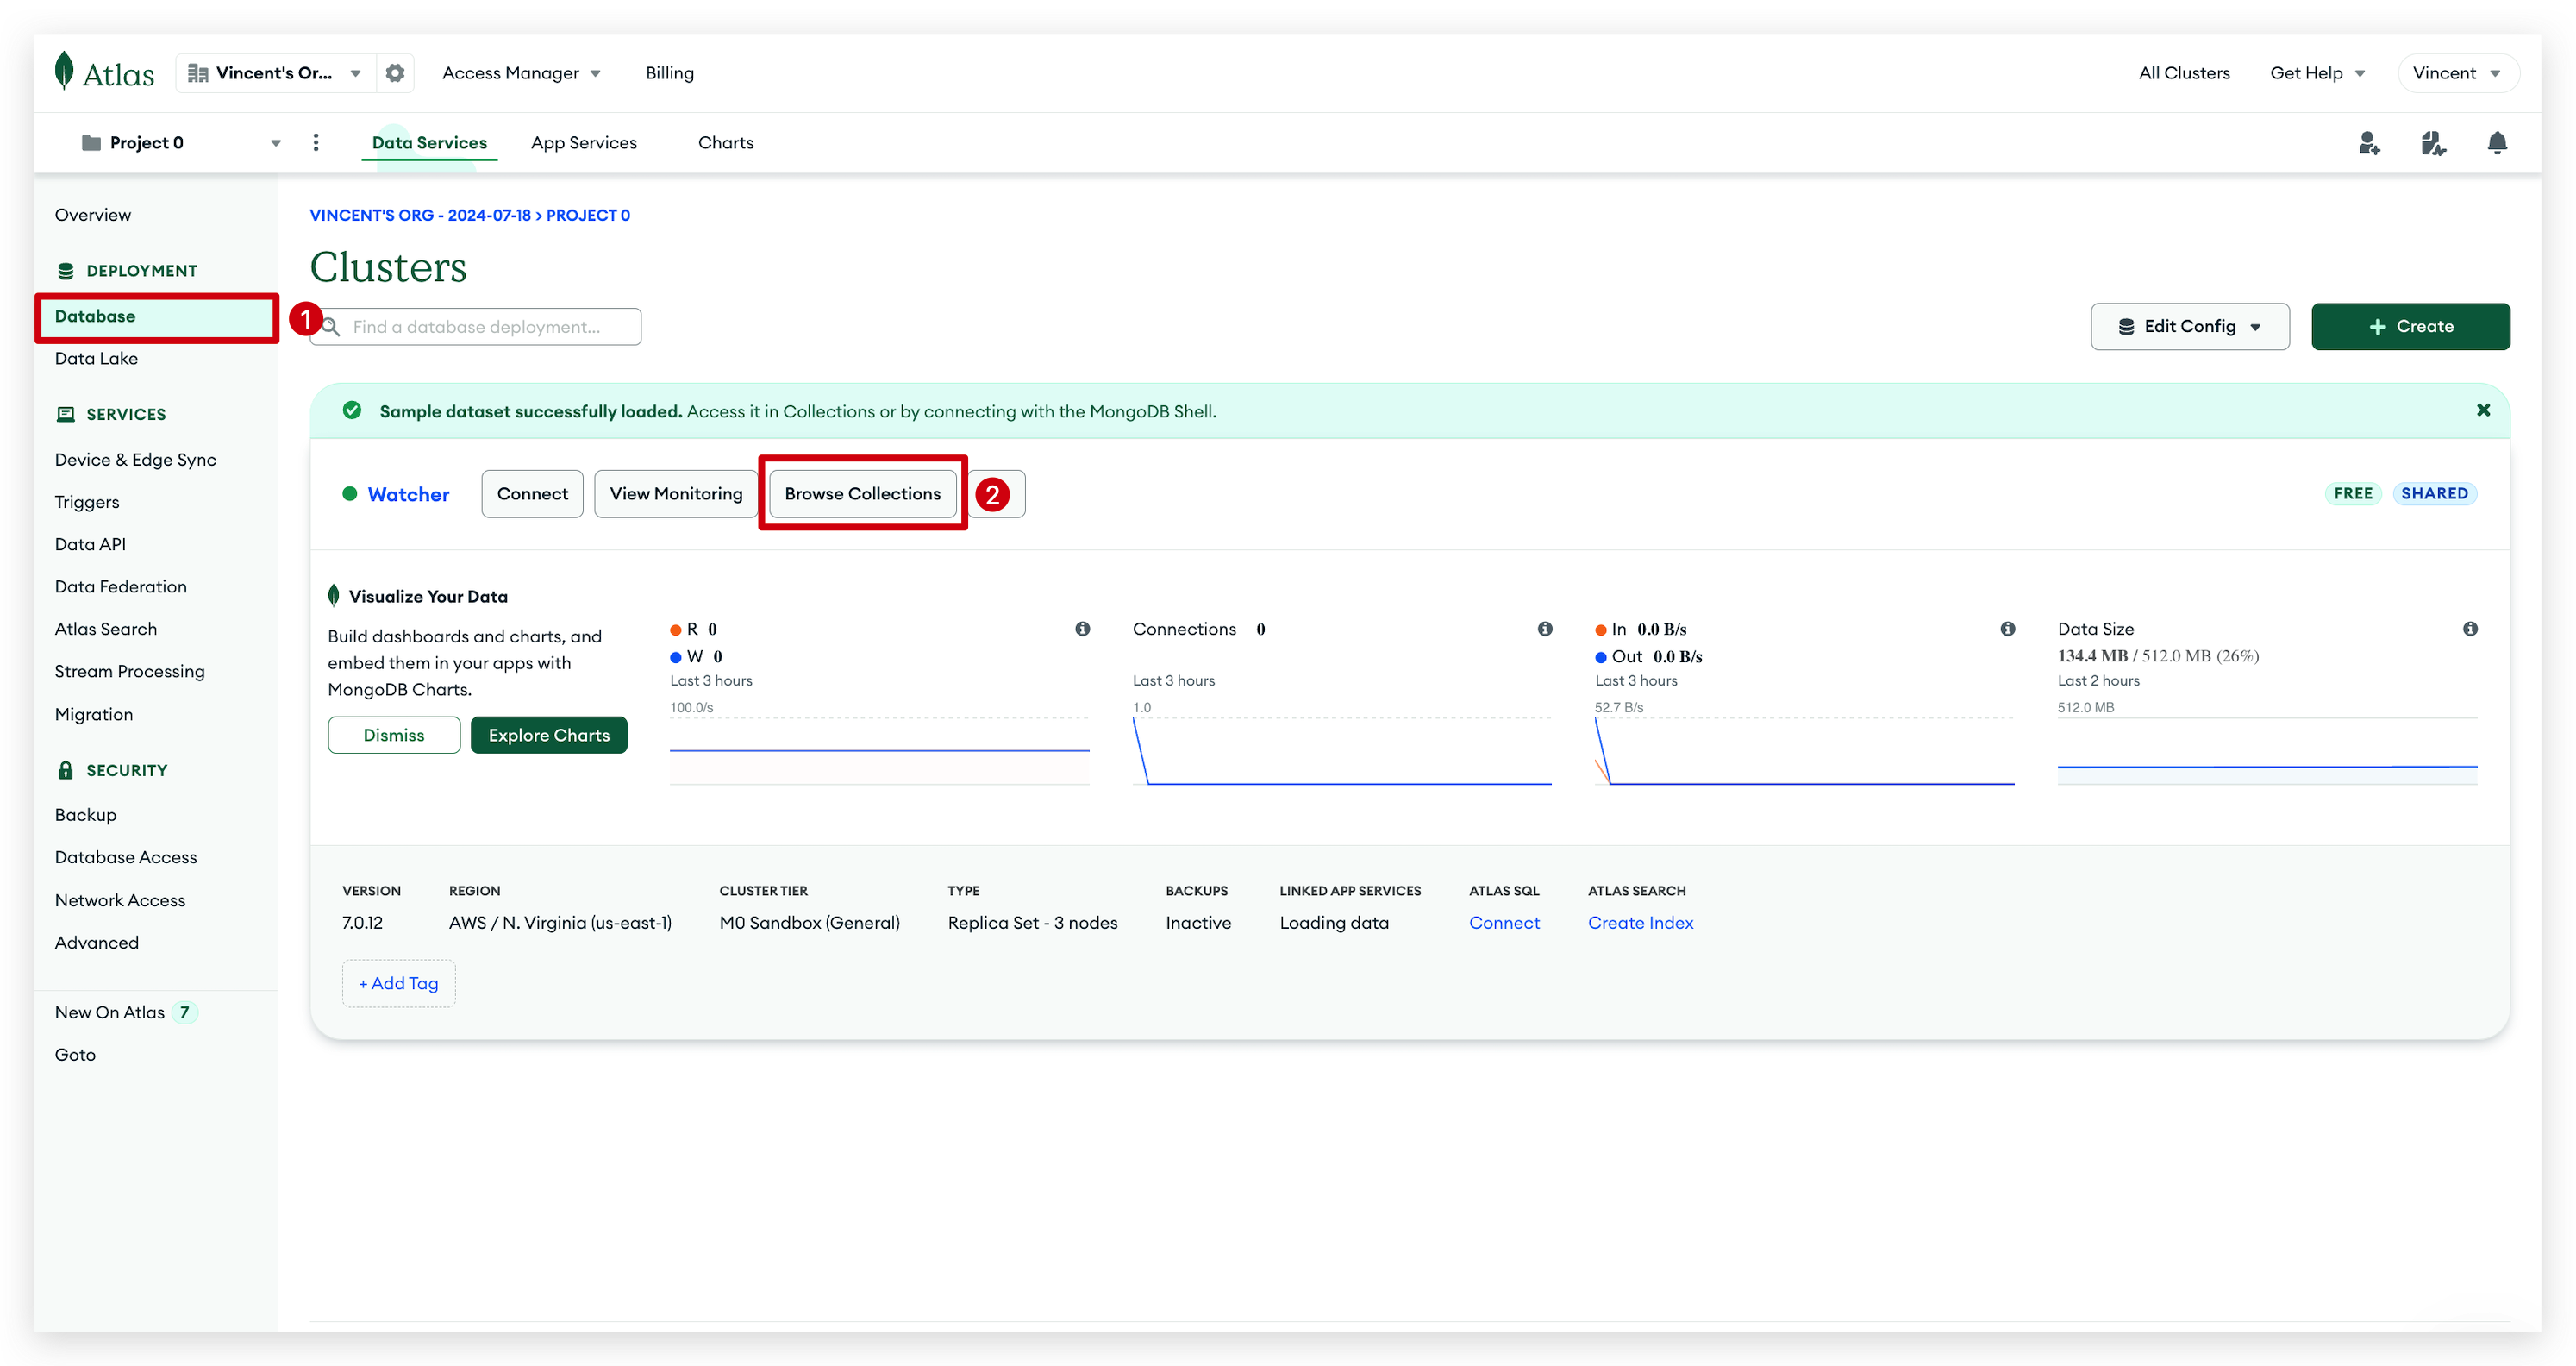
Step 6. Create a Database and Collection
On the left-hand sidebar, click on the Databases menu under the Deployment category. Then, click on Browse Collections to open the database management page. This is where all your databases and collections are managed.
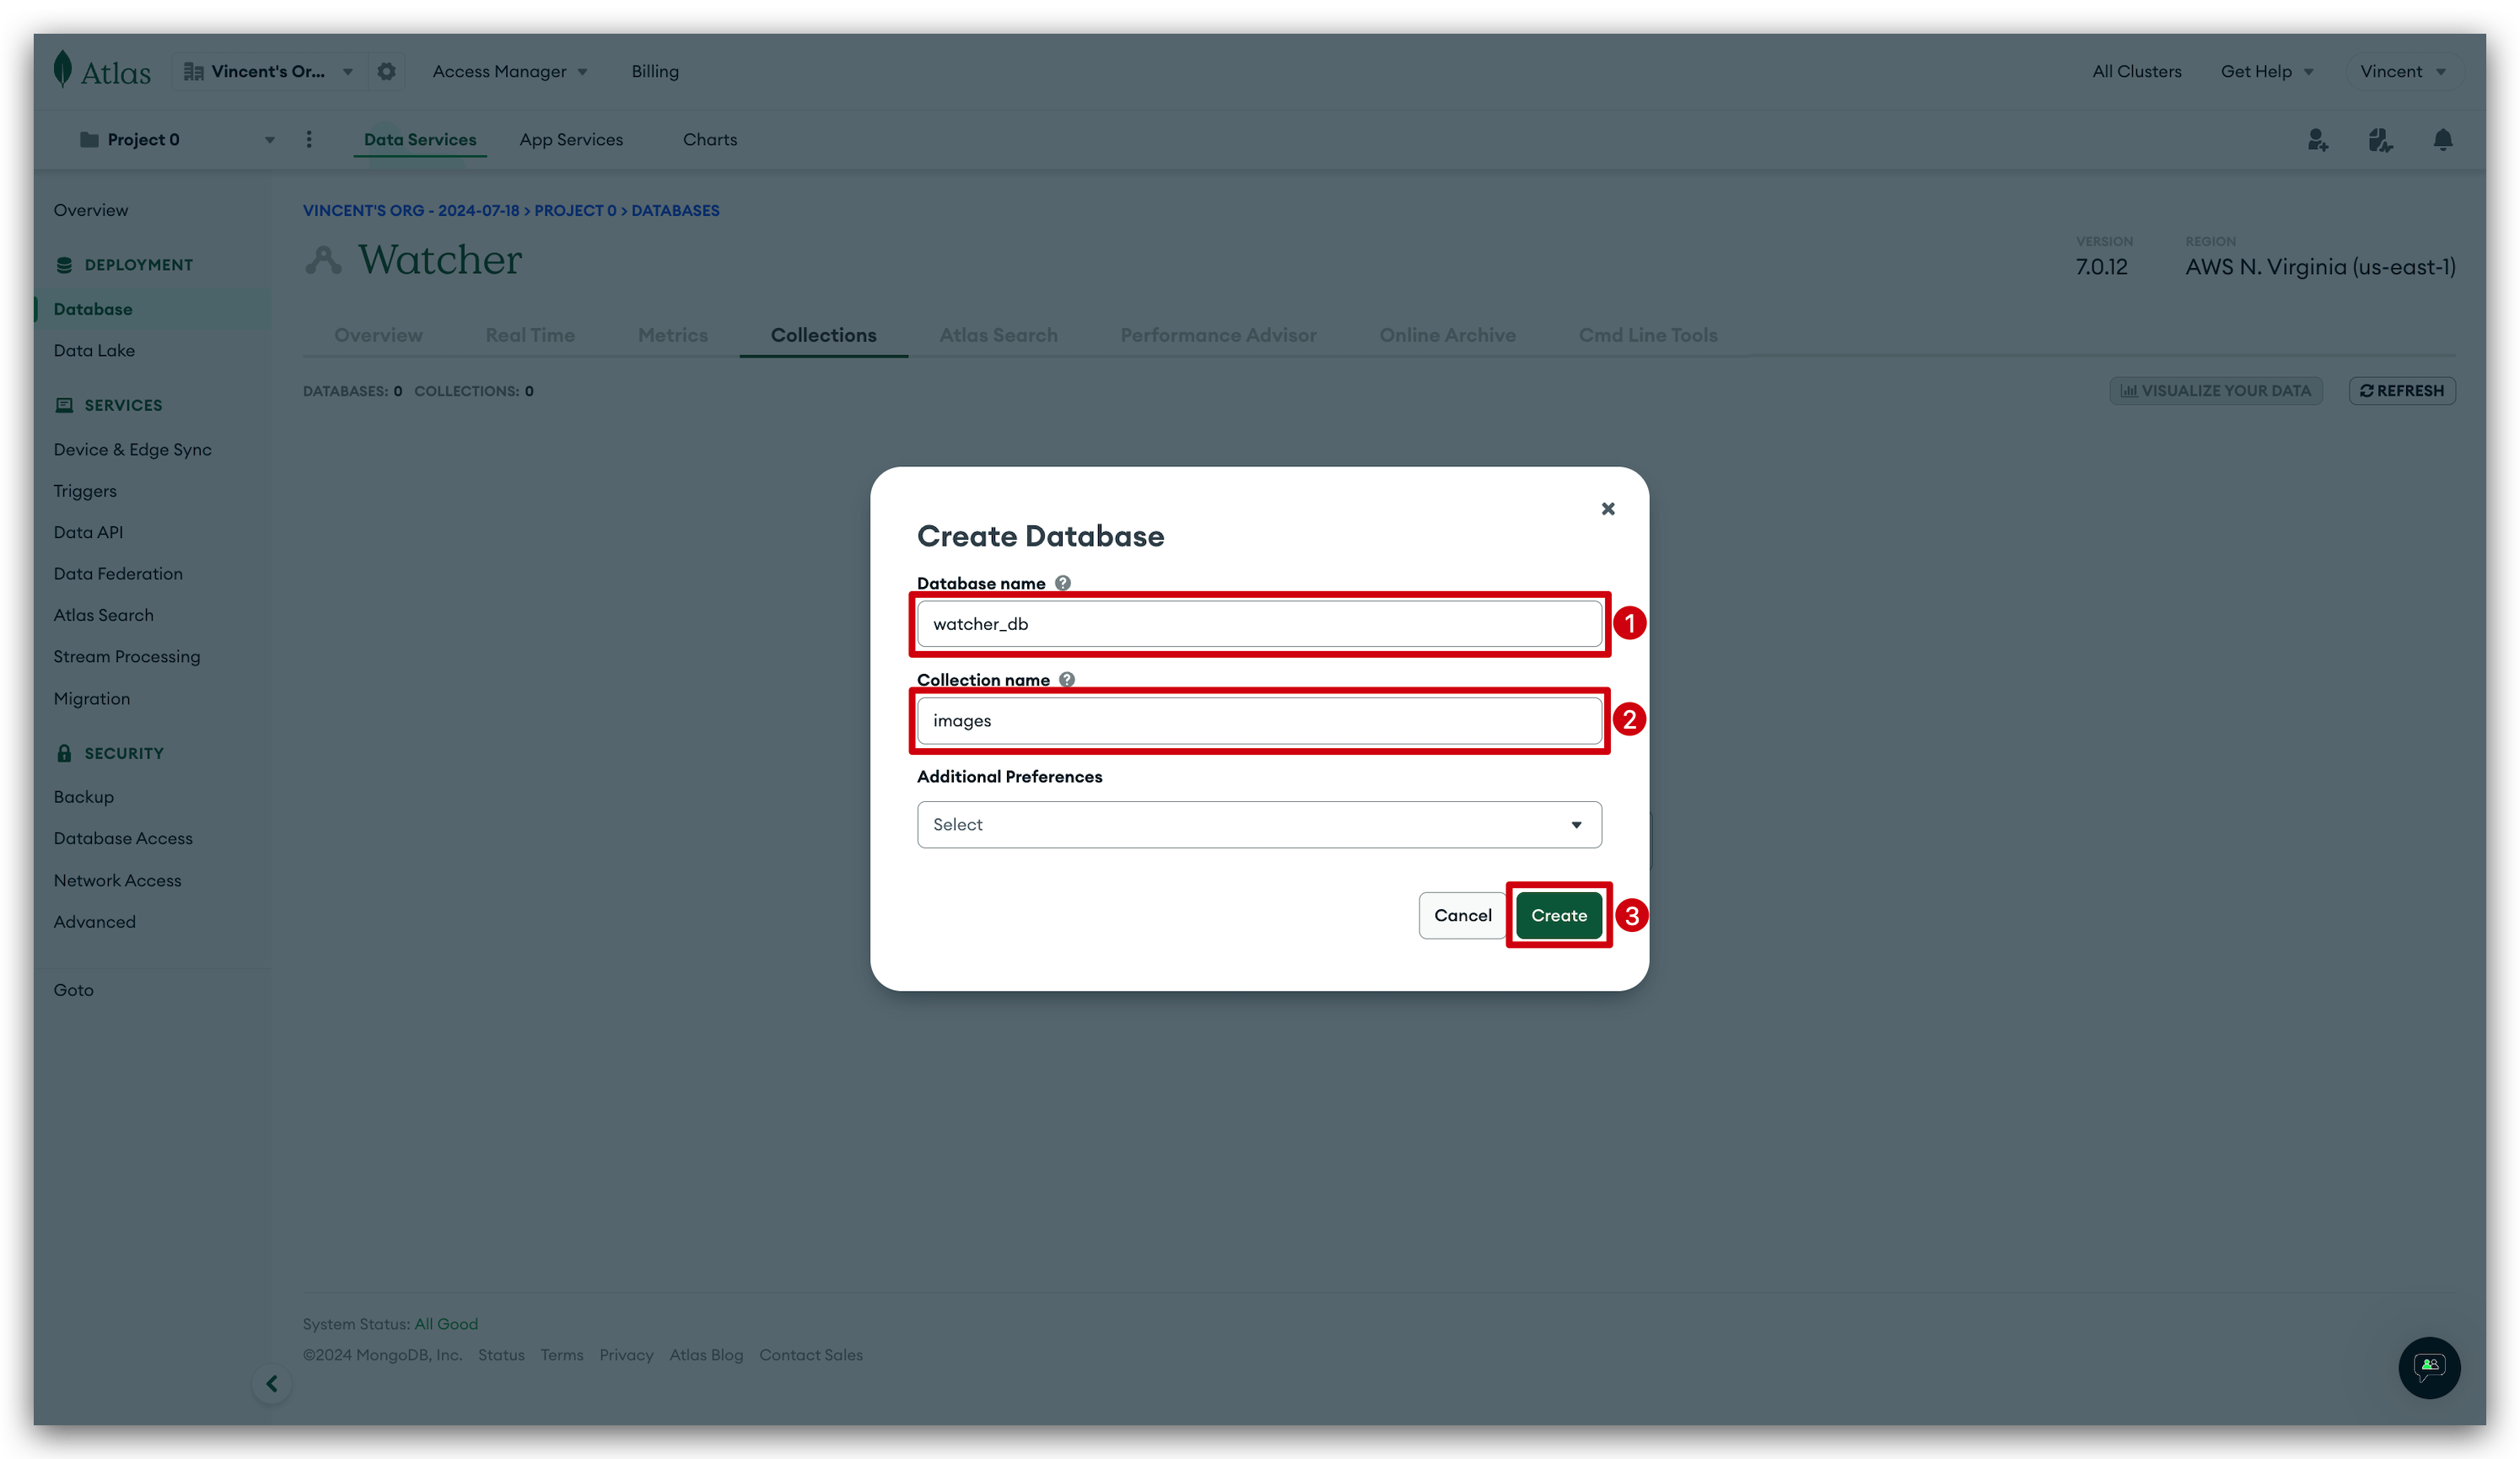
Inside the database manager, click on Add My Own Data to start the process of creating a new database and collection.

A prompt will appear asking you to enter the names for your new database and collection. Fill in the desired names for each.
After entering the names, click on the Create button to finalize the creation of your new database and collection.
Step 7. Get your Hostname
Start by logging into your MongoDB Atlas dashboard. From here, navigate to the Database menu on the left sidebar to find your cluster. Locate your desired cluster and click the Connect button associated with it. This will open a series of connection options.
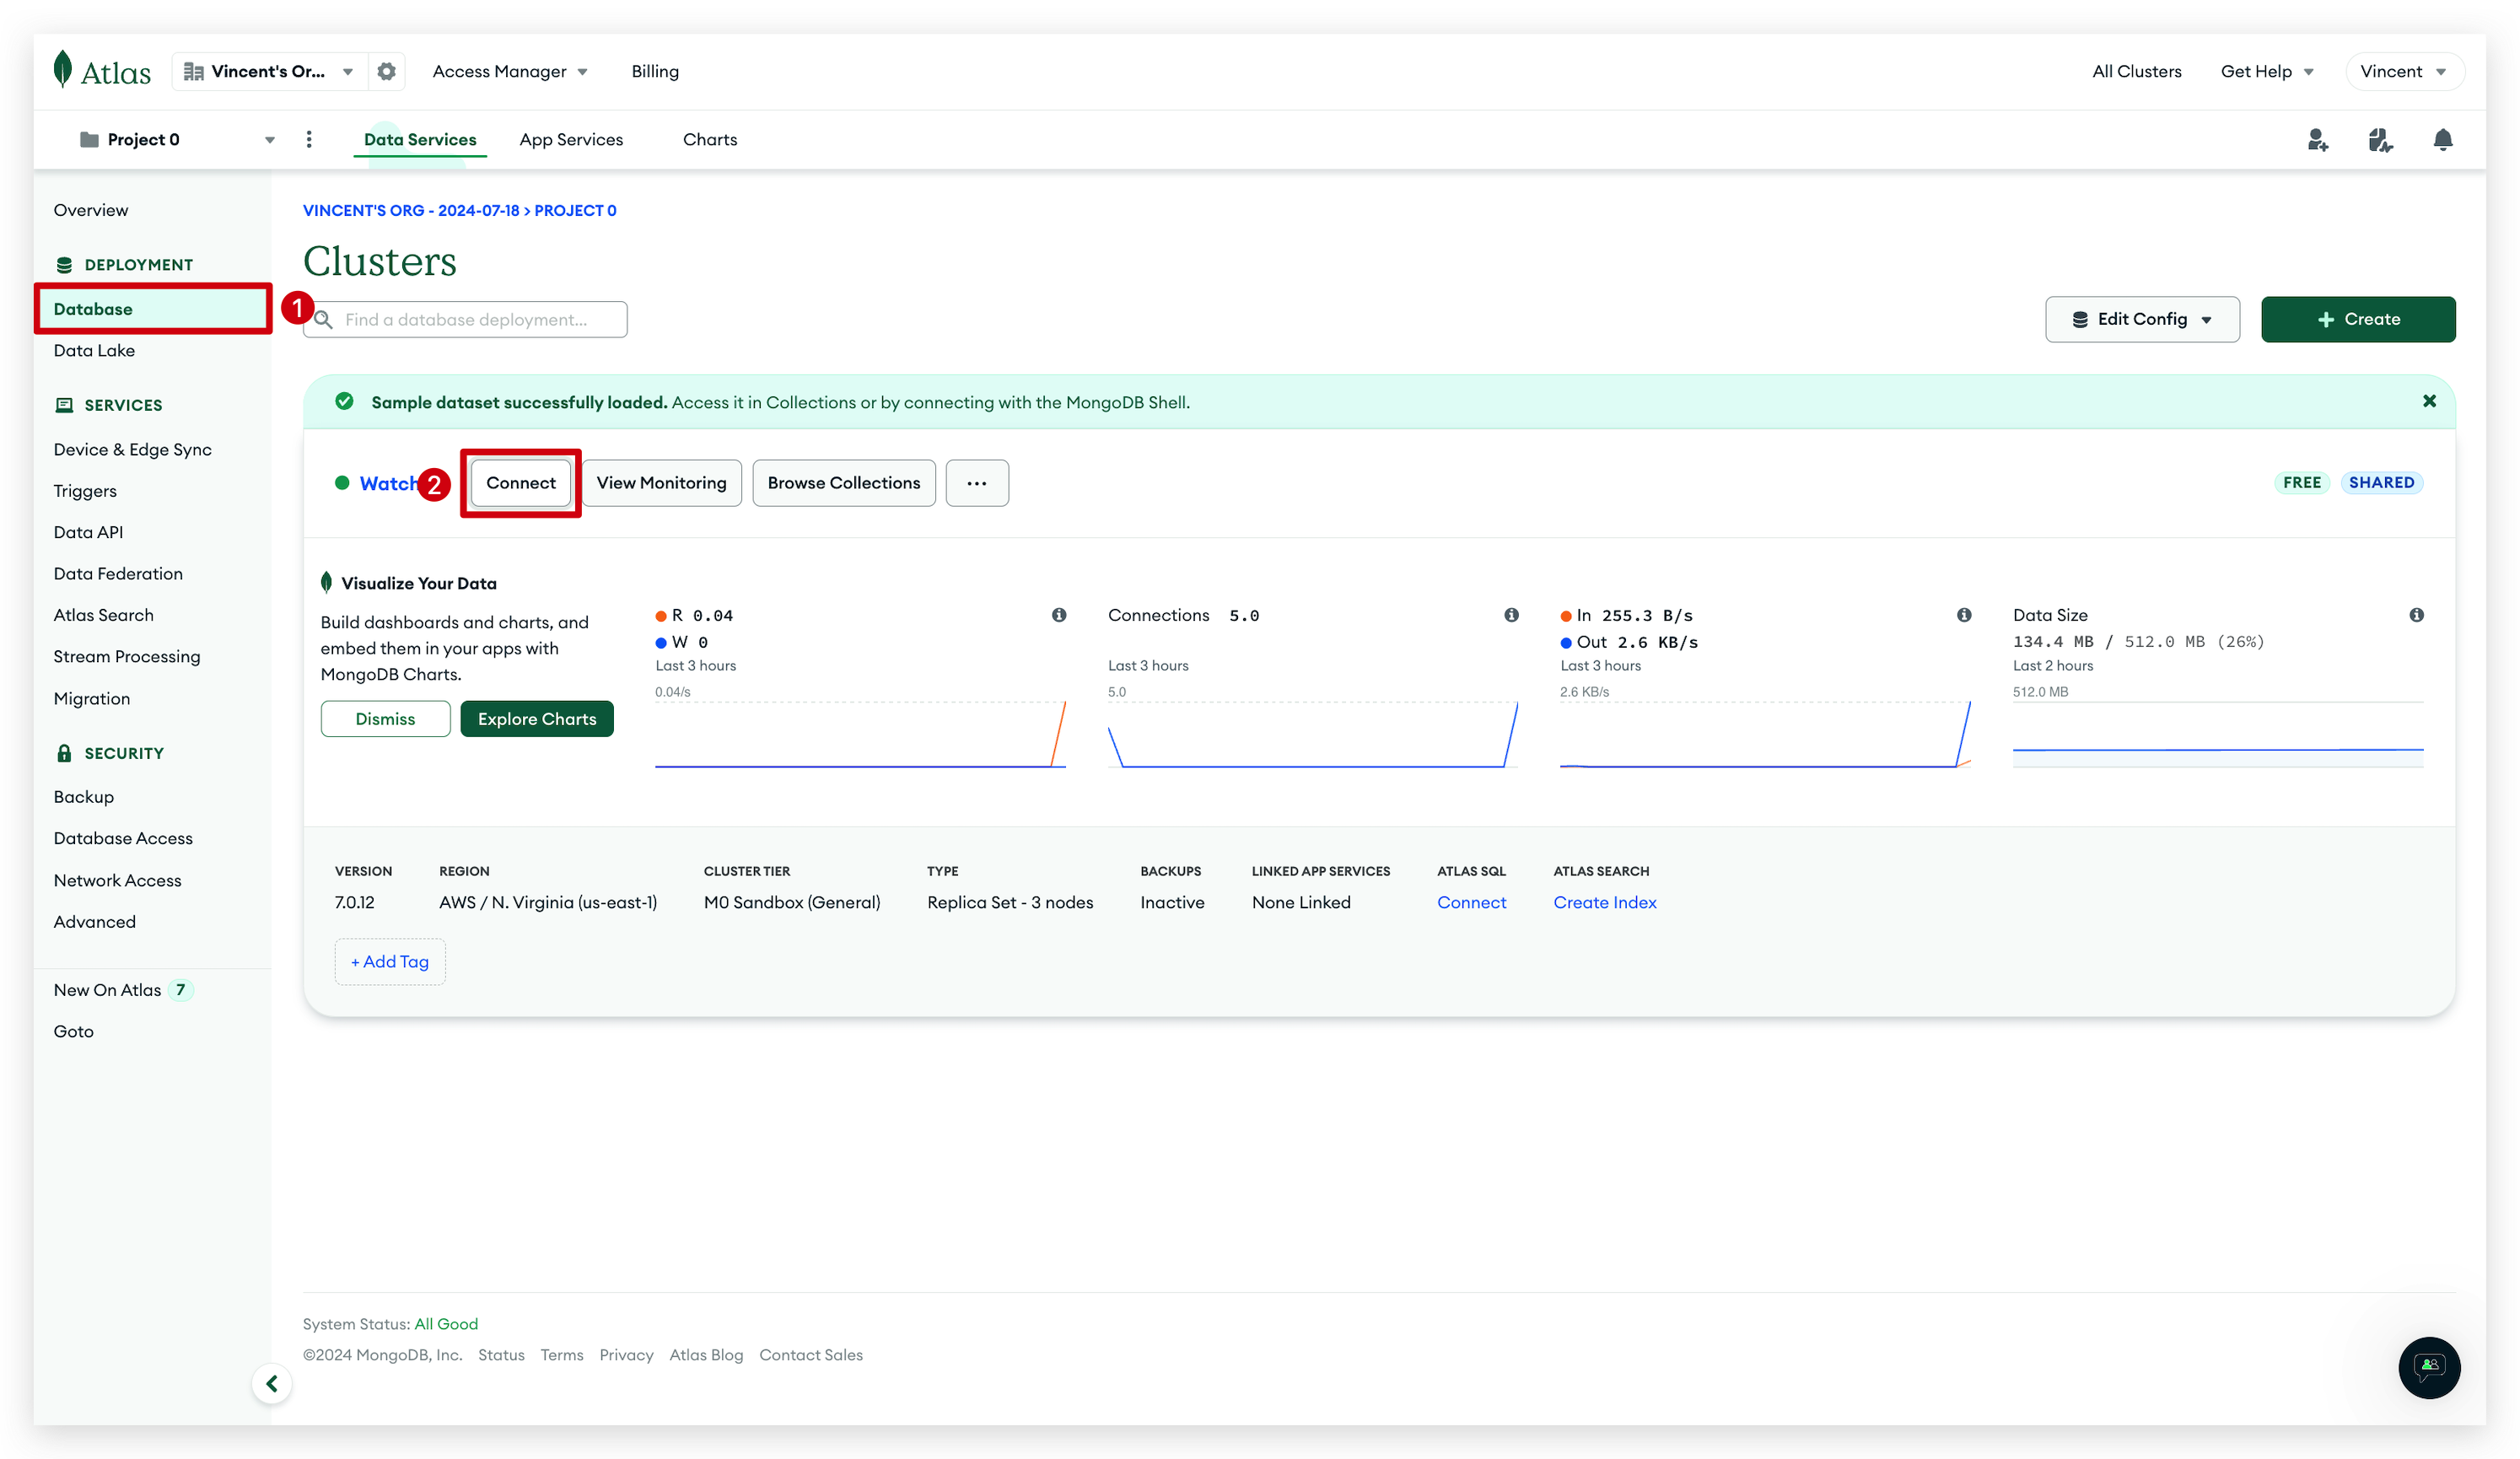
In the connection options presented, click on Shell.

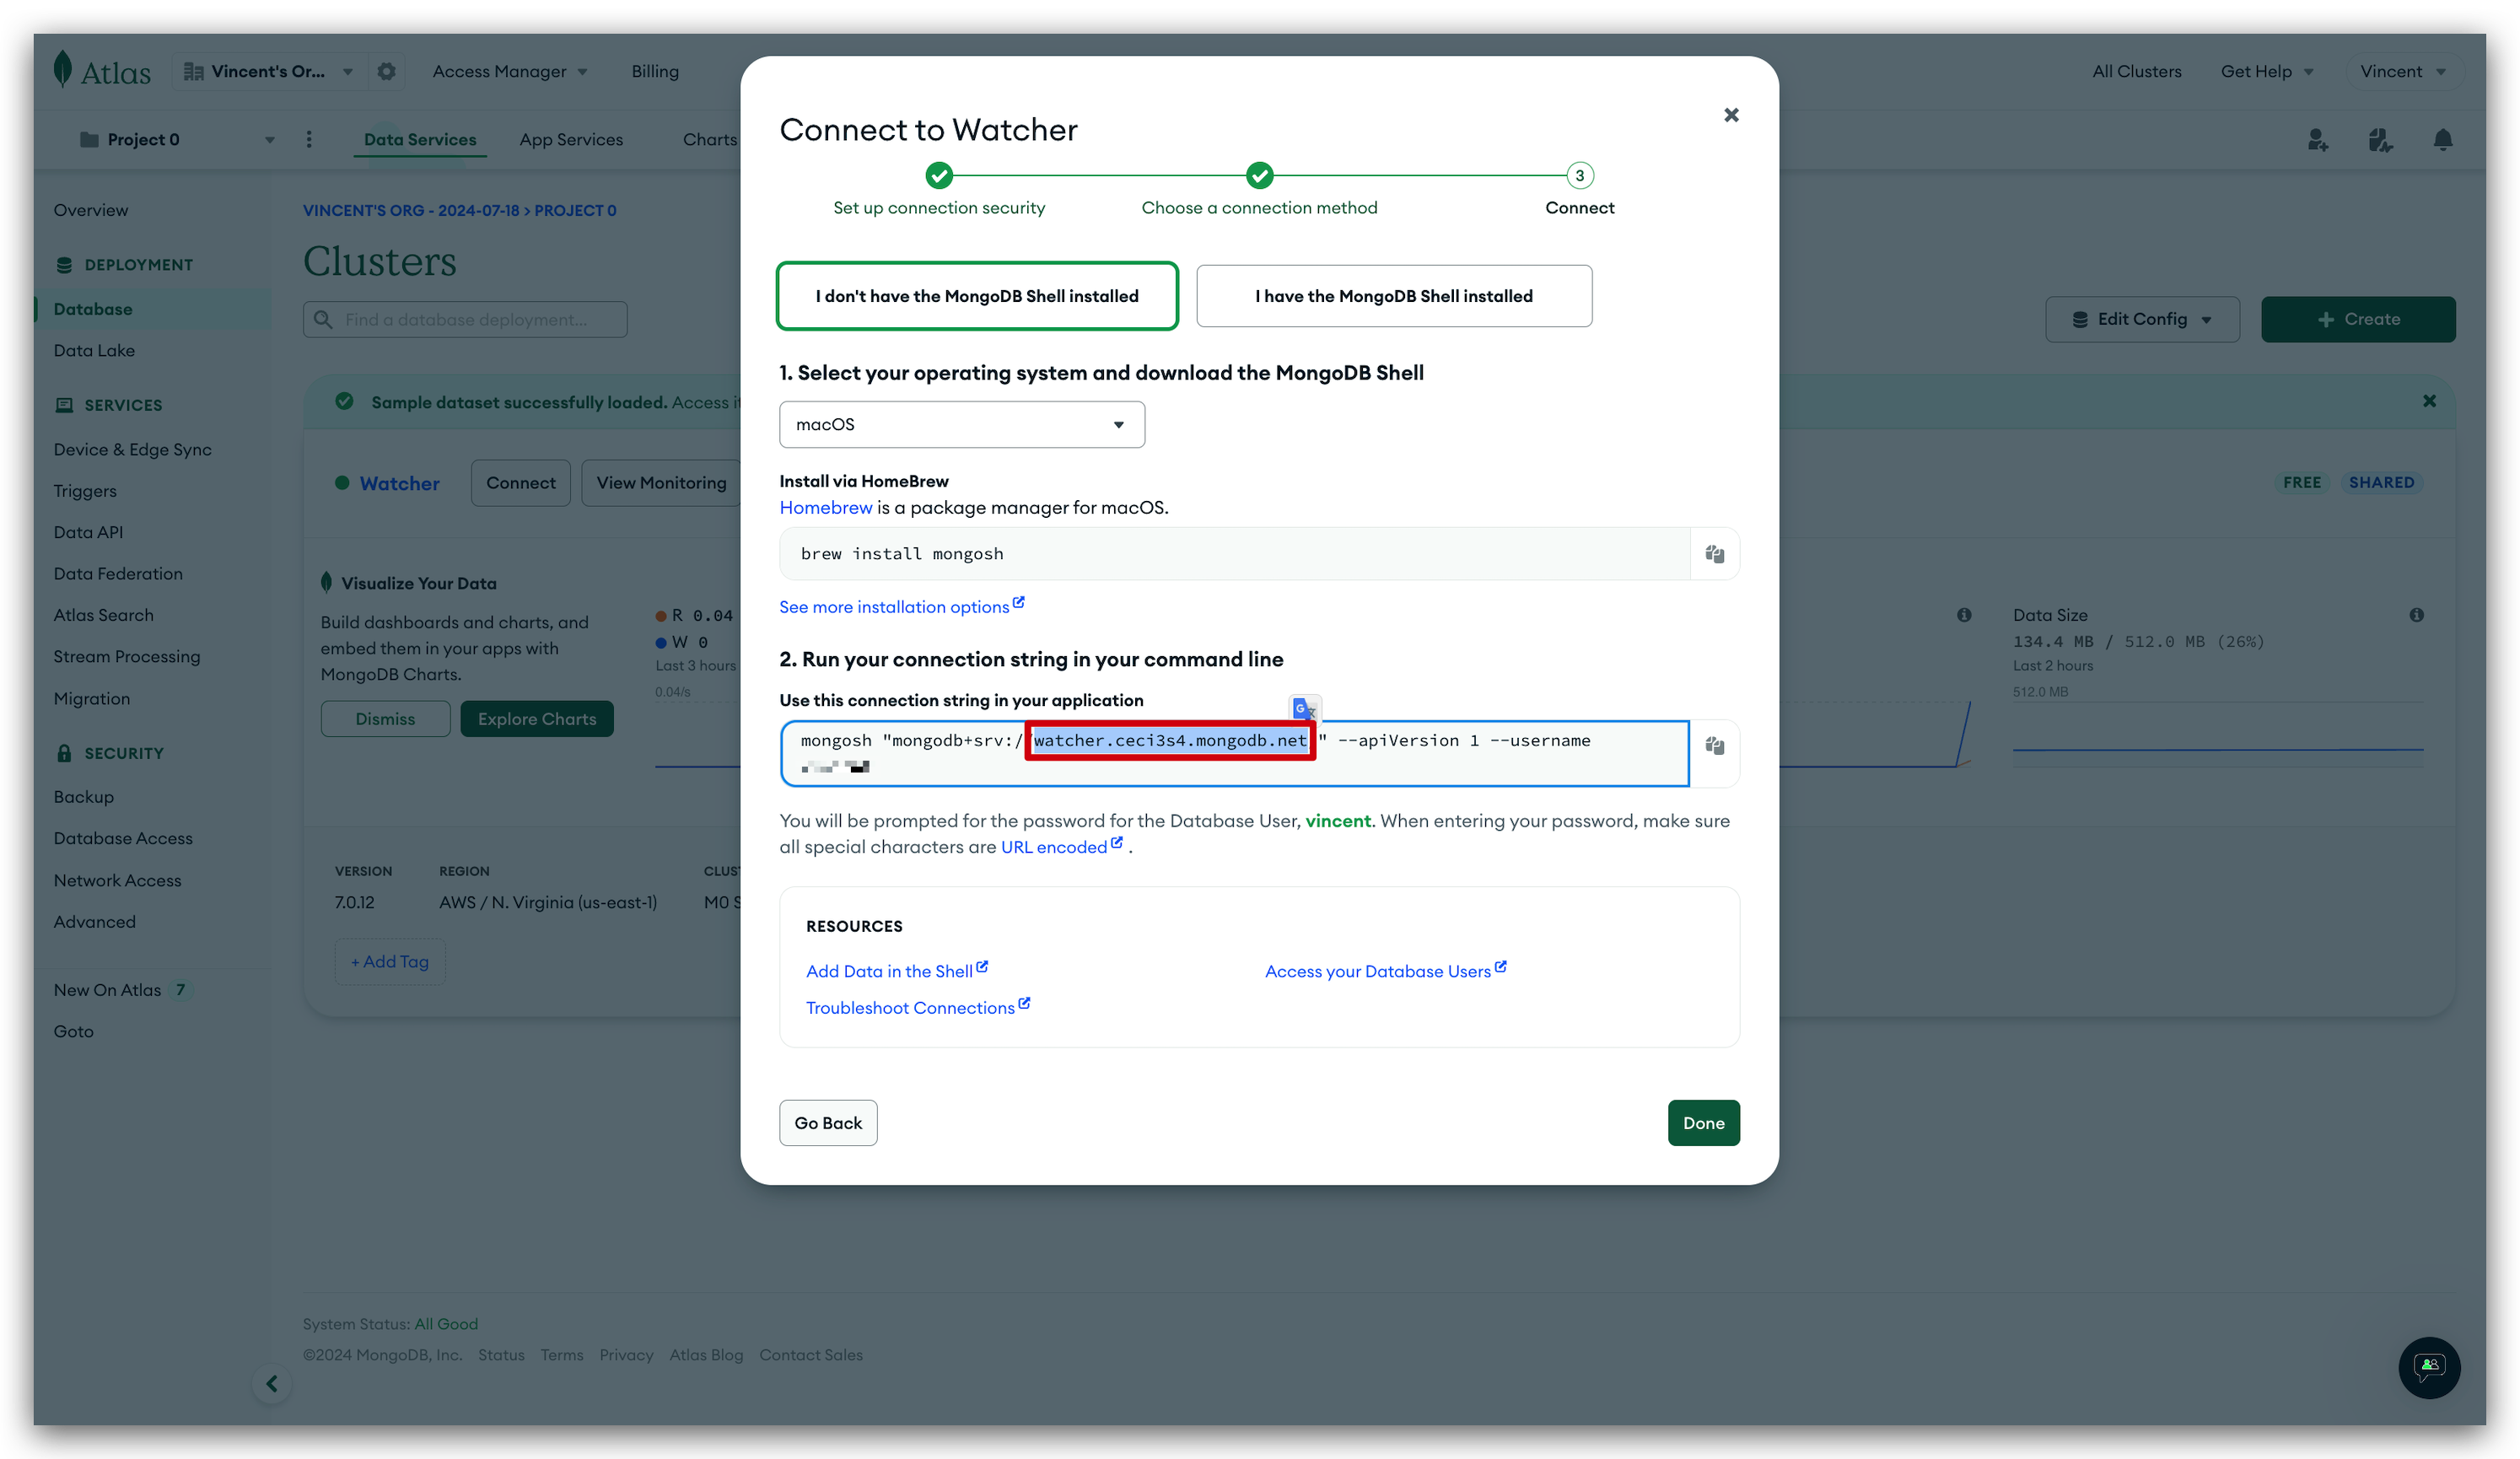
After selecting the MongoDB Shell option, you will be guided to a section titled Run your connection string in your command line. Here, you'll find your full connection string presented.
In the connection string, look for the portion that starts after mongodb+srv:// and continues until you reach a / character. This part is your hostname. It typically contains your cluster name followed by .mongodb.net.
For example, if your connection string is:
mongosh "mongodb+srv://my-cluster123.mongodb.net" --apiVersion 1 --username my-username
The hostname would be:
my-cluster123.mongodb.net
Part 3. Connect MongoDB Database to Node-RED
Step 8. Install MongoDB module
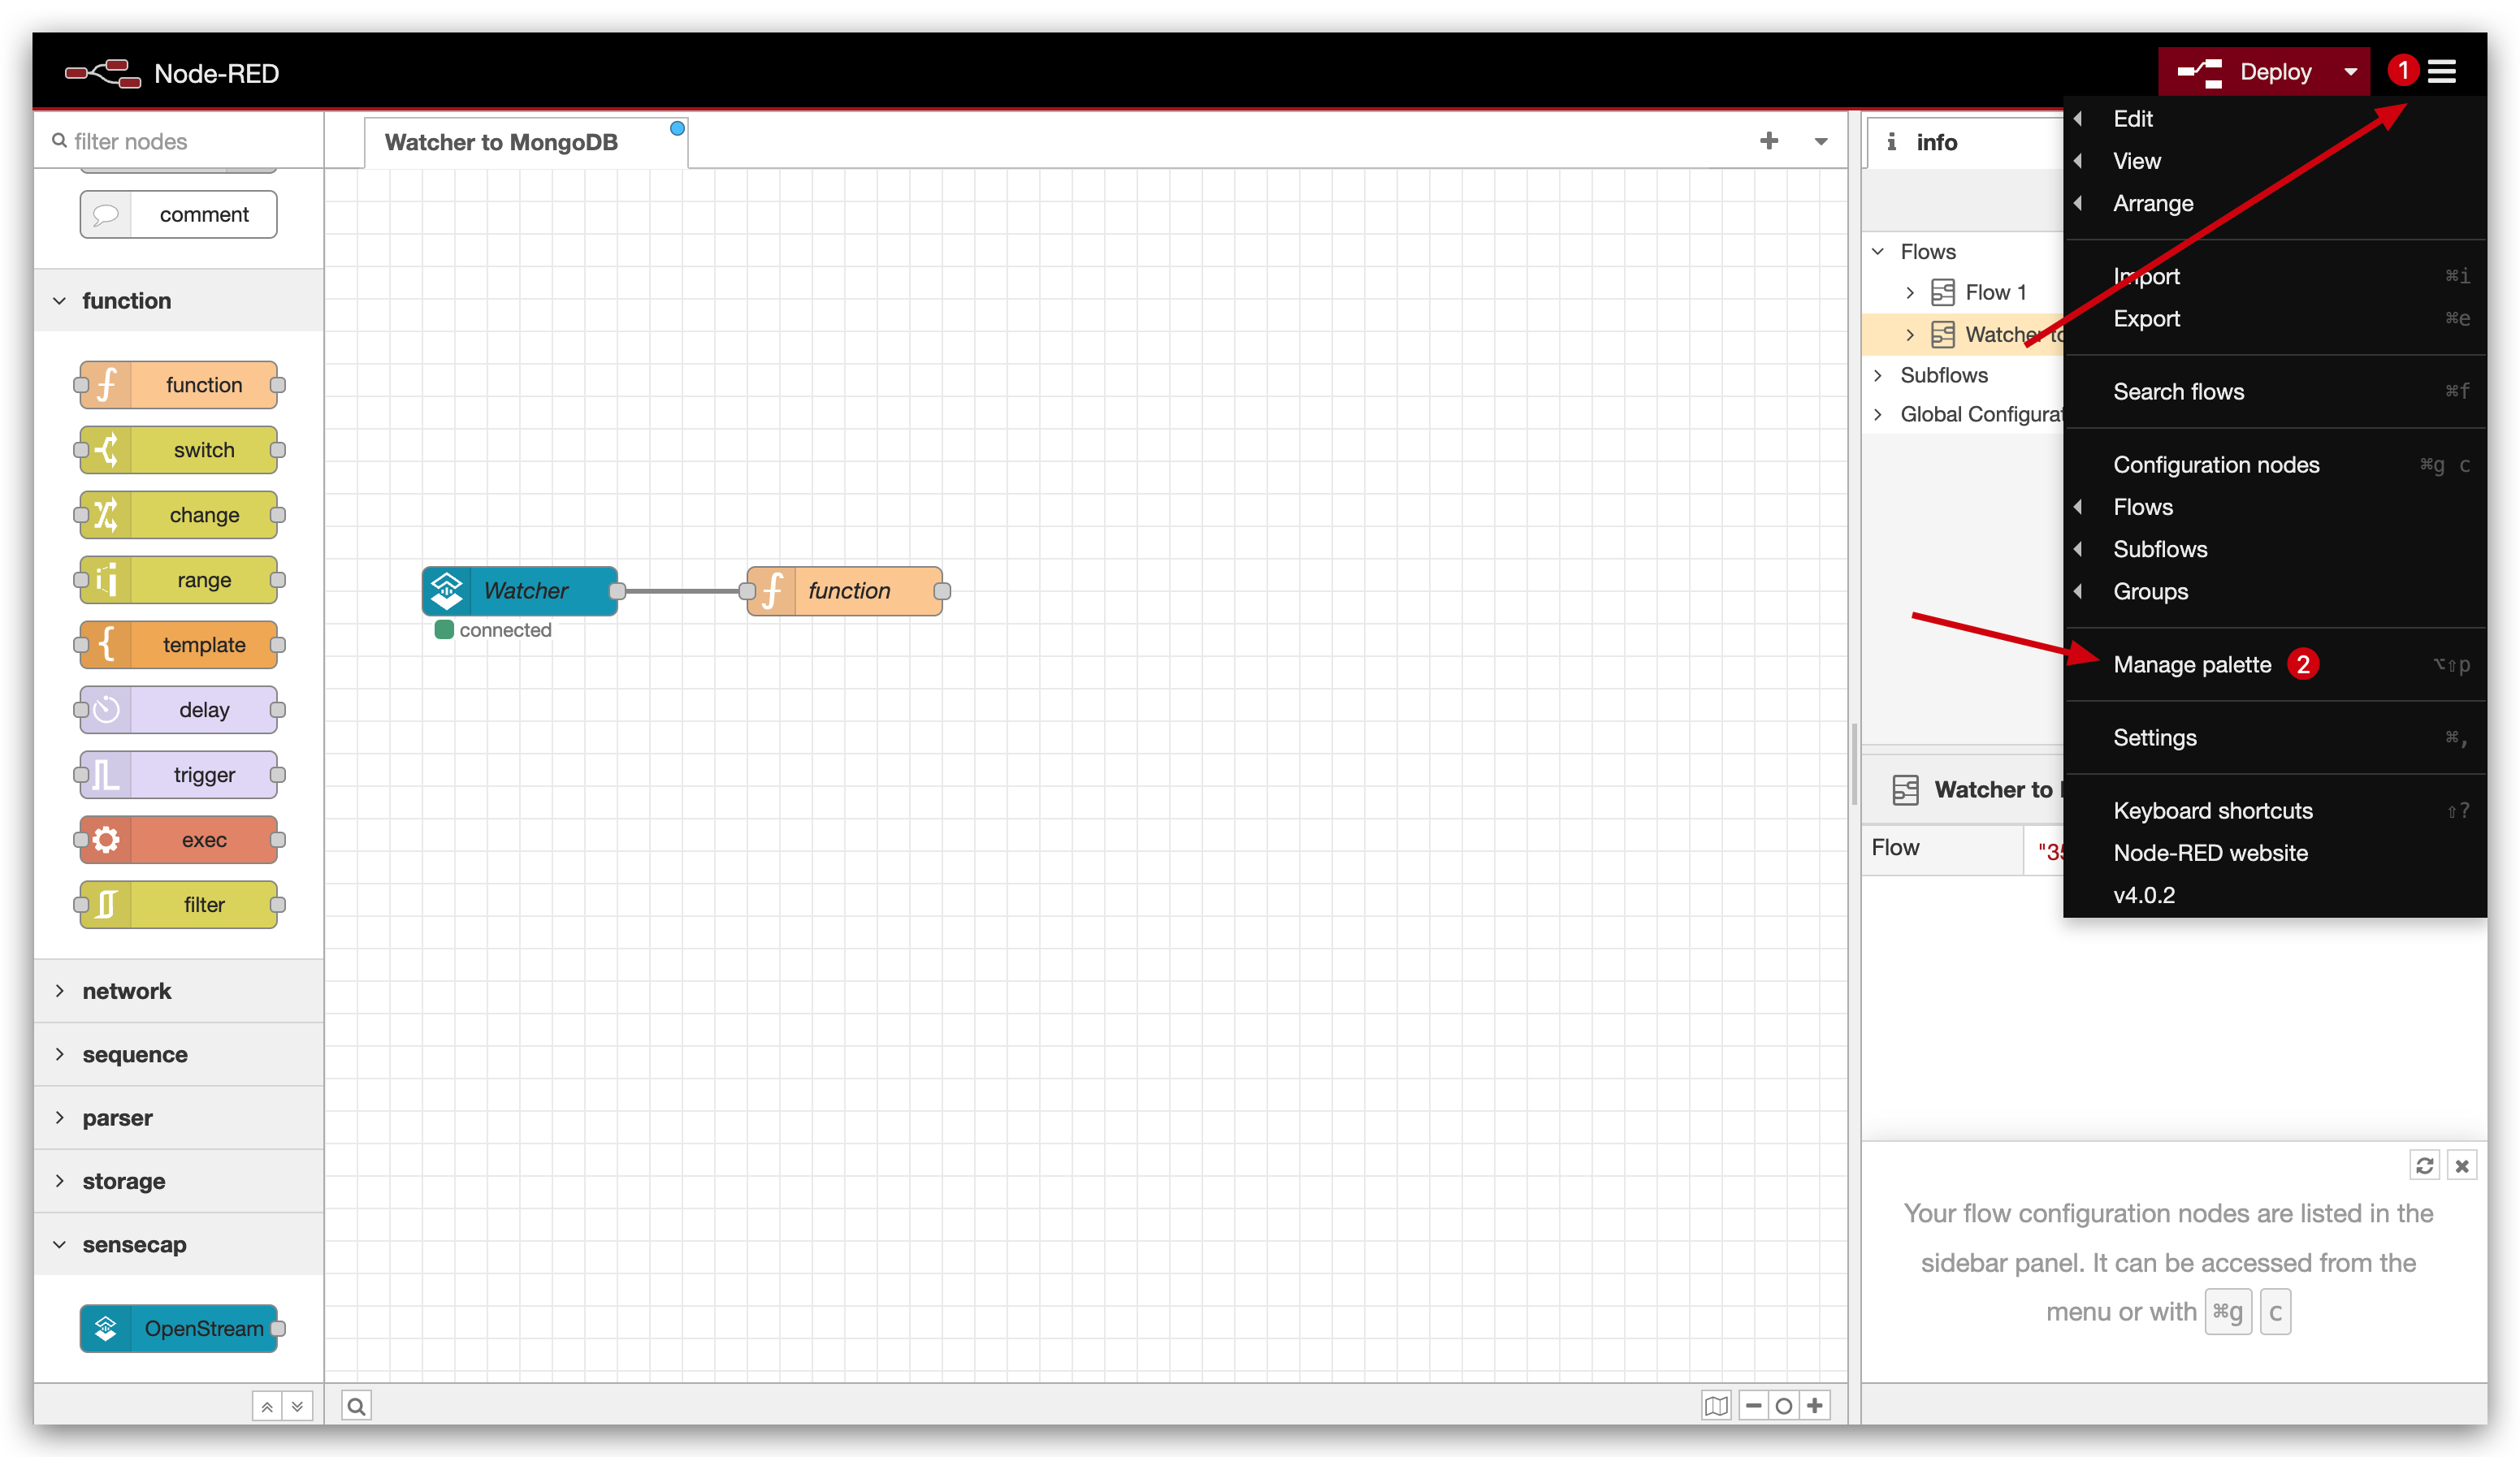
Click the three bars icon and then click Manage palette option. This opens a new window where you can add or remove nodes.
Switch to the Install tab within the palette management window. In the search bar, type mongodb-aleph to find the module. Then, click the install button next to the node-red-contrib-mongodb-aleph entry.
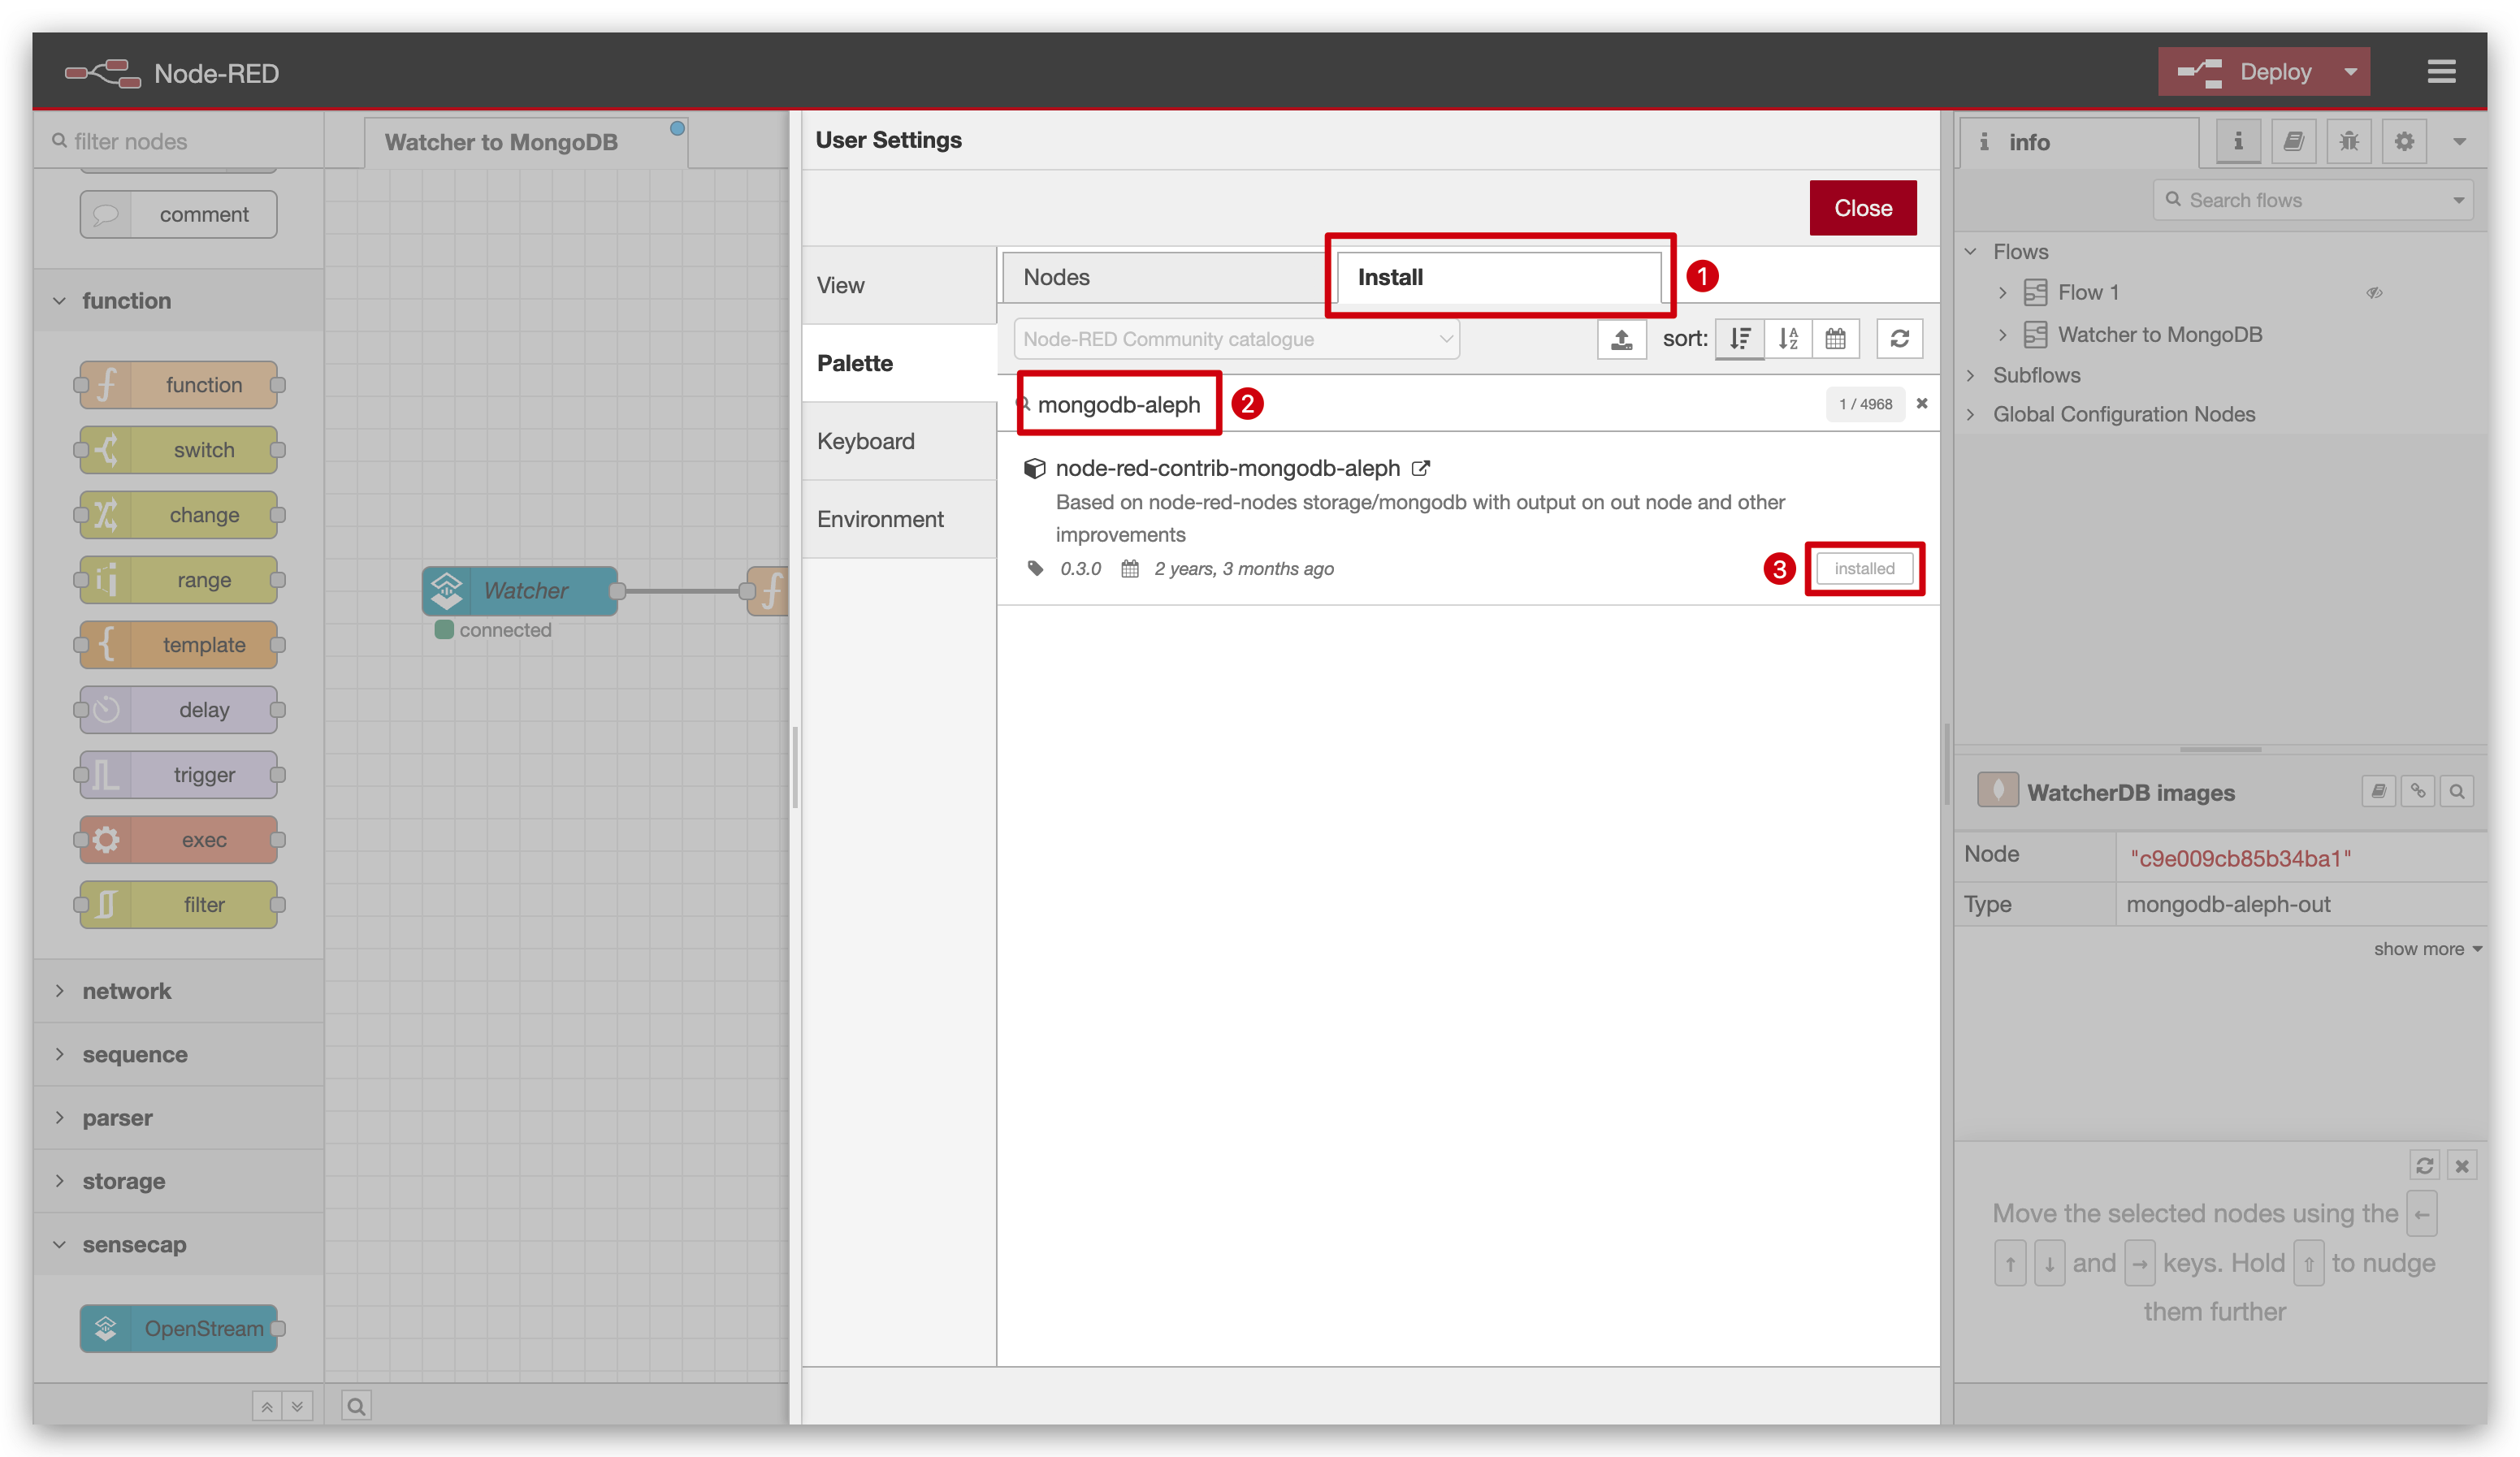
The node-red-contrib-mongodb-aleph module is recommended for its current compatibility and reliability at the time of writing this tutorial (July 2024). However, the availability and functionality of Node-RED modules can vary over time. It's advisable to review the most recent user feedback and compatibility notes in the Node-RED library or GitHub repositories. If you encounter issues with this module, consider exploring other MongoDB modules listed in the Node-RED library for a more suitable option.
Step 9. Configure MongoDB node
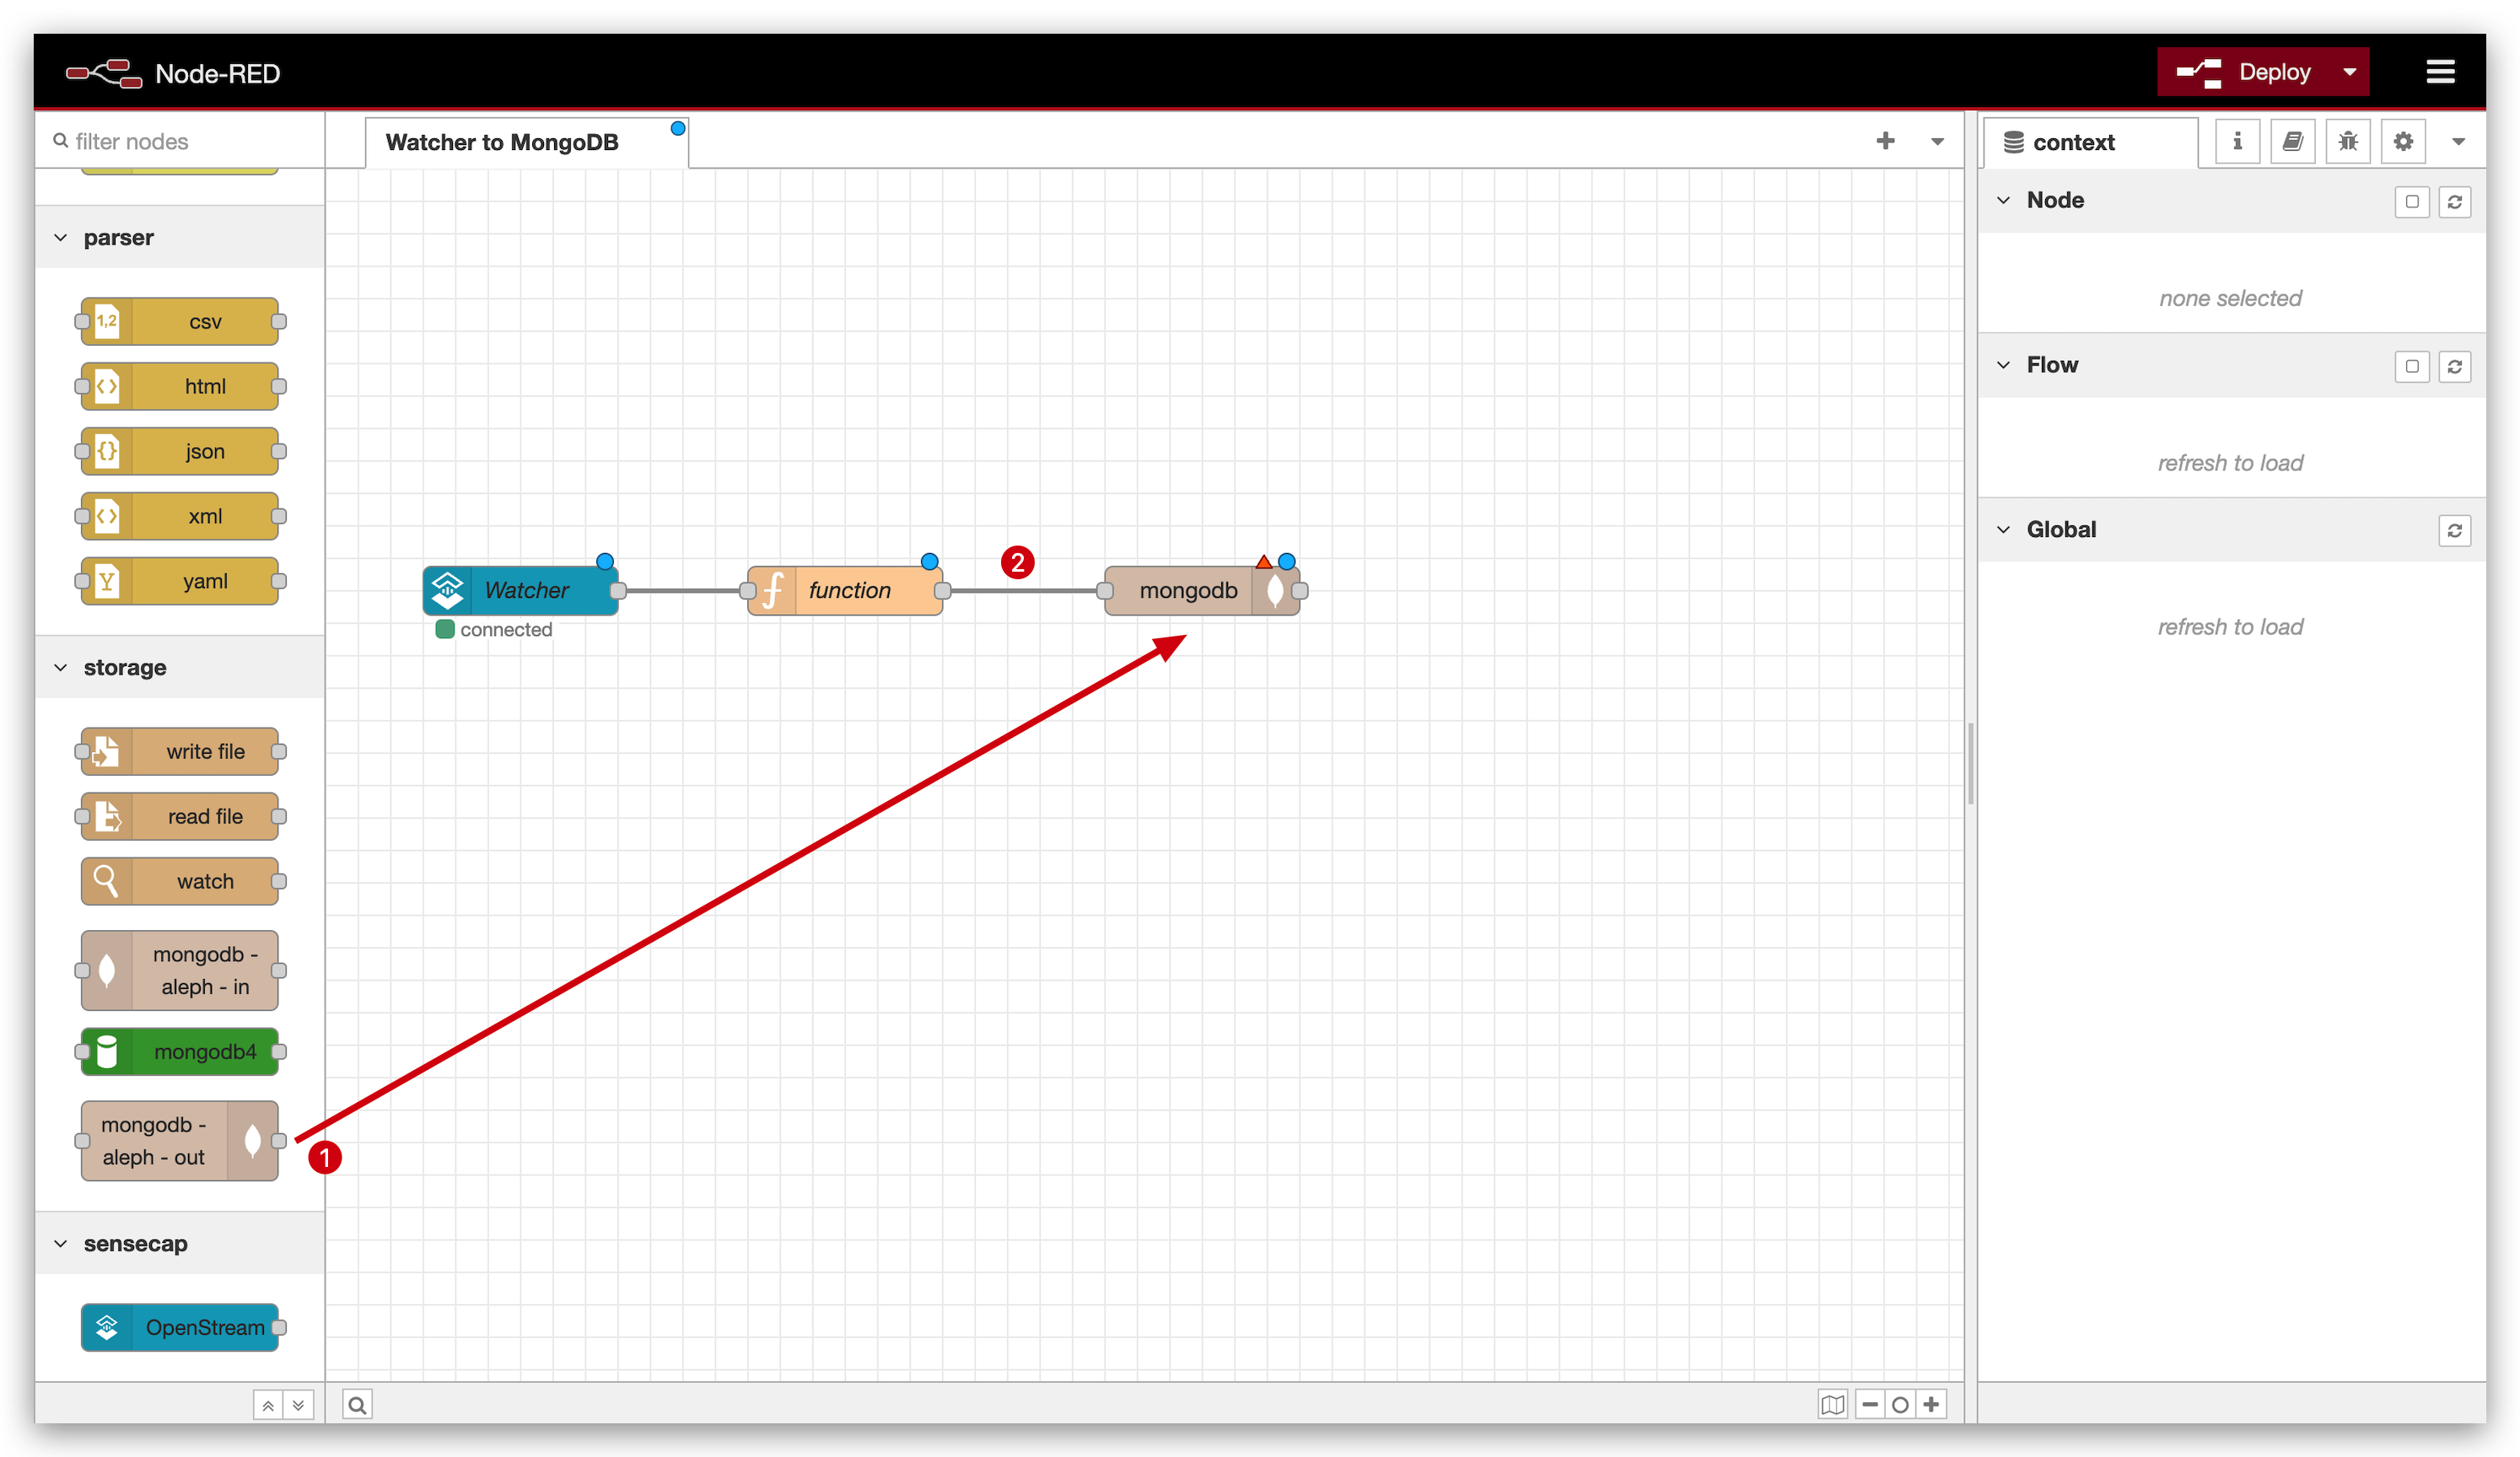
Once you installed the MongoDB module, drag the mongodb - aleph - out node to your Node-RED flow and connect it to the function node.
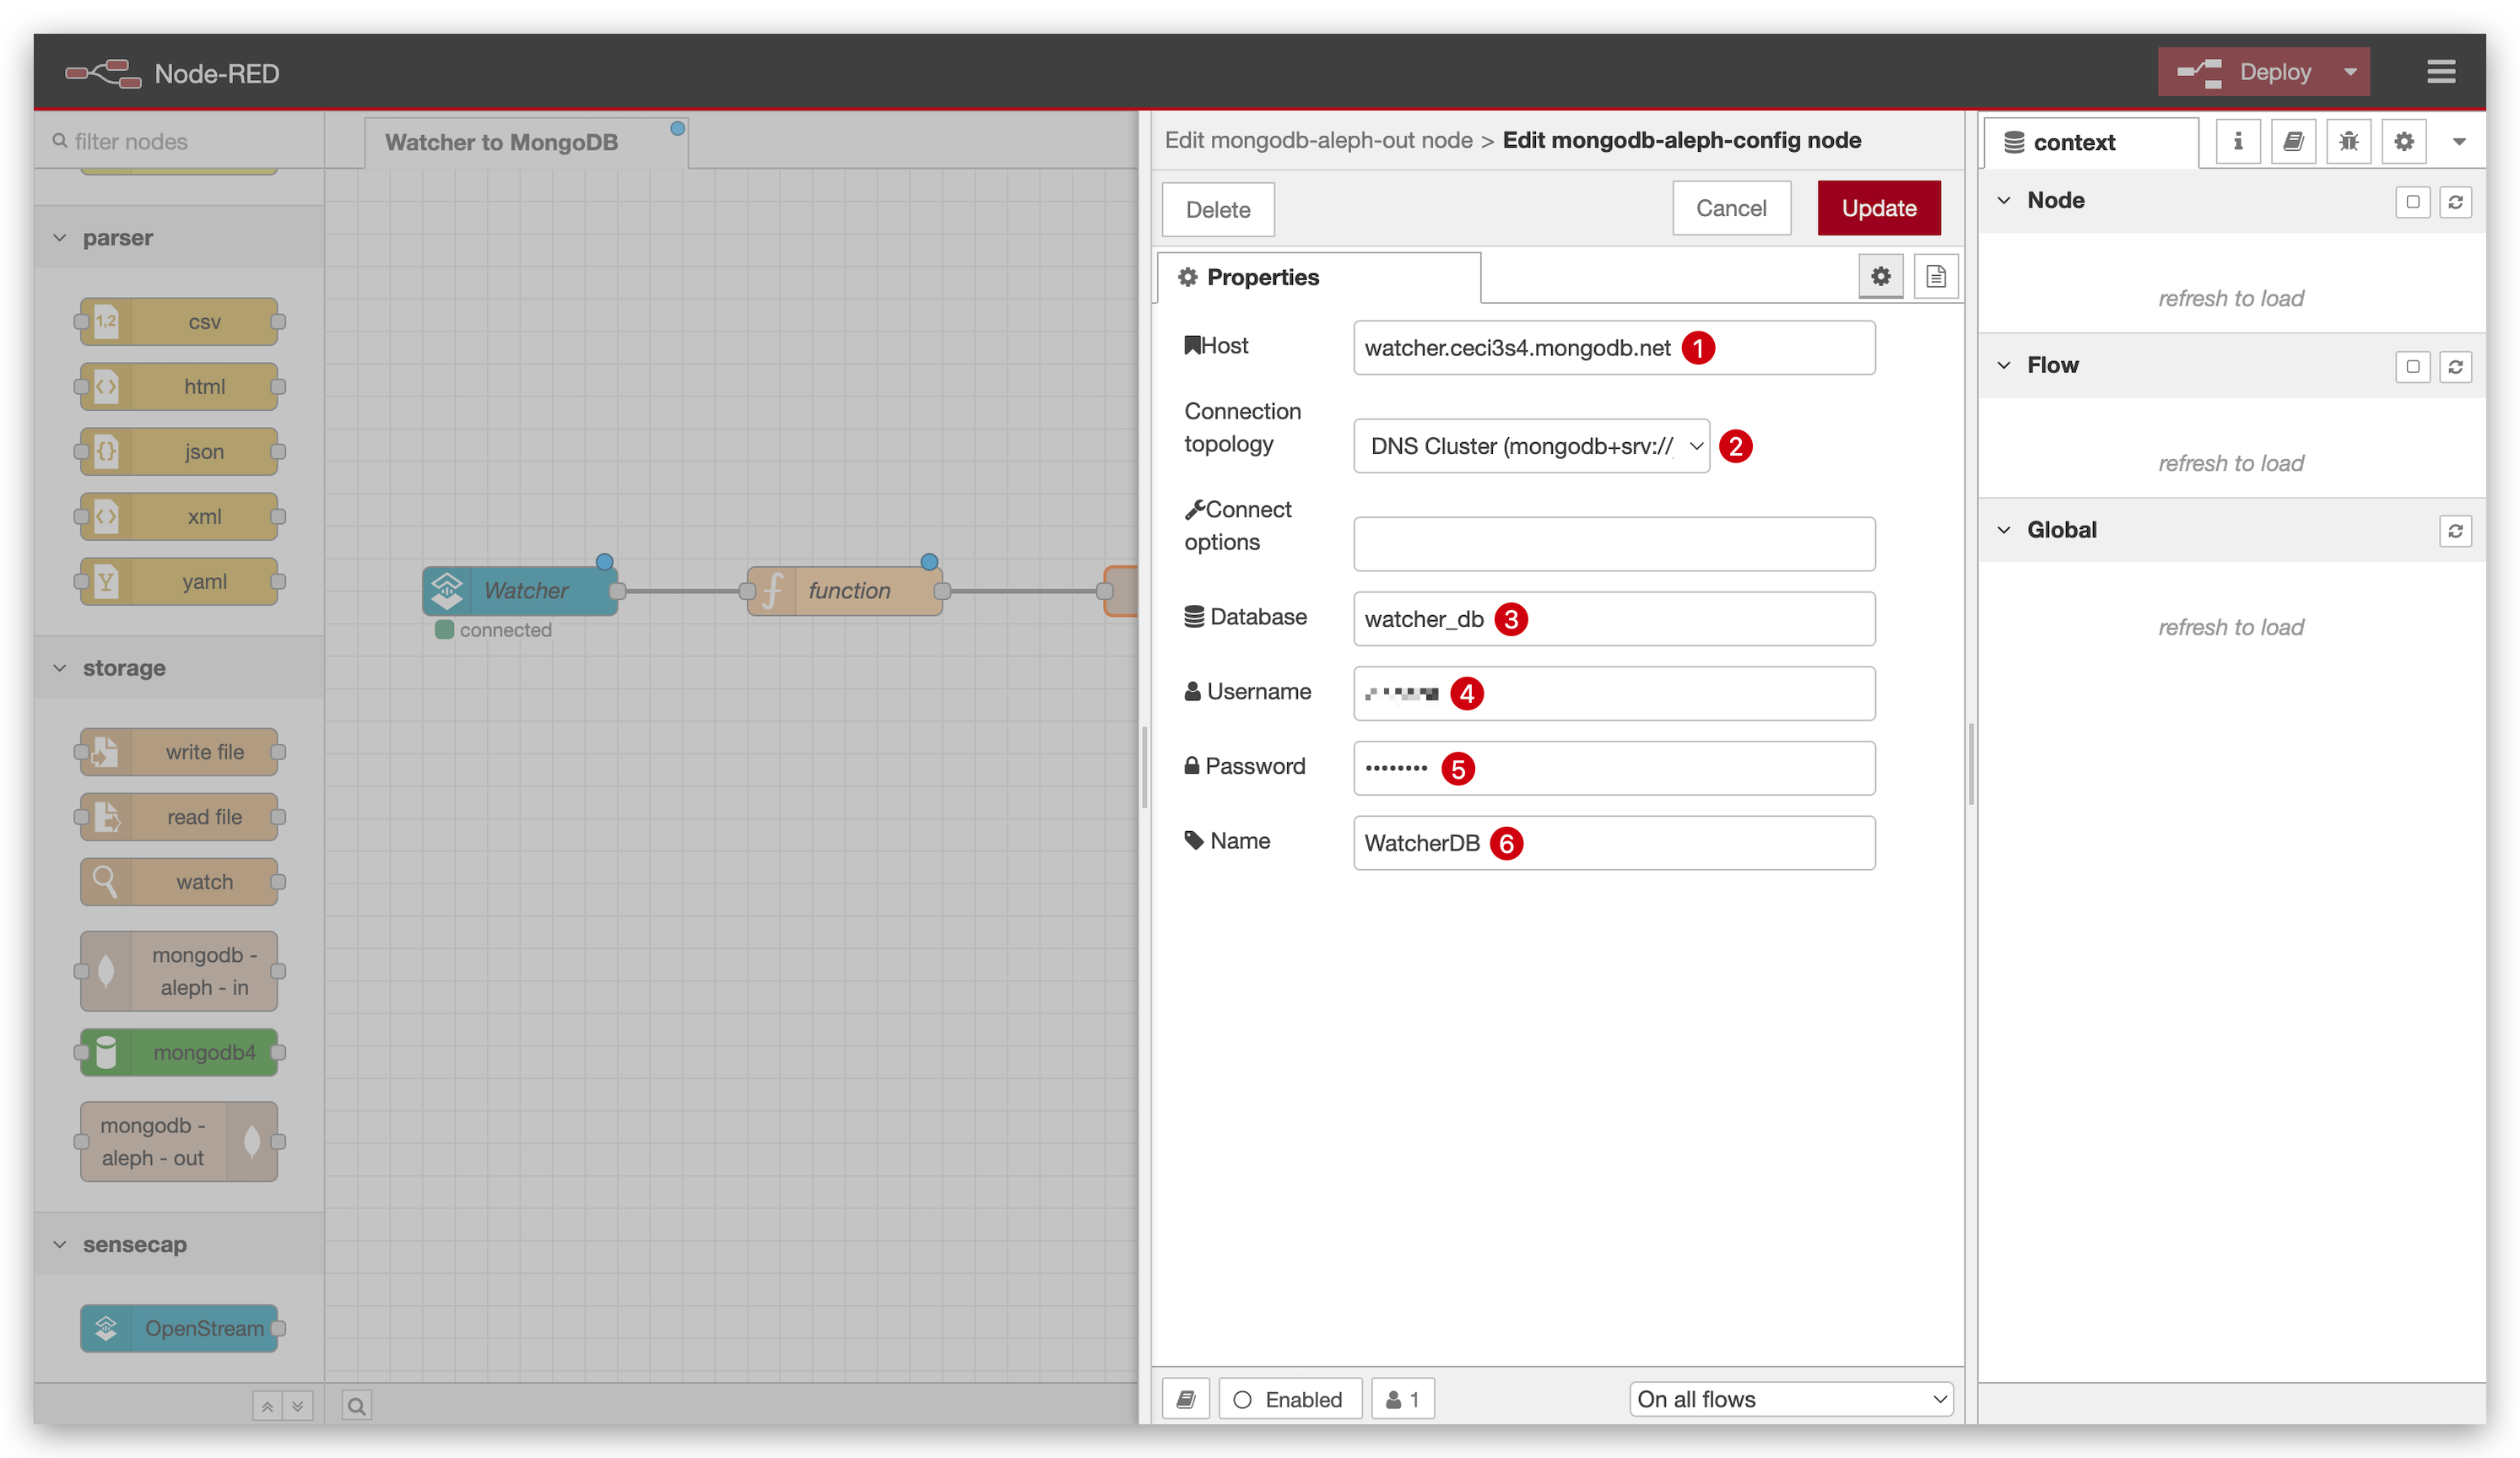
Double-click the MongoDB node to configure it. Then, click the plus icon next to the server field to add a new server configuration.
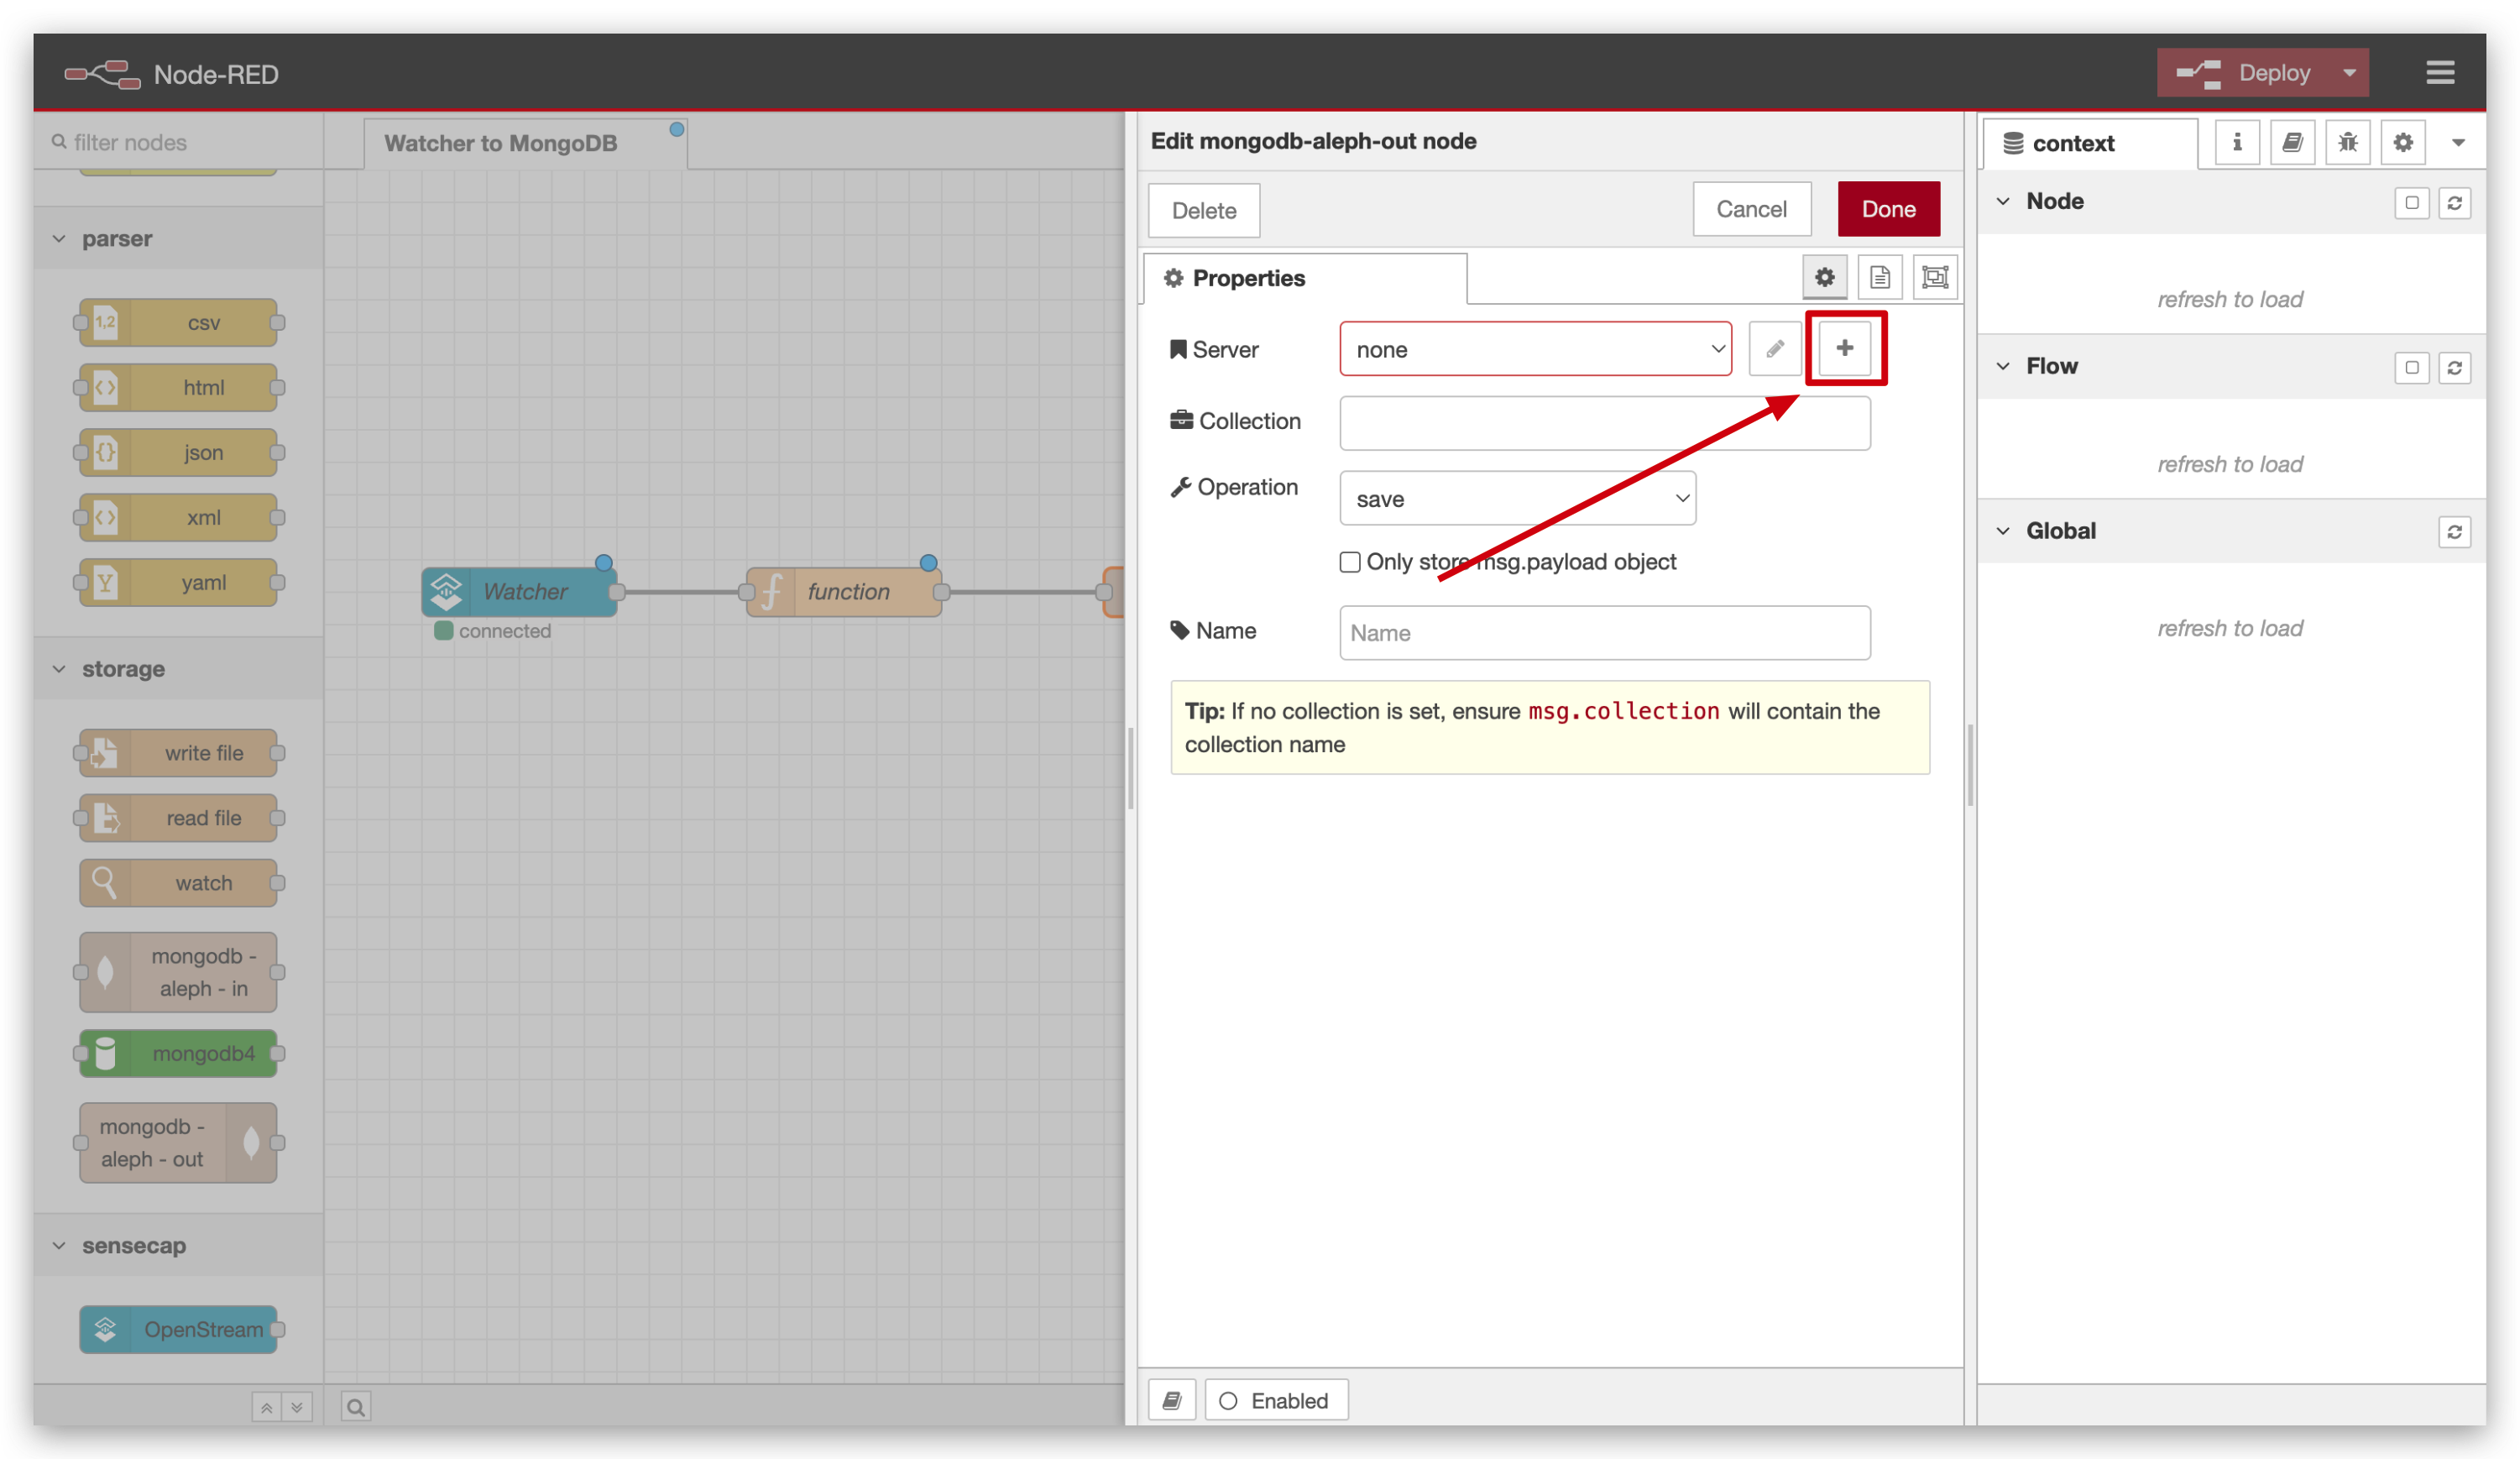
- Enter the hostname you retrieved earlier.
- Change the Connection topology to DNS Cluster (mongodb+srv://) from the dropdown.
- Enter the name of your MongoDB database.
- Input the username you configured in the security settings.
- Input the corresponding password.
- Provide a descriptive name for your MongoDB connection that will be used within Node-RED.
Then, click Add or Update to save the server configuration.
With the server configured, you can now specify the details for the data insertion:
- Enter the name of the MongoDB collection where you want to insert the data.
- Set the operation to Insert, which will add new documents to the collection.
Click Done to complete the setup.

Step 10. Deploy
Finally, deploy your flow by clicking the Deploy button at the top right of the Node-RED interface. This action activates your configured nodes, allowing data to flow from your function node to MongoDB.
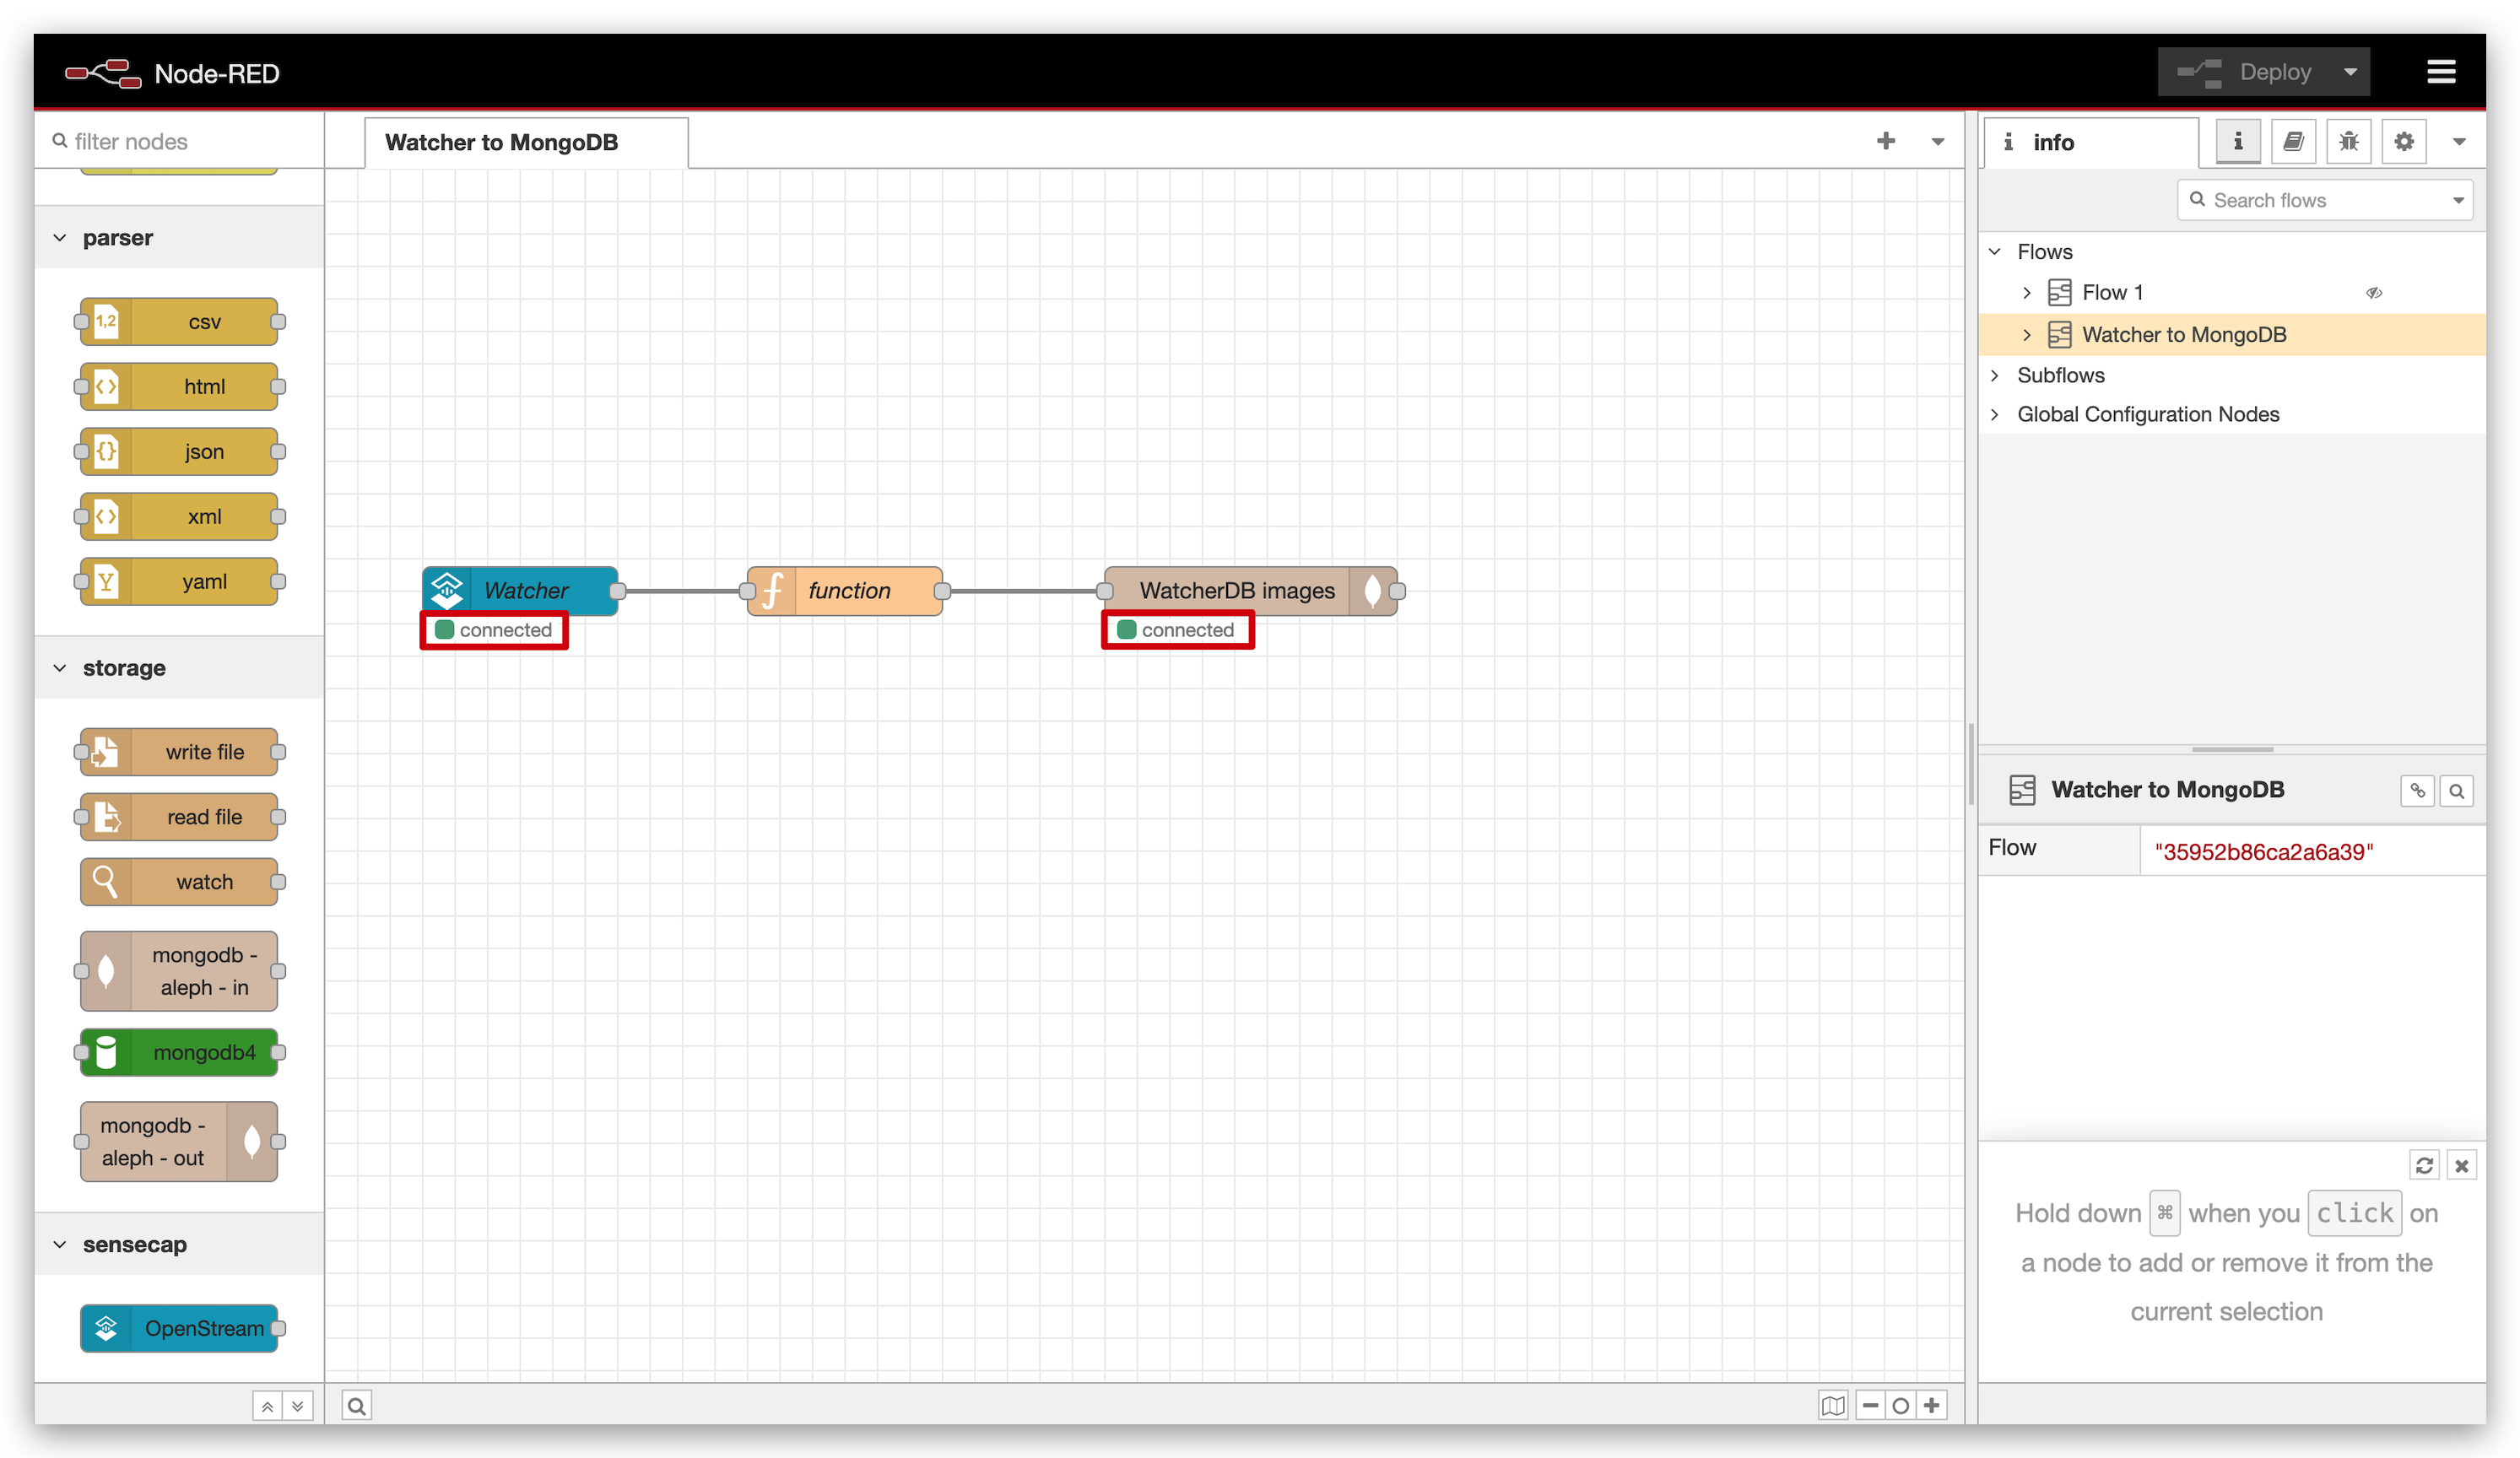
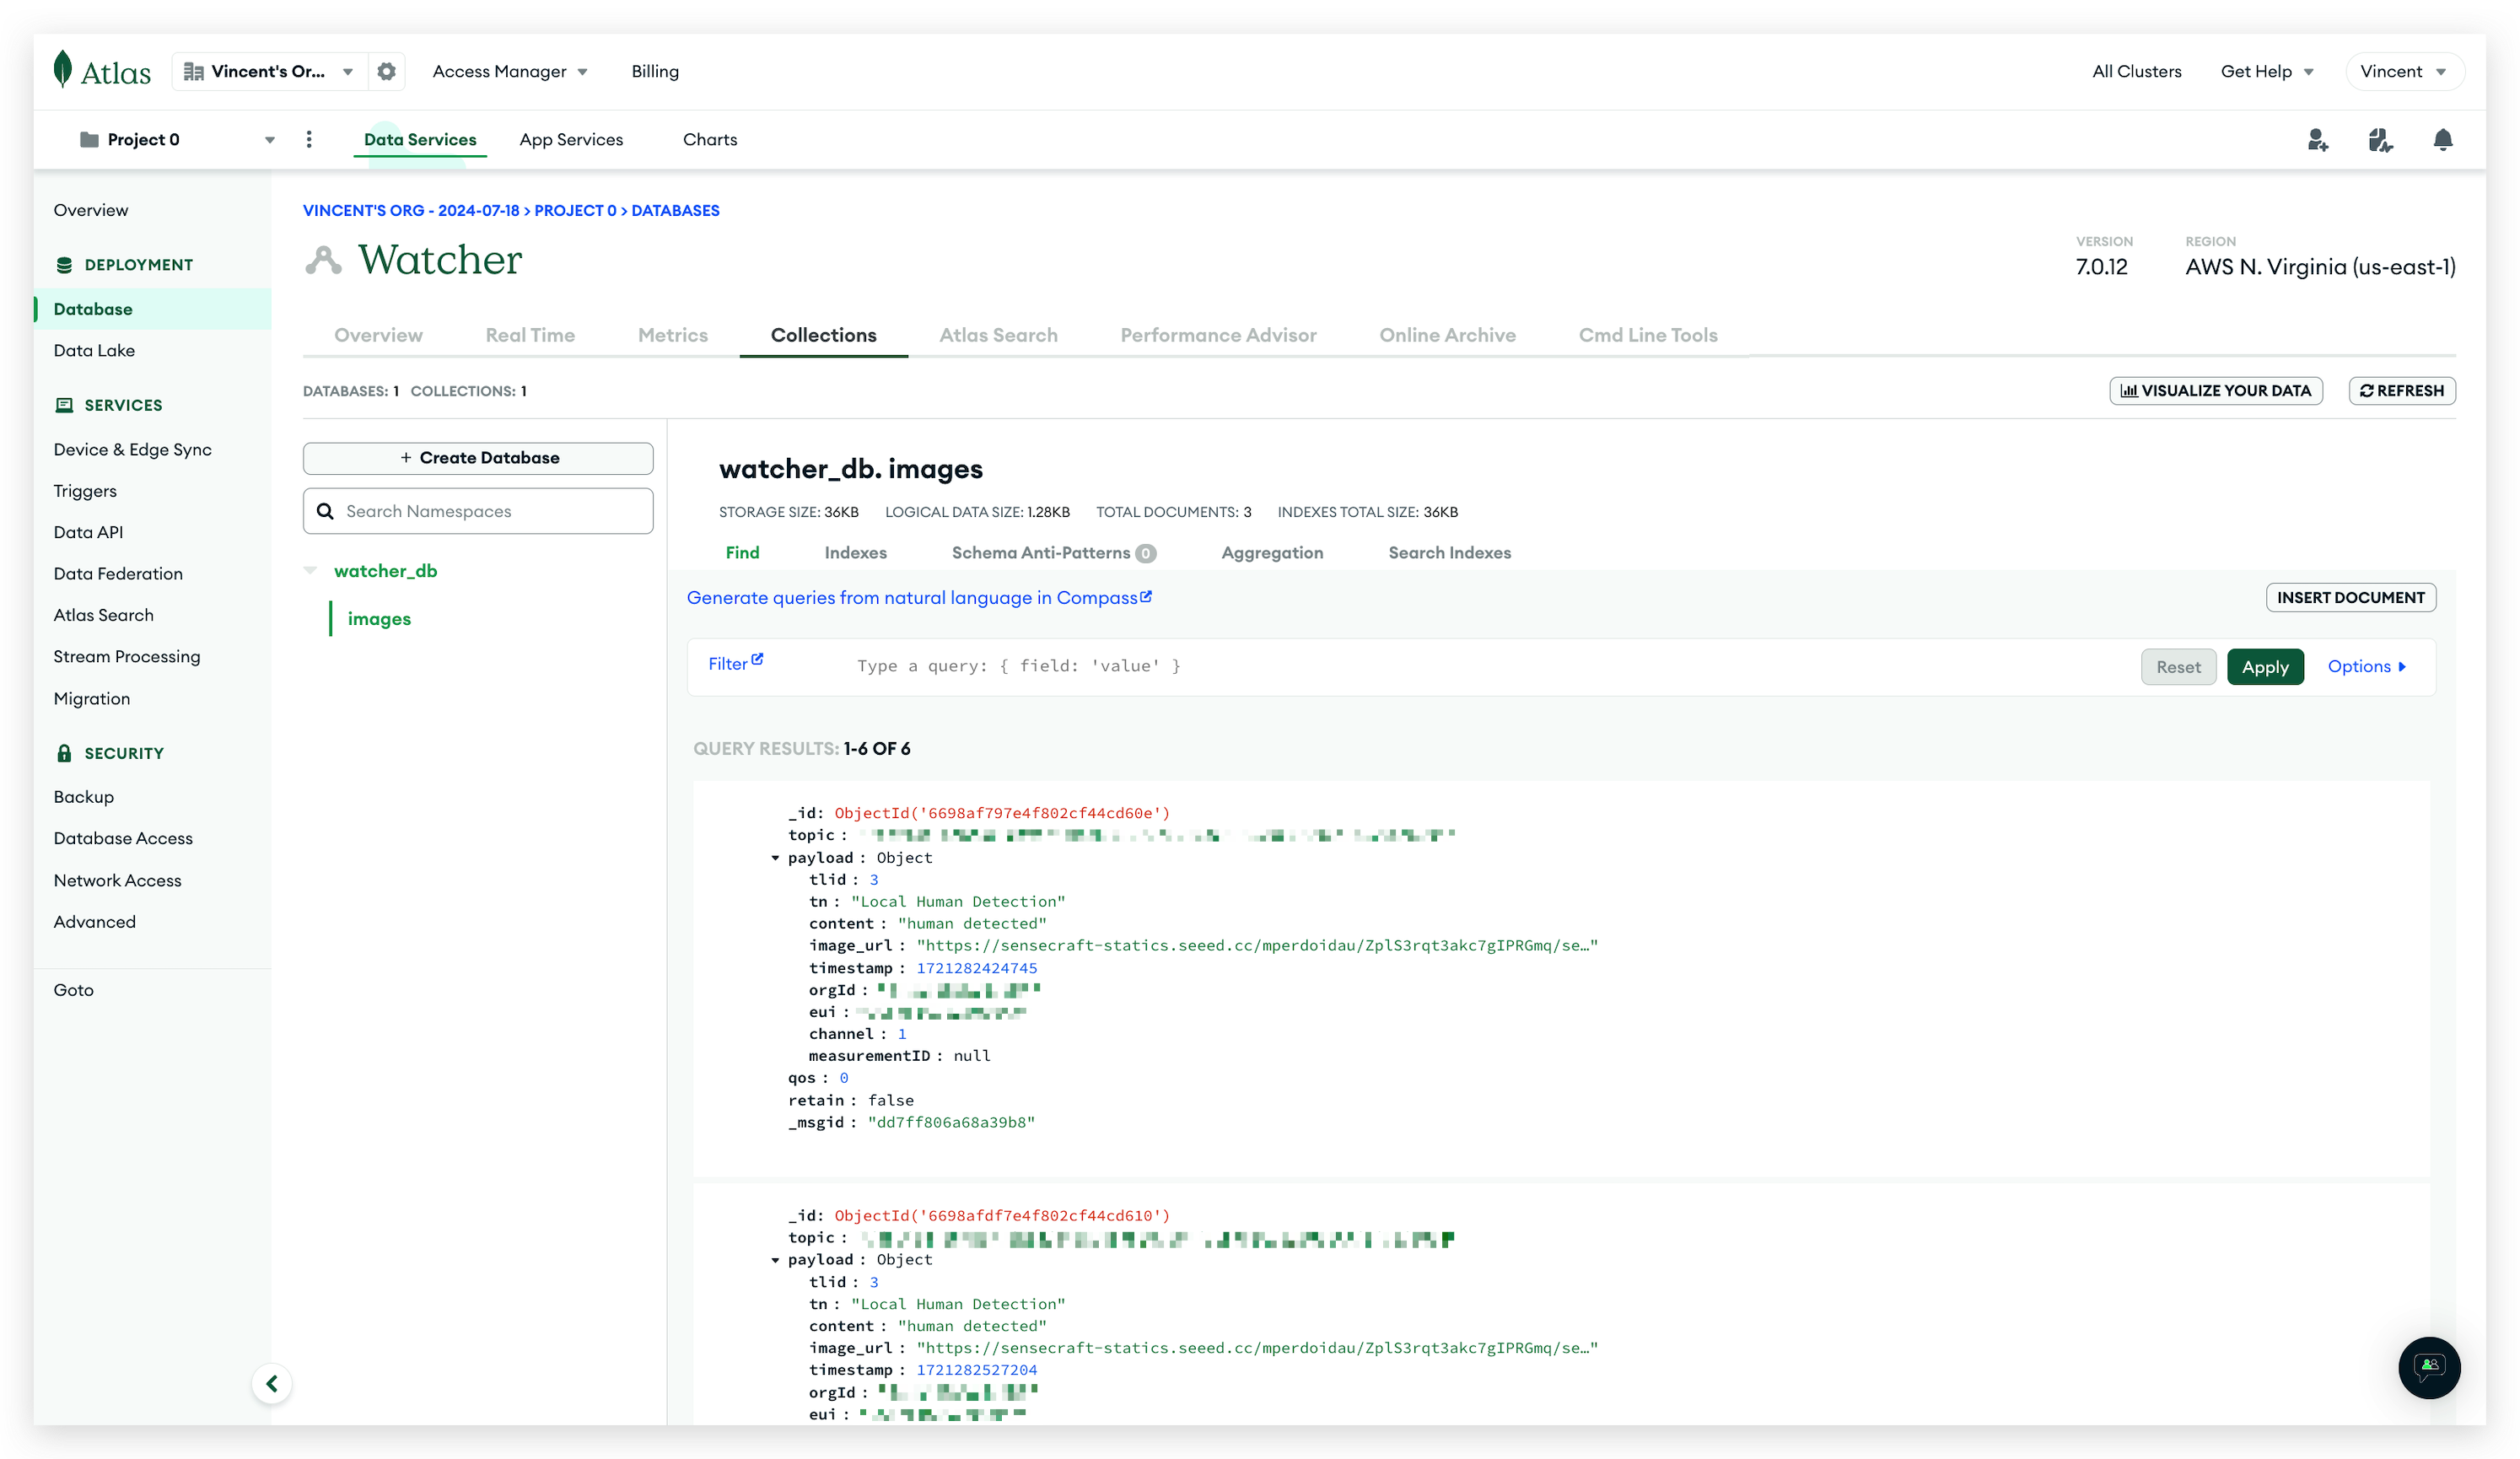
Now, you will see the data populate in MongoDB.
Congratulations on successfully integrating Watcher with MongoDB! You've opened the door to a vast array of exciting opportunities in your development endeavors. Prepare to dive into creating innovative applications that harness the robust capabilities of MongoDB. We look forward to seeing the remarkable solutions you'll develop next!
Tech Support & Product Discussion
Thank you for choosing our products! We are here to provide you with different support to ensure that your experience with our products is as smooth as possible. We offer several communication channels to cater to different preferences and needs.