Watcher To Twilio Quick Start
Part 1. What is Twilio
Twilio is a leading cloud communications platform for developers. It offers a set of APIs to integrate voice, video, and messaging capabilities into applications. With Twilio, developers can easily build powerful communication features such as voice calls, video chat, and SMS messaging. It provides user-friendly tools and reliable infrastructure, making it a top choice for developers to create innovative applications and improve user experiences. Twilio operates on a pay-as-you-go model, allowing developers to only pay for the specific communication services they use.
Part 2. How to register
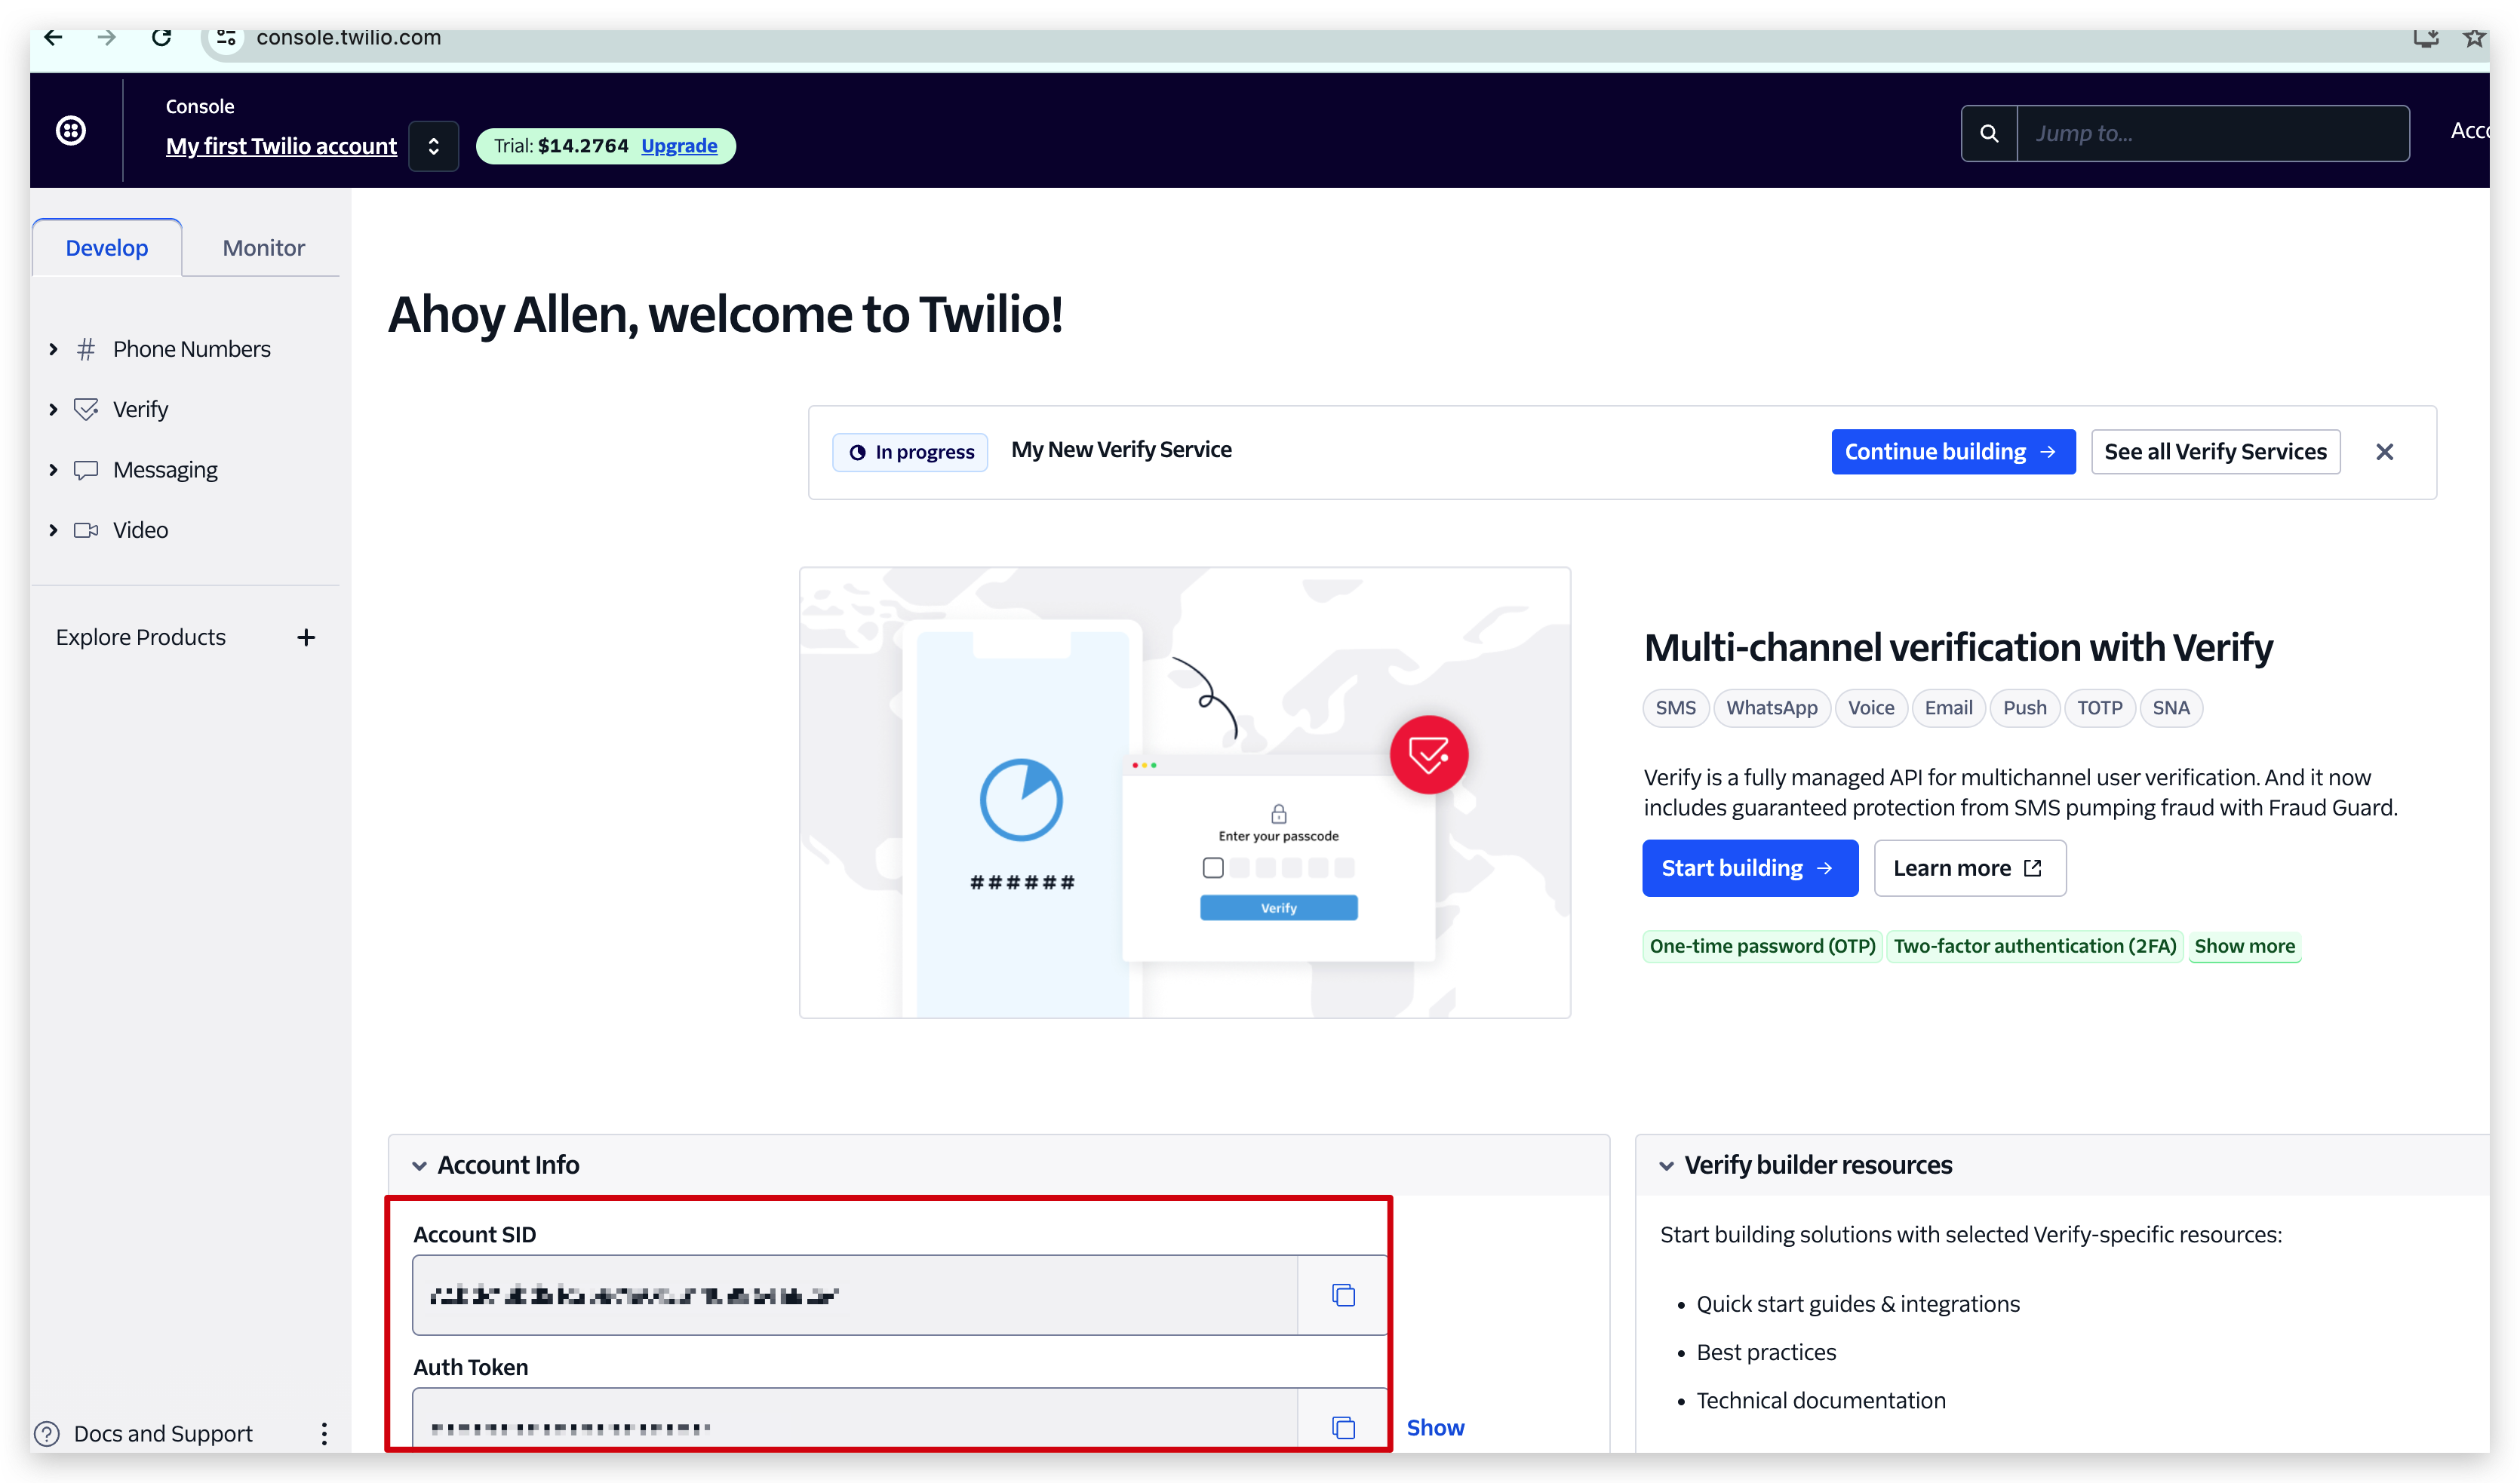
Step 1.Click here jump to Twilio. When you finish registration, you will see your SID and Token. Besides, we need to buy a number to send message.
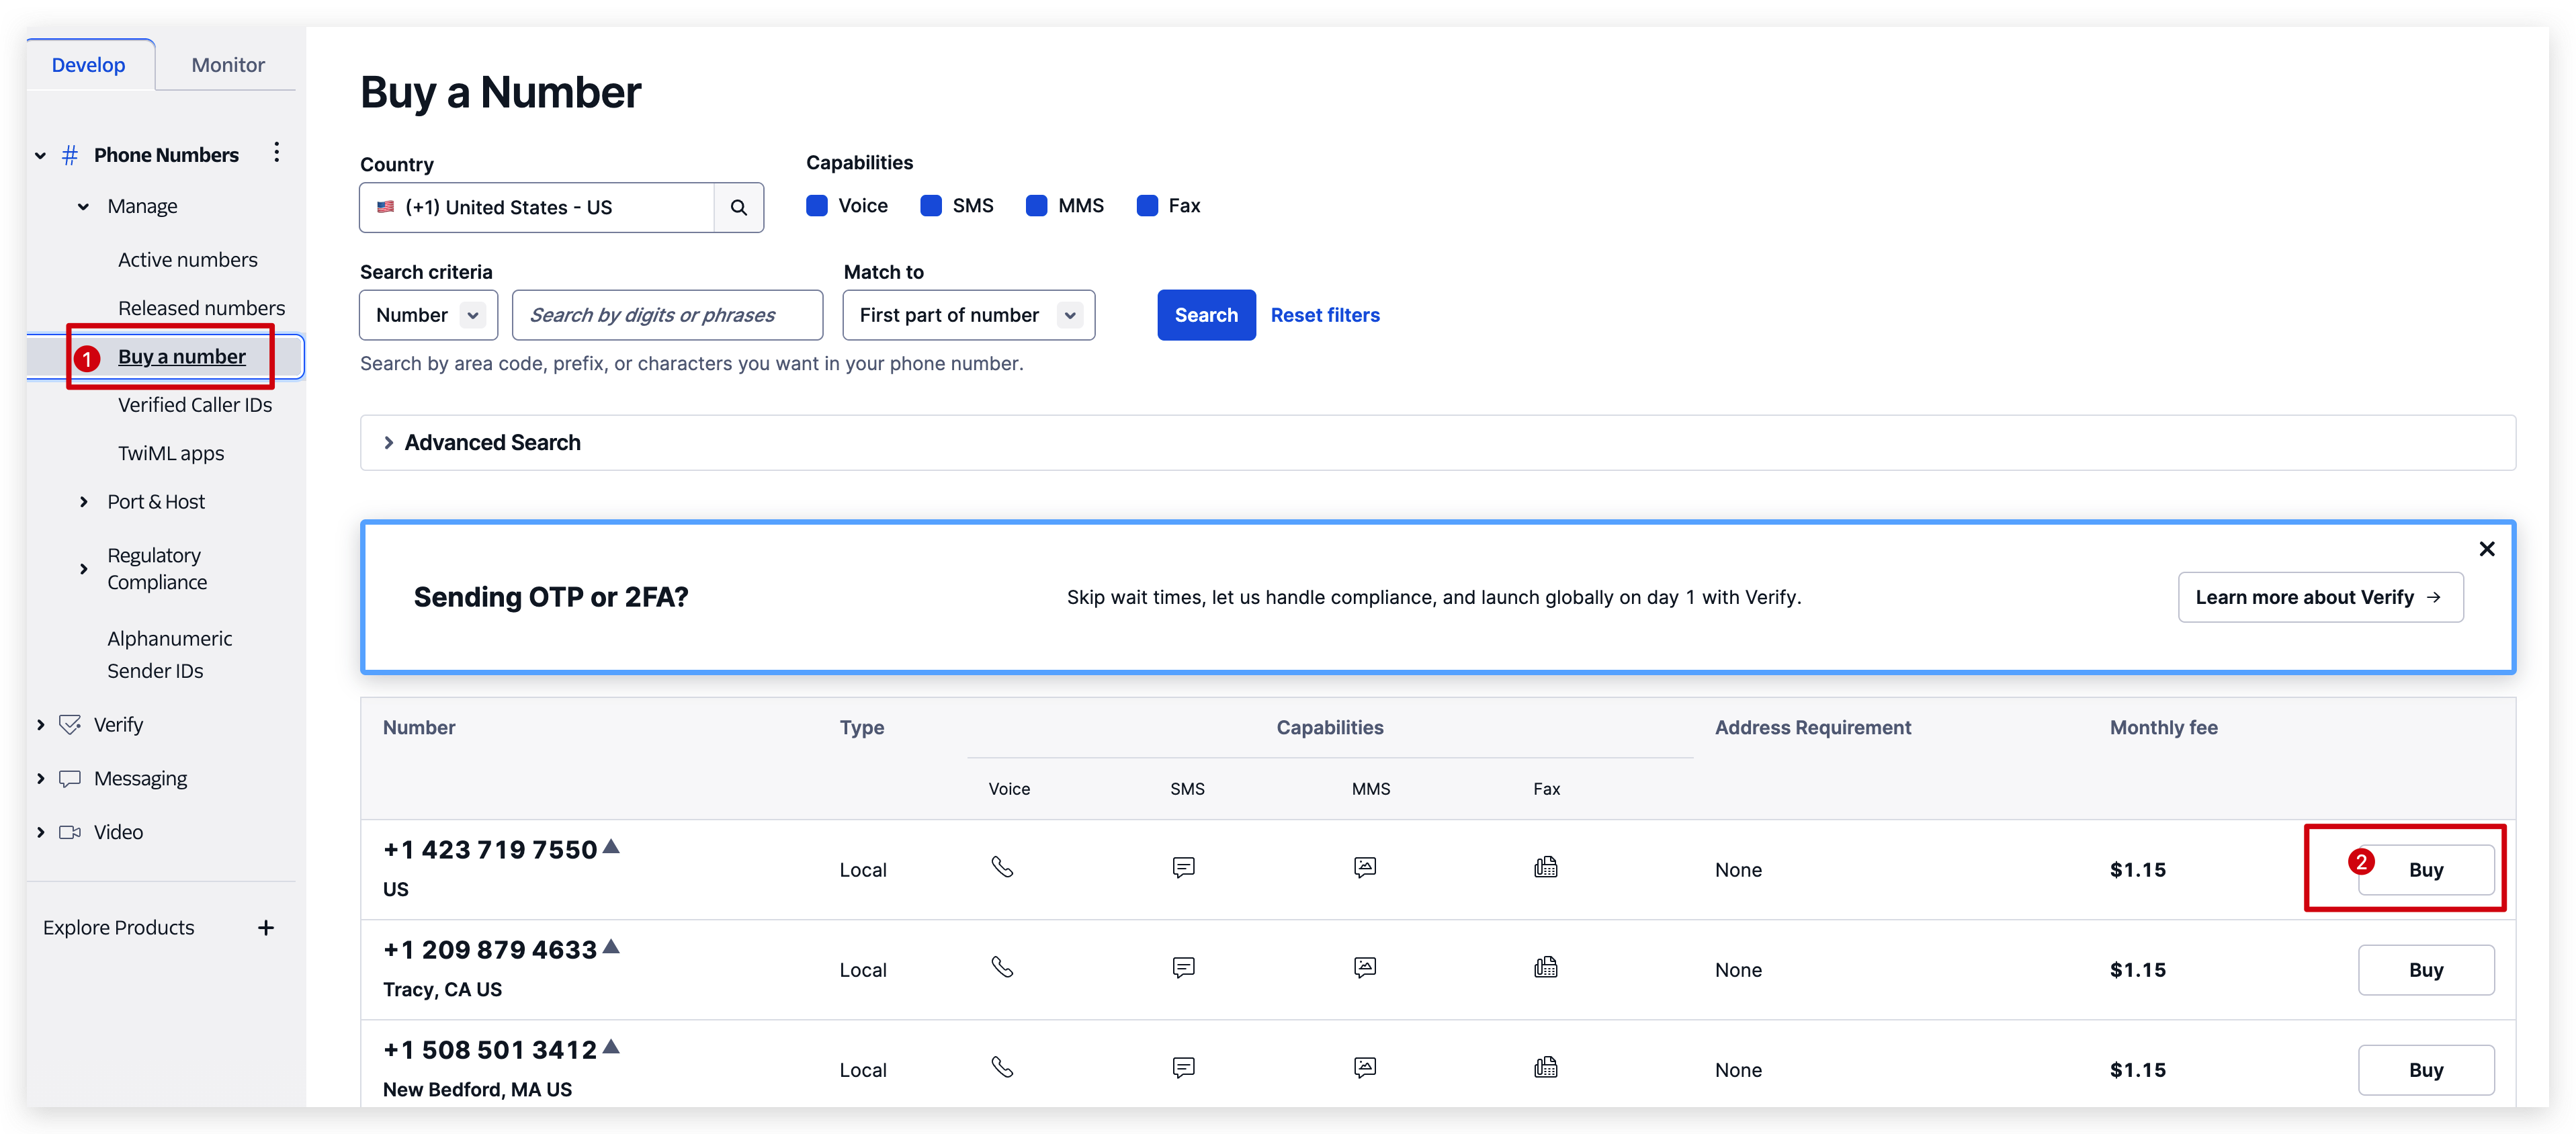
Step 2. Go to this page and select a number you like and buy it. As a new user, Twilio will give you 15 dollars to try its functions.
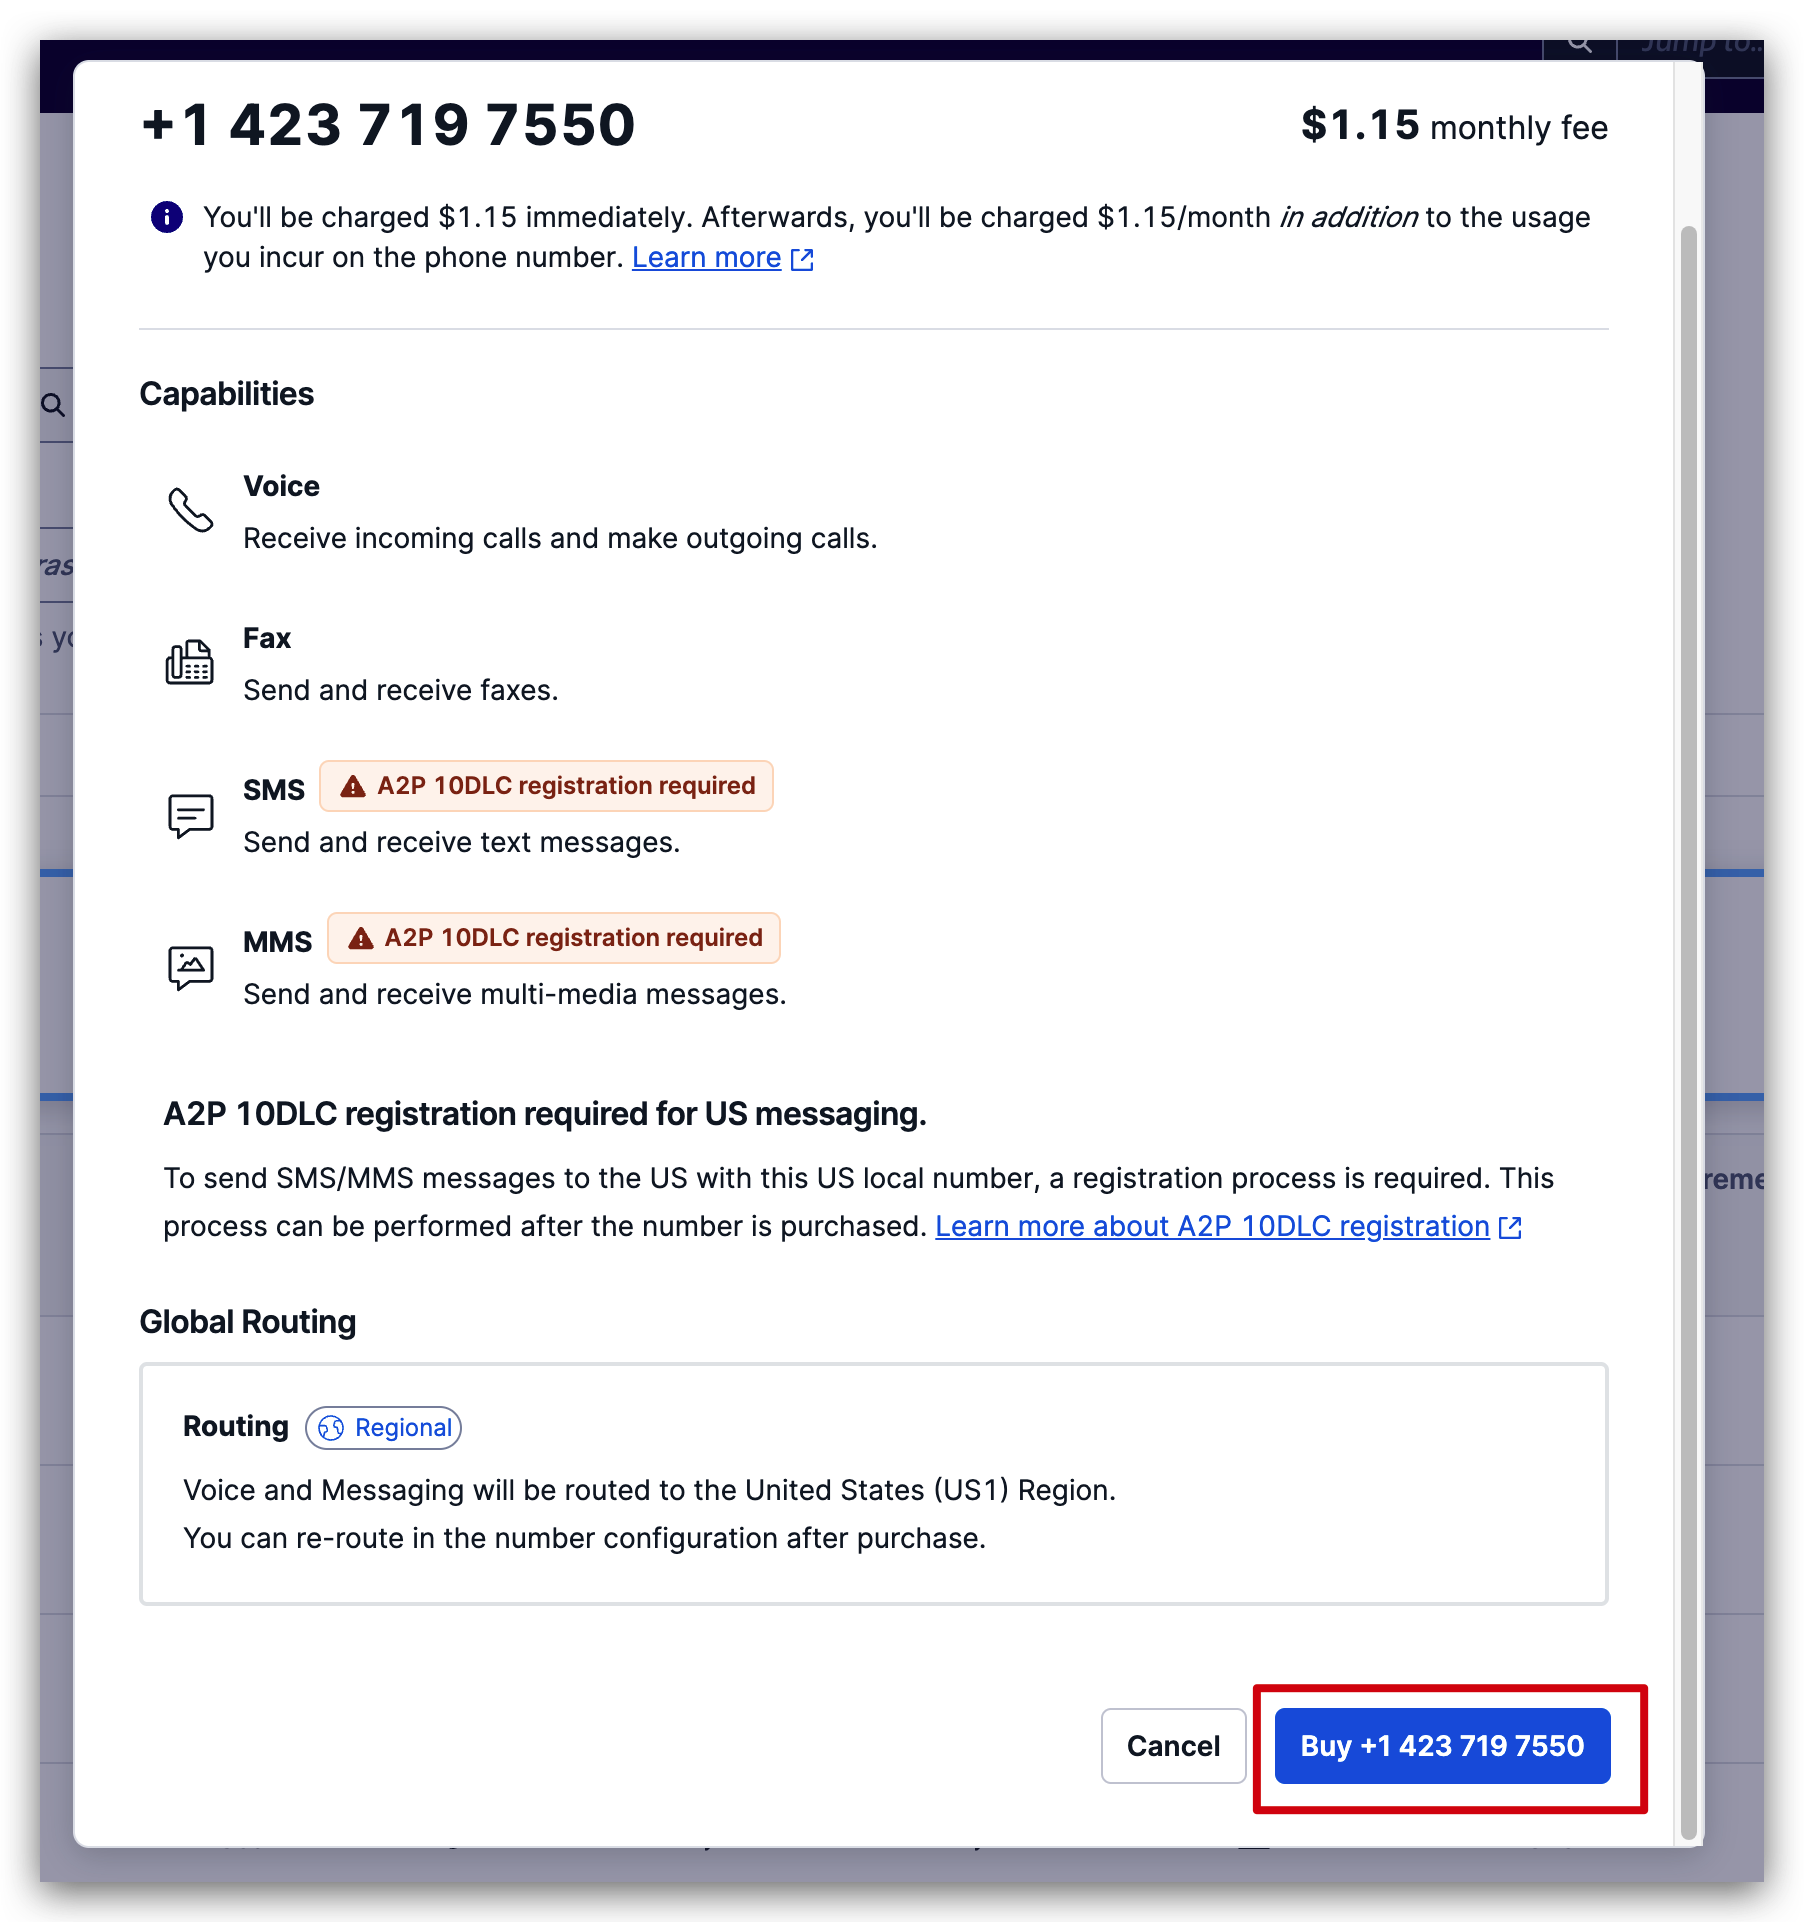
Step 3. Here is a introduction of this number, you can take a look and then click the Buy button.
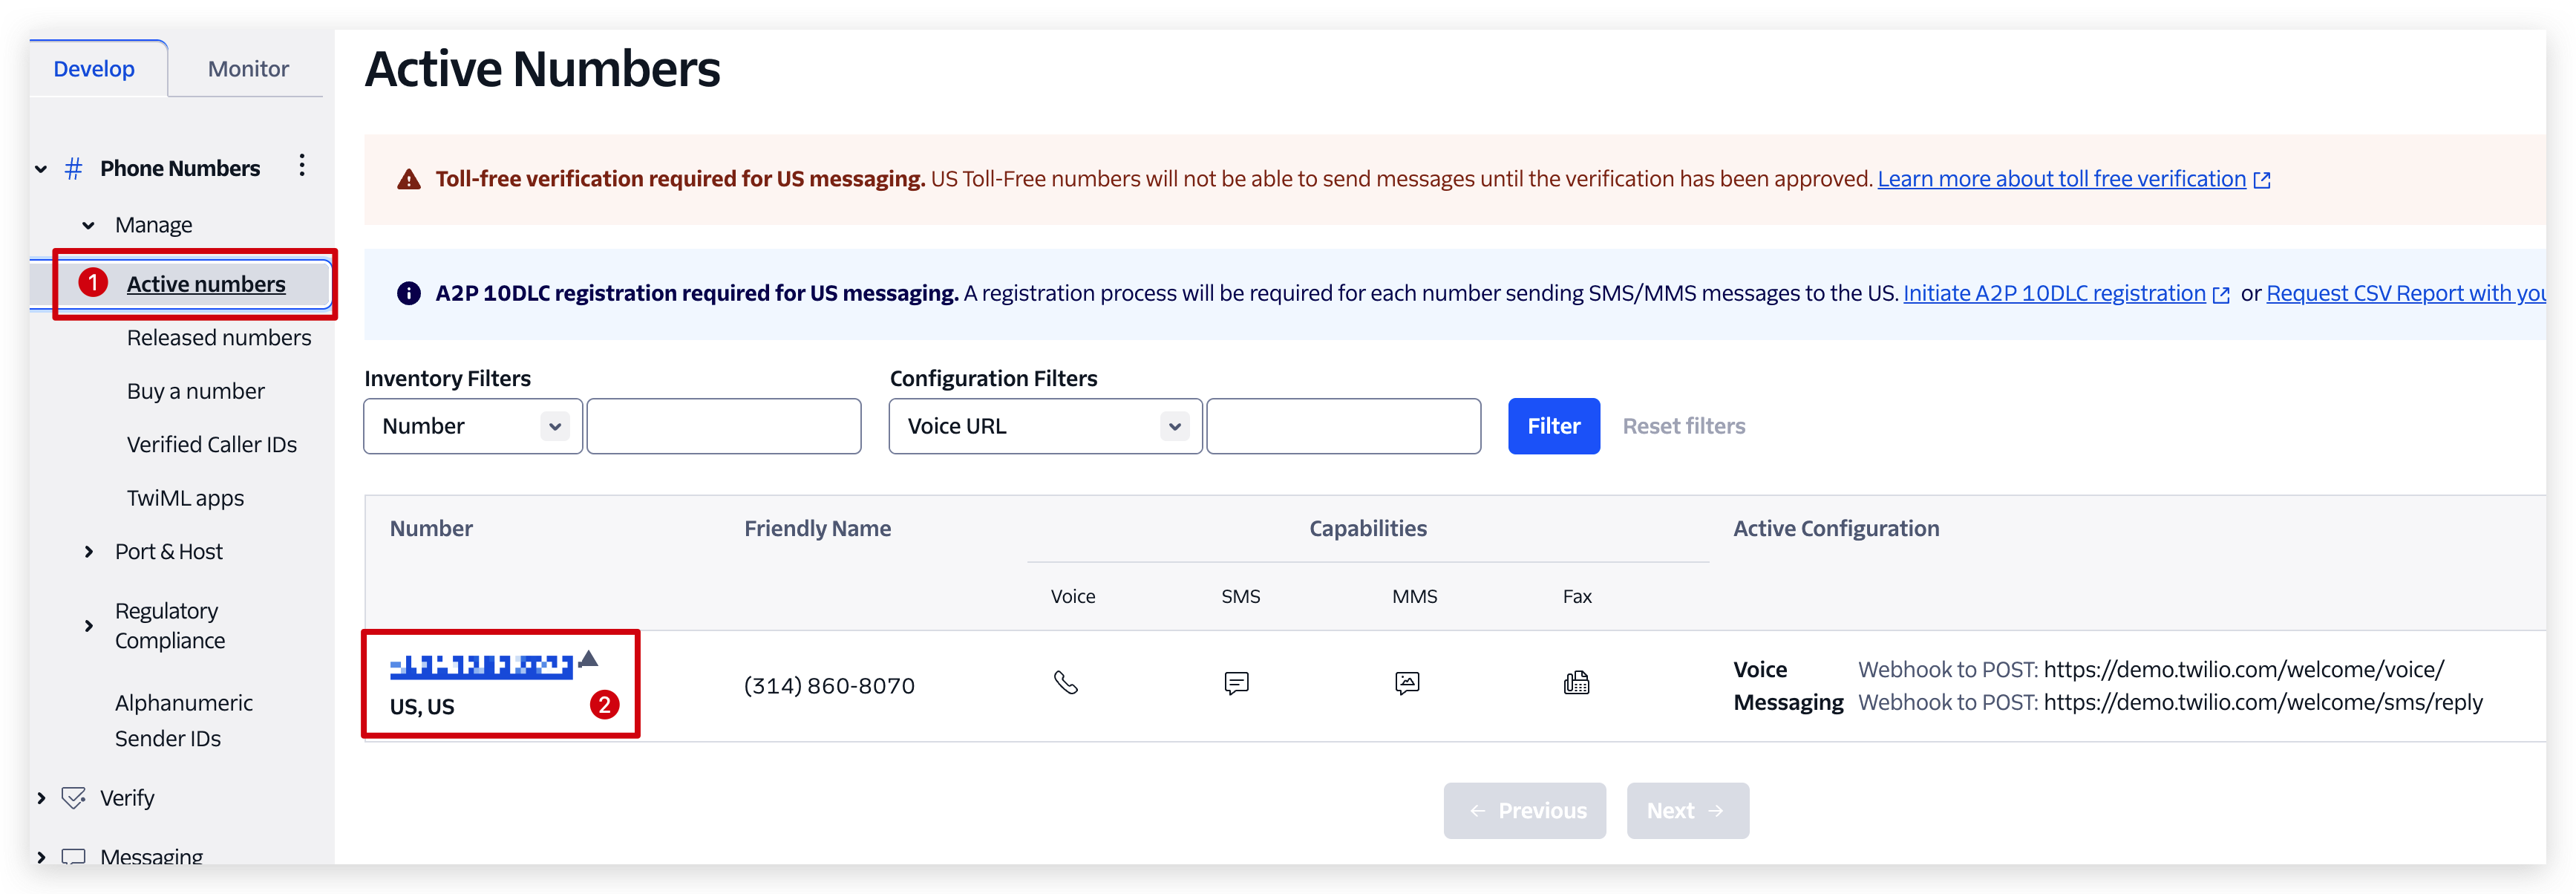
Step 4. This page will show all active numbers. The number you buy just now will show here.
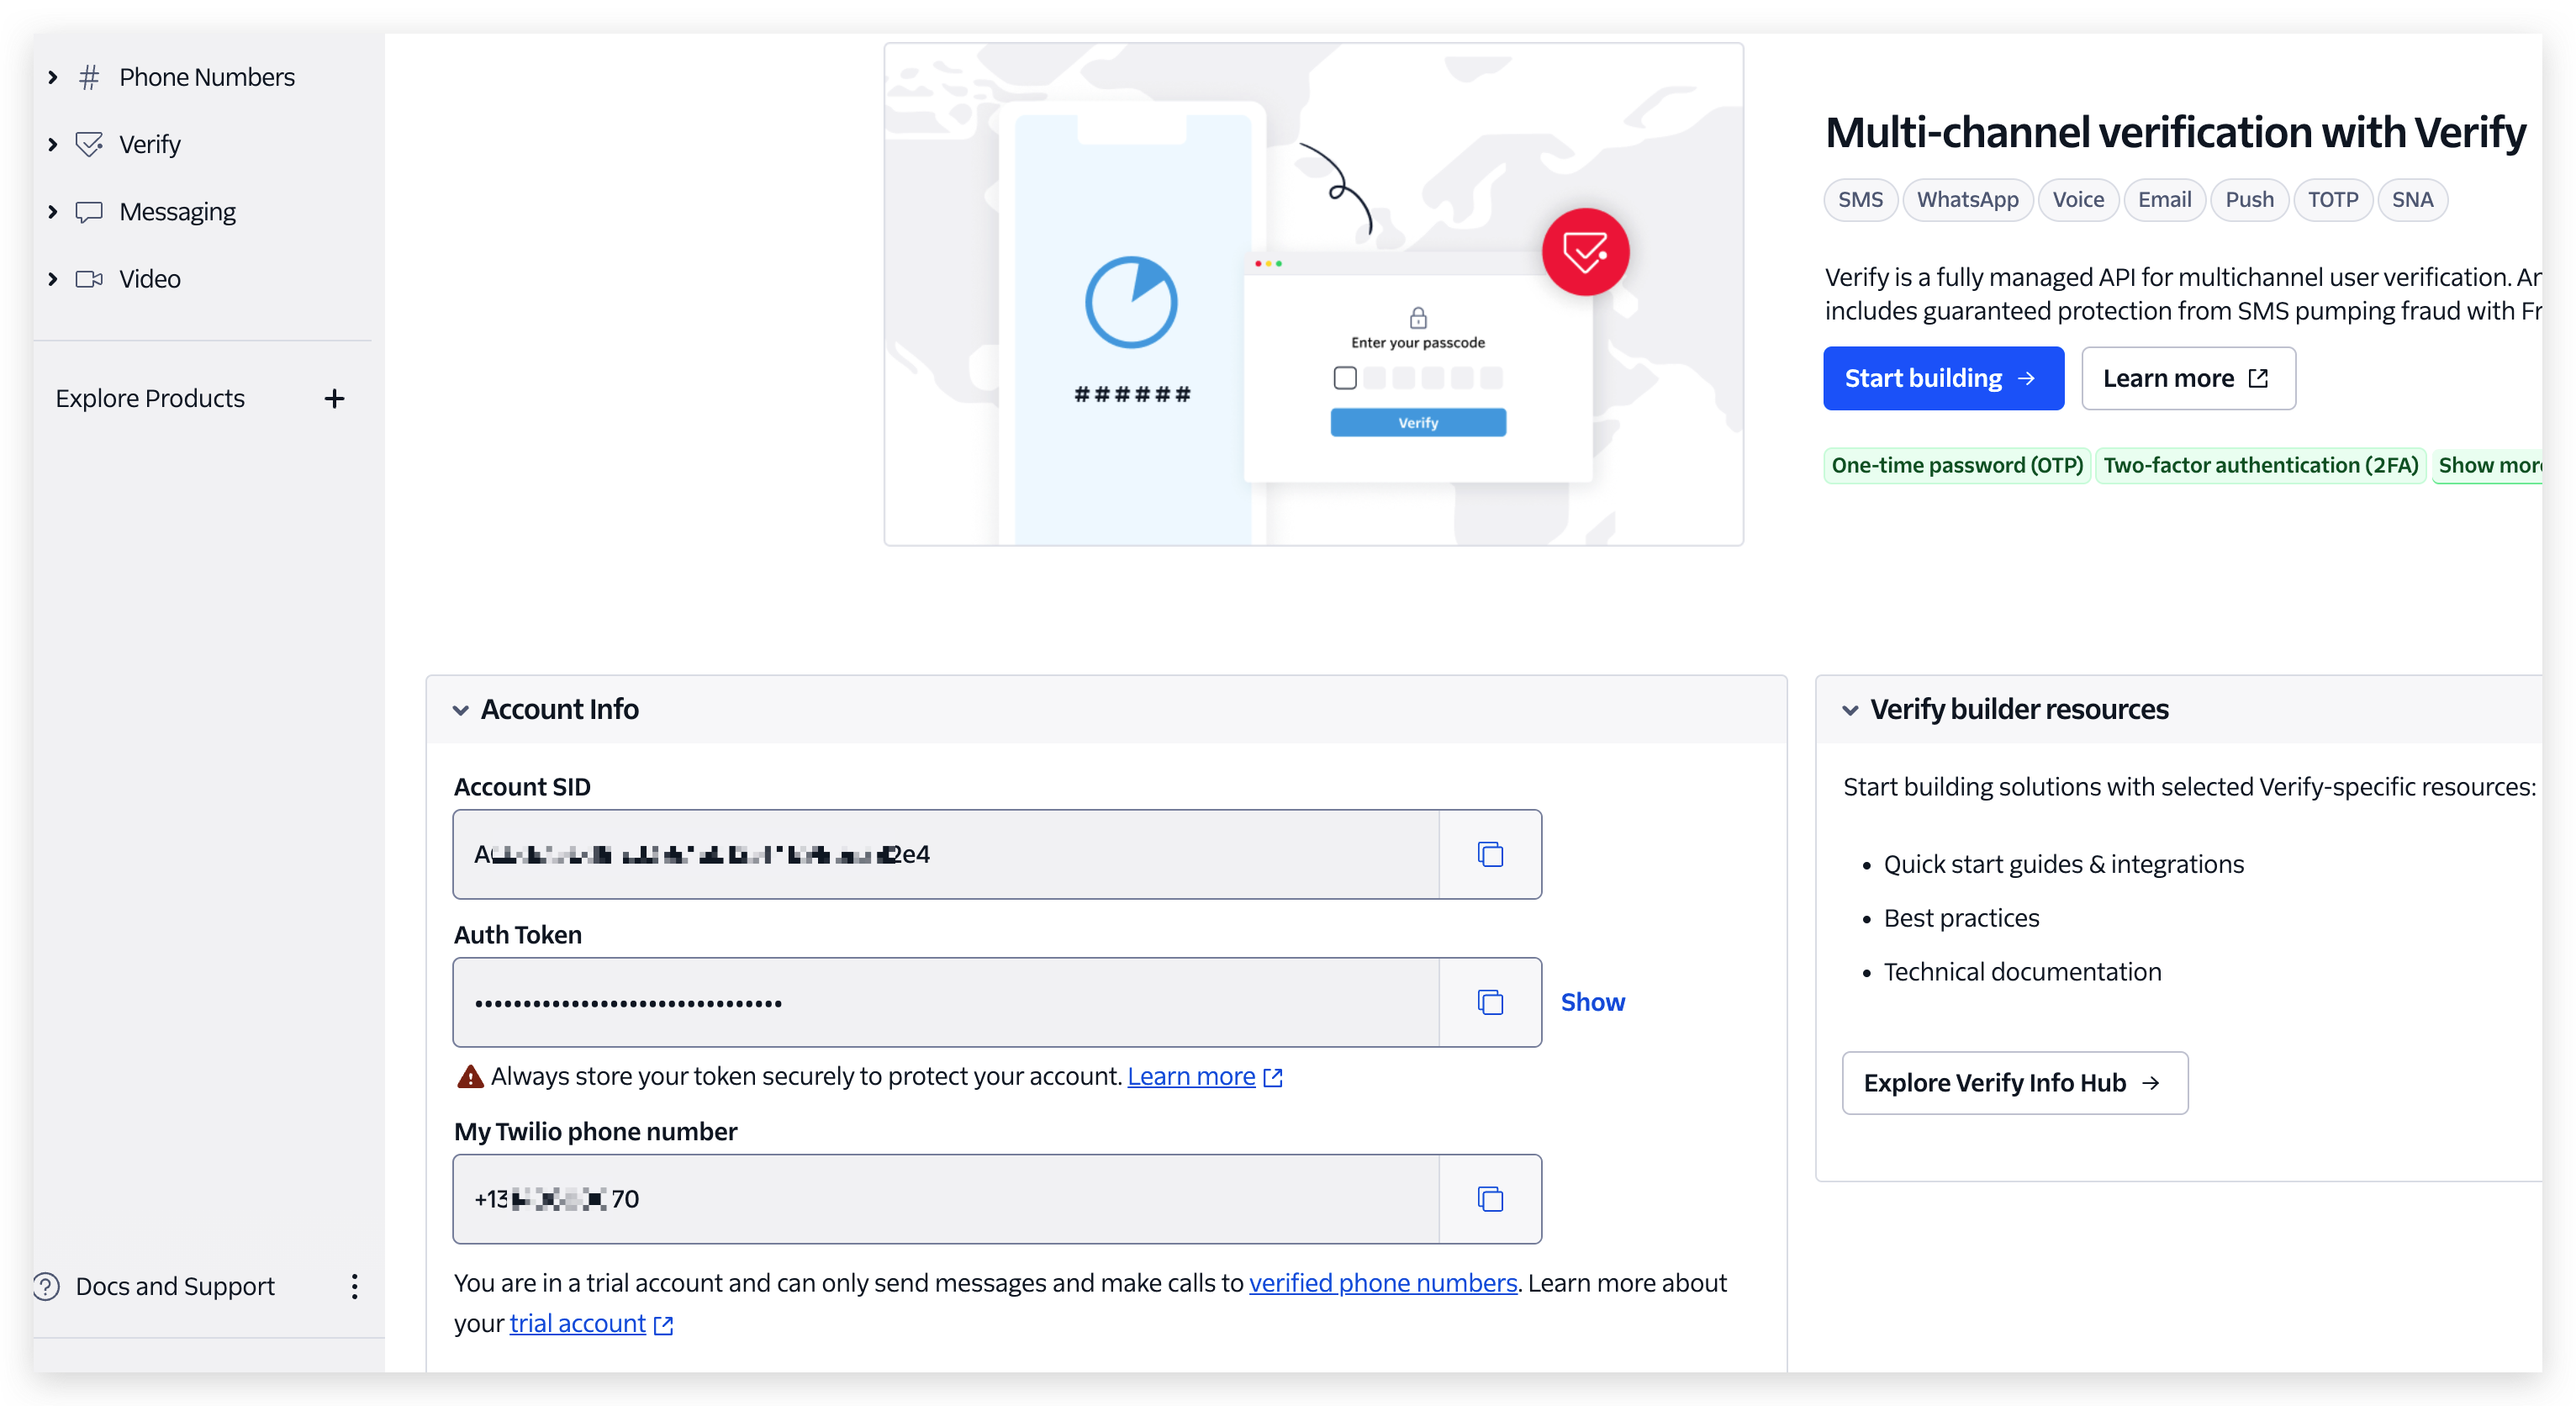
Step 5. Go back to console page you will see SID, Token and phone number. That's what we need later.
Part 3. How to configure Twilio in Node-RED
If you don't know how to send message from watcher to Node_RED yet, please click here.
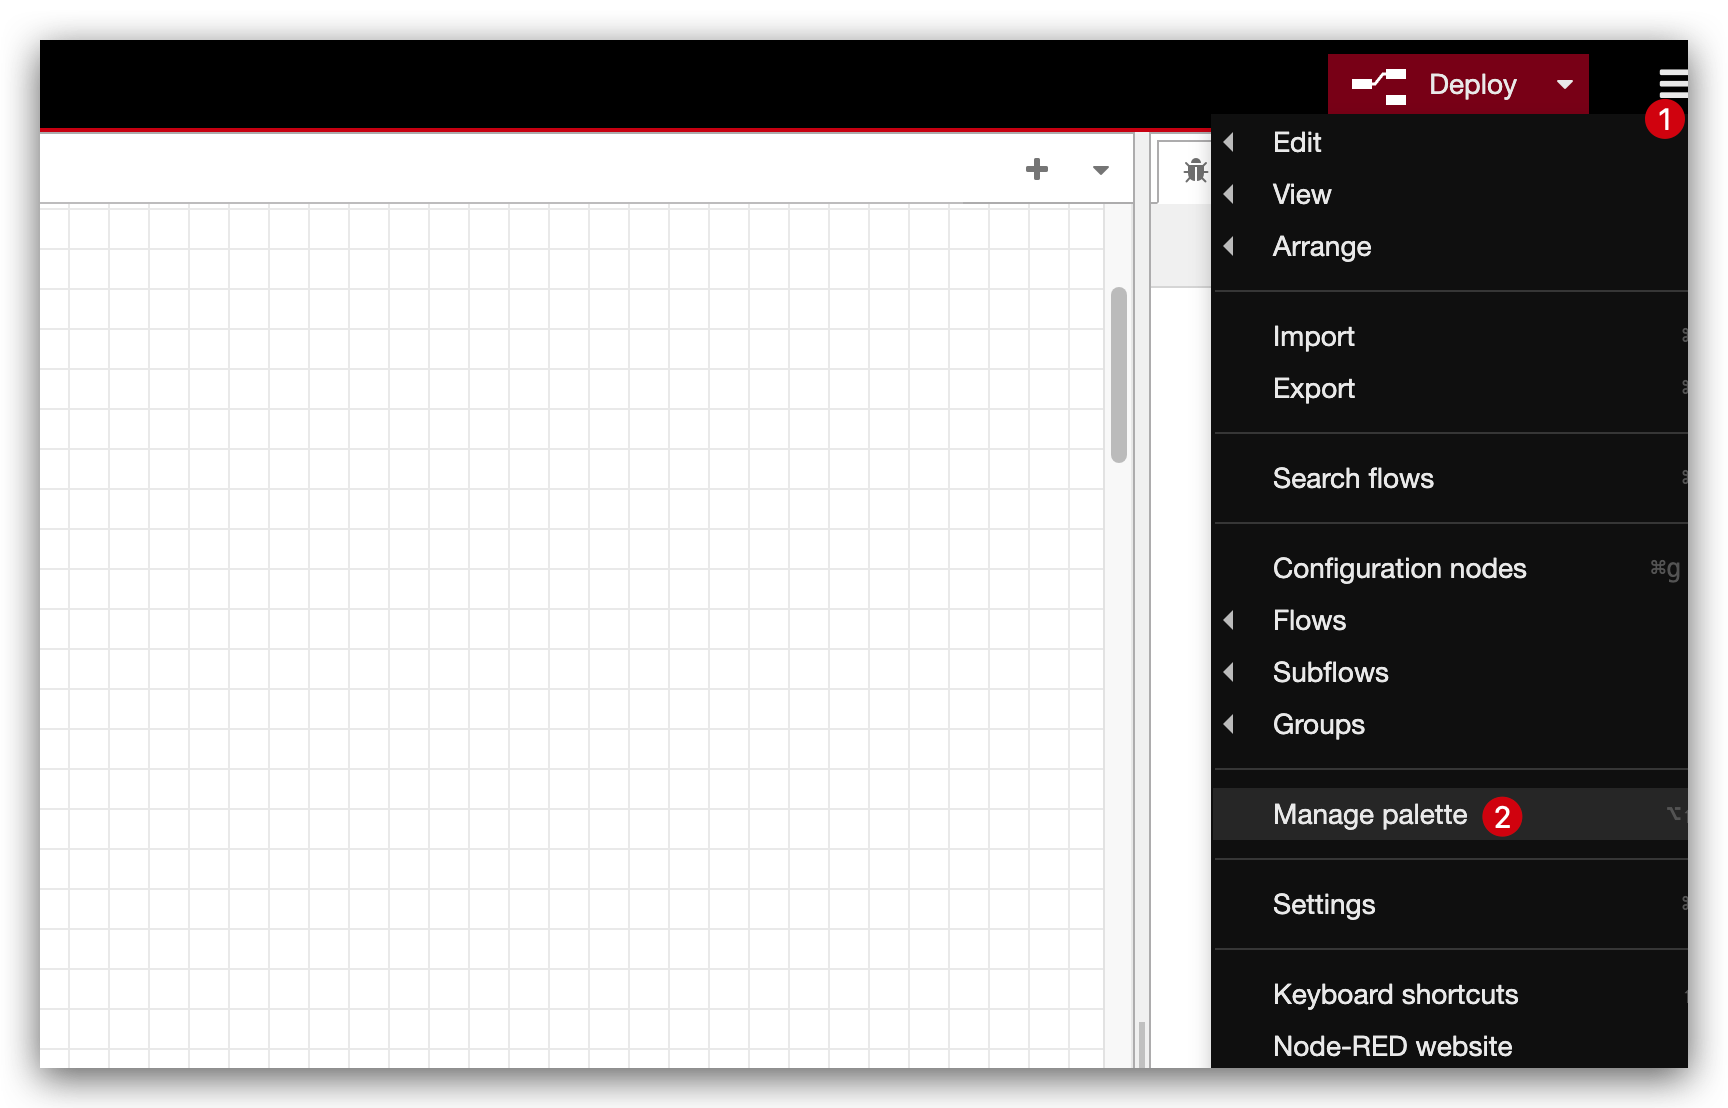
Step 1. First we need to download Twilio add-on in Node-RED, so click Manage palette.
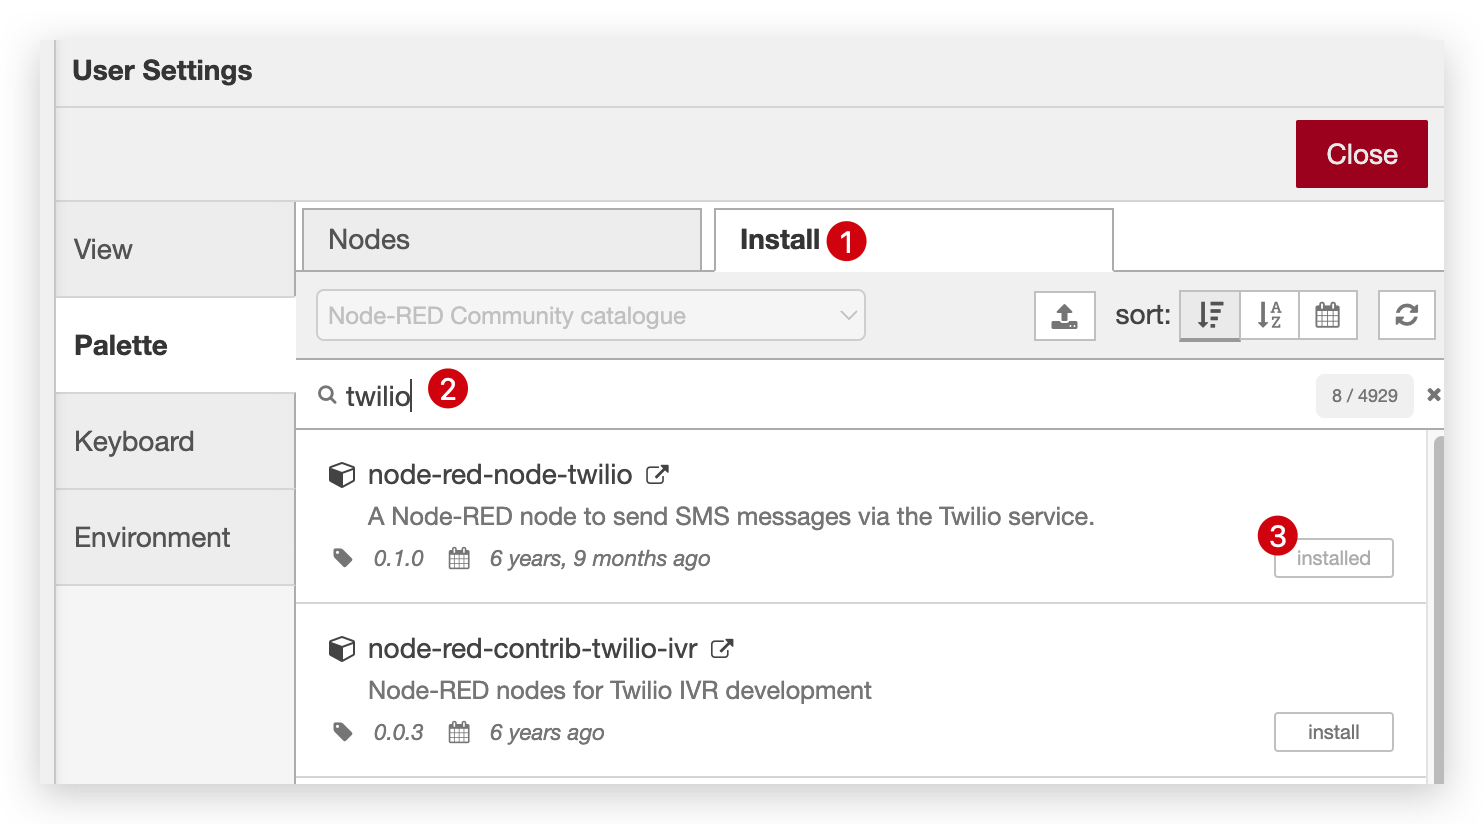
Step 2. Search twilio and install the first one.
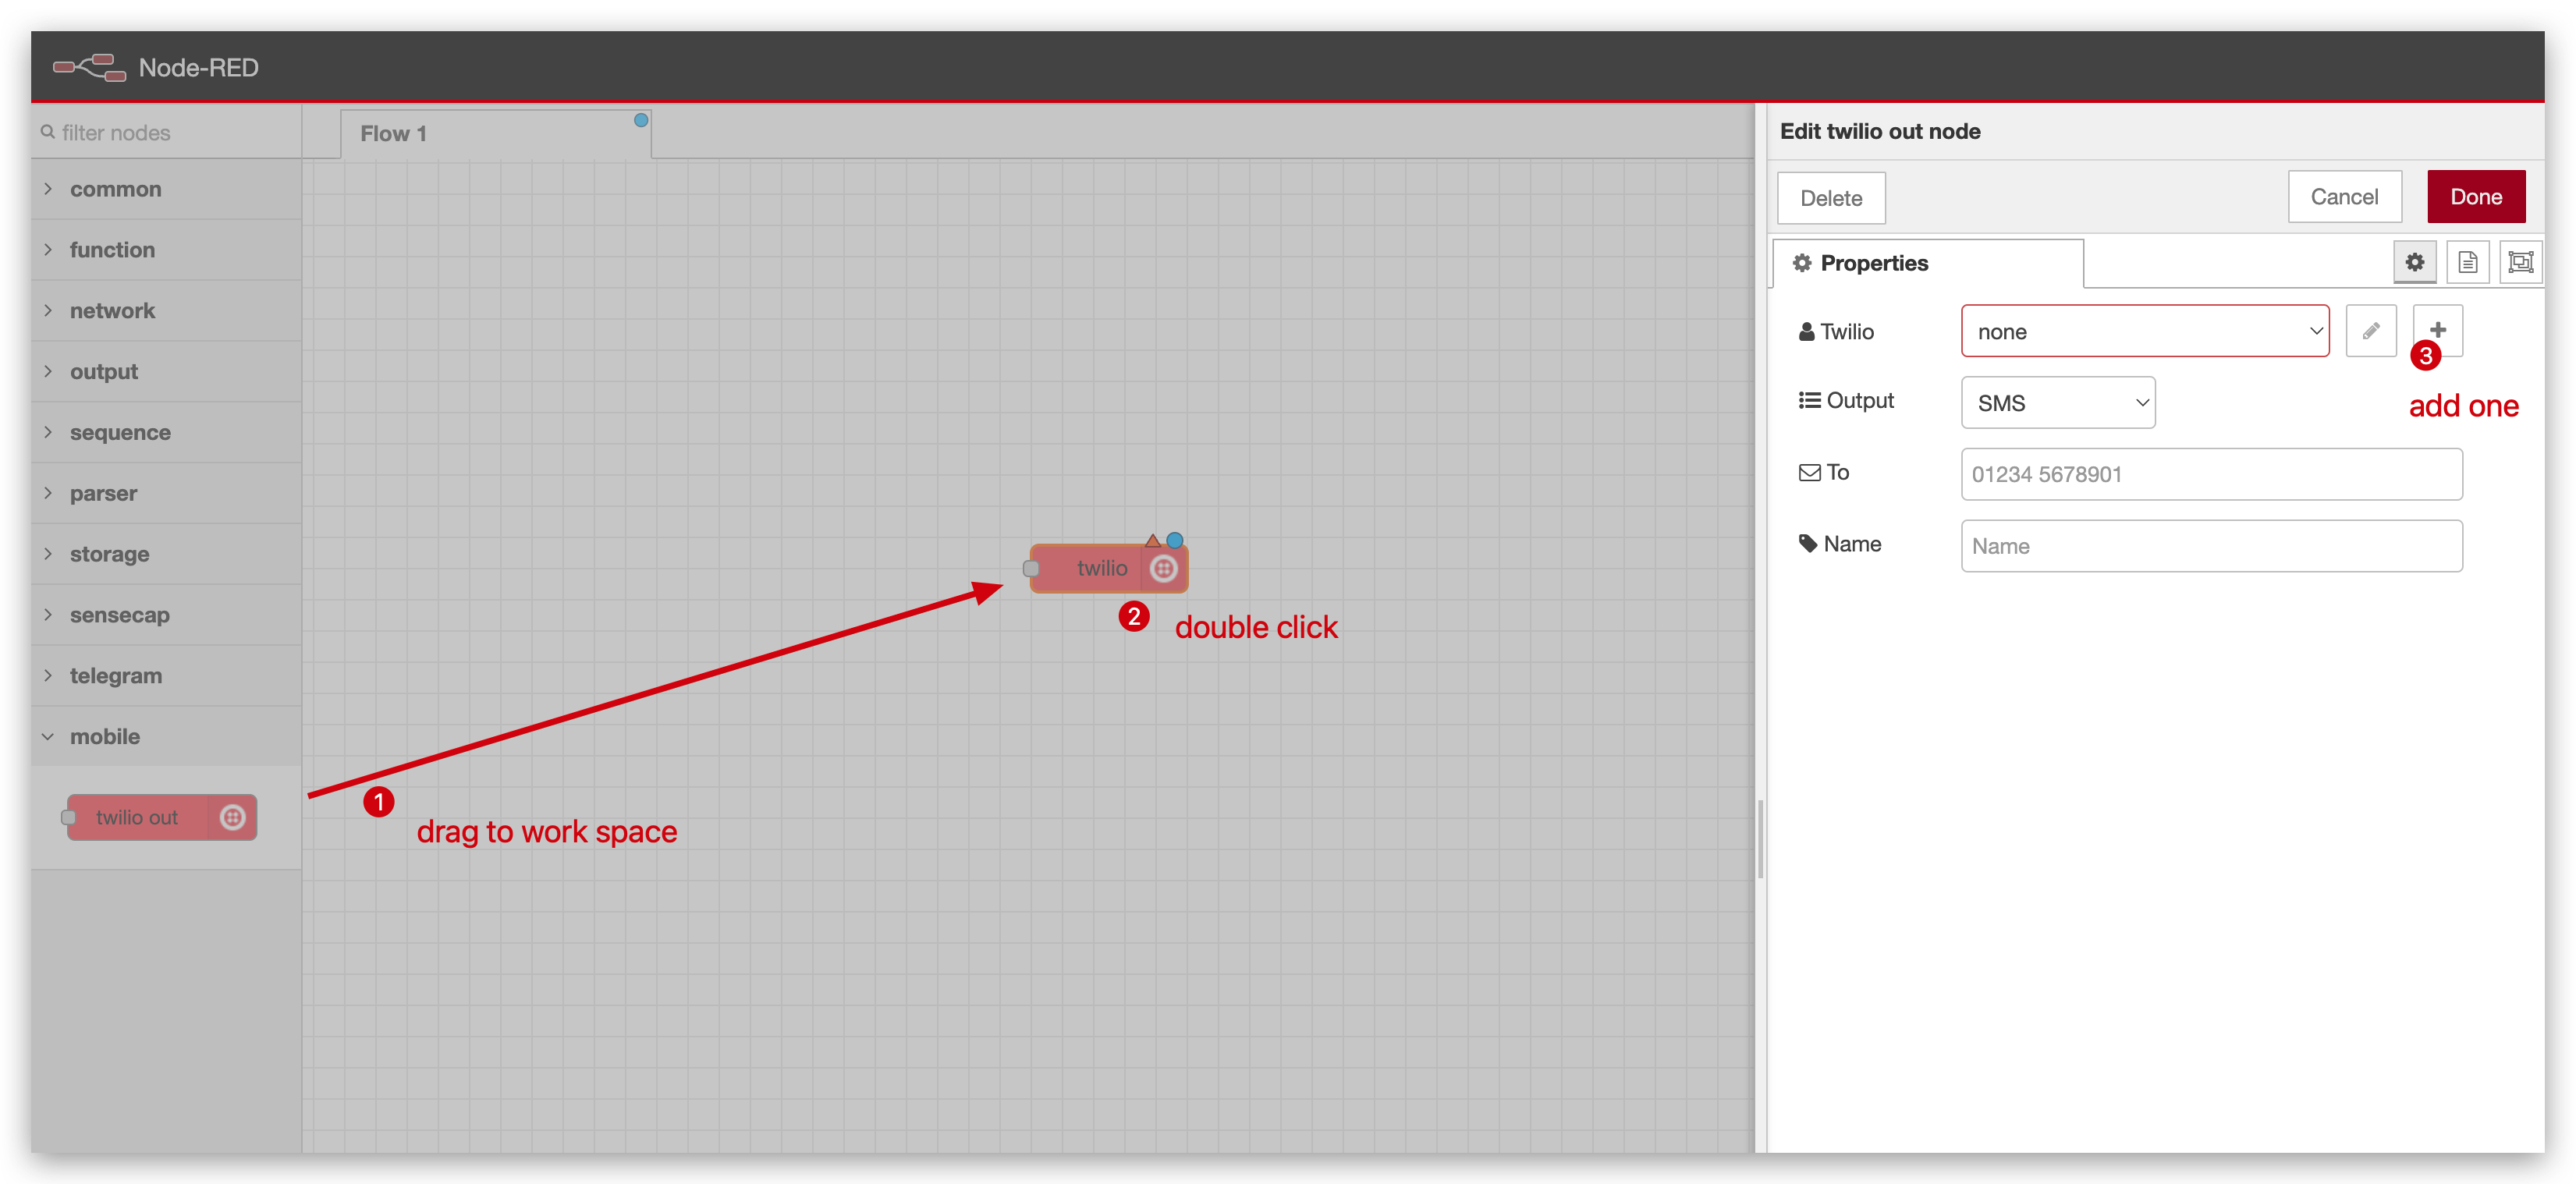
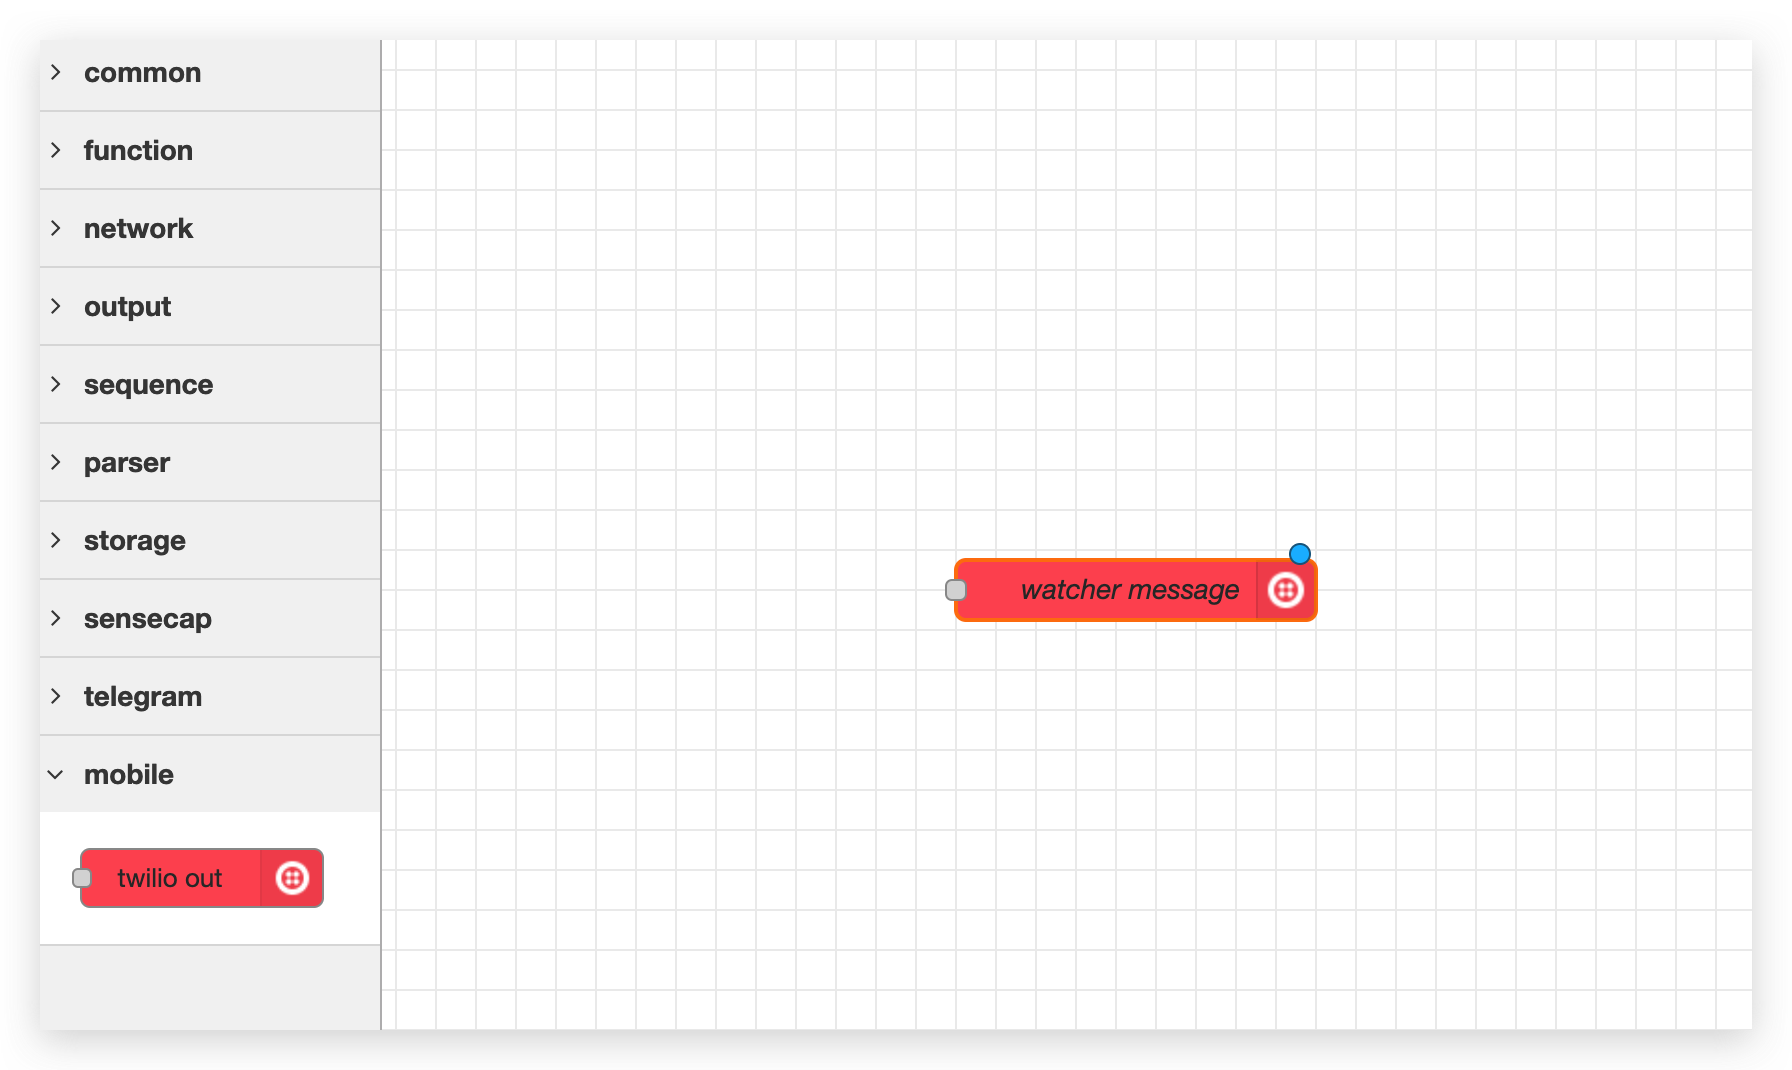
Step 3. Drag the Twilio module to workspace and double click it, and then add a new Twilio configration.
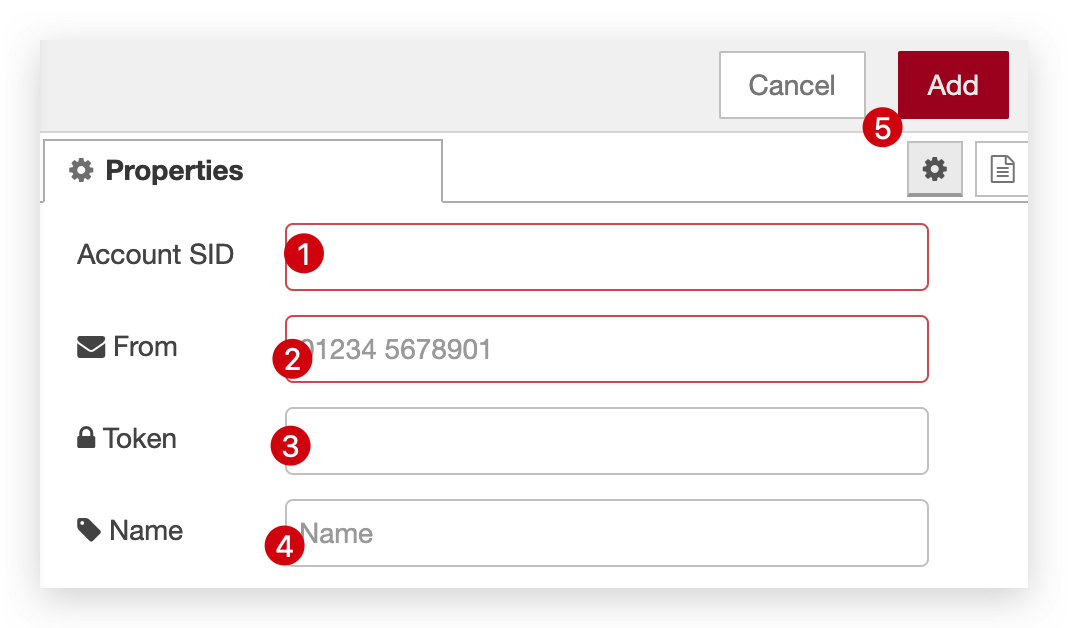
Step 4. Fill in those properties, SID and From and Token are from Twilio console. Name means this configuration name.
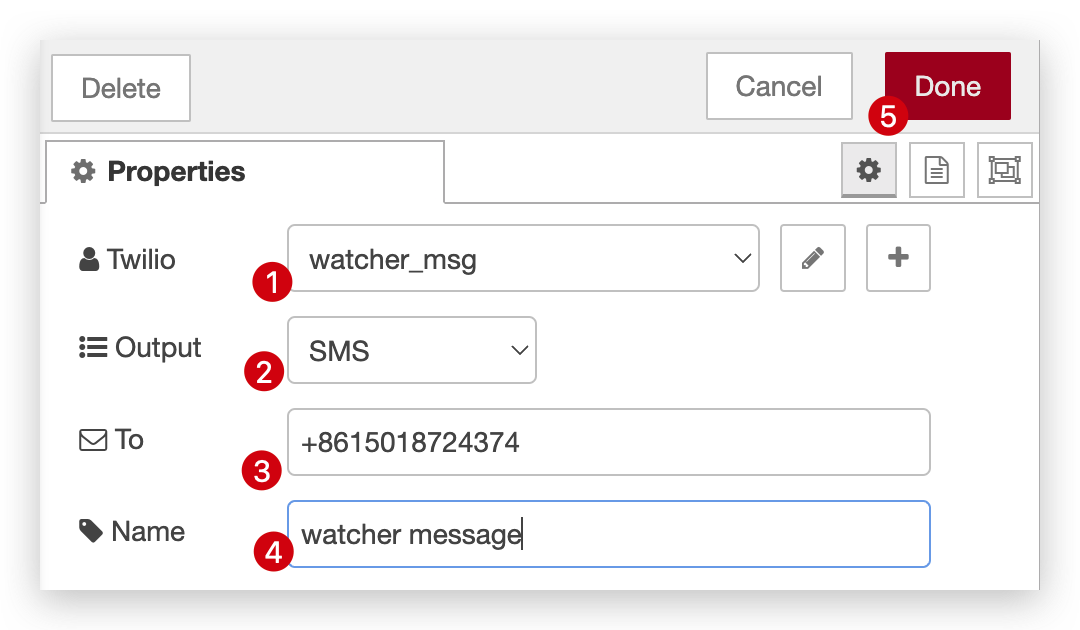
Step 5. Fill in those properties, Output means you want SMS or phone call, To means which phone number you want to send, Name means this module name.
Step 6. After that, you will see this page.
Part 4. Send message to twilio
Get all results
Step 1. Run a task in Watcher.
First of all, you need to run a task in Watcher following the video below. If you want to know more please click here.
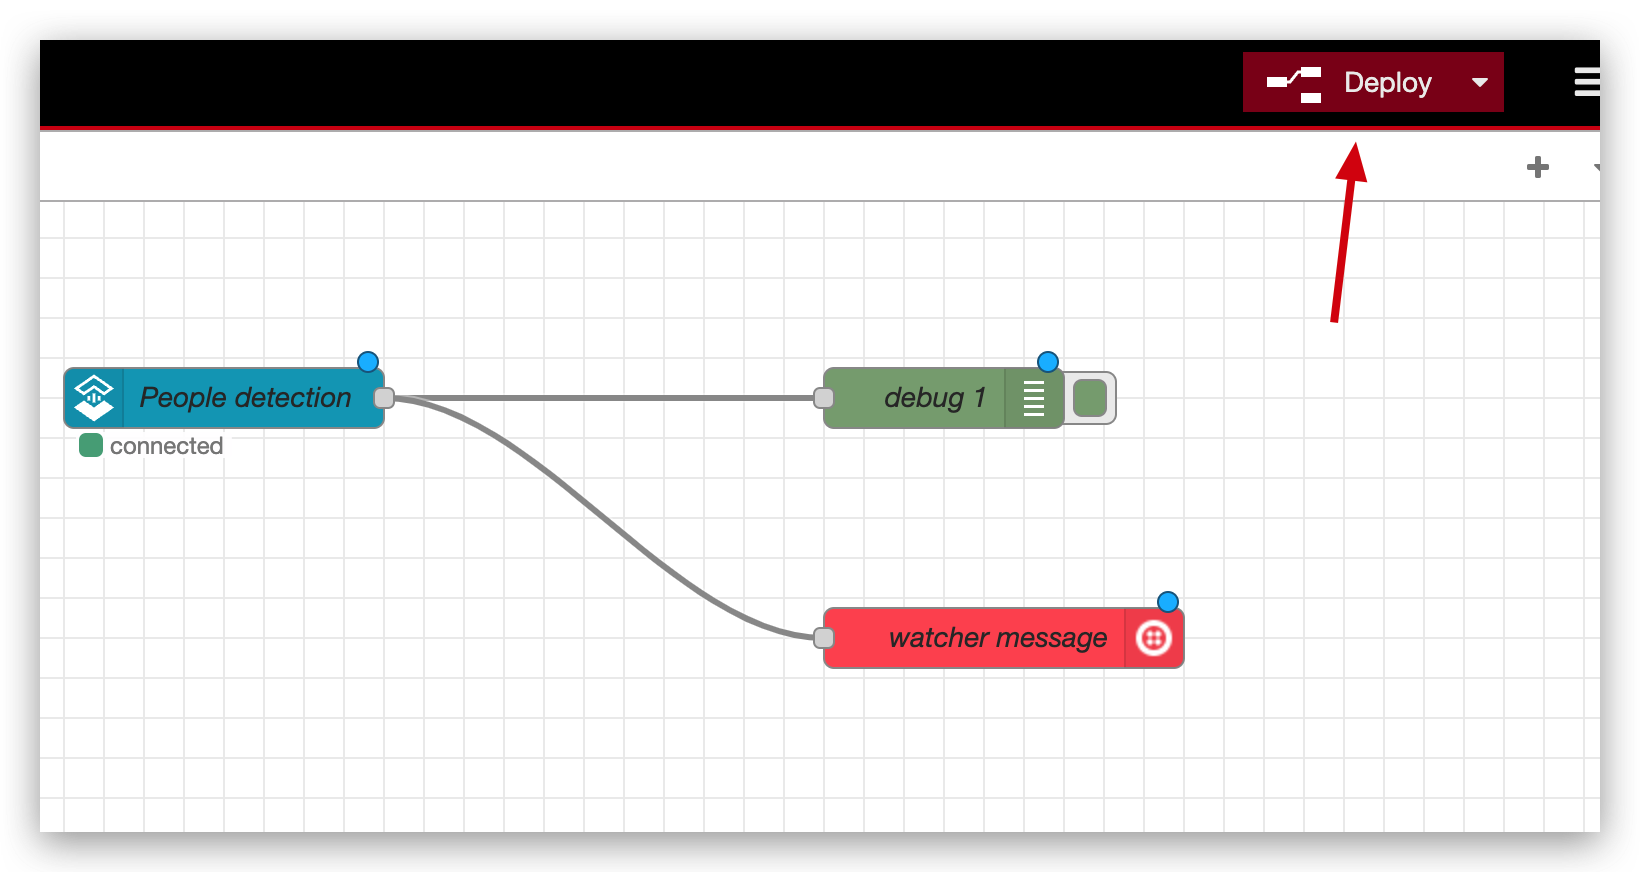
Step 2. Drag sensecap OpenStream module and debug module to workspace and configure them. If you don't know how to configure, please click here. Connect them and Click the Deploy button on the right upside coner.
Step 3. You will receive message at both debug page and Twilio message on your phone.
| debug page | Twilio message |
|---|---|
 |  |
Get specific results
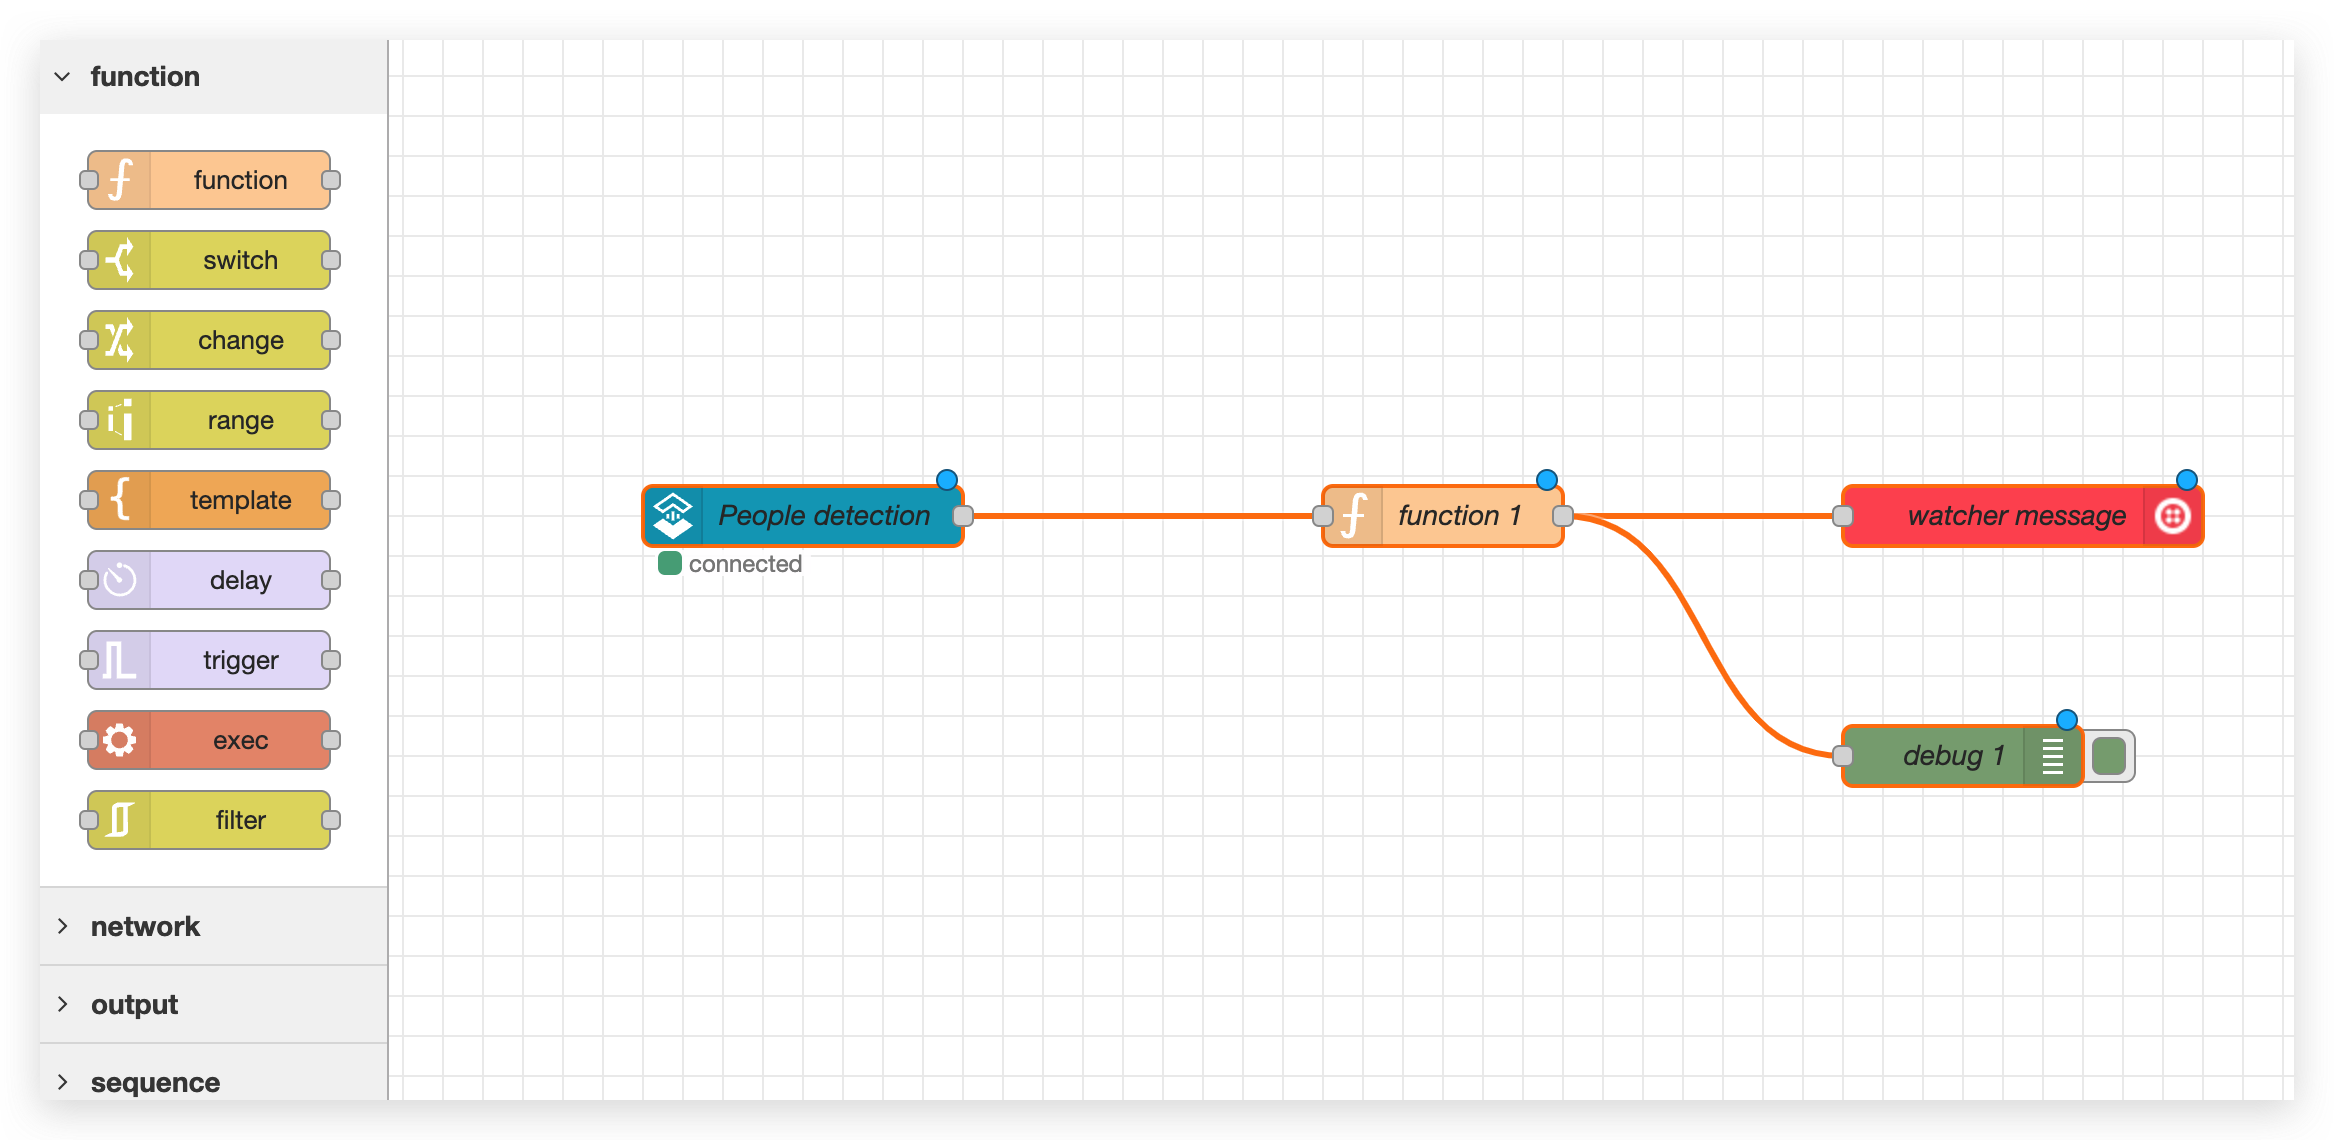
Step 1. If you thought getting all results is too much and you just want to get specific results. You need to drag a function module to the middle and connect them.
Step 2. Double click function module and write some codes to get which message you want. Click Done and Deploy it.
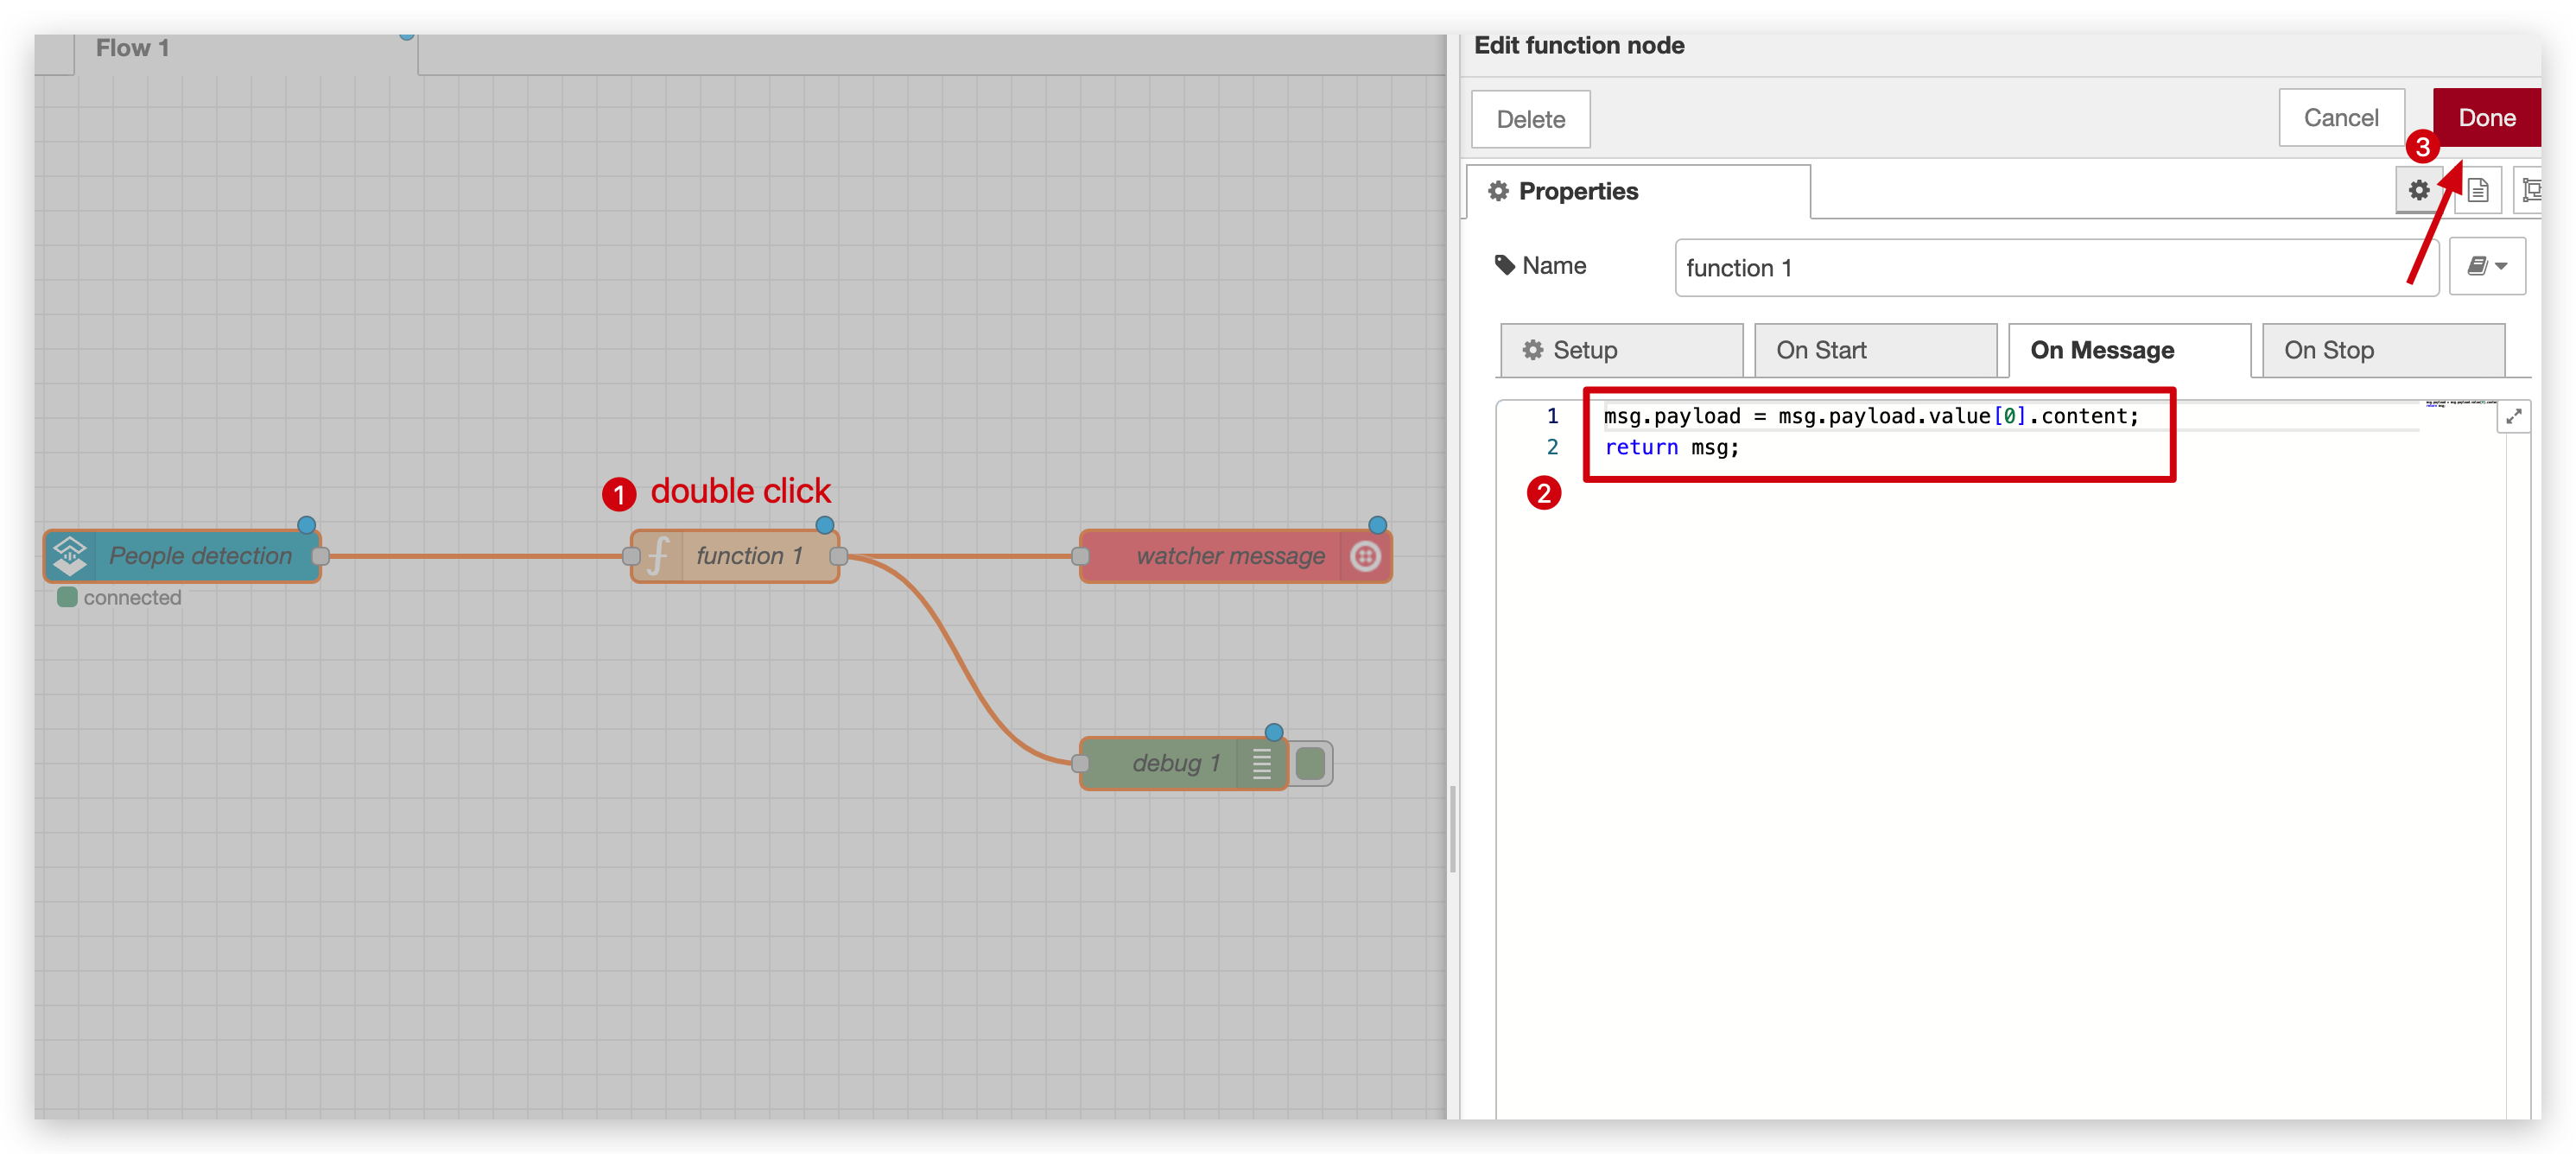
Get one specific message.
msg.payload = msg.payload.value[0].content;
return msg;
If you want to get more than one message please following the codes below.
var content = msg.payload.value[0].content;
var image_url = msg.payload.value[0].image_url;
var timestamp = new Date(msg.payload.timestamp).toLocaleString();

msg.payload = {
    value1: content,
    value2: image_url,
    value3: "Alert received at " + timestamp
};
return msg;
Step 2. Run a task in Watcher, if you don't know how to run a task, please refer here.
Step 3. You will receive message at both debug page and Twilio message on your phone.
| debug page | Twilio message |
|---|---|
 |  |
Congratulations on successfully connecting Watcher with Twilio! Now, unleash the power of this integration and start building innovative applications that leverage seamless communication capabilities~
Tech Support & Product Discussion
Thank you for choosing our products! We are here to provide you with different support to ensure that your experience with our products is as smooth as possible. We offer several communication channels to cater to different preferences and needs.