Get Started for Meshtastic
Meshtastic is an open source, off-grid, decentralized, mesh network built to run on affordable, low-power devices. Seeed Studio provides a comprehensive range of ready-to-go Meshtastic devices for hobbyists and industrial users. XIAO ESP32S3 & Wio-SX1262 Kit is flexible solution for meshtastic developer and maker.
Flash Firmware
Please flash the firmware onto your device if you purchased the XIAO ESP32S3 & Wio-SX1262 Kit before October 24, 2024 by following this step-by-step tutorial.
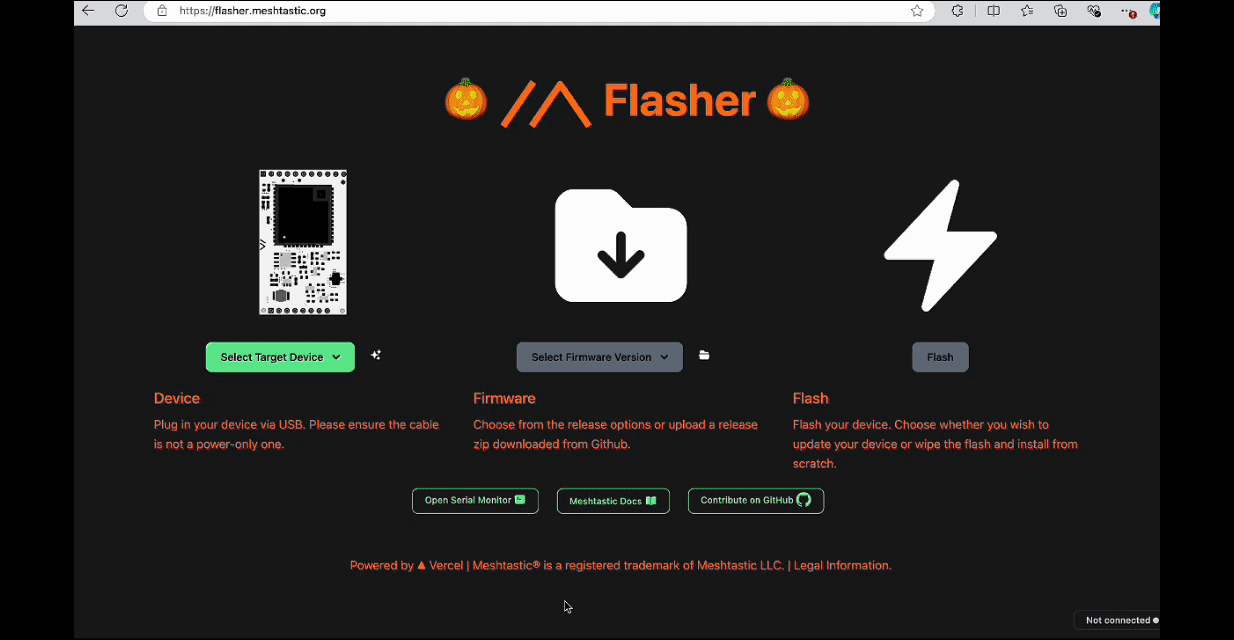
Step 1: Firstly, open a browser and visit https://flasher.meshtastic.org/# requires Chrome or Edge browser.
Step 2: Then, use a suitable USB cable to connect the device to the PC. You may need to turn off, then press and hold the BOOT button while plugging in the USB cable.
Step 3: Follow the following instruction provided to perform the subsequent flashing operations. Select the Device as "Seeed XIAO S3", Firmware as the lastest one, and then click "Flash". Don't forget to tick "Full Erase and Install" if you want to cover previous firmware.
Software Overview
Meshtastic provides multiple platform softwares for users to choose from, including Android app, Apple app, web client. It also provides Python CLI, Linux Native and integration methods for developers to use.
For specific information, please refer to the official website of Meshtastic.
- Android App: Android application is available on F-Droid repo and Google Play Store. This allows you to connect to your Meshtastic device from your Android phone via Bluetooth, Wi-Fi (if on the same network) or USB On-The-Go (OTG).
- Apple App: It is available on app store. By default, the Meshtastic app for iOS supports the use of native offline Apple Maps.
- Web Client: Meshtastic Web is a Meshtastic client that runs directly in your browser.
- Python CLI: The python pip package installs a "meshtastic" command line executable, which displays packets sent over the network as JSON and lets you see serial debugging information from the meshtastic devices.
- Linux Native: The device software can also run on a native Linux machine thanks to the Portduino framework.
- Meshtastic Integrations: The Meshtastic ecosystem is highly extensible and allows easy integration with a number of existing software products and projects.
Device Connection
Before using Meshtastic, the device needs to be connected first. There are two connection methods. The first one is to use an expansion board, and the corresponding information will be displayed on the display. Then, the configuration can be carried out on the corresponding platform according to the reflected information. The second one is to connect the XIAO and the Wio-SX1262 module, and use a serial port tool to obtain the node ID and password.
Method 1: Connected to Expansion board
After flashing firmware and downloading Meshtastic app, Expansion board would be a good tool for connection and additional application such as adding grove sensors and modules easily.
Step 1: Ensure that the device to be connected (such as "device") is turned on and in a discoverable state. And open the Meshtastic app on your mobile phone.
Step 2: In the Meshtastic app, there is an "+" icon on bottom right. Click it to let the app start scanning for nearby connectable devices. Then select the corresponding device ID showing on OLED display.
Step 3: Once selected correctly, enter the code showing on OLED display. Press the botton to switch display.
Button Functions:
- Press once to switch the screen.
- Press twice to broadcast.
- Press three times to switch the GPS mode.
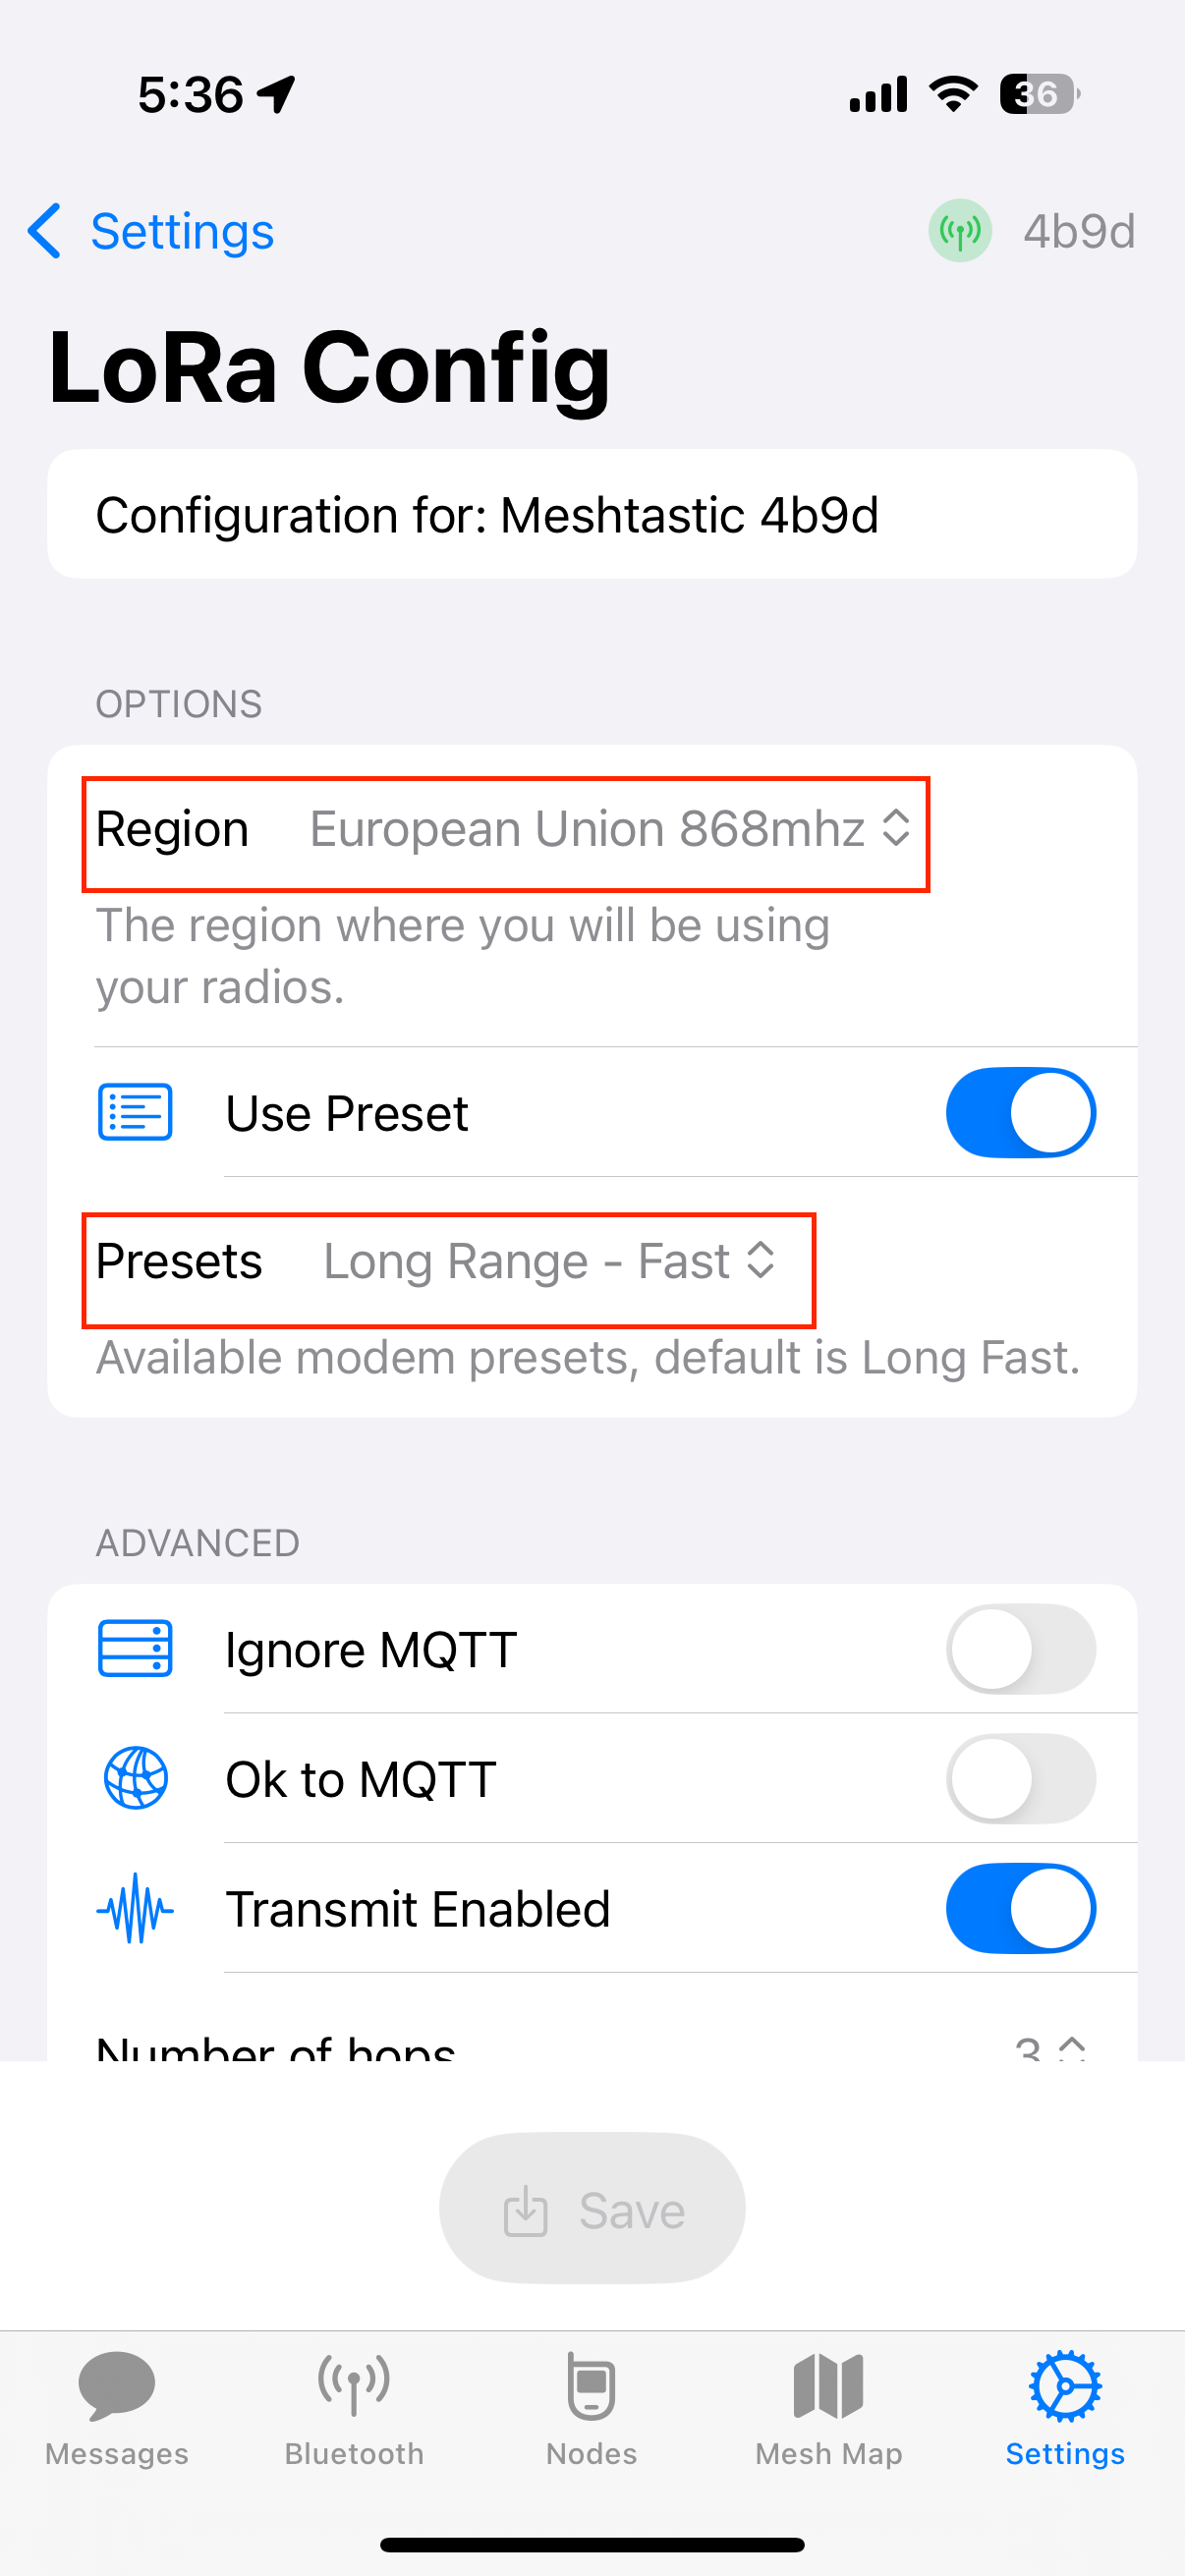
Step 4: Set the Lora region, then the device will reboot.
Step 5: Finish reboot, the device status can be checked on Meshtastic app and OLED display.
Method 2: Serial port tool
Select a serial port debugging tool you like. I will take Comtool on mac as an example below. Select the serial connection, choose the corresponding port, configure the baud rate as 115200, and turn on RTS and DTR. Open the connection and you can see the connection data. Search for "nodenum" to find the corresponding node ID. Its default password is 123456.
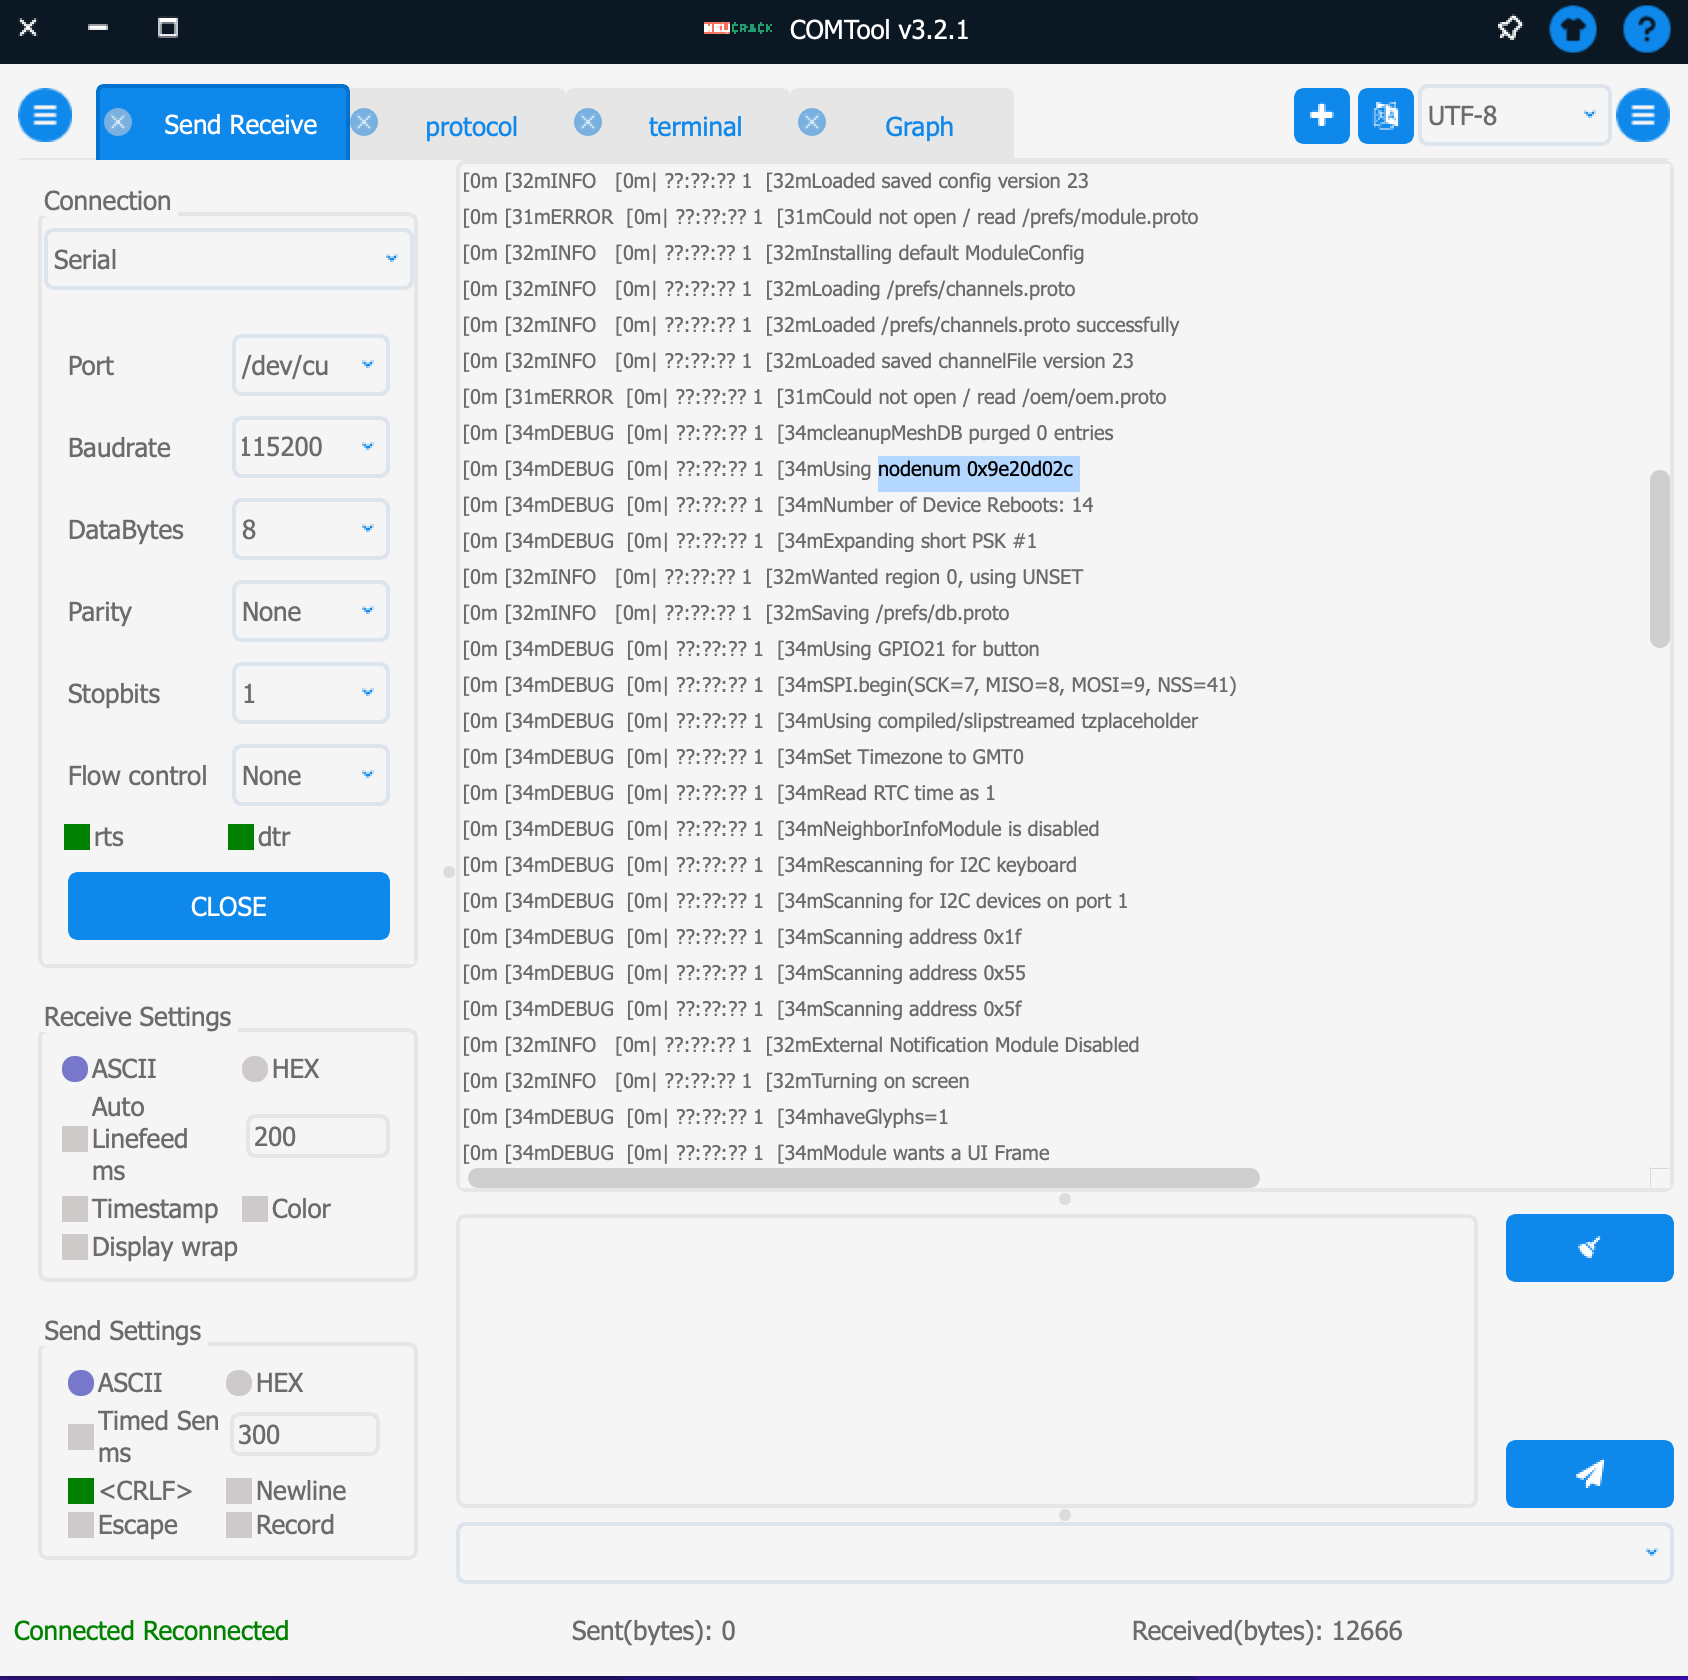
The last four digits of nodenum are the device number ID discovered by the meshtastic app. For example, "nodenum 0x9e20d02c" is "Meshtastic_d02c" in meshtastic.
Communicate with Wio Tracker T1000-E
Step 1. Connect Wio Tracker T1000-E following wiki.
Step 2. Make sure the following setting is same as your configuration on XIAO ESP32S3 for Meshatastic.
- Device activation and setup
- Ensure that both devices are turned on and in normal working condition.
- The wireless communication function of the device (such as Bluetooth, LoRa, etc.) should be enabled. Check the relevant settings to ensure that it is not accidentally turned off or restricted.
- Distance and signal strength
- The distance between the two devices cannot be too far. After initail testing, the communication distance of XIAO ESP32S3 for Meshtastic with 2 dbm IPEX antenna is over 2.5 km. Generally speaking, in a more open environment, can be over 20 km.
- Network Settings
- Ensure that the devices are in the same network mode or channel setting. Easily set to same 'lora region' and 'Modem preset' using Meshtastic APP.
Step 3. Communicate with Wio Tracker T1000-E
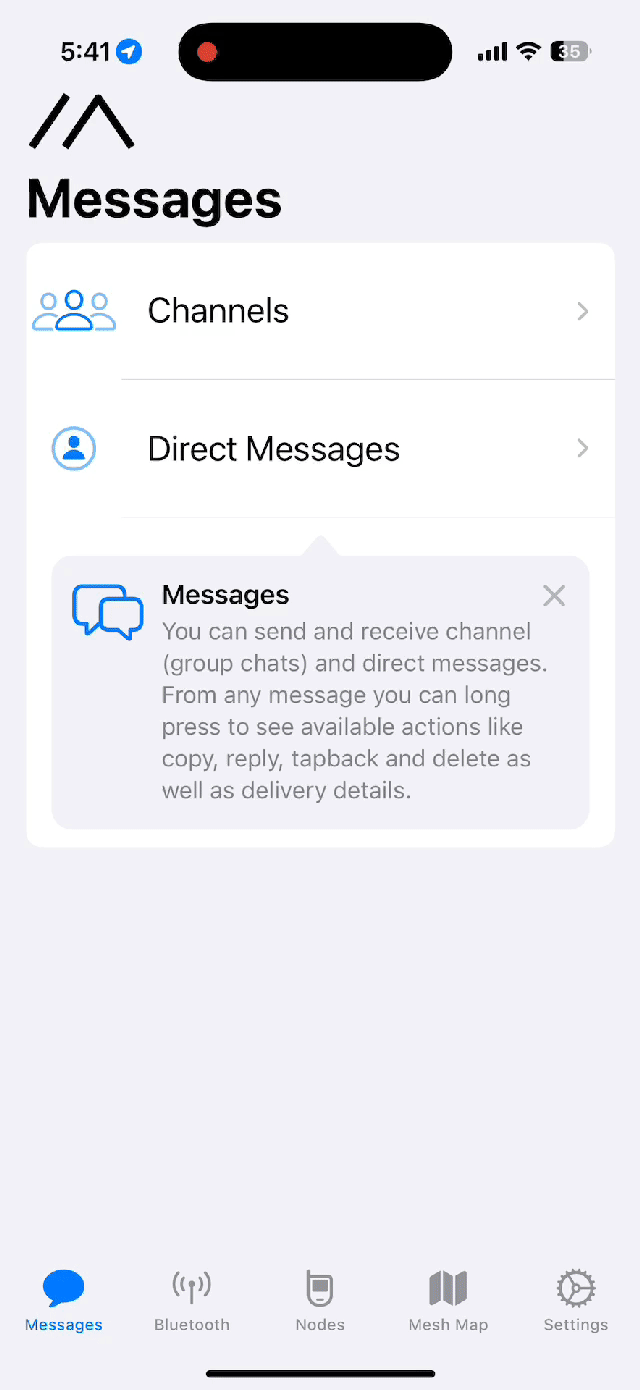
Once connected, you can start sending and receiving messages through the Meshtastic network. Messages can be text-based or may support additional features depending on the capabilities of the devices and the app. You can also monitor the network activity and see which devices are currently connected and active.
Sensor Connection
In the meshtastic application, the Wio-SX1262 with XIAO esp32s3 kit is capable of supporting a wide range of sensors. When used in conjunction with the XIAO expansion board, it can support numerous grove sensors, please check here. Additionally, when combined with the GNSS add on module, it forms the smallest module within meshtastic that has GPS functionality.
Temperature and Humidity Sensor
| DHT20 Temperature & Humidity Sensor |
|---|
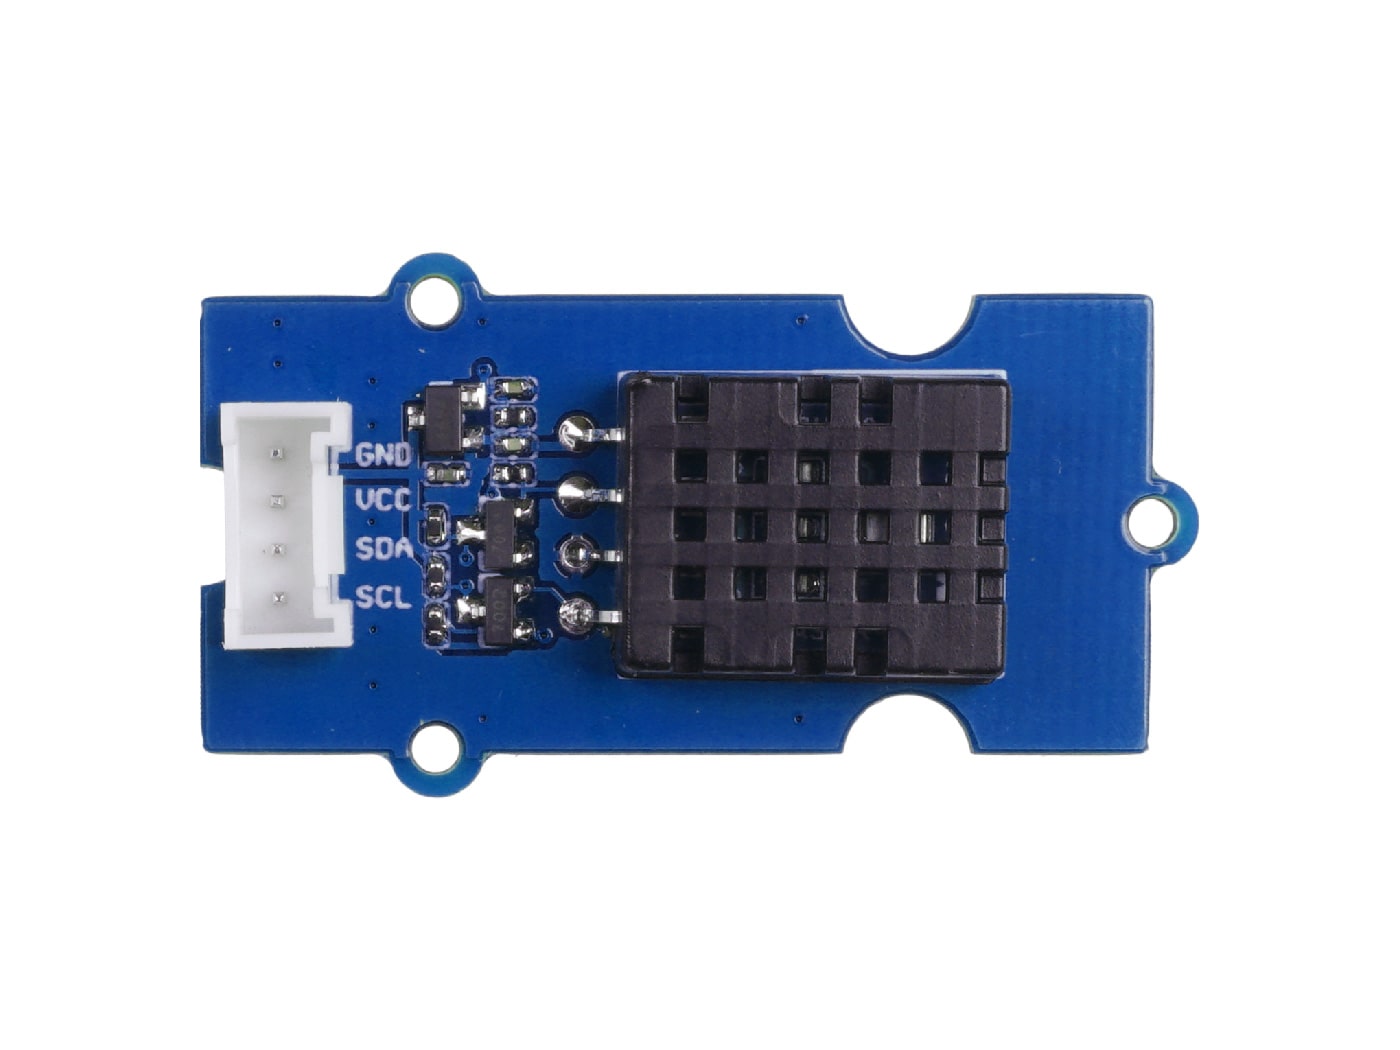 |
Step 1: Connect the Grove DHT20 sensor of the XIAO Expansion Board
Step 2: Enable Detection Sensor in Meshtastic APP

GNSS Sensor
| L76K GNSS Module for XIAO |
|---|
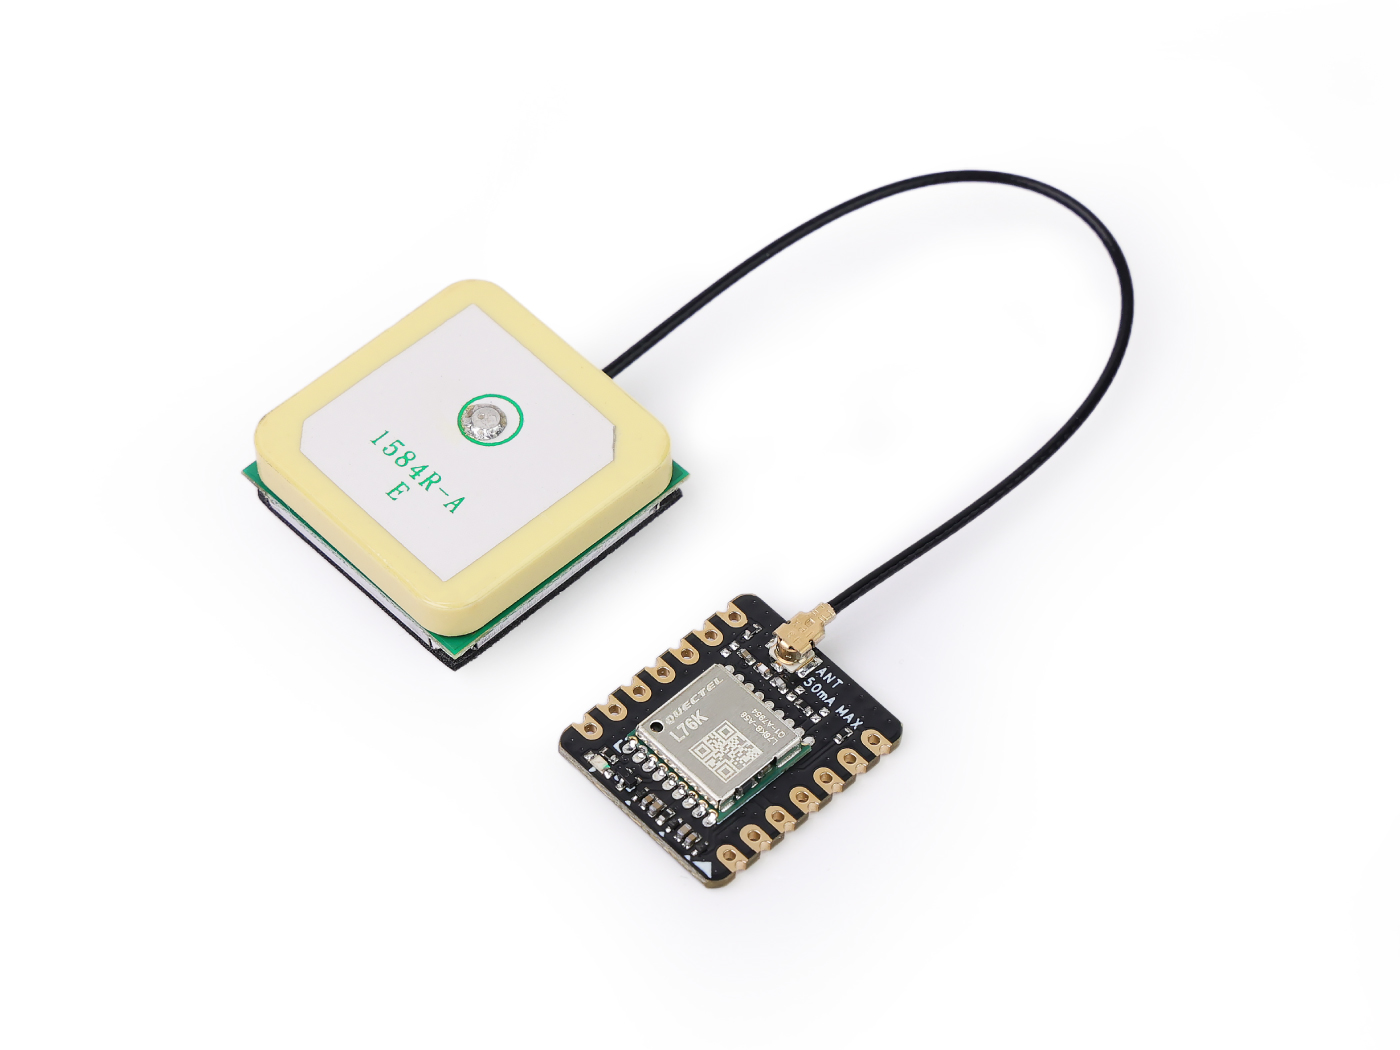 |
Initial Configuration
For more details, please refer to Meshtastic.
Radio Configuration
There are several config sections in the Meshtastic firmware, these are broken out so they can be sent as small admin messages over the mesh.
| Name | Description |
|---|---|
| Bluetooth | Bluetooth config options are: Enabled, Pairing Mode and Fixed PIN. |
| Channels | Channels config options are: Index, Role and Settings. |
| Device | Device config options are: Device Role, Serial Output, Debug Log and Factory Reset. |
| Display | Display config options are: Screen On Duration, Auto Carousel Interval, Always Point North, and GPS Format. |
| LoRa | The LoRa config options are: Region, Modem Preset, Max Hops, Transmit Power, Bandwidth, Spread Factor, Coding Rate, Frequency Offset, Transmit Disabled and Ignore Incoming Array. |
| Network | Network config options are: WiFi Enabled, WiFi SSID, WiFi PSK, WiFi Mode and NTP Server. |
| Position | Position config options are: GPS Enabled, GPS Update Interval, GPS Attempt Time, Fixed Position, Smart Broadcast, Broadcast Interval and Position Packet Flags. |
| Power | Power config options are: Charge Current, Power Saving, Shutdown after losing power, ADC Multiplier Override Wait Bluetooth Interval, Light Sleep Interval and Minimum Wake Interval. |
| User | User config options are: Long Name, Short Name, and Is Licensed. |
Module Configuration
Modules are included in the firmware and allow users to extend the functionality of their mesh or device.
| Name | Description |
|---|---|
| Ambient Lighting | Adjust the brightness of NCP5623 I2C RGB LEDs. |
| Audio | Enable Support for Codec2 Voice Comms on certain devices. |
| Canned Message | Set a number of predefined messages to send out directly from the device with the use of an input device like a rotary encoder. |
| Detection Sensor | Configure a GPIO pin to be monitored for specified high/low status and send text alerts. |
| External Notification | Incoming messages are able to alert you using circuits you attach to the device (LEDs, Buzzers, etc). |
| MQTT | Forward packets along to an MQTT server. This allows users on the local mesh to communicate with users on another mesh over the internet. |
| Neighbor Info | Send info on 0-hop neighbors to the mesh. |
| Paxcounter | Count the number of BLE and Wifi devices passing by a node. |
| Range Test | Send messages with GPS location at an interval to test the distance your devices can communicate. Requires (at least) one device set up as a sender and one as a receiver. The receiver(s) will log all incoming messages to a CSV. |
| Remote Hardware | Set and read a GPIO status remotely over the mesh. |
| Serial Module | Send messages across the mesh by sending strings over a serial port. |
| Store & Forward | Stores messages on a device for delivery after disconnected clients rejoin the mesh. |
| Telemetry | Attach sensors to the device and transmit readings on a regular interval to the mesh. |
| Traceroute | Track which nodes are used to hop a message to a certain destination. |
Tech Support & Product Discussion
Thank you for choosing our products! We are here to provide you with different support to ensure that your experience with our products is as smooth as possible. We offer several communication channels to cater to different preferences and needs.