Deploying Espectre on Seeed Studio XIAO ESP32 Series with ESPHome

ESPectre is a motion detection system based on Wi-Fi spectre analysis (CSI), with native Home Assistant integration via ESPHome. When someone moves in a room, they "disturb" the Wi-Fi waves traveling between the router and the sensor. It's like when you move your hand in front of a flashlight and see the shadow change. The XIAO ESP32 board "listens" to these changes and understands if there's movement.
Feature
- Wi-Fi-based motion detection: Detects human movement using Wi-Fi signals only — no cameras, no microphones, ensuring full privacy
- Minimal hardware, fast setup: Requires just a XIAO ESP32 board and can be set up in 10–15 minutes, with a total cost of around $7
- Completely non-intrusive: No wearables or physical sensors needed — users don’t have to carry or wear anything
- Works through walls: Wi-Fi signals penetrate walls, enabling reliable motion detection across rooms
What You Need
Hardware
- 2.4GHz Wi-Fi Router - the one you already have at home works fine
- ESP32 with CSI support - XIAO ESP32-C3 / XIAO ESP32-C6 / XIAO ESP32-S3, XIAO ESP32-C5 supported experimentally.
Software (All Free)
- Python 3.12 (⚠️ Python 3.14 has known issues with ESPHome)
- ESPHome (integrated in Home Assistant or standalone)
- Home Assistant (on Raspberry Pi, PC, NAS, or cloud.It is recommended, but optional)
Quick Start
1. Install ESPHome
# Create virtual environment (recommended)
python3 -m venv venv
source venv/bin/activate  # On macOS/Linux
# venv\Scripts\activate   # On Windows

# Install ESPHome
pip install esphome
The reason we recommend downloading and running ESPHome on a computer terminal, rather than directly within Home Assistant, is that the binary files generated by PlatformIO (PIO) are quite large. The Home Assistant environment is unable to handle such large temporary and system files reliably, which can ultimately cause the build or deployment process to fail.
For example, during our testing we observed the following message:
We found 1.63GB of unnecessary PlatformIO system data (temporary files, unnecessary packages, etc.). Use pio system prune --dry-run to list them or pio system prune to save disk space.
2. Download a configuration file
Download the example configuration for your hardware:
| Platform | Configuration File | CPU | WiFi | PSRAM | Status |
|---|---|---|---|---|---|
| XIAO ESP32-C6 | espectre-c6.yaml | RISC-V @ 160MHz | WiFi 6 | ❌ | ✅ Tested |
| XIAO ESP32-S3 | espectre-s3.yaml | Xtensa @ 240MHz | WiFi 4 | ✅ 8MB | ✅ Tested |
| XIAO ESP32-C3 | espectre-c3.yaml | RISC-V @ 160MHz | WiFi 4 | ❌ | ✅ Tested ² |
| XIAO ESP32-C5 | espectre-c5.yaml | RISC-V @ 240MHz | WiFi 6 | ❌ | ⚠️ Experimental ¹ |
Recommendations:
- XIAO ESP32-C6: Best for WiFi 6 environments, standard motion detection
- XIAO ESP32-S3: Best for advanced applications, future ML features (more memory)
- XIAO ESP32-C3: Budget-friendly option
These files are pre-configured to download the component automatically from GitHub.
⚠️ Experimental platforms: ESP32-S2 and ESP32-C5 have CSI support but have not been extensively tested.
ESP32-C5:
improv_serial(USB provisioning) not yet supported by ESPHome. Use BLE or WiFi AP provisioning instead.
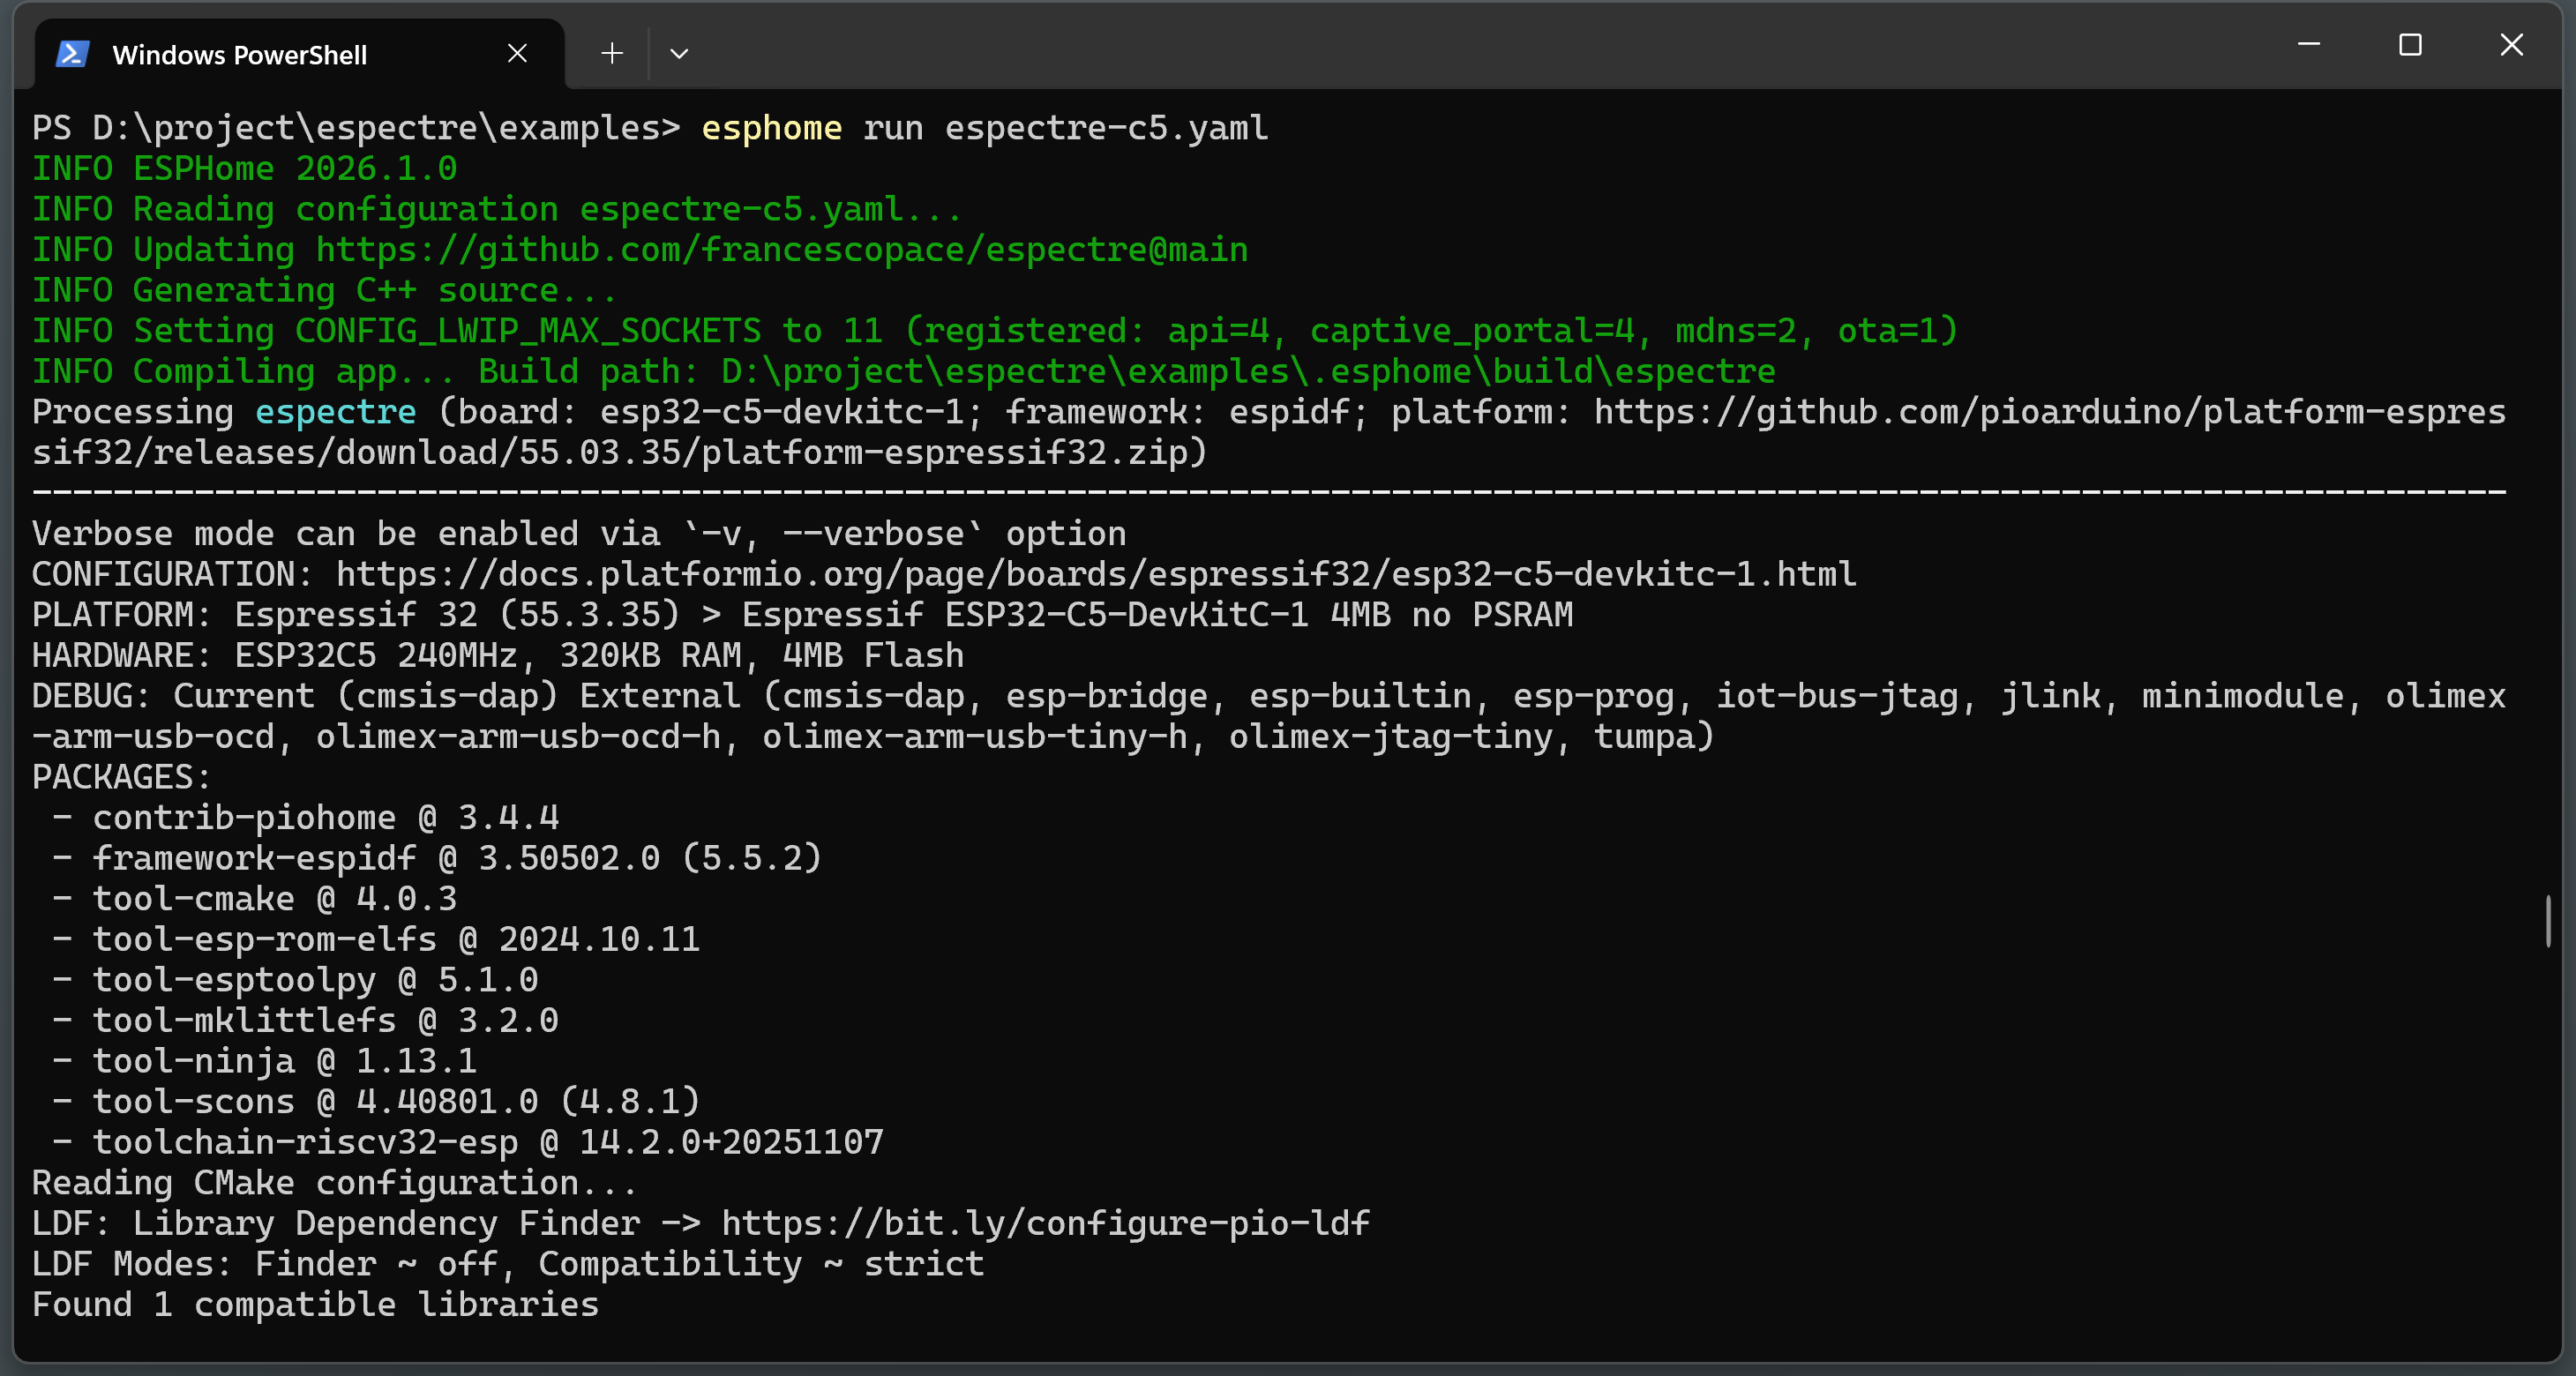
3. Build and flash
cd examples
esphome run espectre-c5.yaml  # or espectre-s3.yaml
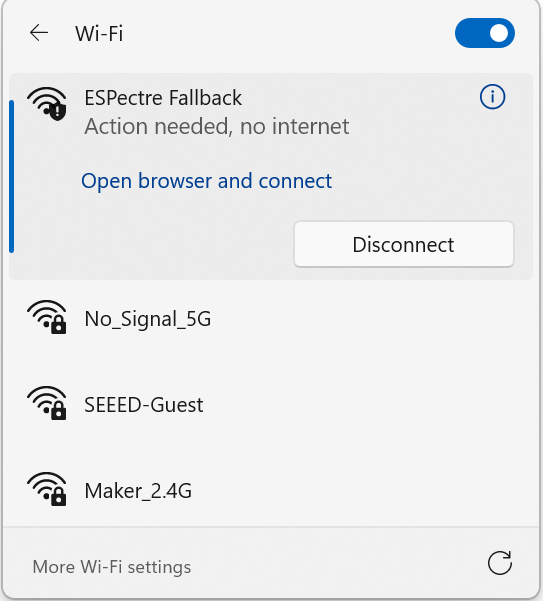
4. Configure WiFi
After flashing, configure WiFi using one of these methods:
| Method | How |
|---|---|
| BLE (easiest) | Use ESPHome app or Home Assistant Companion app |
| USB | Go to web.esphome.io → Connect → Configure WiFi (XIAO ESP32-C5 not recommended) |
| Captive Portal | Connect to "ESPectre Fallback" WiFi → http://192.168.4.1 |
To integrate your XIAO ESP32 device into Home Assistant, you need to configure it to use the same local area network as Home Assistant.
That's it! The device will be automatically discovered by Home Assistant.
5. Place the Sensor
Optimal sensor placement is crucial for reliable movement detection. Recommended Distance from Router, optimal range: 3-8 meters
| Distance | Signal | Multipath | Sensitivity | Noise | Recommendation |
|---|---|---|---|---|---|
| < 2m | Too strong | Minimal | Low | Low | ❌ Too close |
| 3-8m | Strong | Good | High | Low | ✅ Optimal |
| > 10-15m | Weak | Variable | Low | High | ❌ Too far |
Placement Tips
Do:
- Position sensor in the area to monitor (not necessarily in direct line with router)
- Height: 1-1.5 meters from ground (desk/table height)
- External antenna: Use IPEX connector for better reception
Don't:
- Avoid metal obstacles between router and sensor (refrigerators, metal cabinets)
- Avoid corners or enclosed spaces (reduces multipath diversity)
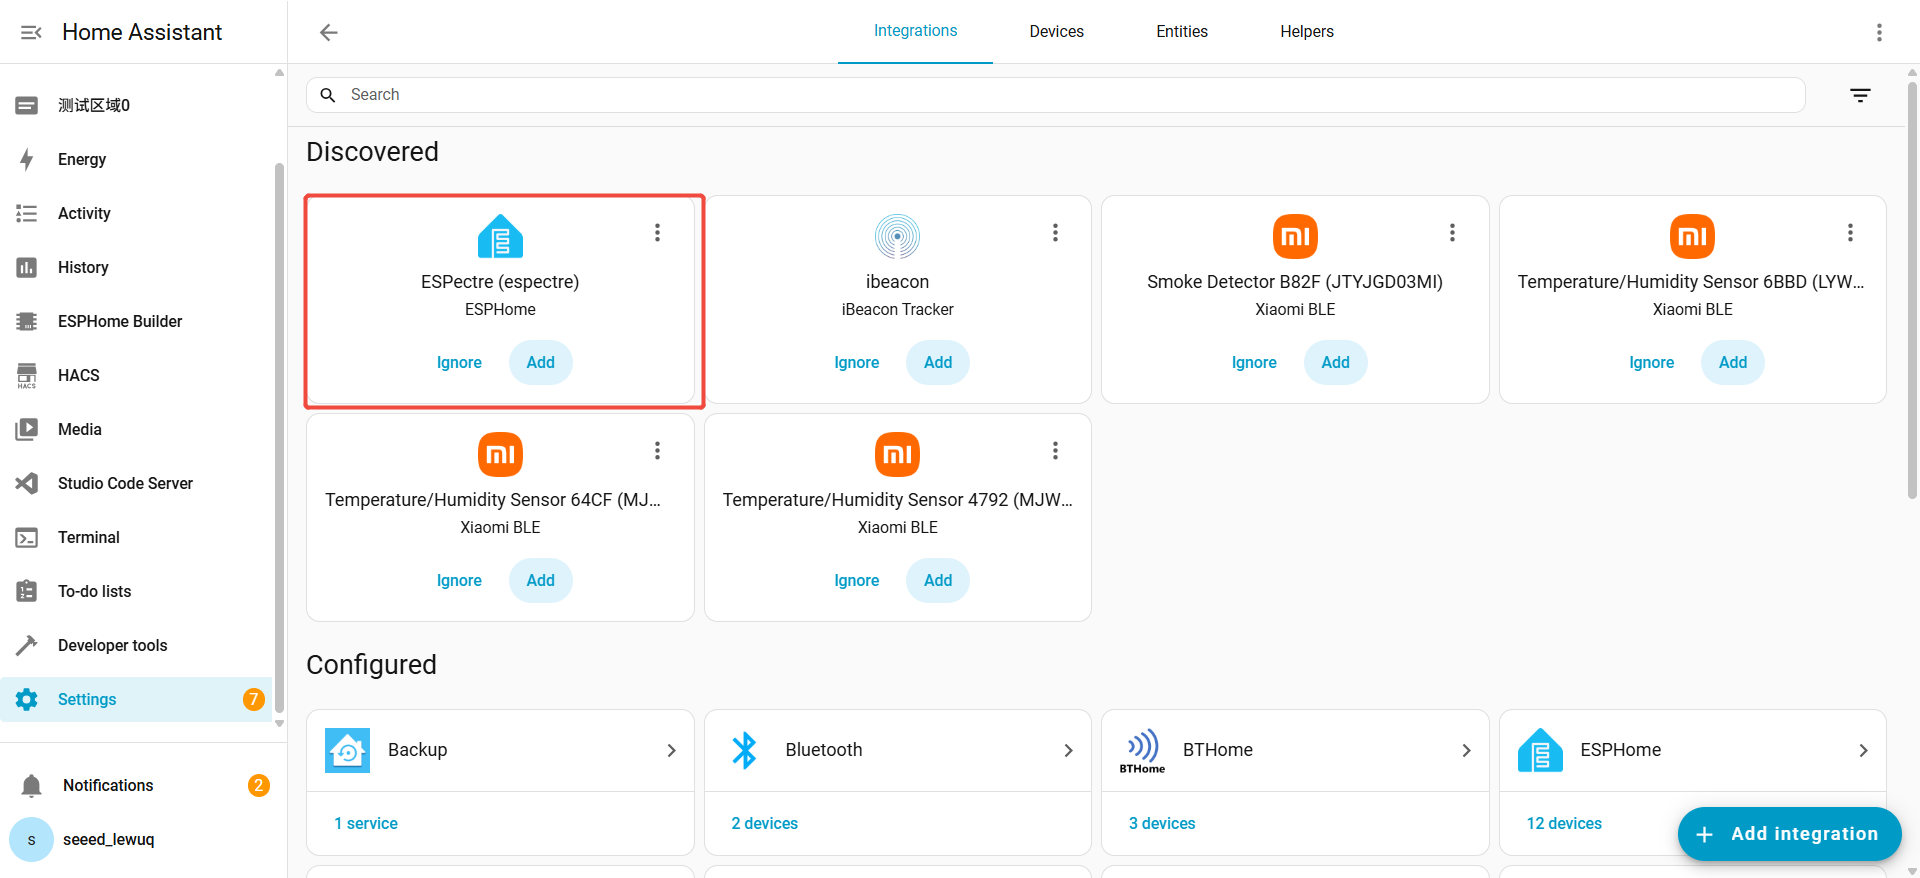
6. Home Assistant Integration
ESPHome provides automatic Home Assistant integration. Once the device is flashed and connected to WiFi:
- Home Assistant will automatically discover the device
- Go to Settings → Devices & Services → ESPHome
- Click Configure on the discovered device
- All sensors will be automatically added

-
Please calibrate the device before use. Simply press the
Calibratebutton; the button status will automatically reset once calibration is complete. Note: The room must be unoccupied during calibration. -
If you find that Home Assistant can detect the Espectre device but fails to add it successfully, simply try lowering the
traffic_generator_rate.
When collecting CSI data, the CPU operates under a high interrupt load (100 times per second or more). As a result, resource contention occurs between the CSI data collection process and the Home Assistant communication tasks, either at the hardware level or due to limited network bandwidth.
- For further automation examples, dashboard examples, and more setup detials, please refer to SETUP.md.
7. Configuration Parameters
If you find the accuracy unsatisfactory, you can fine-tune it manually by adjusting the parameters in the YAML file under the espectre: section. After adjustments, rebuild and upload the file.
| Parameter | Type | Default | Description |
|---|---|---|---|
traffic_generator_rate | int | 100 | Packets/sec for CSI generation (0=disabled, use external traffic) |
traffic_generator_mode | string | dns | Traffic generator mode: dns (UDP queries) or ping (ICMP) |
publish_interval | int | auto | Packets between sensor updates (default: same as traffic_generator_rate, or 100 if traffic is 0) |
segmentation_threshold | float | 1.0 | Motion sensitivity (lower=more sensitive) |
segmentation_window_size | int | 50 | Moving variance window in packets |
selected_subcarriers | list | auto | Fixed subcarriers (omit for auto-calibration) |
lowpass_enabled | bool | false | Enable low-pass filter for noise reduction |
lowpass_cutoff | float | 11.0 | Low-pass filter cutoff frequency in Hz (5-20) |
hampel_enabled | bool | false | Enable Hampel outlier filter |
hampel_window | int | 7 | Hampel filter window size |
hampel_threshold | float | 4.0 | Hampel filter sensitivity (MAD multiplier) |
gain_lock | string | auto | AGC/FFT gain lock: auto, enabled, disabled |
For detailed parameter tuning (ranges, recommended values, troubleshooting), see TUNING.md.
System Architecture
Processing Pipeline
ESPectre uses a focused processing pipeline for motion detection:
┌─────────────┐
│  CSI Data   │  Raw Wi-Fi Channel State Information
└──────┬──────┘
       │
       ▼
┌─────────────┐
│  Gain Lock  │  AGC/FFT stabilization (~3 seconds)
│             │  Locks hardware gain for stable measurements
└──────┬──────┘
       │
       ▼
┌─────────────┐
│    Auto     │  Automatic subcarrier selection (once at boot)
│ Calibration │  Selects optimal 12 subcarriers via NBVI
└──────┬──────┘
       │
       ▼
┌─────────────┐
│Normalization│  Attenuate if baseline > 0.25 (always enabled)
│             │  Prevents extreme motion values
└──────┬──────┘
       │
       ▼
┌─────────────┐
│   Hampel    │  Turbulence outlier removal
│   Filter    │  (optional, disabled by default)
└──────┬──────┘
       │
       ▼
┌─────────────┐
│  Low-pass   │  Noise reduction (smoothing)
│   Filter    │  (optional, disabled by default)
└──────┬──────┘
       │
       ▼
┌─────────────┐
│Segmentation │  MVS algorithm
│    (MVS)    │  IDLE ↔ MOTION
└──────┬──────┘
       │
       ▼
┌─────────────┐
│ Home        │  Native ESPHome integration
│ Assistant   │  Binary sensor + Movement/Threshold
└─────────────┘
Single or Multiple Sensors
┌─────────┐  ┌─────────┐  ┌─────────┐
│ ESP32   │  │ ESP32   │  │ ESP32   │
│ Room 1  │  │ Room 2  │  │ Room 3  │
└────┬────┘  └────┬────┘  └────┬────┘
     │            │            │
     └────────────┴────────────┘
                  │
                  │ ESPHome Native API
                  ▼
         ┌────────────────────┐
         │   Home Assistant   │
         │   (Auto-discovery) │
         └────────────────────┘
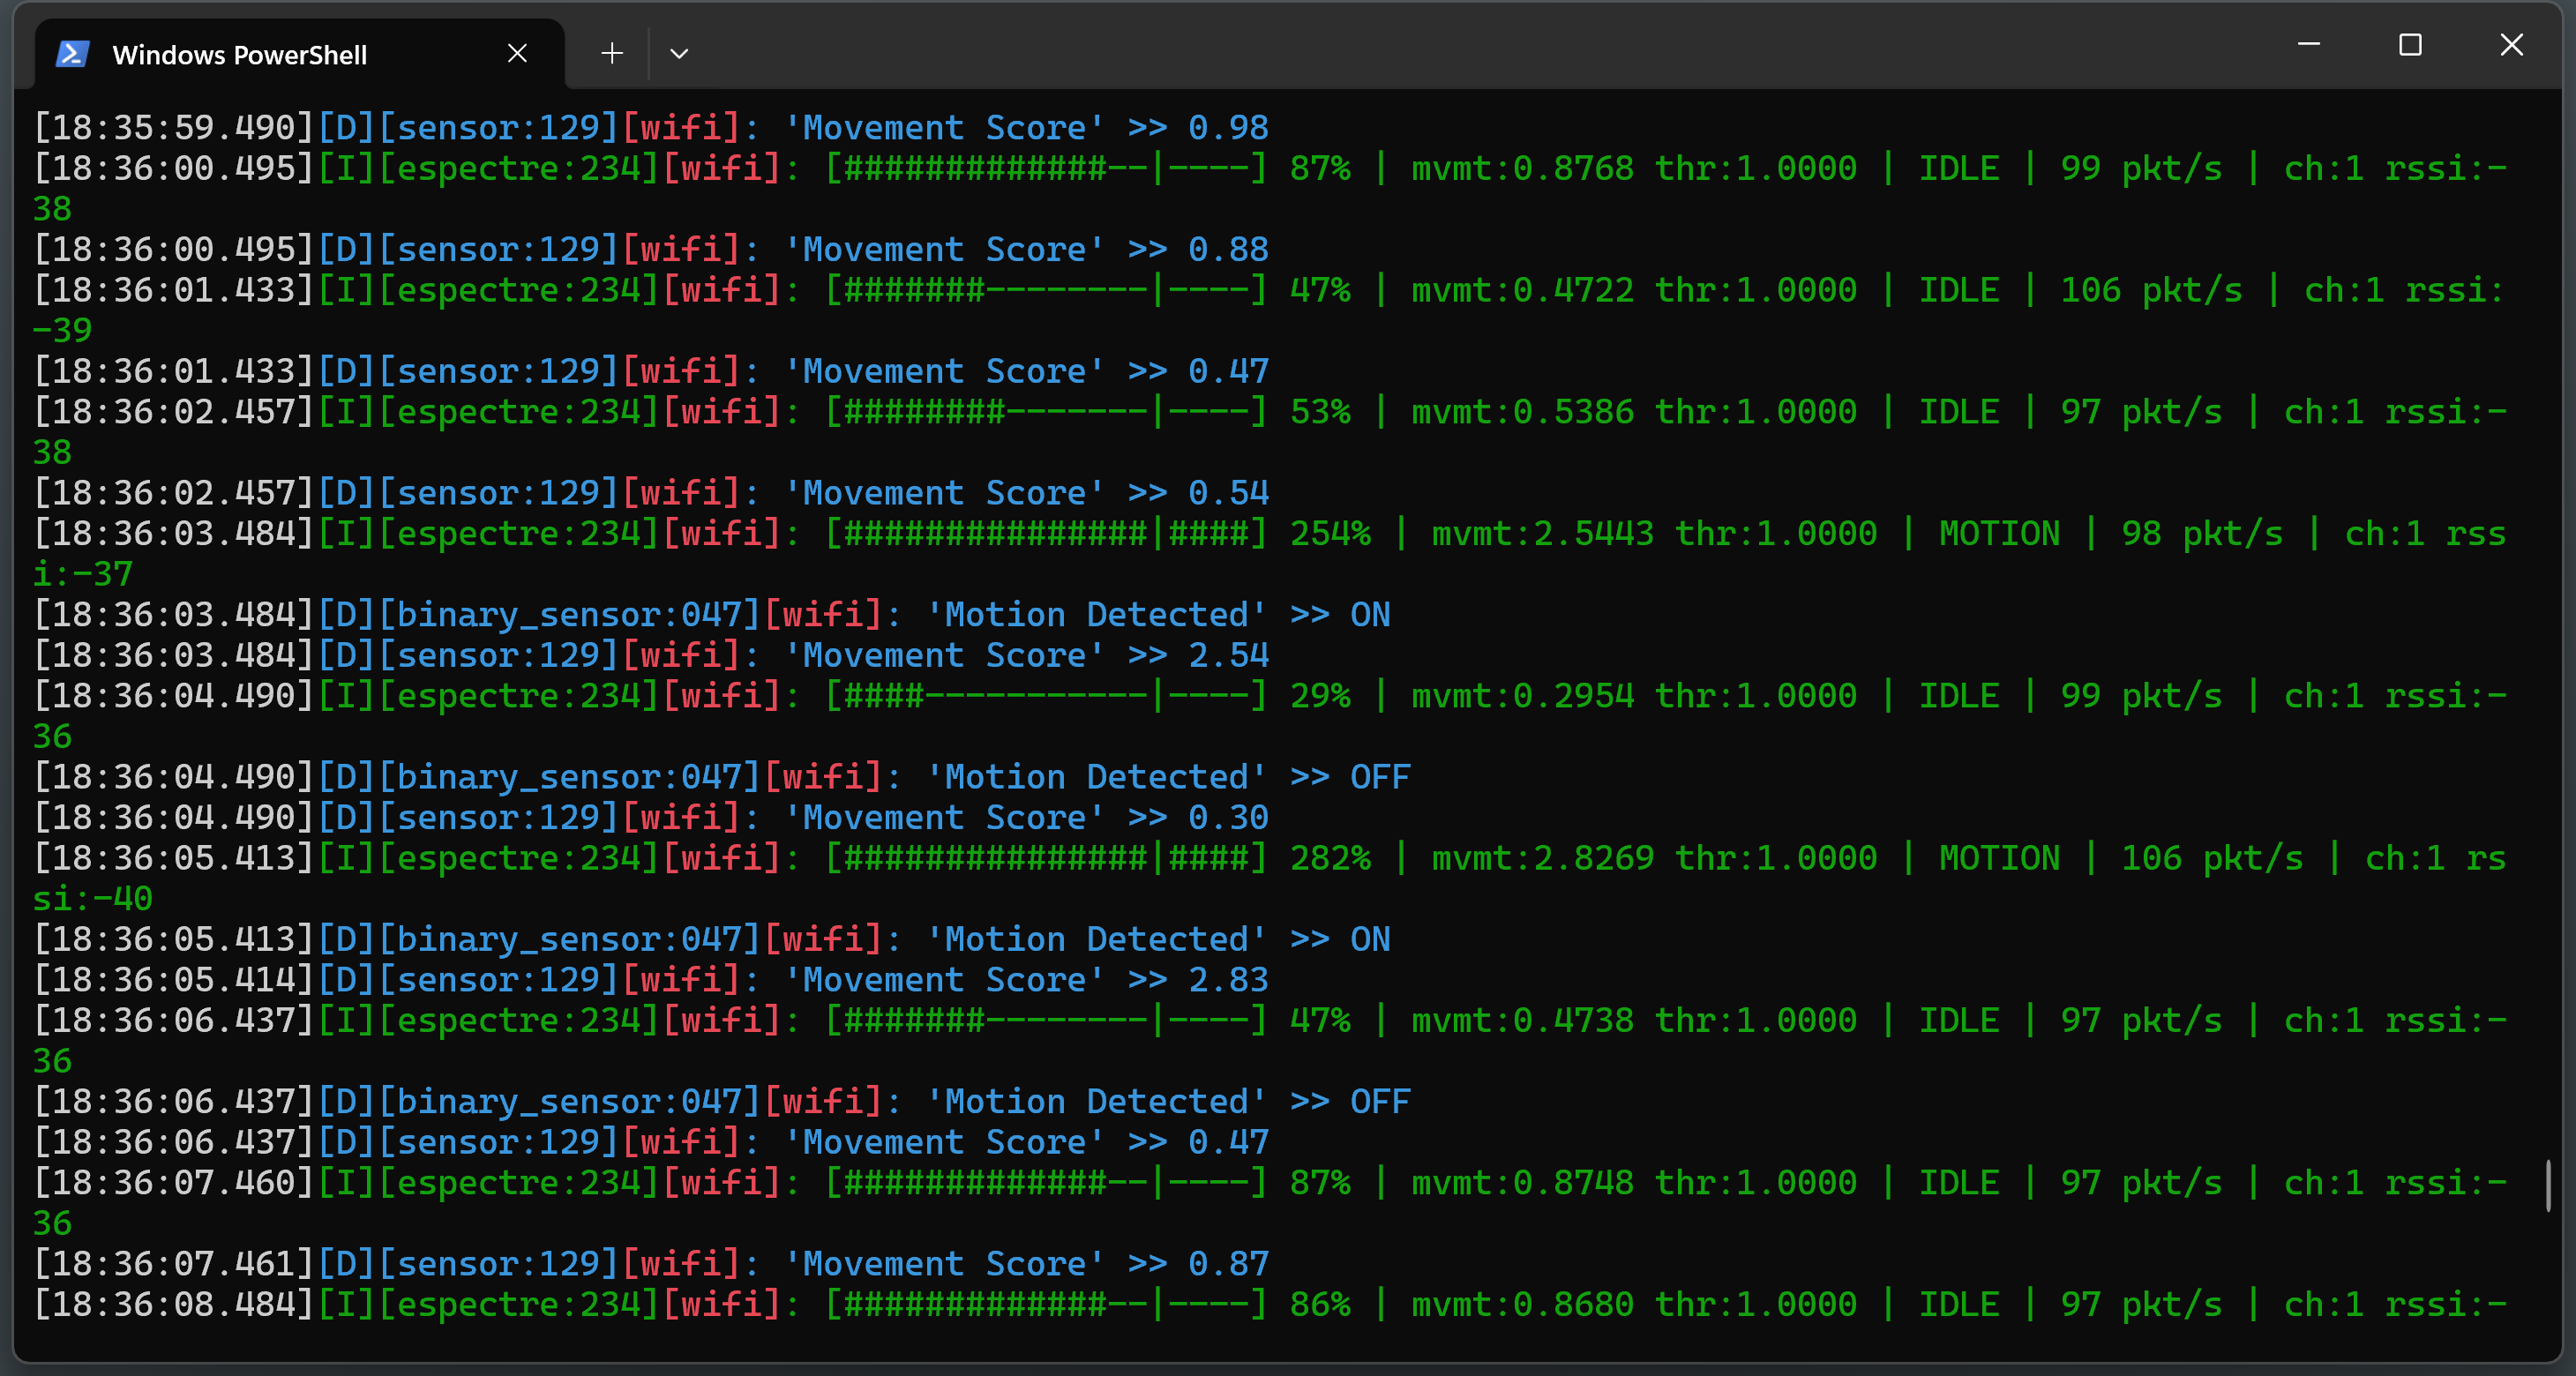
Each sensor is automatically discovered by Home Assistant with:
- Binary sensor for motion detection
- Movement score sensor
- Adjustable threshold (number entity)
Automatic Subcarrier Selection
ESPectre implements the NBVI (Normalized Baseline Variability Index) algorithm for automatic subcarrier selection, achieving near-optimal performance (F1=98.2%) with zero manual configuration.
⚠️ IMPORTANT: Keep the room quiet and still for 10 seconds after device boot. The auto-calibration runs during this time and movement will affect detection accuracy.
For NBVI algorithm details, see ALGORITHMS.md.
What You Can Do With It
- Home security: Get an alert if someone enters while you're away
- Elderly care: Monitor activity to detect falls or prolonged inactivity
- Smart automation: Turn on lights/heating only when someone is present
- Energy saving: Automatically turn off devices in empty rooms
- Child monitoring: Alert if they leave the room during the night
- Climate control: Heat/cool only occupied zones
Technical Deep Dive
For algorithm details (MVS, NBVI, Hampel filter), see ALGORITHMS.md.
For performance metrics (confusion matrix, F1-score, benchmarks), see PERFORMANCE.md.
Tech Support & Product Discussion
Thank you for choosing our products! We are here to provide you with different support to ensure that your experience with our products is as smooth as possible. We offer several communication channels to cater to different preferences and needs.