Deploying ESPresense on Seeed Studio XIAO ESP32-C3 with Home Assistant
This document describes how to integrate the open-source Bluetooth presence detection system, ESPresense, with the Seeed Studio XIAO ESP32-C3. The presence detection node based on the XIAO ESP32-C3 can work with the MQTT Room component of Home Assistant to enable indoor positioning.
Project Overview
ESPresense is an open-source Bluetooth Low Energy (BLE) presence detection system designed to work with Home Assistant using MQTT.
In this migration:
1. Added XIAO ESP32-C3 Build Environment
The .ini configuration has been updated to add a dedicated build environment for Seeed Studio XIAO ESP32-C3.
[env:seeed_xiao_esp32c3]
extends = esp32c3-cdc            ; XIAO ESP32-C3 uses native USB CDC
board = seeed_xiao_esp32c3
board_build.filesystem = spiffs
lib_deps =
  ${esp32c3.lib_deps}
  ${sensors.lib_deps}
build_flags =
  -D CORE_DEBUG_LEVEL=1
  -D FIRMWARE='"xiao-esp32c3"'   ; Firmware identifier
  -D SENSORS
  ${esp32c3-cdc.build_flags}
2. Improved Reporting Responsiveness
To make data reporting more responsive, several parameters in defaults.h were tuned as follows:
A. Increased Movement Sensitivity
The distance threshold that triggers an early report has been reduced from 0.5 m to 0.1 m. Even small movements will now activate the “early reporting” logic.
#define DEFAULT_SKIP_DISTANCE 0.1 // changed from 0.5
B. Shortened Forced Reporting Interval
The maximum reporting interval has been reduced from 5 seconds to 1–2 seconds, ensuring more timely data updates even when movement is minimal.
#define DEFAULT_SKIP_MS 1000 // changed from 5000, now is 1 second
C. Improved Wi-Fi and BLE Coexistence (2.4 GHz)
When using 2.4 GHz Wi-Fi (non-C5 chips), Bluetooth scanning is adjusted to avoid monopolizing the shared antenna. The BLE scan window is set slightly smaller than the scan interval, allowing Wi-Fi sufficient airtime for MQTT connections and data transmission.
#define BLE_SCAN_INTERVAL 0x80  // 128
#define BLE_SCAN_WINDOW   0x60  // reduced from 0x80 (~75% duty cycle)
This change helps reduce internal contention and minimizes latency caused by radio resource preemption.
Hardware Requirements
- Seeed Studio XIAO ESP32-C3
- USB-C cable (data capable)
- PC (Windows/macOS/Linux)
- Stable Wi-Fi network (2.4 GHz)
- Home Assistant instance
Software & Tools
| Tool | Purpose |
|---|---|
| PlatformIO | Build system & flashing tool |
| ESP-IDF toolchain (via ESPresense) | Firmware build |
| Web browser | Device configuration |
| Home Assistant | Presence integration |
| Mosquitto Broker (HA Add-on) | MQTT backend |
| MQTT Explorer (optional) | MQTT debugging |
| nRF Connect (Android only) | BLE advertising |
1. Home Assistant – MQTT Broker Setup
Install Mosquitto Broker Add-on
-
Open Home Assistant
If you haven't set up Home Assistant yet, please refer to this guide for configuration.
-
Click Settings → Add-ons → Add-on Store
-
Search for Mosquitto broker, install it. After installation:
-
Click Start
-
Enable:
- ✔ Start on boot
- ✔ Watchdog
-
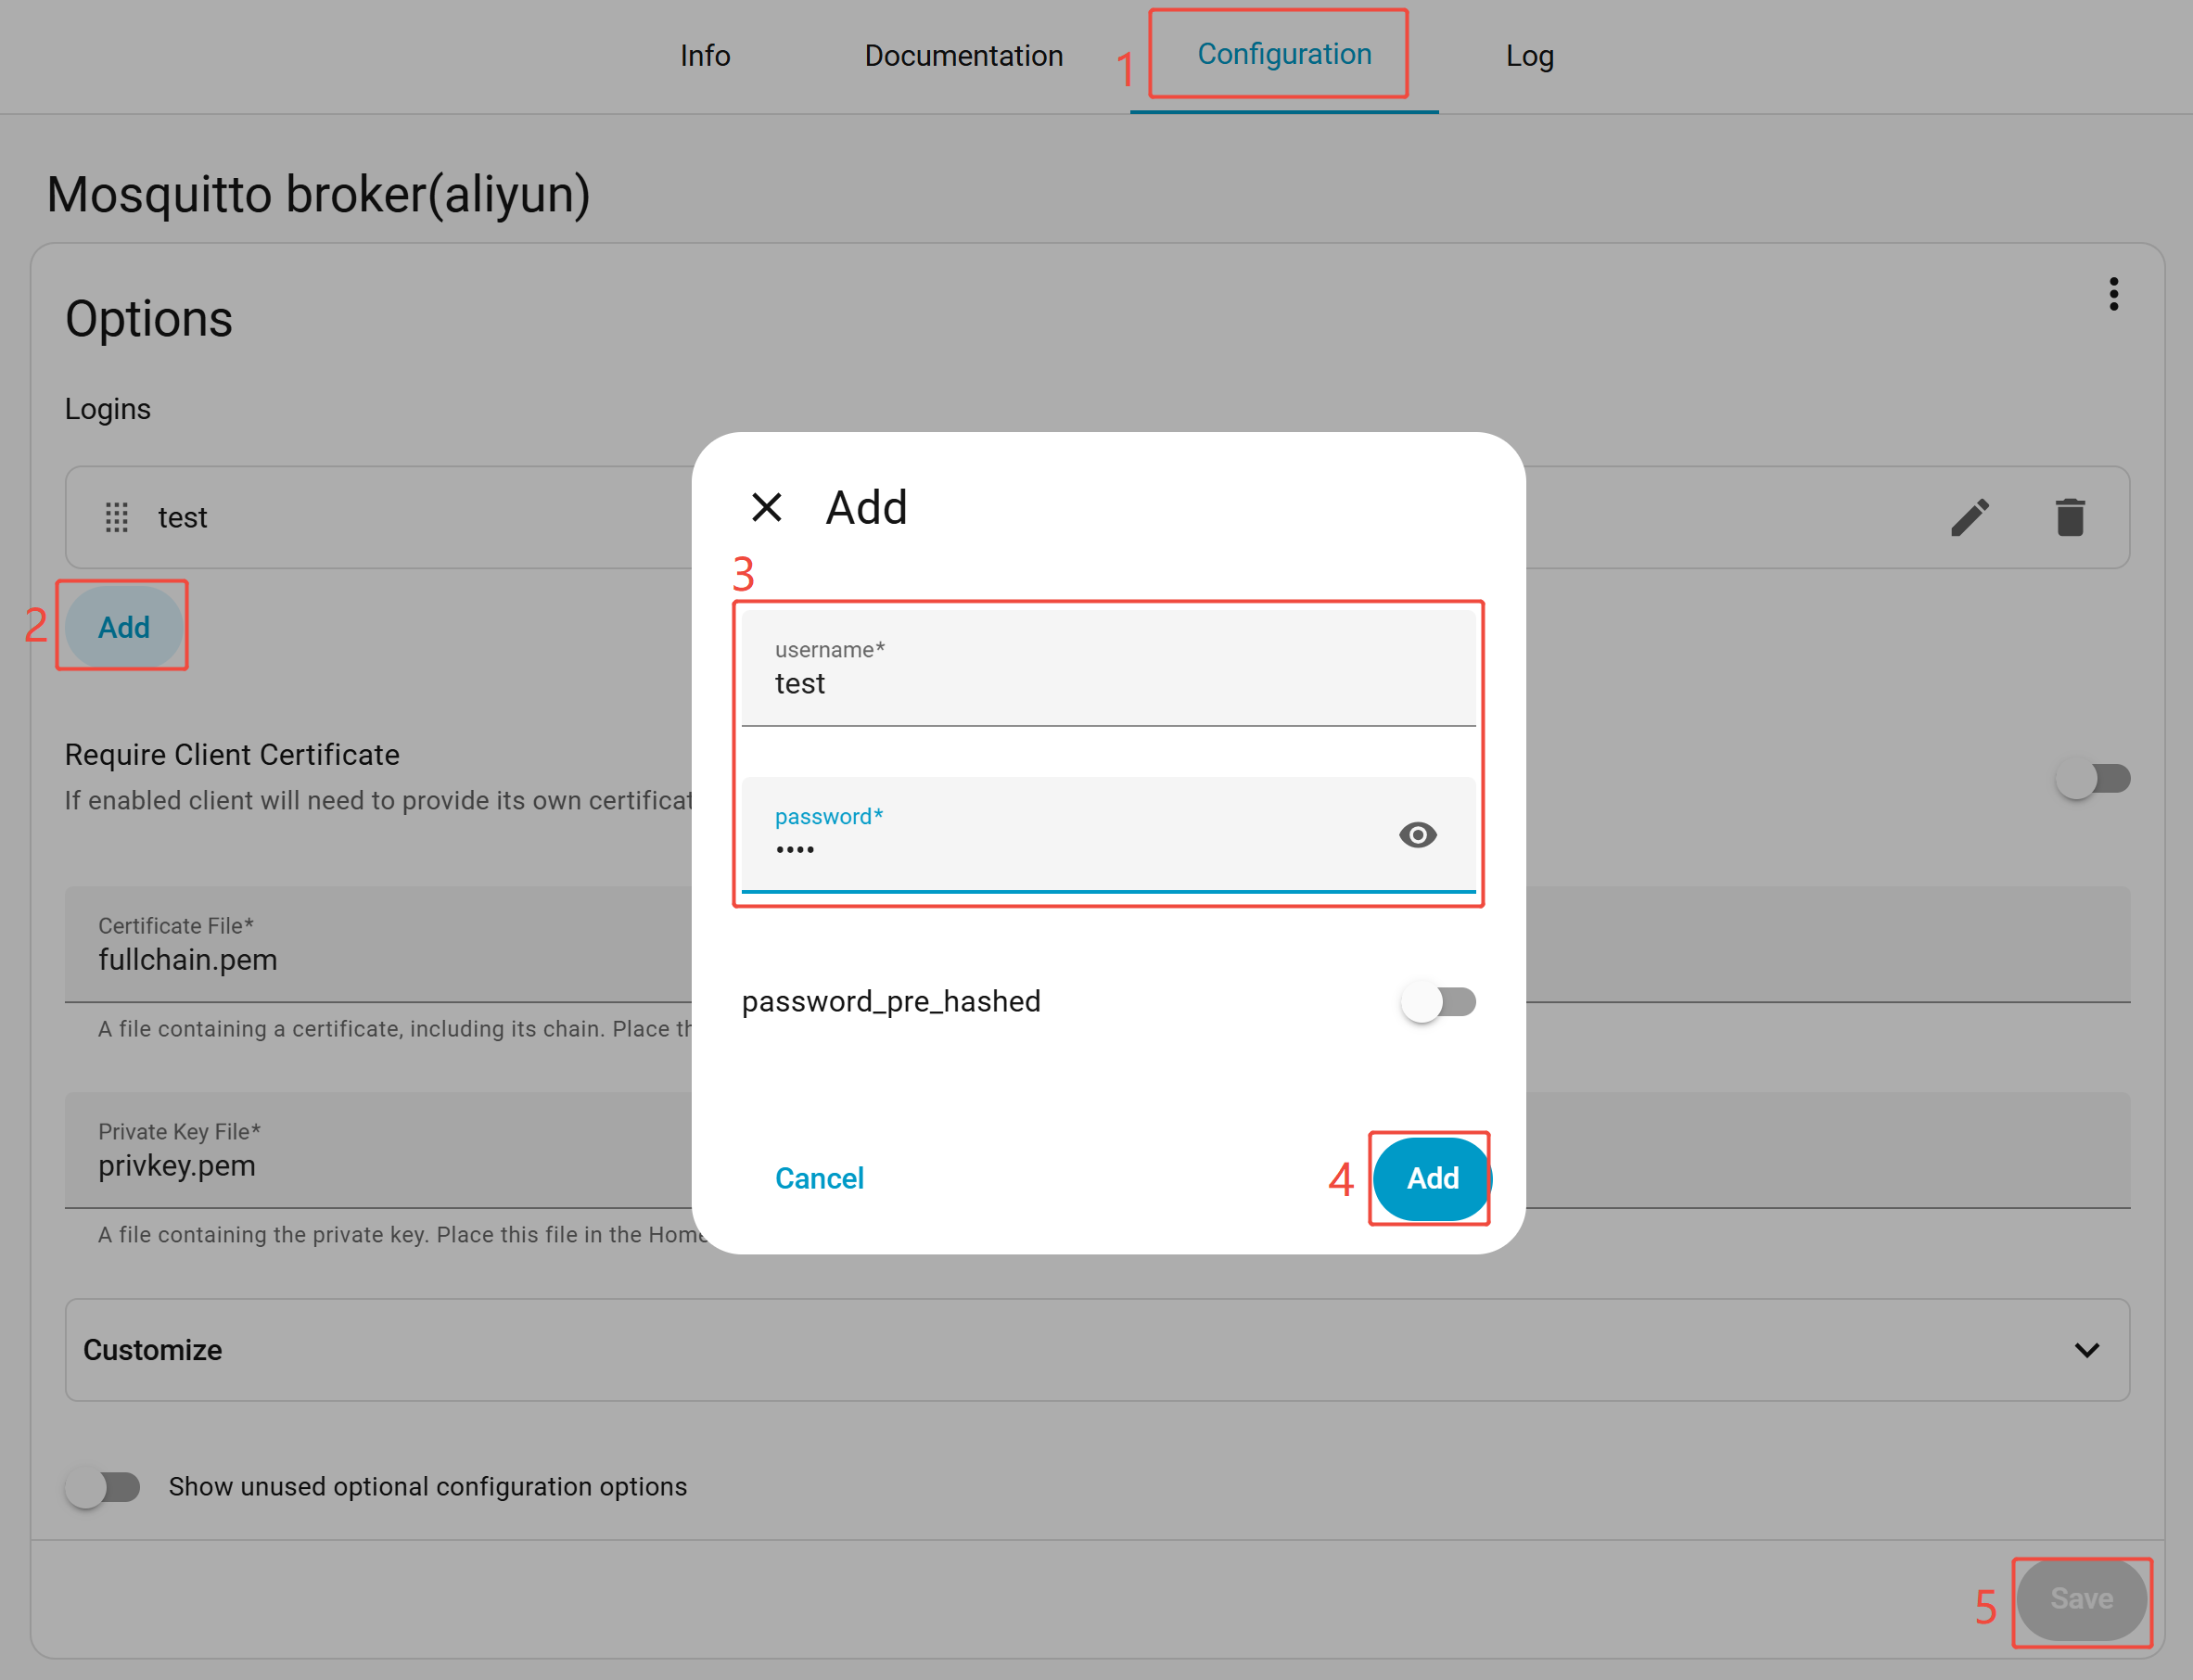
Create MQTT Credentials
-
Go to Configuration → Logins → Add
-
Create a dedicated MQTT user (recommended)
-
Note:
- Username
- Password
- Home Assistant IP address
2. Build & Flash ESPresense
-
Download the ESPresense code files, open the project using PlatformIO.
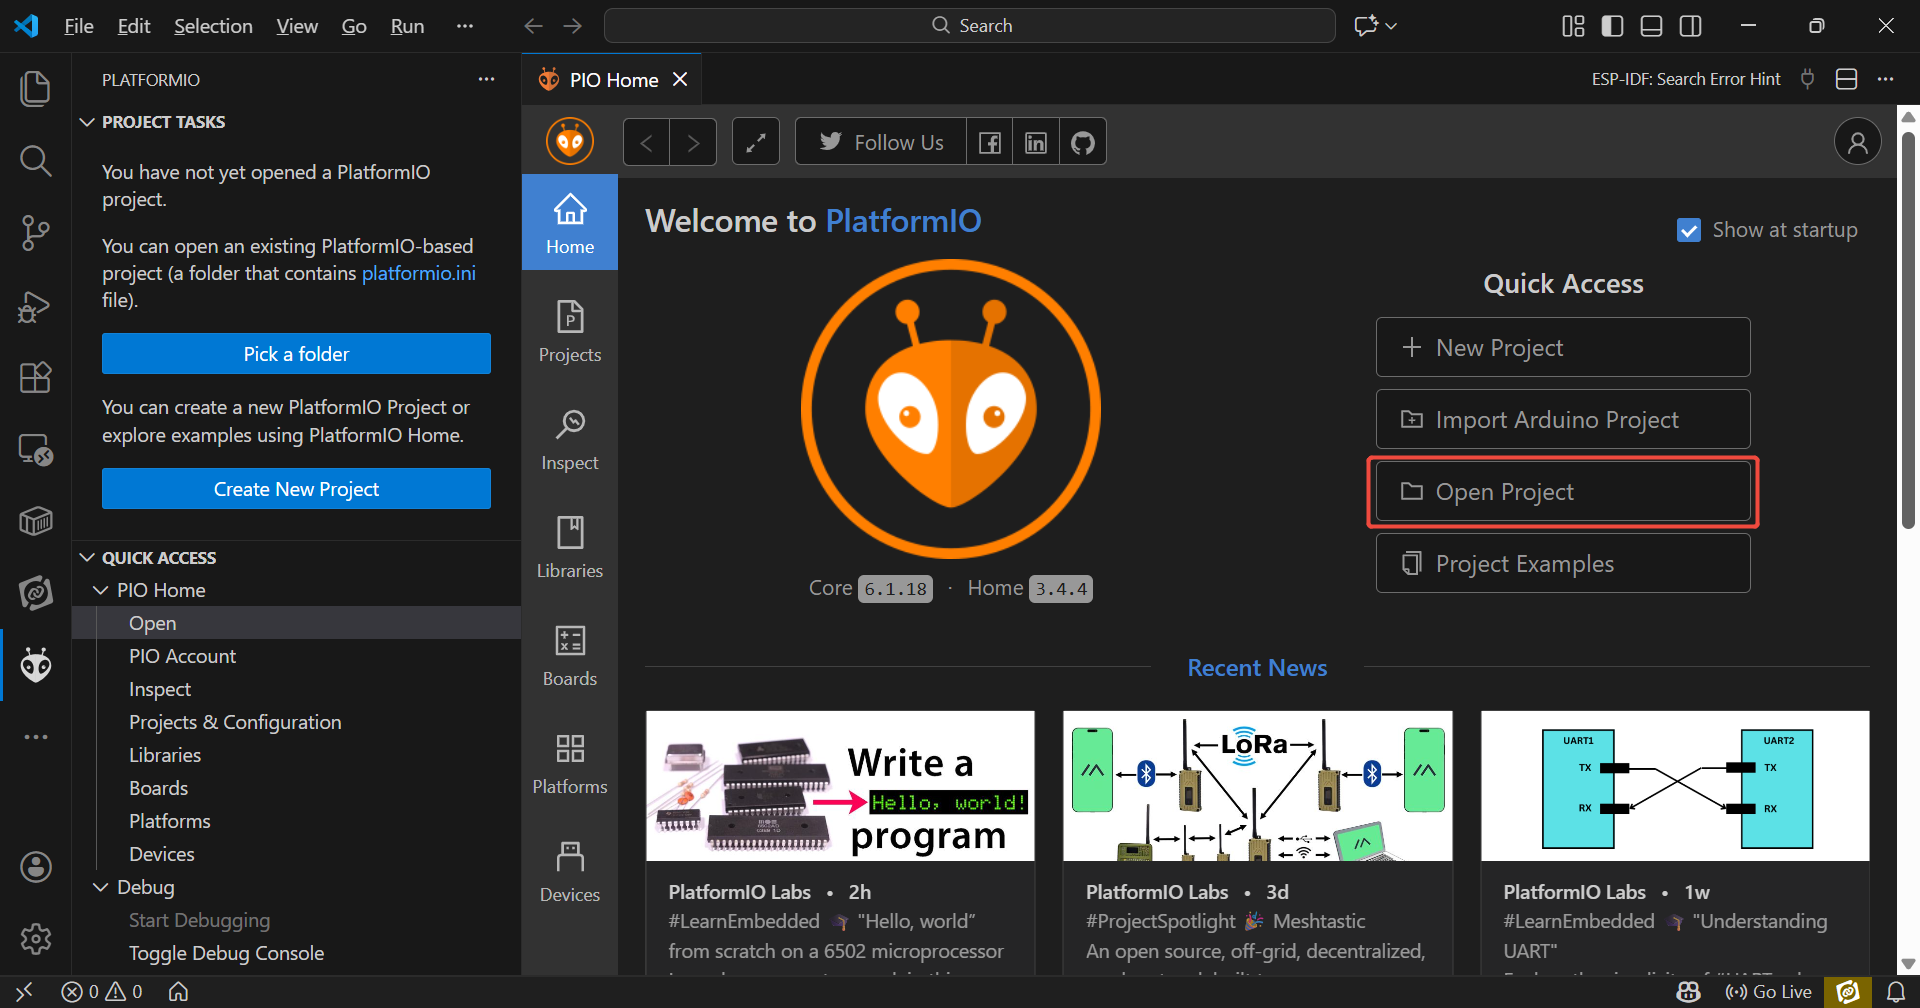
If you haven't set up Platform IO yet, please refer to this guide for download.
-
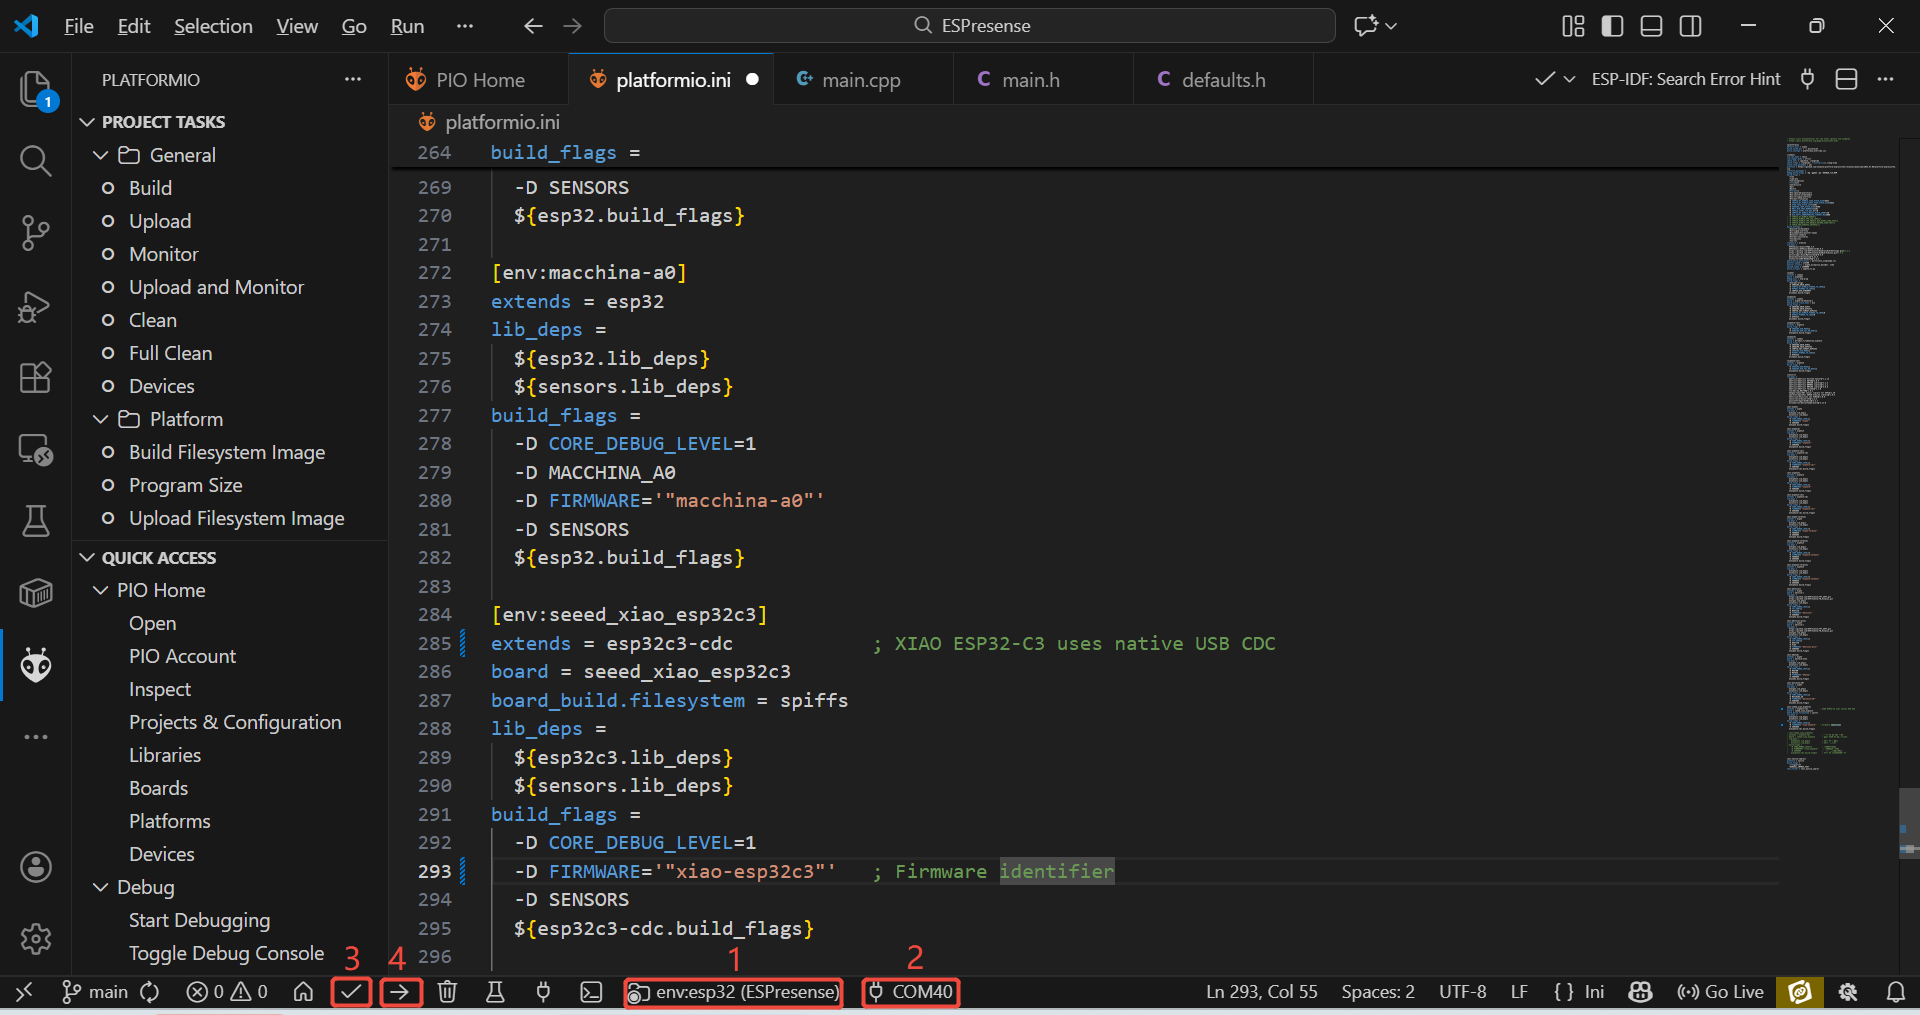
Wait for dependency installation and environment setup to complete. Select the seeed_xiao_esp32c3 environment, select the correct port, build and upload.
-
Wait for the firmware flashing to complete, press the Reset button to restart the XIAO ESP32-C3.
3. Wi-Fi & MQTT Configuration (Captive Portal)
-
Power the XIAO ESP32-C3
-
On your PC or phone, open Wi-Fi settings, connect to the ESPresense AP (e.g.
ESPresense-XXXX)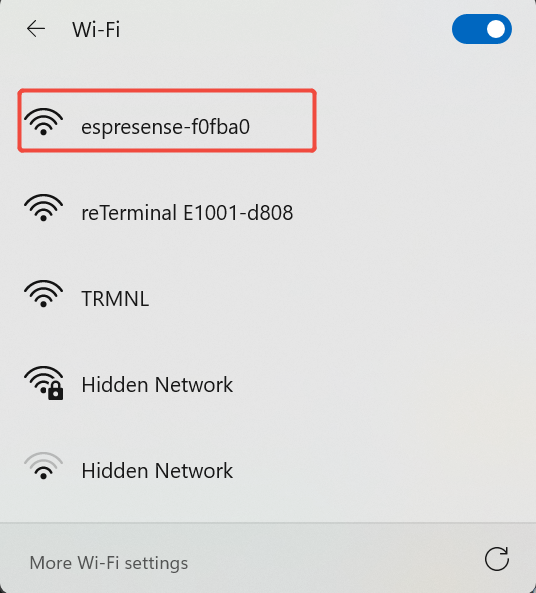
-
Open browser:
http://192.168.4.1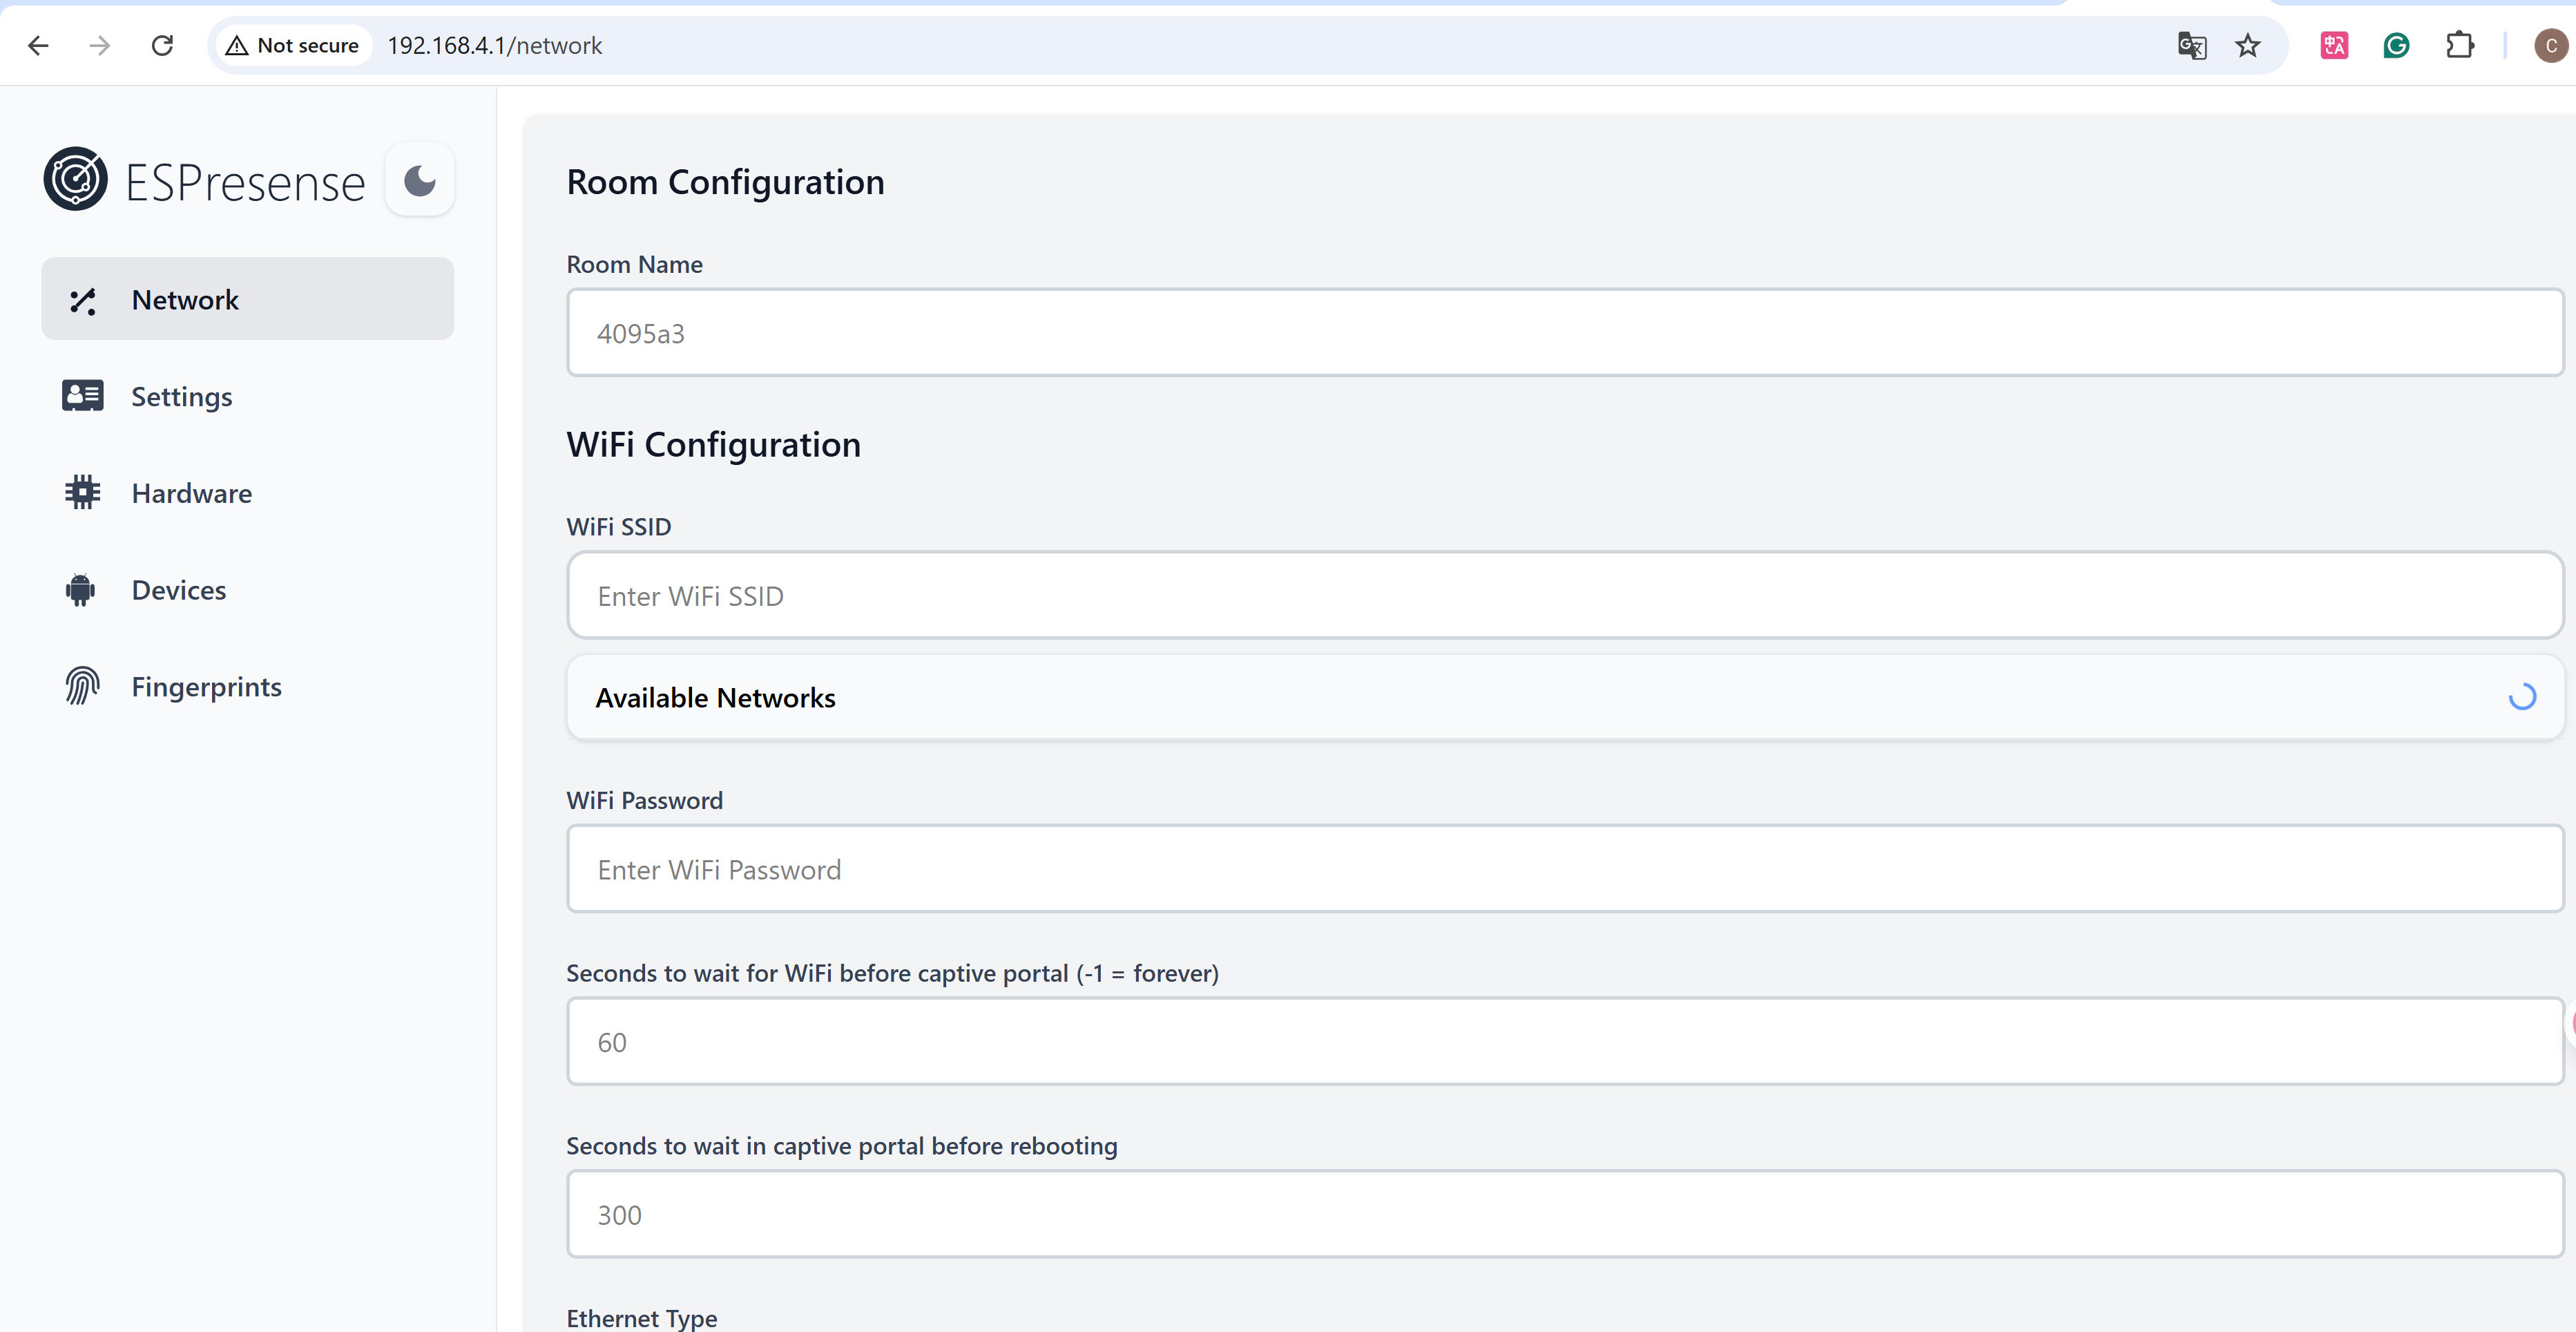
-
Fill in the following fields on the web page:
Field Description Room Name Logical room identifier (e.g. room1)Wi-Fi SSID 2.4 GHz network Wi-Fi Password Network password MQTT Broker IP Home Assistant IP MQTT Port 1883(default)MQTT Username From Mosquitto setup MQTT Password From Mosquitto setup -
Click Save
-
After saving, restart the XIAO ESP32-C3. The device will automatically connect to WiFi and MQTT.
Recommendation: Deploy at least two XIAO ESP32-C3 nodes in different rooms for meaningful presence comparison.
-
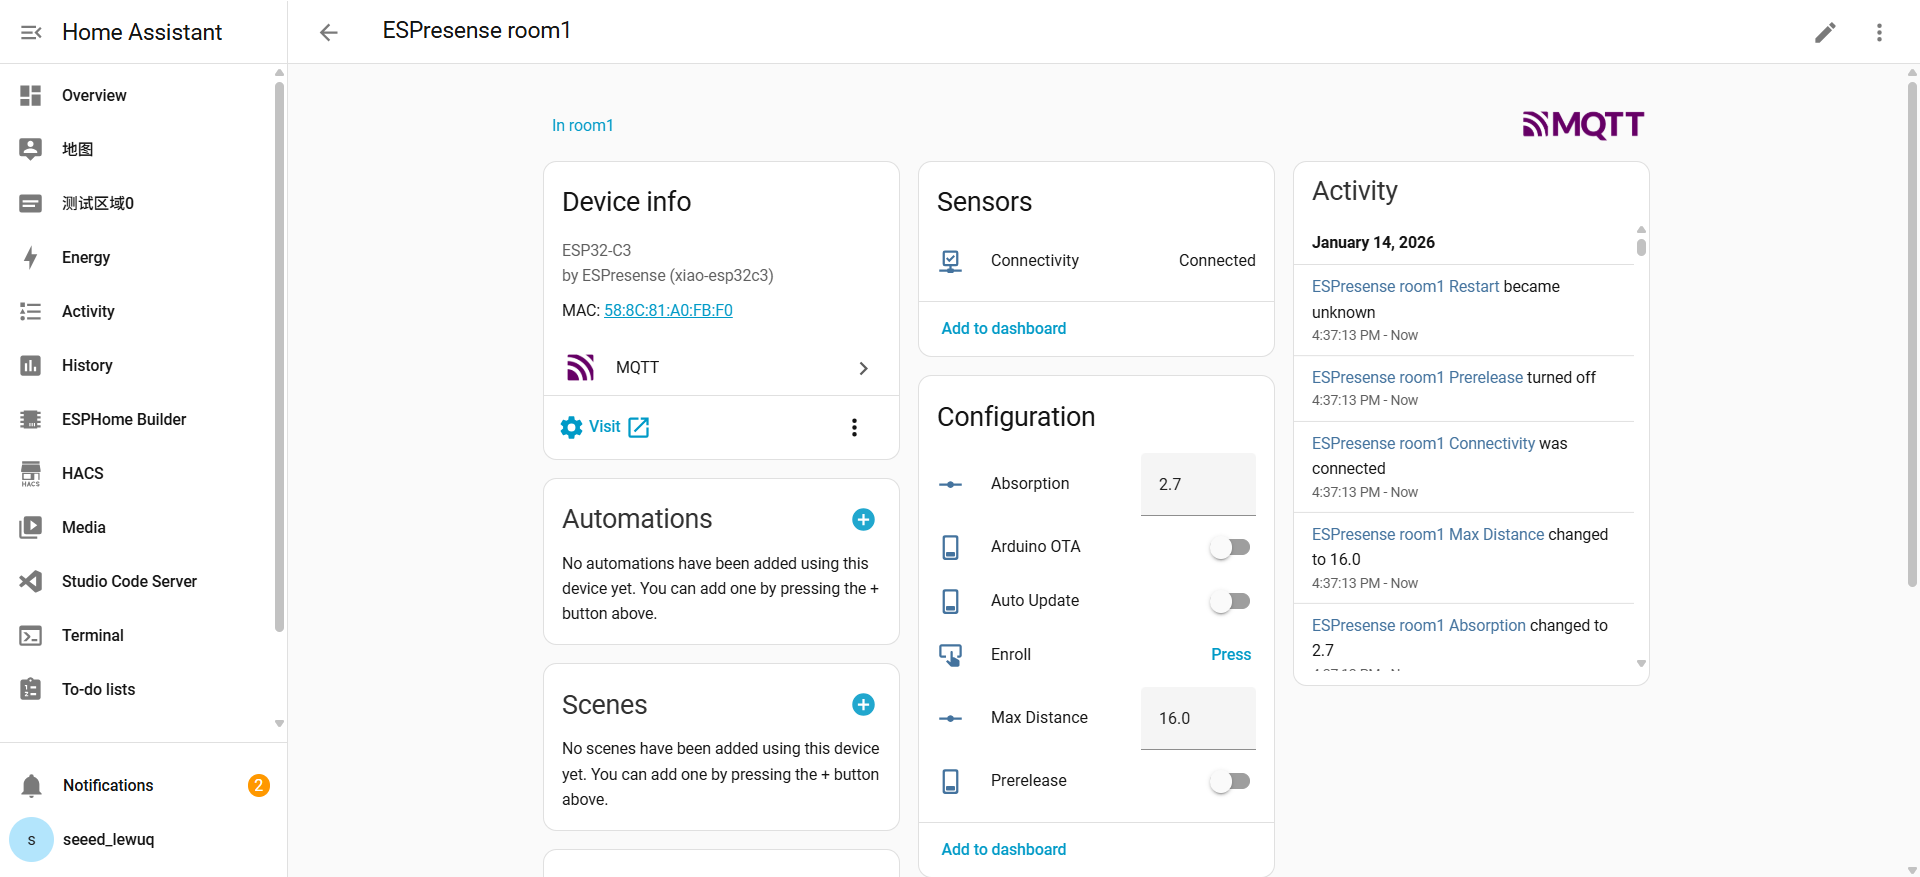
Now, open Home Assistant, navigate to Settings → Devices & Services
-
ESPresense nodes will appear automatically, device name format:
ESPresense + <Room Name>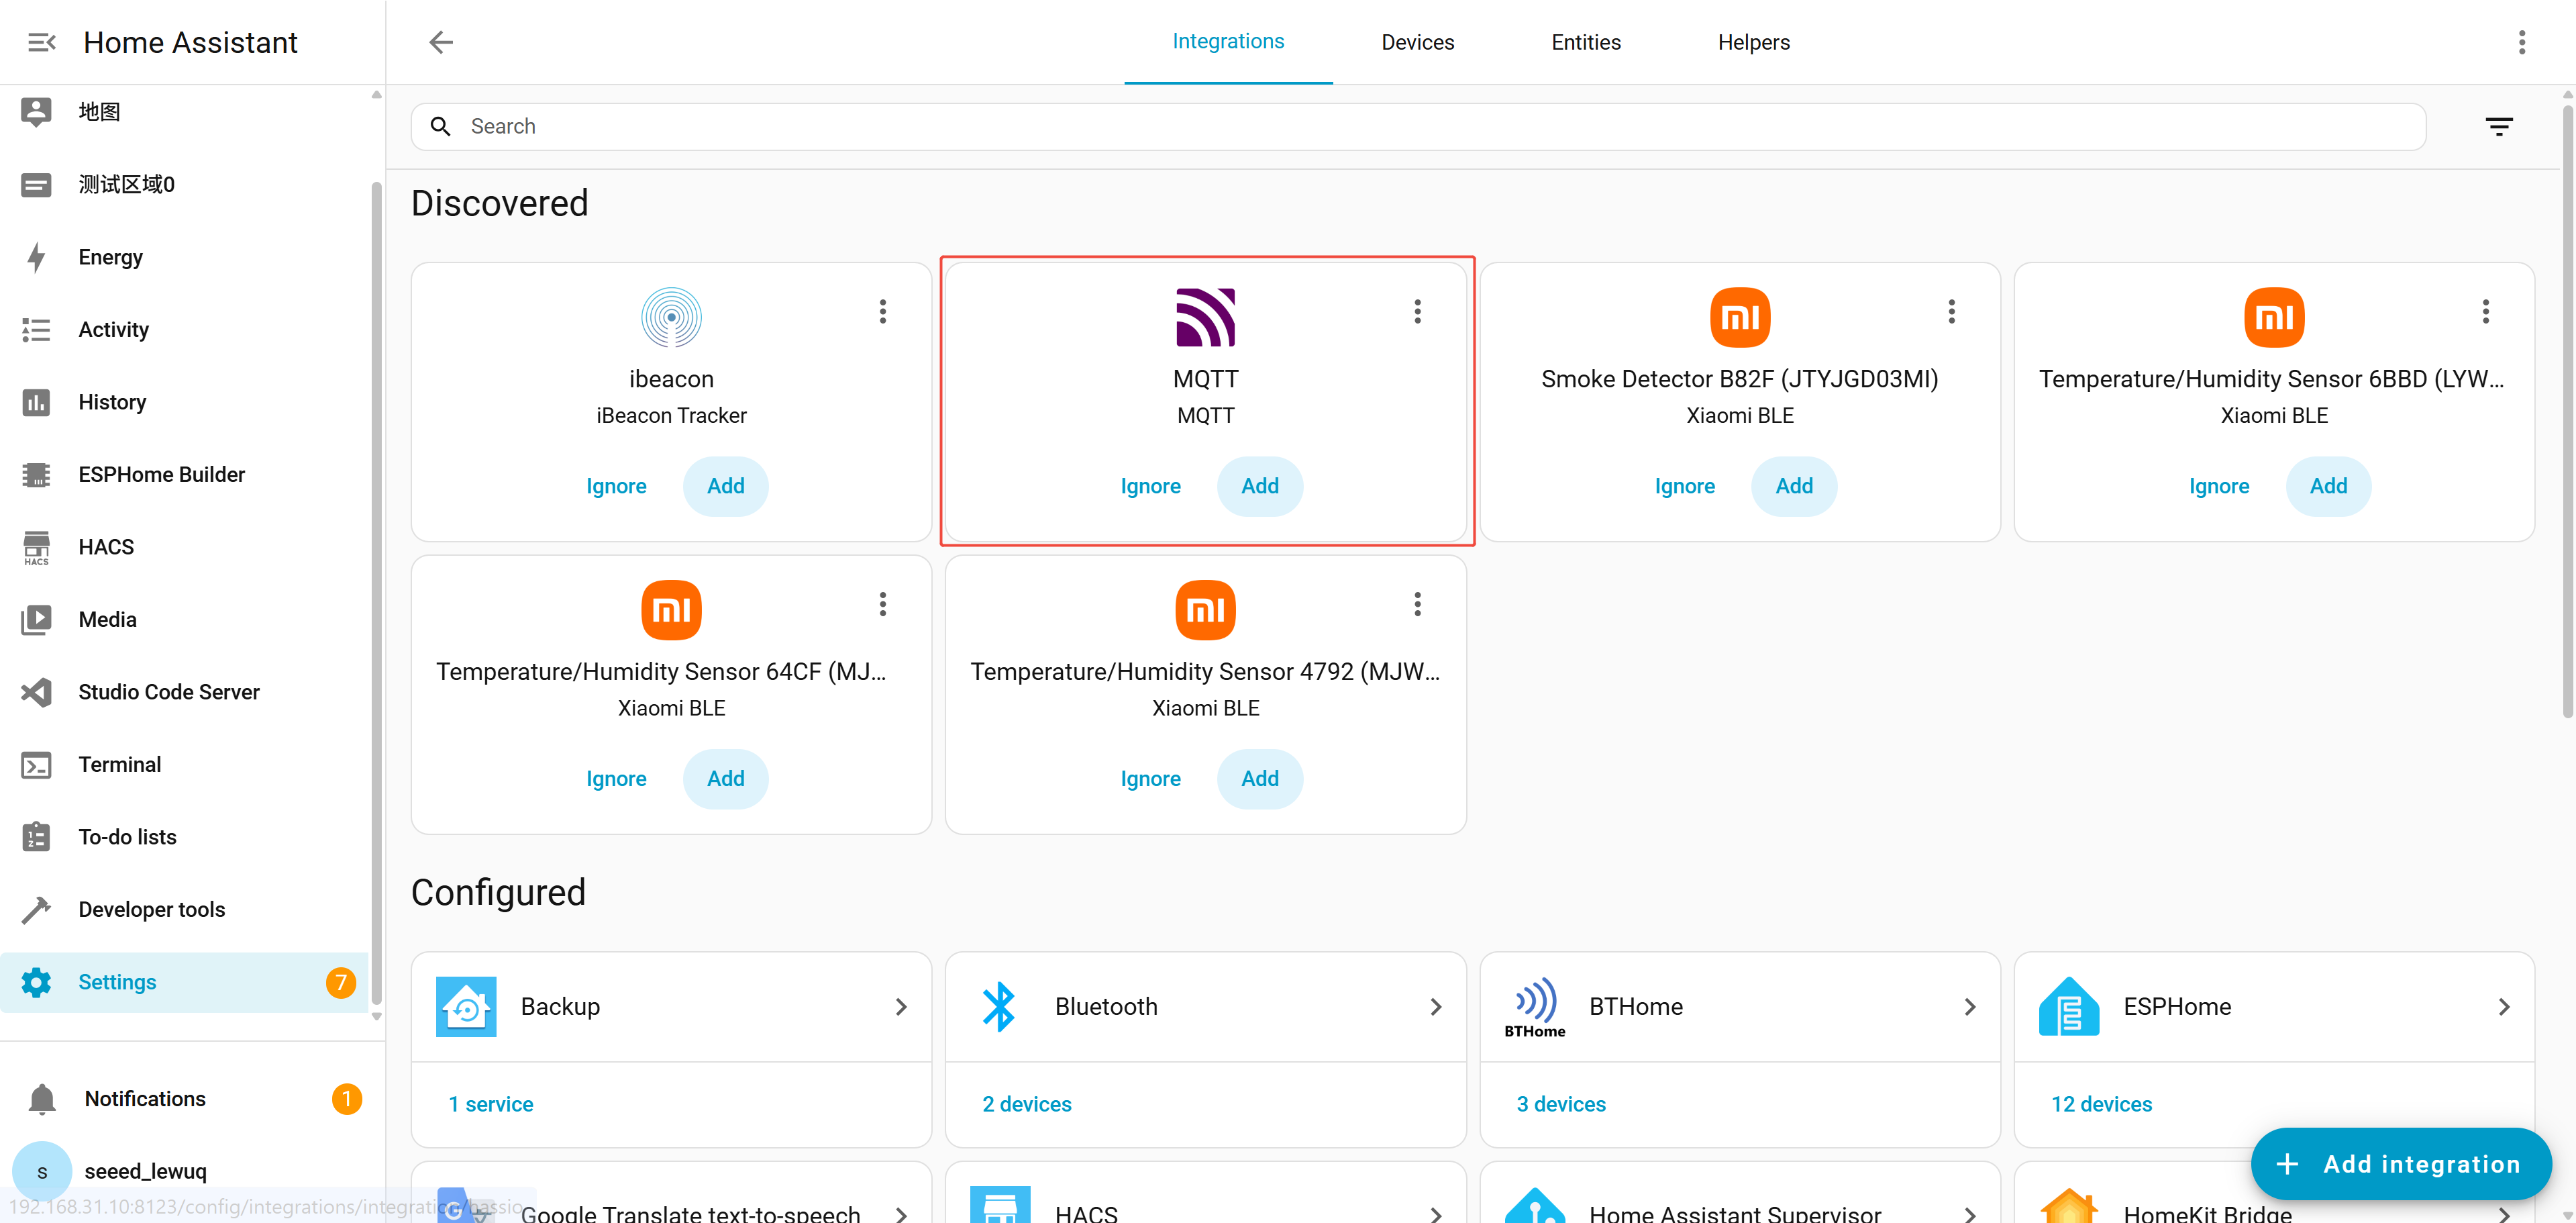
4. BLE Device Broadcasting
Next, we need to make your personal device discoverable by ESPresense via BLE. In some cases, you may need to install an app to enable your device to broadcast over BLE.
iOS Devices
Apple devices emit various BTLE continuity messages, often identified by the fingerprint apple:100?:*-*.
In households with multiple iPhones, the nearby info may collide, leading to duplicate fingerprints.You can refer to https://espresense.com/devices/apple to resolve the issue.
Android Devices (Manual Advertising)
Android devices are typically tight lipped and need an app to get them to emit BLE advertisements. Thus, the need for an app to allow us to find it.
-
Install nRF Connect and open the app.
-
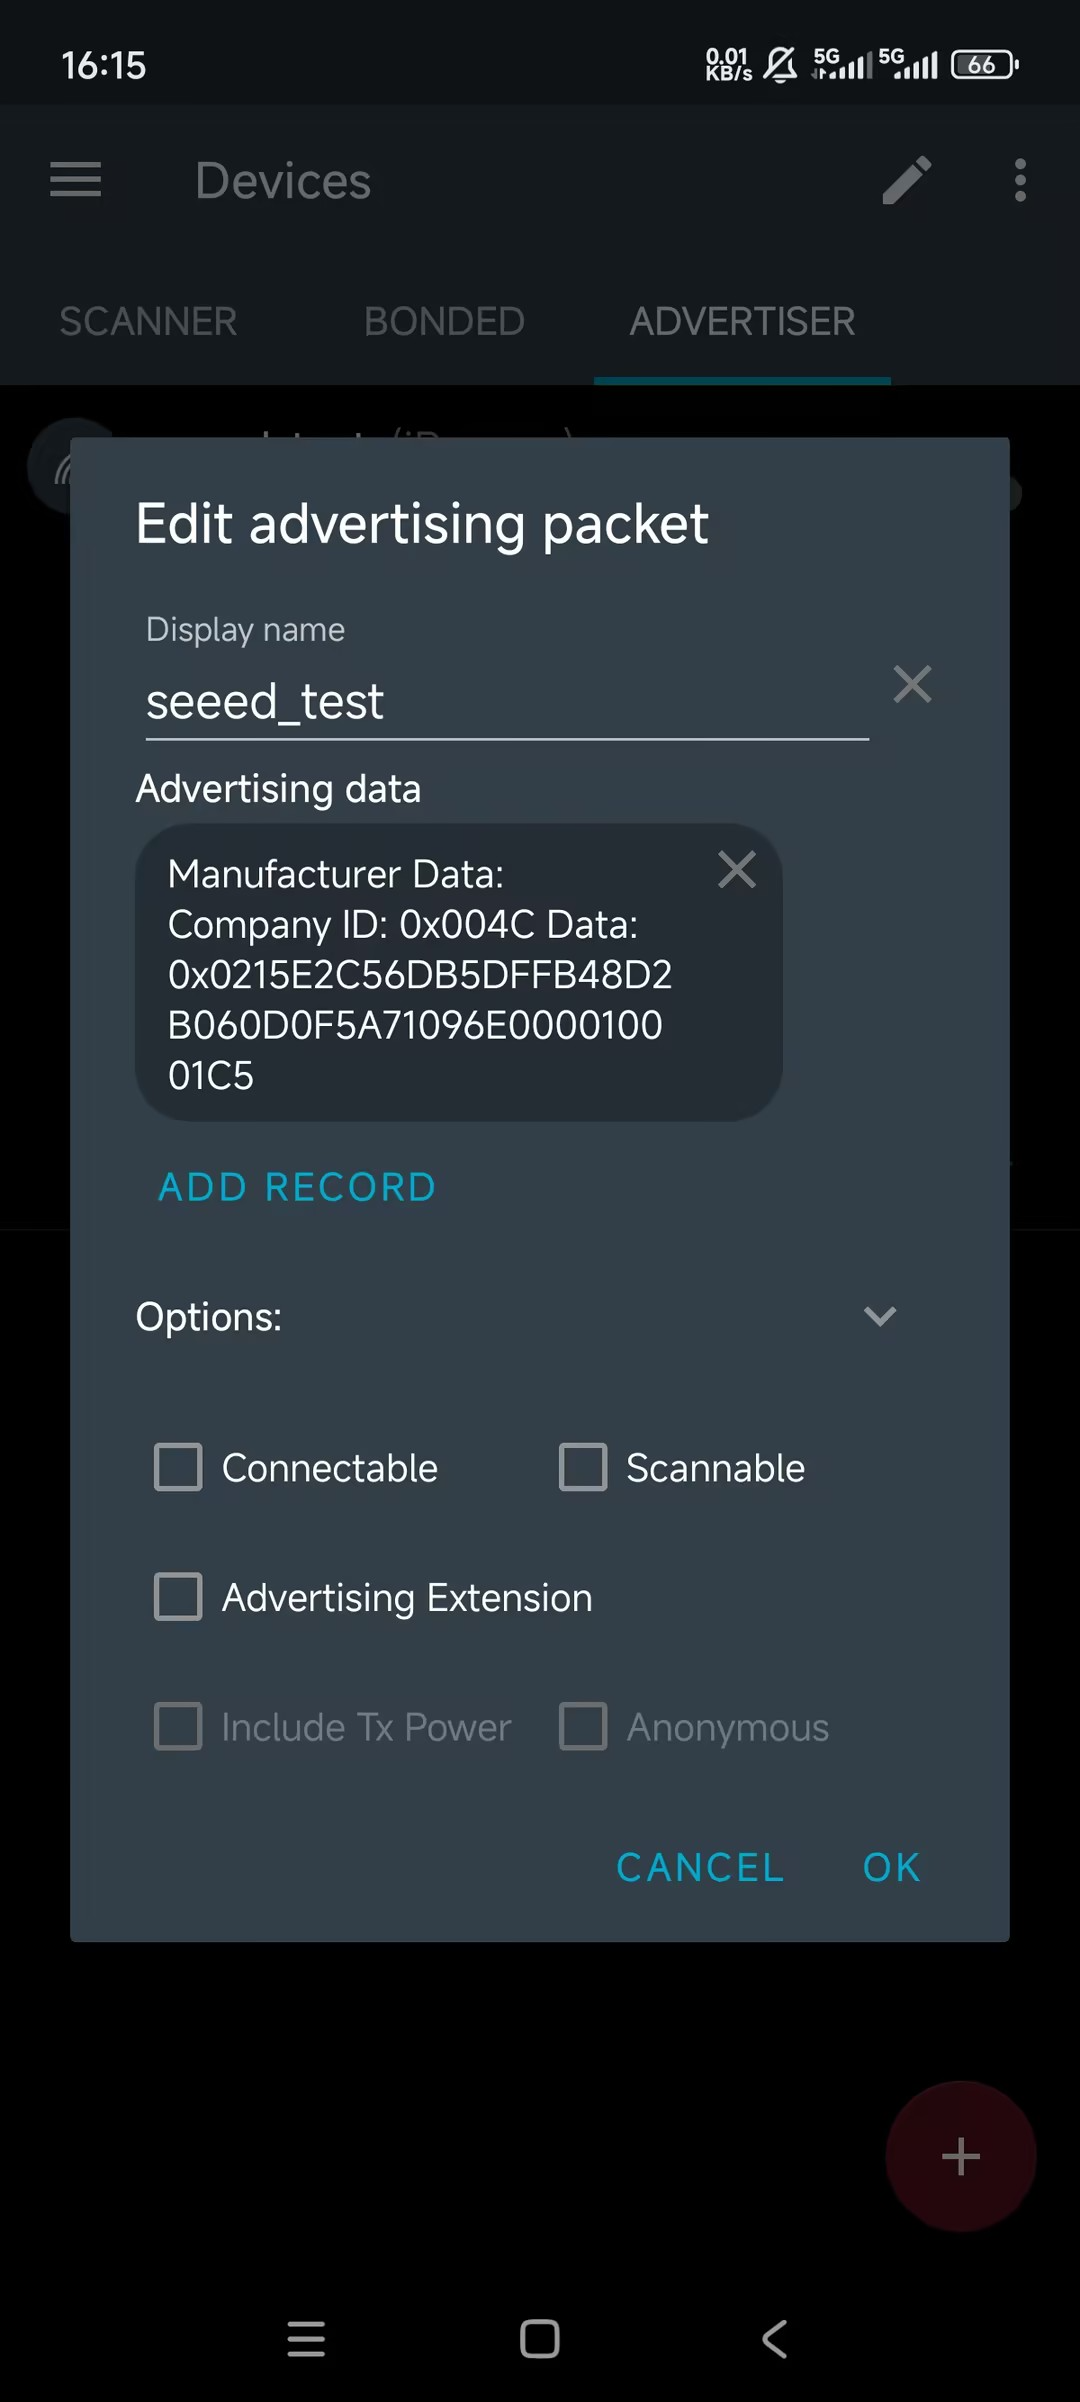
Go to ADVERTISER → "+" → ADD RECORD, select Manufacturer Data
-
Fill in:
Field Value Company ID 0x004C(This is the fixed ID of Apple Inc., and all iBeacons must use this manufacturer ID.)Data 0215E2C56DB5DFFB48D2B060D0F5A71096E000010001C5Data Format Explanation
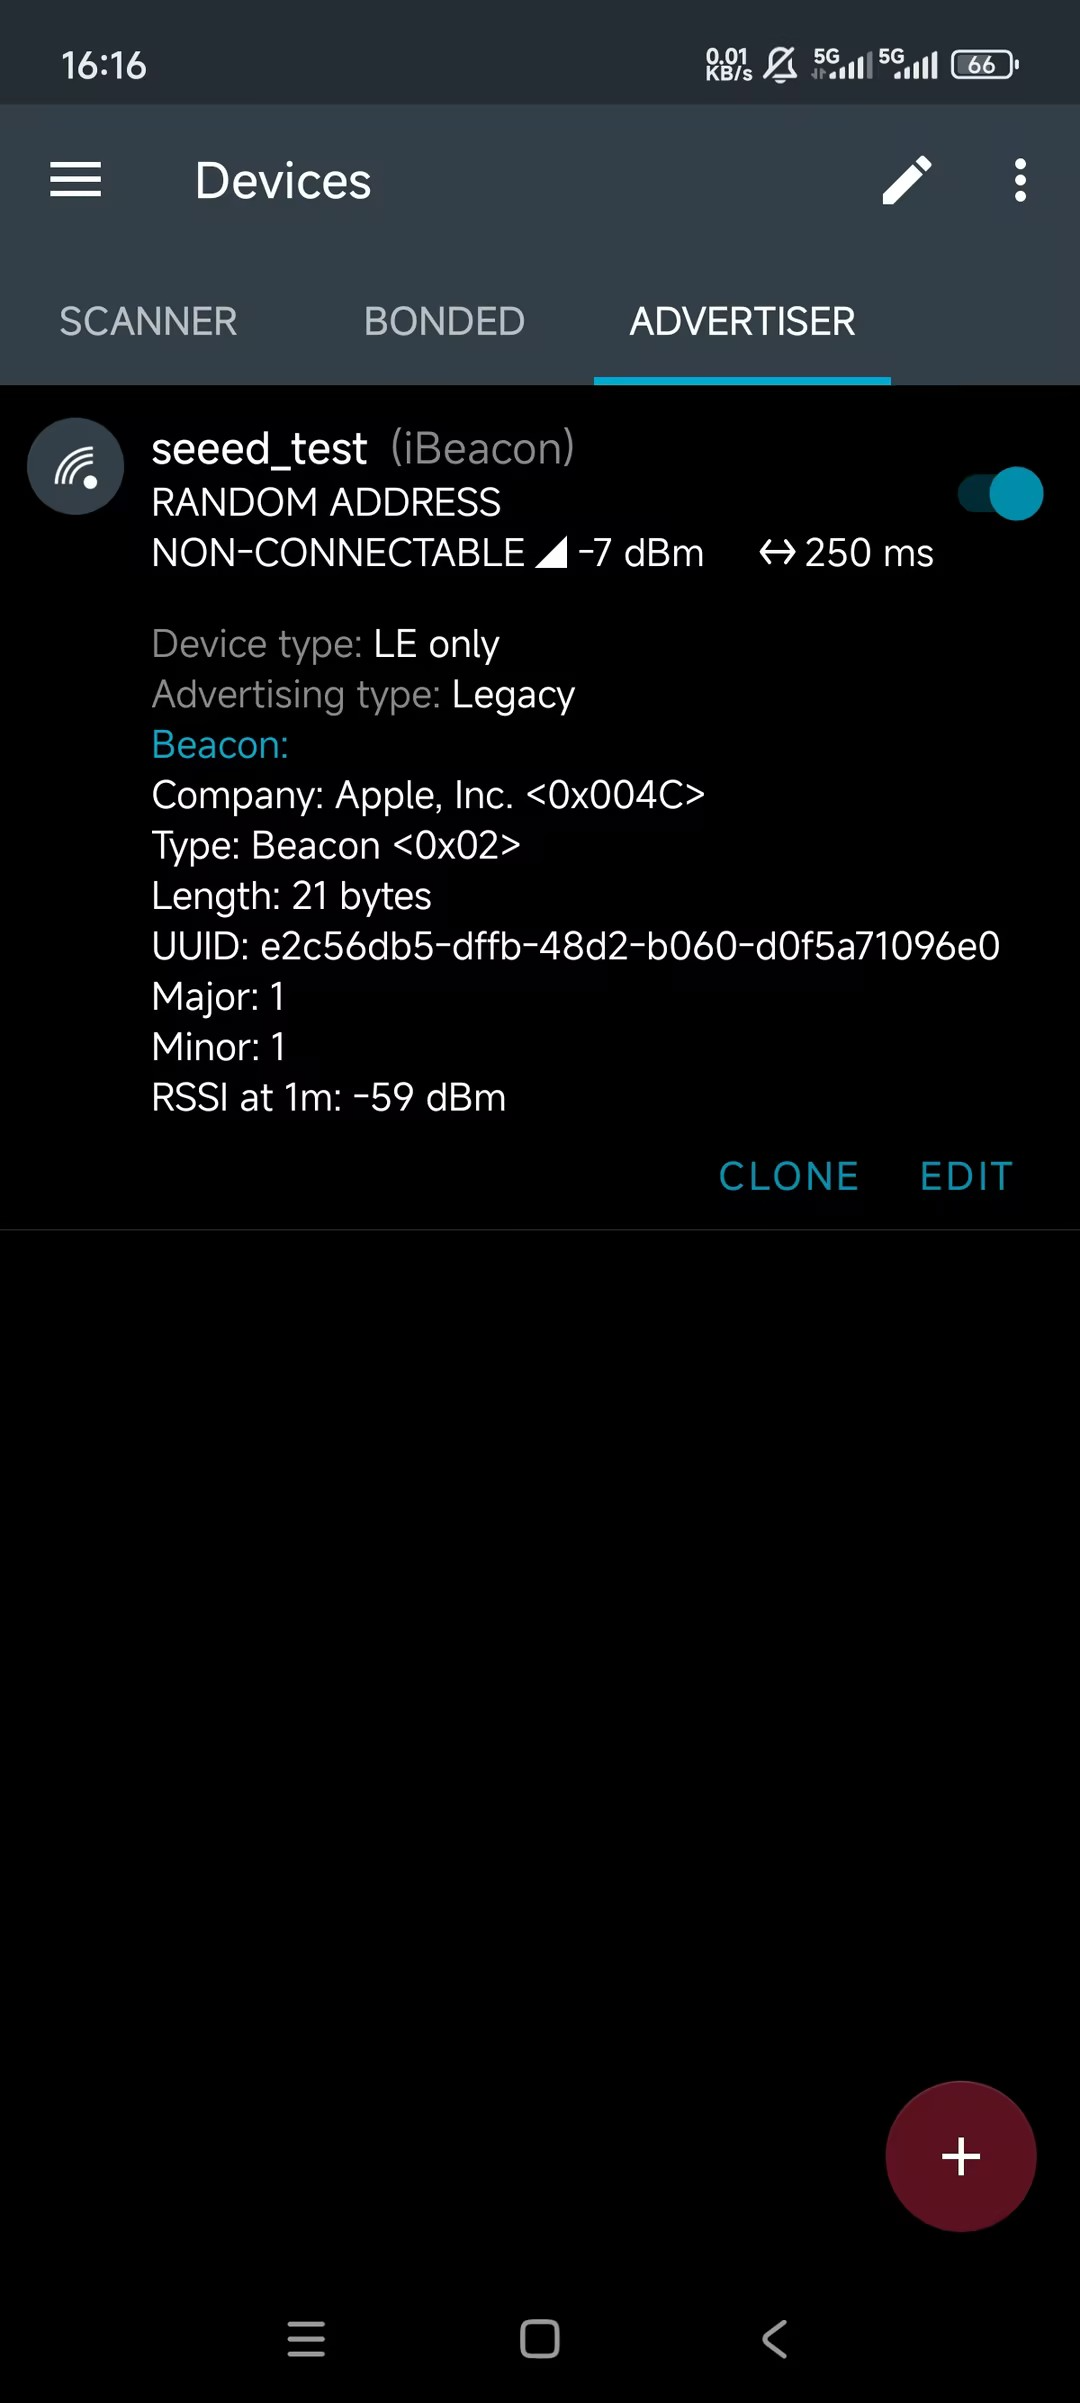
Section Description 0215iBeacon prefix E2C56D...96E0UUID (16 bytes) 0001Major 0001Minor C5Measured Power -
Save and toggle advertising ON
Other supported devices:
https://espresense.com/devices
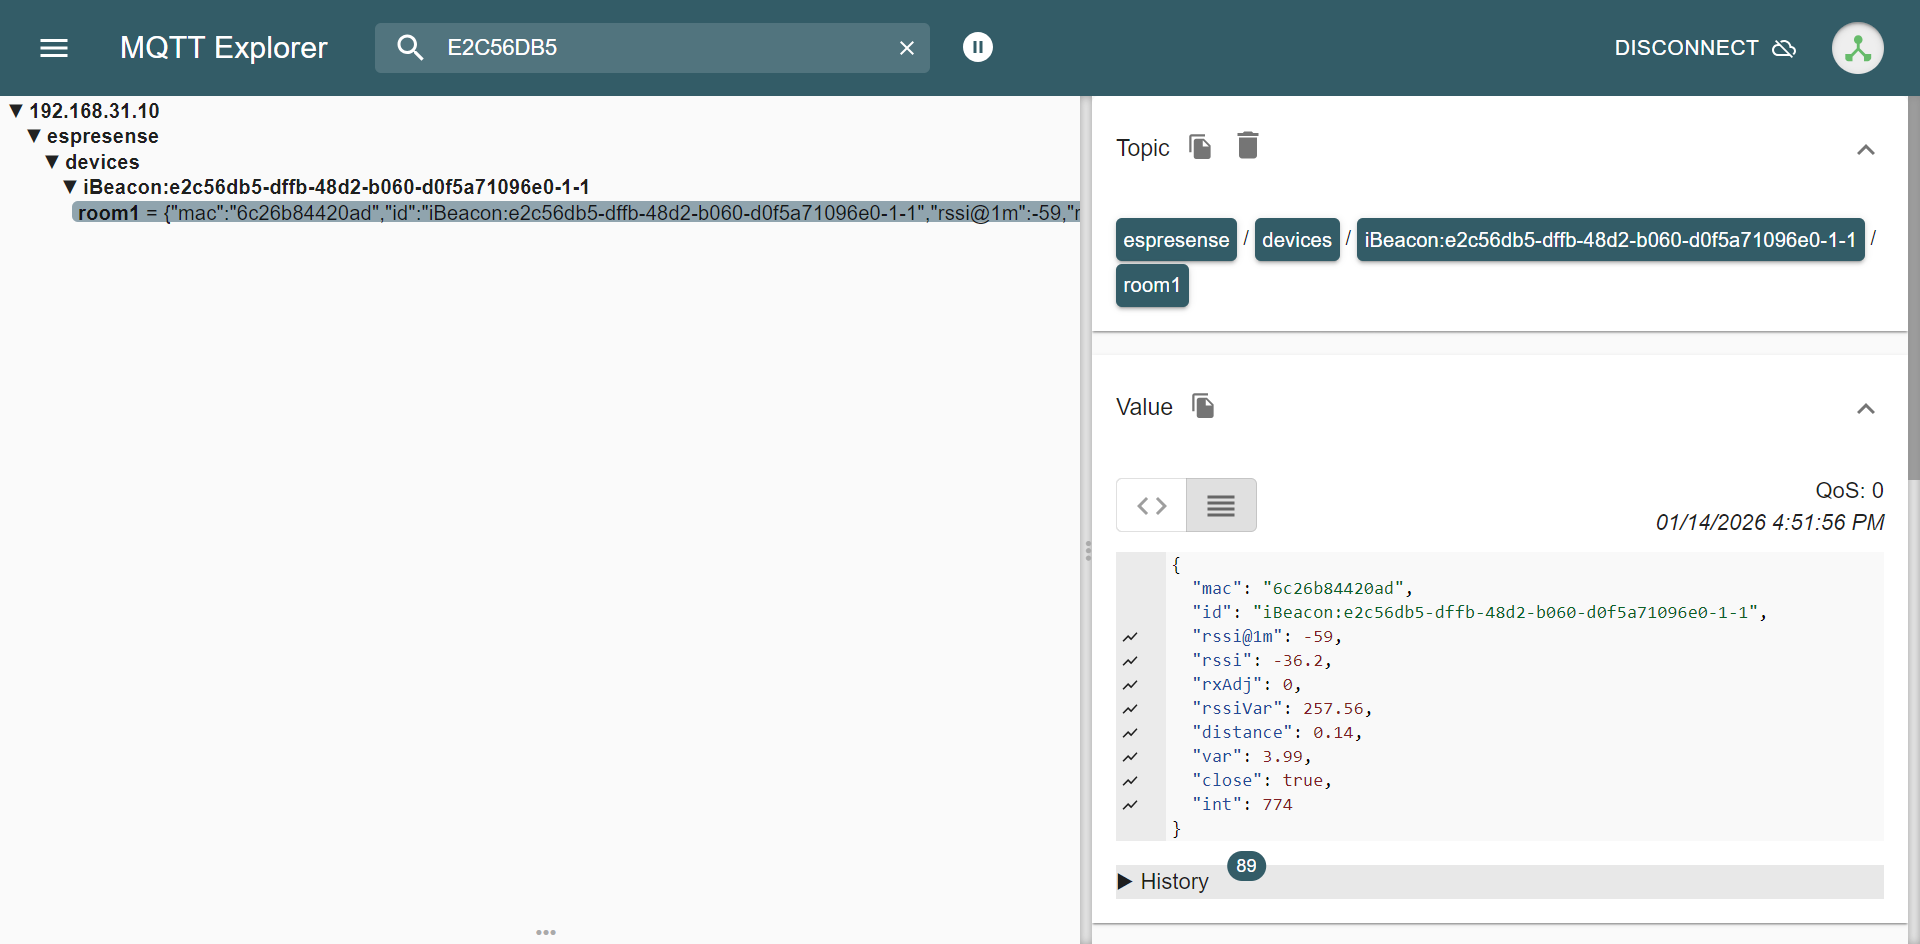
MQTT Data Verification
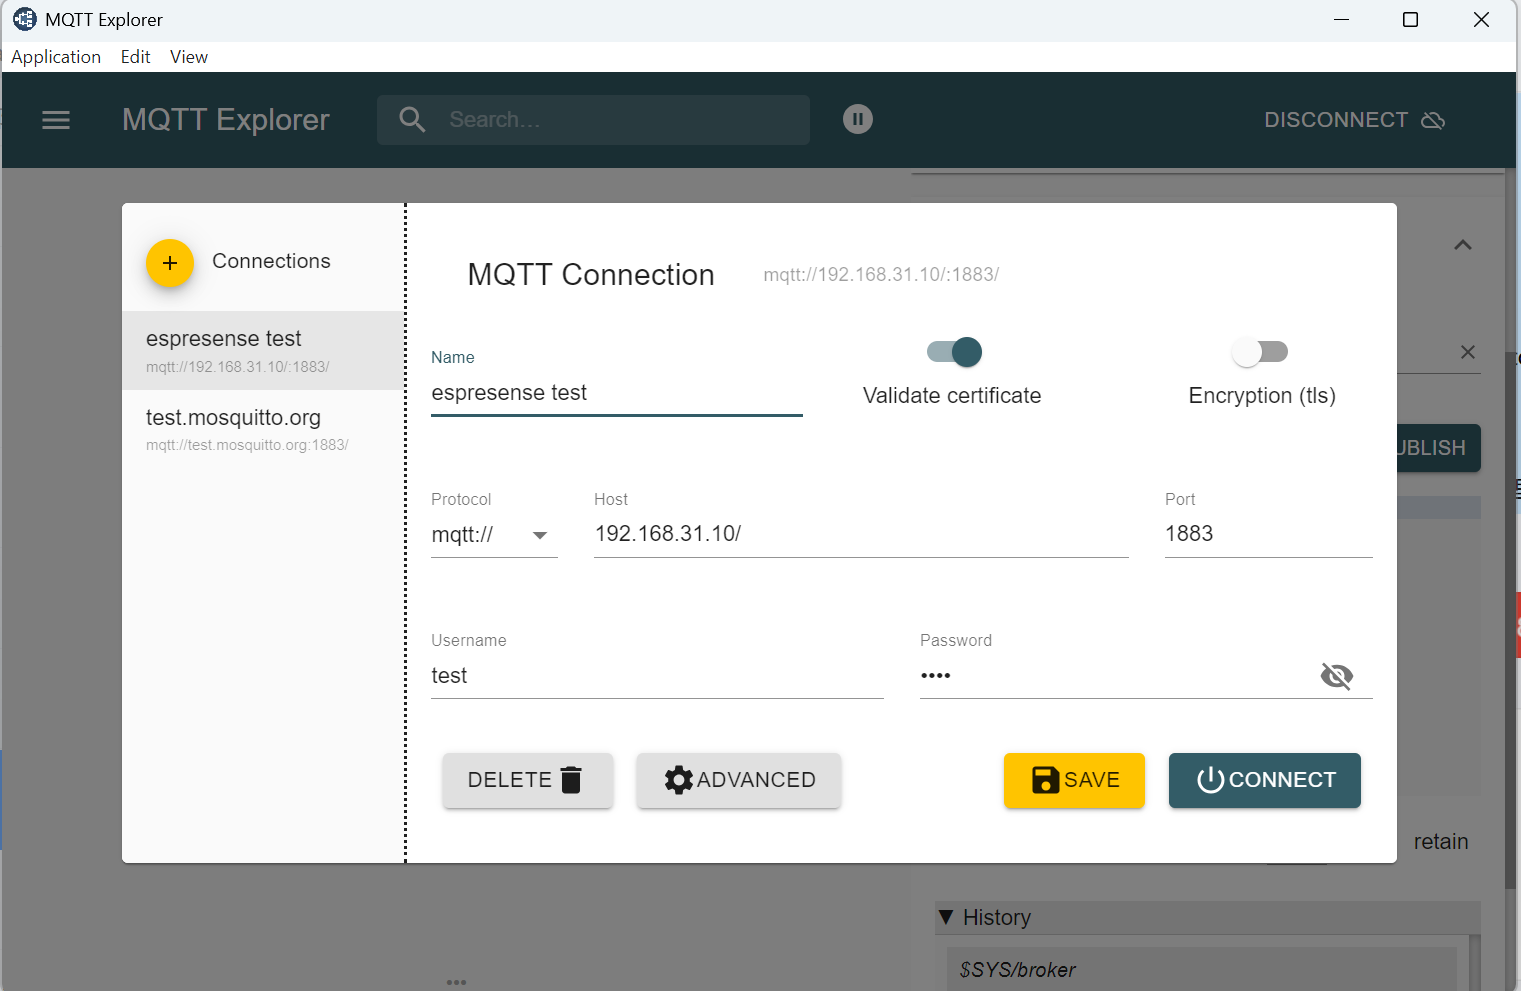
You can use MQTT Explorer to view all topics published by ESPresense.
- Connect to:
- Host: HA IP
- Port: 1883
- Username / Password
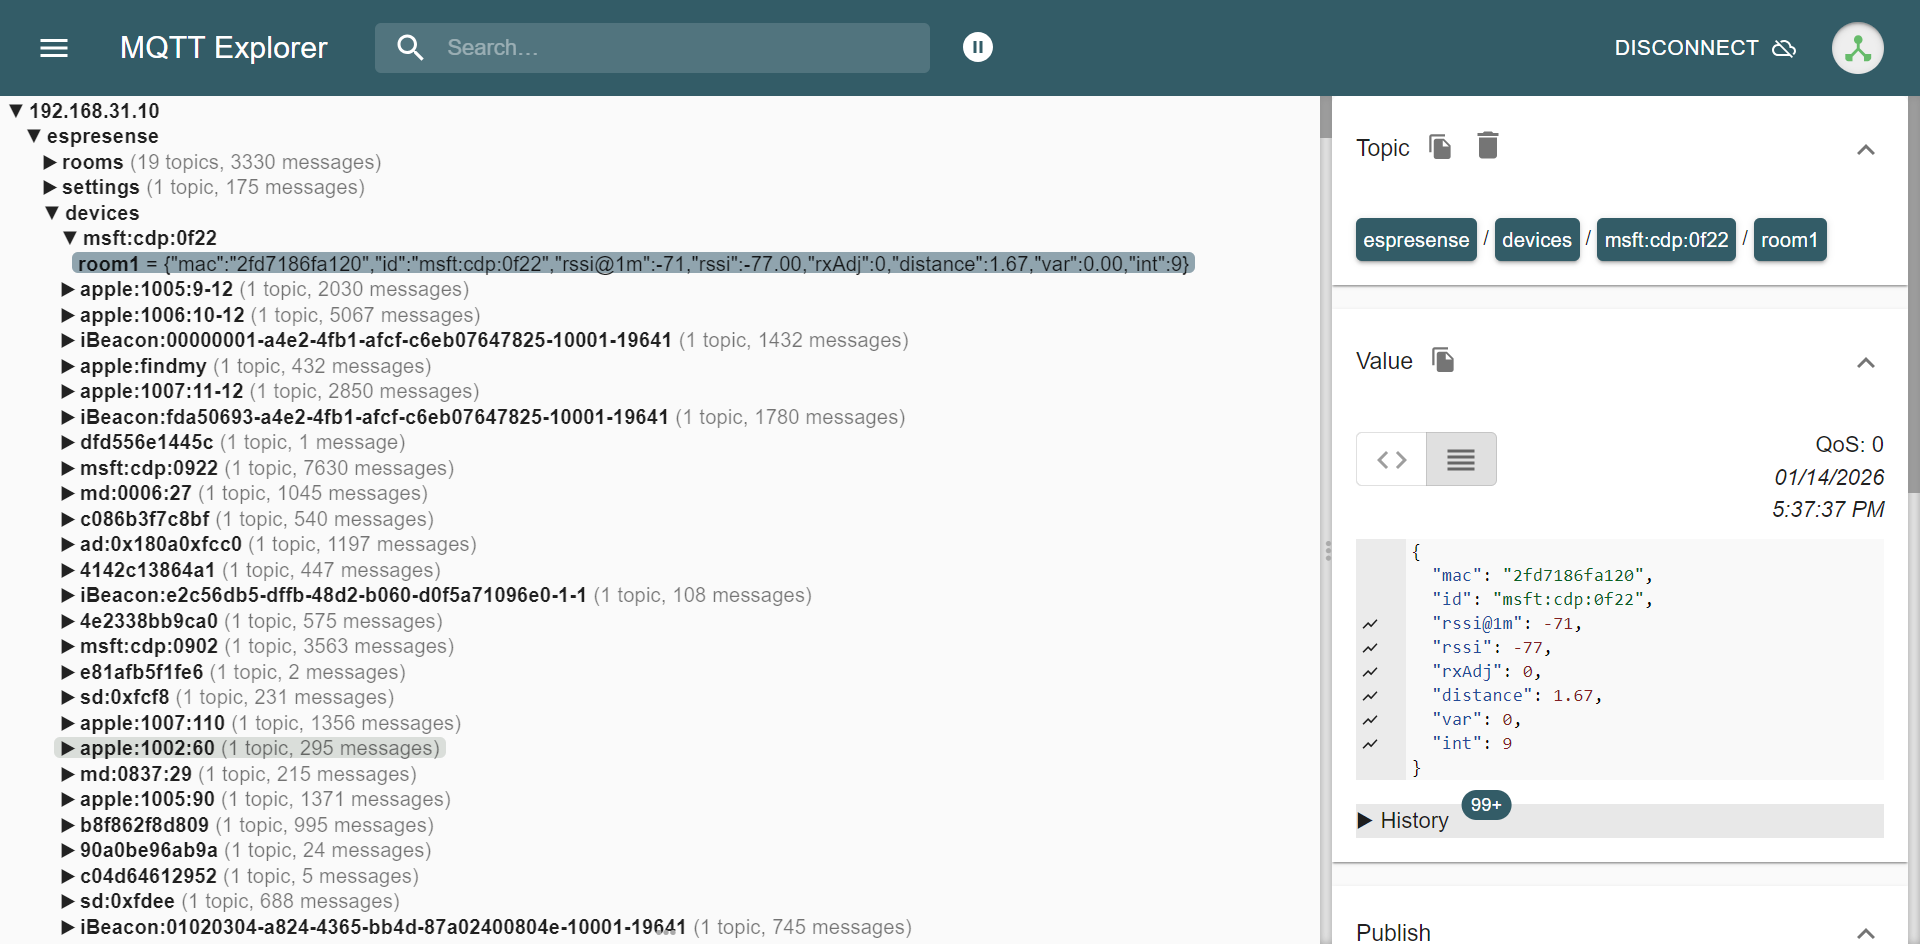
- Search using the first 8 characters of your UUID
5. Room Presence via MQTT Room Sensor
Edit configuration.yaml
-
Go to Settings → Add-ons → Terminal, open terminal
-
Run:
ls /configConfirm
configuration.yamlexists. -
Edit the file:
nano /config/configuration.yaml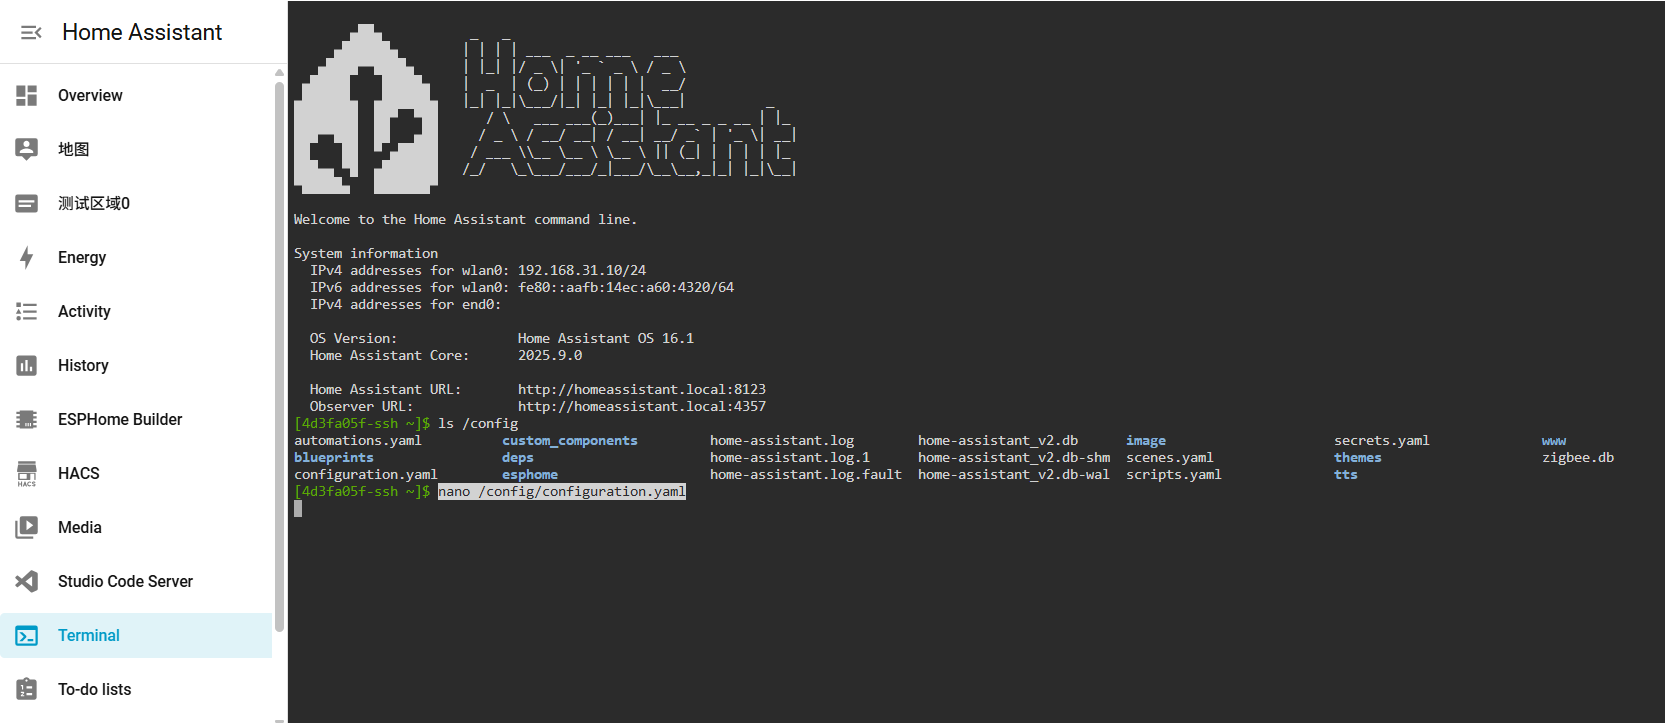
-
Append:
sensor:
  - platform: mqtt_room
    device_id: "iBeacon:e2c56db5-dffb-48d2-b060-d0f5a71096e0-1-1"
    name: "My iBeacon"
    state_topic: "espresense/devices/iBeacon:e2c56db5-dffb-48d2-b060-d0f5a71096e0-1-1"
    timeout: 60
    away_timeout: 120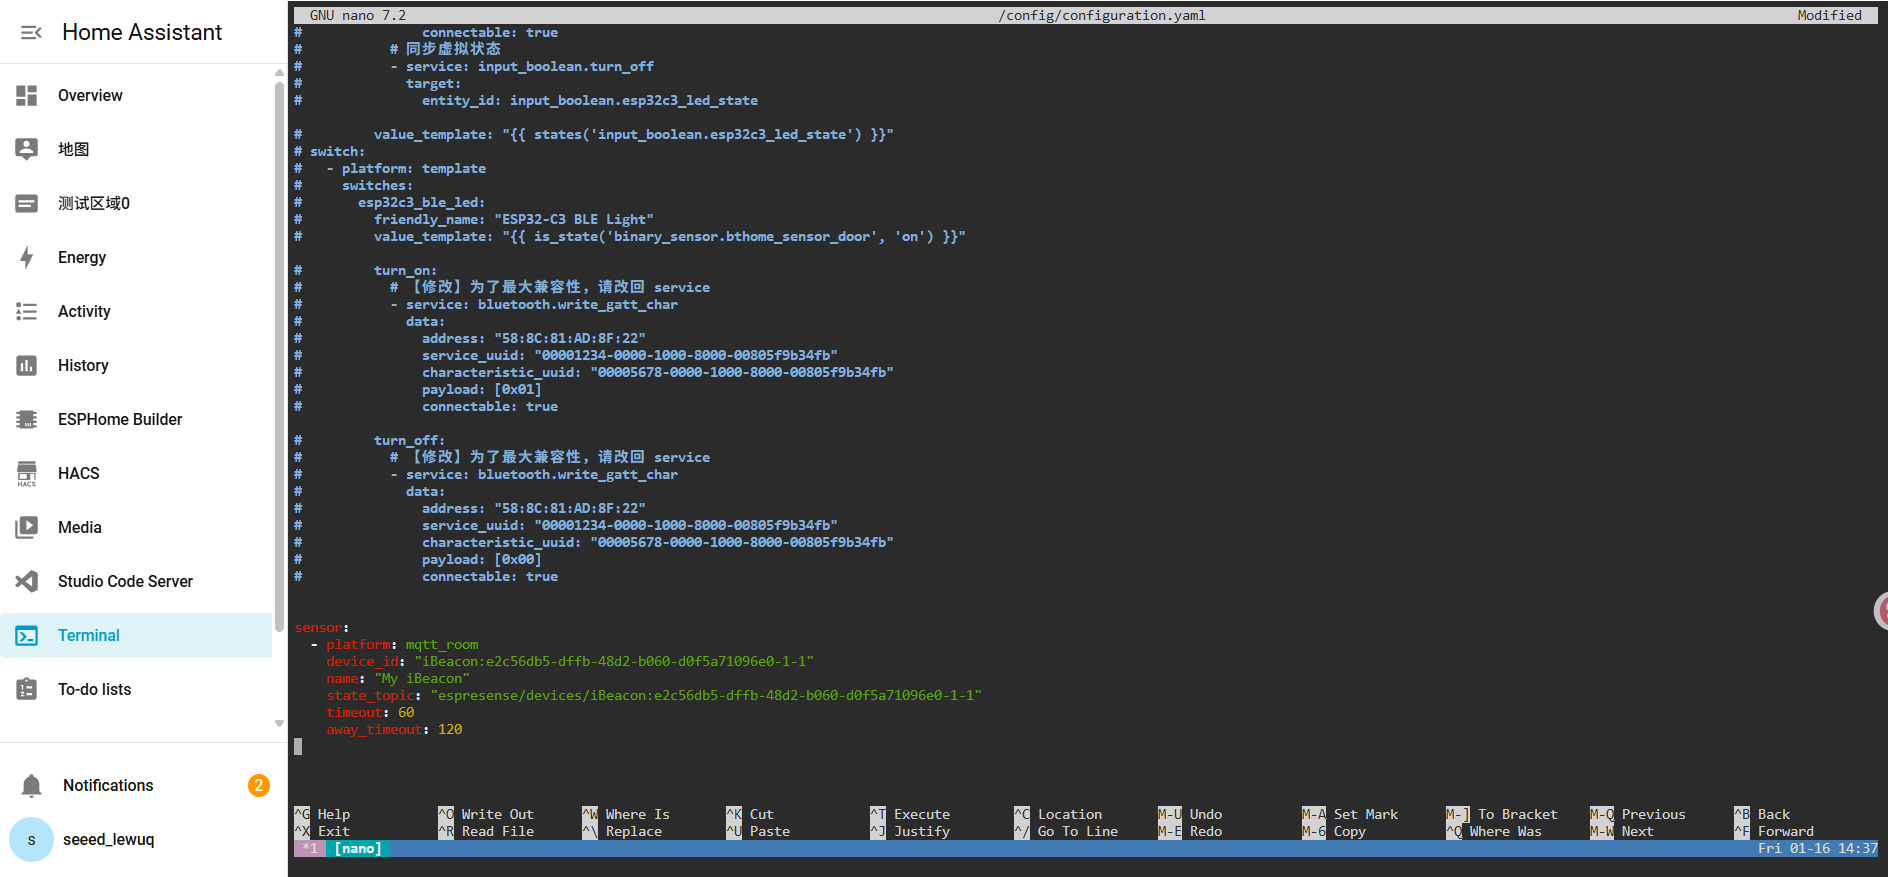
⚠ YAML indentation is critical
- Use spaces only
- Do not use TAB
-
Save:
Ctrl + O→ EnterCtrl + X
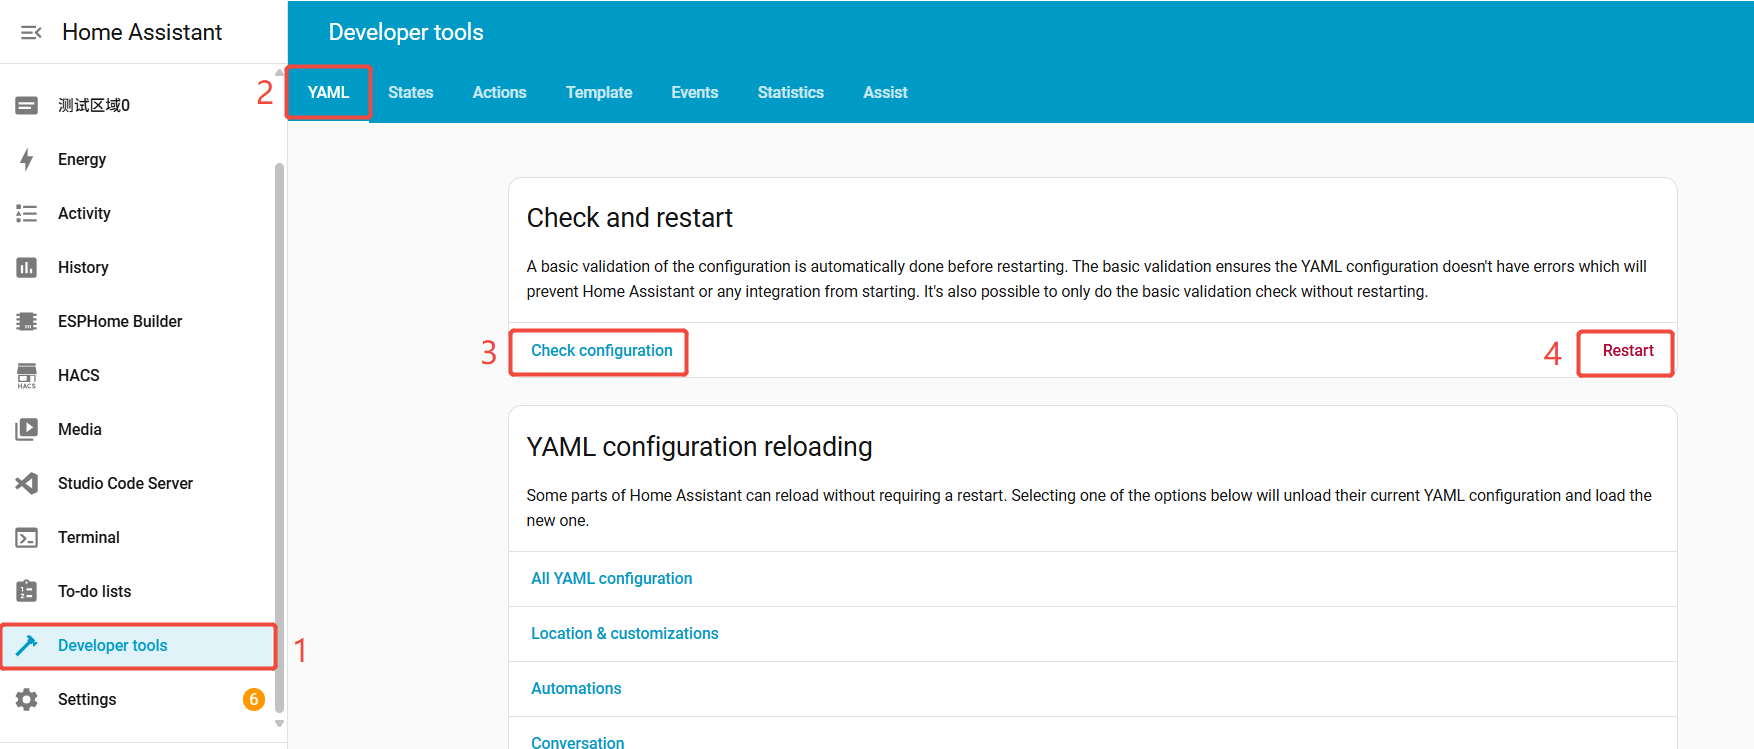
Validate & Restart
- Go to Settings → System → Developer Tools
- Open YAML tab, click Check Configuration, if valid, click Restart
6. Add entities to your dashboard
After restart:
-
Go to Developer Tools → States
-
Search for:
sensor.my_ibeacon -
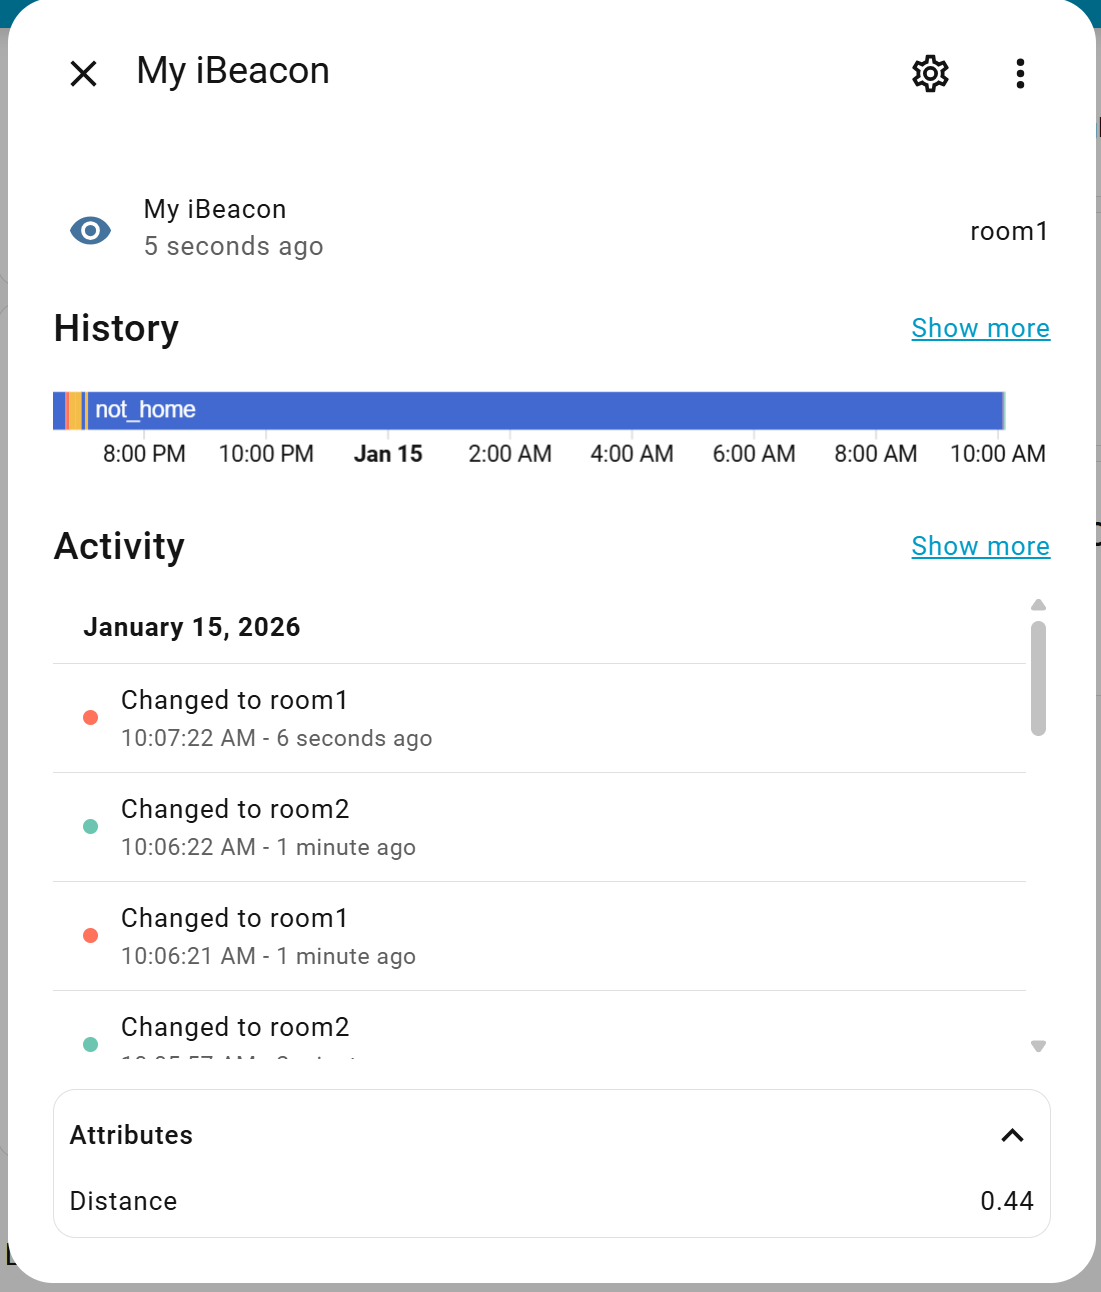
If the entity updates with room names, setup is complete
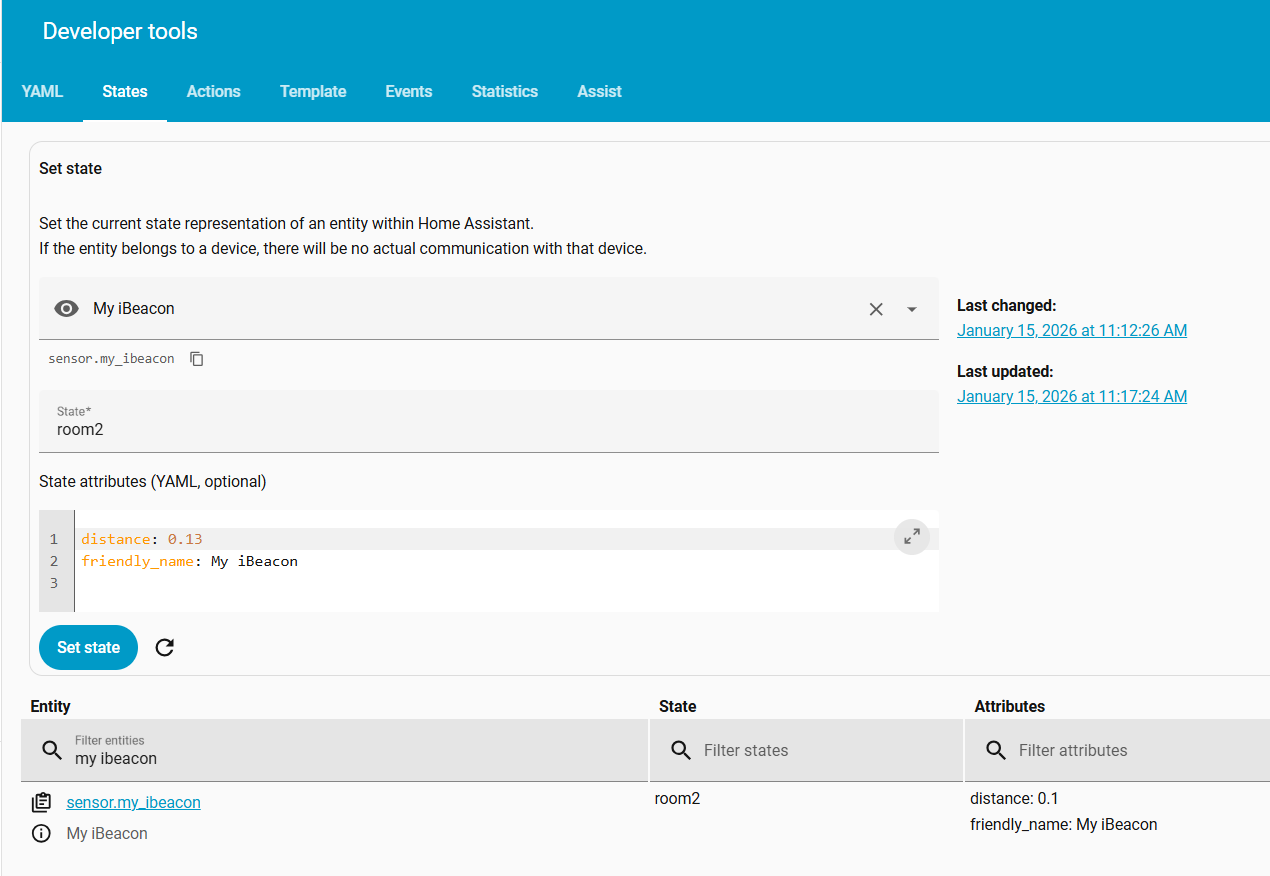
Sensor initialization may take some time. If the status shows not_home, please wait patiently for a while. If there is still no state update after an extended period, we recommend using MQTT Explorer to check whether ESPresense has gone offline or to verify that your personal device can be successfully scanned.
-
Add the entity to your Dashboard
Tech Support & Product Discussion
Thank you for choosing our products! We are here to provide you with different support to ensure that your experience with our products is as smooth as possible. We offer several communication channels to cater to different preferences and needs.