Seeed Studio XIAO RP2350 with C/C++ SDK
Introduction
The Seeed Studio XIAO RP2350, powered by the RP2350 microcontroller, offers robust performance in a small form factor. This guide provides essential steps for setting up and using the C/C++ SDK with the XIAO RP2350.
Prerequisites
Before starting, ensure you have the following:
- A computer running Windows, macOS, or Linux.
- A USB cable to connect the XIAO RP2350 to your computer.
- Basic knowledge of C/C++ programming.
Installation Guide Via Vscode
For those who prefer the native development experience, explore the Raspberry Pi Pico C/C++ SDK Documentation or Raspberry Pi Pico SDK | GitHub.
For an easier and more streamlined experience with SDK programming, especially for those new to it, you can install the Raspberry Pi Pico extension for Visual Studio Code (VSCode).
This extension simplifies the setup process by guiding you through the necessary toolchain installations, avoiding the need to manually install each tool individually. However, you will still need to ensure your system meets the platform requirements: Windows x64, macOS (Sonoma and newer), Linux x64, or arm64.
For detailed installation instructions tailored to your operating system, please refer to the Raspberry Pi Pico Extension for VSCode page.
Step 1: Install the Extension
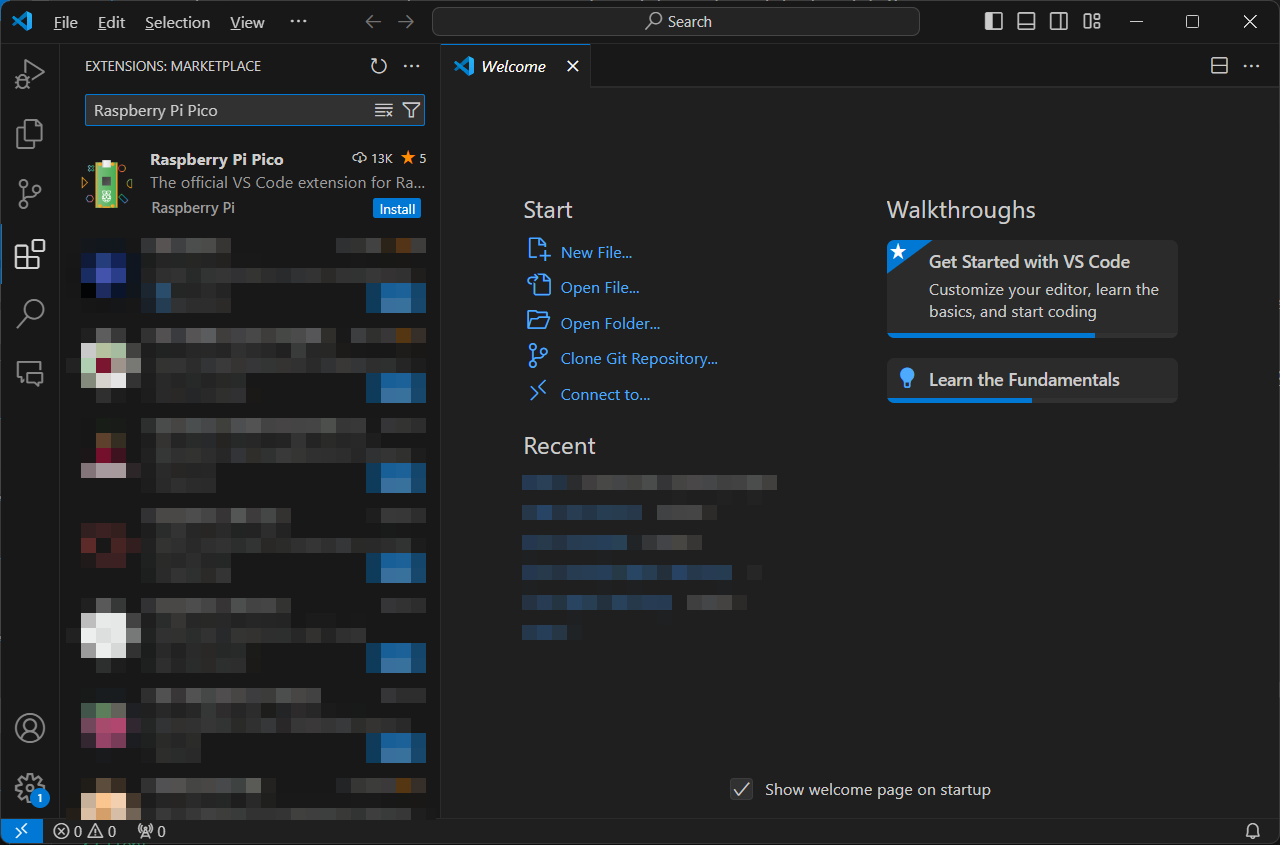
Step 2: Create a New Project
Once the page loads, you can see the required content.
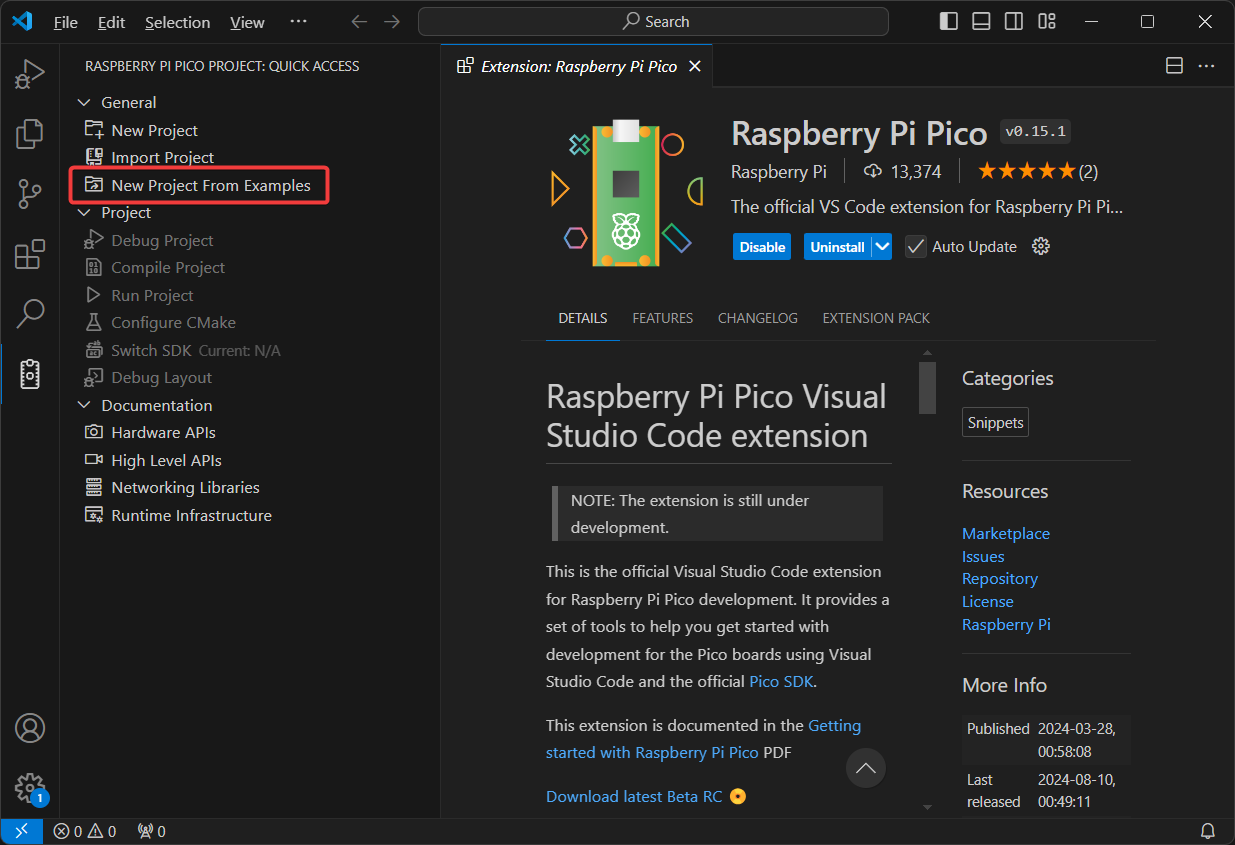
Try create a project via New Project From Examples.
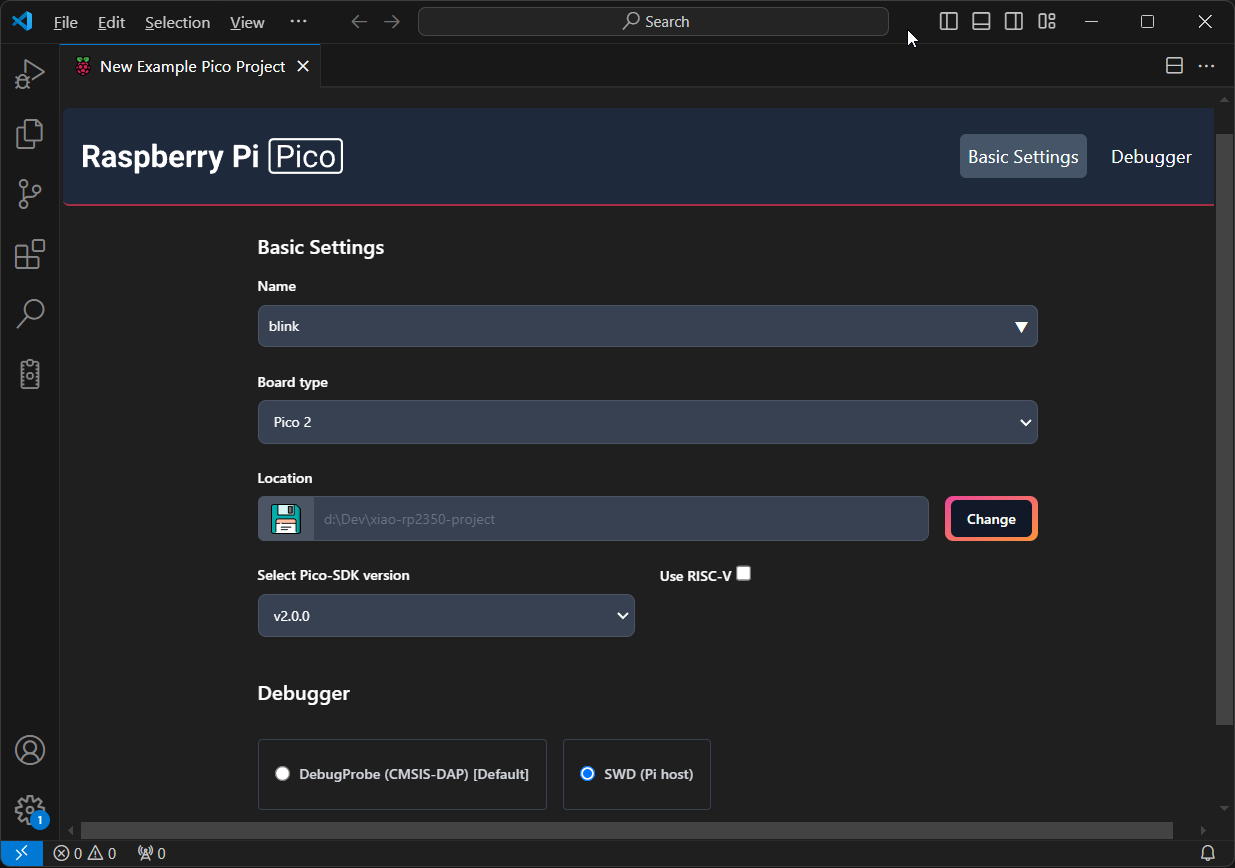
Step 3: Configure Your Project
- Name: Typically, this will be the example project name; in this case, we’ll choose the
blinkproject. - Board Type:
Pico 2 - Location: Choose where you want to store your XIAO RP2350 project.
- SDK Version: Must be version
v2.0.0or later. - Debugger: If you plan to use the SWD debugging interface, check the SWD Debugger option to enable debugging later.
- Configure project
- Adavanced Options
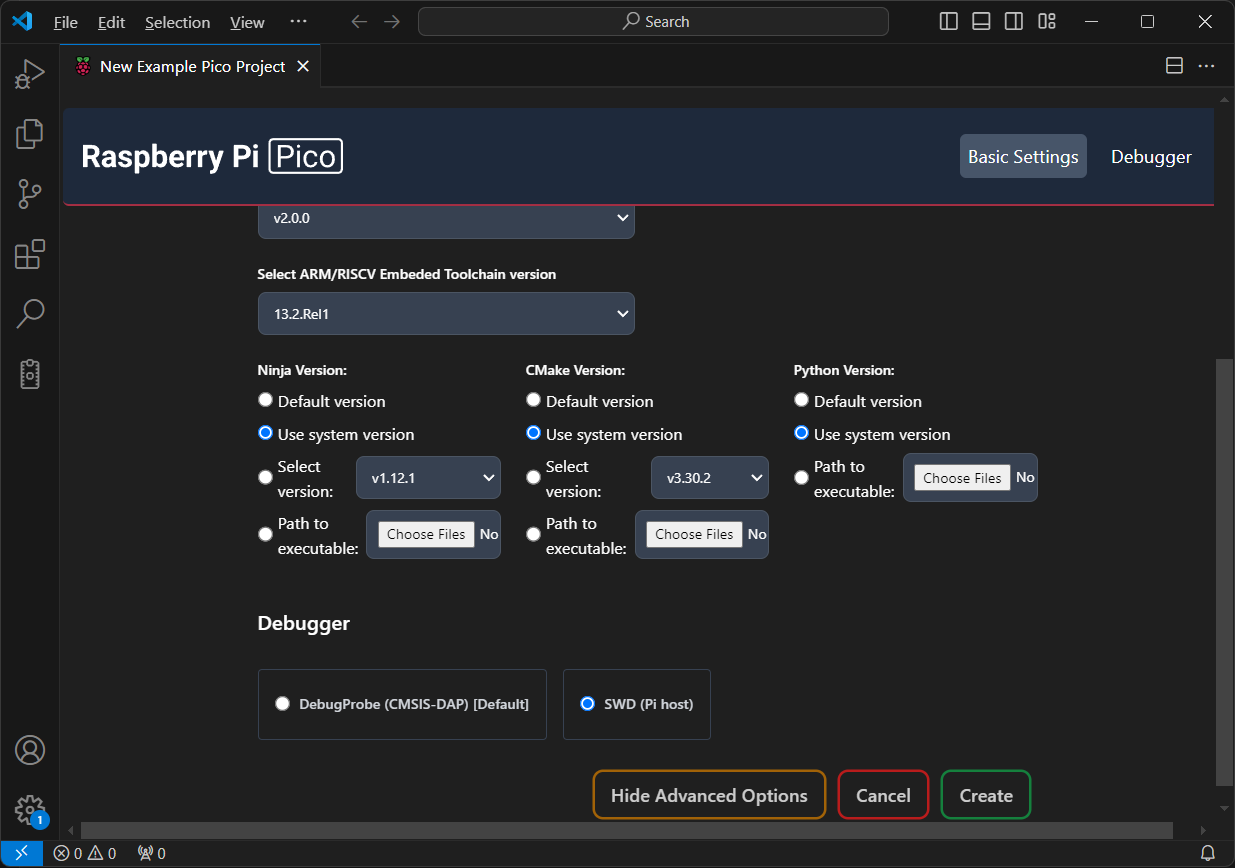
If you want to fine-tune your toolchain setup and avoid downloading redundant resources, check the Advanced Options. Here, you can specify paths for tools like Ninja and CMake. If you haven't previously installed CMake or a Python environment, or if you'd rather not worry about it, you can skip this step.
In this example, I'll use the system versions already installed on my Windows machine and added to the system PATH. Therefore, I select Use system version.
If this is your first time running the setup, when you click Create, the extension will download and manage the SDK for you. On Windows, the SDK will typically be placed in %userprofile%.pico-sdk. The time it takes to set up depends on your internet speed. Once completed, a new window will open with your project.
Step 4: Build the Project
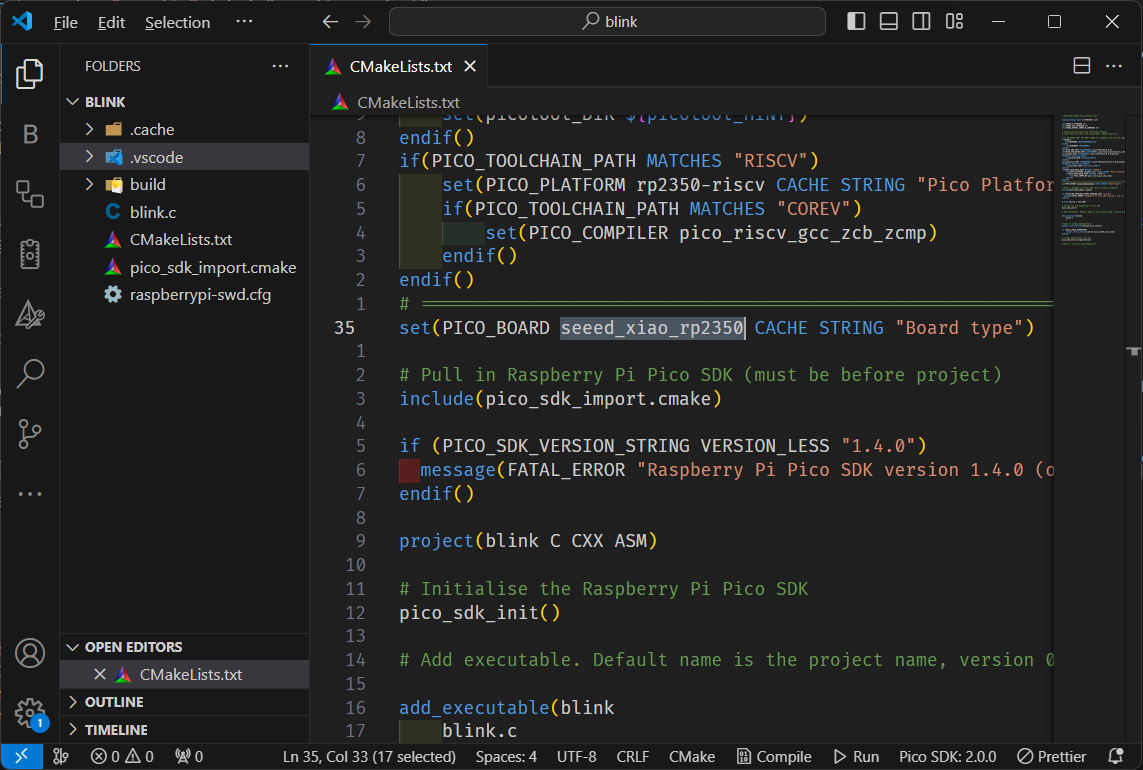
The first time you set up your project, you'll need to manually modify the board type in the CMake project because the extension doesn't include the XIAO RP2350 board by default. Set the board to seeed_xiao_rp2350 as shown below:
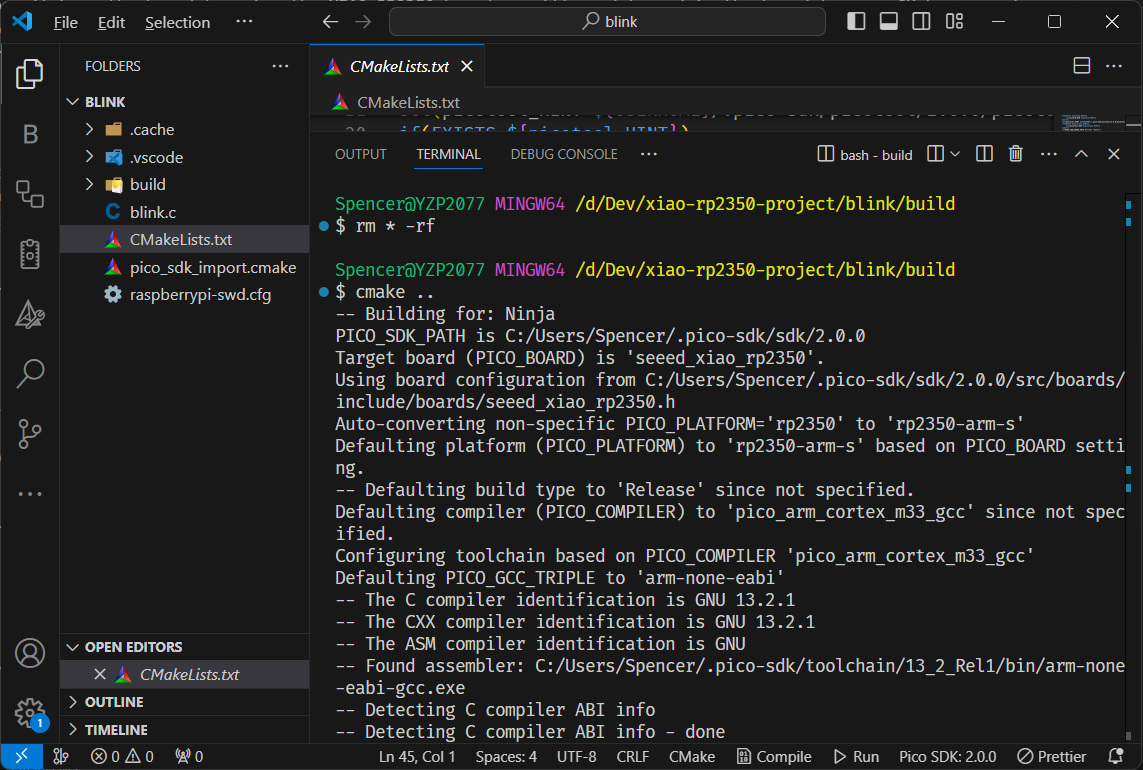
After modifying the board type, clean up the build folder to ensure that it uses the correct board configuration from %userprofile%/.pico-sdk/sdk/2.0.0/src/boards/include/boards/seeed_xiao_rp2350.h. Then type the following commands to generate the CMake cache in the build folder:
cmake .. # in build folder
This will allow the compile task of the extension to work correctly.
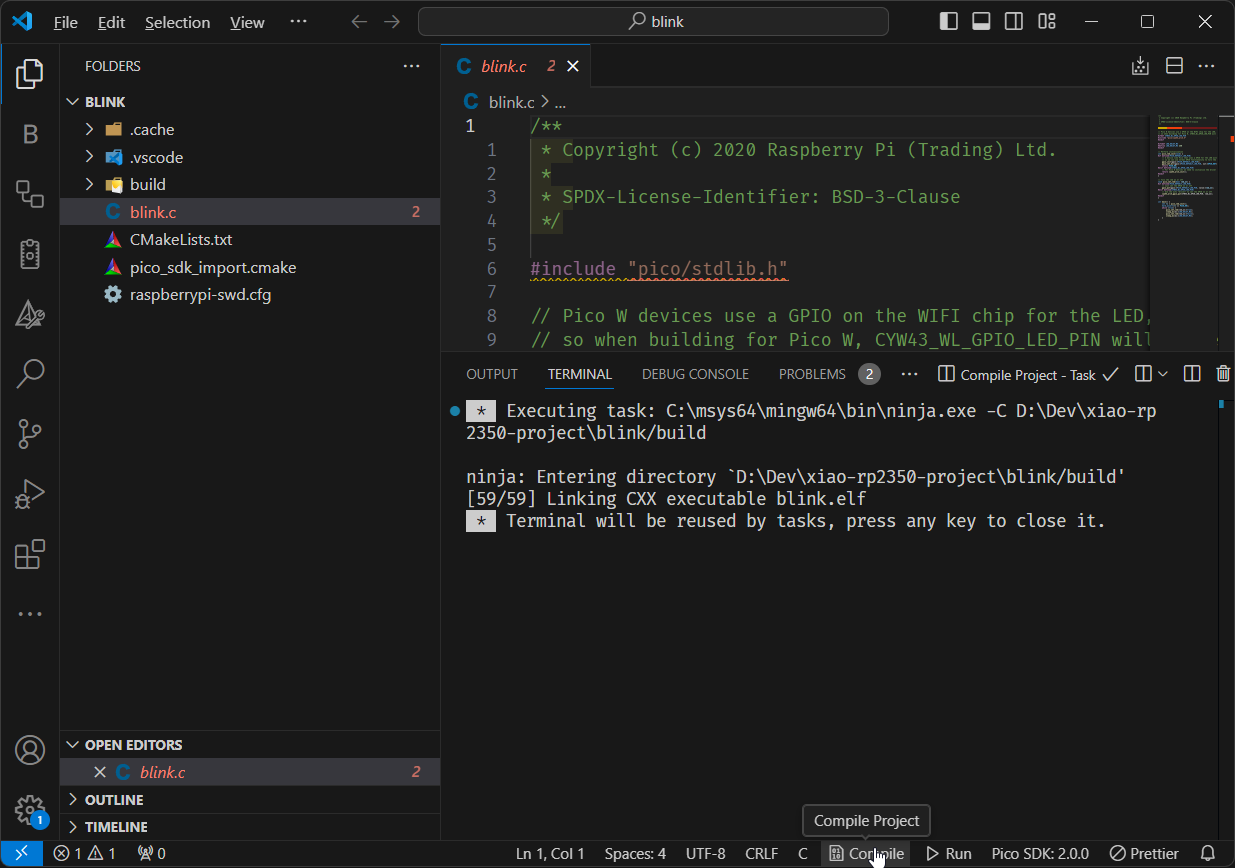
- Compile Project
- Run Project
Now you can press the Compile button to build the project. This will generate the blink.uf2 file in the build folder, which you can drag and drop to the RP2350 drive recognized by your computer.
If your device is in BOOT mode, you can press the Run button to compile and automatically copy the .uf2 file to the RP2350, eliminating the need to manually drag and drop the file.

We've just set up the development environment and successfully created a new project using the Raspberry Pi Pico extension for VSCode. With the project ready and your tools configured, you can easily compile and run your code on the XIAO RP2350, streamlining your development process.
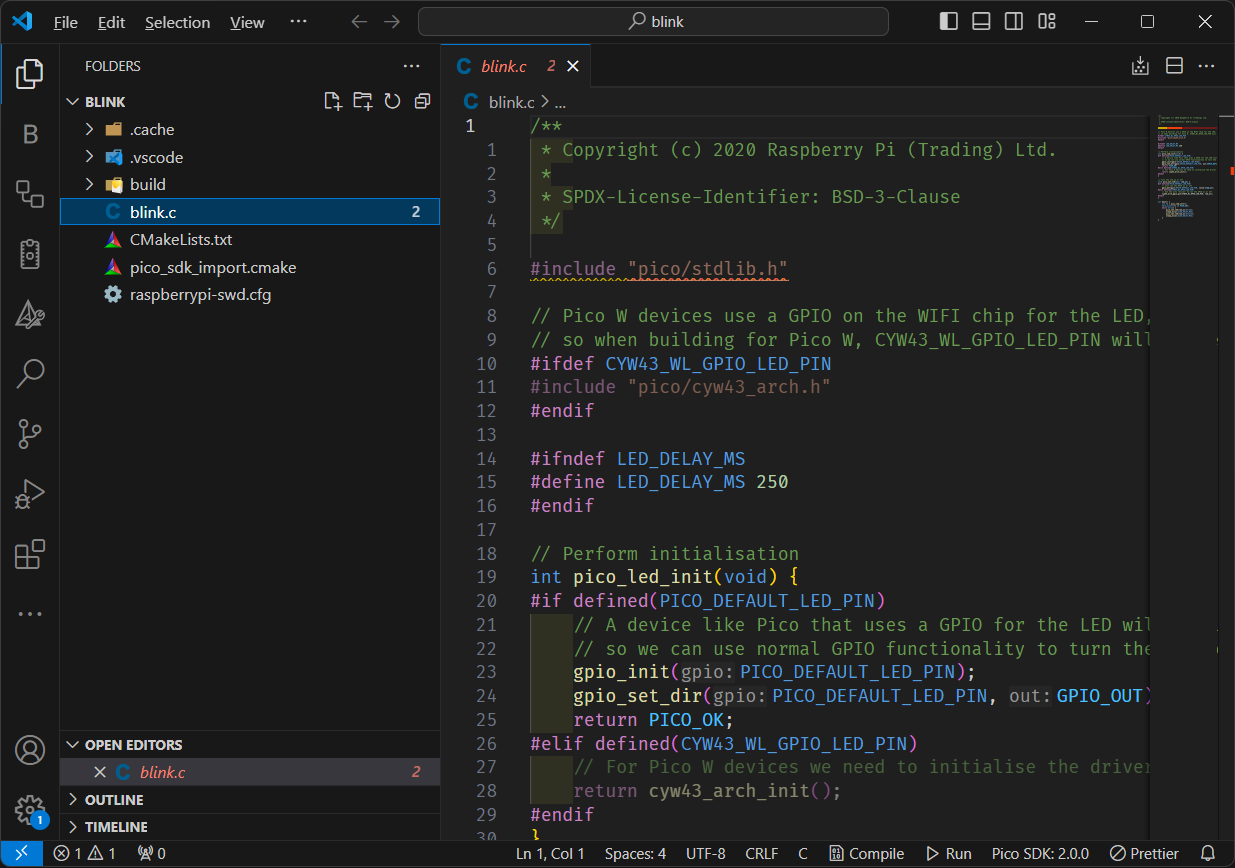
Example 1: LED Blink
To demonstrate basic SDK usage, the following example details programming the onboard LED to blink:
#include "pico/stdlib.h"

const int sleep_time = 250;

int main() {
    const uint LED_PIN = PICO_DEFAULT_LED_PIN; // GPIO25
    gpio_init(LED_PIN);
    gpio_set_dir(LED_PIN, GPIO_OUT);
    while (true) {
        gpio_put(LED_PIN, 1);
        sleep_ms(sleep_time);
        gpio_put(LED_PIN, 0);
        sleep_ms(sleep_time);
    }
}
Example 2: RGB Blink
- ws2812.c
- ws2812.pio
- CMakeLists.txt
/**
 * Copyright (c) 2020 Raspberry Pi (Trading) Ltd.
 *
 * SPDX-License-Identifier: BSD-3-Clause
 */

#include <stdio.h>
#include <stdlib.h>

#include "pico/stdlib.h"
#include "hardware/pio.h"
#include "hardware/clocks.h"
#include "ws2812.pio.h"

#define IS_RGBW true
#define NUM_PIXELS 1

#ifdef PICO_DEFAULT_WS2812_PIN
#define WS2812_PIN PICO_DEFAULT_WS2812_PIN
#else
// default to pin 2 if the board doesn't have a default WS2812 pin defined
#define WS2812_PIN 22
#endif

static inline void put_pixel(uint32_t pixel_grb) {
    pio_sm_put_blocking(pio0, 0, pixel_grb << 8u);
}

static inline uint32_t urgb_u32(uint8_t r, uint8_t g, uint8_t b) {
    return
            ((uint32_t) (r) << 8) |
            ((uint32_t) (g) << 16) |
            (uint32_t) (b);
}

void pattern_snakes(uint len, uint t) {
    for (uint i = 0; i < len; ++i) {
        uint x = (i + (t >> 1)) % 64;
        if (x < 10)
            put_pixel(urgb_u32(0xff, 0, 0));
        else if (x >= 15 && x < 25)
            put_pixel(urgb_u32(0, 0xff, 0));
        else if (x >= 30 && x < 40)
            put_pixel(urgb_u32(0, 0, 0xff));
        else
            put_pixel(0);
    }
}

void pattern_random(uint len, uint t) {
    if (t % 8)
        return;
    for (int i = 0; i < len; ++i)
        put_pixel(rand());
}

void pattern_sparkle(uint len, uint t) {
    if (t % 8)
        return;
    for (int i = 0; i < len; ++i)
        put_pixel(rand() % 16 ? 0 : 0xffffffff);
}

void pattern_greys(uint len, uint t) {
    int max = 100; // let's not draw too much current!
    t %= max;
    for (int i = 0; i < len; ++i) {
        put_pixel(t * 0x10101);
        if (++t >= max) t = 0;
    }
}

typedef void (*pattern)(uint len, uint t);
const struct {
    pattern pat;
    const char *name;
} pattern_table[] = {
        {pattern_snakes,  "Snakes!"},
        {pattern_random,  "Random data"},
        {pattern_sparkle, "Sparkles"},
        {pattern_greys,   "Greys"},
};

int main() {
    //set_sys_clock_48();
    stdio_init_all();

    const int RGB_POWER = 23;
    gpio_init(RGB_POWER);
    gpio_set_dir(RGB_POWER, GPIO_OUT);
    gpio_put(RGB_POWER, 1);

    printf("WS2812 Smoke Test, using pin %d", WS2812_PIN);

    // todo get free sm
    PIO pio = pio0;
    int sm = 0;
    uint offset = pio_add_program(pio, &ws2812_program);

    ws2812_program_init(pio, sm, offset, WS2812_PIN, 800000, IS_RGBW);

    int t = 0;
    while (1) {
        int pat = rand() % count_of(pattern_table);
        int dir = (rand() >> 30) & 1 ? 1 : -1;
        puts(pattern_table[pat].name);
        puts(dir == 1 ? "(forward)" : "(backward)");
        for (int i = 0; i < 1000; ++i) {
            pattern_table[pat].pat(NUM_PIXELS, t);
            sleep_ms(10);
            t += dir;
        }
    }
}
;
; Copyright (c) 2020 Raspberry Pi (Trading) Ltd.
;
; SPDX-License-Identifier: BSD-3-Clause
;

.program ws2812
.side_set 1

.define public T1 2
.define public T2 5
.define public T3 3

.lang_opt python sideset_init = pico.PIO.OUT_HIGH
.lang_opt python out_init     = pico.PIO.OUT_HIGH
.lang_opt python out_shiftdir = 1

.wrap_target
bitloop:
    out x, 1       side 0 [T3 - 1] ; Side-set still takes place when instruction stalls
    jmp !x do_zero side 1 [T1 - 1] ; Branch on the bit we shifted out. Positive pulse
do_one:
    jmp  bitloop   side 1 [T2 - 1] ; Continue driving high, for a long pulse
do_zero:
    nop            side 0 [T2 - 1] ; Or drive low, for a short pulse
.wrap

% c-sdk {
#include "hardware/clocks.h"

static inline void ws2812_program_init(PIO pio, uint sm, uint offset, uint pin, float freq, bool rgbw) {

    pio_gpio_init(pio, pin);
    pio_sm_set_consecutive_pindirs(pio, sm, pin, 1, true);

    pio_sm_config c = ws2812_program_get_default_config(offset);
    sm_config_set_sideset_pins(&c, pin);
    sm_config_set_out_shift(&c, false, true, rgbw ? 32 : 24);
    sm_config_set_fifo_join(&c, PIO_FIFO_JOIN_TX);

    int cycles_per_bit = ws2812_T1 + ws2812_T2 + ws2812_T3;
    float div = clock_get_hz(clk_sys) / (freq * cycles_per_bit);
    sm_config_set_clkdiv(&c, div);

    pio_sm_init(pio, sm, offset, &c);
    pio_sm_set_enabled(pio, sm, true);
}
%}

.program ws2812_parallel

.define public T1 2
.define public T2 5
.define public T3 3

.wrap_target
    out x, 32
    mov pins, !null [T1-1]
    mov pins, x     [T2-1]
    mov pins, null  [T3-2]
.wrap

% c-sdk {
#include "hardware/clocks.h"

static inline void ws2812_parallel_program_init(PIO pio, uint sm, uint offset, uint pin_base, uint pin_count, float freq) {
    for(uint i=pin_base; i<pin_base+pin_count; i++) {
        pio_gpio_init(pio, i);
    }
    pio_sm_set_consecutive_pindirs(pio, sm, pin_base, pin_count, true);

    pio_sm_config c = ws2812_parallel_program_get_default_config(offset);
    sm_config_set_out_shift(&c, true, true, 32);
    sm_config_set_out_pins(&c, pin_base, pin_count);
    sm_config_set_set_pins(&c, pin_base, pin_count);
    sm_config_set_fifo_join(&c, PIO_FIFO_JOIN_TX);

    int cycles_per_bit = ws2812_parallel_T1 + ws2812_parallel_T2 + ws2812_parallel_T3;
    float div = clock_get_hz(clk_sys) / (freq * cycles_per_bit);
    sm_config_set_clkdiv(&c, div);

    pio_sm_init(pio, sm, offset, &c);
    pio_sm_set_enabled(pio, sm, true);
}
%}
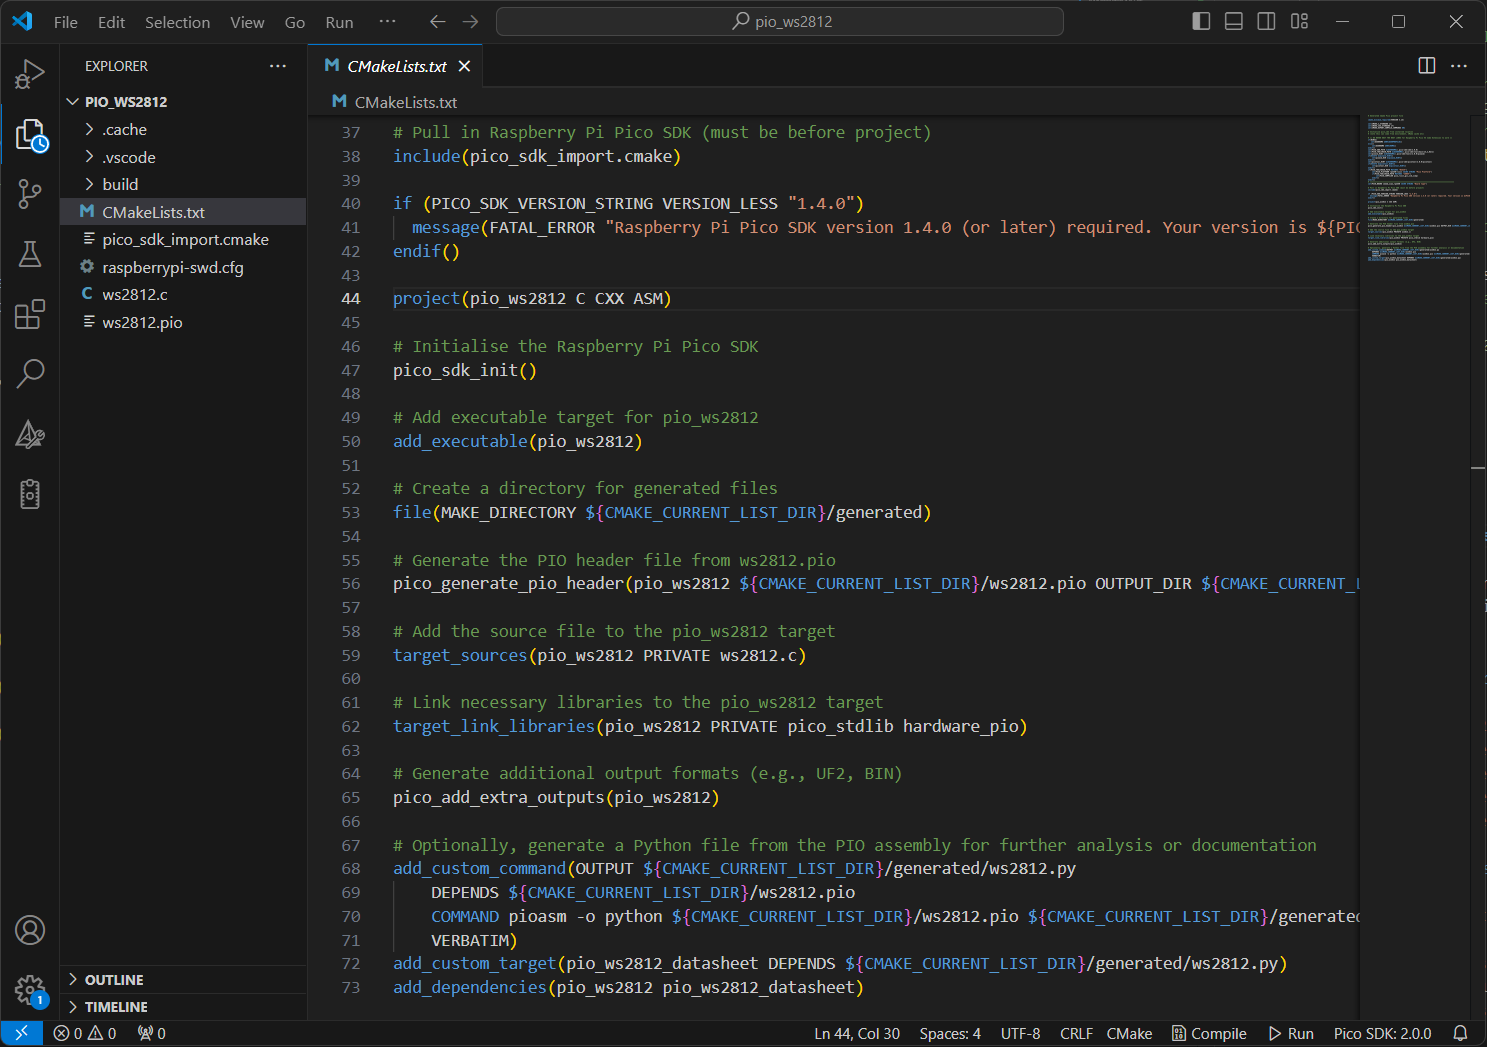
Copy the following snippet and append it to your CMakeLists.txt file.
project(pio_ws2812 C CXX ASM)

# Initialise the Raspberry Pi Pico SDK
pico_sdk_init()

# Add executable target for pio_ws2812
add_executable(pio_ws2812)

# Create a directory for generated files
file(MAKE_DIRECTORY ${CMAKE_CURRENT_LIST_DIR}/generated)

# Generate the PIO header file from ws2812.pio
pico_generate_pio_header(pio_ws2812 ${CMAKE_CURRENT_LIST_DIR}/ws2812.pio OUTPUT_DIR ${CMAKE_CURRENT_LIST_DIR}/generated)

# Add the source file to the pio_ws2812 target
target_sources(pio_ws2812 PRIVATE ws2812.c)

# Link necessary libraries to the pio_ws2812 target
target_link_libraries(pio_ws2812 PRIVATE pico_stdlib hardware_pio)

# Generate additional output formats (e.g., UF2, BIN)
pico_add_extra_outputs(pio_ws2812)

# Optionally, generate a Python file from the PIO assembly for further analysis or documentation
add_custom_command(OUTPUT ${CMAKE_CURRENT_LIST_DIR}/generated/ws2812.py
    DEPENDS ${CMAKE_CURRENT_LIST_DIR}/ws2812.pio
    COMMAND pioasm -o python ${CMAKE_CURRENT_LIST_DIR}/ws2812.pio ${CMAKE_CURRENT_LIST_DIR}/generated/ws2812.py
    VERBATIM)
add_custom_target(pio_ws2812_datasheet DEPENDS ${CMAKE_CURRENT_LIST_DIR}/generated/ws2812.py)
add_dependencies(pio_ws2812 pio_ws2812_datasheet)
Exmaple 3: UART print
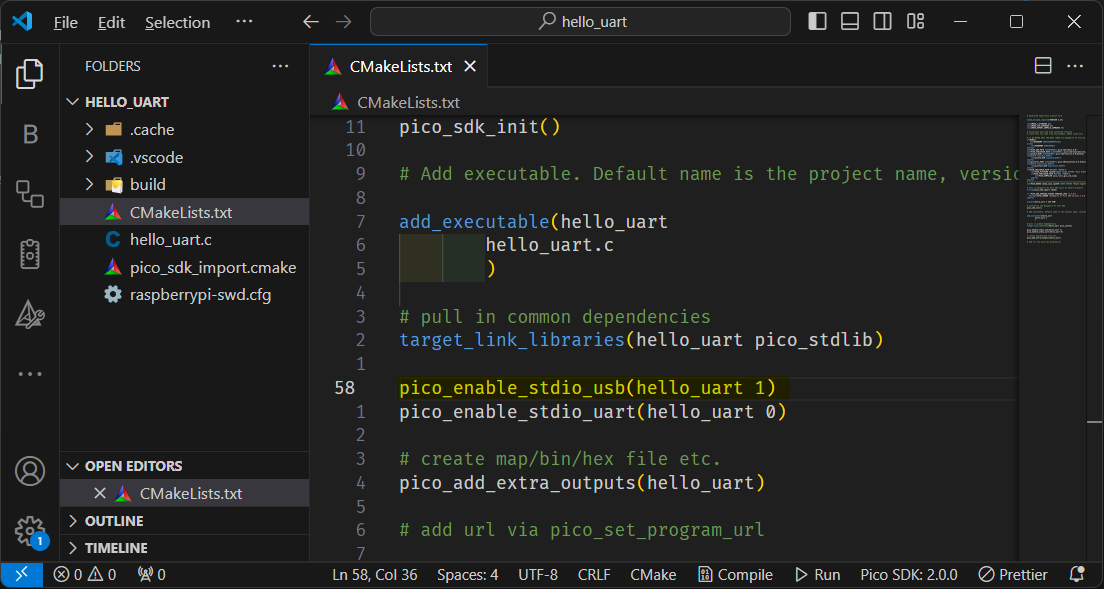
If you want to enable printf output to your computer via USB, you'll need to configure your project's CMakeLists.txt file by adding the following line:
pico_enable_stdio_usb(your_project_name 1)
Additionally, ensure you initialize standard I/O in your code by adding stdio_init_all(); in your main function.
#include "hardware/uart.h"
#include "pico/stdlib.h"
#include <pico/stdio.h>
#include <pico/time.h>
#include <stdio.h>

#define UART_ID uart0
#define BAUD_RATE 115200

// We are using pins 0 and 1, but see the GPIO function select table in the
// datasheet for information on which other pins can be used.
#define UART_TX_PIN 0
#define UART_RX_PIN 1

int main() {
   stdio_init_all();
  // Set up our UART with the required speed.
  uart_init(UART_ID, BAUD_RATE);

  // Set the TX and RX pins by using the function select on the GPIO
  // Set datasheet for more information on function select
  gpio_set_function(UART_TX_PIN, UART_FUNCSEL_NUM(UART_ID, UART_TX_PIN));
  gpio_set_function(UART_RX_PIN, UART_FUNCSEL_NUM(UART_ID, UART_RX_PIN));

  // Use some the various UART functions to send out data
  // In a default system, printf will also output via the default UART

  // Send out a character without any conversions
  uart_putc_raw(UART_ID, 'A');

  // Send out a character but do CR/LF conversions
  uart_putc(UART_ID, 'B');

  // Send out a string, with CR/LF conversions
  uart_puts(UART_ID, " Hello, UART!\n");

  // Print test
  int i = 0;
  for (;;) {
    sleep_ms(500);
    printf("Hello %d", i++);
  }
}
Exmaple 4: Read Battery Voltage
#include <stdio.h>
#include "pico/stdlib.h"
#include "hardware/gpio.h"
#include "hardware/adc.h"

void init_gpio() {
    const int gpio = 19;

    gpio_init(gpio);
    gpio_set_dir(gpio, GPIO_OUT);
    gpio_put(gpio, 1);
}

int main() {
    stdio_init_all();
    printf("ADC battery Example - GPIO29 A3\n");

    init_gpio();
    adc_init();

    // Make sure GPIO is high-impedance, no pullups etc
    adc_gpio_init(29);
    // Select ADC input 0 (GPIO26)
    adc_select_input(3);

    while (1) {
        // 12-bit conversion, assume max value == ADC_VREF == 3.3 V
        const float conversion_factor = 3.3f / (1 << 12);
        uint16_t result = adc_read();
        printf("Raw value: 0x%03x, voltage: %f V\n", result, result * conversion_factor * 2);
        sleep_ms(500);
    }
}
FAQ
TinyUSB Submodule Not Initialized; USB Support Unavailable
Issue: When building a project, you may see this warning:
TinyUSB submodule has not been initialized; USB support will be unavailable
Solution:
-
Open Terminal on Linux/macOS or Command Prompt/PowerShell/Git Bash on Windows.
-
Navigate to the Pico SDK directory:
cd /path/to/your/pico-sdk -
Initialize the submodule:
git submodule update --init
This will enable USB support in your project.
Resources
- 🔗 [Link] Raspberry Pi Pico SDK | GitHub
- 📄 [PDF] Raspberry Pi Pico-series C/C++SDK the book which documents the SDK APIs
- 📄 [PDF] Getting started with Raspberry Pi Pico-series - Official Raspberry Pi documentation.
- 📽️ [Video] Intro to Raspberry Pi Pico and RP2040 - A video tutorial.
Tech Support & Product Discussion
Thank you for choosing our products! We are here to provide you with different support to ensure that your experience with our products is as smooth as possible. We offer several communication channels to cater to different preferences and needs.