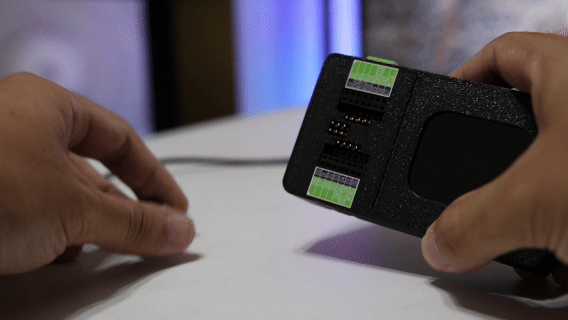
Power Meter

Introducion
The Power Meter feature of the XIAO Debug Mate transforms your device into a versatile, high-precision tool for measuring voltage, current, and power consumption. With an intuitive graphical interface and real-time data updates, you can easily monitor the power draw of your XIAO board or other connected hardware throughout all stages of development. Whether you're optimizing for ultra-low-power operation or verifying system stability under load, the Power Meter provides clear, accurate insight at your fingertips. This section will walk you through its key capabilities and how to get the most from this function.
Tips for Using the Power Meter
To ensure accurate measurements and protect your device, please review these important tips before using the power analysis function.
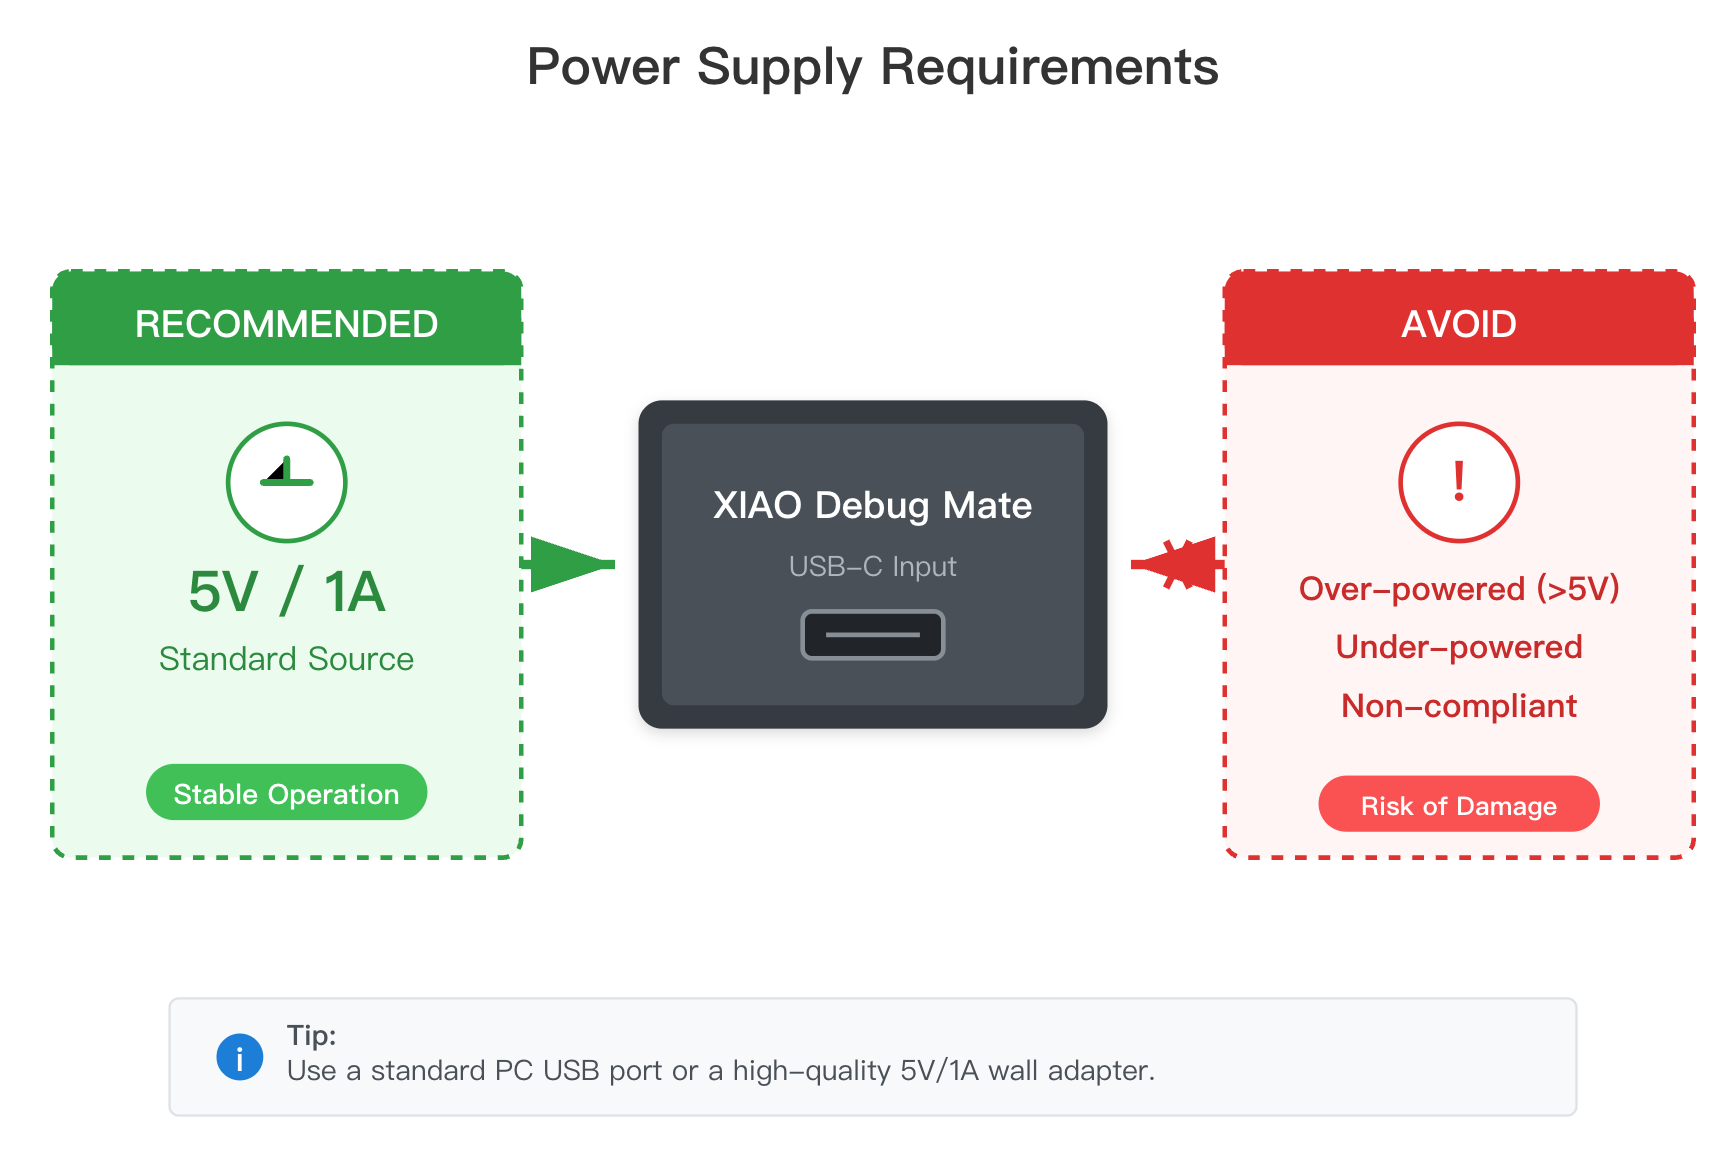
Safe Input Voltage
The XIAO Debug Mate itself should be powered by a standard 5V/1A USB source. Using under-powered, over-powered, or non-compliant chargers may result in unstable operation or risk damaging the device.
Safe Measurement Range
The power meter is a high-precision instrument designed to measure current from 1µA to 1A. It maintains an accuracy of ±1% across the 10µA to 1A range. Exceeding the 1A limit may damage the measurement circuitry.
Power Consumption Discrepancy: Meter vs. Battery
When you measure a XIAO board's power consumption with the Debug Mate, the measurement is taken from the 5V power supply line. This power then goes through the XIAO's internal voltage regulator (LDO) to produce 3.3V for the chip. This regulator itself consumes a small amount of power.
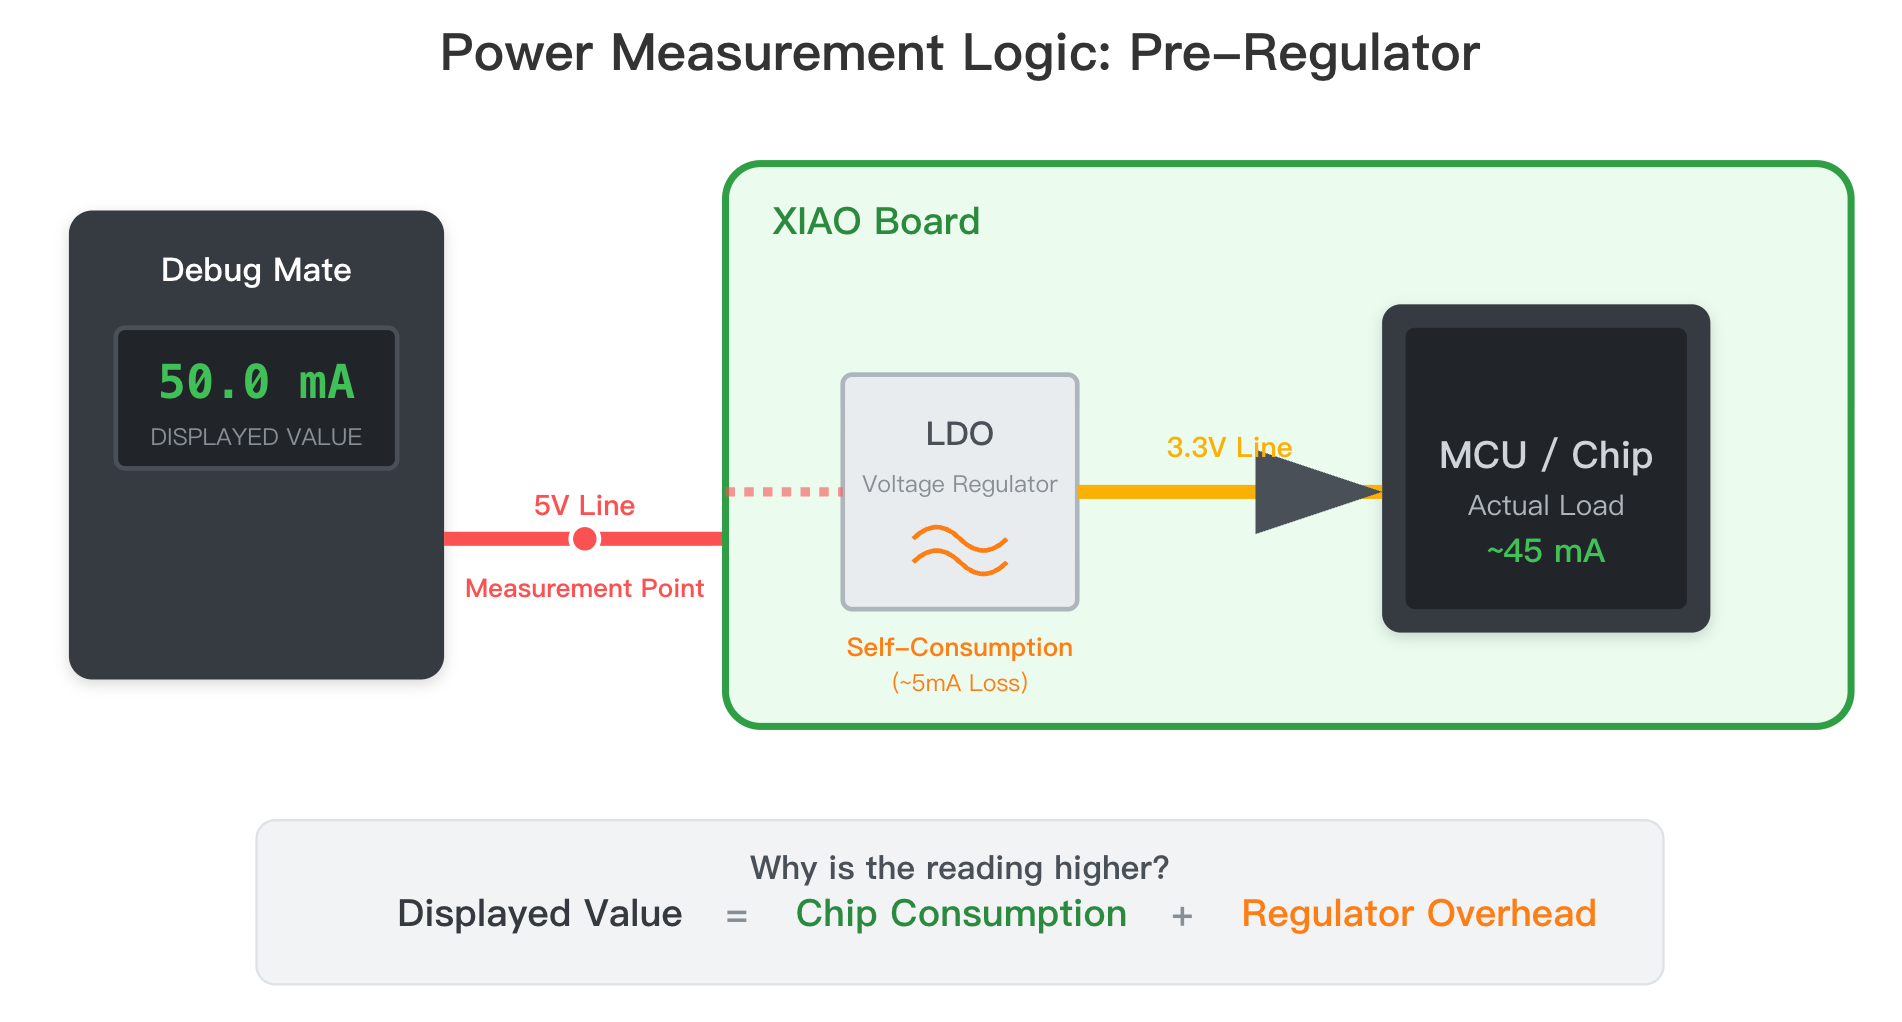
Therefore, the power value shown on the Debug Mate will be slightly higher than the actual power consumed by the XIAO if it were powered directly by a 3.3V battery. This is normal and expected behavior for any measurement taken "pre-regulator."
Calibration and Verification
Every XIAO Debug Mate is individually calibrated for voltage and current at the factory. This calibration data is stored in a write-protected section of memory (EEPROM) and is not affected by firmware updates.
Do not attempt to manually erase or alter this calibration data. Doing so will destroy the factory calibration and may permanently disable the power measurement functionality.
Getting Started
To access the power meter, navigate to the Power Meter icon (bottom-right) on the main menu and press the button.
Getting Started: Understanding the Three Power Meter UIs
The Power Meter function provides three distinct user interfaces (UIs), each tailored for a specific stage of the development process. You can instantly switch between these views to get the data you need, whether it's a high-precision snapshot, a low-power reading, or a long-term analysis.
Navigation:
- Switching UIs: Simply turn the scroll wheel to cycle between the three power meter screens. There is no cursor; the entire page changes.
- Resetting Data: The statistics on UI 3 are cleared only when you long-press the button to return to the main menu.
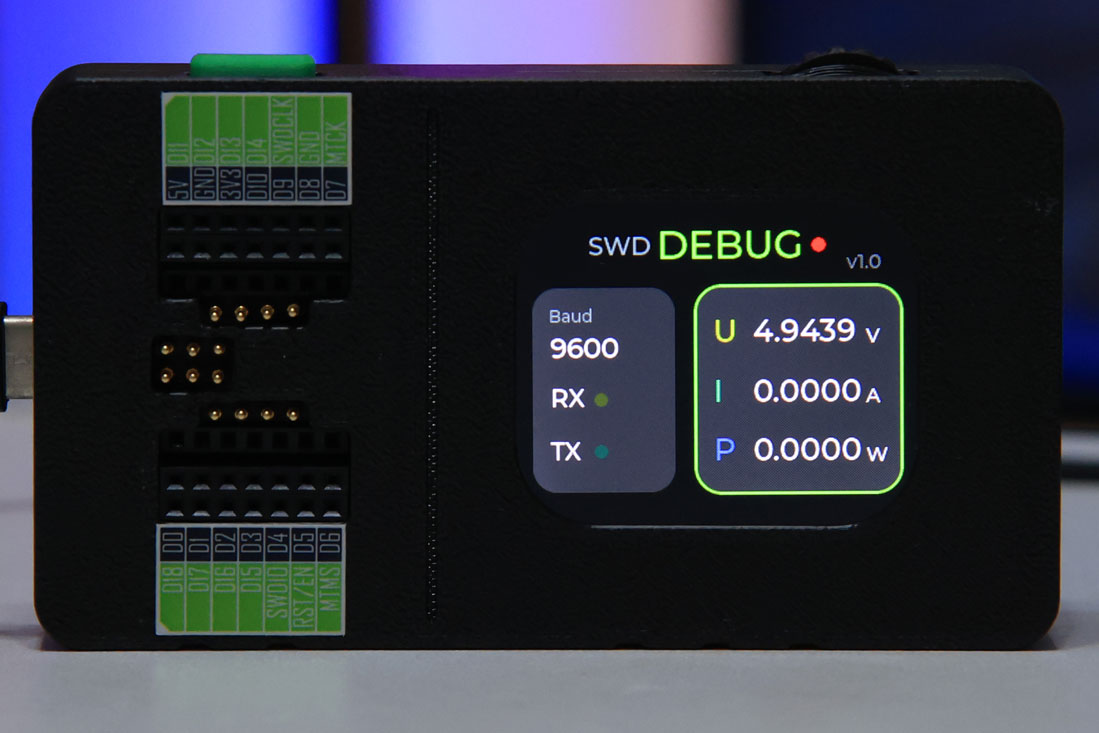
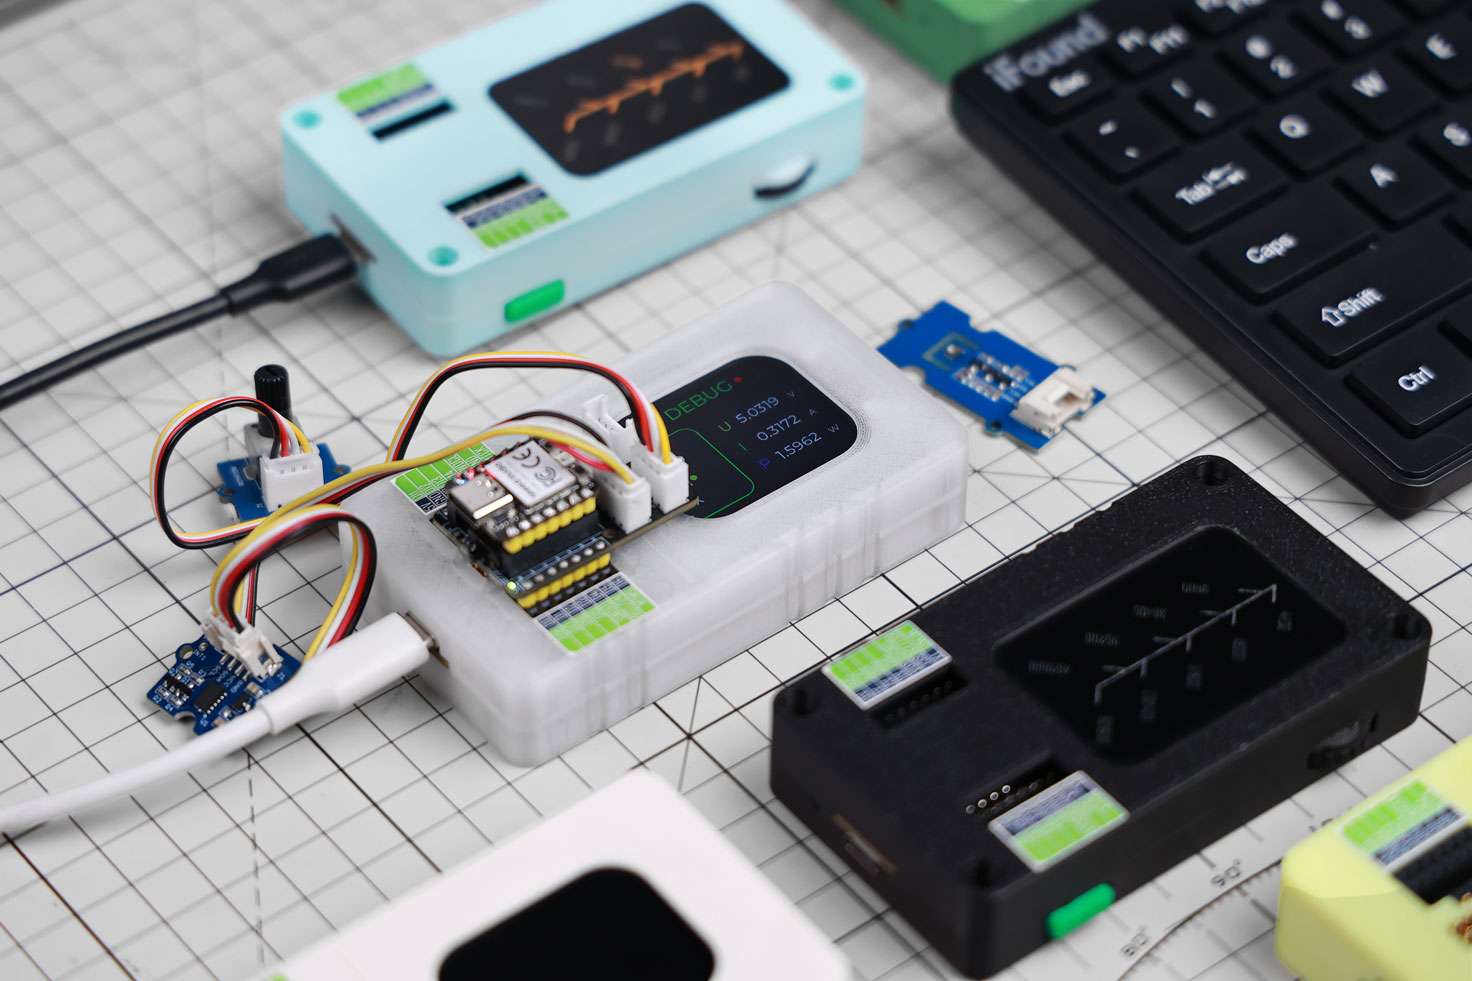
UI 1: High-Precision Dashboard

This is the default view, designed for immediate, high-resolution feedback.
-
What It Shows:
U: Instantaneous Voltage (V) up to 4 decimal places.I: Instantaneous Current (A) up to 4 decimal places.P: Instantaneous Power (W) up to 4 decimal places.
-
Purpose and Use Case: This UI is your go-to for real-time debugging and fundamental sanity checks. Its high precision allows you to see even small fluctuations in power draw. Use this screen to quickly verify:
- If the device is drawing the expected amount of current when idle.
- The immediate power impact of turning on a peripheral (like a screen or sensor).
- The stability of your 5V power source.
UI 2: Multi-Unit View for Low-Power

This view is optimized for the intuitive observation of low-power projects.
-
What It Shows:
U: Instantaneous Voltage (V).I: Instantaneous Current, automatically scaled and displayed in Amps (A), milliamps (mA), and microamps (µA).P: Instantaneous Power, automatically scaled and displayed in Watts (W) and milliwatts (mW).
-
Purpose and Use Case: When developing battery-powered or energy-efficient devices, current can drop into the microamp range. This UI eliminates the need for manual unit conversion, allowing you to instantly understand the magnitude of your device's power consumption. It is perfect for:
- Verifying that your device has successfully entered a deep sleep mode (current should be in the µA range).
- Comparing the power draw of different code optimizations without having to mentally calculate the units.
UI 3: Statistical Analysis & Battery Estimation
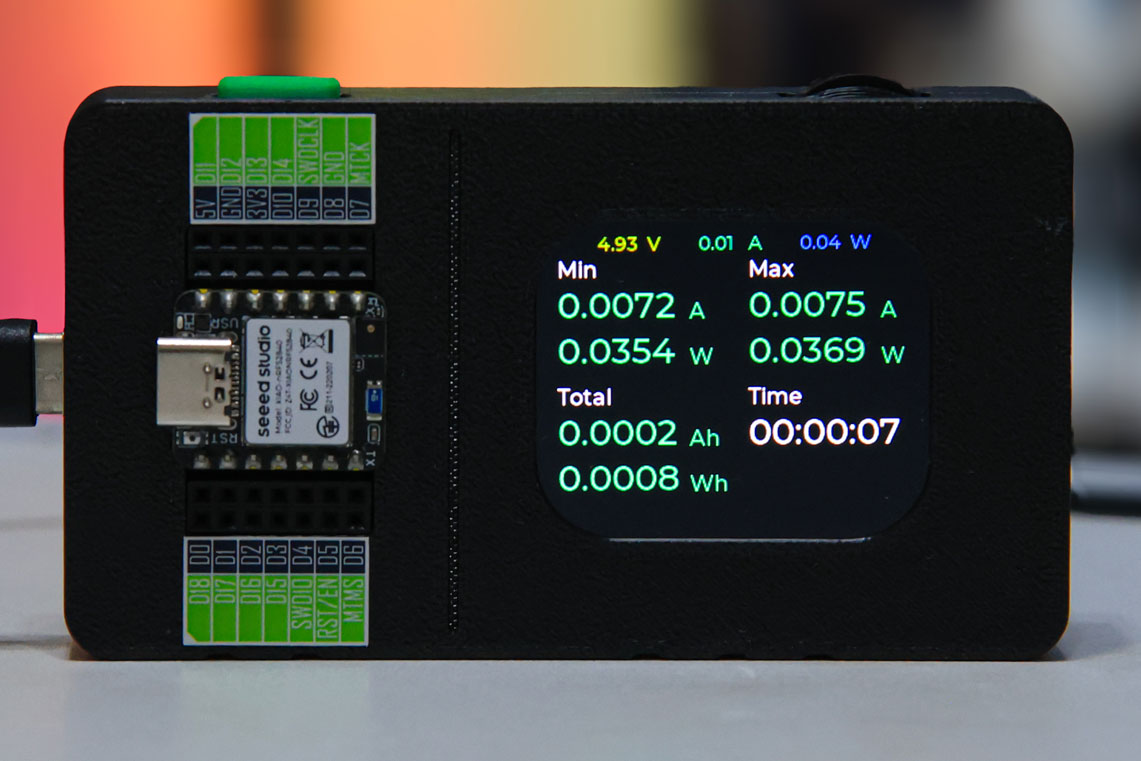
This view is designed for long-term testing and final product validation.
-
What It Shows:
Min/Max: The minimum and maximum Current (A) and Power (W) recorded during the session.Total: The accumulated Energy (Wh) and Charge (Ah).Time: The elapsed time since the measurement session began.
-
Operation: The timer and data accumulation start automatically when you first enter this screen. Switching to UI 1 or UI 2 will not reset the data, allowing you to check real-time values while a long-term test is running. The data is only cleared when you exit to the main menu.
-
Purpose and Use Case: This UI is essential for pre-deployment validation. Before committing to a battery, you can simulate the device's workload and use this screen to:
- Identify peak current (
Max A) to ensure your battery and power circuitry can handle the load. - Use the total consumed charge (
Total Ah) to accurately estimate the battery life you can expect from a battery of a specific capacity (mAh).
- Identify peak current (
Important Note on Battery Life Estimation
Please be aware of a critical detail when using UI 3 for battery calculations:
The XIAO Debug Mate measures the power consumed from the 5V power input to the XIAO. This 5V supply is then converted to 3.3V by the XIAO's onboard power management IC (PMIC/LDO). This conversion process is not 100% efficient and the PMIC itself consumes a small amount of power.
When you power a XIAO directly with a Li-Po battery, you typically connect it to the 3.3V battery pads on the back, bypassing the 5V-to-3.3V conversion circuit.
Therefore, the power consumption measured by the Debug Mate will be slightly higher than the actual power drawn from a 3.3V battery. The value you measure is an excellent and safe upper-bound estimate for your battery life calculations.
Measuring the Power Consumption of a XIAO
This is the most straightforward use case.
- Simply plug your XIAO board directly into the female headers on the front of the XIAO Debug Mate.
- The Debug Mate will automatically power the XIAO and begin measuring its total power draw.
Measuring a XIAO and its Peripherals
You can measure the combined power consumption of a XIAO board and any connected sensors or modules.
Connect your peripheral (e.g., a sensor) to the I/O pins on the headers surrounding the XIAO socket.
-
To be included in the measurement, the peripheral must be powered from a 5V pin on the header. Power drawn from the 3.3V pin is supplied by the XIAO's internal regulator and will not be measured by the Debug Mate.
-
Do not connect the peripheral to the Debug Mate's Grove port for power measurement, as its power line is separate from the XIAO measurement circuit.
Measuring Other Microcontrollers
The power meter is not limited to the XIAO series. You can measure any development board that can be powered by 5V.
- Use DuPont wires to connect your target board to the 5V and GND pins on the XIAO Debug Mate's female headers.
- Ensure that your entire target system (the microcontroller board and all peripherals you wish to measure) is powered exclusively through this 5V connection from the Debug Mate.

Example: Measuring a Seeeduino V4.2
- Connect the 5V pin of the Seeeduino V4.2 to the 5V pin on the Debug Mate's header.
- Connect a GND pin of the Seeeduino V4.2 to a GND pin on the Debug Mate's header.
- Power on the Debug Mate. It will now supply 5V to the Seeeduino board and measure its total current consumption.
Troubleshooting
Q1: Is the power consumption of the Grove interface also included in the statistics?
Do not connect the peripheral to the Debug Mate's Grove port for power measurement, as its power line is separate from the XIAO measurement circuit.