Connecting XIAO ESP32-C5 to Home Assistant
This wiki tutorial will demonstrate how to connect the Seeed Studio XIAO ESP32-C5 to Home Assistant, as well as how to control devices or transmit data after connecting Grove modules to the XIAO ESP32-C5. So, let's get started!
Introduction to Home Assistant
Home Assistant is a powerful open-source home automation platform that allows you to control and monitor your smart home devices from a single, unified interface. It acts as the central hub for your smart home, enabling you to automate routines, monitor sensors, and create a more intelligent living space.

ESPHome Integration
ESPHome is an open-source firmware creation tool specifically designed for ESP8266 / ESP32 devices. It allows you to create custom firmware using simple YAML configuration files, which can then be flashed to your device.

Method 1: Using ESPHome
This example will connect to Home Assistant via ESPHome.
Hardware Preparation
You need to prepare the items listed in the table.
| Seeed Studio XIAO ESP32-C5 | Seeed Studio Grove Base for XIAO | Grove - Red LED |
|---|---|---|
 |  |  |
Install The Firmware
If you have not set up Home Assistant, you can click this link and follow the official Home Assistant tutorial to complete the setup.Home Assistant Installation
Step 1. Install ESPhome
If you have already installed ESPHome, you can skip this step.
- Go to Settings -> Add-ons

- ADD-ON STORE -> Search ESPHome


- Start ESPhome
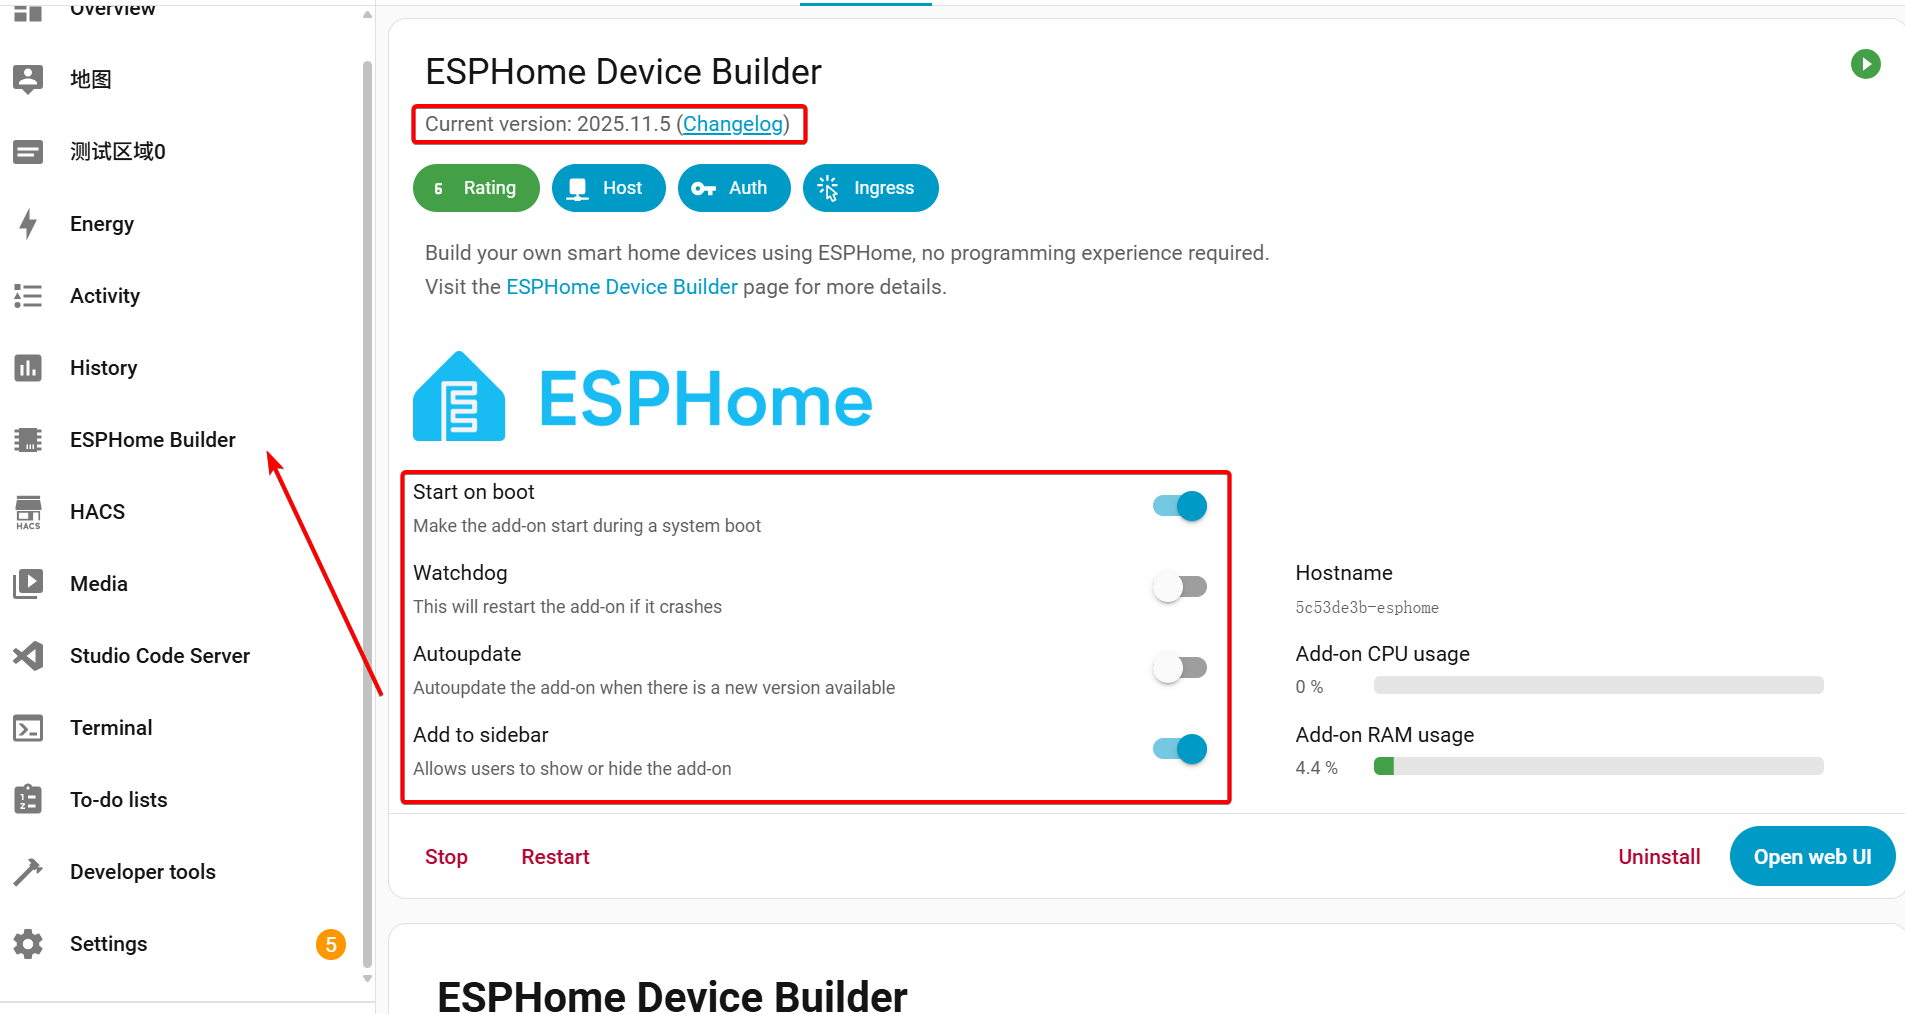
Make sure that the version of ESPHome you have installed is greater than or equal to 25.11.5; otherwise, it may not support the XIAO ESP32-C5.
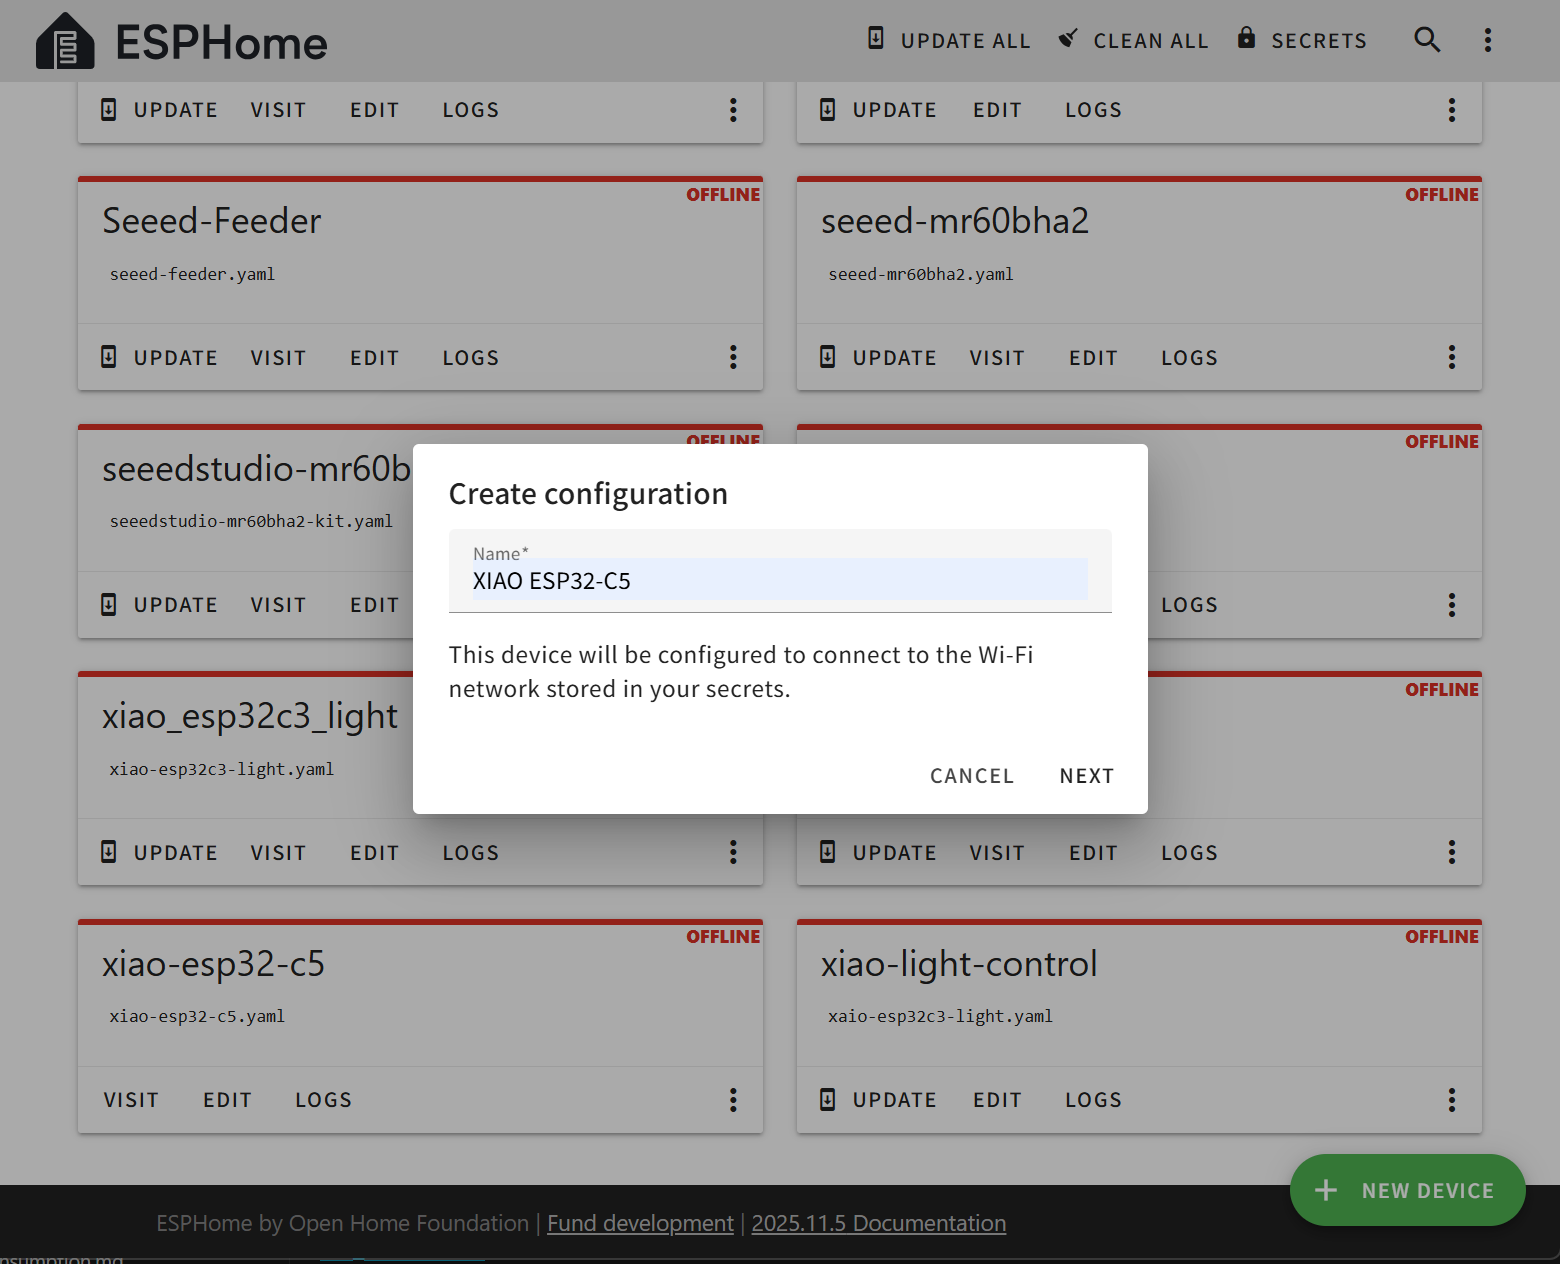
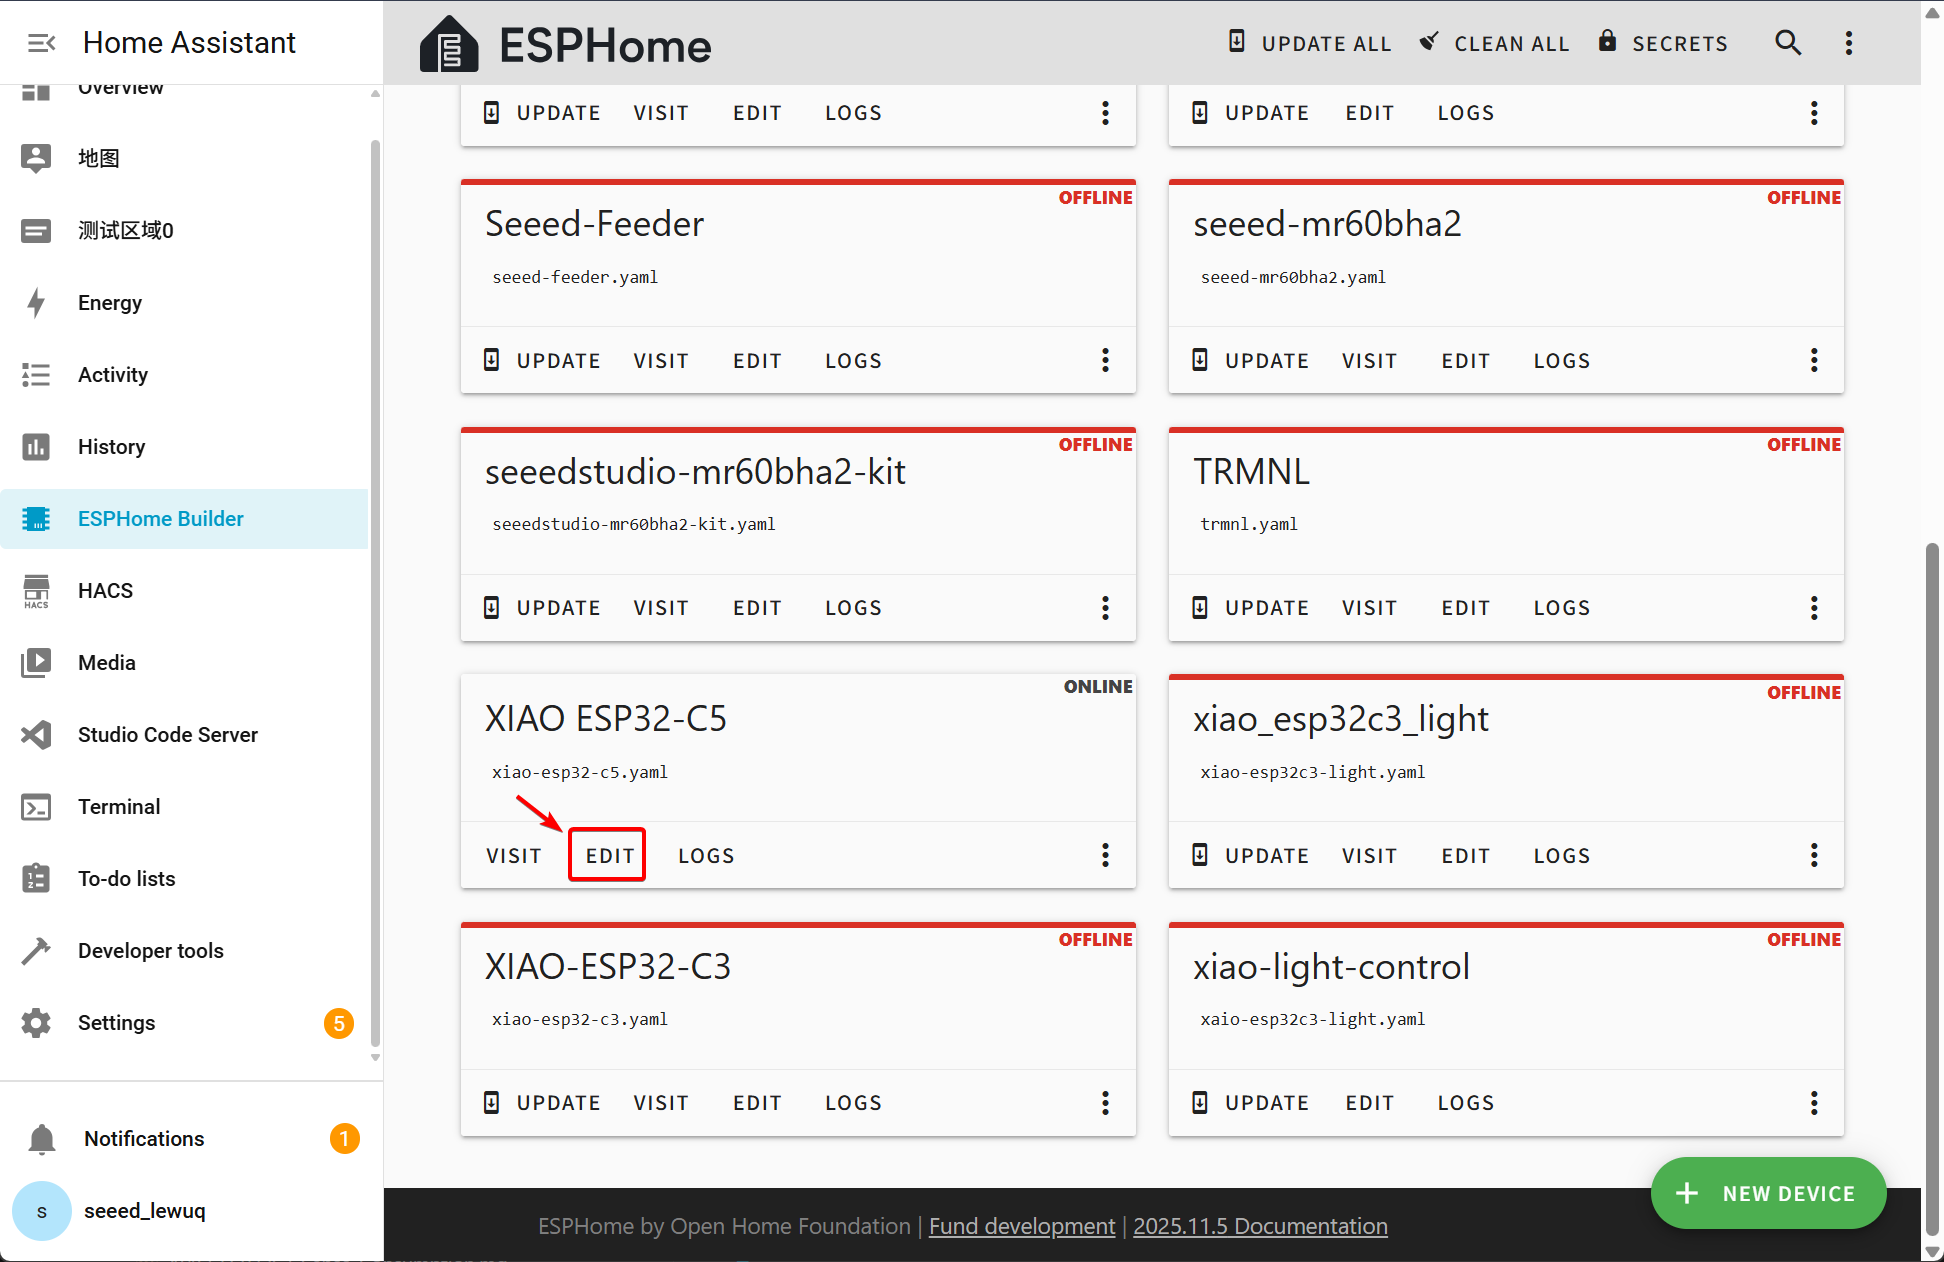
Step 2. Add new device
Go to ESPHome, and click on the Add New Device button at the bottom right.
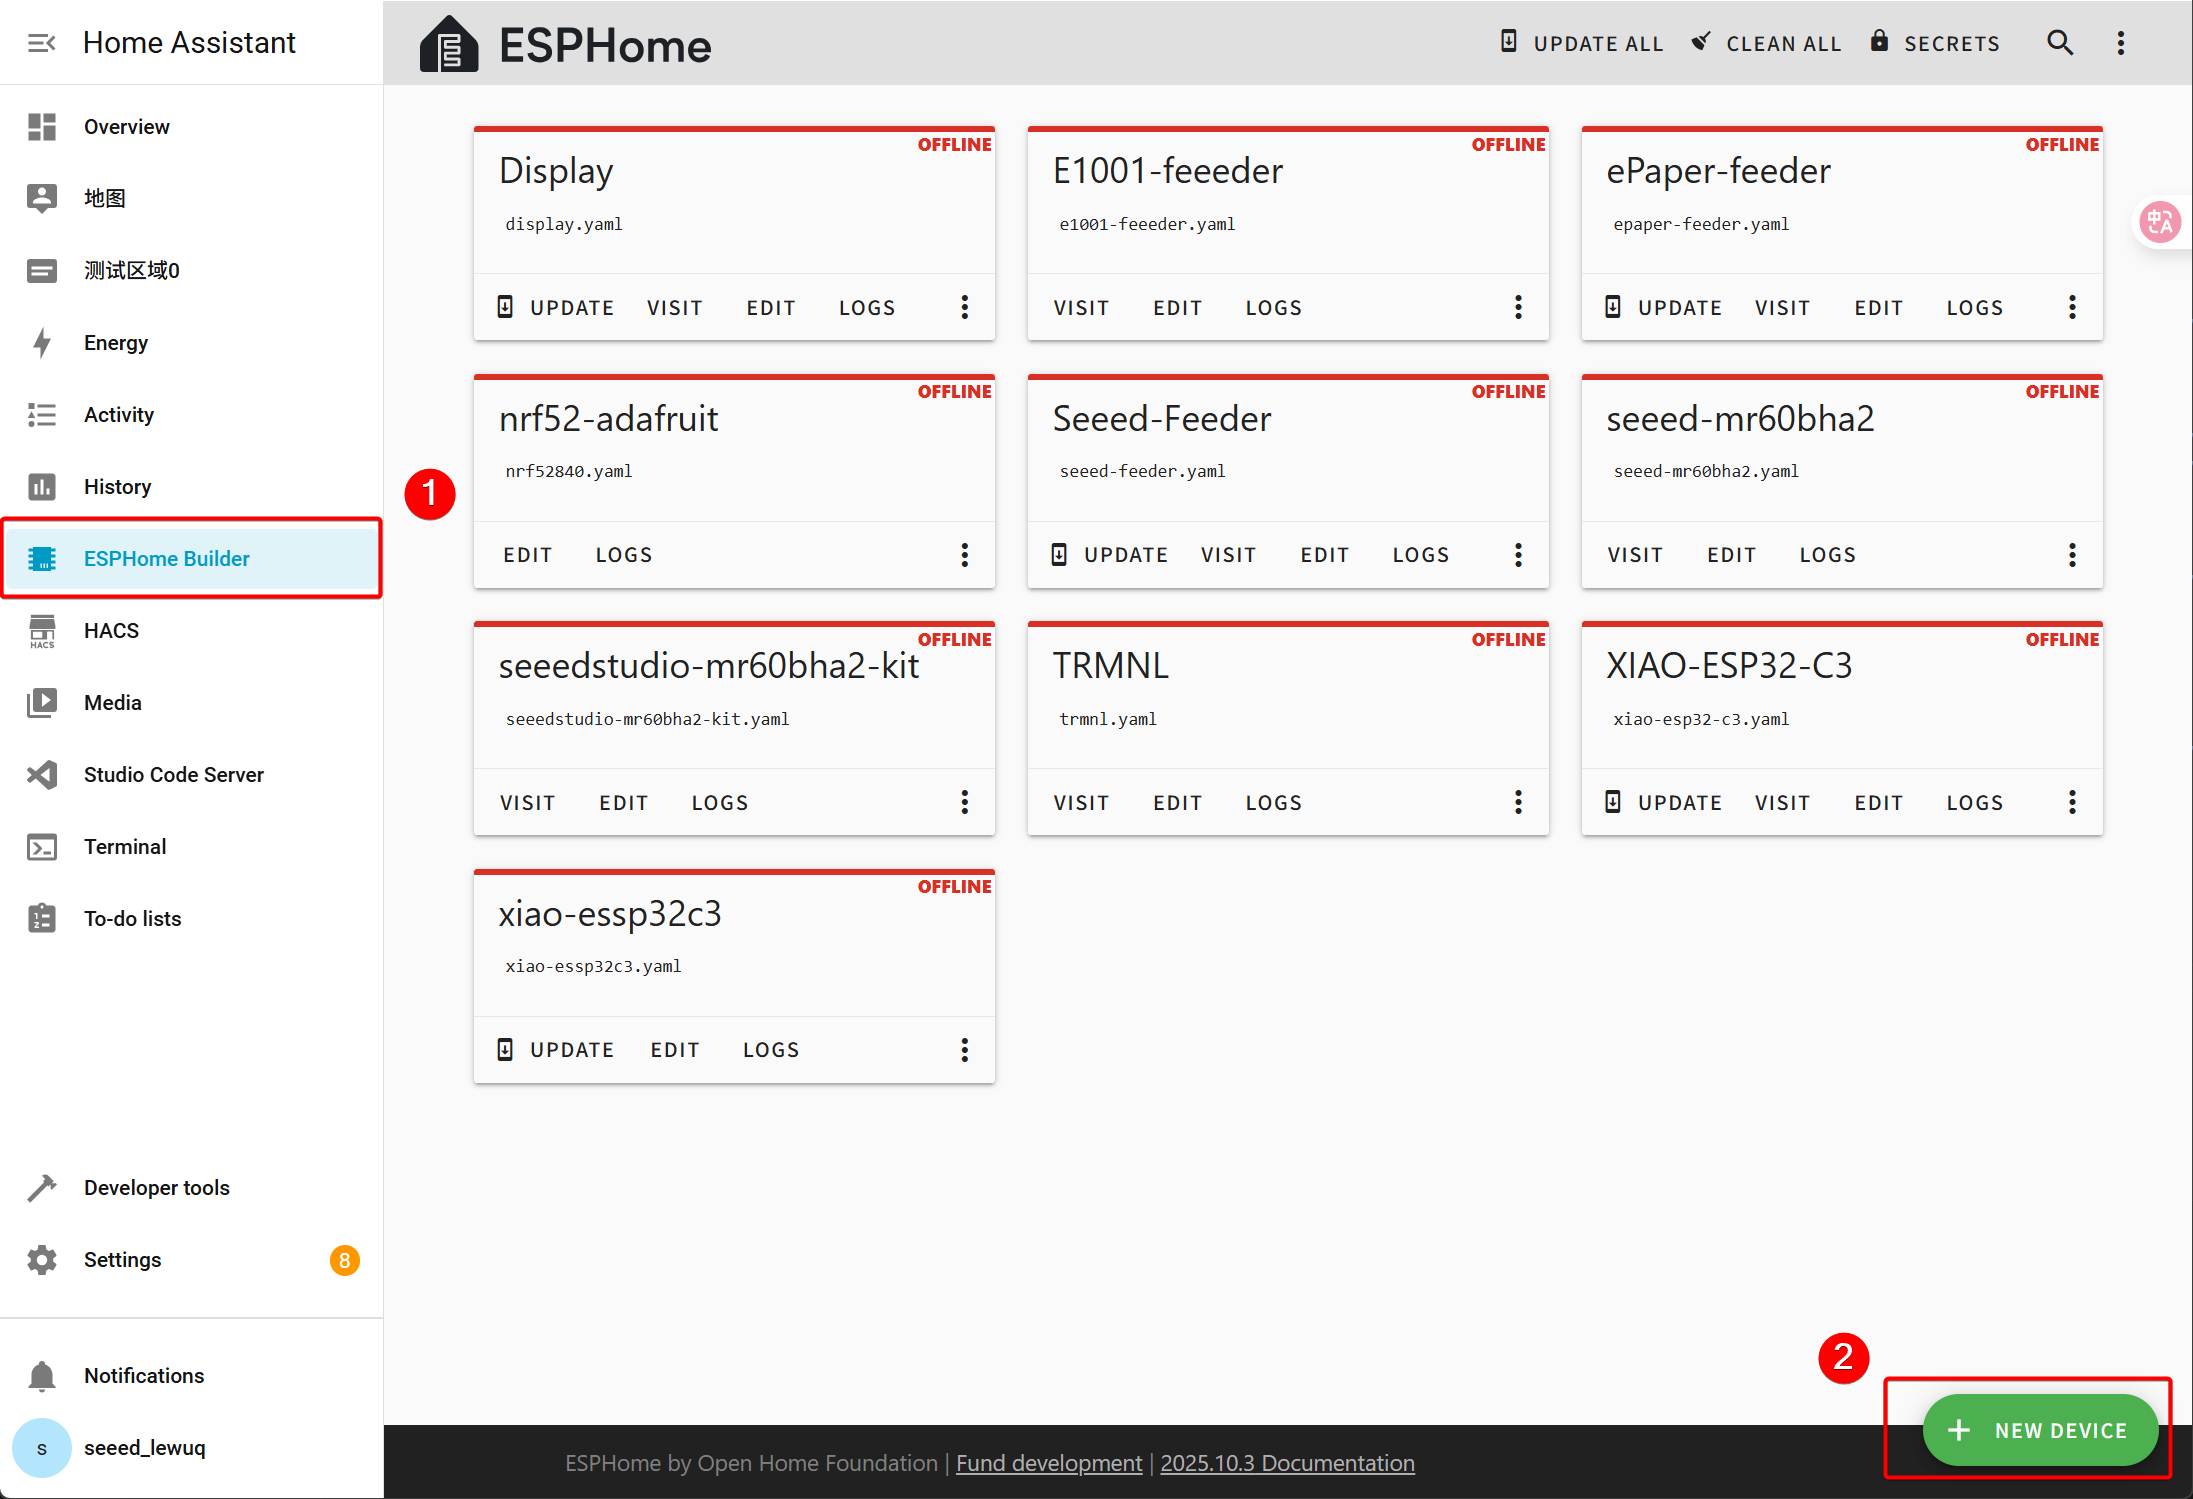
Add a new device and name it XIAO ESP32-C5.
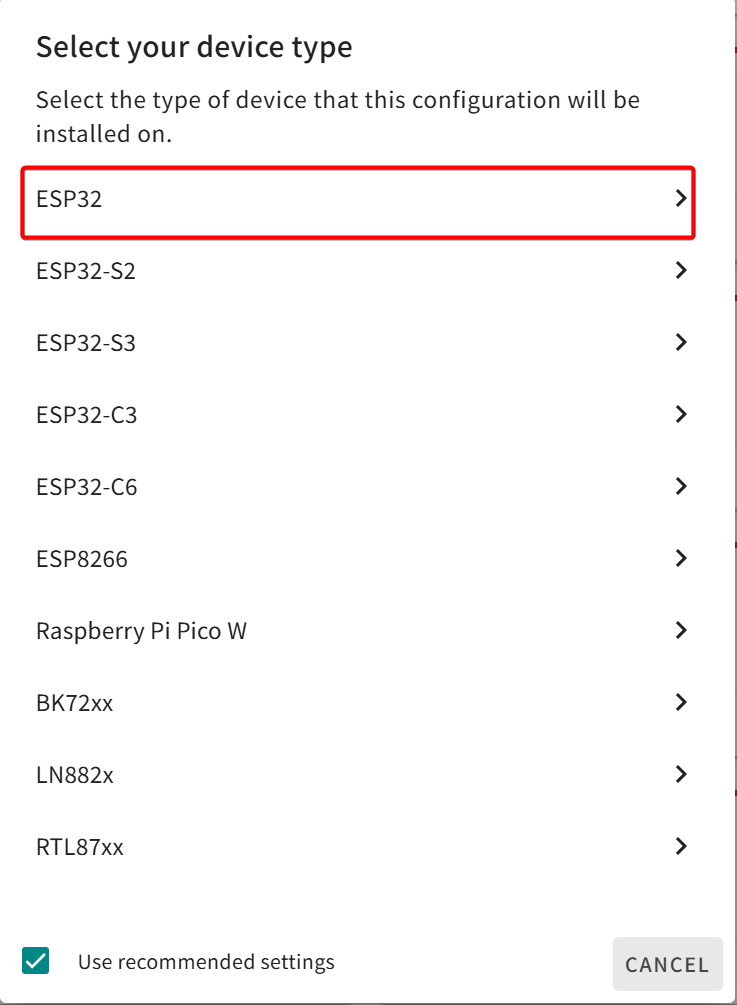

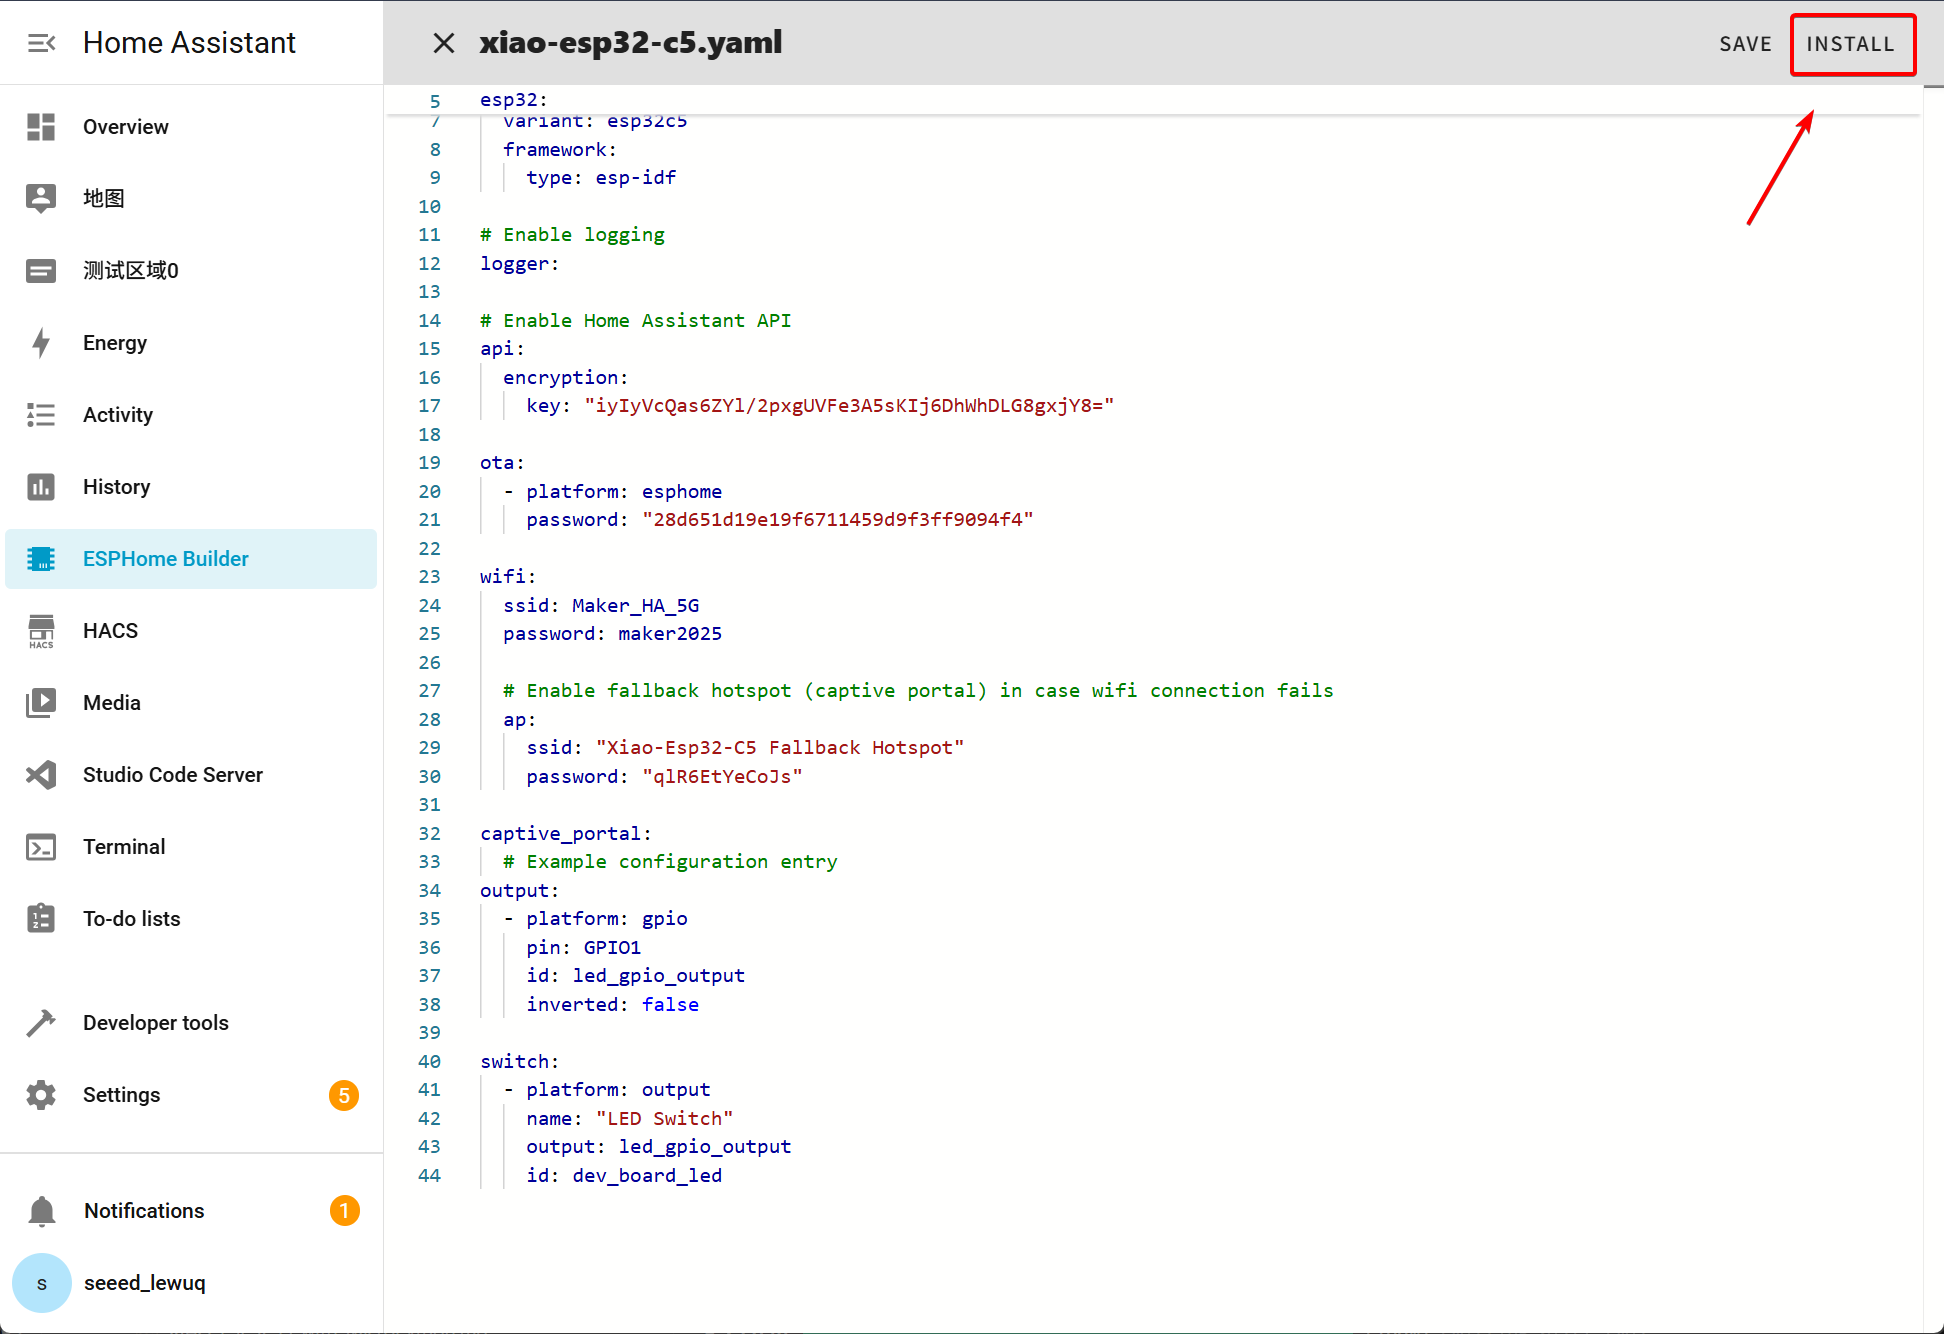
Step 3. Install firwmare
Reference YAML File Configuration
You need to modify the parameters to match those of your device, such as the API key, SSID, password, and so on. In addition, the XIAO ESP32-C5 supports dual-band WiFi (2.4 GHz & 5 GHz), which means you can connect it to the 5 GHz router in your home.
esphome:
  name: xiao-esp32-c5
  friendly_name: XIAO ESP32-C5

esp32:
  board: esp32-c5-devkitc-1
  variant: esp32c5
  framework:
    type: esp-idf

# Enable logging
logger:

# Enable Home Assistant API
api:
  encryption:
    key:

ota:
  - platform: esphome
    password:

wifi:
  ssid: !secret wifi_ssid
  password: !secret wifi_password

  # Enable fallback hotspot (captive portal) in case wifi connection fails
  ap:
    ssid: "Xiao-Esp32-C5 Fallback Hotspot"
    password:

captive_portal:
  # Example configuration entry
output:
  - platform: gpio
    pin: GPIO1
    id: led_gpio_output
    inverted: false

switch:
  - platform: output
    name: "LED Switch"
    output: led_gpio_output
    id: dev_board_led
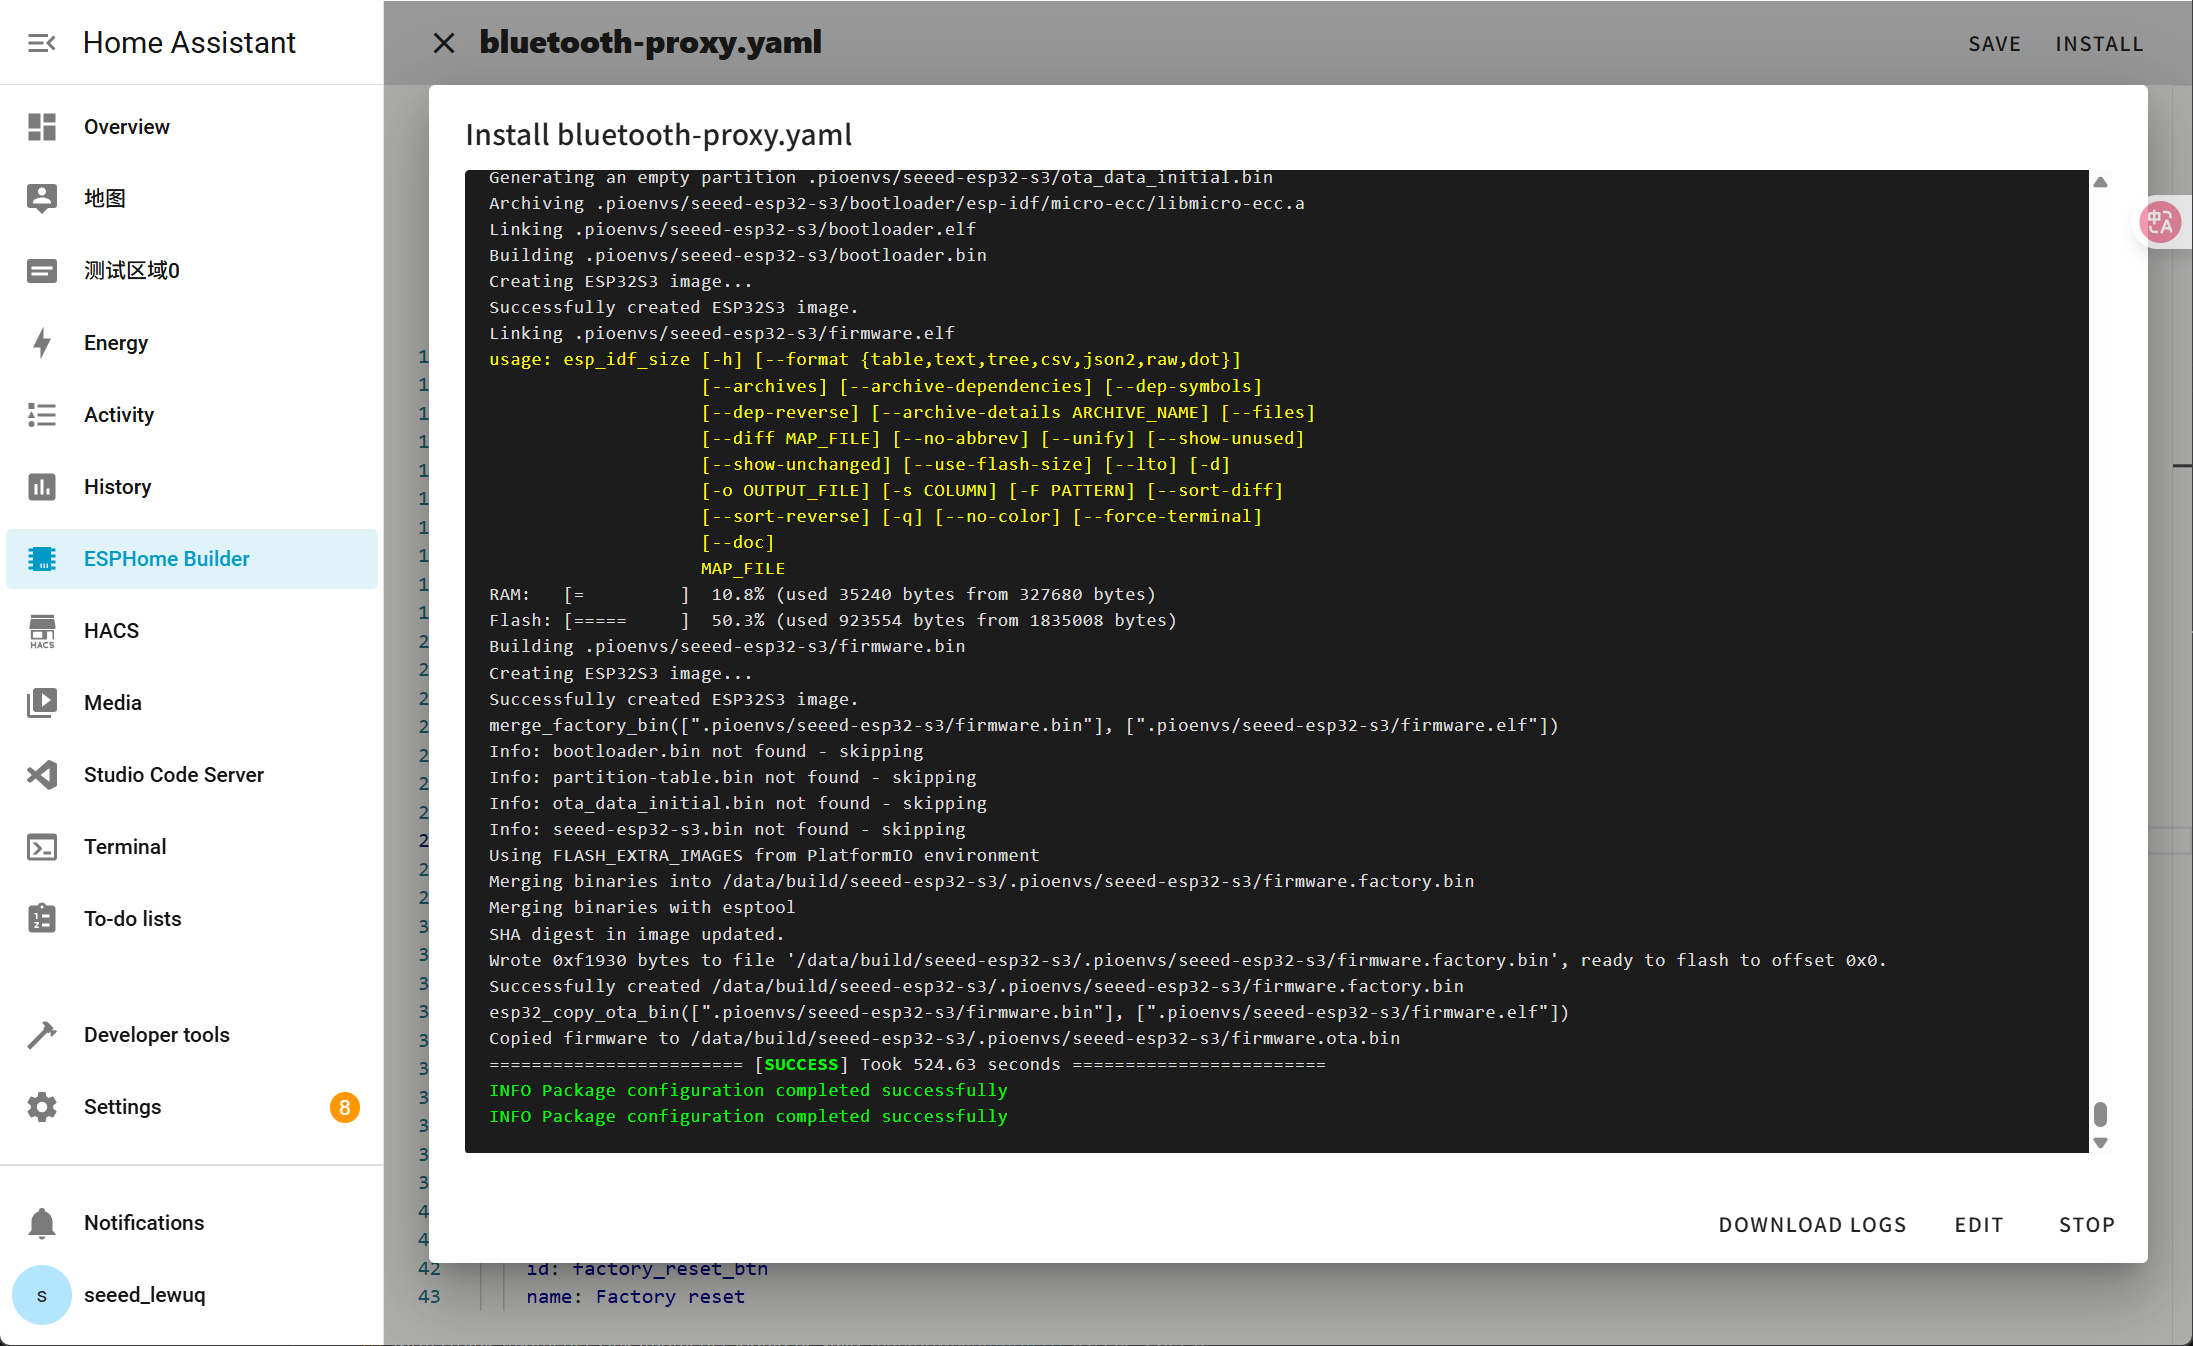
Click INSTALL to install the code to the device and you will see the following image.
- Install through browser
- Install through host
- Install through Wi-Fi
If your Home Assistant Host (Raspberry PI/Green/Yellow etc.) is far away from you, we recommend using this method. You can install it with the computer you have on hand.
First, you need to click Manual download to download the compiled firmware.

Open this website where we will upload the firmware to the XIAO ESP32-C5.
ESPHome dashboard_install
Go back to ESPHome to download the firmware.

Select Factory format.

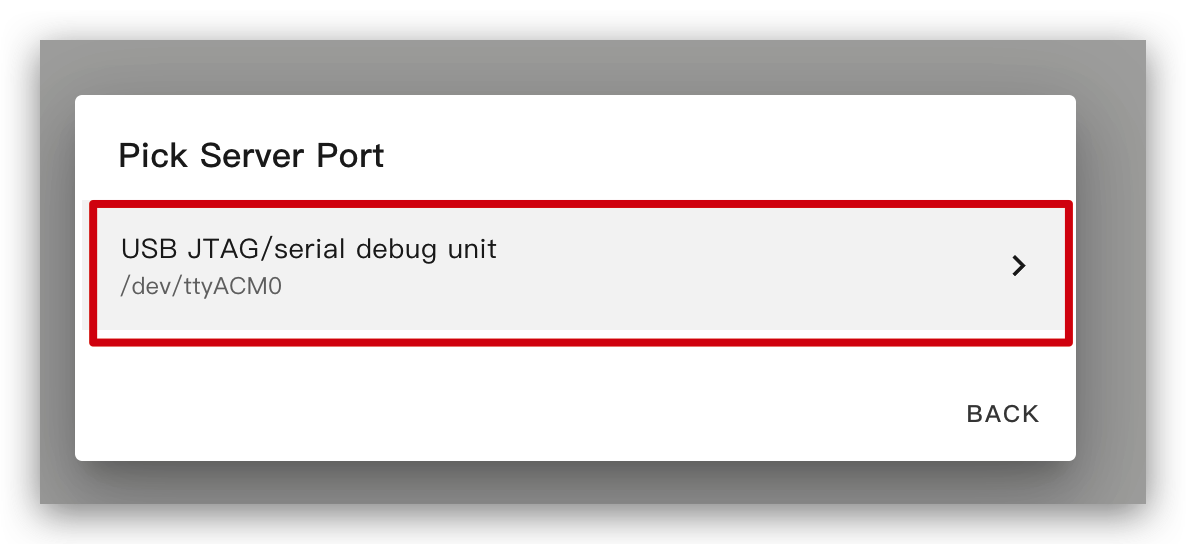
Use USB cable to connect the device to your computer and click CONNECT.
ESPHome dashboard_install

Select usbmodemxxx(Windows is COMxxx) and click connect.

Click INSTALL and select the firmware you just downloaded.

If your Home Assistant Host (Raspberry PI/Green/Yellow etc.) is nearby, we recommend using this method as it is simpler.
Before you install the code to the device, you need to use USB cable to connect this device to your Raspberry Pi or HA Green(Yellow) etc which is running Home Assistant.
Click the options following the image to install the code to the device.

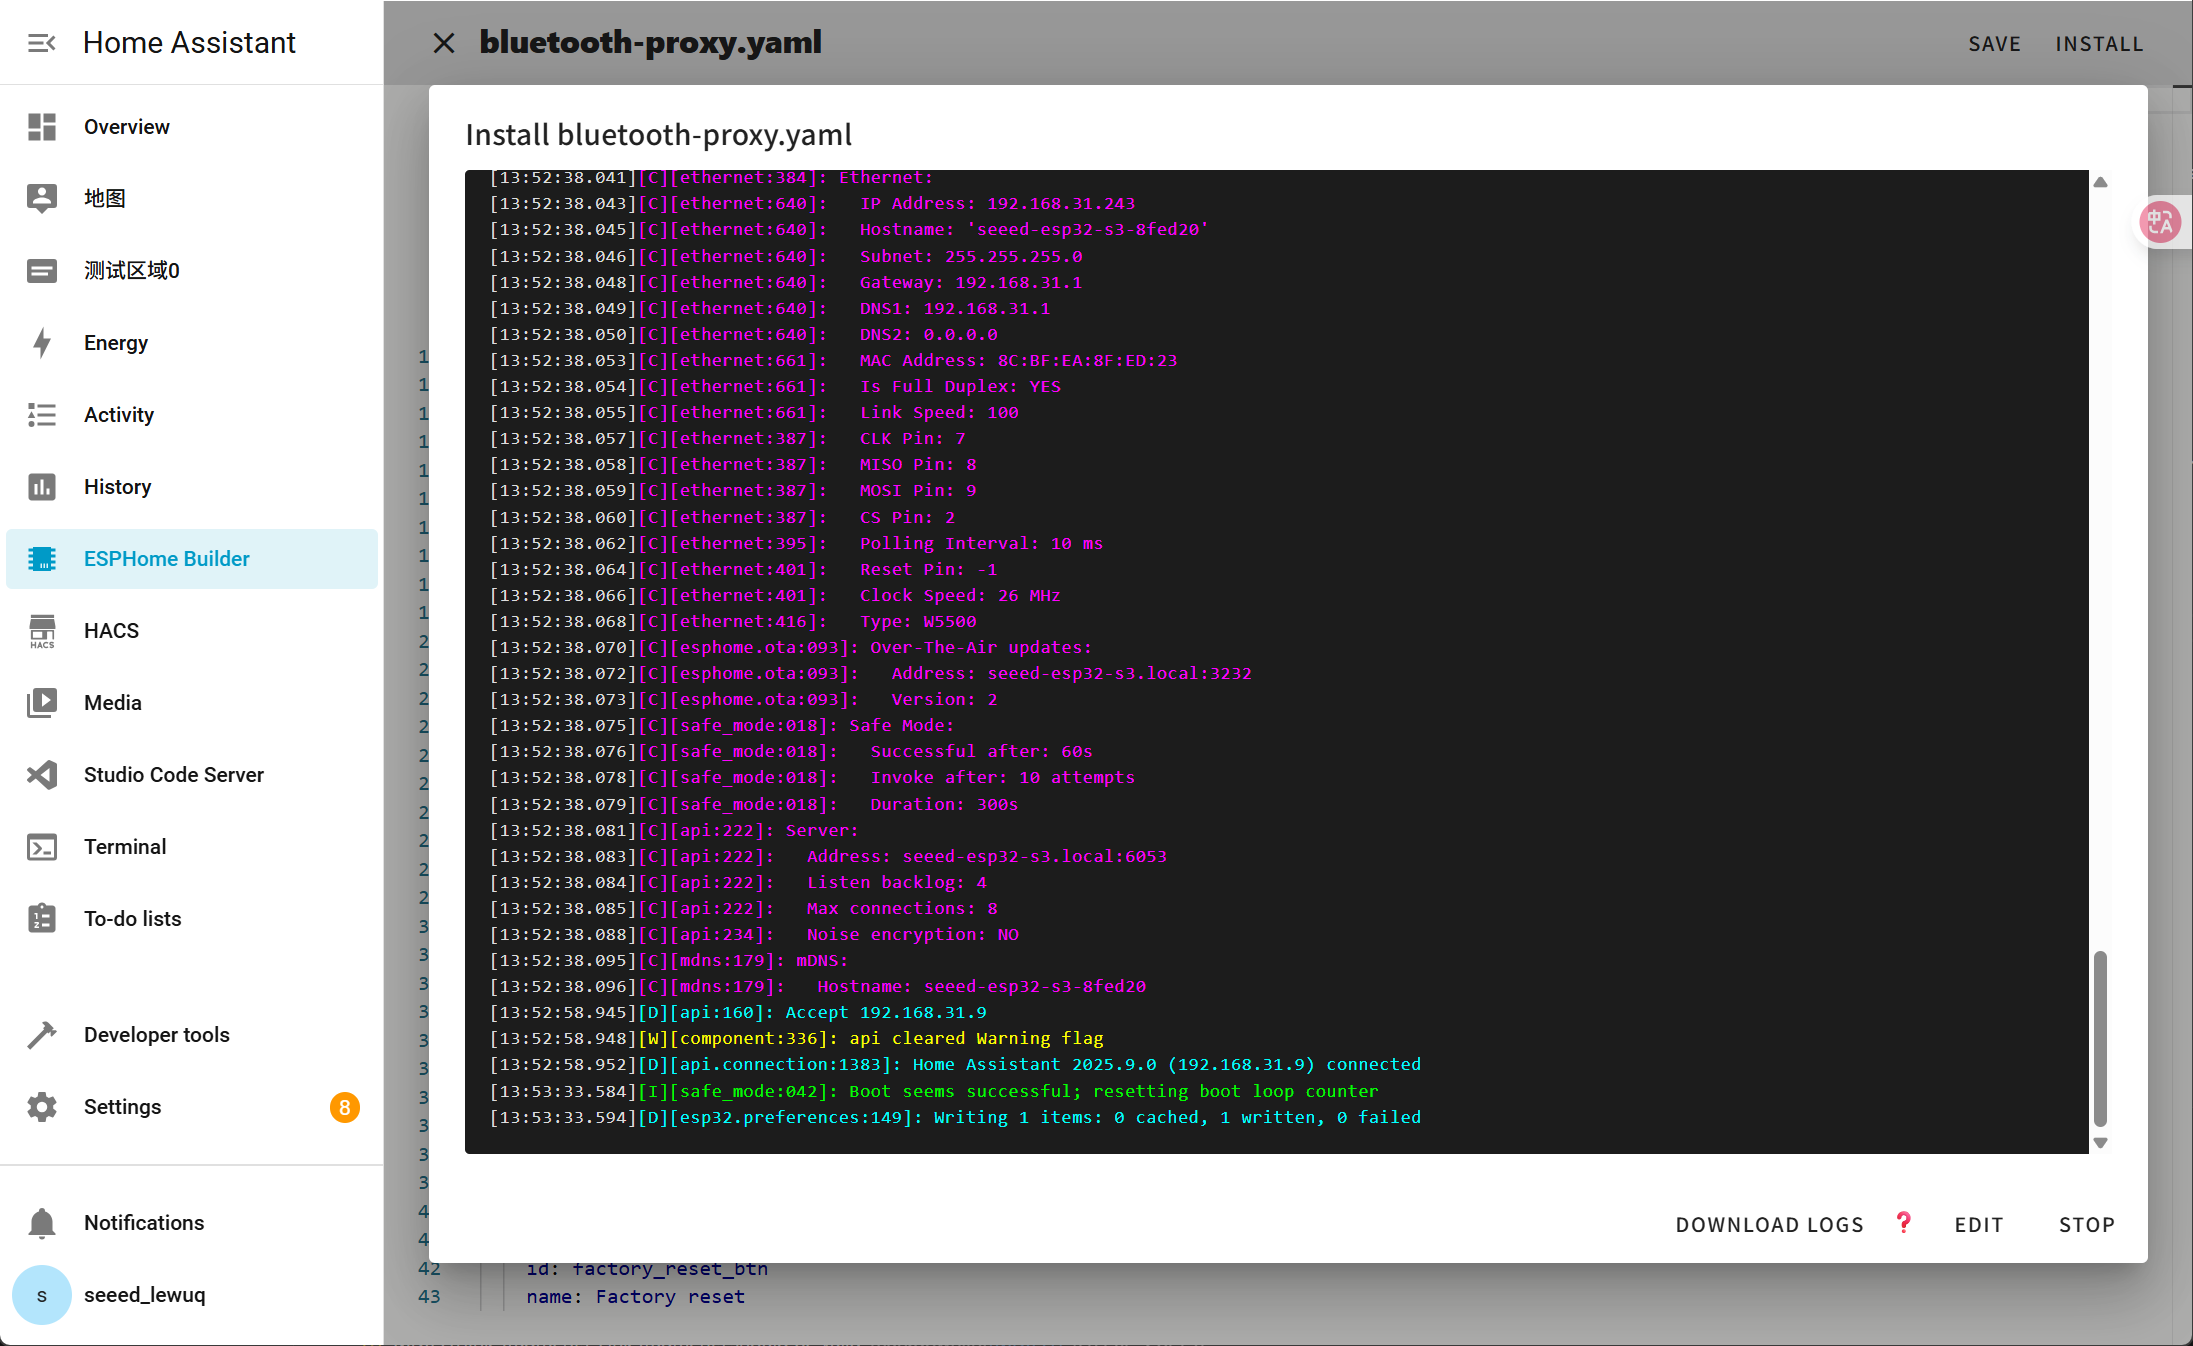
Wait a moment and you will see the feedback like the following image. It means the code is running successfully.
This is the simplest way, but on the premise that when installing the program for the first time, you should first upload the program to the ePaper Panel using the method on the left. After that, you can upload it via wifi. Also, make sure your YAML configuration includes properly configured ota and api sections with valid encryption keys for this method to work.
In this way, you don't need to connect the XIAO ESP32-C5 to anything, just make sure it is online.
Click the option and then the firmware will be installed to ePaper penal automatically.

Wait a moment and you will see the feedback like the following image. If it fails, it may be due to a weak signal. Please move the device closer to your router.
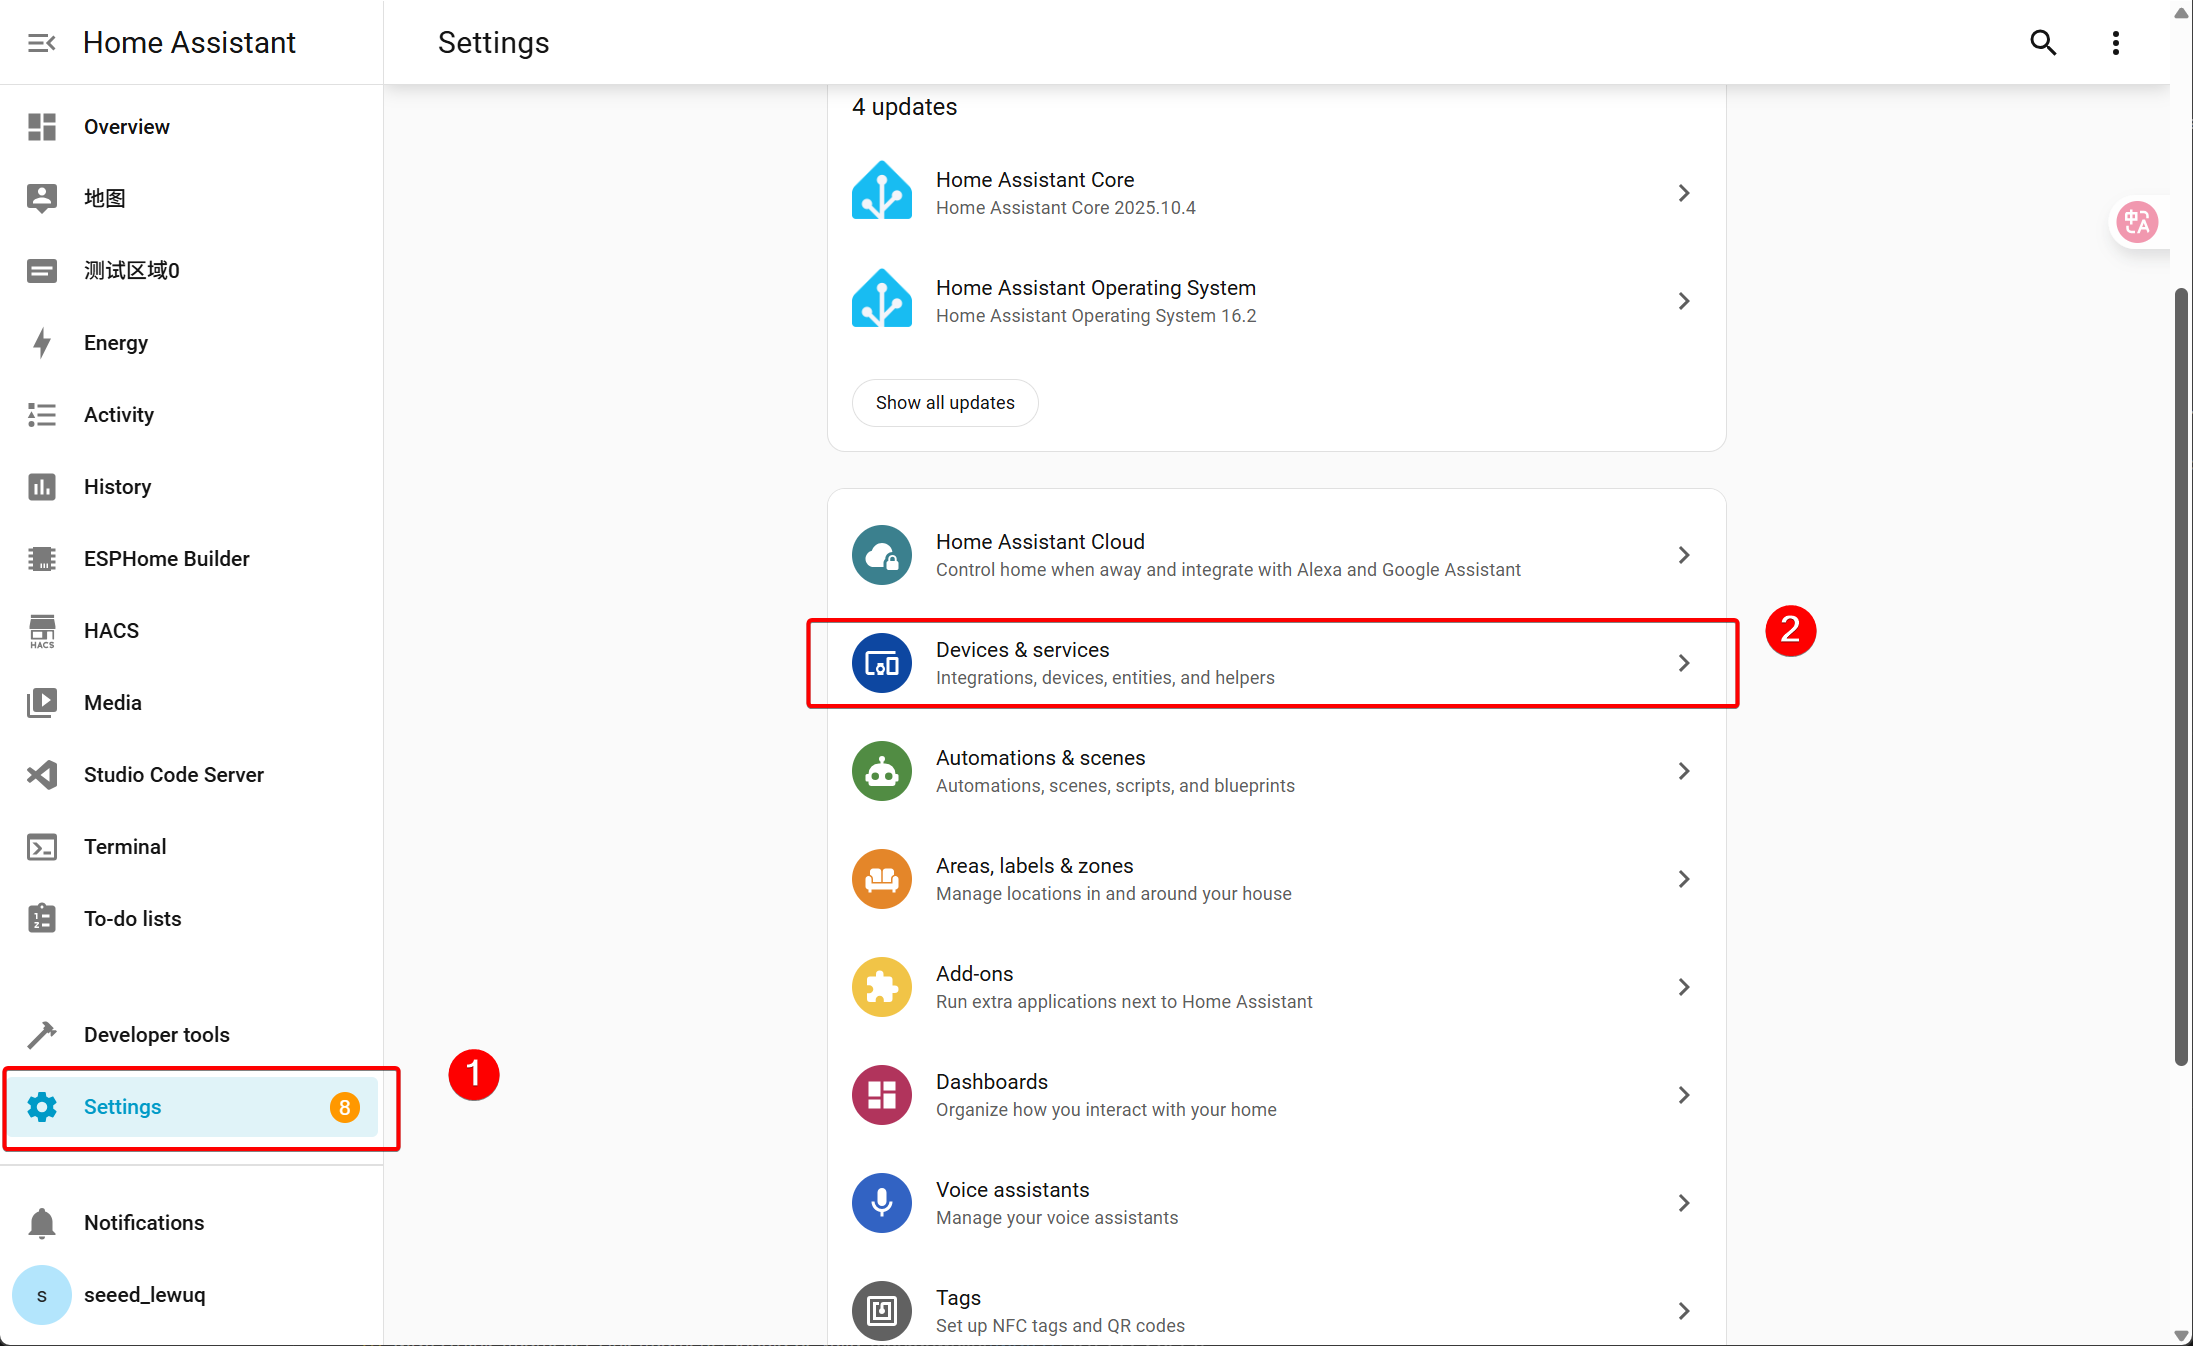
Step 4. Add Device
-
Navigate to Settings → Devices & services
-
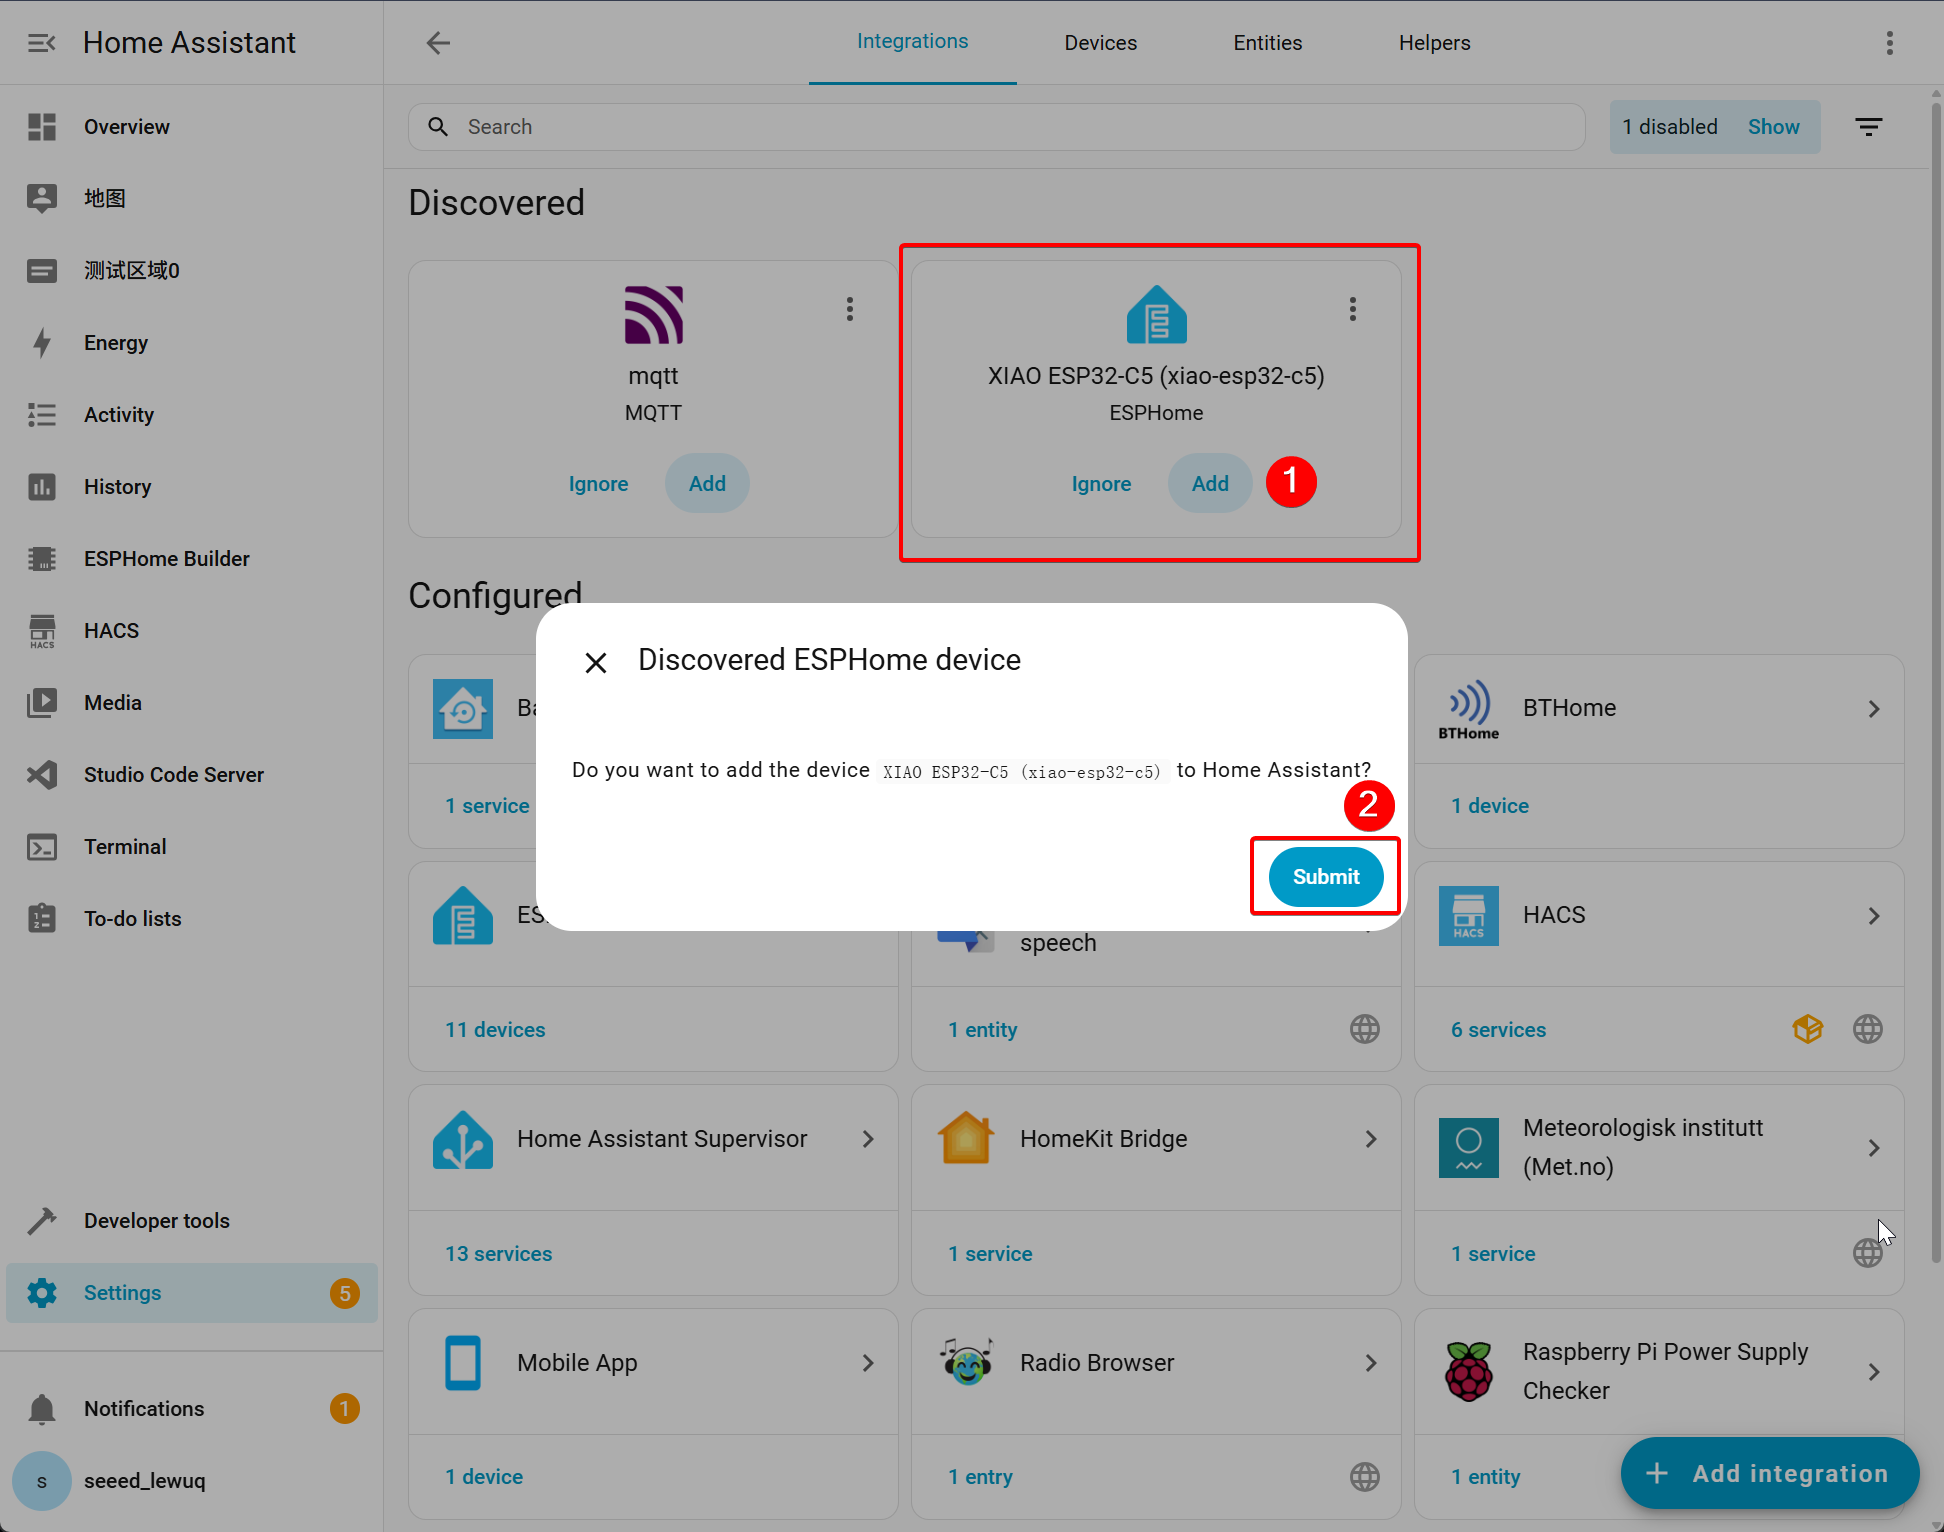
ESPHome Device -> Add.
-
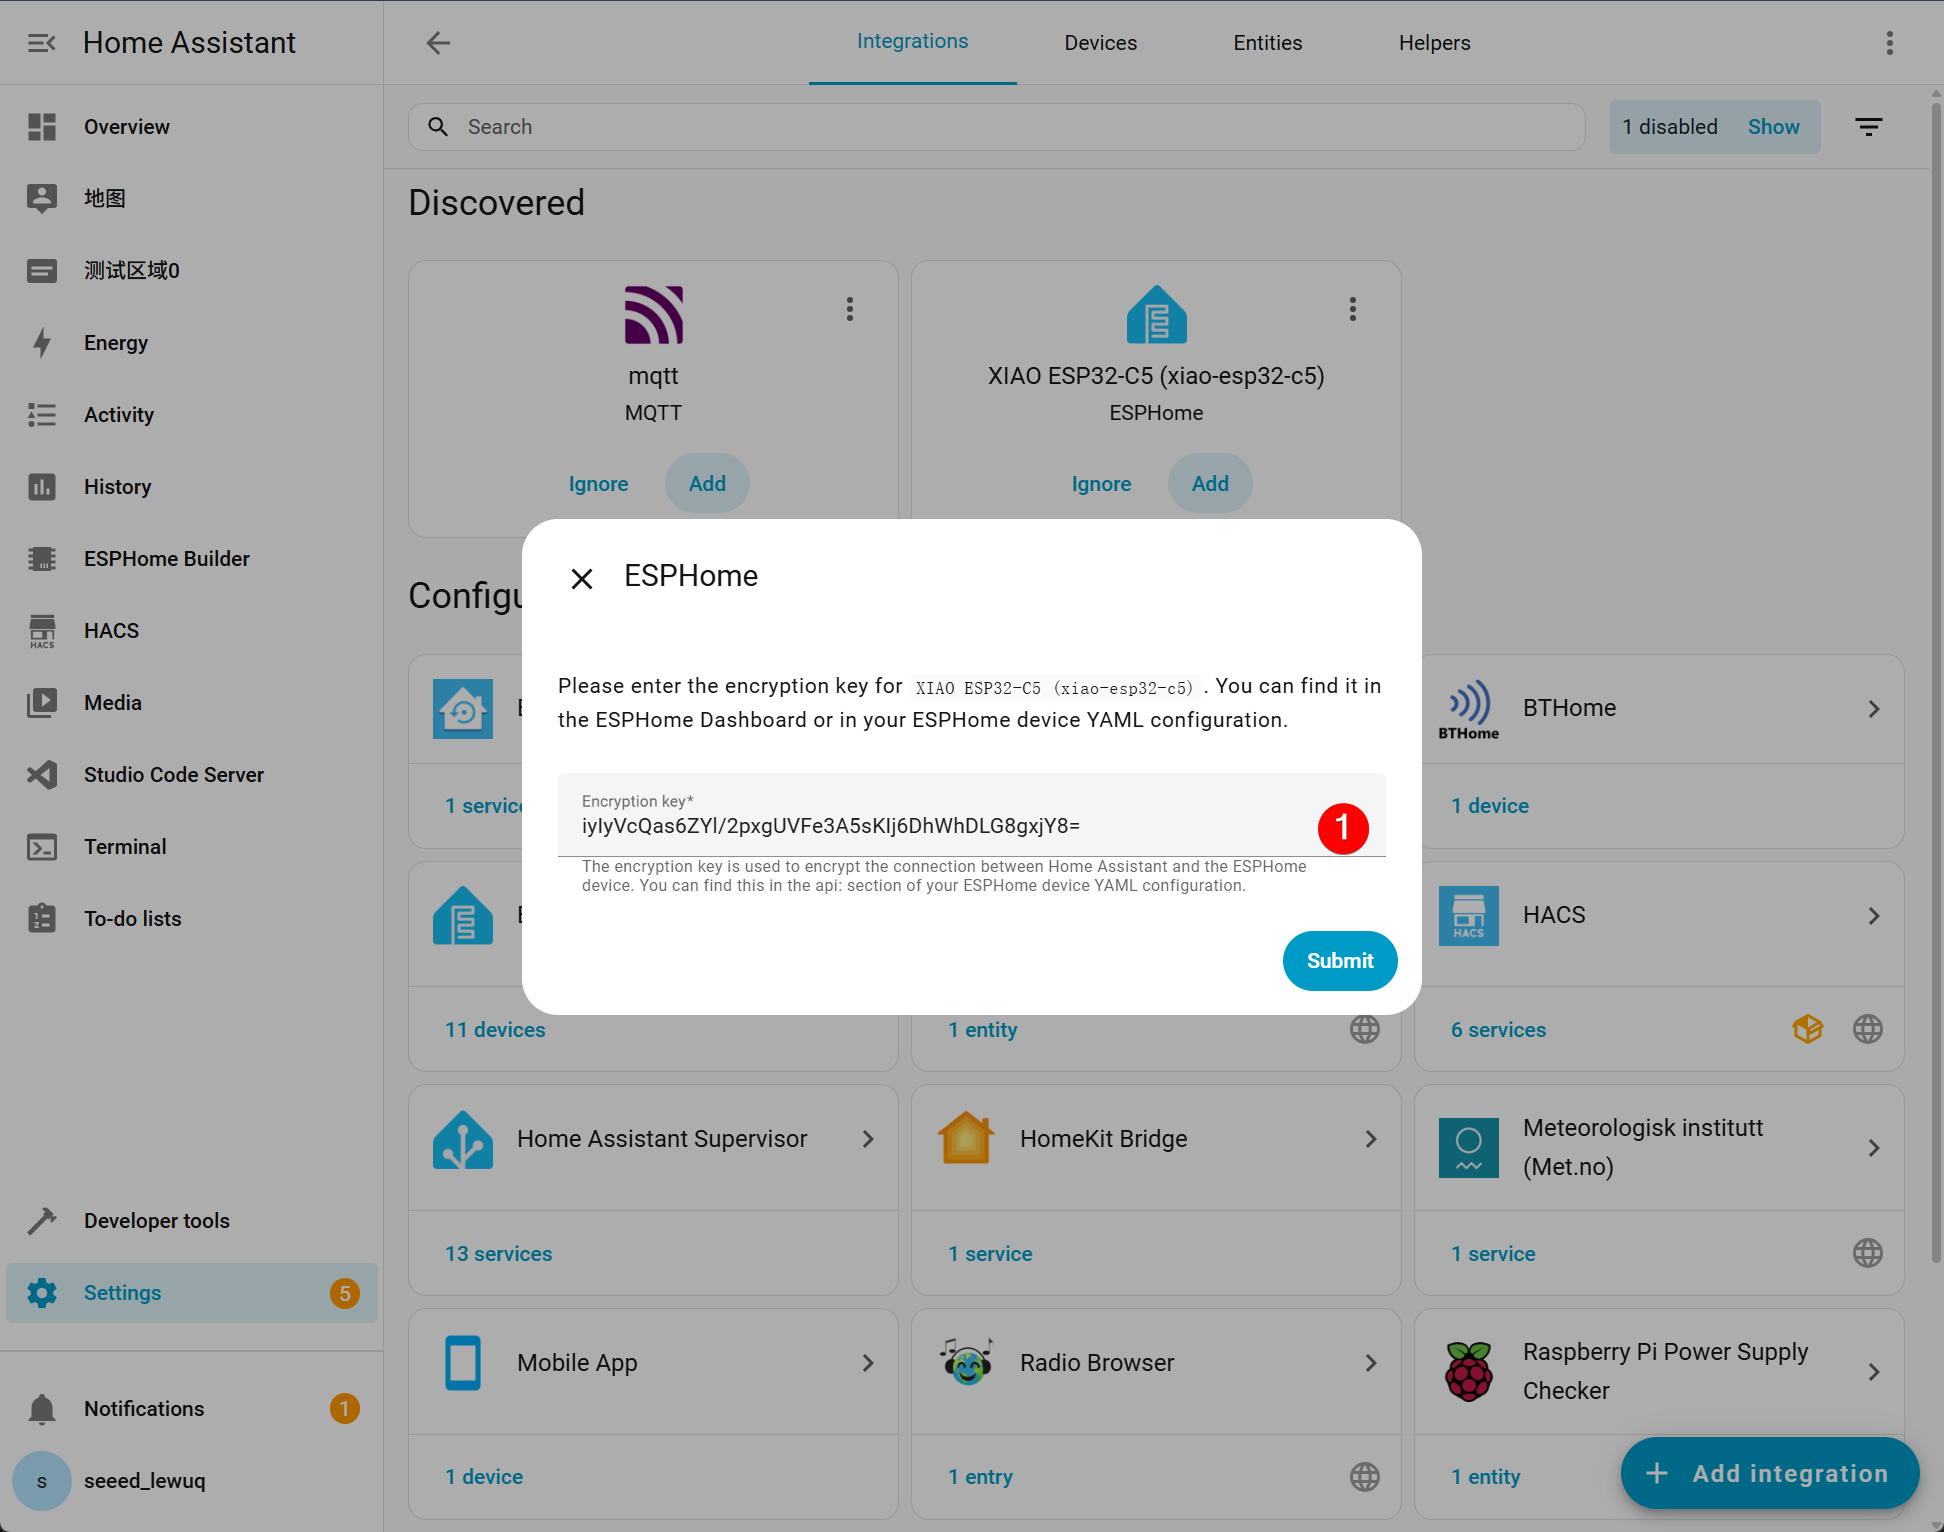
If you have opted to add a secret key, you need to enter it, which can be found in the YAML file you created.
-
The following screen will be displayed after a successful addition.

Display on the Dashboard
Step 1. Open Overview -> Click Edit in the upper right corner

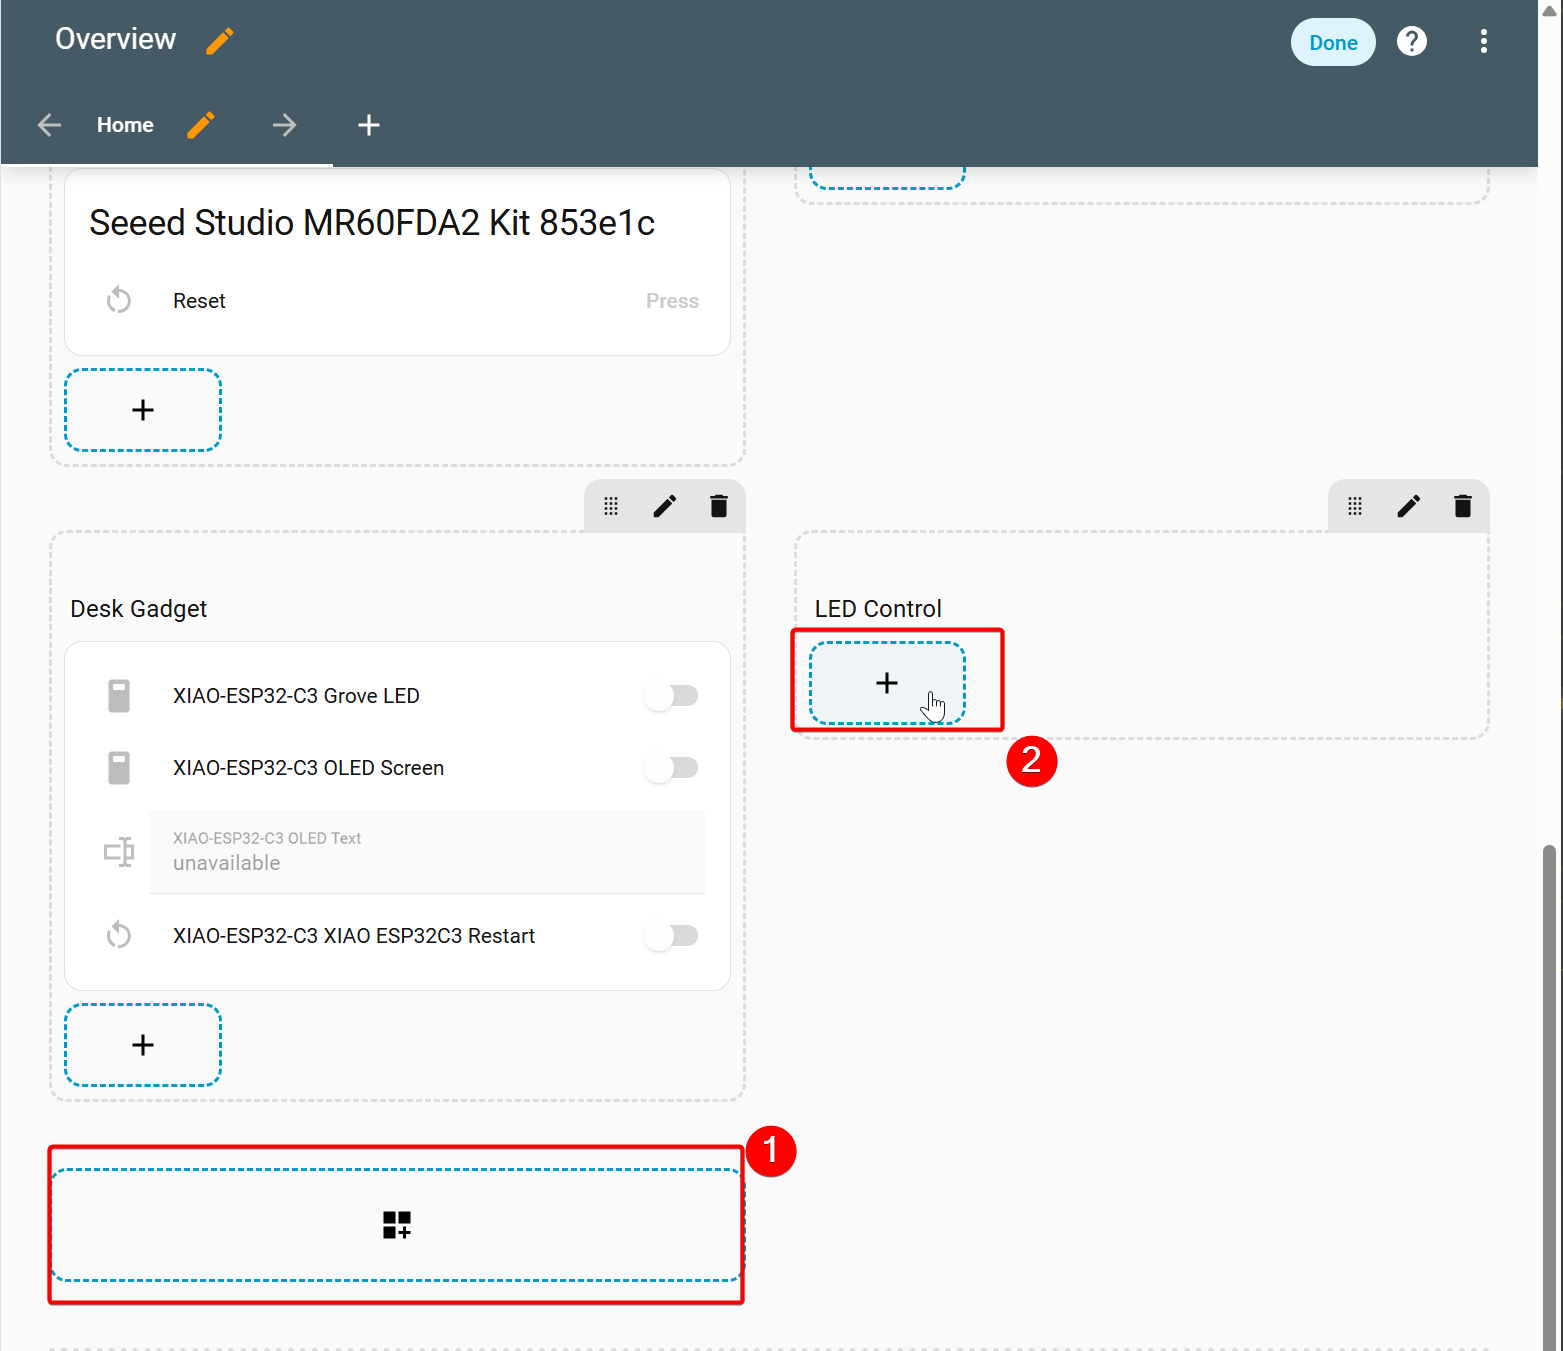
Step 2. Create a section and name it LED Control -> Add the Card
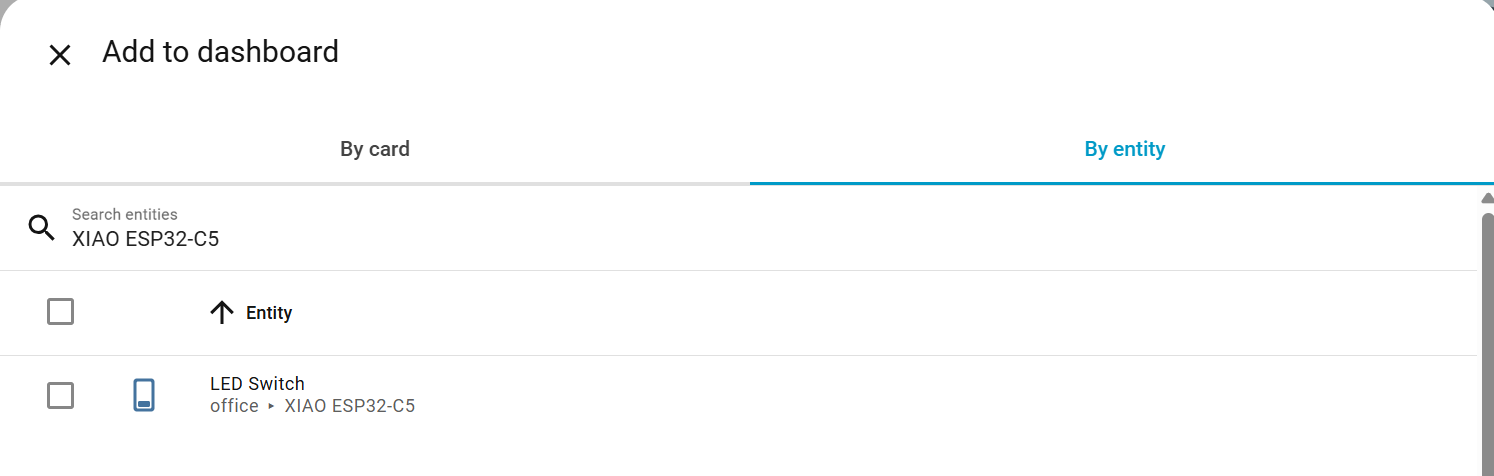
Step 3. Add by entity -> Search XIAO ESP32-C5 -> Continue
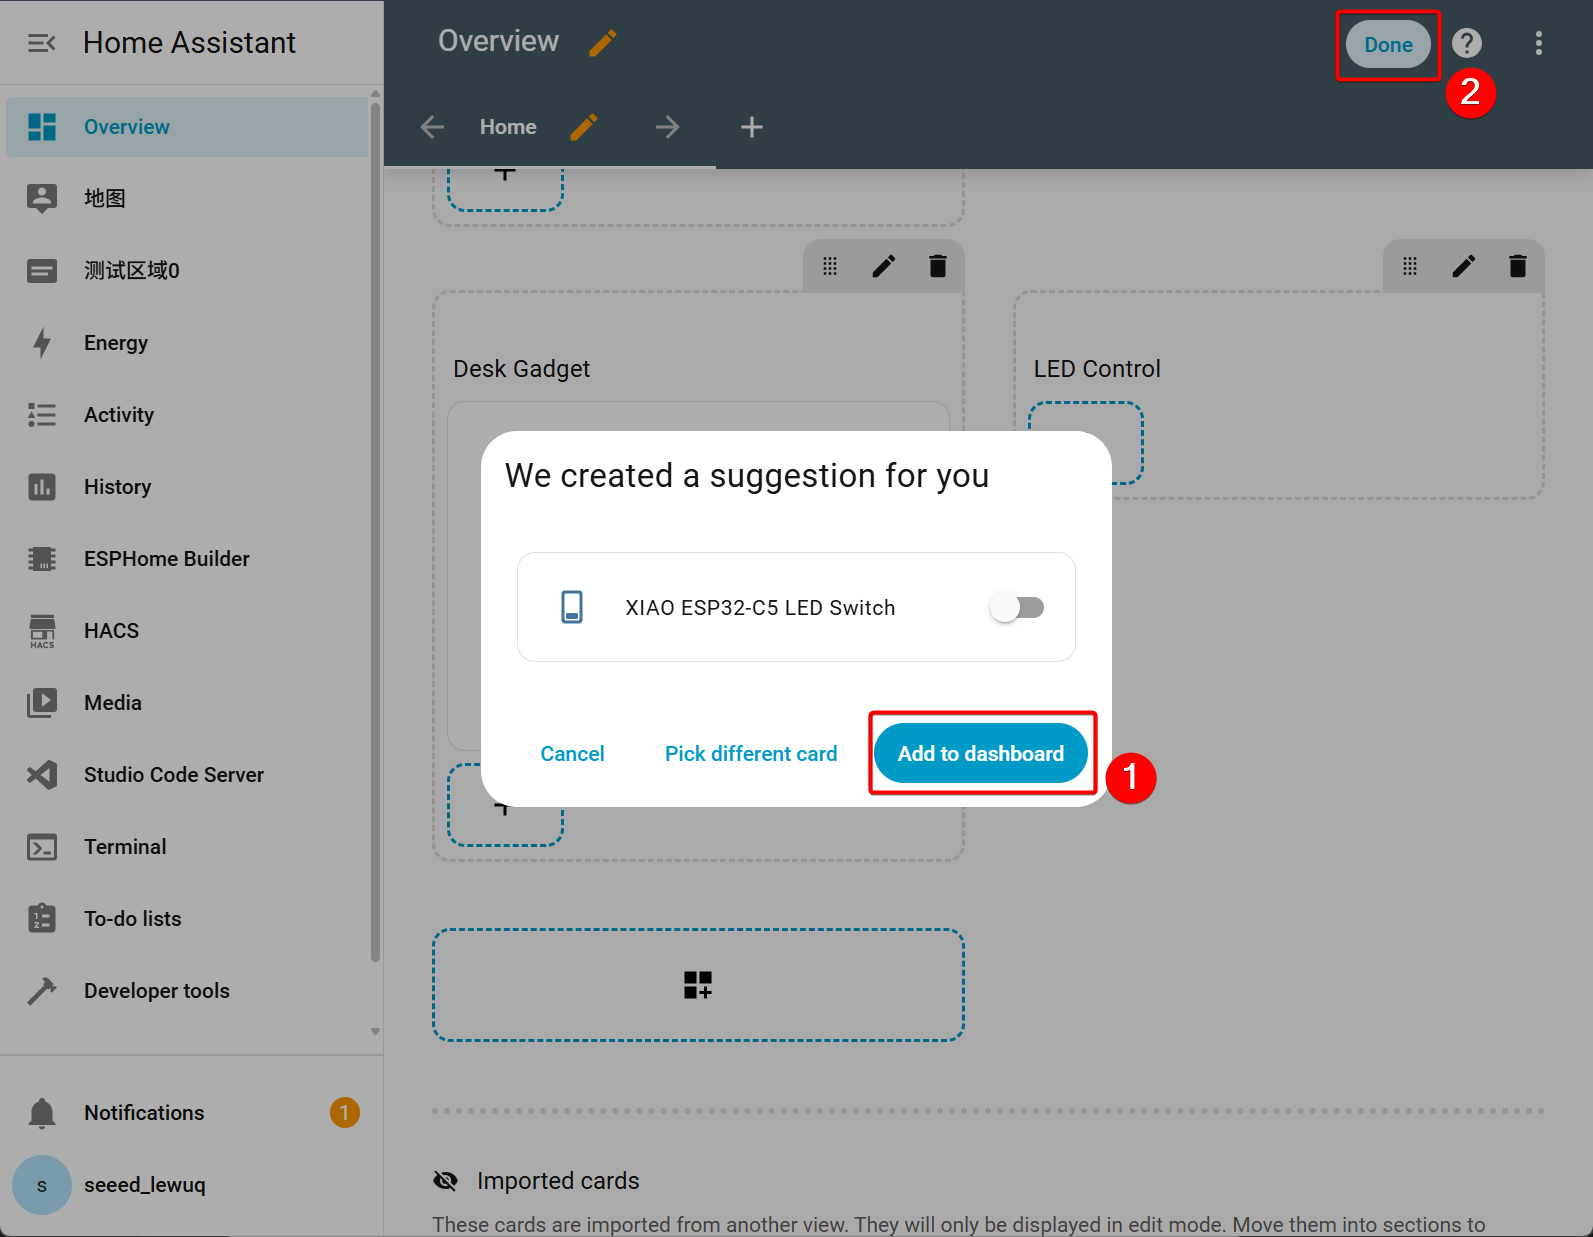
Step 4. Select Add to dashboard in the pop-up window -> Click Done in the upper right corner to complete the addition.
-
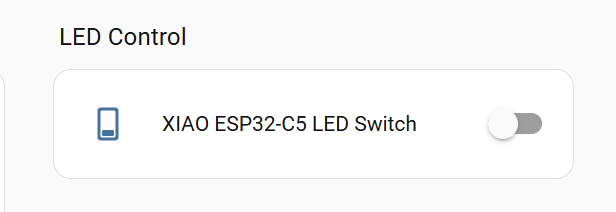
The effects are as follows:
Method 2: Seeed Home Assistant Discovery
- Seeed HA Discovery is a complete solution for easily connecting ESP32/nRF52840 devices to Home Assistant, provided by Seeed Studio.
- With just a few lines of code in Arduino IDE or PlatformIO for your XIAO series development boards, you can connect to Home Assistant via WiFi or BLE.
- Here we will use an example of reading a greenhouse temperature and humidity sensor to show you how to use Seeed Home Assistant Discovery to connect the XIAO ESP32-C5 to Home Assistant.
Hardware Preparation
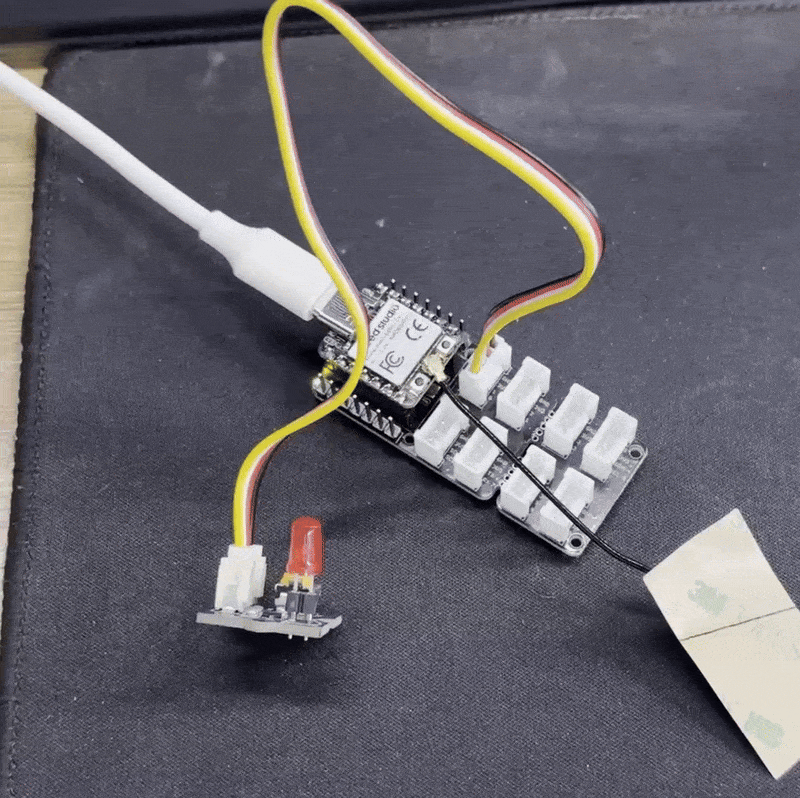
| Seeed Studio XIAO ESP32-C5 | Seeed Studio Grove Base for XIAO | Grove - Temperature & Humidity Sensor (DHT11) |
|---|---|---|
| |  |
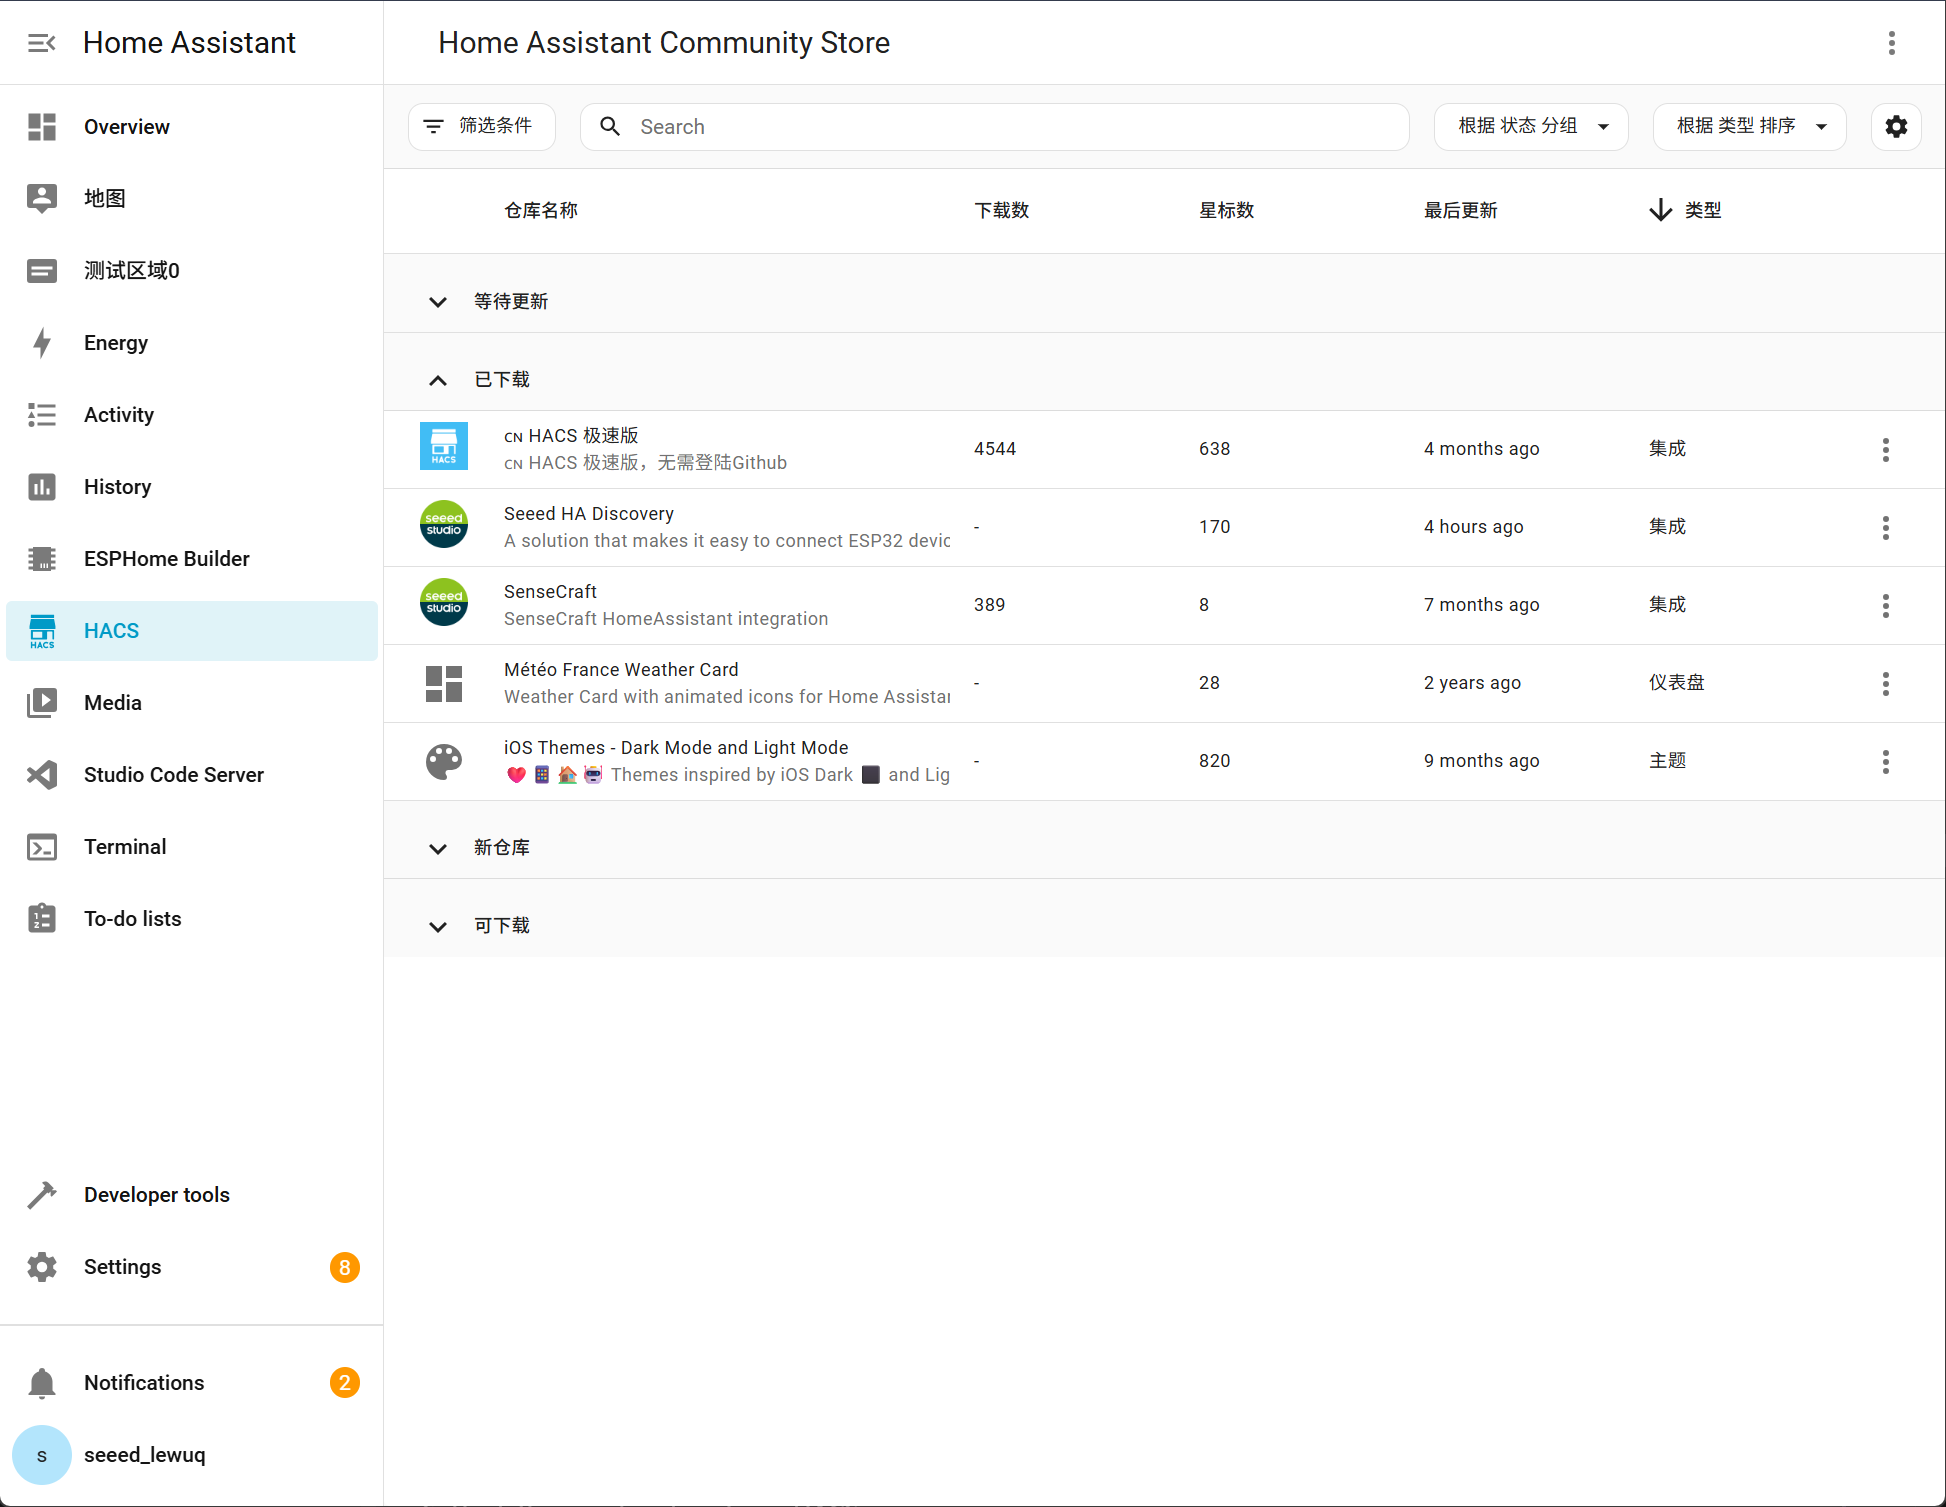
Install HACS Instagram
Before adding the Seeed Home Assistant Discovery integration, you need to install HACS first.
Installation Steps:
- Settings -> Devices & services -> Add integration -> Search HACS
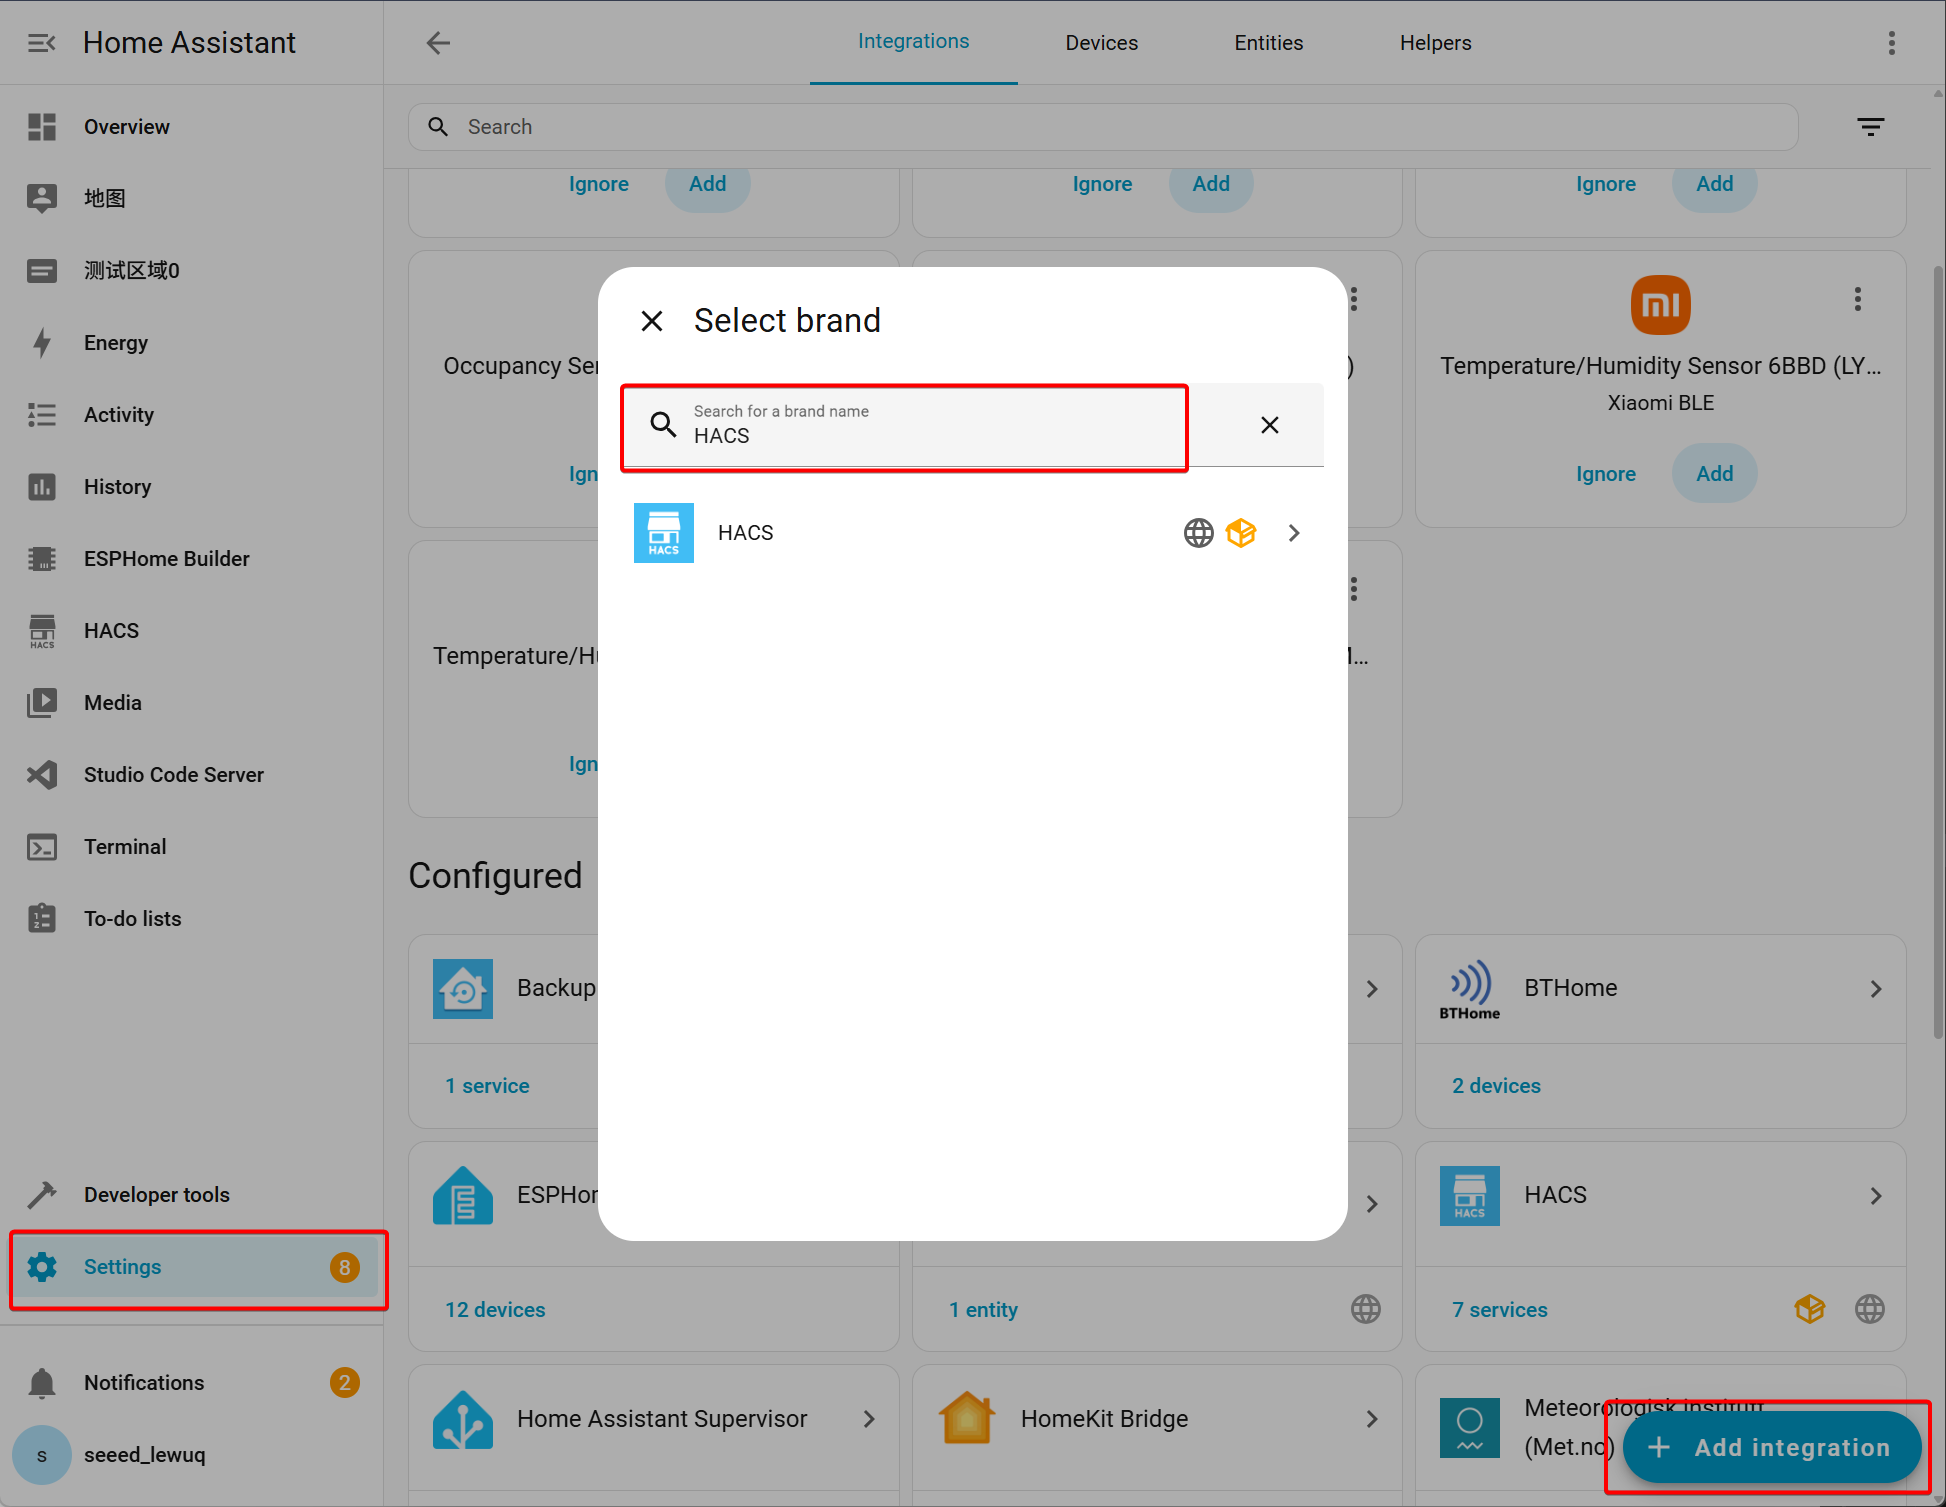
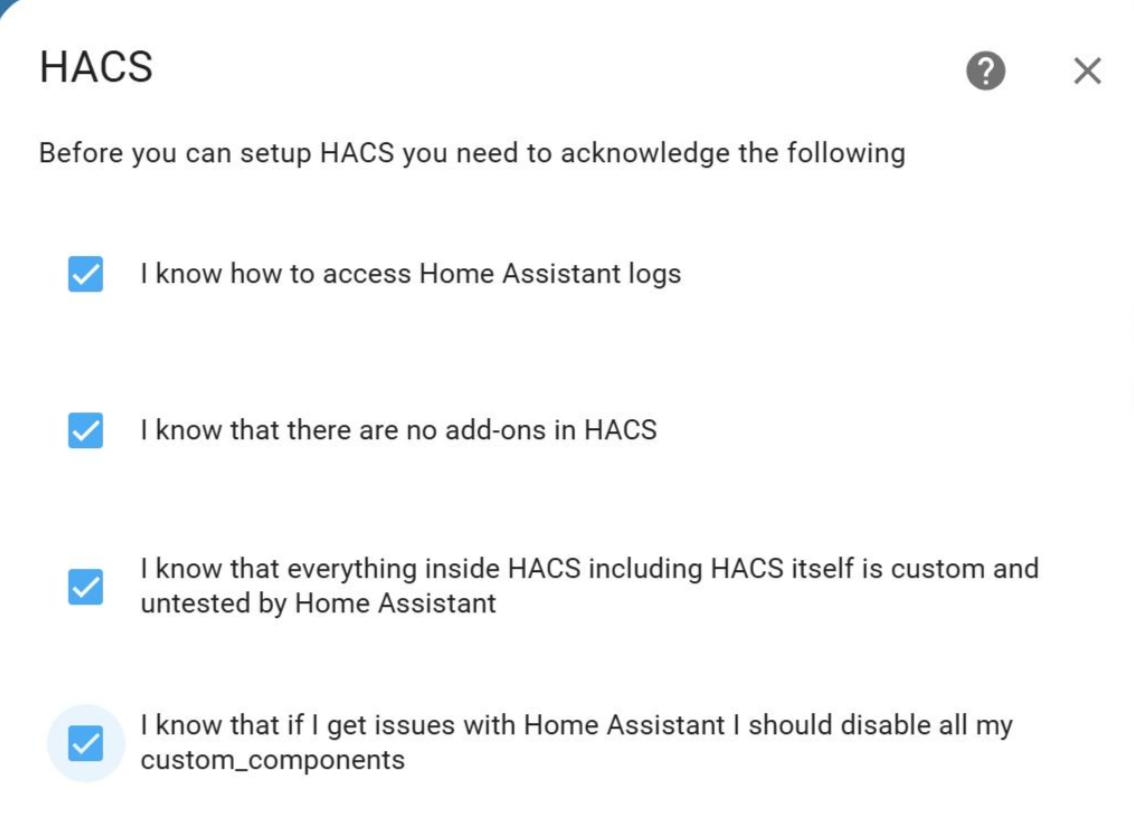
- Select all options -> Submit
-
Click on the hyperlink and copy the activation code within it.
-
Enter the activation code mentioned earlier
-
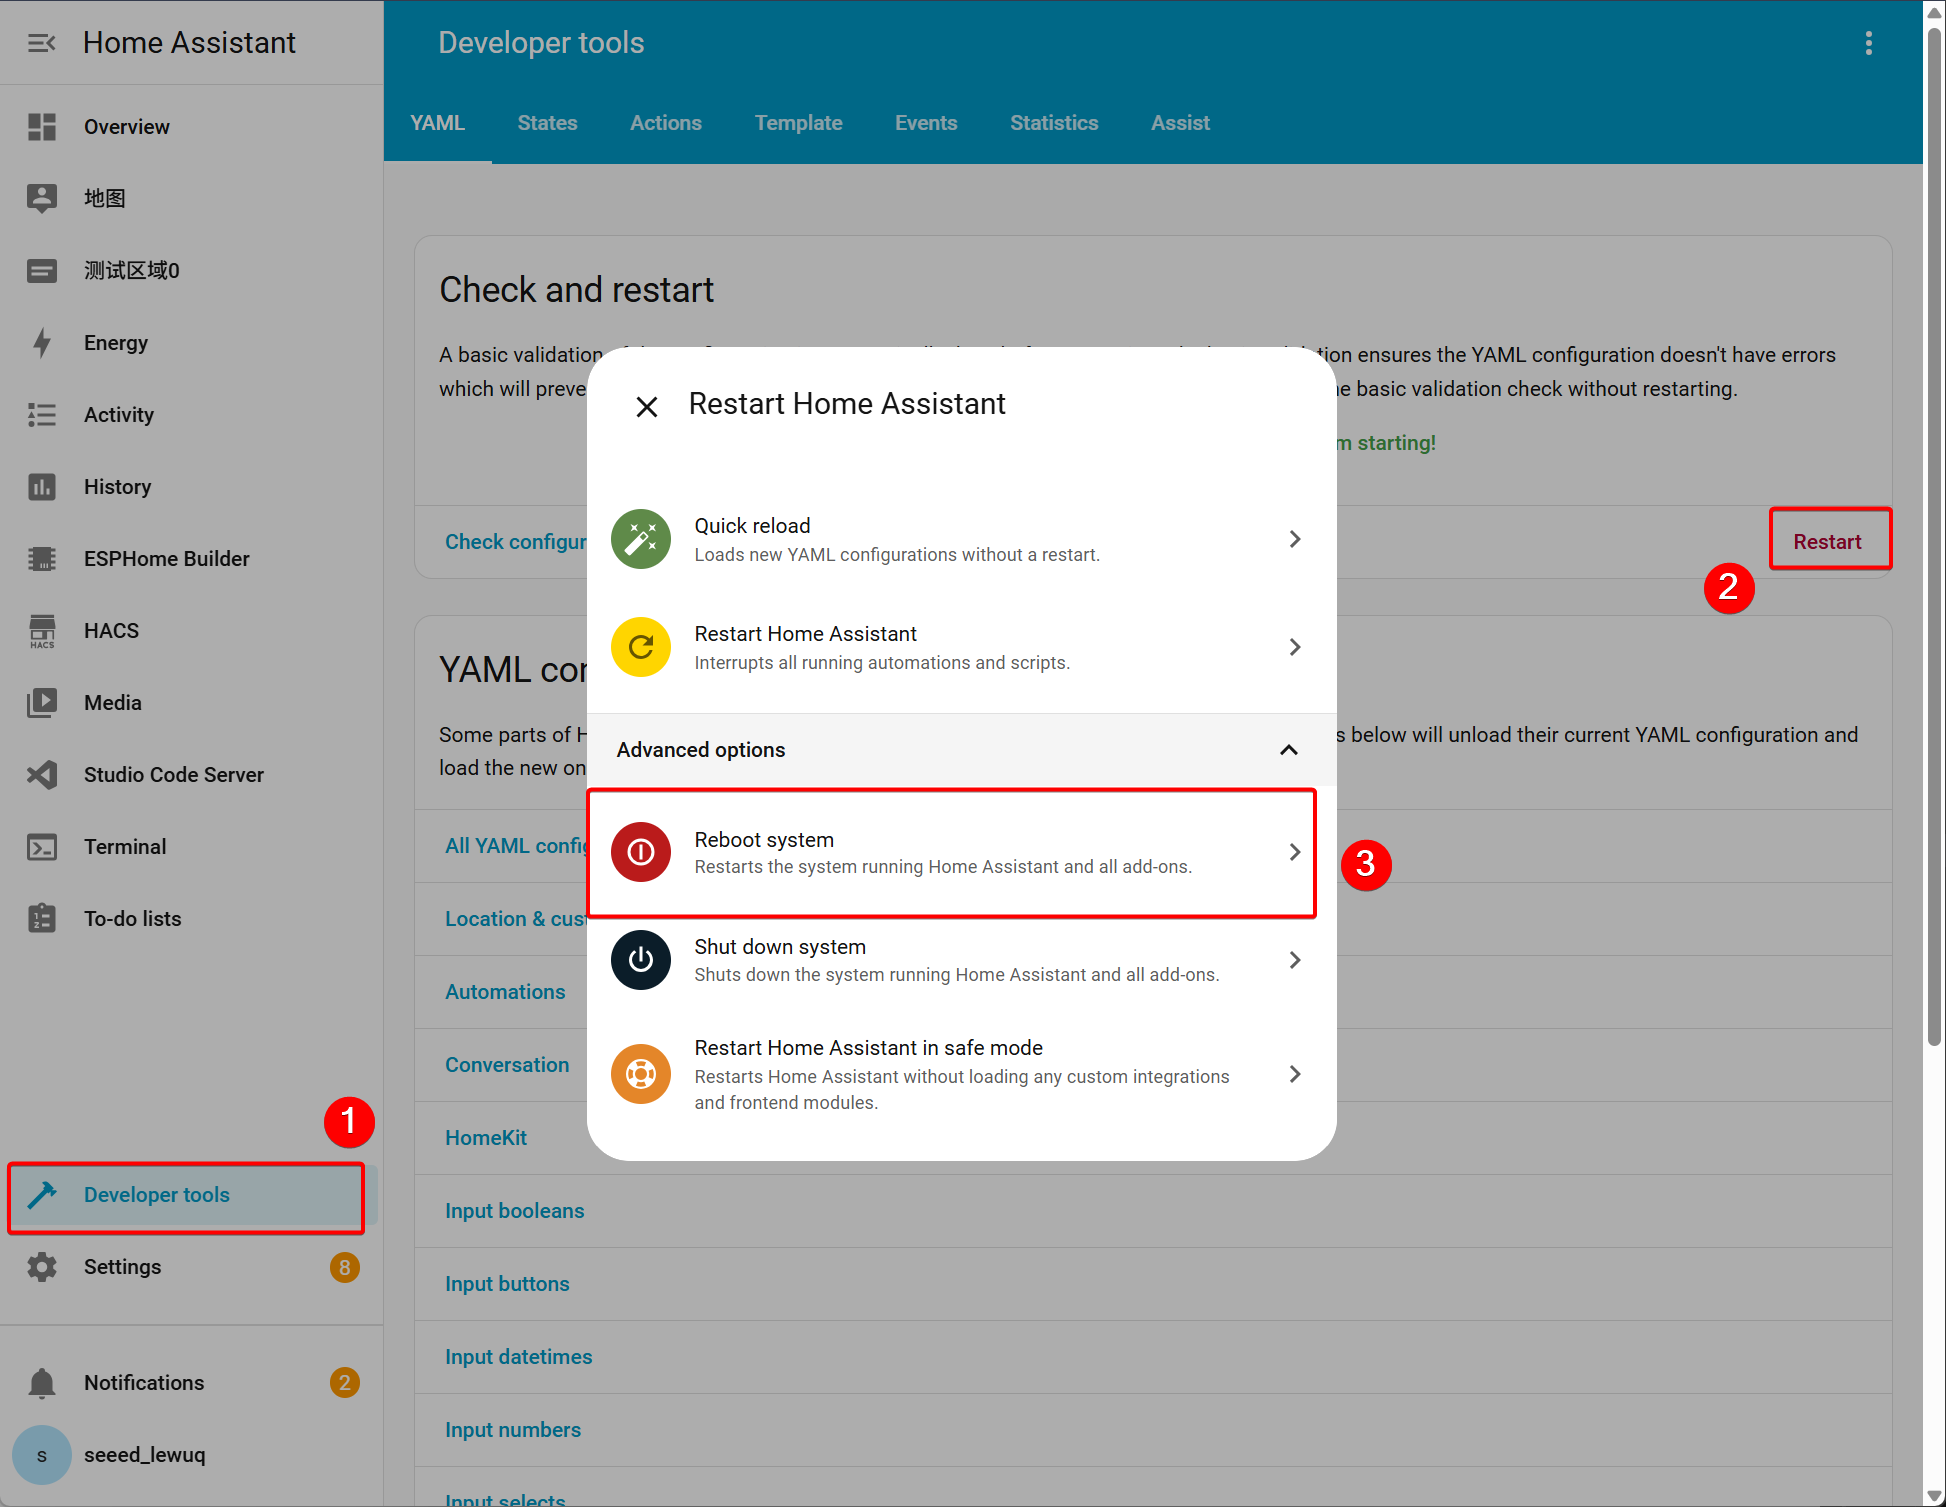
Return to HomeAssistant -> Developer tools -> Reboot system
- The left navigation bar shows HACS
Install Integration
- One-Click Installation via HACS (Recommended)
-
Open HACS -> Integrations:
-
Click the ⋮ icon in the upper right corner -> Custom repositories
-
Enter
https://github.com/limengdu/Seeed-Homeassistant-Discovery, elect category Integration -
Click Add, then search for Seeed HA Discovery and install
-
Restart Home Assistant
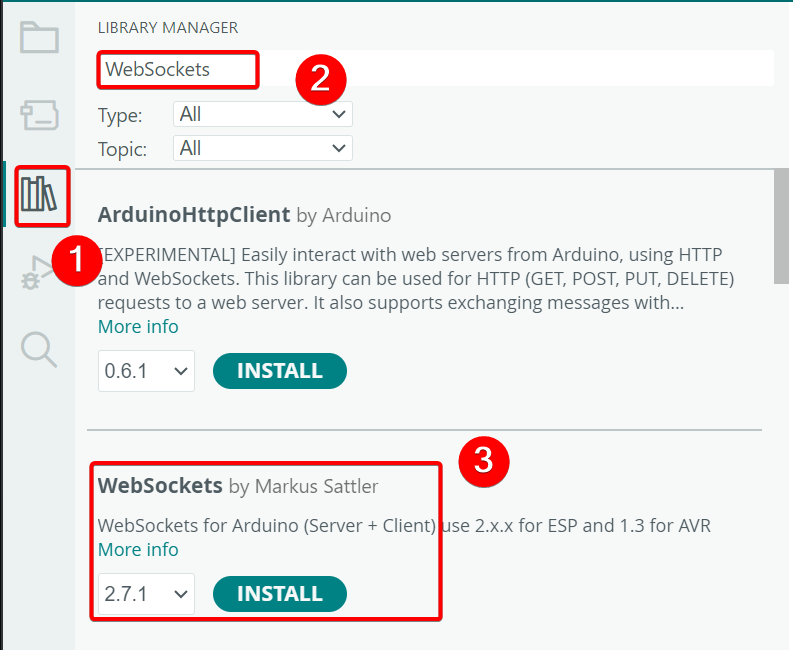
Install Arduino Library
Install the WiFi Dependency Library
- For Arduino IDE
- Download the
arduino/SeeedHADiscoveryfolder
-
Copy to
C:\Users\yourname\Documents\Arduino\libraries\ -
ArduinoJson (by Benoit Blanchon)
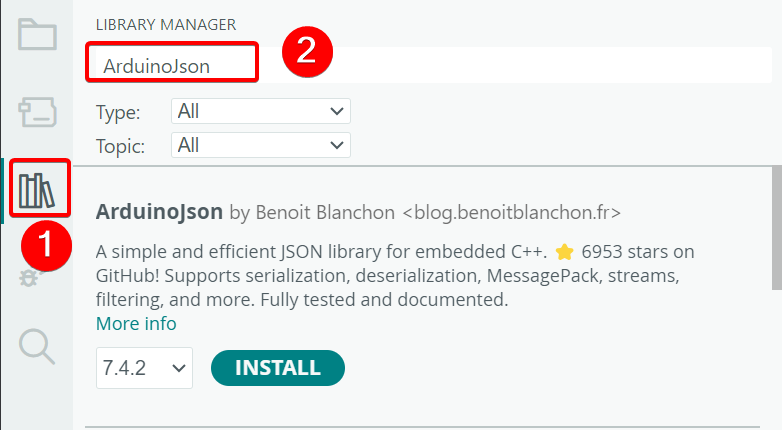
- WebSockets (by Markus Sattler)
- For PlatformIO
lib_deps =
    bblanchon/ArduinoJson@^7.0.0
    links2004/WebSockets@^2.4.0
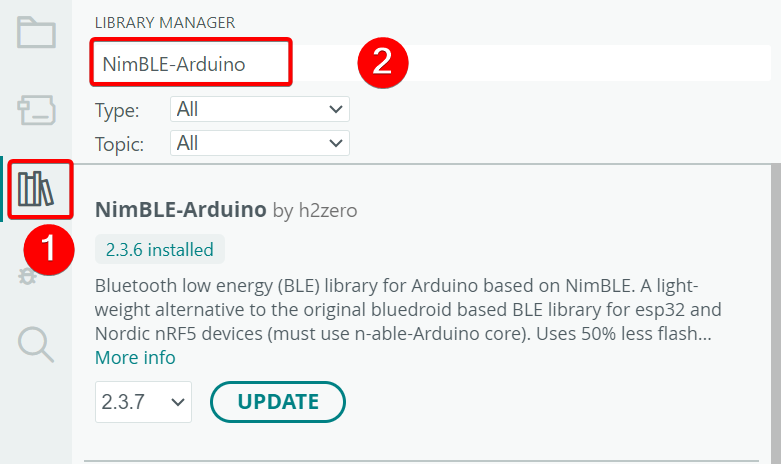
Install the BLE Dependency Library
- For Arduino IDE
-
Download the
arduino/SeeedHADiscoveryBLEfolder -
Copy to
C:\Users\yourname\Documents\Arduino\libraries\
- NimBLE-Arduino
- For PlatformIO
lib_deps =
    h2zero/NimBLE-Arduino@^1.4.0
Write Arduino Program
Choose the corresponding version according to your actual needs.
- WiFi Version Code
- BLE Version Code
#include <SeeedHADiscovery.h>
const char* WIFI_SSID = "Your WiFi Name";
const char* WIFI_PASSWORD = "Your WiFi Password";
SeeedHADiscovery ha;
SeeedHASensor* tempSensor;
SeeedHASensor* humiditySensor;
void setup() {
Serial.begin(115200);
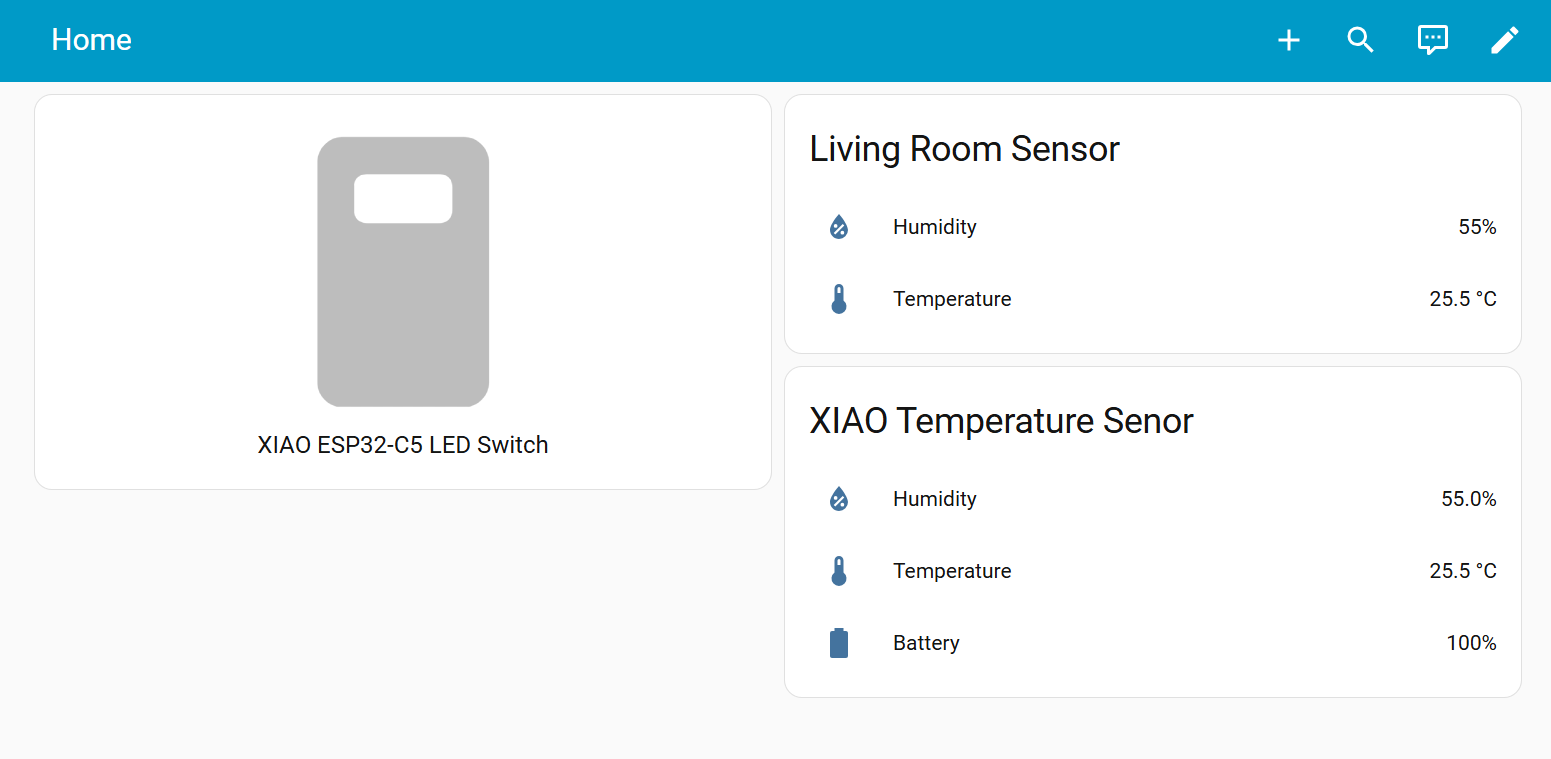
ha.setDeviceInfo("Living Room Sensor", "ESP32-C5", "1.0.0");
ha.enableDebug(true);
if (!ha.begin(WIFI_SSID, WIFI_PASSWORD)) {
Serial.println("WiFi connection failed!");
while (1) delay(1000);
}
tempSensor = ha.addSensor("temperature", "Temperature", "temperature", "°C");
tempSensor->setPrecision(1);
humiditySensor = ha.addSensor("humidity", "Humidity", "humidity", "%");
humiditySensor->setPrecision(0);
}
void loop() {
ha.handle();
static unsigned long lastUpdate = 0;
if (millis() - lastUpdate > 5000) {
lastUpdate = millis();
tempSensor->setValue(25.5);
humiditySensor->setValue(55);
}
}
After uploading the code, open the serial monitor. Once the WiFi connection is successful, the corresponding IP address will be printed.
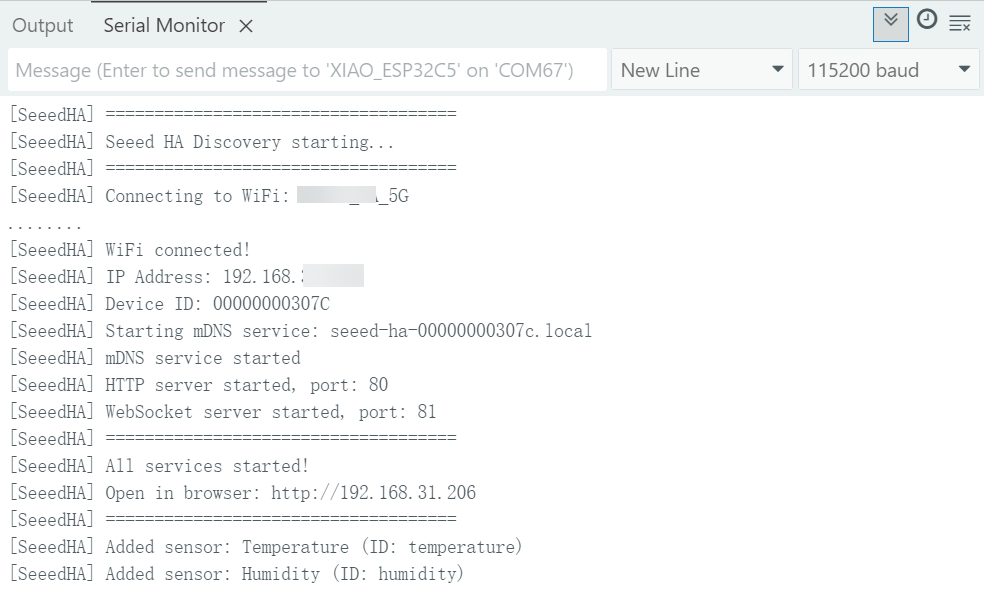
XIAO ESP-C5 supports dual-band WiFi (2.4 GHz & 5 GHz).
If you find manual network configuration too cumbersome, you can also use the firmware flashing webpage we launched.: Web Firmware Flasher
#include <SeeedHADiscoveryBLE.h>

SeeedHADiscoveryBLE ble;
SeeedBLESensor* tempSensor;
SeeedBLESensor* humiditySensor;
SeeedBLESensor* batterySensor;

void setup() {
    Serial.begin(115200);
    ble.enableDebug(true);

    if (!ble.begin("XIAO Temperature Sensor")) {
        Serial.println("BLE initialization failed!");
        while (1) delay(1000);
    }

    // Use BTHome standard sensor types
    tempSensor = ble.addTemperature();
    humiditySensor = ble.addHumidity();
    batterySensor = ble.addBattery();
}

void loop() {
    // Set sensor values
    tempSensor->setValue(25.5f);      // Temperature 25.5°C
    humiditySensor->setValue(55.0f);  // Humidity 55%
    batterySensor->setValue(100.0f);    // Battery 100%

    // Send BLE broadcast
    ble.advertise();

    // Wait 10 seconds (BLE is suitable for low frequency updates)
    delay(10000);
}
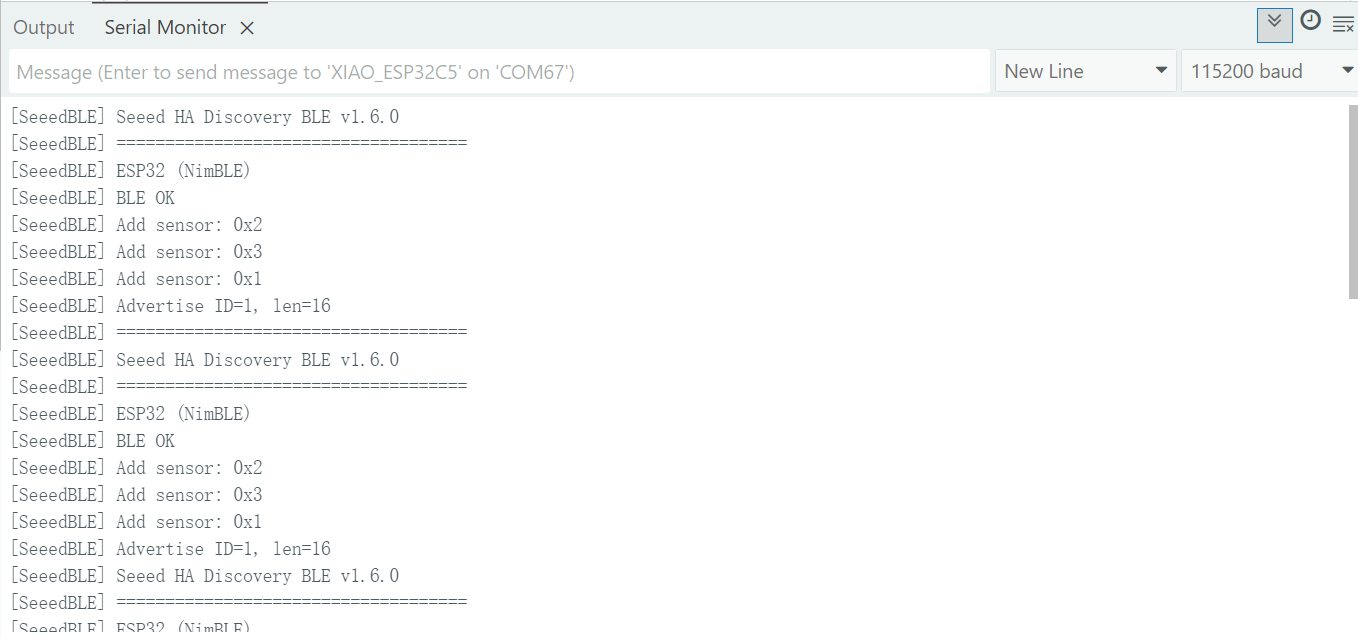
After uploading the code, open the serial monitor, and the Bluetooth information of the XIAO ESP32-C5 will be output.
Add Device in Home Assistant
- WiFi Device
- BLE Device
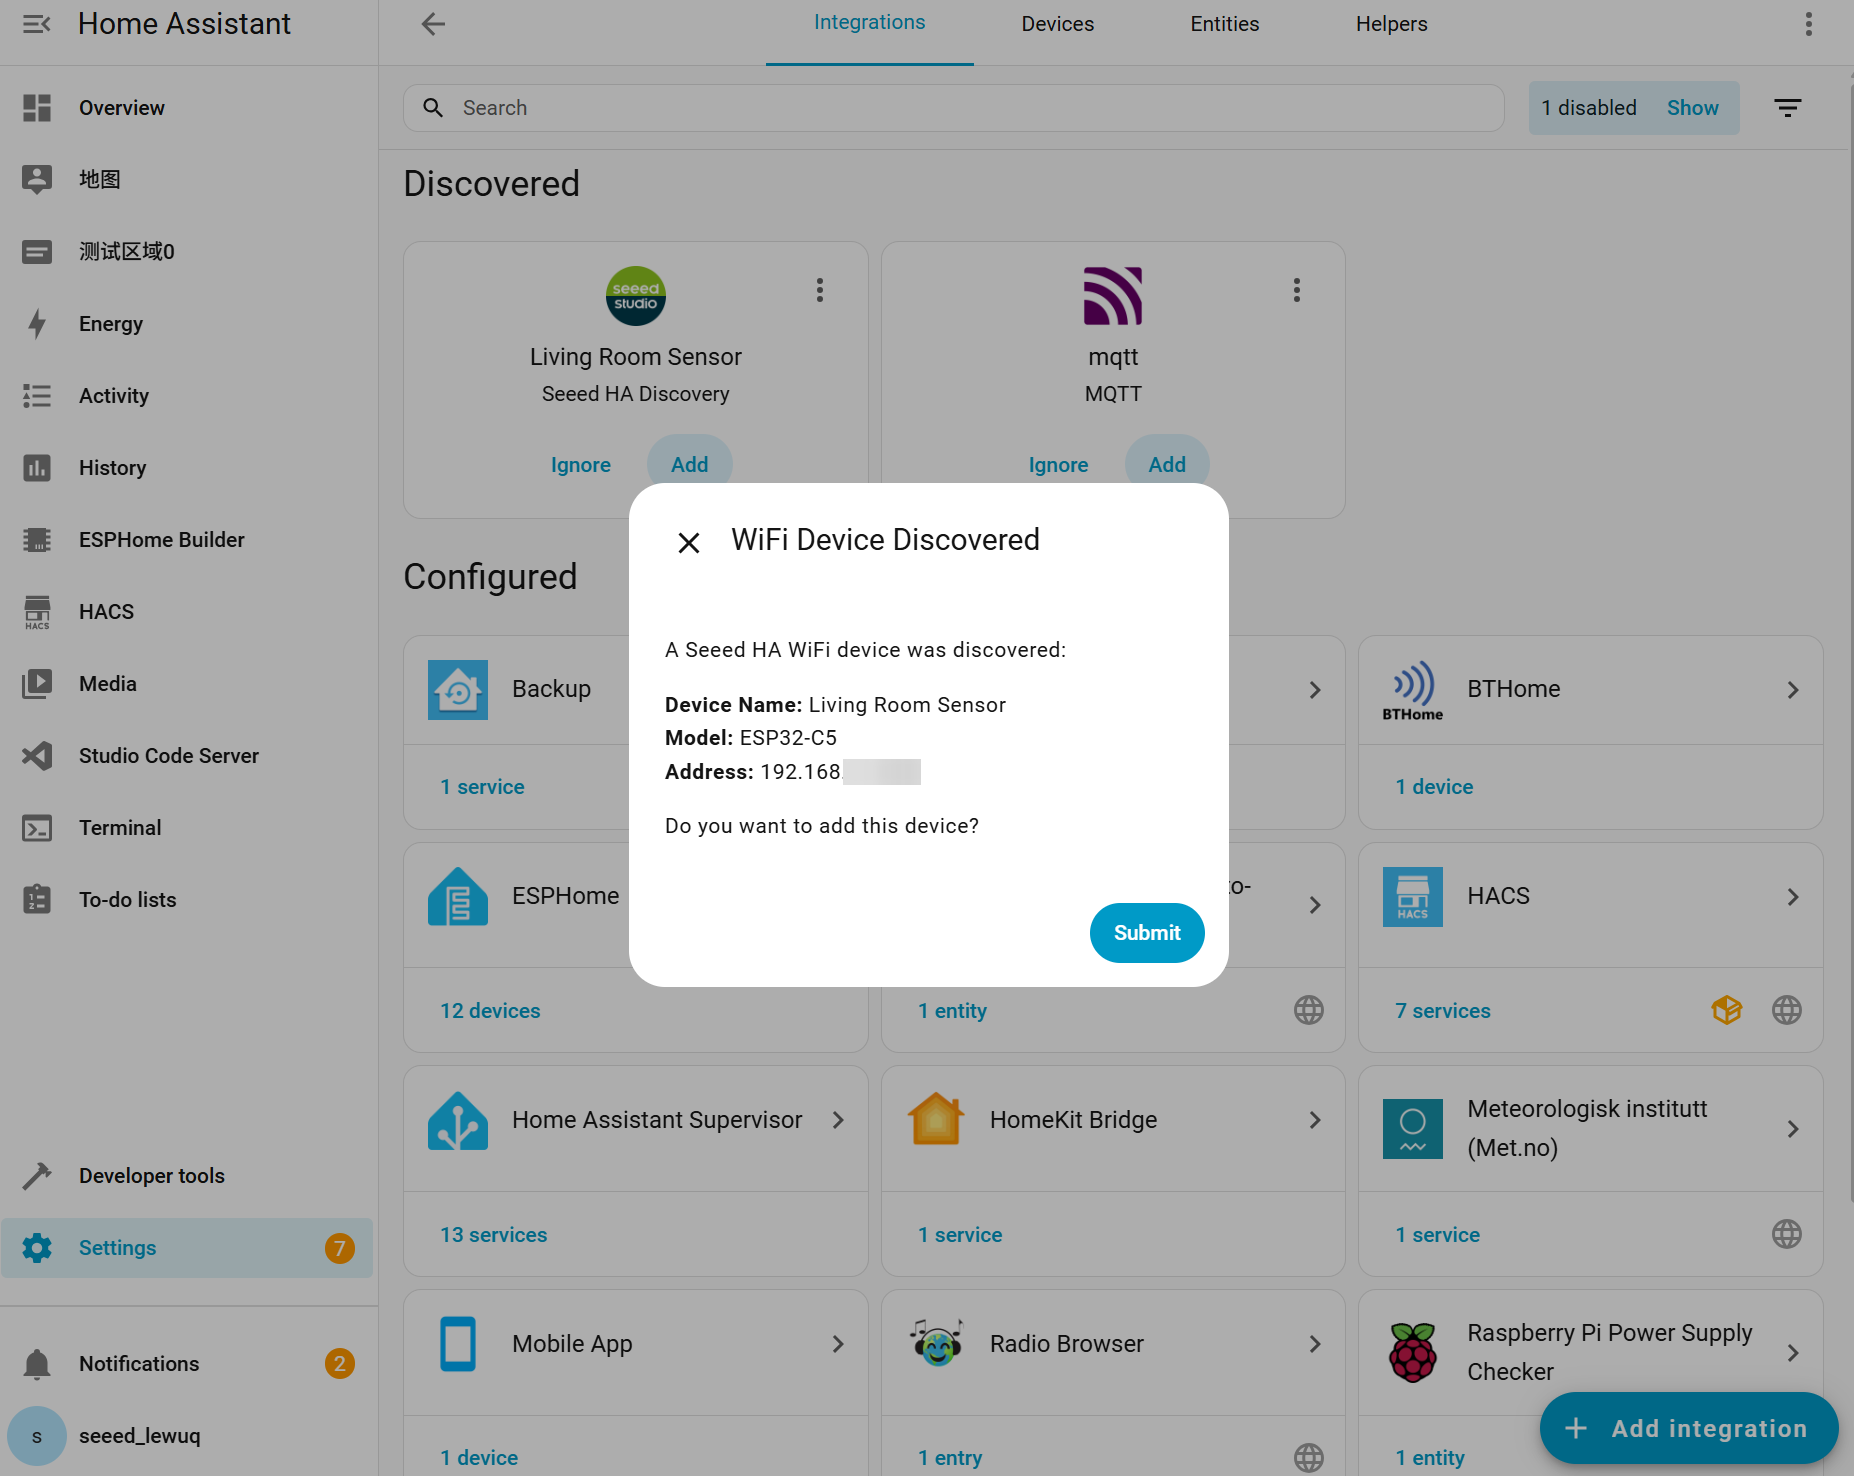
It Will be automatically discovered! Or add manually:
-
Go to Settings -> Devices & Services
-
Click Add Integration
-
Search for Seeed HA Discovery
-
Enter the IP address of the ESP32
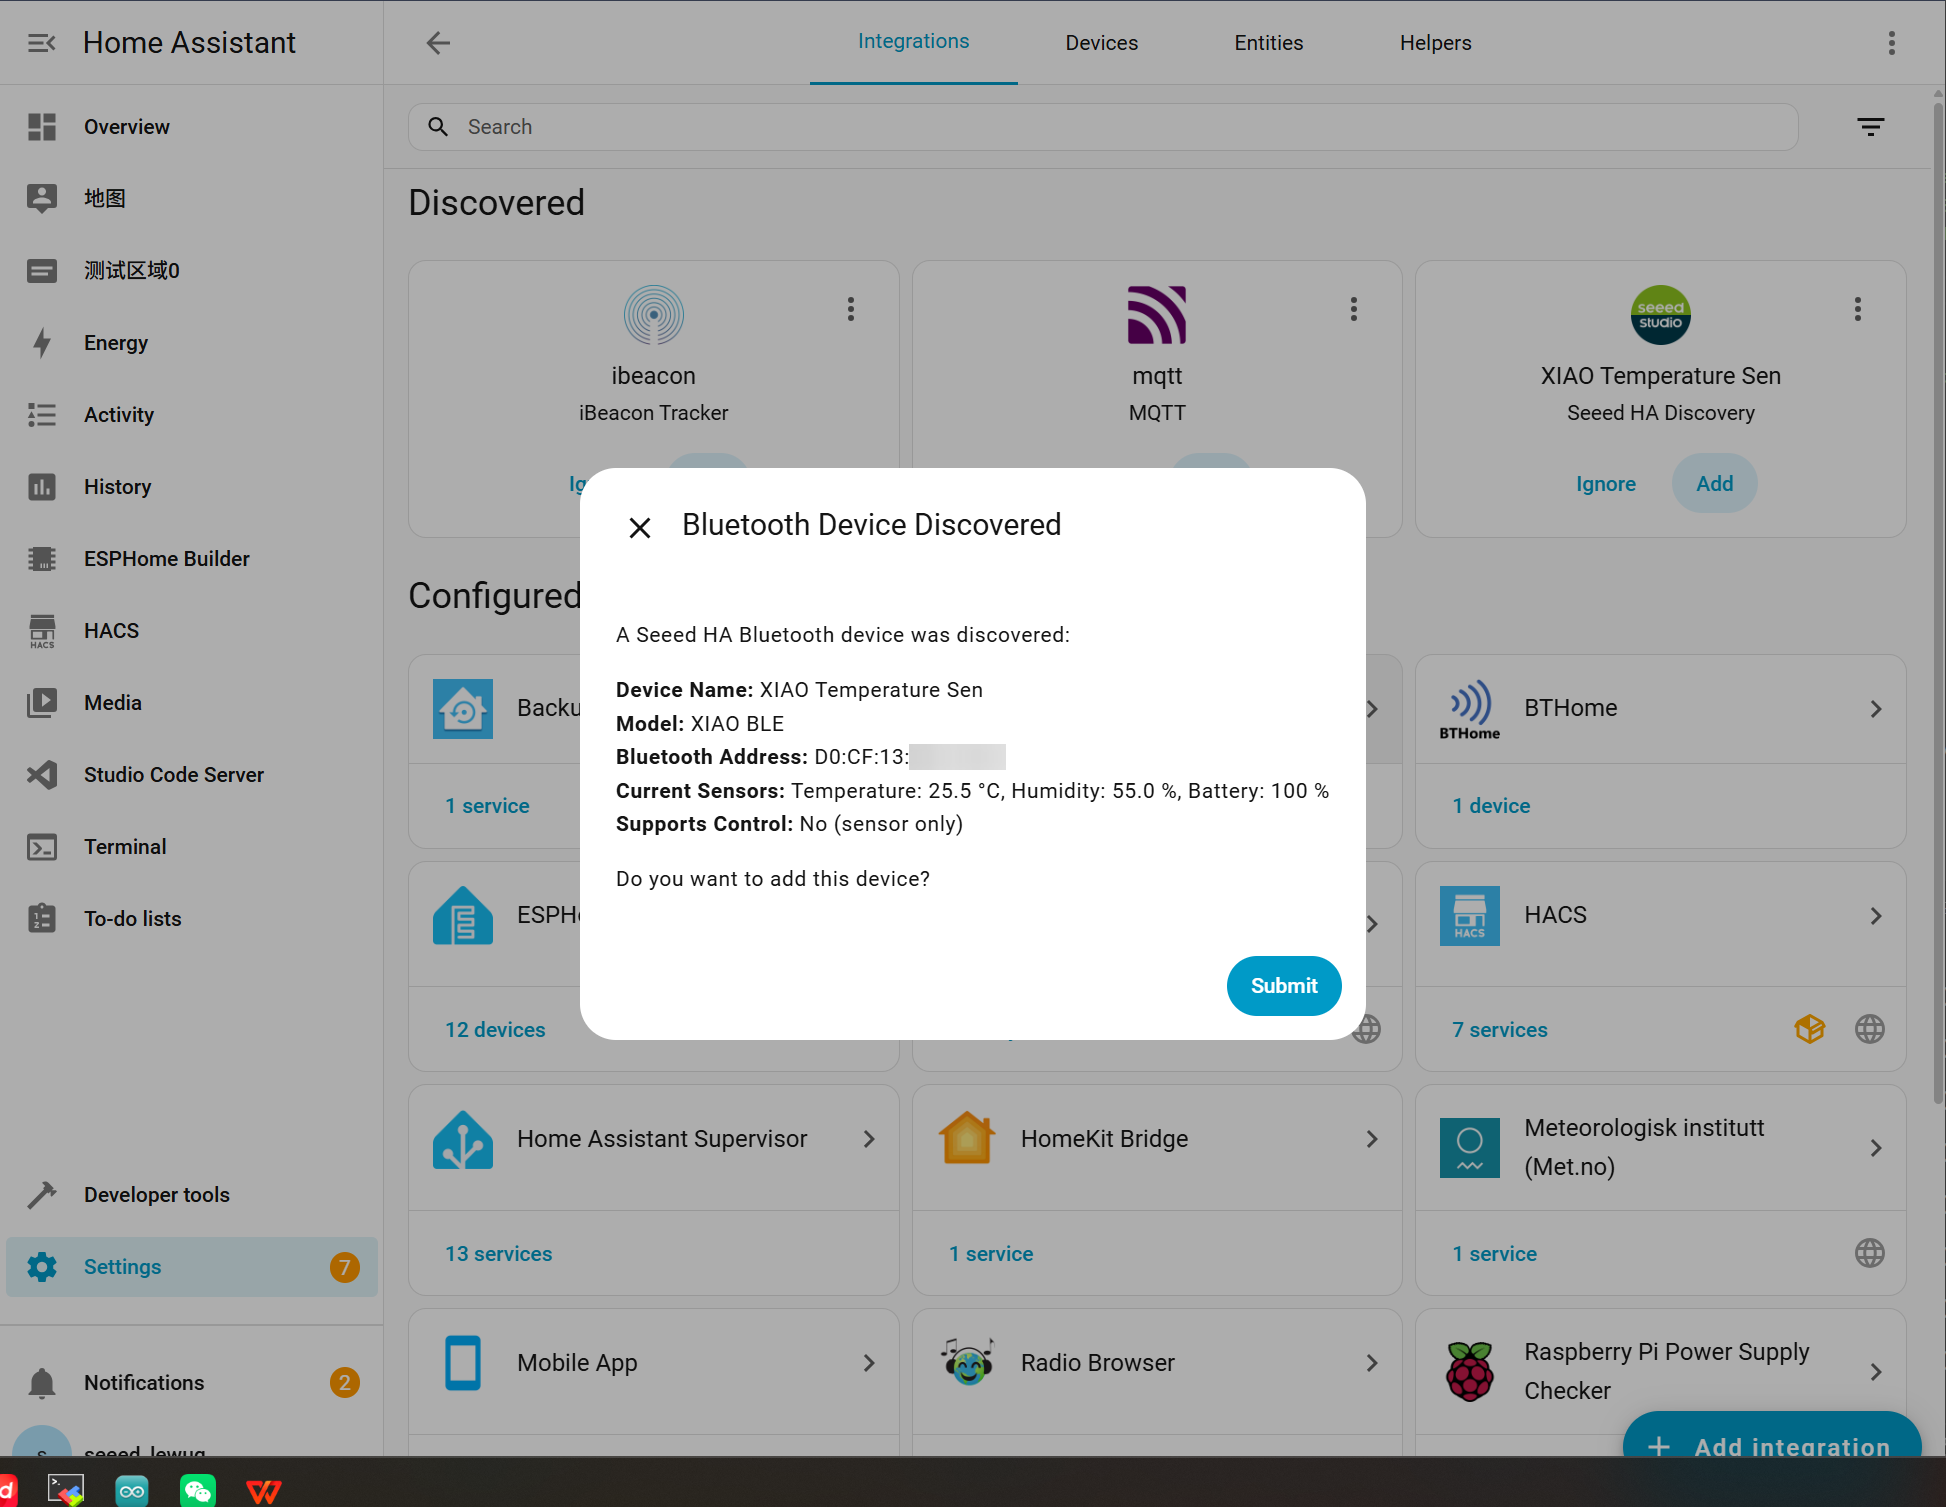
It uses BTHome protocol, will be automatically discovered by Home Assistant!
-
Make sure HA has a Bluetooth adapter or ESP32 Bluetooth proxy
-
Device will automatically appear in Settings -> Devices & Services -> BTHome
Effect Demonstration
Congratulations! By now, you should have mastered two methods to connect the XIAO ESP32-C5 to Home Assistant. We look forward to seeing your amazing projects and welcome you to share them with us!
Tech Support & Product Discussion
Thank you for choosing our products! We are here to provide you with different support to ensure that your experience with our products is as smooth as possible. We offer several communication channels to cater to different preferences and needs.