Seeed Studio XIAO ESP32-C5 With Micropython
MicroPython is a Python interpreter with support for native code emission for performance-critical code. It provides a subset of core Python 3.6+ features, optimized for microcontrollers and resource-constrained systems. It differs from CPython, and you can read more about the differences in the MicroPython vs CPython differences page.
Using MicroPython with XIAO ESP32-C5
Next, I will guide you through how to use MicroPython on the XIAO ESP32-C5 and program it with Thonny IDE, based on the Windows operating system.
Hardware Preparation
Before you start, you need to prepare a XIAO ESP32-C5 development board.
| Seeed Studio XIAO ESP32-C5 |
|---|
 |
Deploying MicroPython Firmware
Next, we will guide you through how to deploy the MicroPython firmware on the XIAO ESP32-C5.
Install esptool
Before installing the MicroPython firmware for the ESP32-C5, you need to install esptool first. We will use esptool.py to erase and flash the firmware onto the development board.
Open a terminal in any folder and enter the following command.
pip install esptool

Erasing
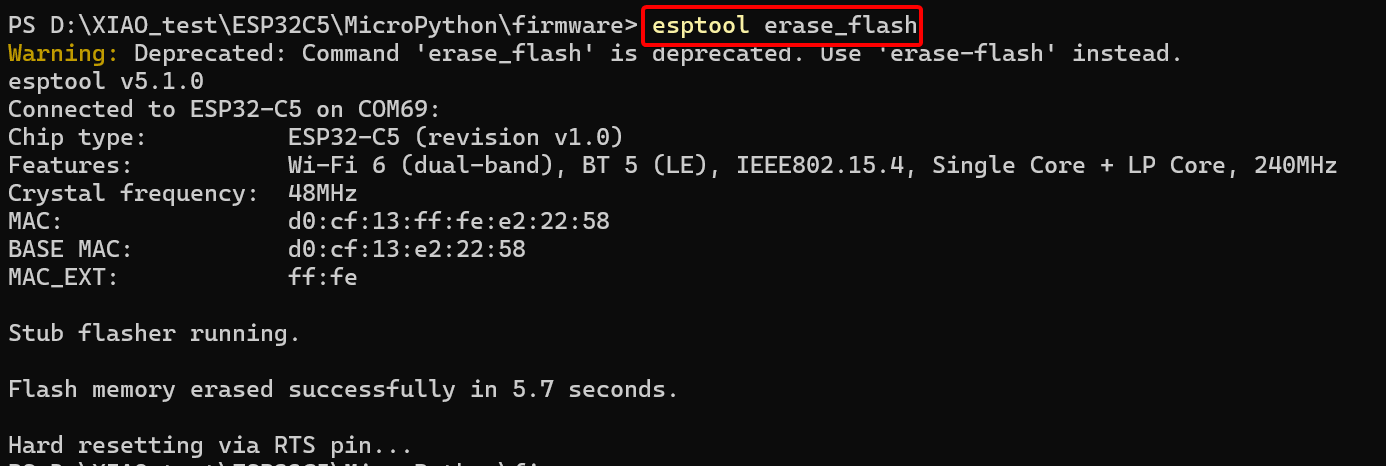
On the Windows operating system, the installed program may have been renamed from esptool.py to esptool.
If you are installing MicroPython on the XIAO ESP32-C5 for the first time, use the following command to erase the Flash first.
esptool.py eraase_flash
esptool.py will try to detect the serial port with the ESP32 automatically.
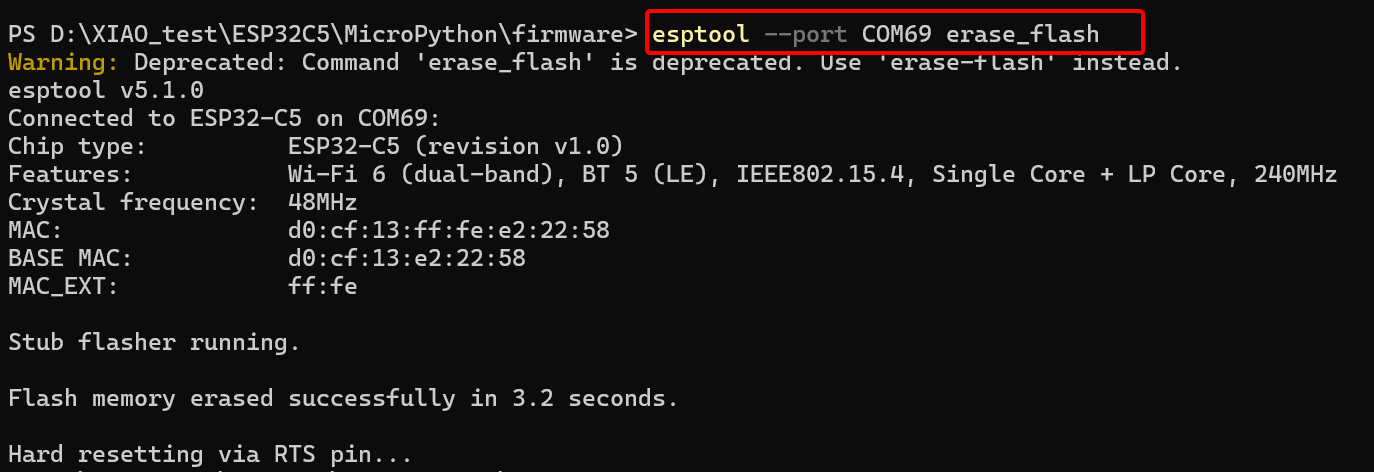
But if this fails or there might be more than one Espressif-based device attached to your computer then pass the --port option with the name of the target serial port. For example:
esptool.py --port PORTNAME erase_flash
Flashing
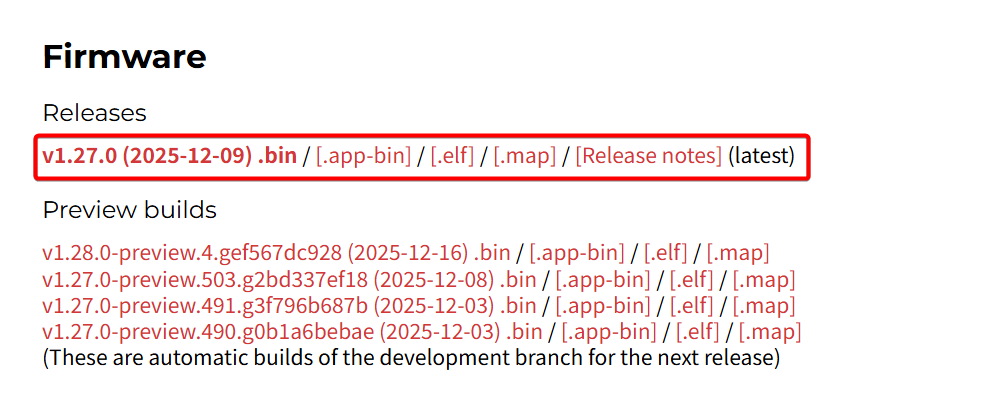
Step 1. Click the link, select a suitable version of the MicroPython firmware for the ESP32-C5 to download, and the v1.27.0 version is chosen here. ESP32_GENERIC_C5 MicroPython
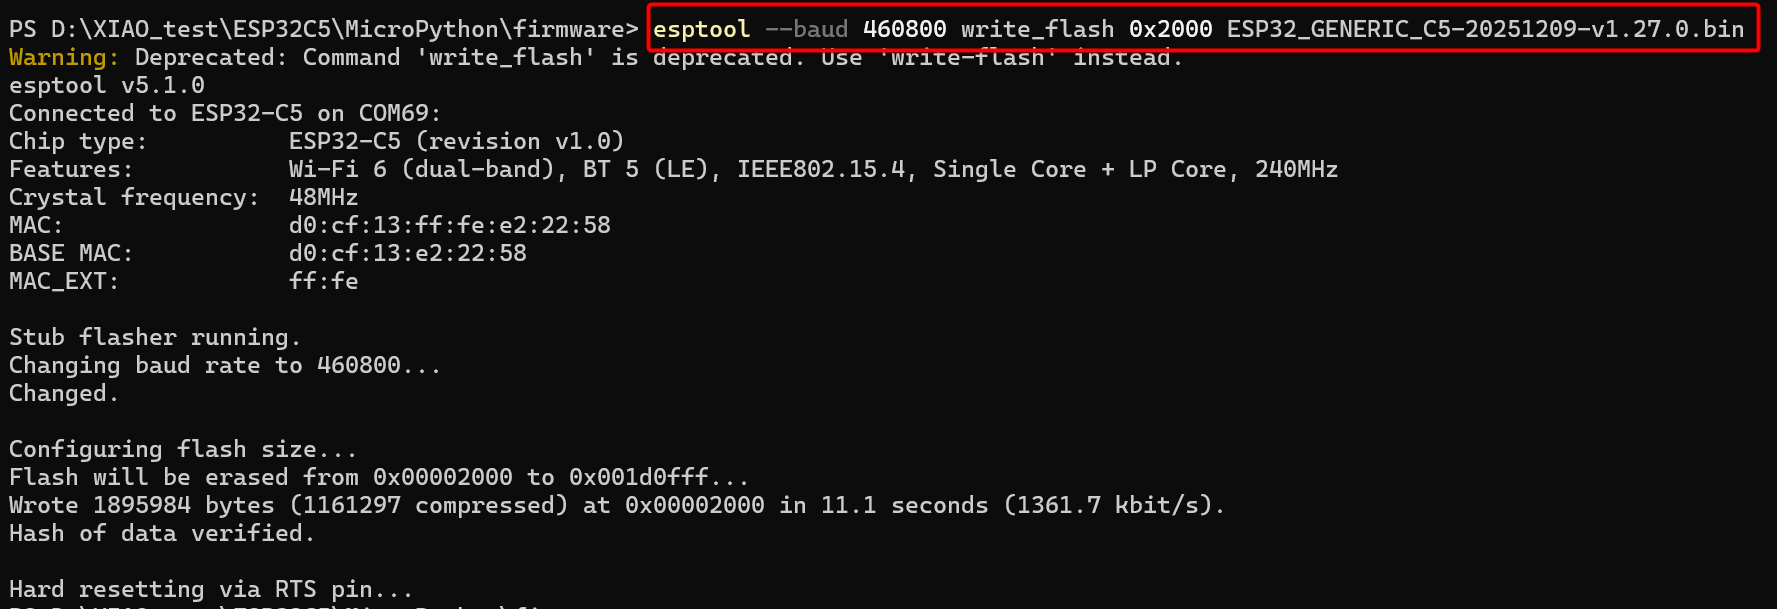
Step 2. deploy the firmware to the board, starting at address 0x2000.
To avoid losing track of the firmware, it is recommended that you place the downloaded MicroPython firmware in a separate folder, then right-click in this folder to open a terminal.
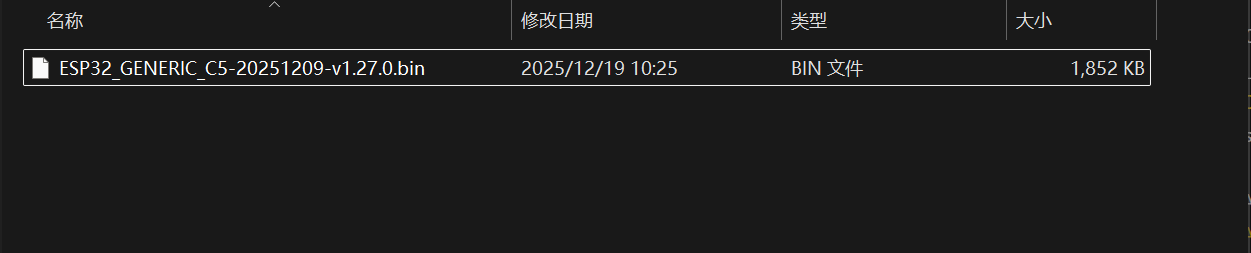
Enter the command below and replace ESP32_BOARD_NAME-DATE-VERSION.bin with ESP32_GENERIC_C5-20251209-v1.27.0.bin.
esptool.py --baud 460800 write_flash 0x2000 ESP32_BOARD_NAME-DATE-VERSION.bin
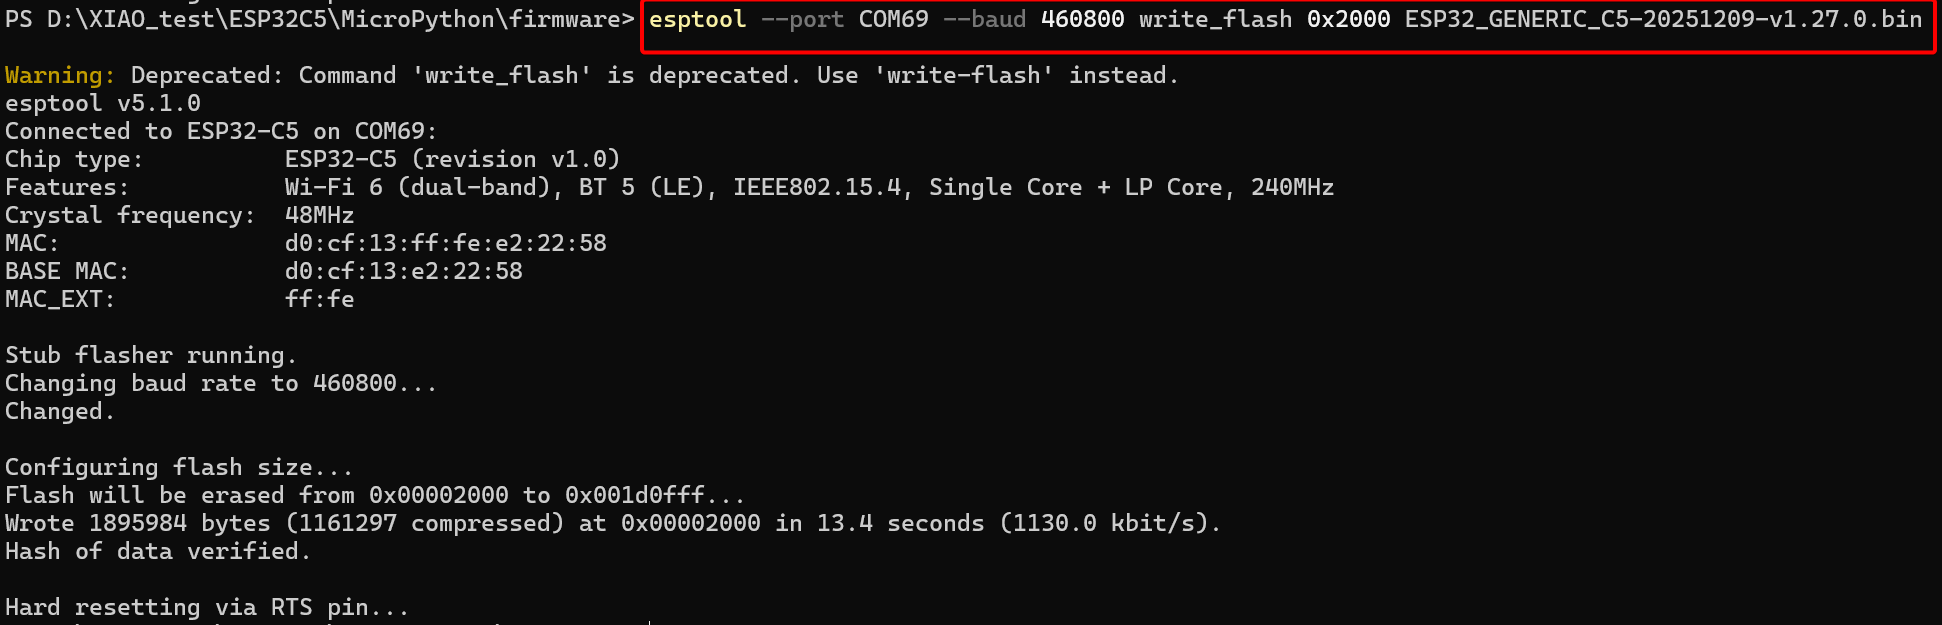
If esptool.py can't automatically detect the serial port then you can pass it explicitly on the command line instead.
esptool.py --port PORTNAME --baud 460800 write_flash 0x2000 ESP32_BOARD_NAME-DATE-VERSION.bin
- On Windows, the port name is usually similar to
COM4. - On Linux, the port name is usually similar to
/dev/ttyUSBor/dev/ttyACM0. - On Mac, the port name is usually similar to
/dev/cu.usbmodem01.
If flashing starts and then fails partway through, try removing the --baud 460800 option to flash at the slower default speed.
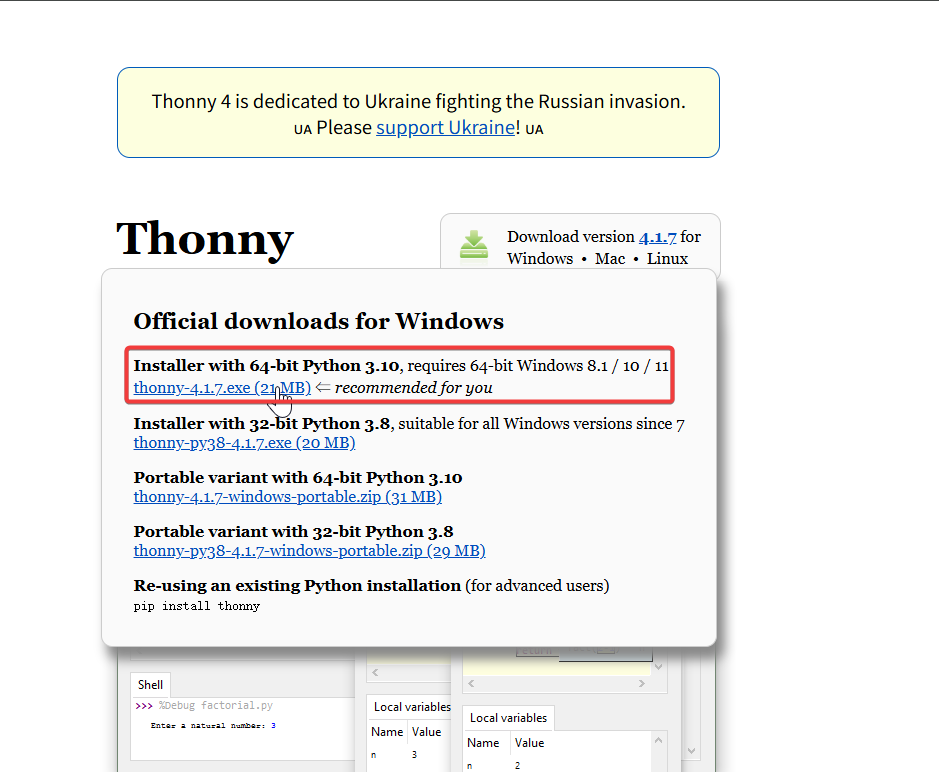
Install Thonny IDE
Choose the appropriate version for installation. Here, I am installing it on a Windows system, so I have selected the Windows version.
Follow the instructions for the desired Python version.
Then, simply follow the default steps for configuration.
LED Blinking Example
Here we will show you how to light up the L LED on the XIAO ESP32-C5 using MicroPython with Thonny IDE.
Step 1. Interpreter Configuration
- Open Thonny IDE, then click the bottom right corner of the interface to Configure interpreter options. Select MicroPython (generic) and Port
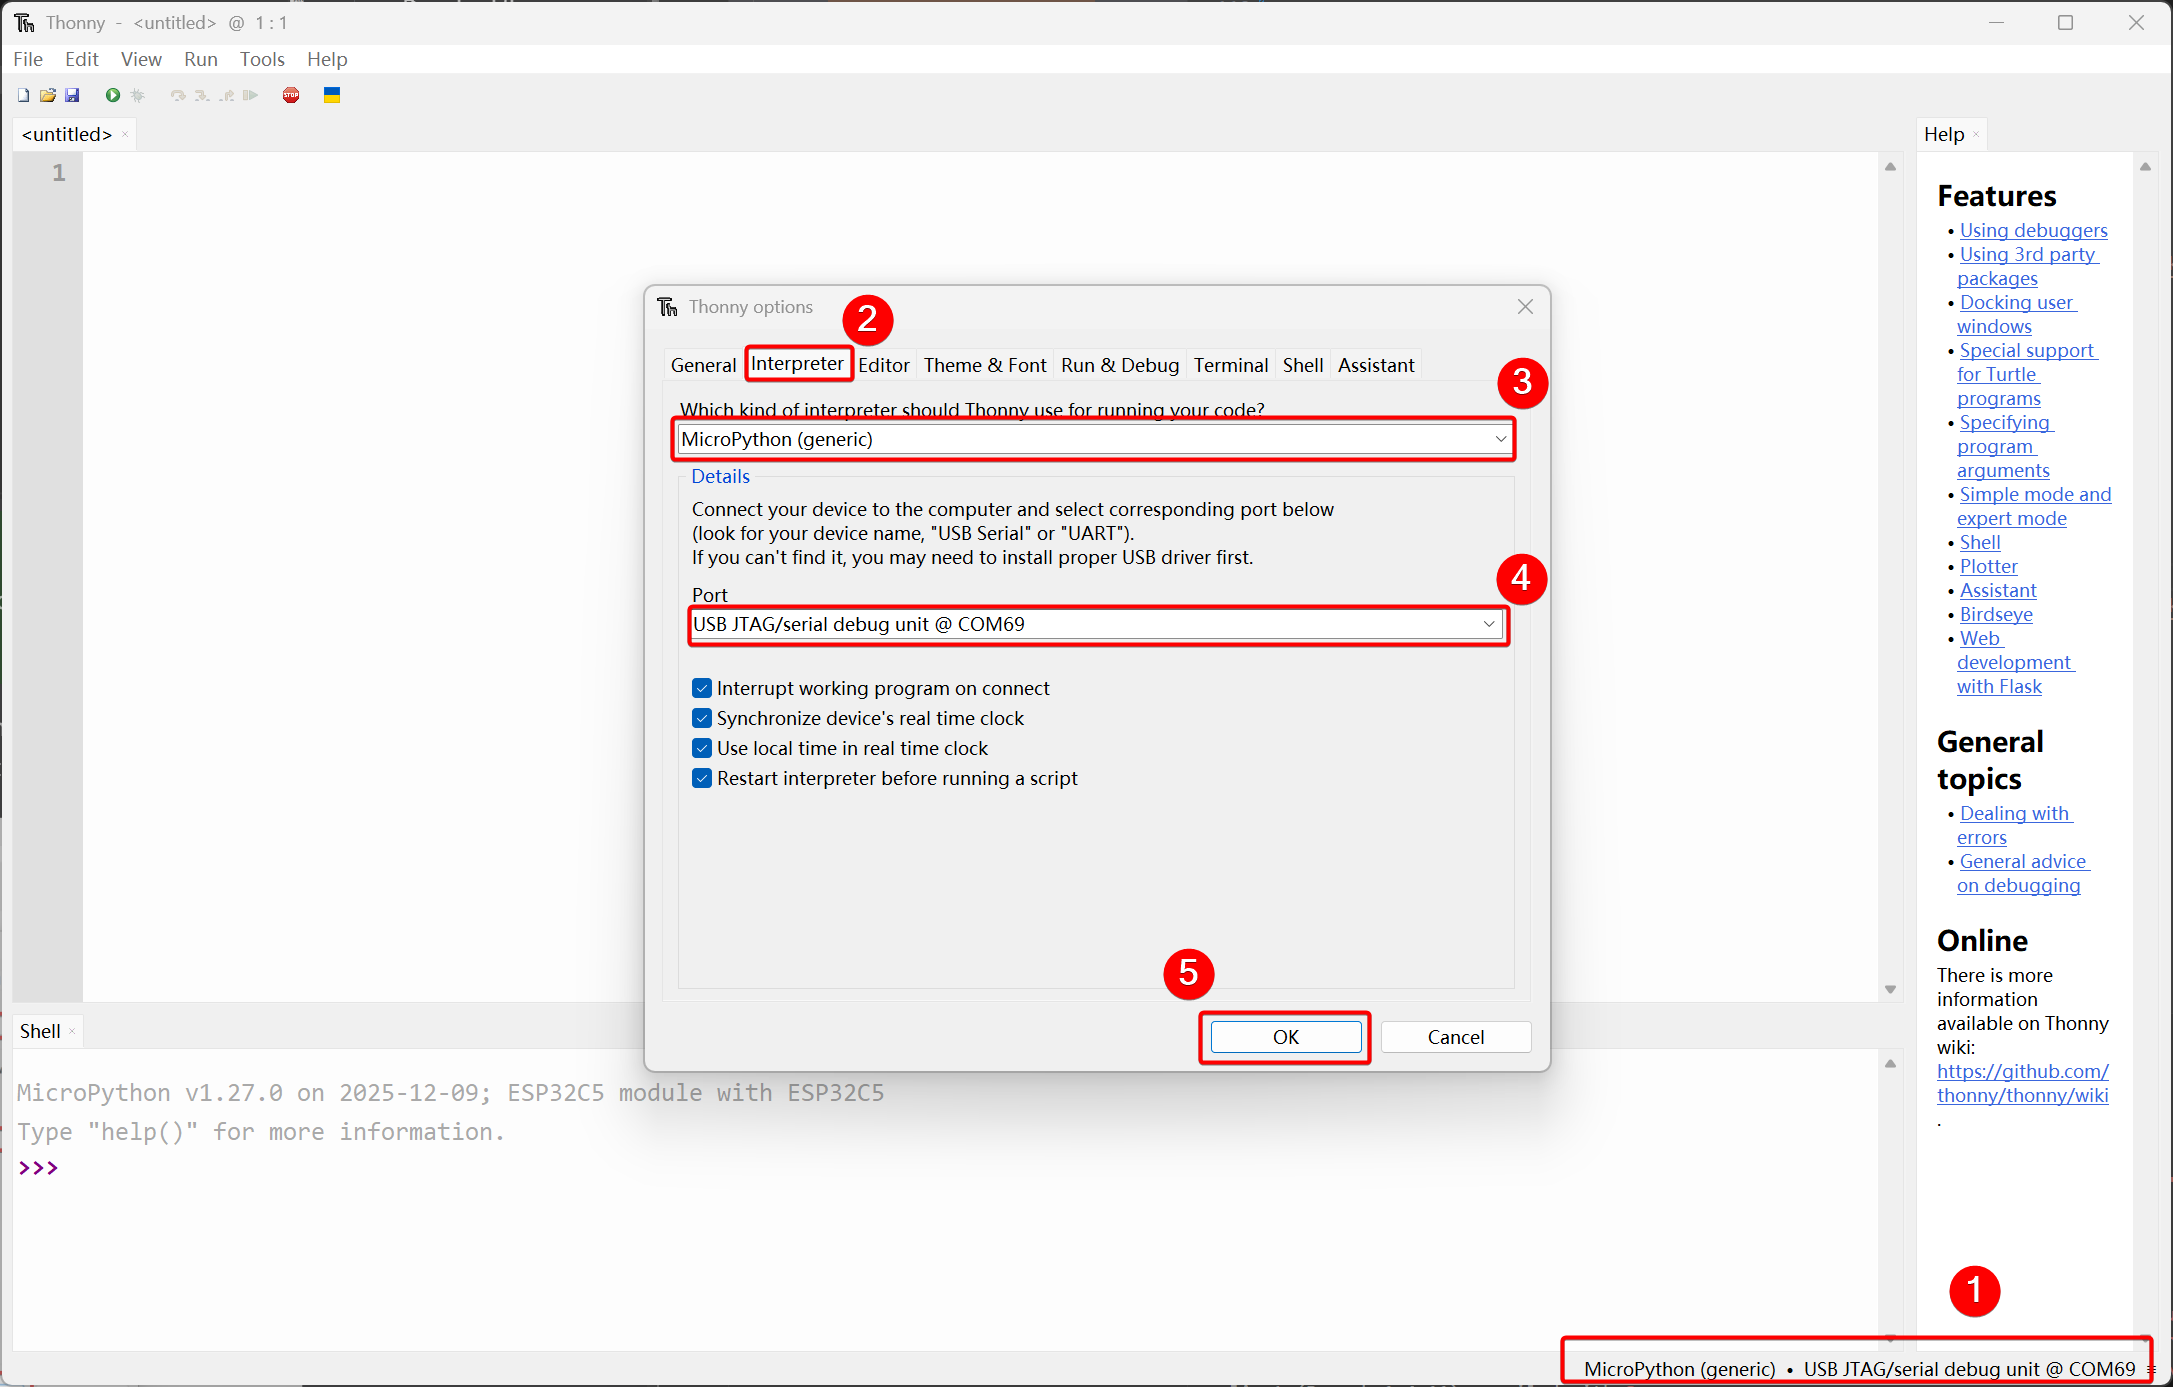
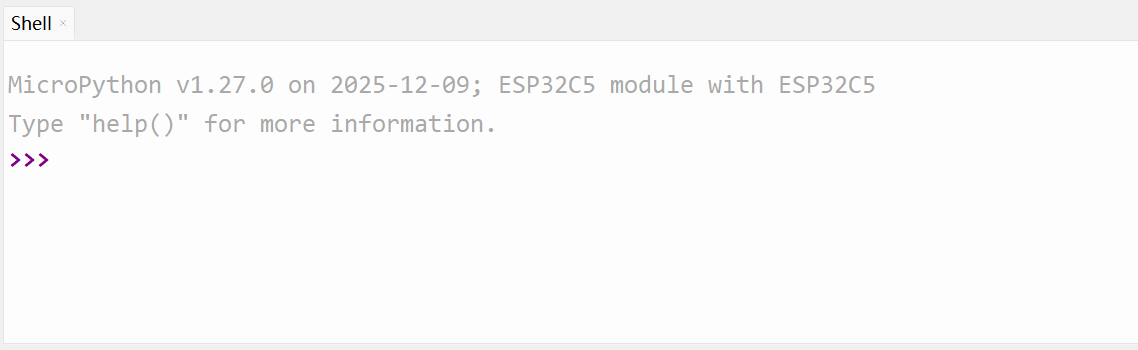
After a successful connection, the MicroPython firmware version information will be output in the shell window below.
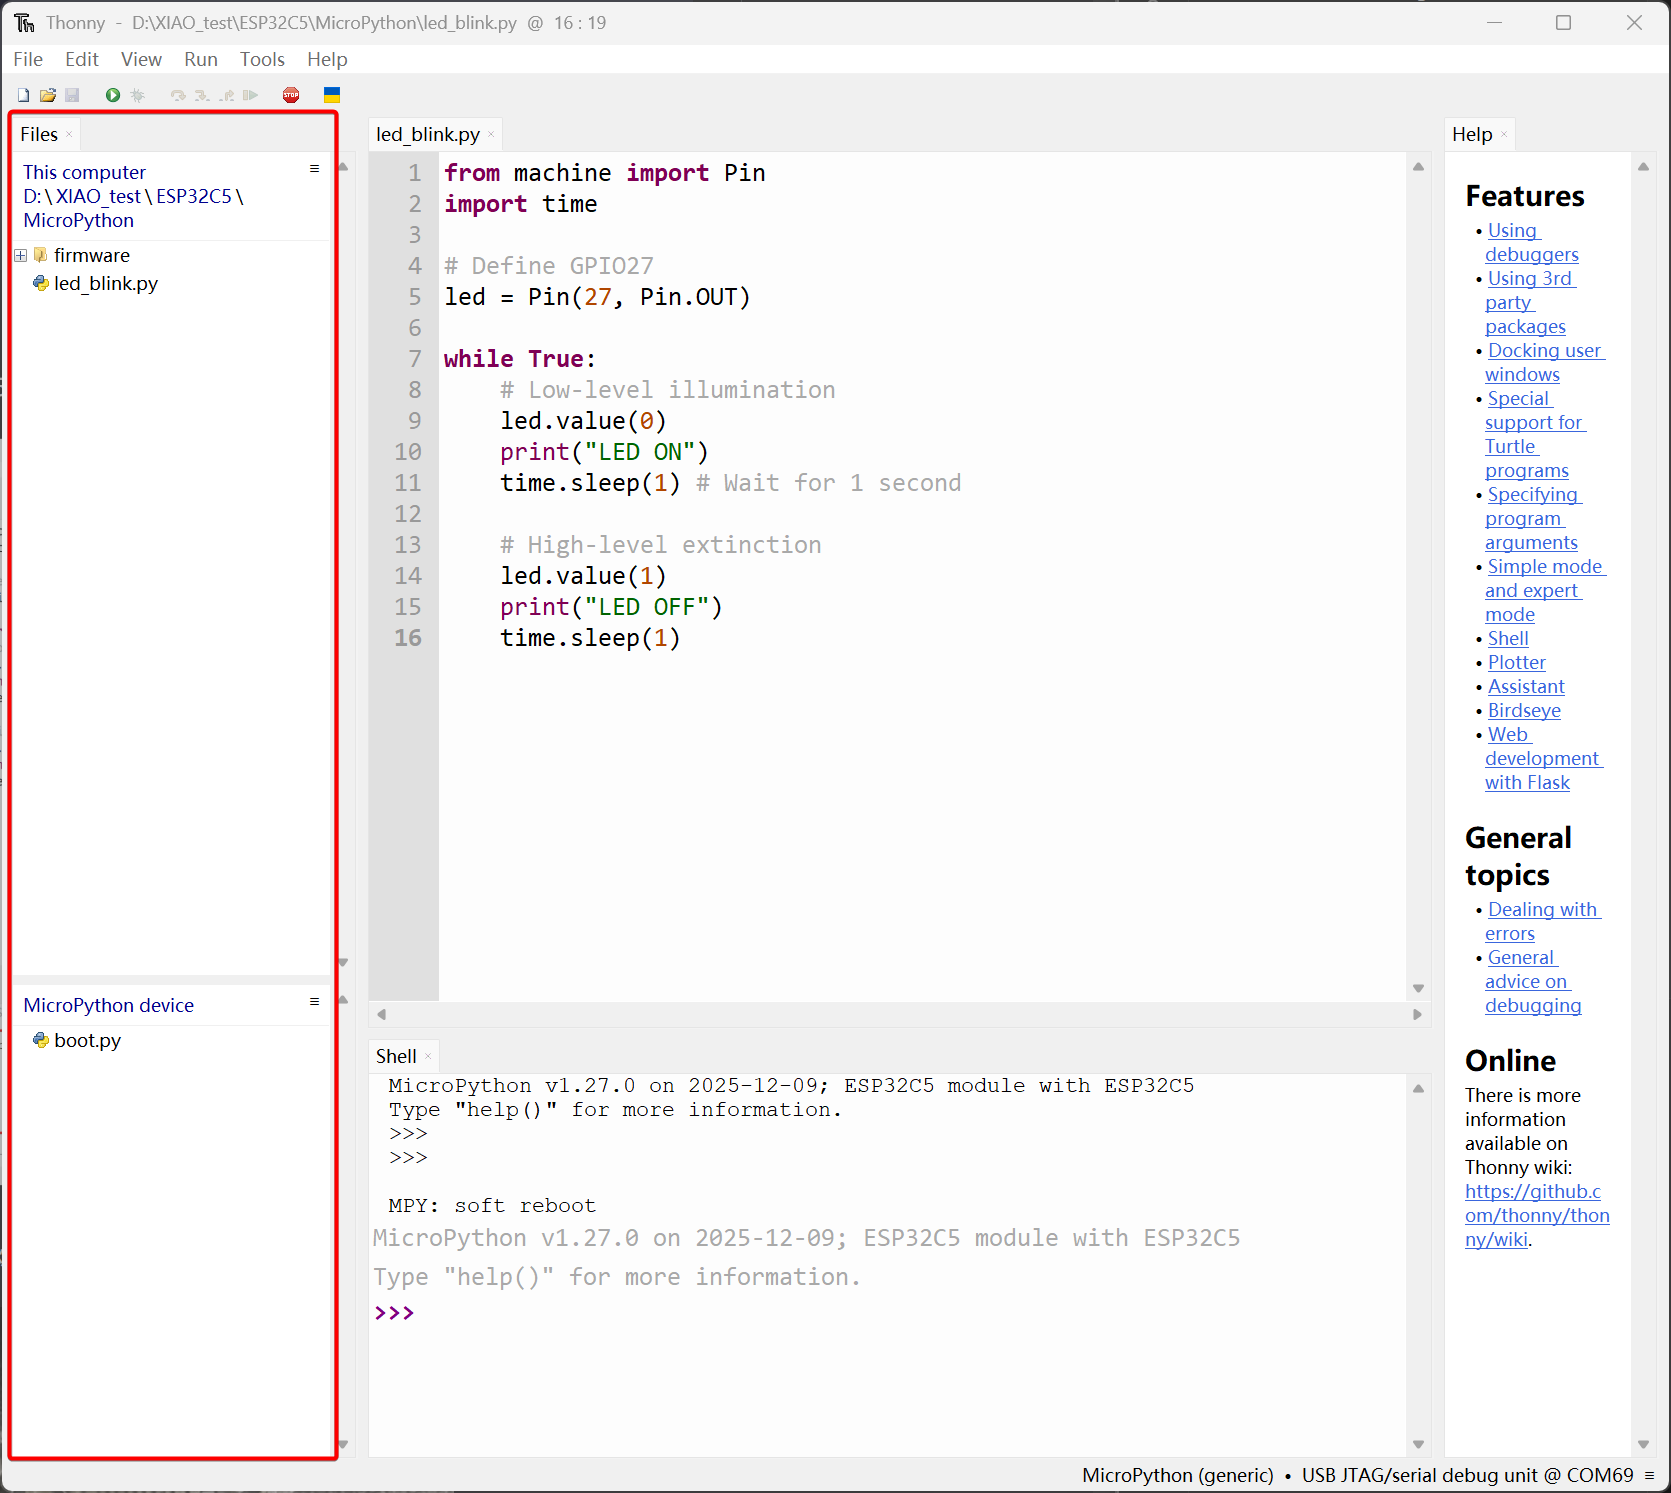
Step 2. New led_blink.py File
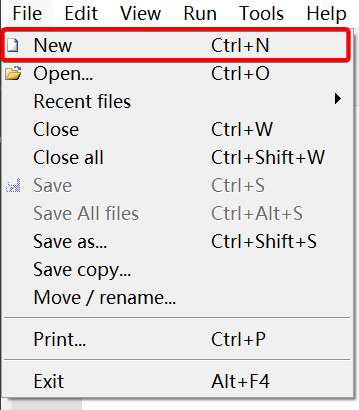
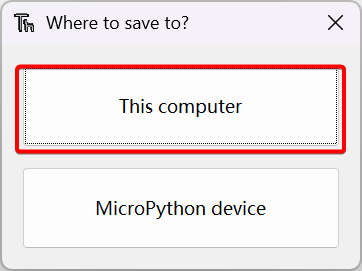
- Click File -> New in the upper left corner to create a new file, then press Ctrl + S to name it led_blink and save it to your computer.
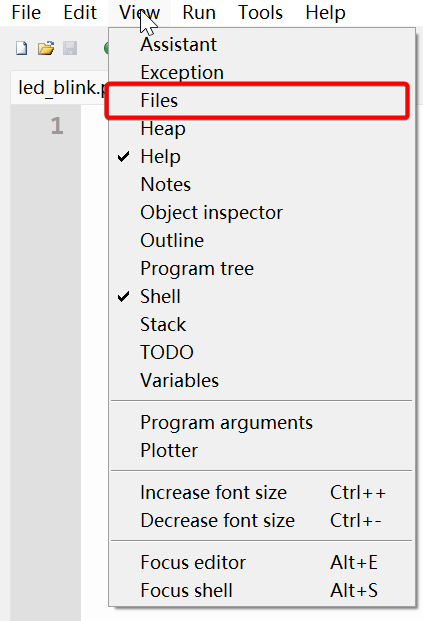
- Click View -> Files in the upper left corner to check it (a √ will appear next to it), and a window displaying the location of your stored files will show up on the left side.
Step 3. Write the Example Code
For the L LED on the XIAO ESP32-C5, the corresponding pin is GPIO27, and it is lit with a low-level signal.
- Copy the example code into the
led_blink.pyfile.
from machine import Pin
import time

# Define GPIO27
led = Pin(27, Pin.OUT)

while True:
    # Low-level illumination
    led.value(0)
    print("LED ON")
    time.sleep(1) # Wait for 1 second

    # High-level extinction
    led.value(1)
    print("LED OFF")
    time.sleep(1)
Step 4. Run the Code
- Click the icon shown in the upper right corner or press F5 to run the code, and the LED information will be printed.
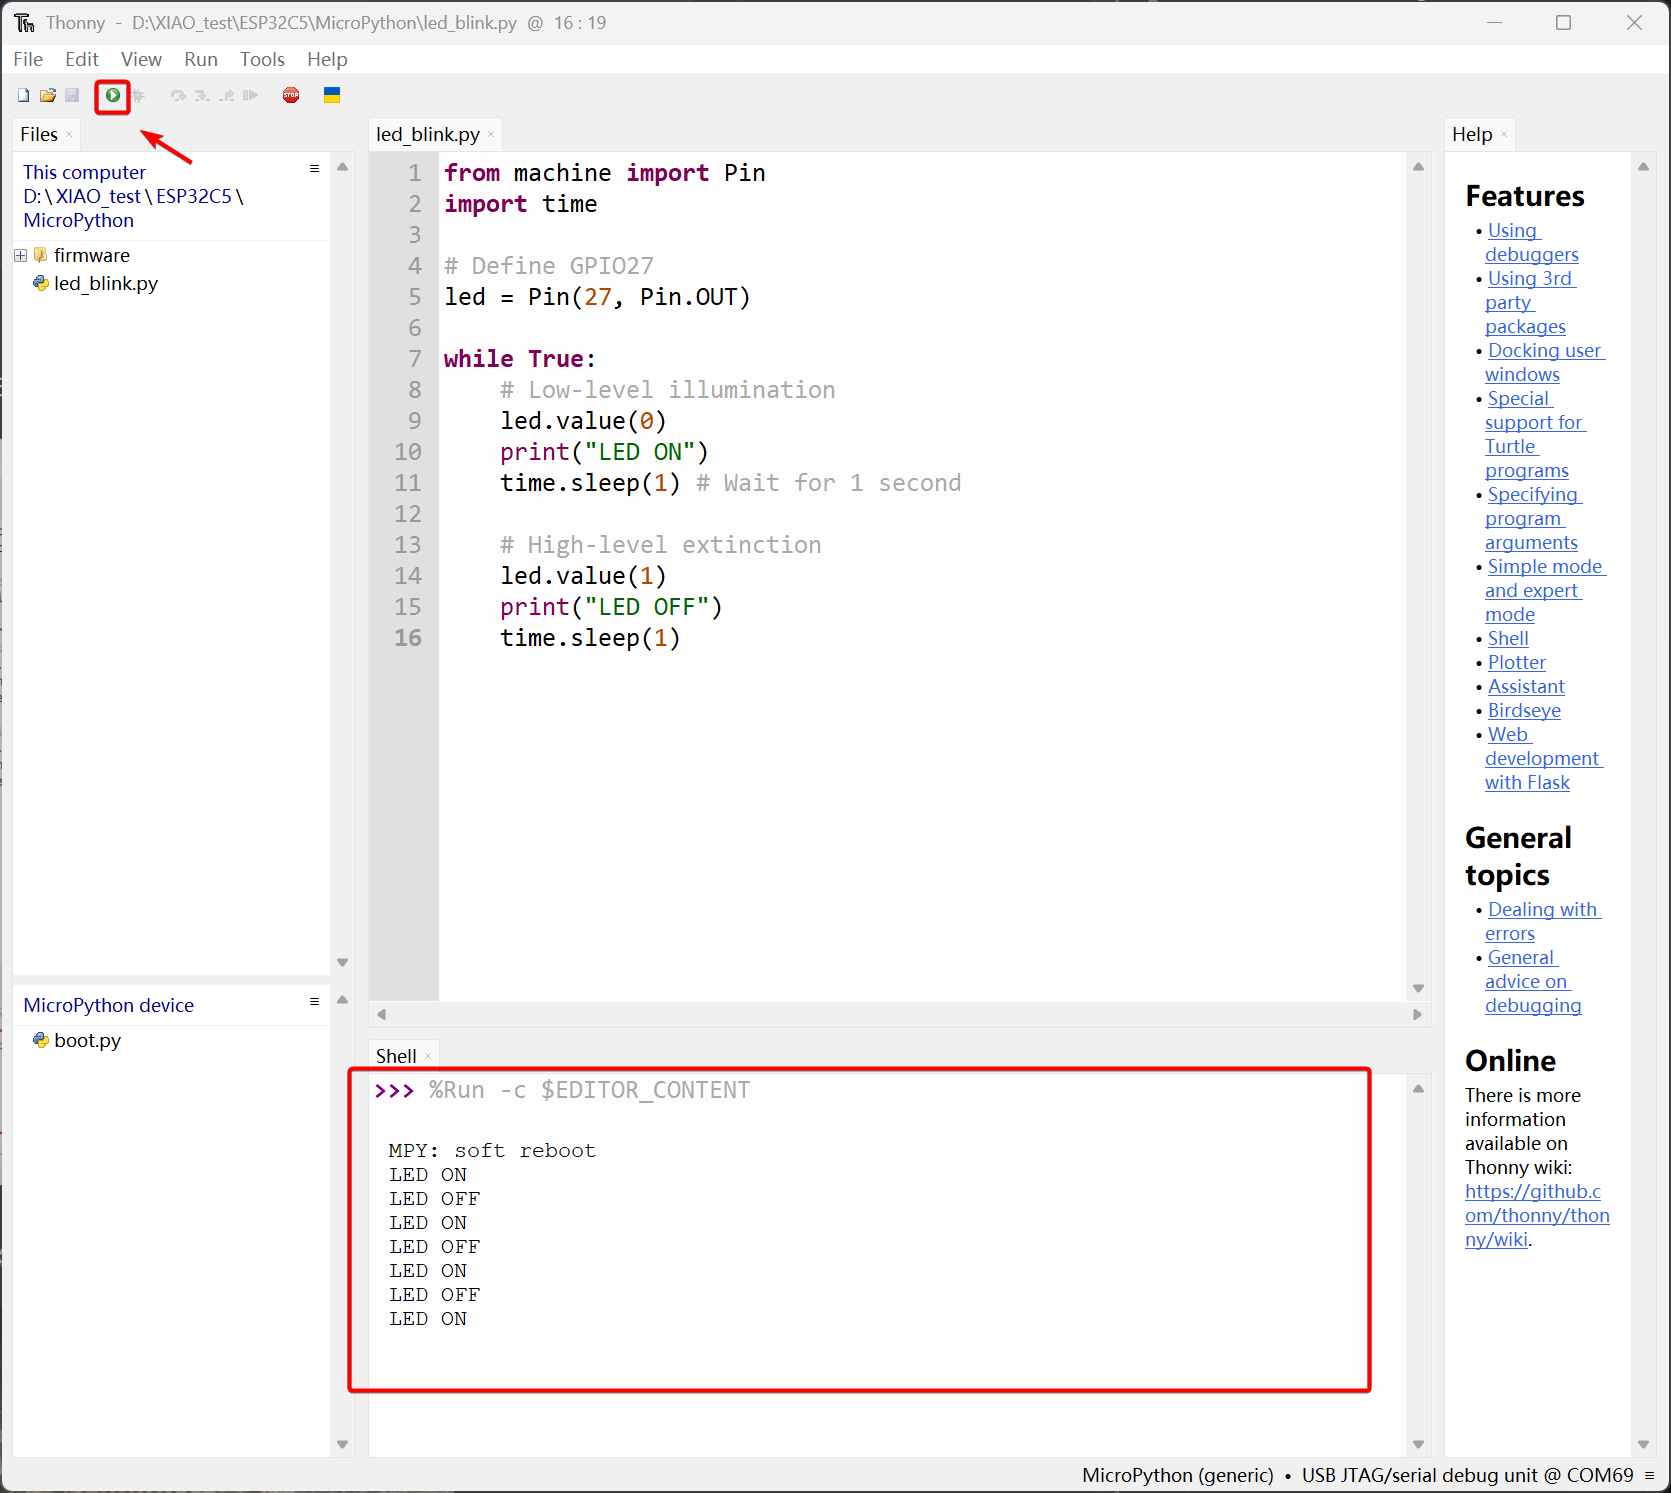
- The onboard L LED will blink at 1-second intervals.
5 GHz Wi-Fi Connection Example
XIAO ESP-C5 supports 2.4 GHz & 5 GHz dual-band Wi-Fi 6. This example will demonstrate the effect of connecting to a 5 GHz Wi-Fi network.
- Create a new file named
wifi_connect.pyand copy the following example code into it.
import network
import time


def connect_wifi(ssid, password):
    # Create a Station interface (STA_IF = client mode, connects to a router/AP)
    wlan = network.WLAN(network.STA_IF)

    # If already connected, return immediately
    if wlan.isconnected():
        print("Already connected before, skipping connection step.")
        print("Network config:", wlan.ifconfig())
        return True

    # Enable the Wi-Fi interface
    wlan.active(True)

    print(f"Connecting to network: {ssid} ...")
    wlan.connect(ssid, password)

    # Wait for connection with a timeout (e.g., 10 seconds)
    max_wait = 10
    while max_wait > 0:
        if wlan.isconnected():
            break
        max_wait -= 1
        print("Waiting for connection...")
        time.sleep(1)

    # Check connection result
    if wlan.isconnected():
        print("Connected successfully!")
        print("Network config (IP/Mask/Gateway/DNS):", wlan.ifconfig())

        # led.value(0)  # If you want to turn on an LED after connection succeeds, add code here
        return True
    else:
        print("Connection failed. Please check SSID or password.")
        return False


# ==========================================
# Main Program
# ==========================================

# Fill in your Wi-Fi SSID and password here
SSID = "YourWiFiName"
PASSWORD = "YourWiFiPassword"

# Call the function
connect_wifi(SSID, PASSWORD)
- Enter the SSID and PASSWORD of the 5GHz WiFi in your environment, then run the code, and the connection information will be printed.
Before running a new example code, you need to click the Stop icon in the upper left corner or press Ctrl + F2 to exit the previous running environment.
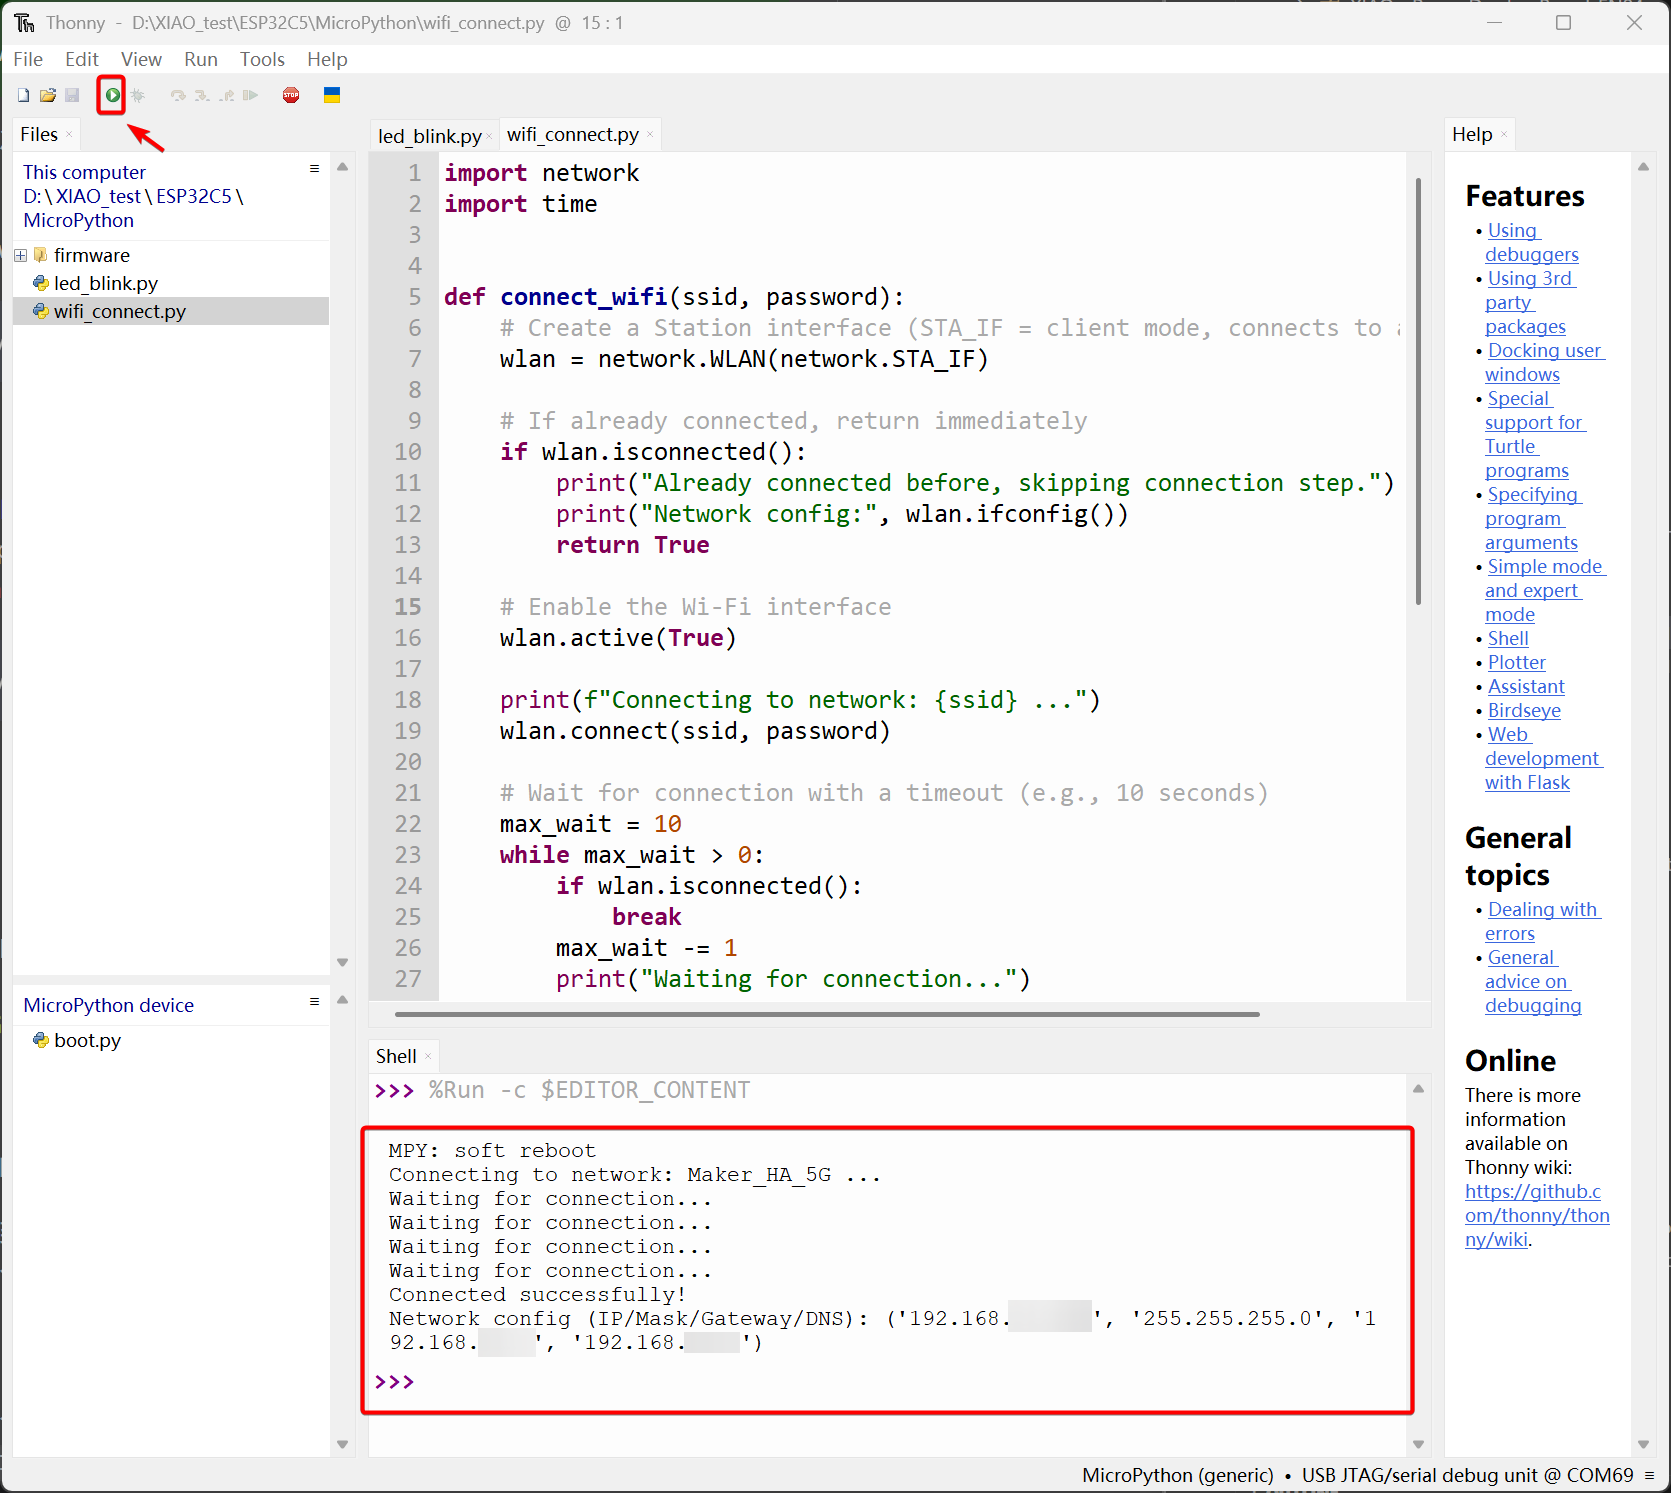
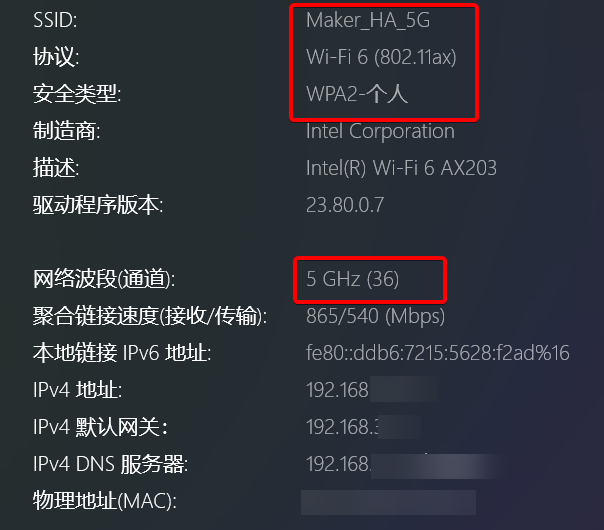
This proves that it is feasible for the XIAO ESP32-C5 to connect to a 5GHz WiFi network.
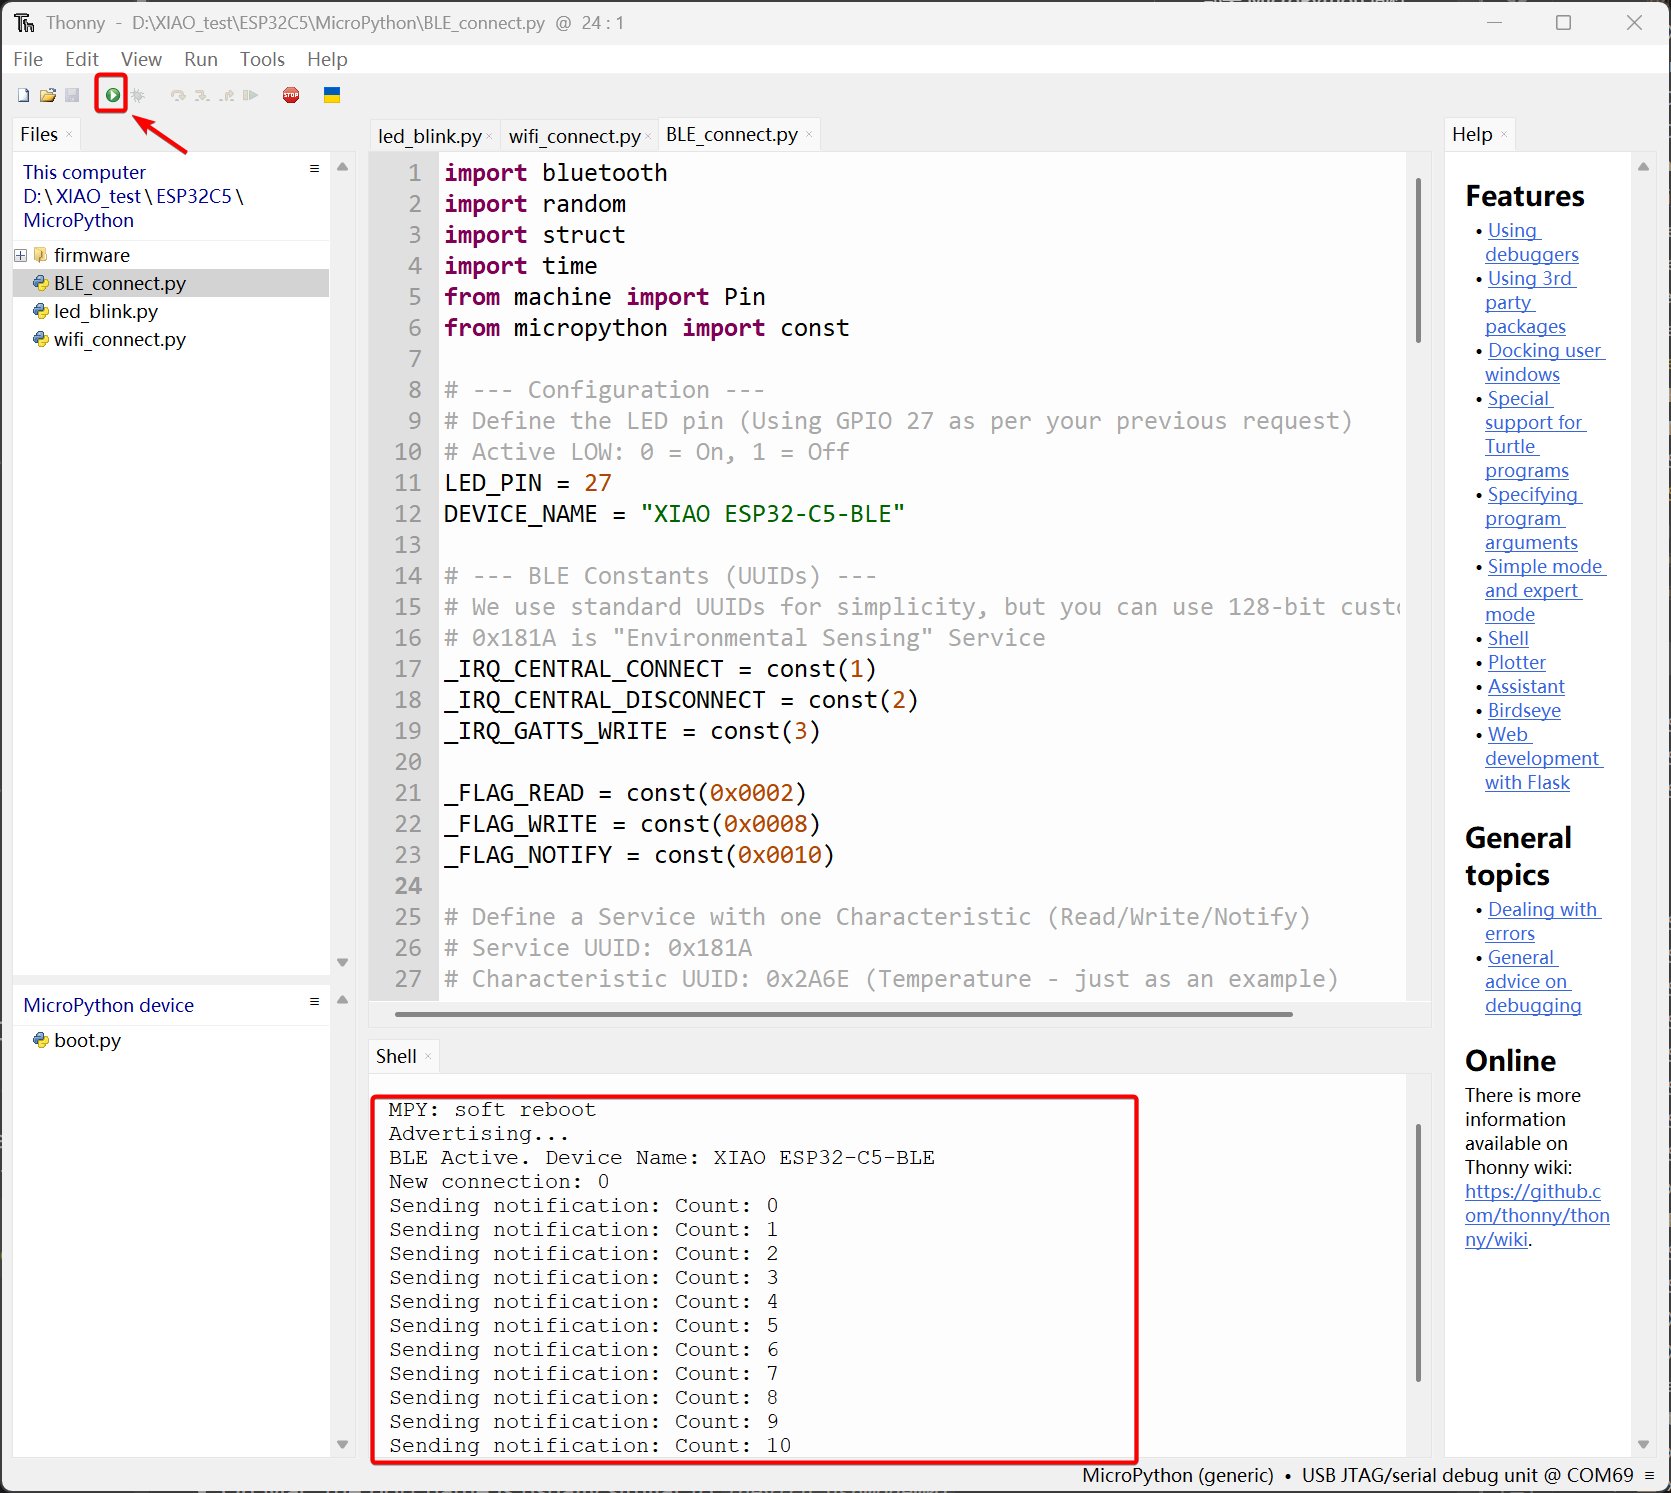
BLE Example
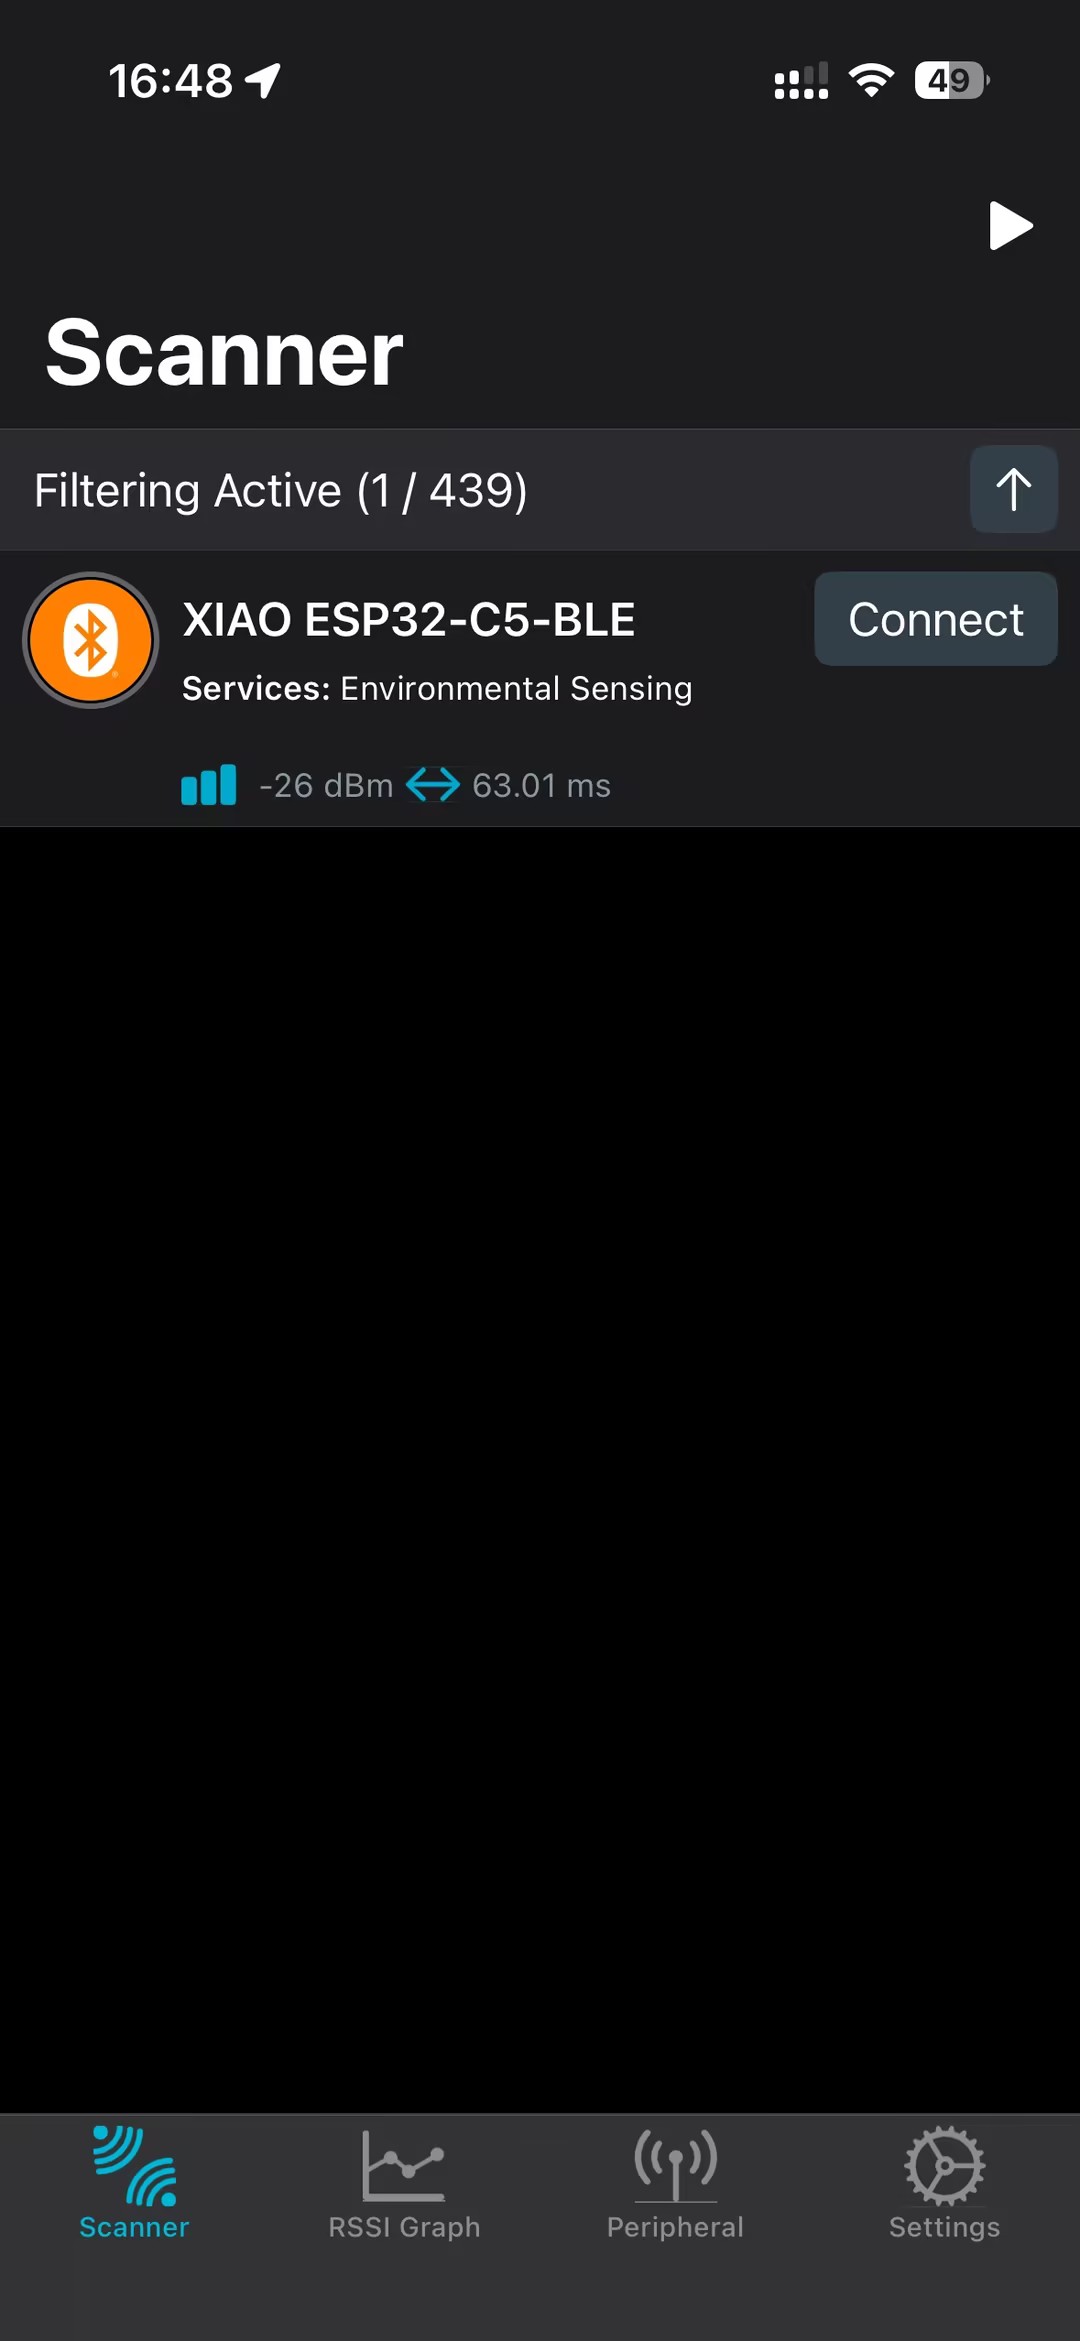
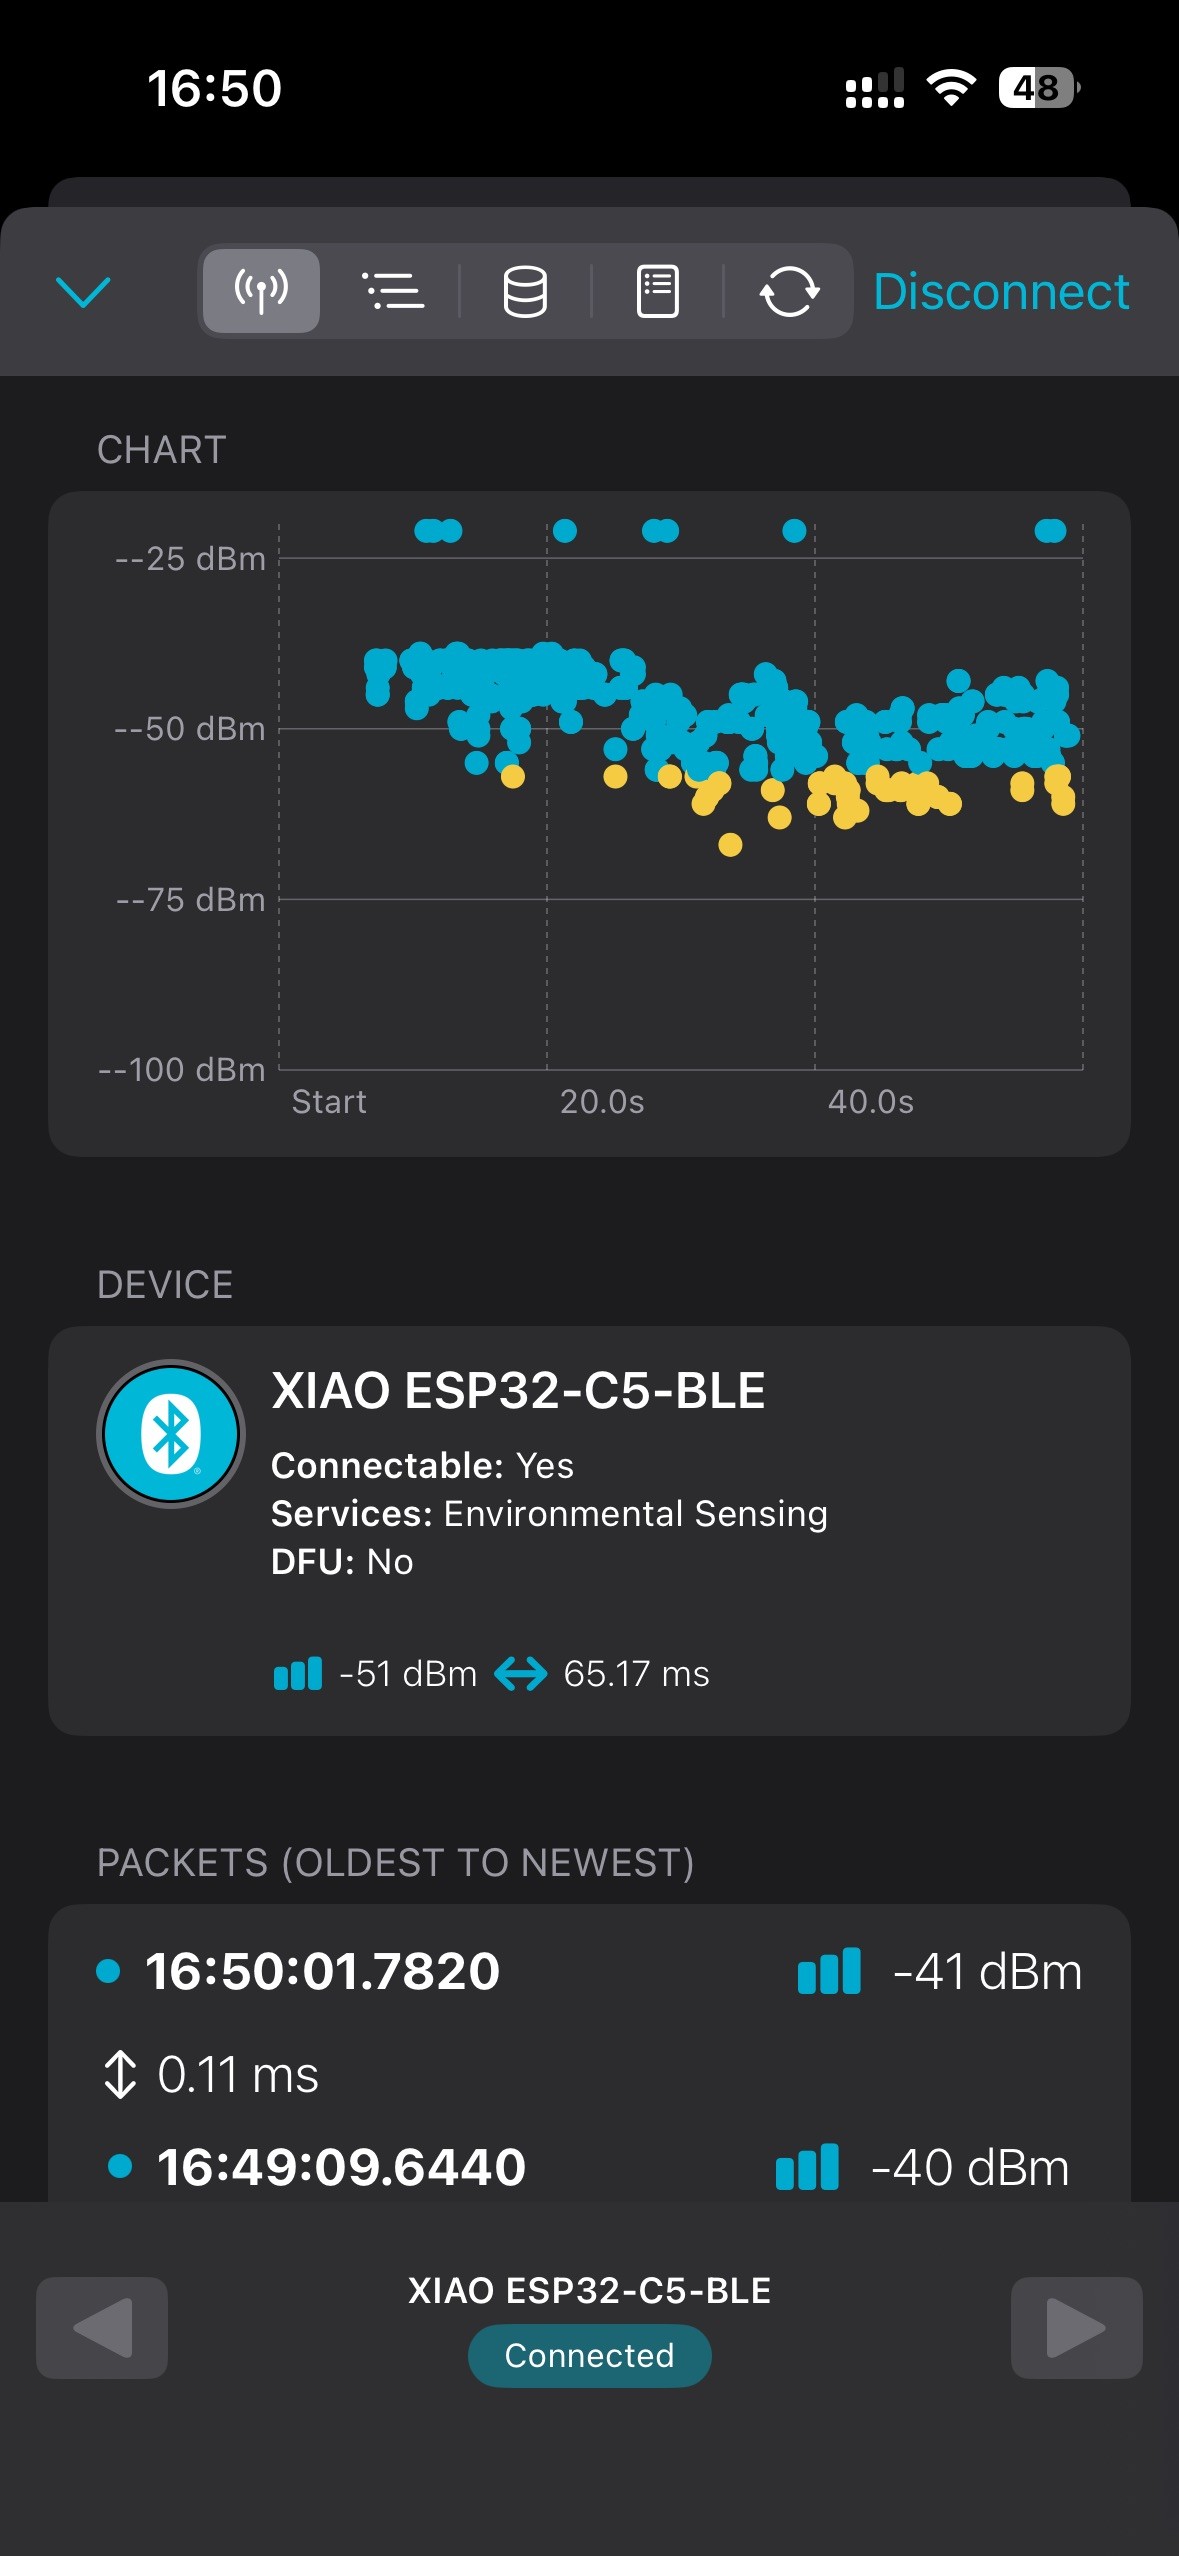
This example will show you the BLE functionality of the XIAO ESP32-C5, and demonstrate how to discover and connect to it using the nRF Connect App.
- Create a new file named
BLE_connect.pyand copy the following example code into it.
Reference Code for BLE Connection
import bluetooth
import random
import struct
import time
from machine import Pin
from micropython import const

# --- Configuration ---
# Define the LED pin (Using GPIO 27 as per your previous request)
# Active LOW: 0 = On, 1 = Off
LED_PIN = 27
DEVICE_NAME = "XIAO ESP32-C5-BLE"

# --- BLE Constants (UUIDs) ---
# We use standard UUIDs for simplicity, but you can use 128-bit custom UUIDs.
# 0x181A is "Environmental Sensing" Service
_IRQ_CENTRAL_CONNECT = const(1)
_IRQ_CENTRAL_DISCONNECT = const(2)
_IRQ_GATTS_WRITE = const(3)

_FLAG_READ = const(0x0002)
_FLAG_WRITE = const(0x0008)
_FLAG_NOTIFY = const(0x0010)

# Define a Service with one Characteristic (Read/Write/Notify)
# Service UUID: 0x181A
# Characteristic UUID: 0x2A6E (Temperature - just as an example)
_UART_UUID = bluetooth.UUID(0x181A)
_UART_TX = (
    bluetooth.UUID(0x2A6E),
    _FLAG_READ | _FLAG_WRITE | _FLAG_NOTIFY,
)
_UART_SERVICE = (
    _UART_UUID,
    (_UART_TX,),
)

# --- Helper: Advertising Payload Generator ---
def advertising_payload(limited_disc=False, br_edr=False, name=None, services=None, appearance=0):
    payload = bytearray()

    def _append(adv_type, value):
        nonlocal payload
        payload += struct.pack("BB", len(value) + 1, adv_type) + value

    _append(
        0x01,  # Flags
        struct.pack("B", (0x02 if not limited_disc else 0x01) | (0x04 if not br_edr else 0x00)),
    )

    if name:
        _append(0x09, name)  # Complete Local Name

    if services:
        for uuid in services:
            b = bytes(uuid)
            if len(b) == 2:
                _append(0x03, b)  # 16-bit Service Class UUIDs
            elif len(b) == 16:
                _append(0x06, b)  # 128-bit Service Class UUIDs

    if appearance:
        _append(0x19, struct.pack("<h", appearance))

    return payload

# --- BLE Class ---
class BLEPeripheral:
    def __init__(self, ble, name="ESP32"):
        self._ble = ble
        self._ble.active(True)
        self._ble.irq(self._irq)

        # Register services
        ((self._handle_tx,),) = self._ble.gatts_register_services((_UART_SERVICE,))

        self._connections = set()
        self._payload = advertising_payload(name=name, services=[_UART_UUID])

        # Initialize LED
        self._led = Pin(LED_PIN, Pin.OUT)
        self._led.value(1) # Turn OFF initially (High)

        self._advertise()
        print(f"BLE Active. Device Name: {name}")

    def _irq(self, event, data):
        # Track connections so we can send notifications
        if event == _IRQ_CENTRAL_CONNECT:
            conn_handle, _, _ = data
            print(f"New connection: {conn_handle}")
            self._connections.add(conn_handle)
            self._led.value(0) # Turn LED ON (Active Low)

        elif event == _IRQ_CENTRAL_DISCONNECT:
            conn_handle, _, _ = data
            print(f"Disconnected: {conn_handle}")
            self._connections.remove(conn_handle)
            self._led.value(1) # Turn LED OFF
            # Start advertising again to allow new connections
            self._advertise()

        elif event == _IRQ_GATTS_WRITE:
            conn_handle, value_handle = data
            value = self._ble.gatts_read(value_handle)
            if value_handle == self._handle_tx:
                print(f"Received write request: {value}")
                # You can parse 'value' here to control hardware

    def update_value(self, data):
        # Write the local value to the handle
        self._ble.gatts_write(self._handle_tx, data)
        # Notify all connected centrals
        for conn_handle in self._connections:
            self._ble.gatts_notify(conn_handle, self._handle_tx, data)

    def _advertise(self):
        self._ble.gap_advertise(100, adv_data=self._payload)
        print("Advertising...")

# --- Main Execution ---
def demo():
    ble = bluetooth.BLE()
    p = BLEPeripheral(ble, name=DEVICE_NAME)

    counter = 0

    try:
        while True:
            # Only update value if connected, to save power/cpu (optional)
            if p._connections:
                # Create a string data: "Count: 1", "Count: 2"...
                data_str = f"Count: {counter}"
                print(f"Sending notification: {data_str}")

                # Send data (must be bytes)
                p.update_value(data_str.encode('utf-8'))

                counter += 1

            time.sleep(2) # Wait 2 seconds

    except KeyboardInterrupt:
        print("Stopping...")
        ble.active(False)

if __name__ == "__main__":
    demo()
- Then run the code, open the nRF Connect app on your phone, and you will discover the device named XIAO ESP32-C5-BLE. After a successful connection, the onboard L LED will light up, and the transmission count information will also be printed at that time.
Congratulations! After completing all the examples above, we believe you have mastered how to develop projects on the XIAO ESP32-C5 using MicroPython with Thonny IDE. We look forward to seeing more of your creations!
Tech Support & Product Discussion
Thank you for choosing our products! We are here to provide you with different support to ensure that your experience with our products is as smooth as possible. We offer several communication channels to cater to different preferences and needs.