Platform IO with Seeed Studio XIAO ESP32-C5

PlatformIO Introduce
PlatformIO stands as a powerful and highly extensible development ecosystem designed for embedded systems. It seamlessly integrates support for a vast array of development boards and microcontrollers, offering unparalleled flexibility. What sets PlatformIO apart is its remarkable scalability: even if your specific board isn't natively supported, its architecture allows for straightforward custom board definitions.
Crucially, PlatformIO bridges the gap for developers familiar with Arduino, enabling the compilation and deployment of Arduino-style code by simply including the relevant libraries.
Use PlatformIO For XIAO ESP32-C5
Next, we will conduct development for the XIAO ESP32-C5 based on PlatformIO, helping you explore the PlatformIO development workflow.
Hardware Preparation
You need to prepare a XIAO ESP32-C5 in advance.
| Seeed Studio XIAO ESP32-C5 |
|---|
 |
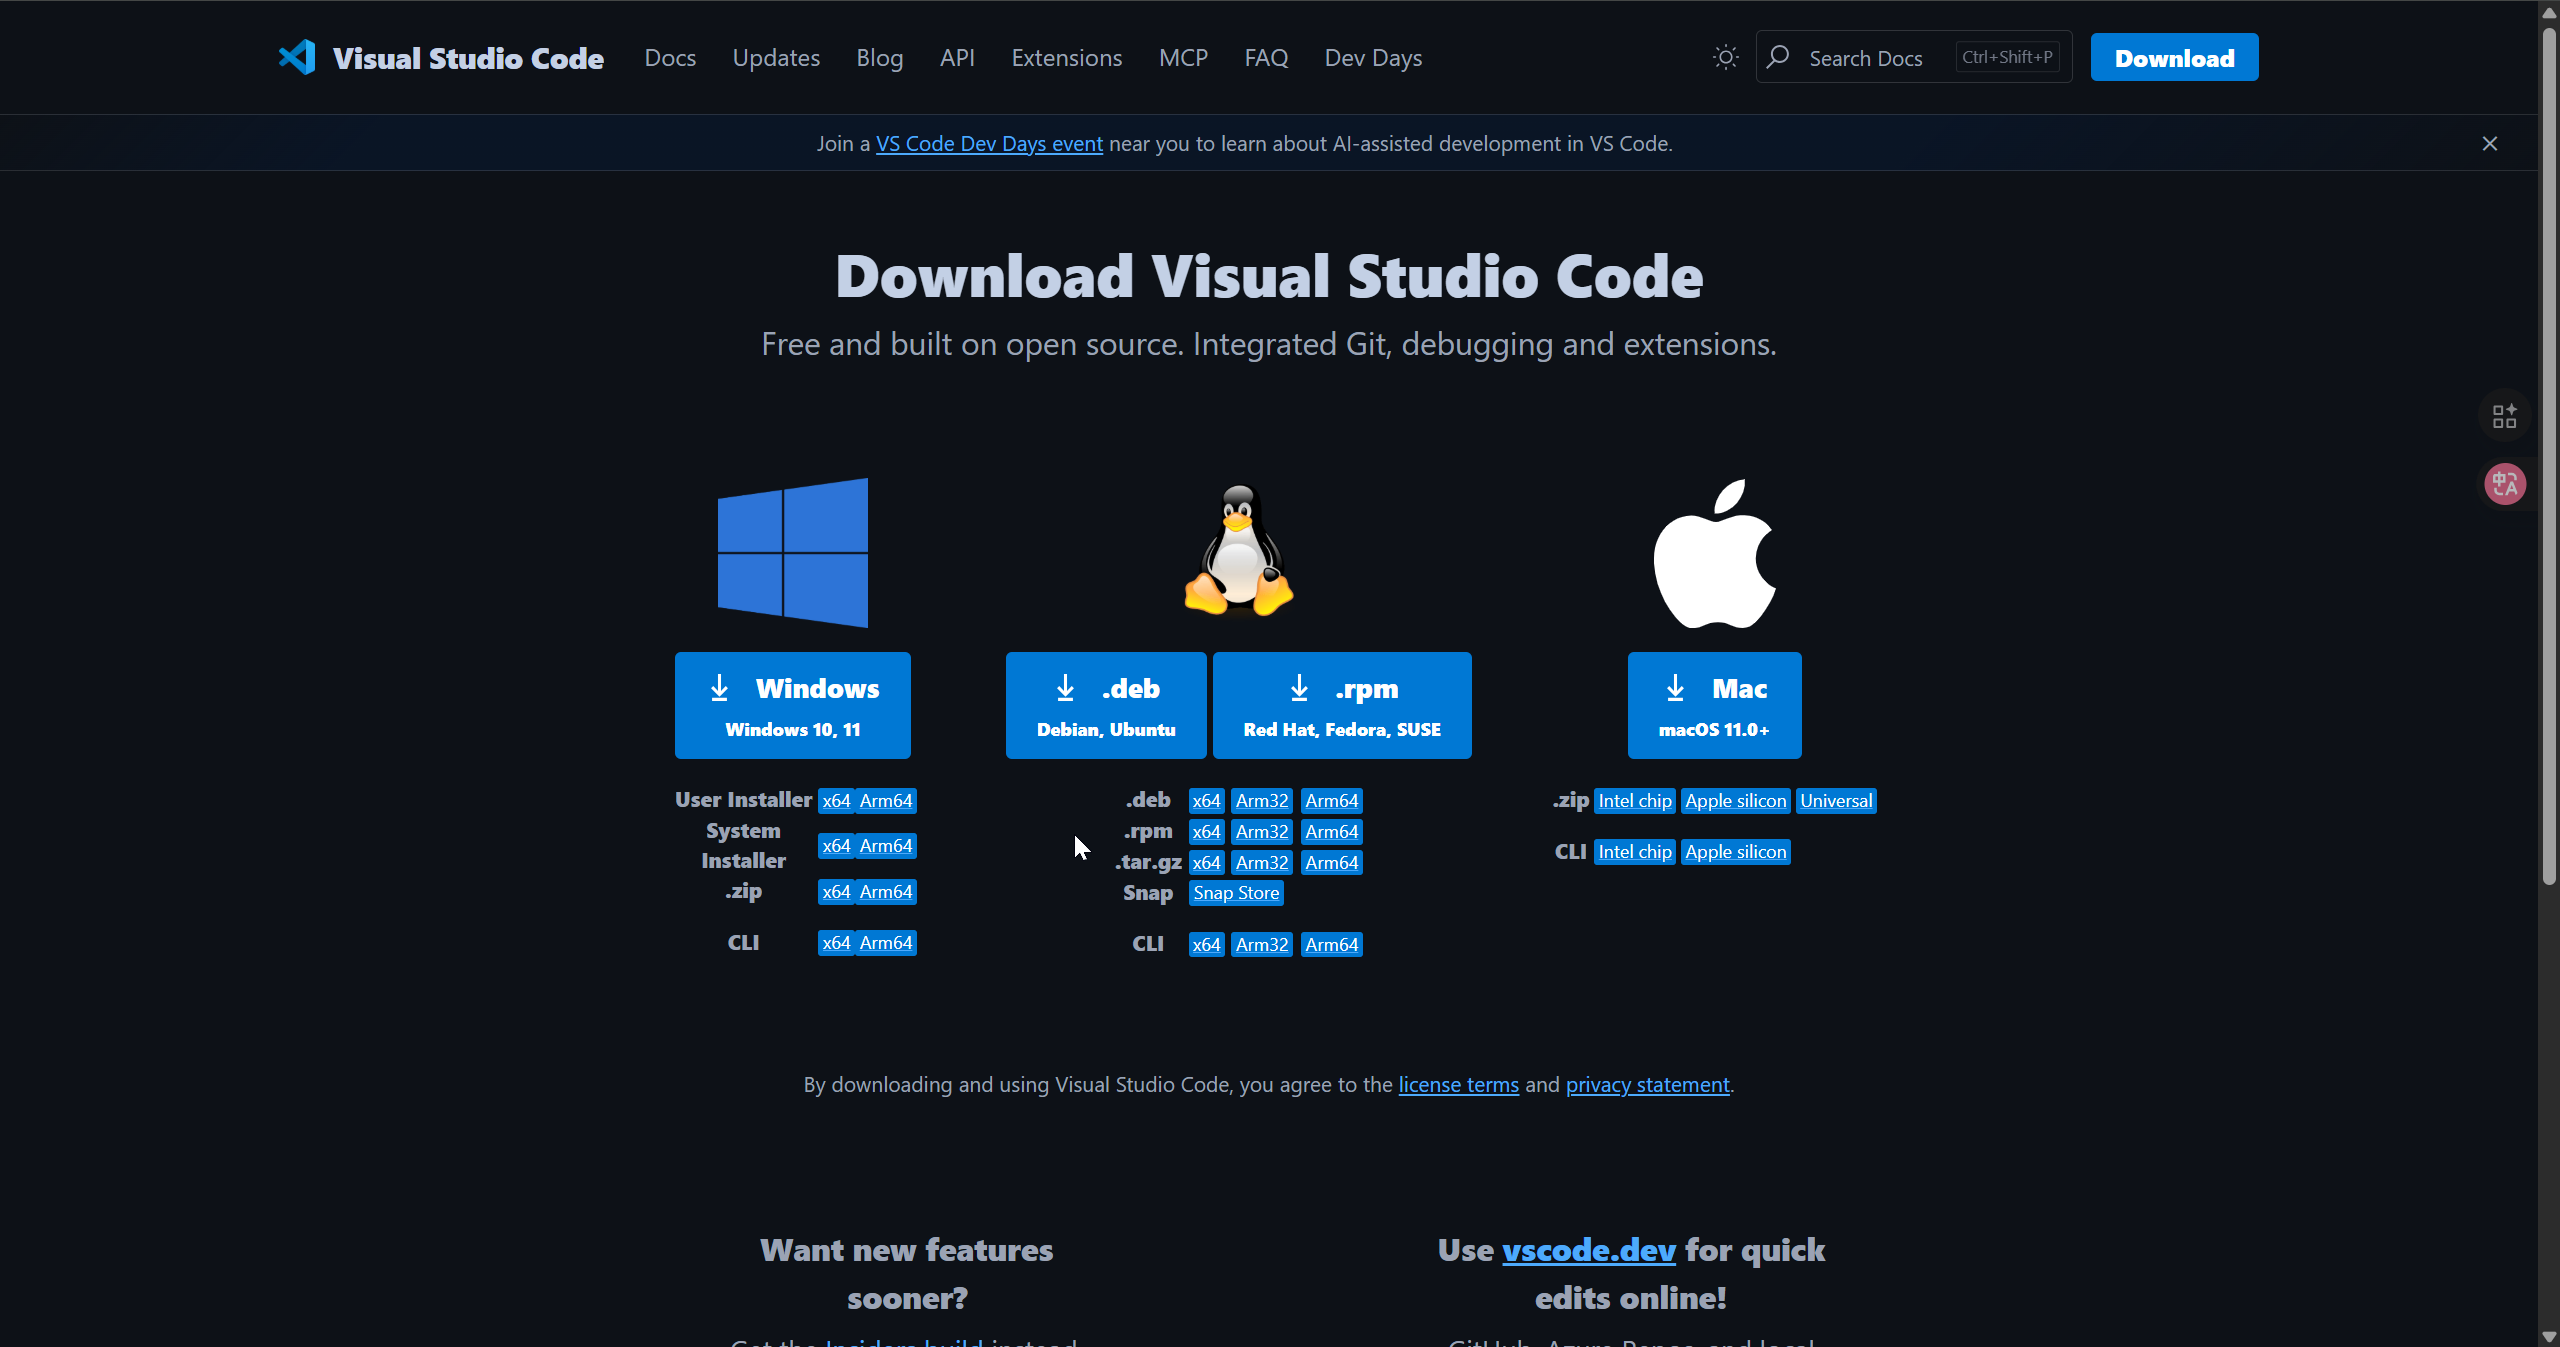
Download VS Code
Download according to the system you are using VS Code
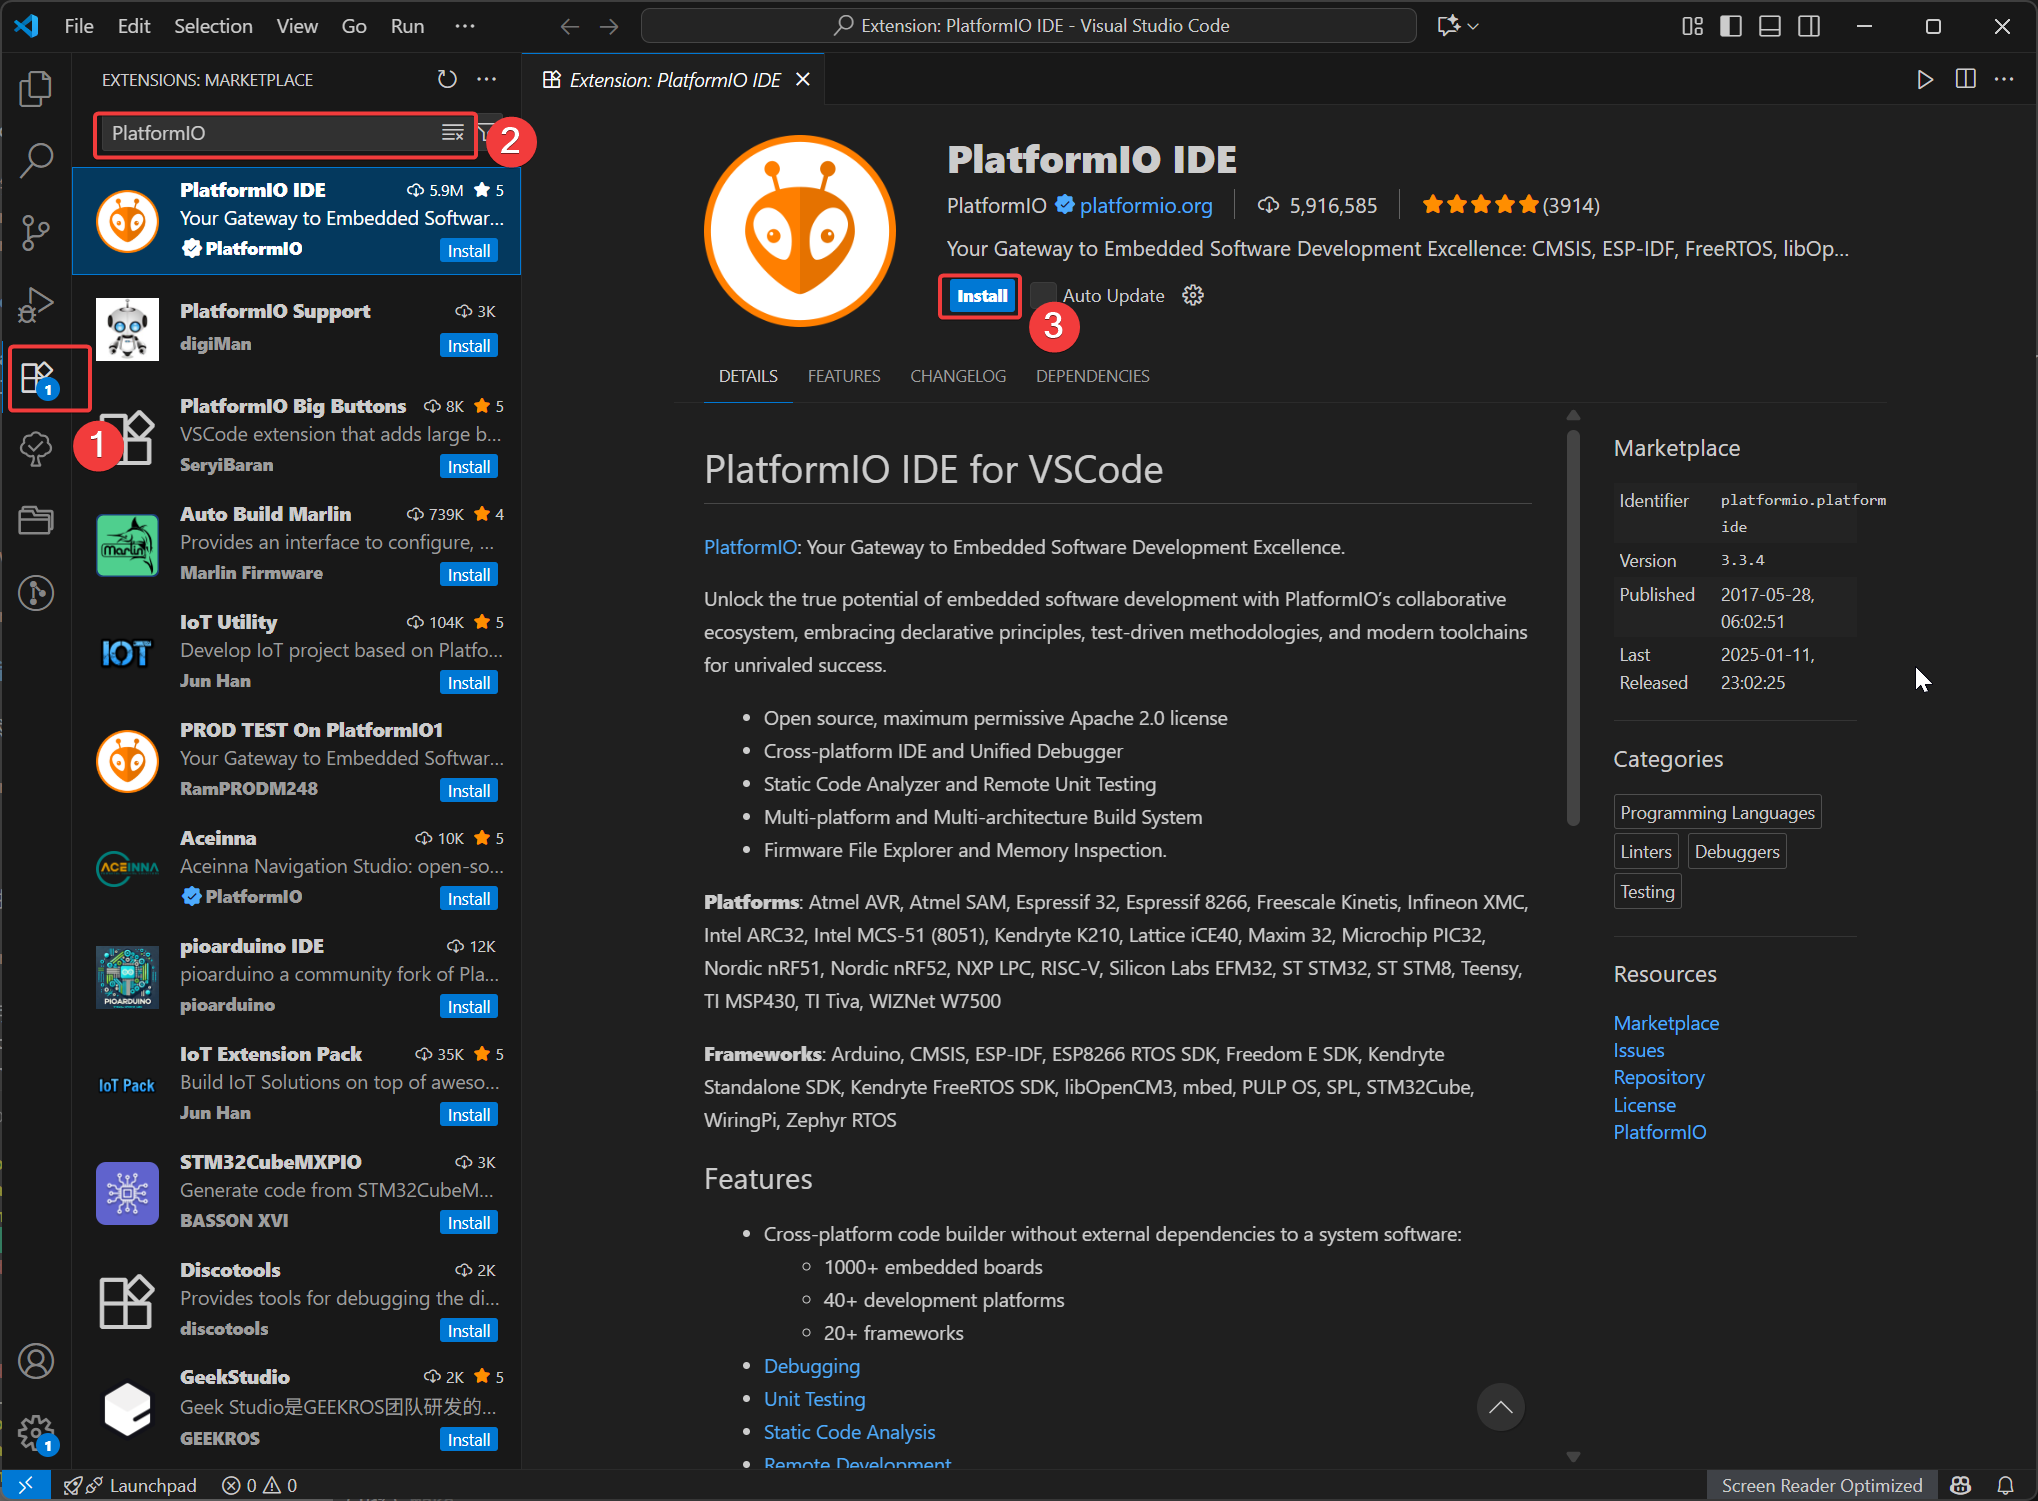
Install the PlatformIO
Open VSCode, click on Extensions, then search for PlatformIO and select to install. After the installation is complete, restart VSCode.
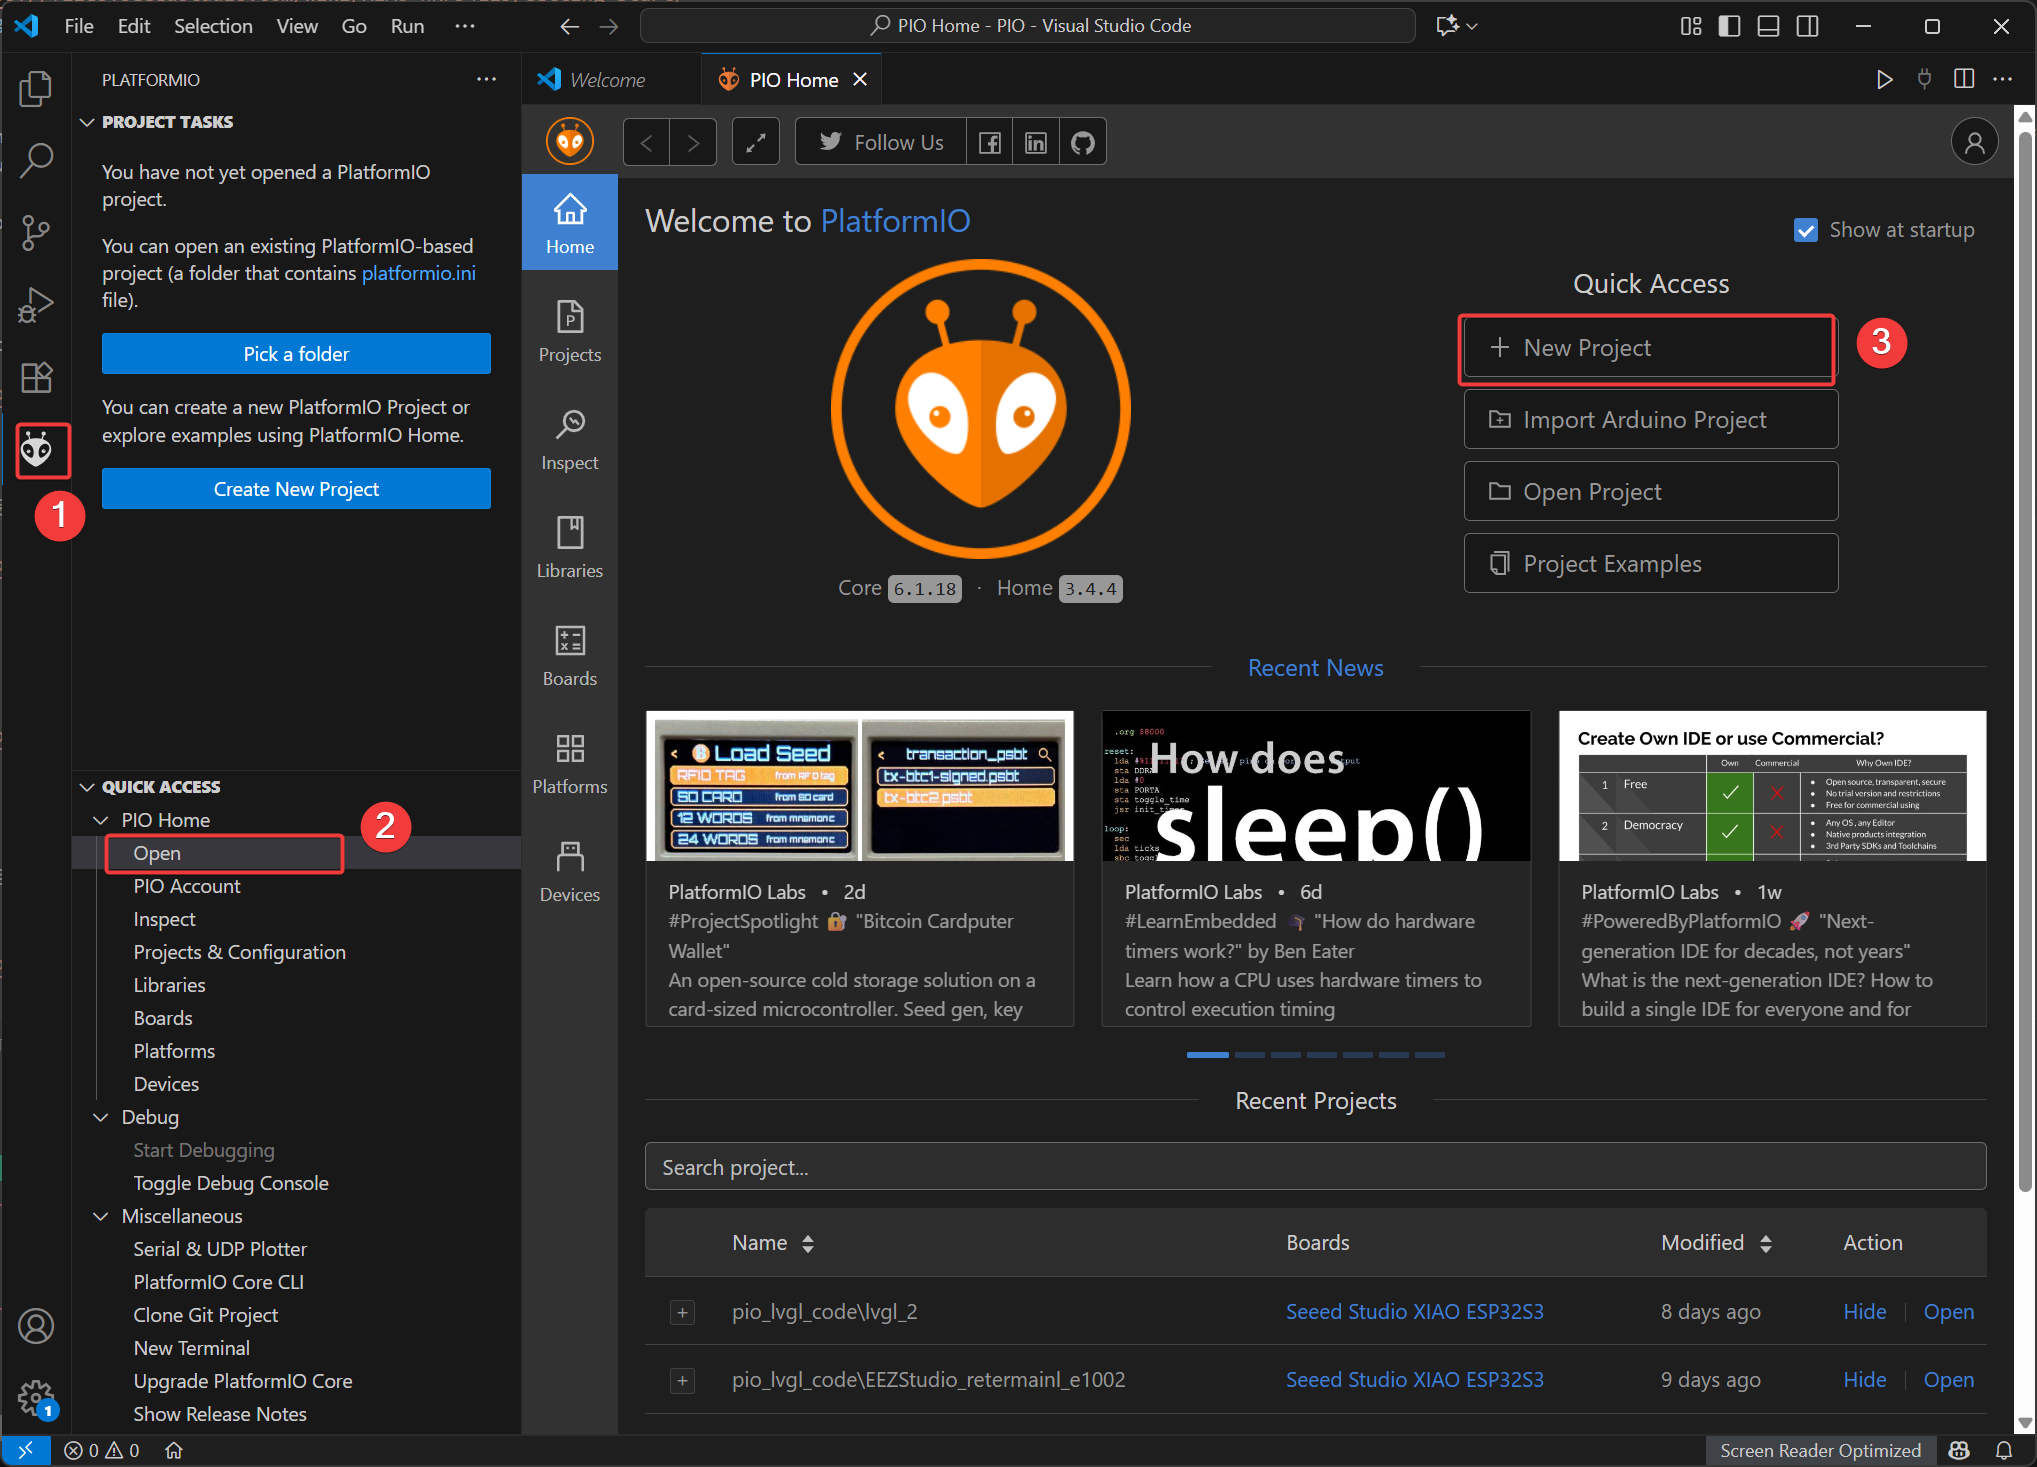
New Project
- Open the PIO Home interface and select
New Project
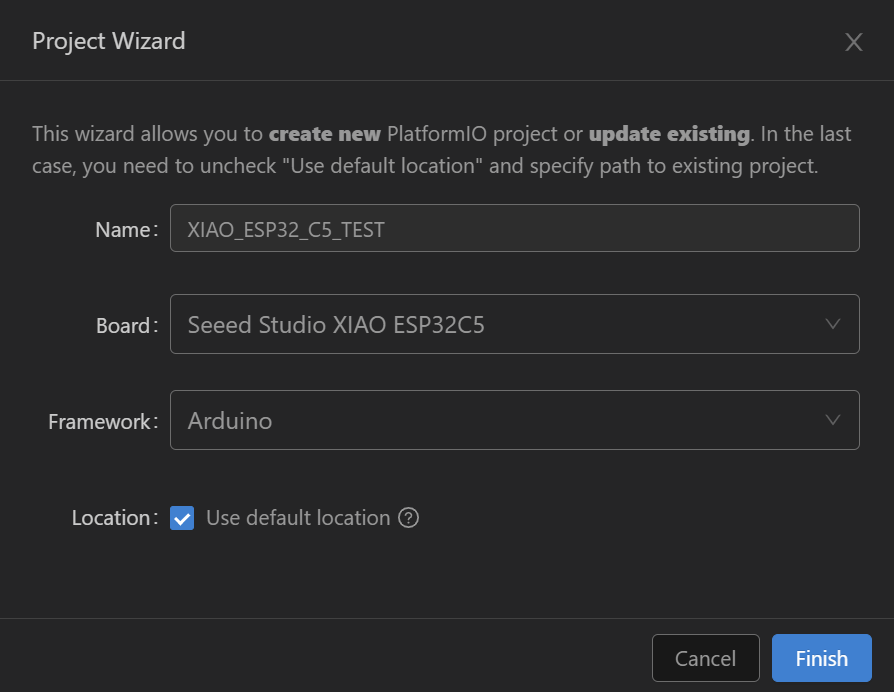
- Name: Name your project name
- Board: Select Seeed Studio XIAO ESP32-C5
- Framework: Select Ardunio
- Location: The path of the engineering files can be set as a custom path or the default path can be selected.
- Click Finish and wait for the creation to be completed. Then, open the project file in the workspace.
If you want to modify it based on another PlatformIO project, you can also directly refer to the configuration below.
- platfromio.ini
[env:seeed-xiao-esp32-c5]
platform = Seeed Studio
board = seeed-xiao-esp32-c5
framework = arduino
monitor_speed = 115200
LED Blink Example
In this LED Blink example, we will guide you through compiling and uploading files using PlatformIO.
Step 1. Copy the sample code
#include <Arduino.h>

void setup()
{
  // put your setup code here, to run once:
  pinMode(LED_BUILTIN, OUTPUT);
  Serial.begin(115200);
}

void loop()
{
  // put your main code here, to run repeatedly:
  digitalWrite(LED_BUILTIN, LOW);
  Serial.print("LED ON \n");
  delay(1000);
  digitalWrite(LED_BUILTIN, HIGH);
  Serial.print("LED OFF \n");
  delay(1000);
}
Step 2. Build the project
Click the √ icon in the status bar at the bottom of VS Code to Build.
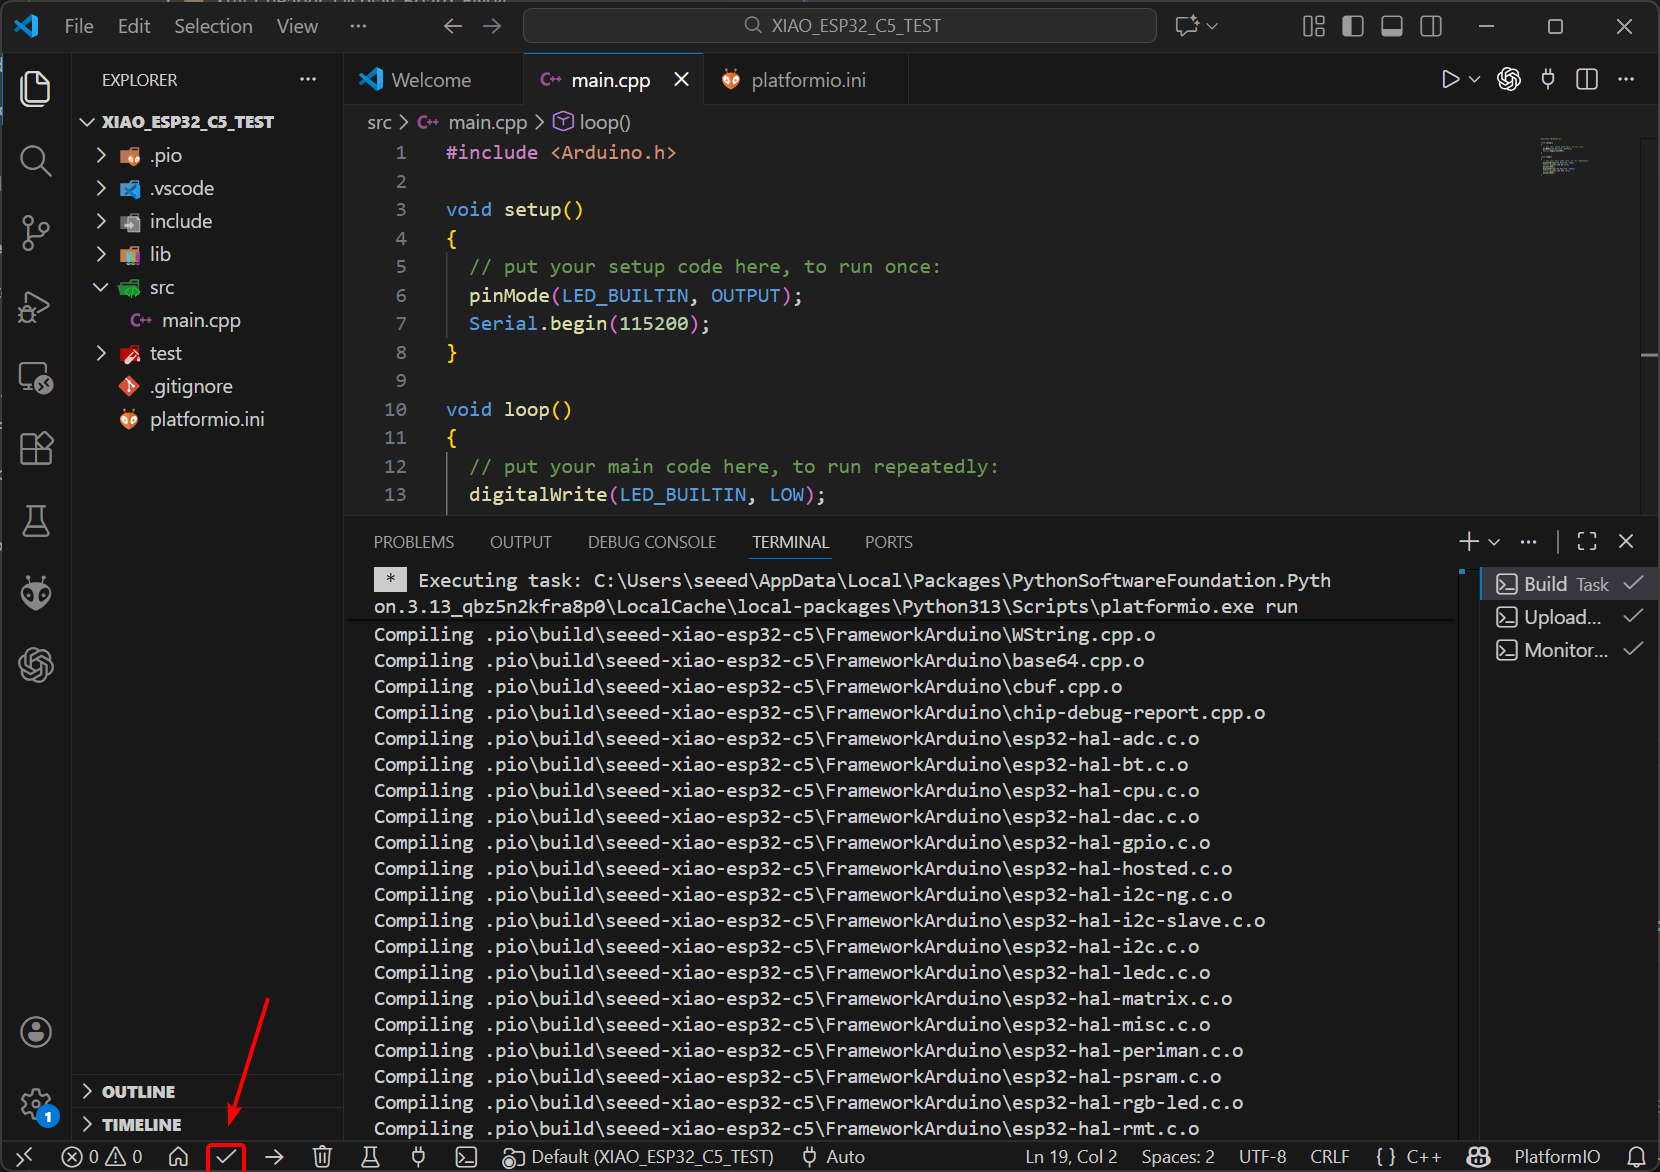
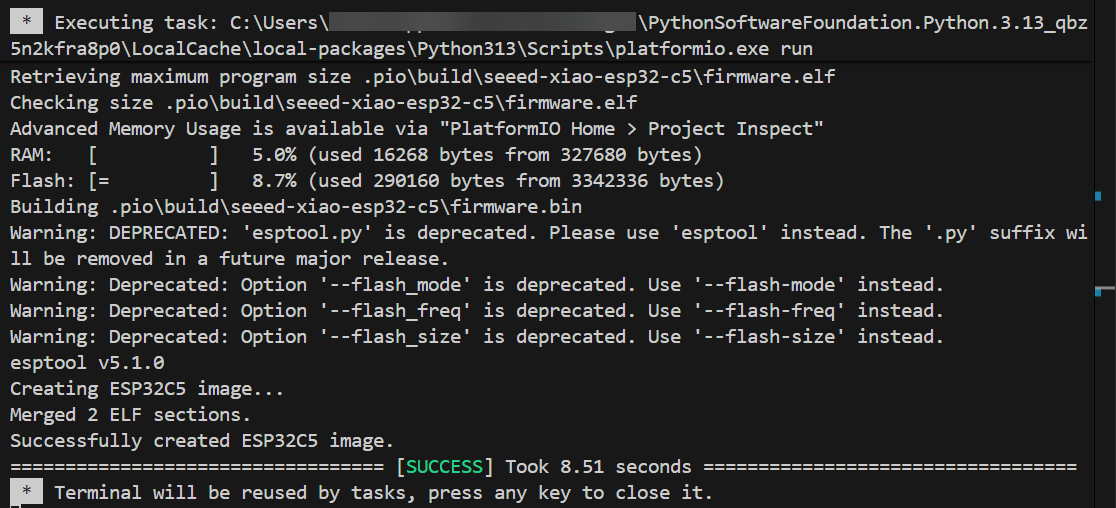
If the build is successful, it will be displayed as shown in the figure.
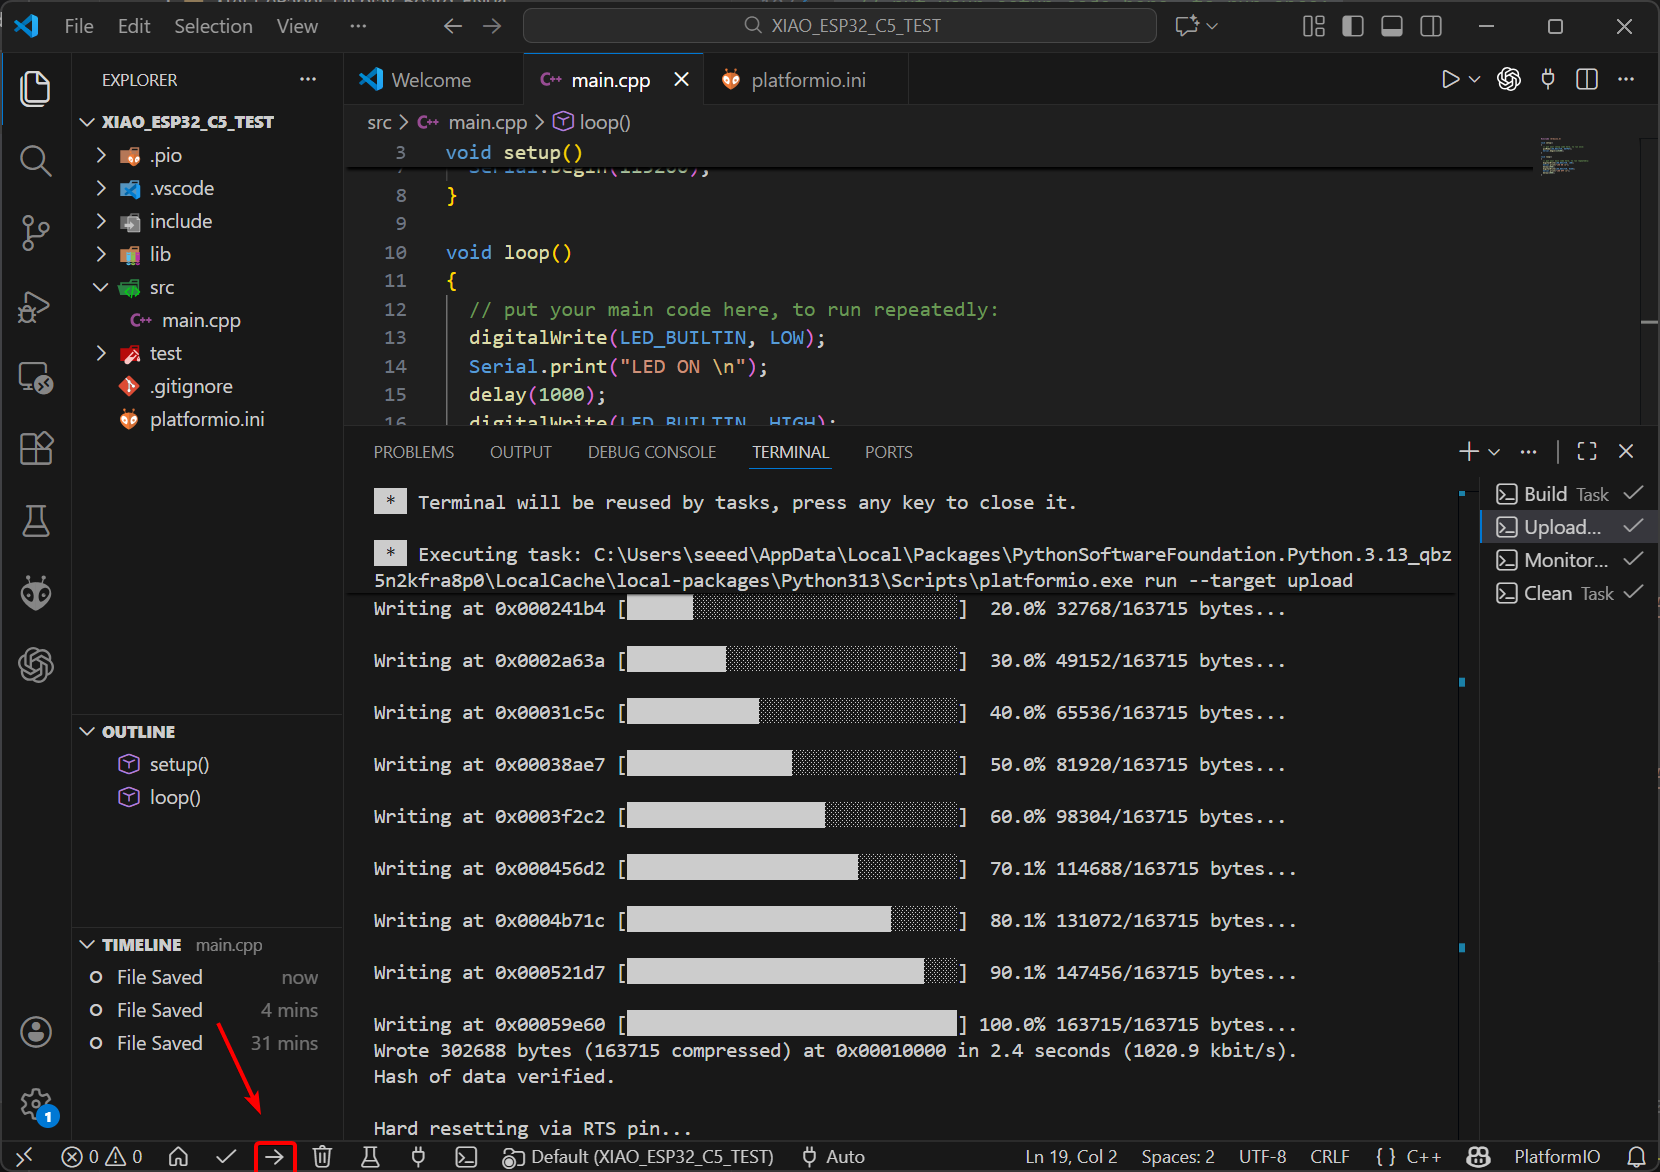
Step 3. Upload
Click the → icon in the status bar at the bottom of VS Code to upload.
Step 4. Check the Program Effect
Open the Serial Monitor as shown in the figure below. It will print the LED on/off status at 1-second intervals.
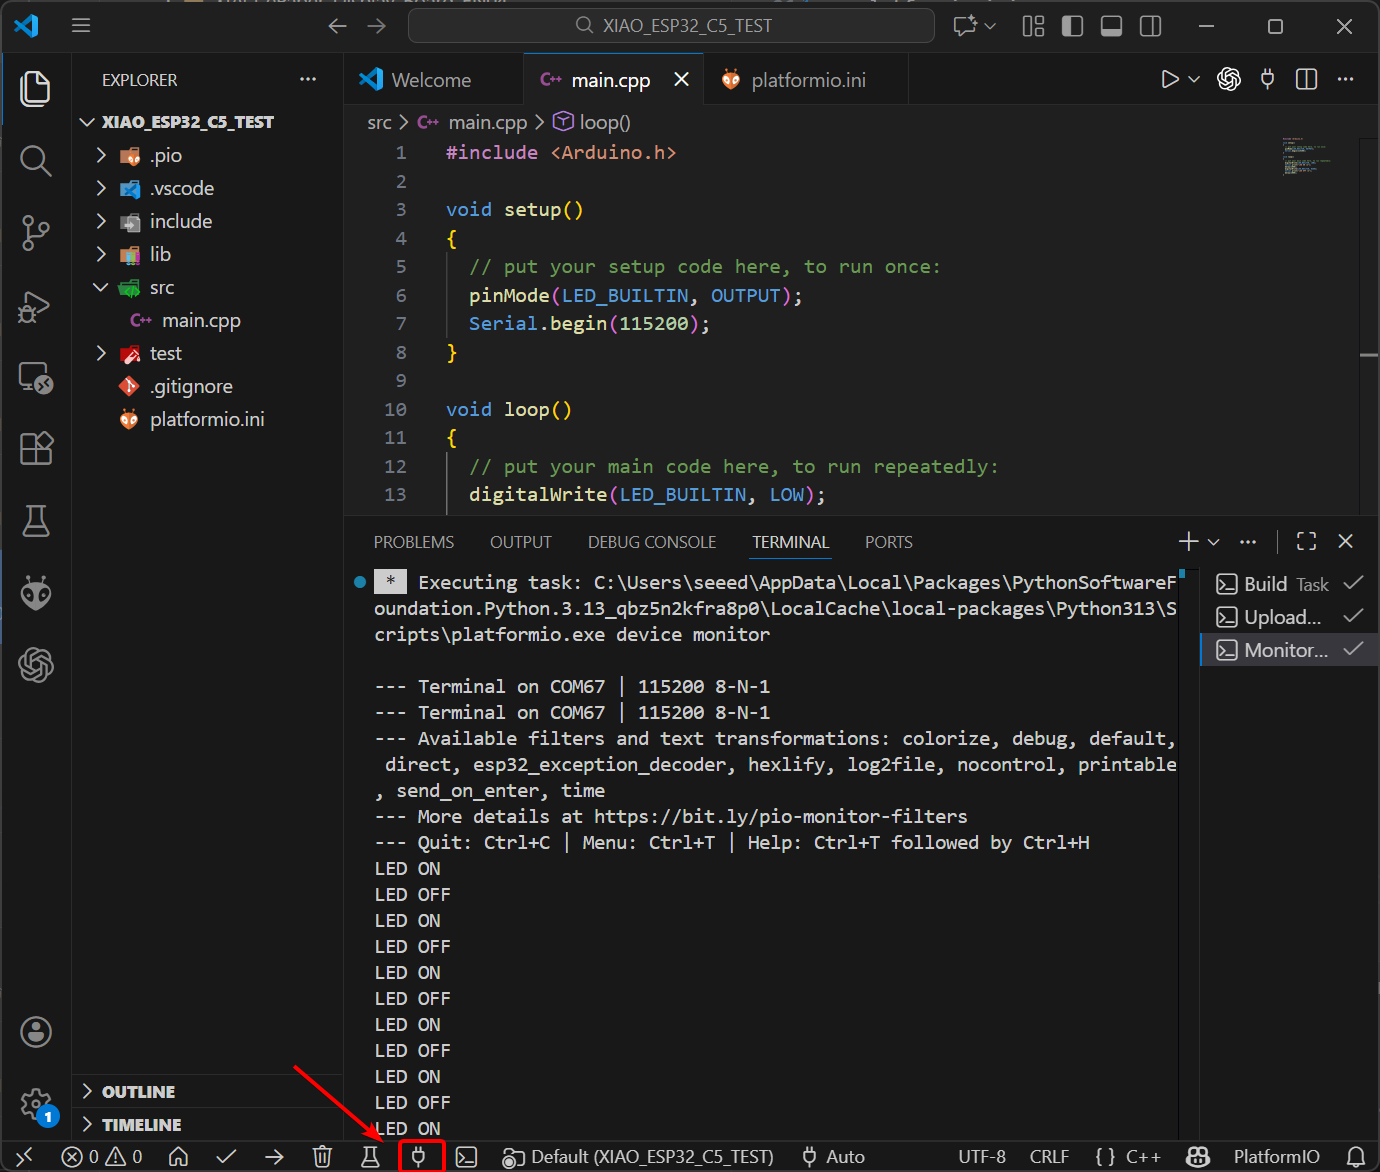
The LED will blink at the same 1-second interval.
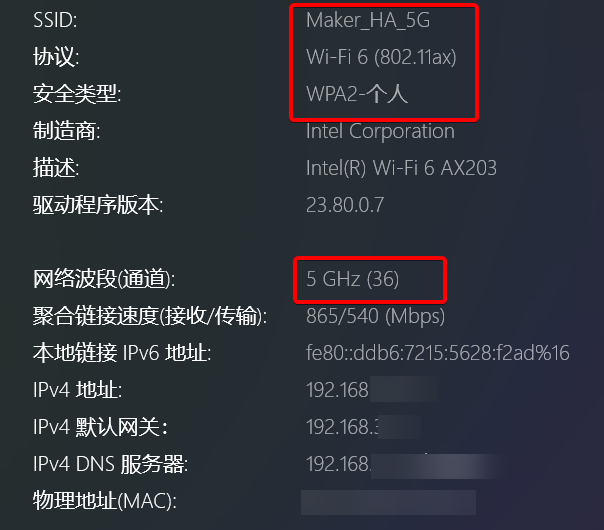
5 GHz Wi-Fi Connection Example
XIAO ESP-C5 supports 2.4 GHz & 5 GHz dual-band Wi-Fi 6. This example will demonstrate the effect of connecting to a 5 GHz Wi-Fi network.
Copy the following code into your PlatformIO project.
WiFi Connect Reference Code
#include <Arduino.h>
#include <WiFi.h>

// ----------------------------------------------------------------
// Modify your WiFi SSID and Password here
// ----------------------------------------------------------------
const char* ssid     = "YOUR_WIFI_SSID";      // e.g., "MyHomeWiFi"
const char* password = "YOUR_WIFI_PASSWORD";  // e.g., "12345678"

void setup() {
  // Initialize serial communication at 115200 baud
  Serial.begin(115200);
  delay(5000); // Wait for serial to stabilize

  Serial.println("\nStarting ESP32 WiFi Connection Demo...");

  // 1. Set WiFi mode to Station (connect to a router as a client)
  WiFi.mode(WIFI_STA);

  // 2. Start connection
  Serial.printf("Connecting to SSID: %s ", ssid);
  WiFi.begin(ssid, password);

  // 3. Wait for connection to be established
  // This loop waits until the status becomes WL_CONNECTED
  while (WiFi.status() != WL_CONNECTED) {
    delay(500);
    Serial.print(".");
  }

  // ----------------------------------------------------------------
  // Connection successful, print detailed information
  // ----------------------------------------------------------------
  Serial.println("\n\n---------------------------------------");
  Serial.println("WiFi Connected Successfully!");
  Serial.println("---------------------------------------");

  // Print IP Address
  Serial.print("IPv4 Address:   ");
  Serial.println(WiFi.localIP());

  // Print Signal Strength (RSSI)
  // Unit is dBm, usually between -30 (Excellent) and -90 (Unusable)
  long rssi = WiFi.RSSI();
  Serial.print("Signal (RSSI):  ");
  Serial.print(rssi);
  Serial.println(" dBm");

  // Simple signal quality check based on RSSI value
  Serial.print("Signal Quality: ");
  if(rssi > -50) Serial.println("Excellent");
  else if(rssi > -60) Serial.println("Good");
  else if(rssi > -70) Serial.println("Fair");
  else if(rssi > -80) Serial.println("Weak");
  else Serial.println("Unstable/Very Poor");

  // Print MAC Address (Hardware ID)
  Serial.print("MAC Address:    ");
  Serial.println(WiFi.macAddress());

  // Print Gateway IP
  Serial.print("Gateway IP:     ");
  Serial.println(WiFi.gatewayIP());

  Serial.println("---------------------------------------");
}

void loop() {
  // In the main loop, we can periodically check the connection status
  // If the connection is lost, attempt to reconnect

  if (WiFi.status() != WL_CONNECTED) {
    Serial.println("WiFi Connection Lost! Reconnecting...");
    WiFi.disconnect();
    WiFi.reconnect();
    delay(5000); // Wait a bit before checking again to avoid spamming
  }

  // Your other application logic goes here
  // ...

  delay(10000); // Loop every 10 seconds
}
Build and Upload the code
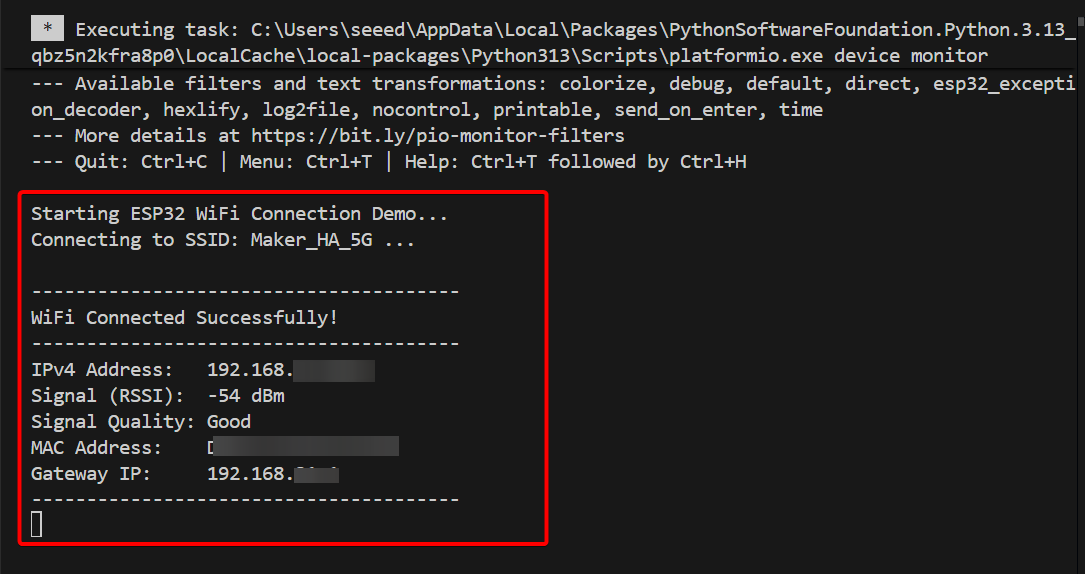
Once the XIAO ESP32-C5 is connected to WiFi, the Serial Monitor will print information such as the signal strength of the connected WiFi network.
It can also be clearly seen that the XIAO ESP32-C5 has a strong capability of connecting to 5 GHz Wi-Fi networks.
Following the two examples above, you should have mastered the basic development operations of PlatformIO. We look forward to seeing you create more interesting projects with the XIAO ESP32-C5!
Tech Support & Product Discussion
Thank you for choosing our products! We are here to provide you with different support to ensure that your experience with our products is as smooth as possible. We offer several communication channels to cater to different preferences and needs.