Real-time IoT Data Processing Node Powered By Apache Kafka
Our cutting-edge processing node, Kafka-ESP32, combines the power of Apache Kafka and ESP32C6 microcontrollers to deliver an efficient solution for handling IoT data streams. By using the XIAO ESP32C6 with the DHT20 environmental sensor, data is collected and seamlessly sent to Apache Kafka via the ESP32C6. Kafka's high-throughput, low-latency messaging capabilities enable real-time data processing and analysis, while its distributed architecture allows for effortless scalability. Kafka-ESP32 empowers you to develop custom applications and integrations, revolutionizing the way you manage and utilize your IoT assets in today's data-driven landscape.
Materials Required
This example will introduce the use of XIAO ESP32C6 with Grove DHT20 temperature and humidity sensor to complete the SageMaker task of AWS IoT Core. Below are all the hardware devices needed to complete this routine.
| XIAO ESP32C6 | DHT20 | Extension Board |
|---|---|---|
 | 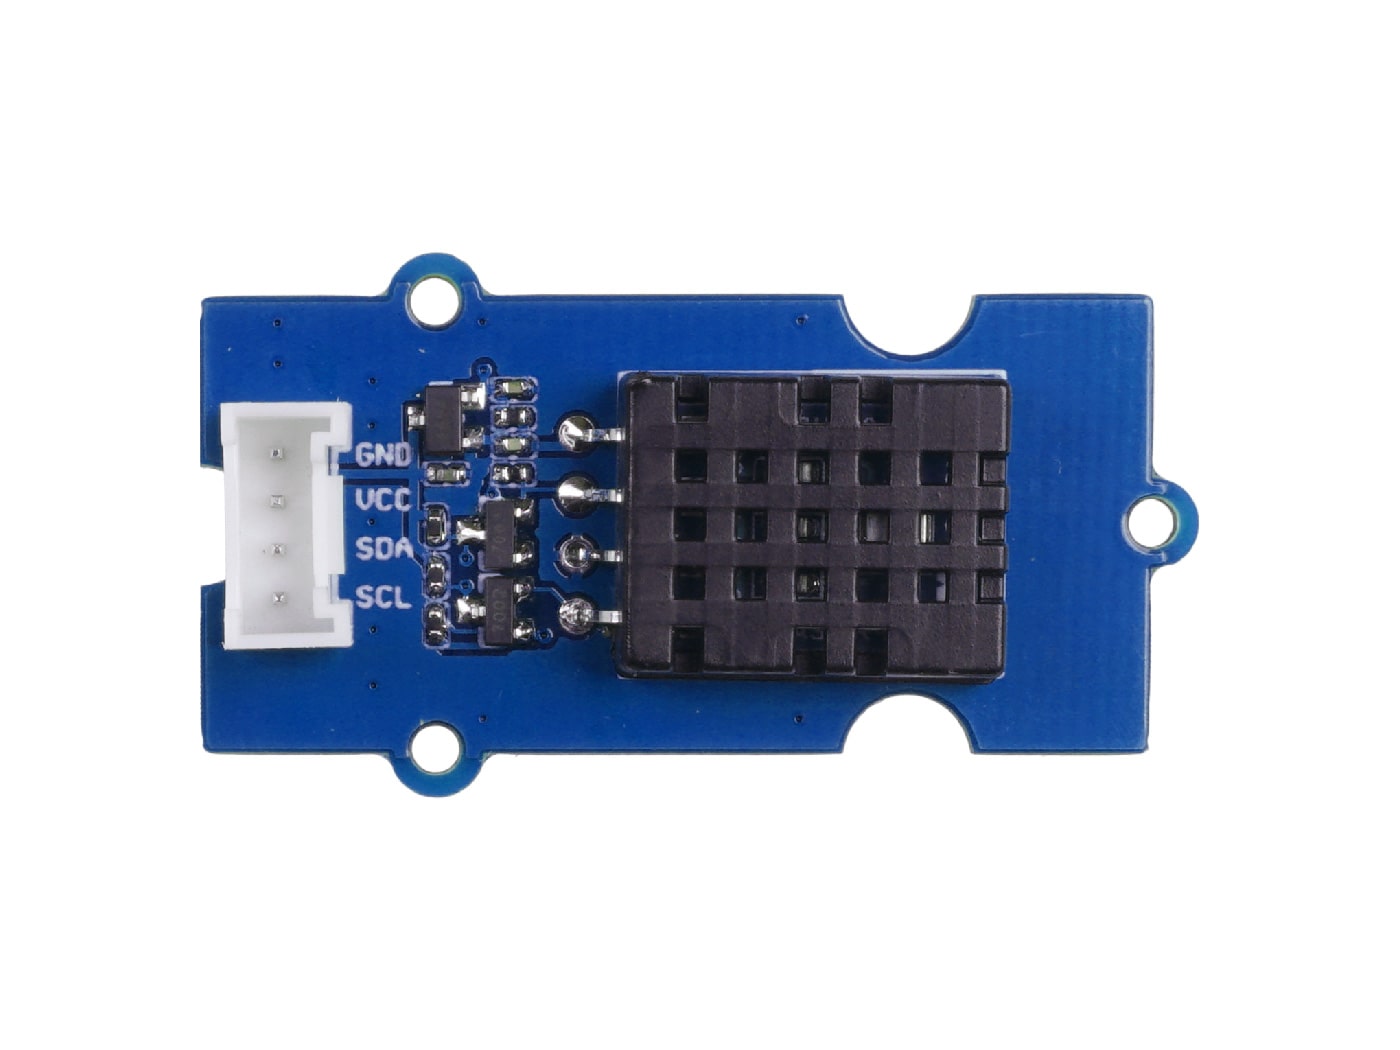 |  |
Docker Installation
Why use Docker? Because Docker can simulate the environment of multiple computers on a single machine and deploy applications with great ease. Therefore, in this project, we will use Docker to set up the environment and improve efficiency.
Step 1. Download Docker
According to your computer to download different types of installer. Click here to jump.
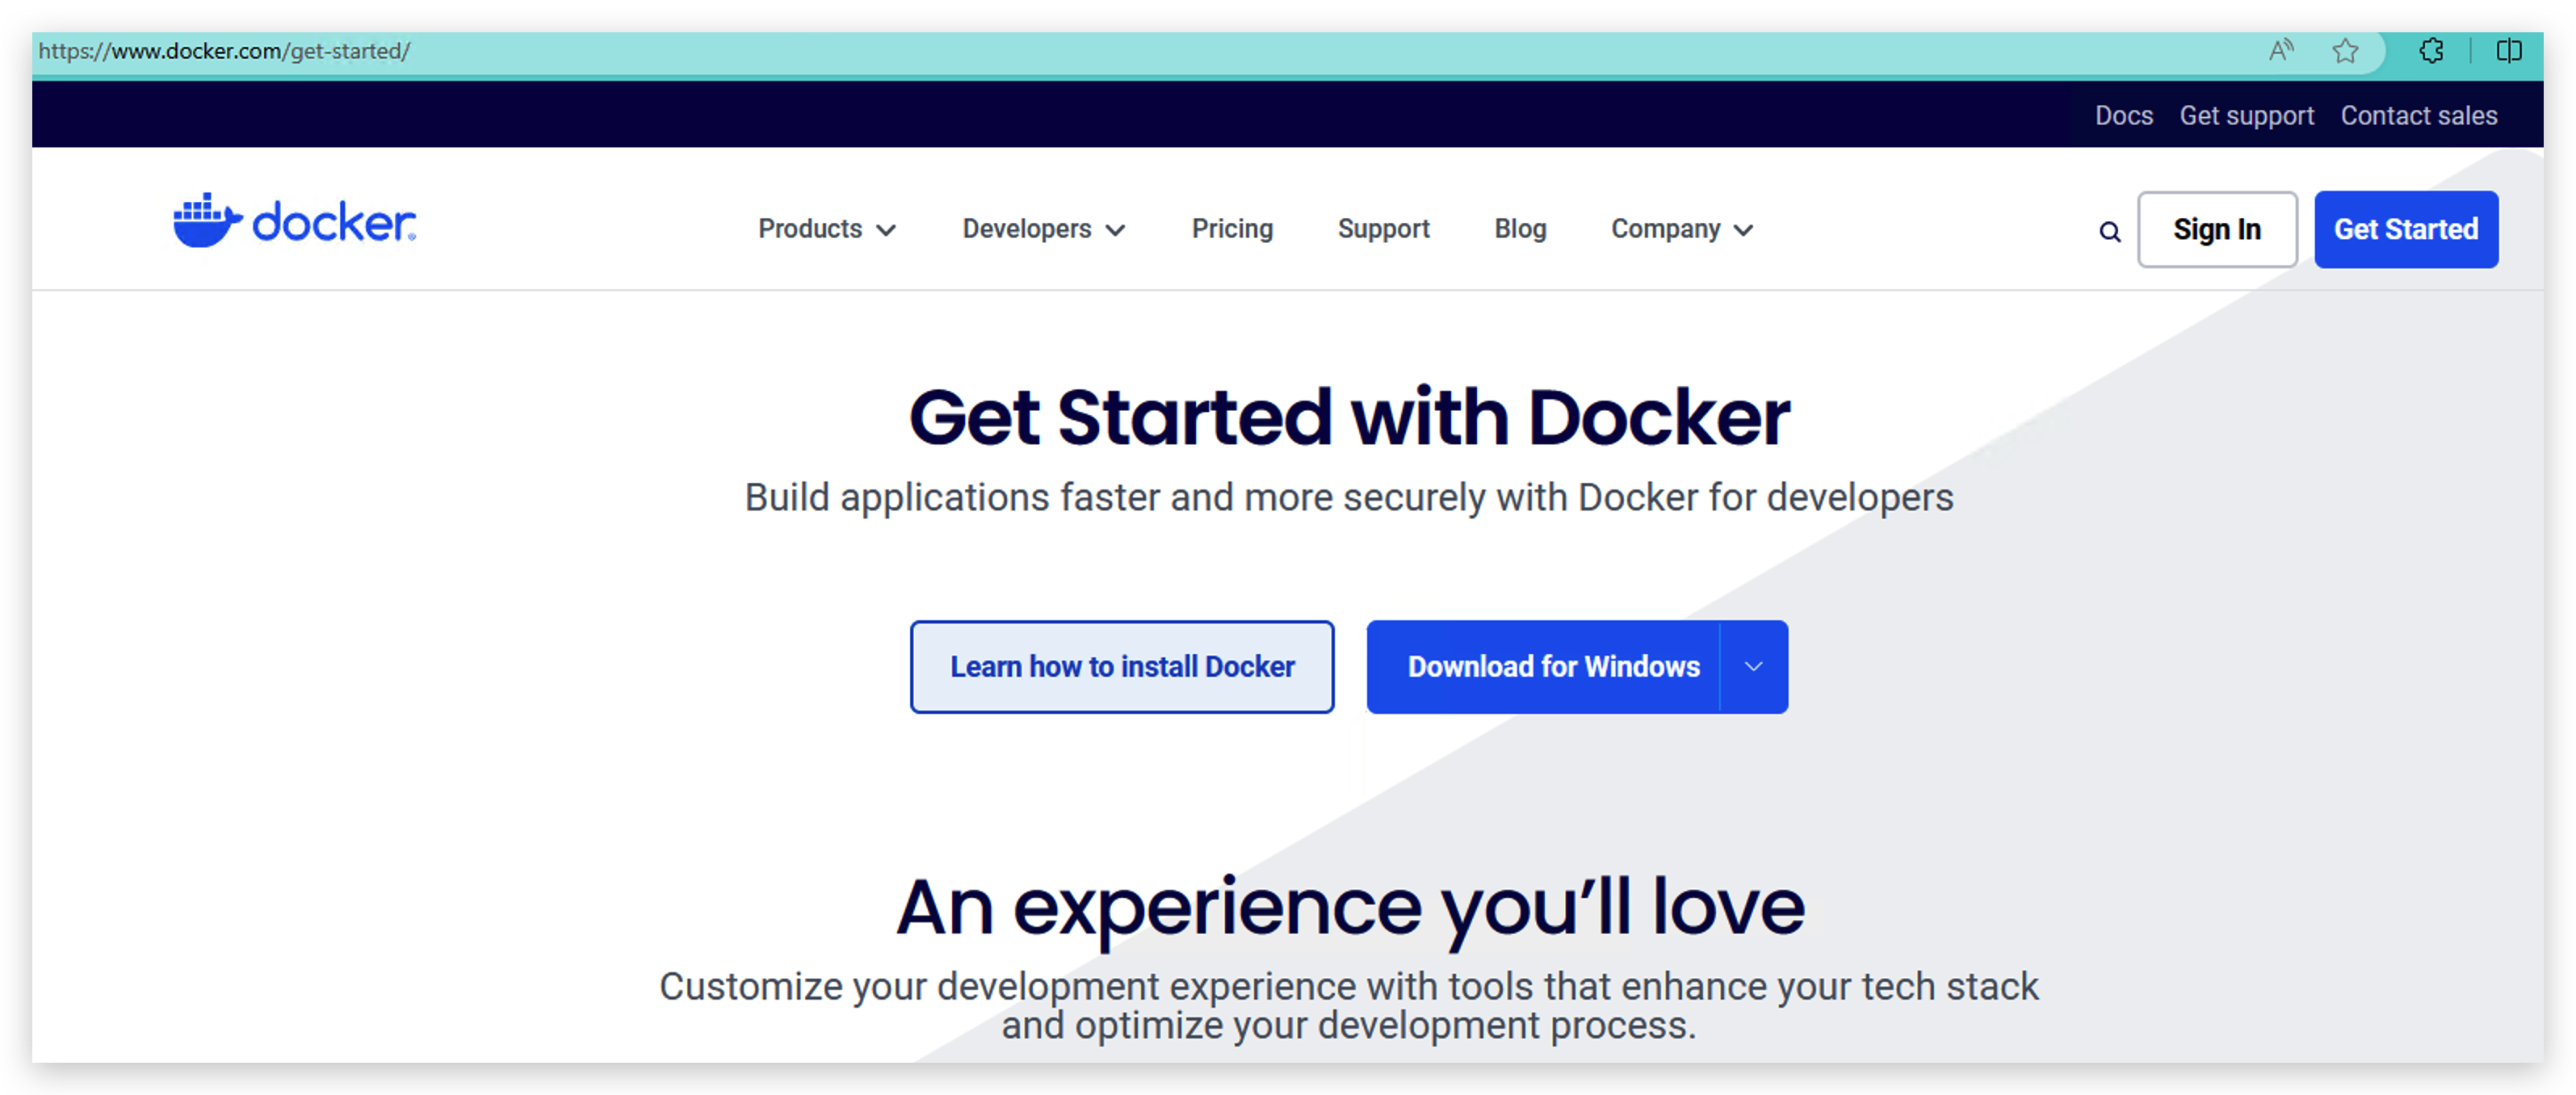
If your computer is Windows, please don't install docker until you finish Step 2.
Step 2. Install WSL(Windows Subsystem for Linux)
This step is for Windows. You can skip this step if you computer is Mac or Linux.
- Run the following code as an administrator.
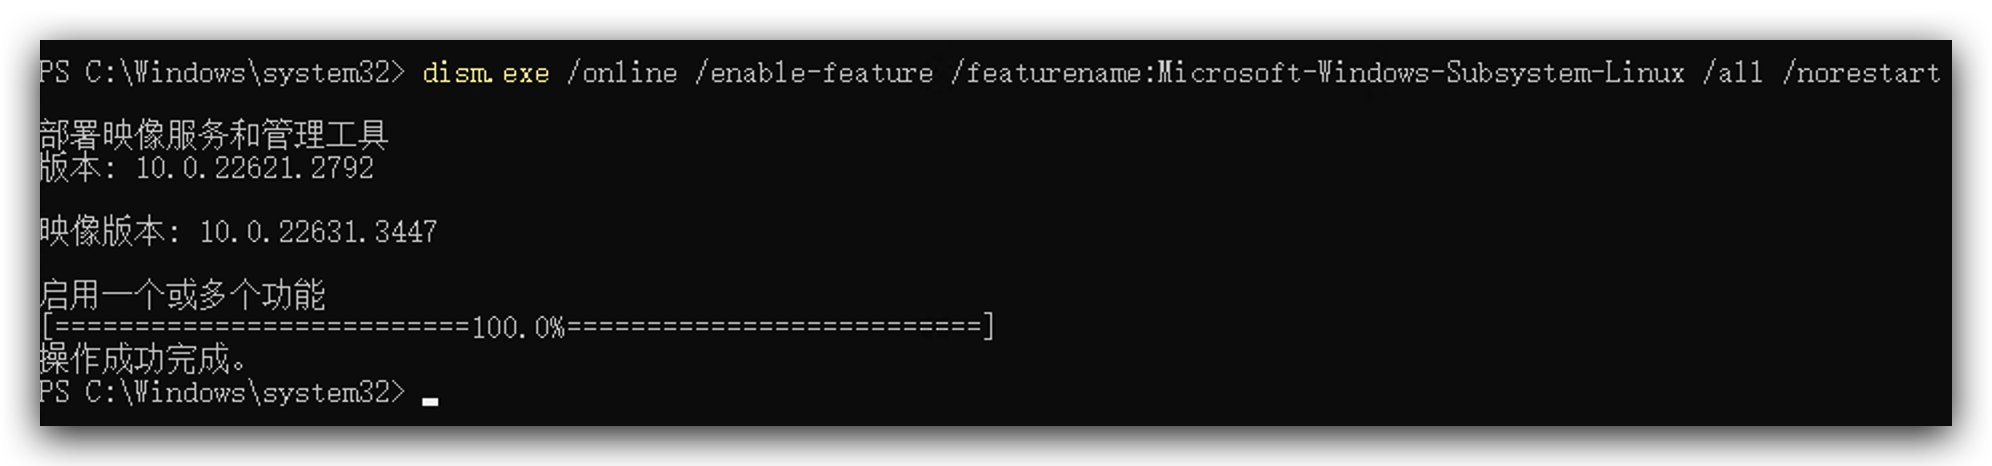
dism.exe /online /enable-feature /featurename:Microsoft-Windows-Subsystem-Linux /all /norestart
dism.exe /online /enable-feature /featurename:VirtualMachinePlatform /all /norestart
-
Download this tool from here and double click to install it.
-
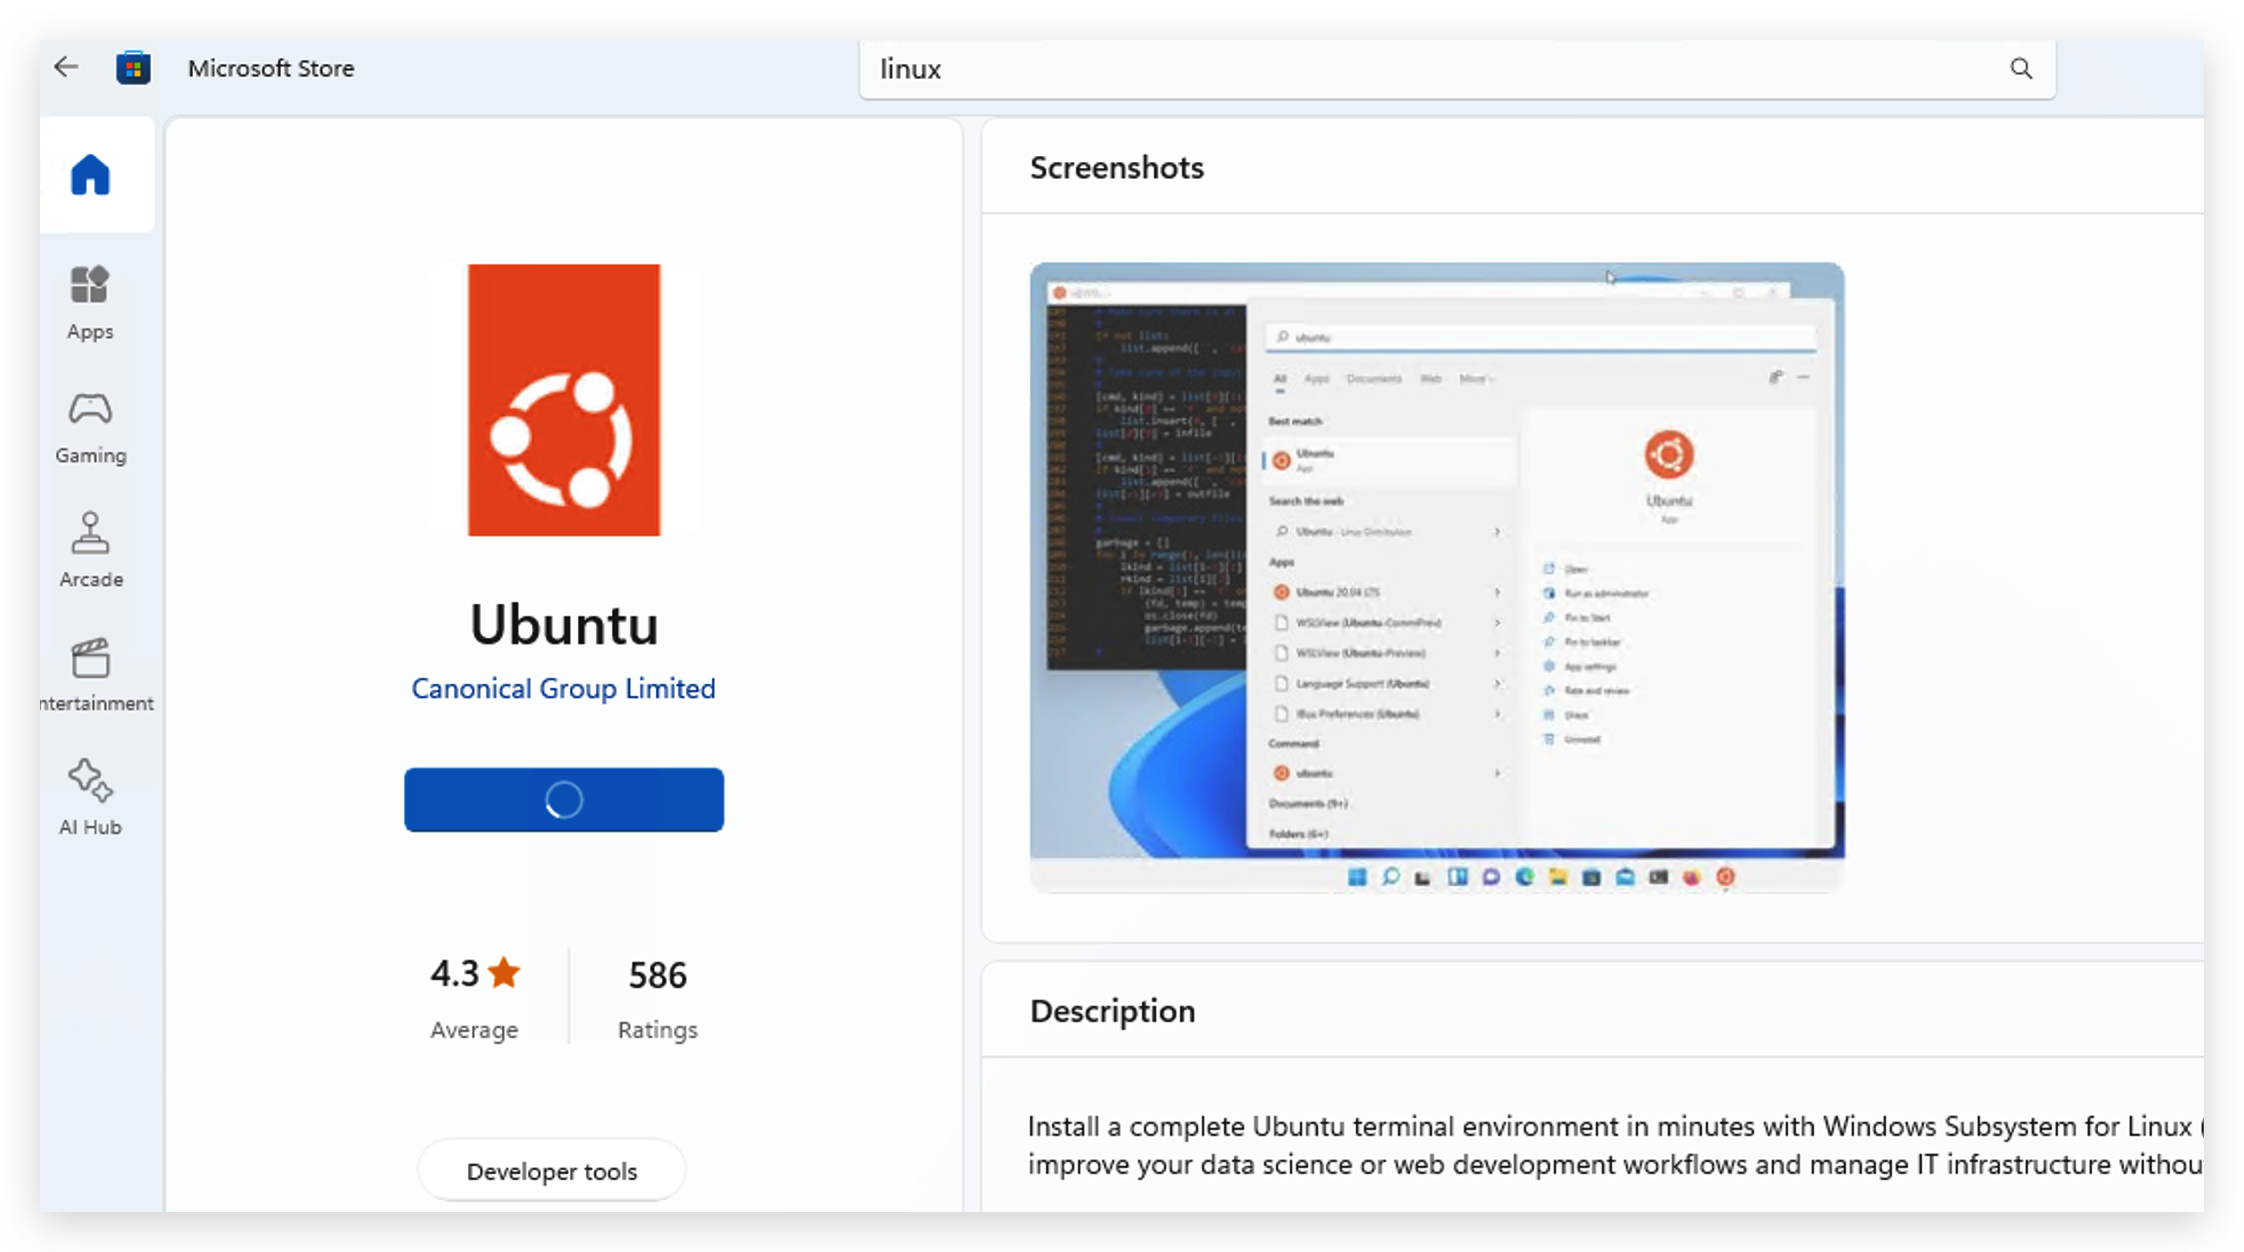
Go to your Microsoft Store to search and download linux version you like, here I installed Ubuntu.
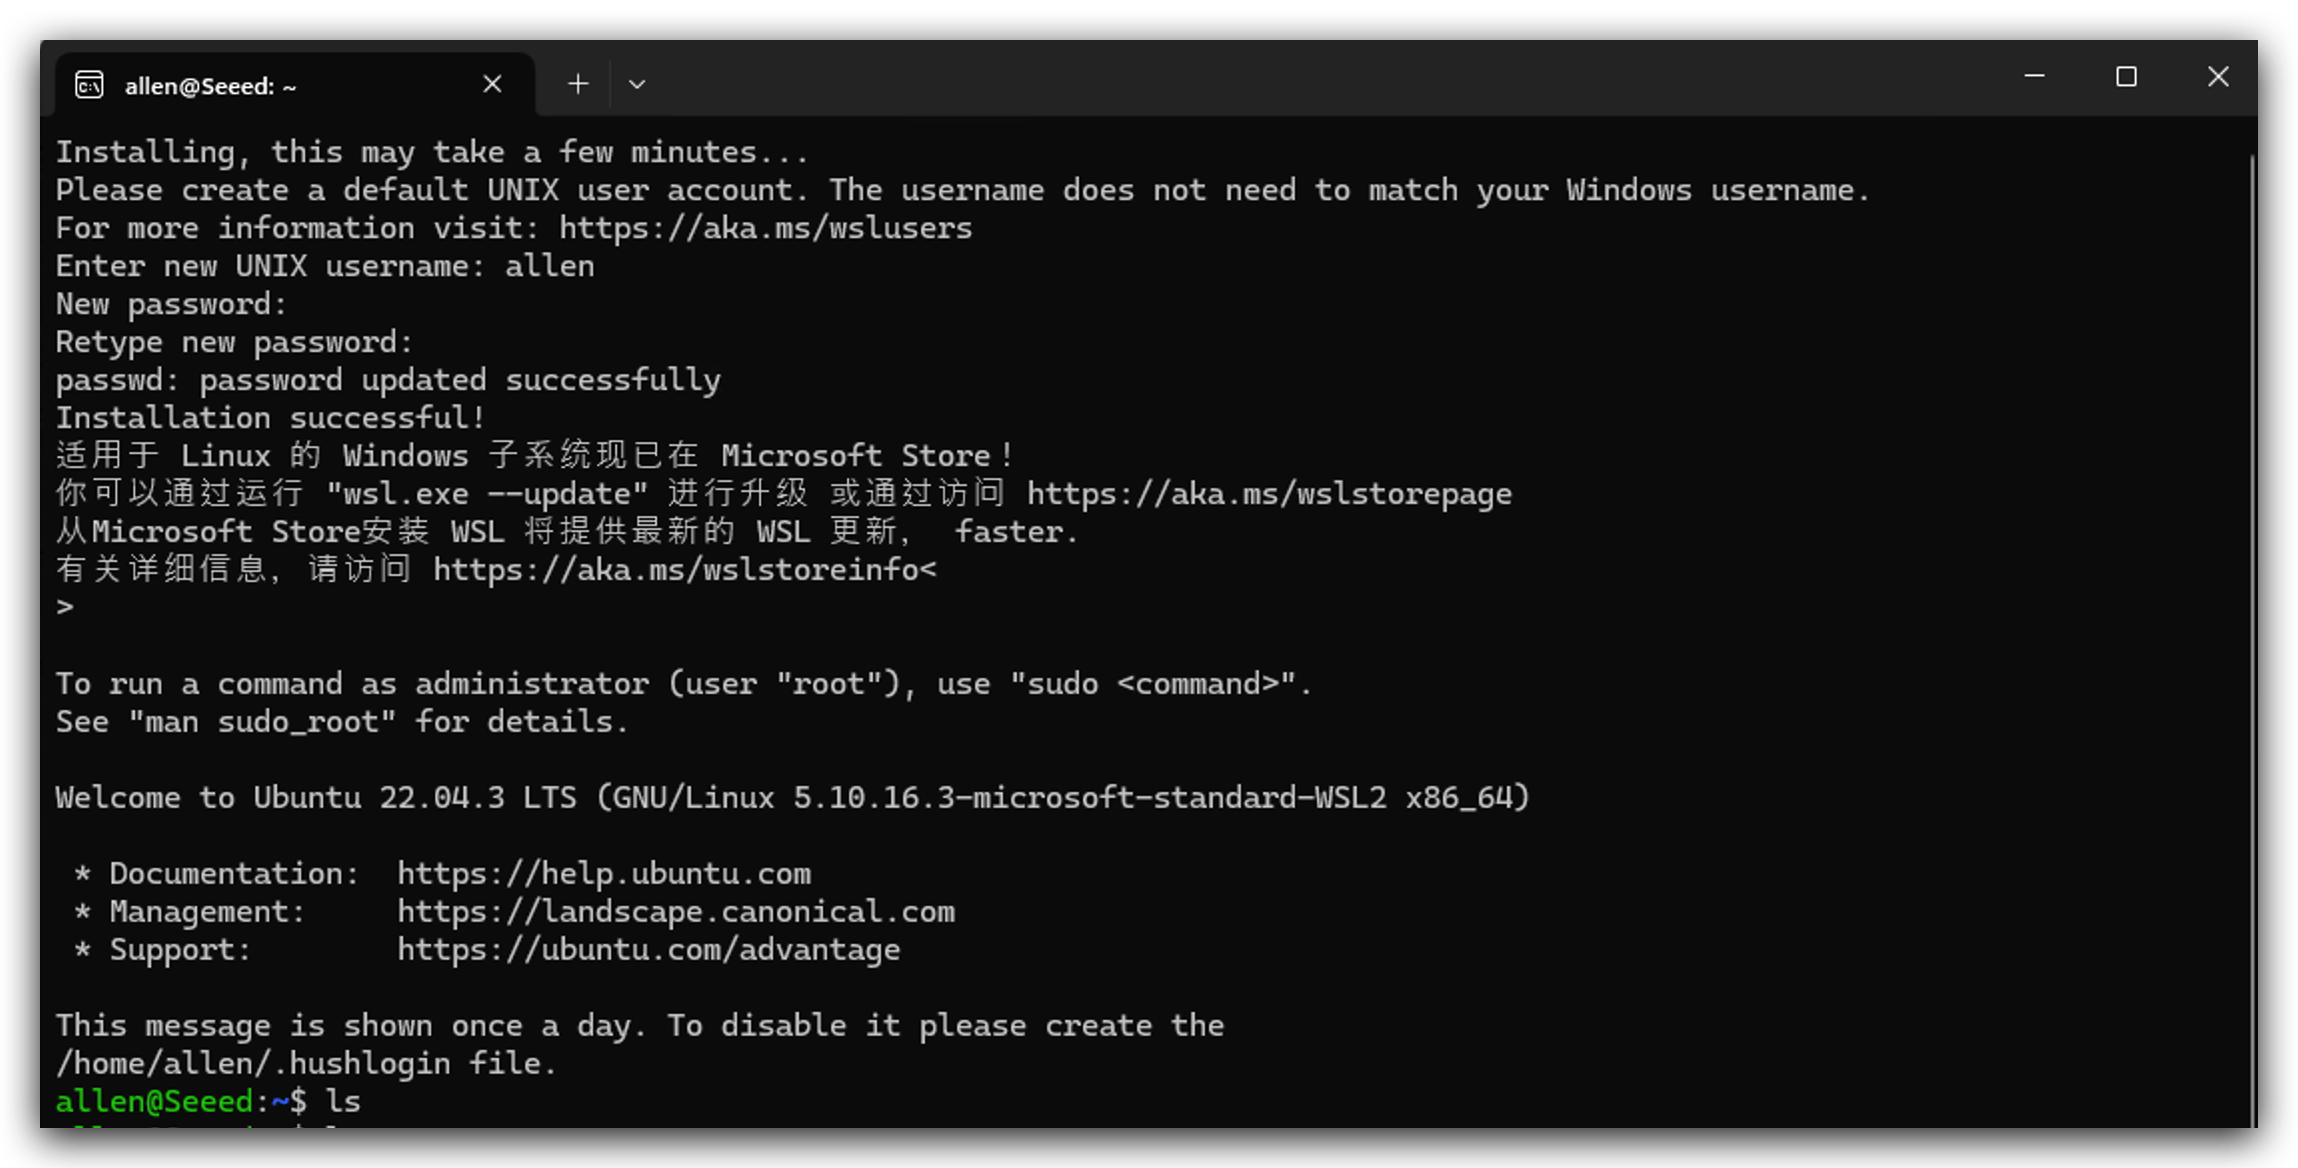
- After installing Linux, you need to open it and set your username and password, and then need to wait a minute to initialize.
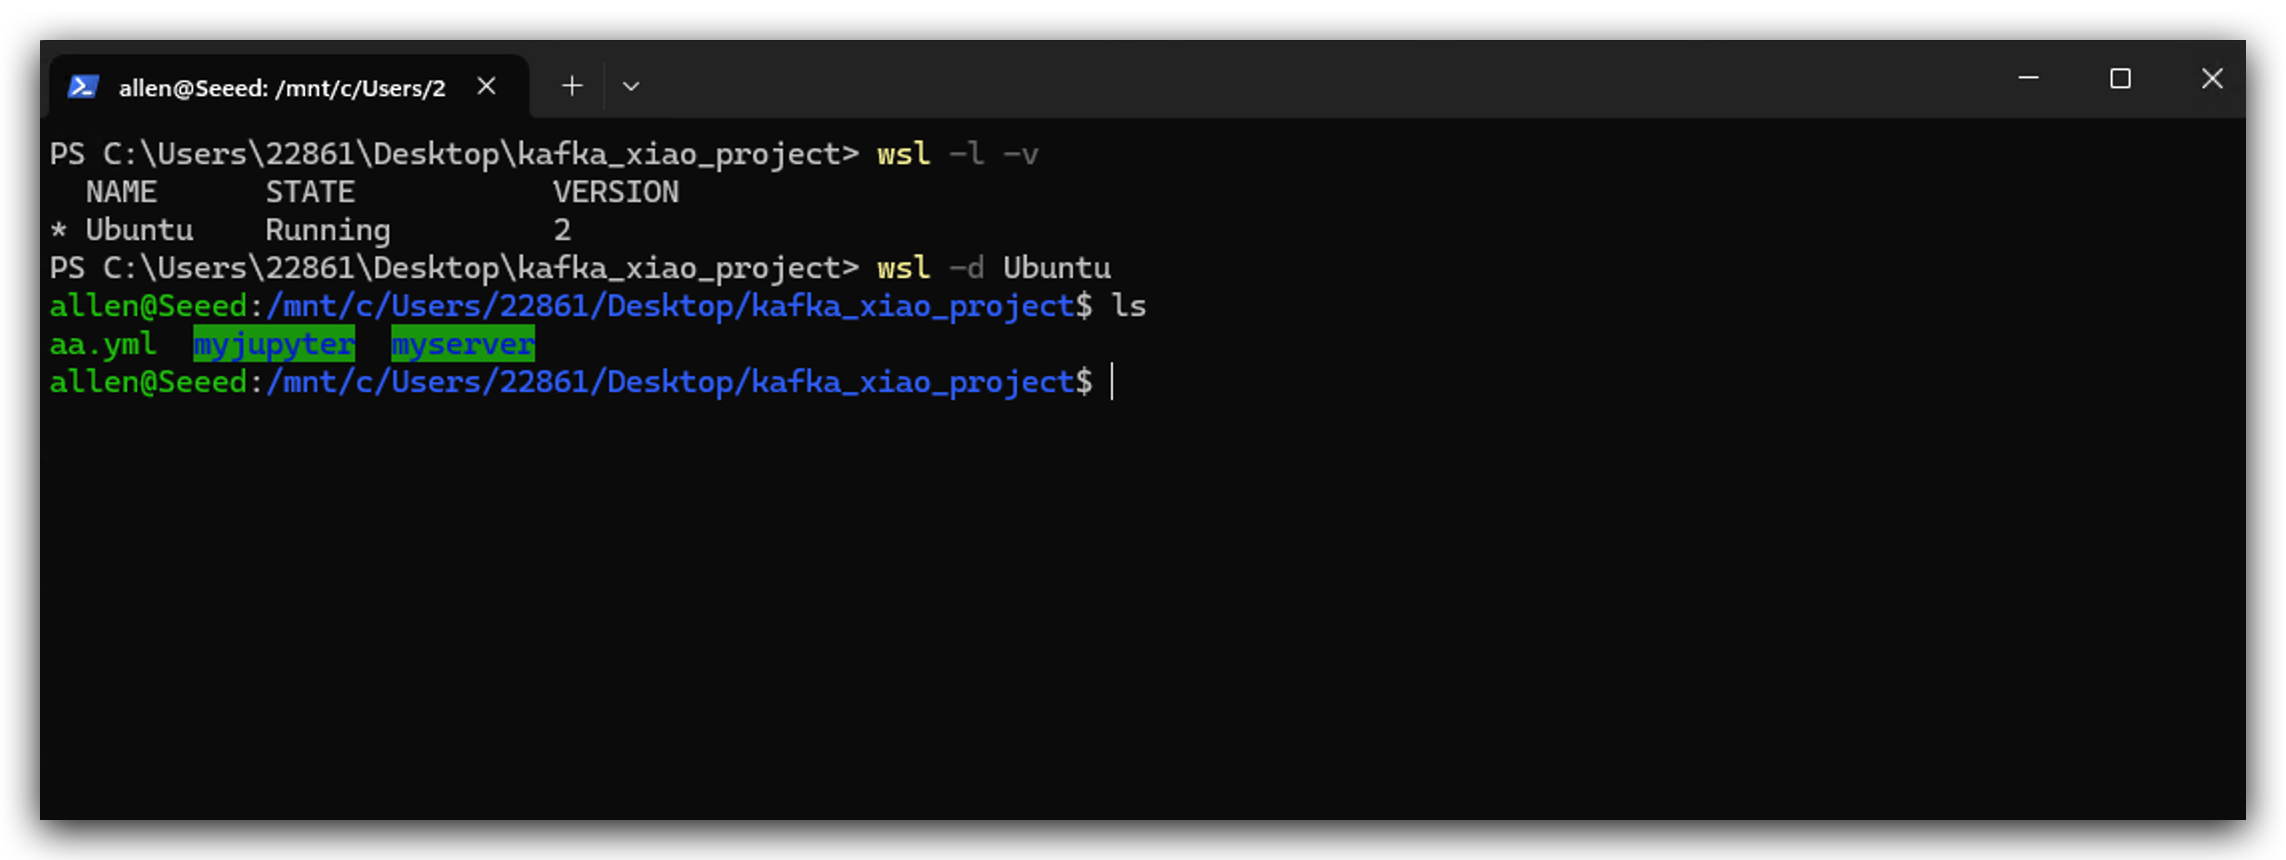
- Run the following instructions to use WSL.
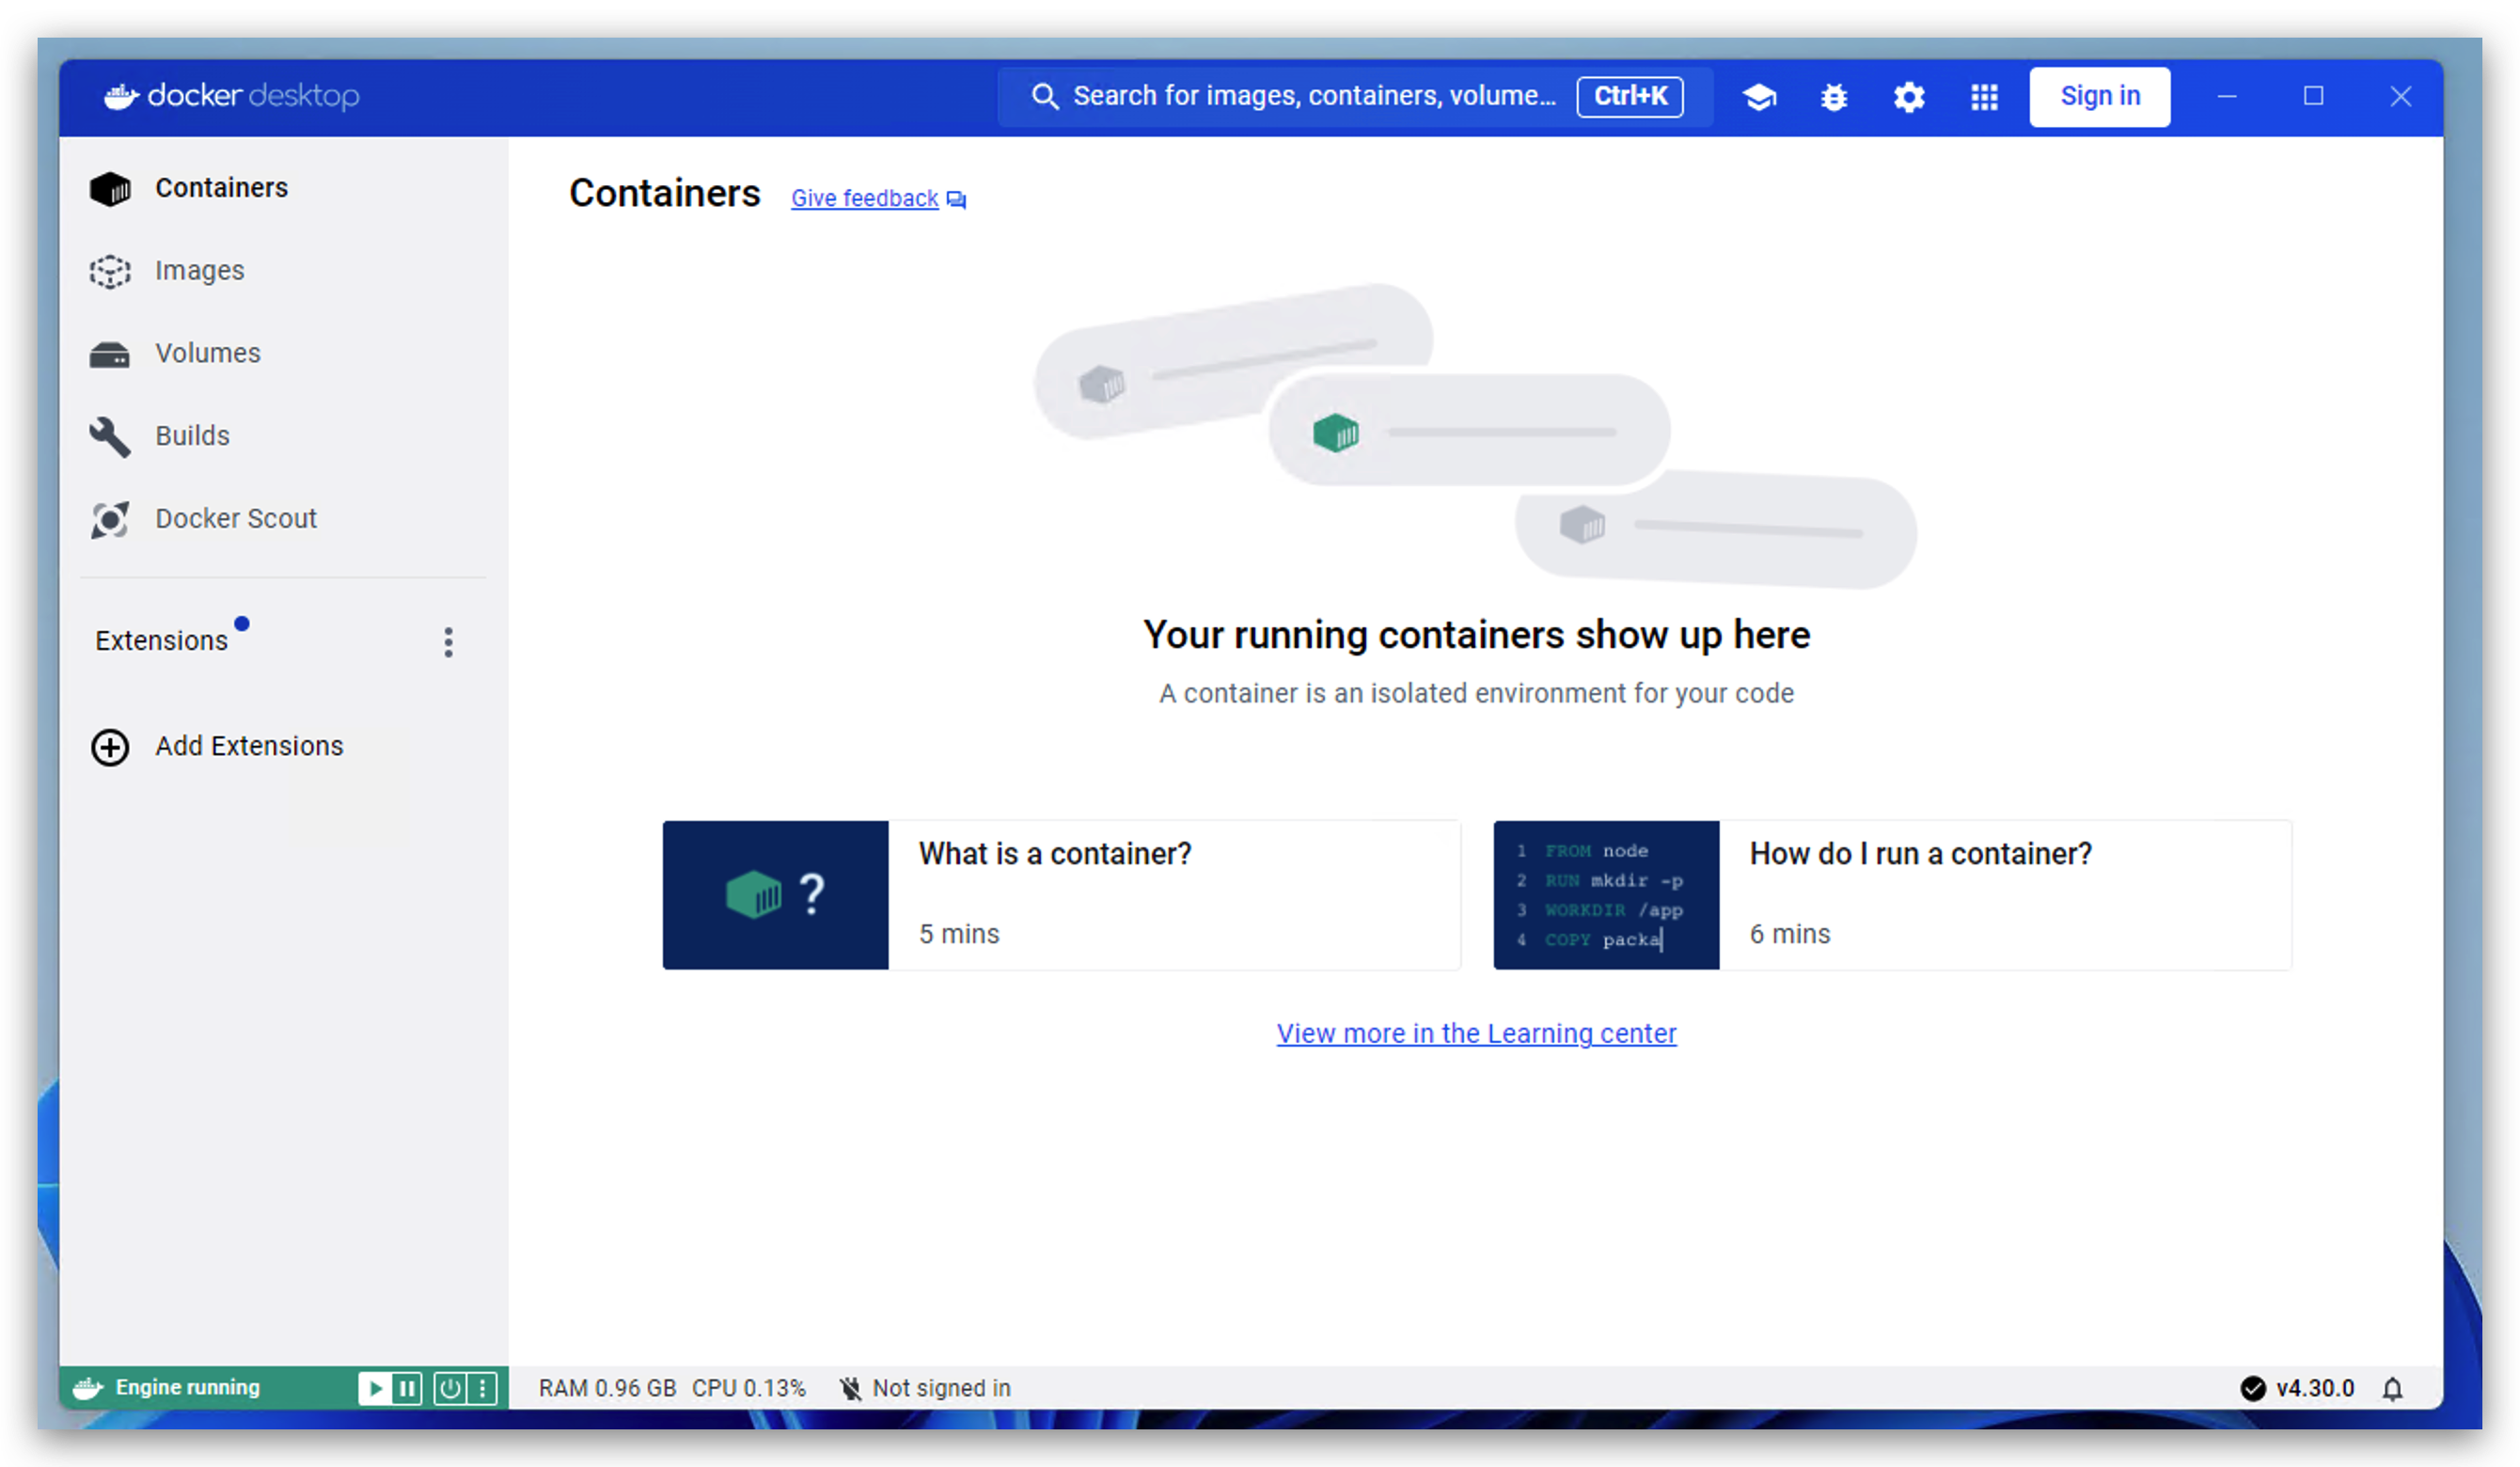
- After installing WSL, now you can double click you docker installer to install it. When you see the following image that means it work.
Deploy Services
Before we start, I want to introduce every service's function in this project.
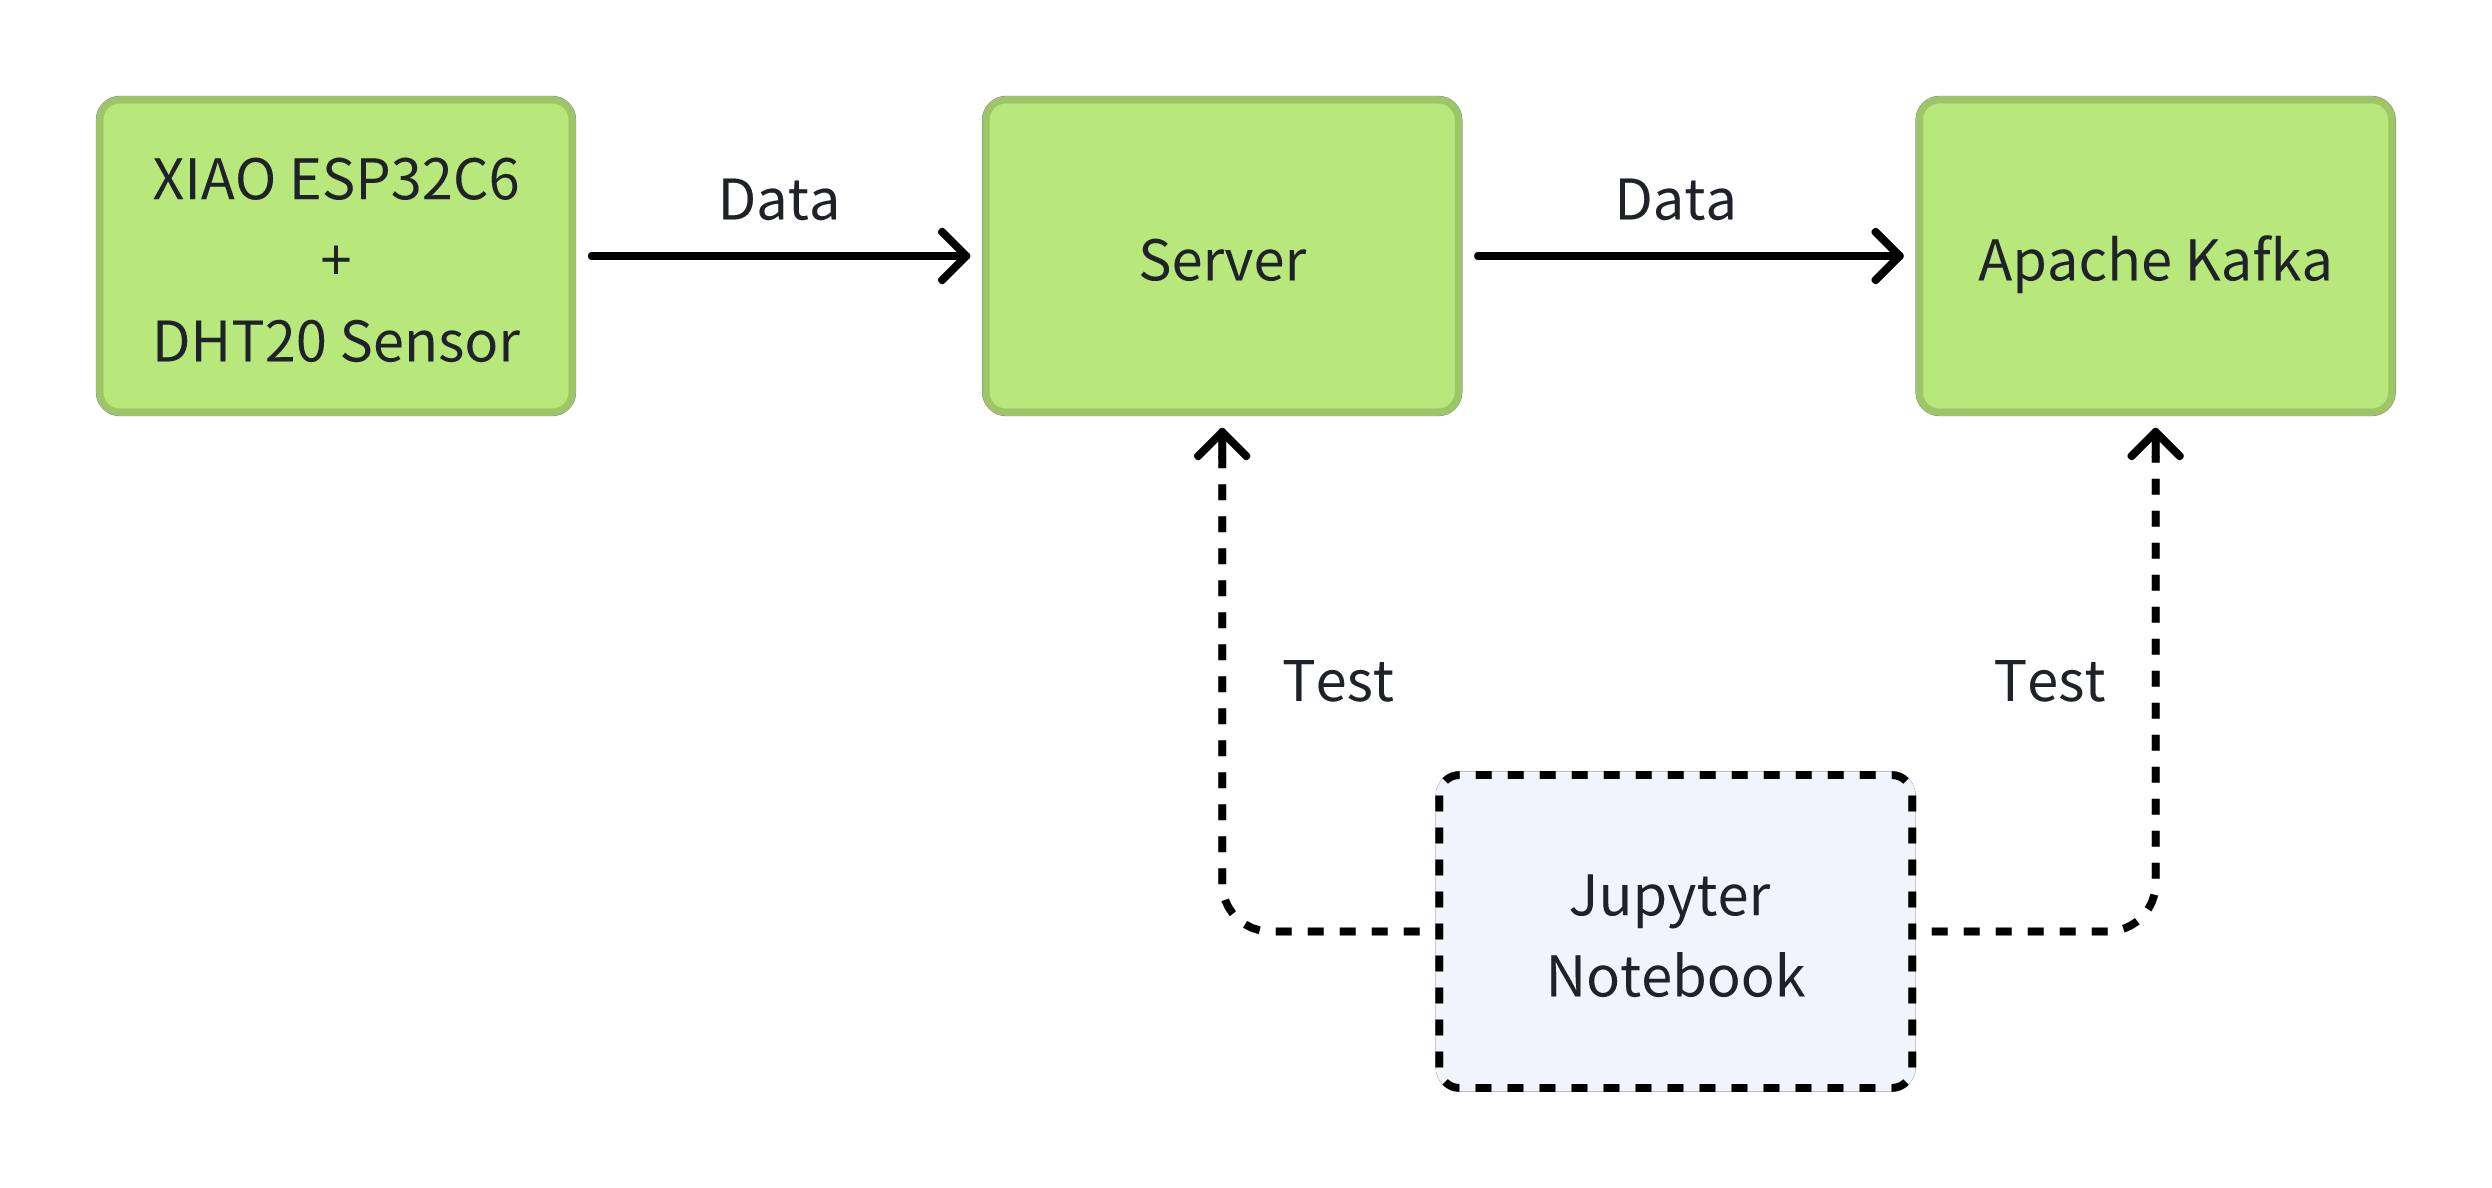
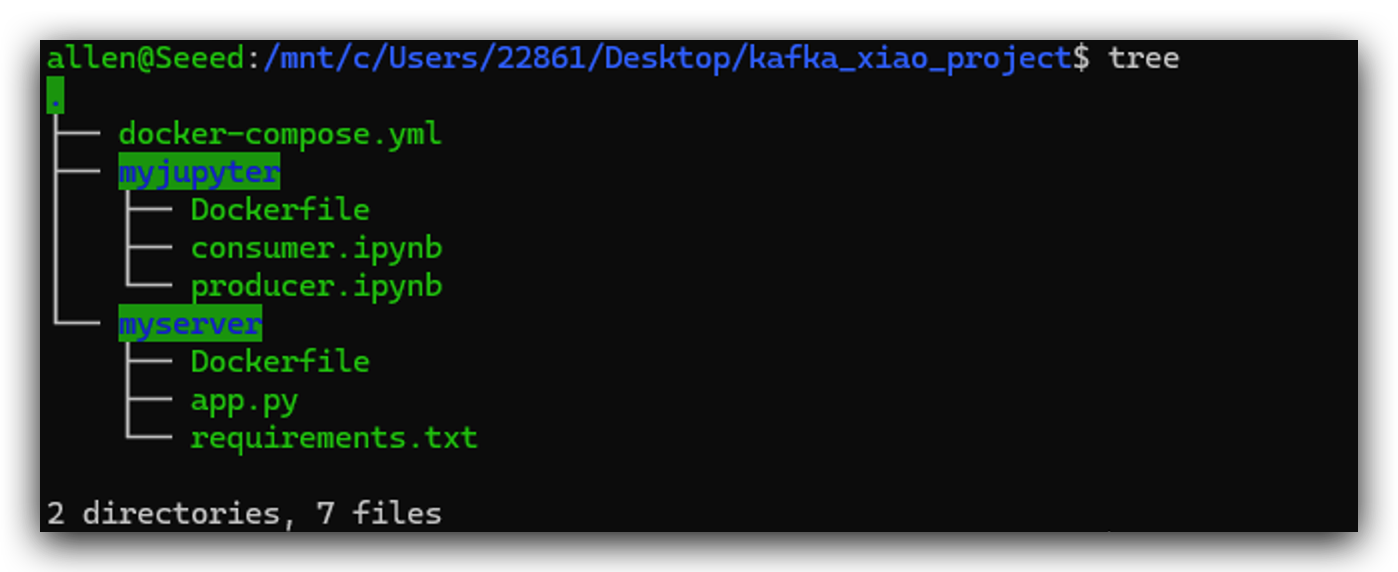
Here is this project directory structure for your reference. I will create those files one by one in the following steps. The position of each files is very important. I strongly recommand you refer this directory structure. Create a kafka_xiao_project directory and include those files.
Step 3. Deploy a Python Server
Because of the lack of performance of the MCU device, it cannot be used directly as a client for kafka. So you need to build a server to do data transit. This step is to build a simple server with python. The XIAO ESP32C6 is mainly to collect enviroment data from DHT20 and send it to the server.
- First we need to create app.py file, which is what server do.
from flask import Flask
from kafka import KafkaProducer, KafkaConsumer

app = Flask(__name__)

@app.route('/favicon.ico')
def favicon():
    return '', 204

@app.route('/<temperature>/<humidity>')
def send_data(temperature, humidity):
    producer = KafkaProducer(bootstrap_servers='kafka:9092')
    data = f'Temperature: {temperature}, Humidity: {humidity}'
    producer.send('my_topic', data.encode('utf-8'))
    return f'Temperature: {temperature}, Humidity: {humidity}'

if __name__ == '__main__':
    app.run(host='0.0.0.0', port=5001)
- Create requirements.txt, which is dependency library.
flask
kafka-python
- Create Dockerfile
FROM python:3.9-slim

WORKDIR /app

COPY requirements.txt .
RUN pip install --no-cache-dir -r requirements.txt

COPY . .

CMD ["python", "app.py"]
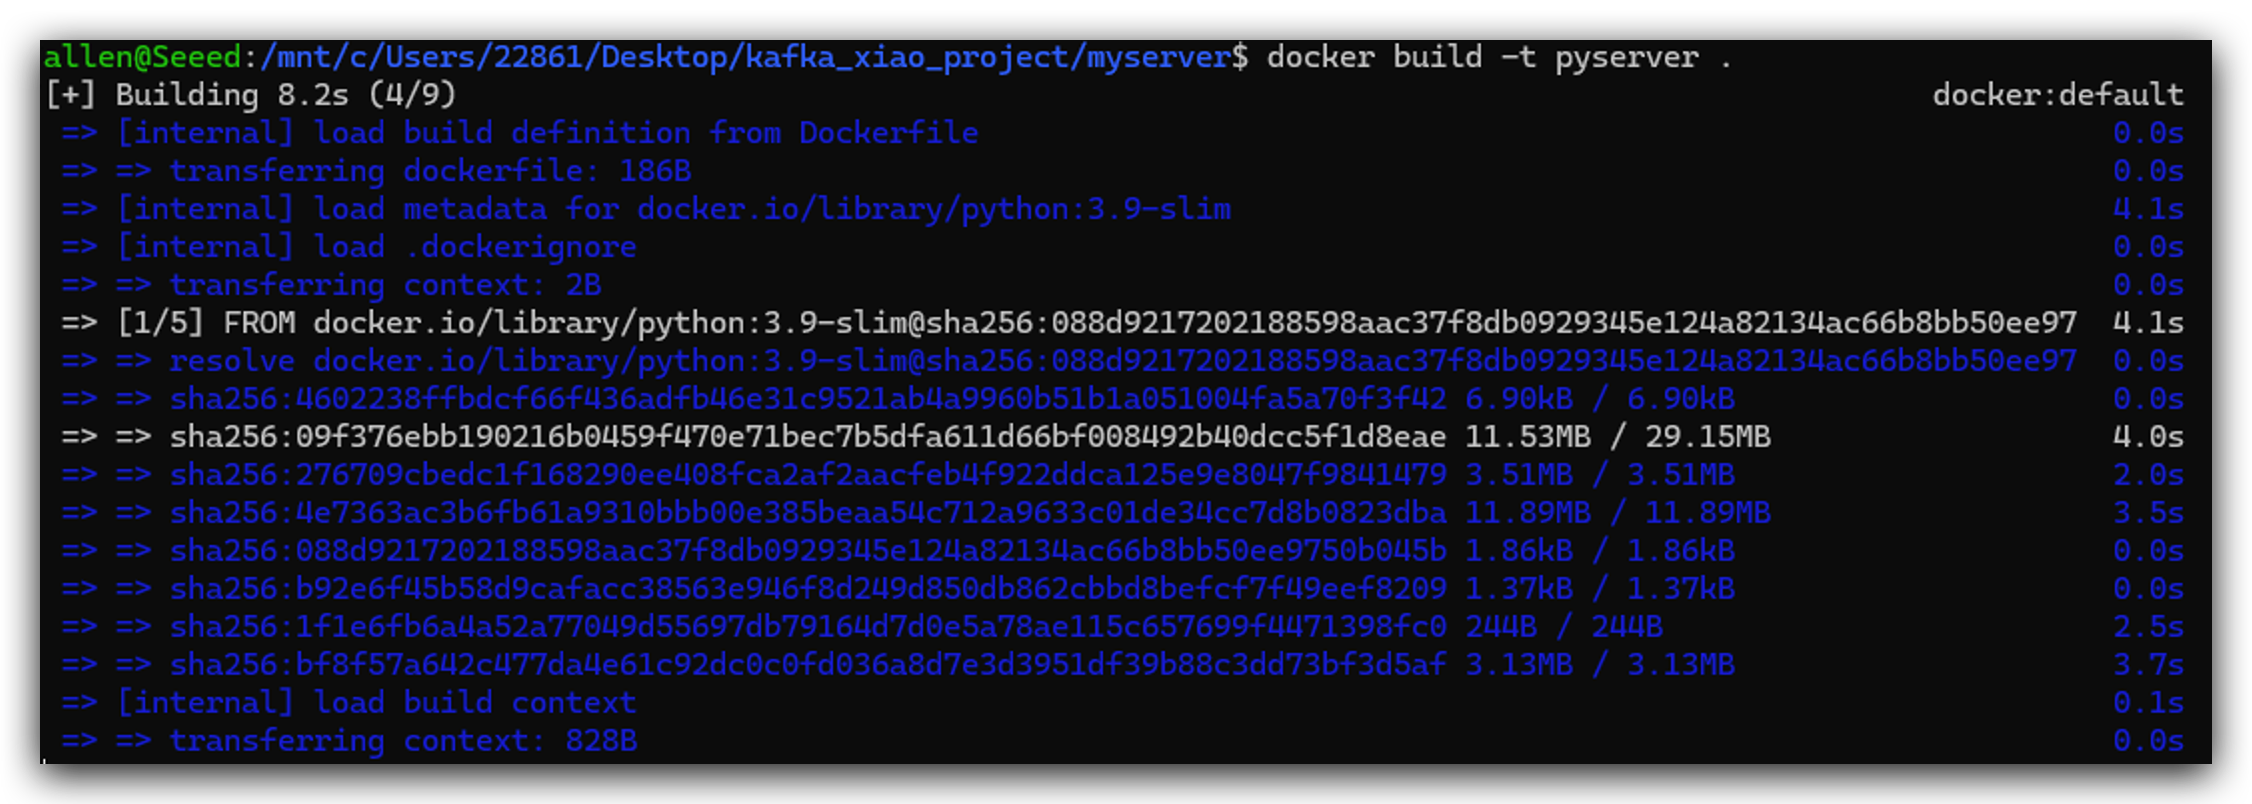
- After creating that 3 files, then we can build a docker image by running the following code.
docker build -t pyserver .
Step 4. Deploy Jupyter Notebook
Jupyter Notebook is mainly used for debugging, and it's a very good tool to use. As well as we can use python to operate Kafka.
- Create Dockerfile first.
FROM python:3.9

RUN pip install jupyter

WORKDIR /notebook

EXPOSE 8888

CMD ["jupyter", "notebook", "--ip=0.0.0.0", "--port=8888", "--no-browser", "--allow-root"]
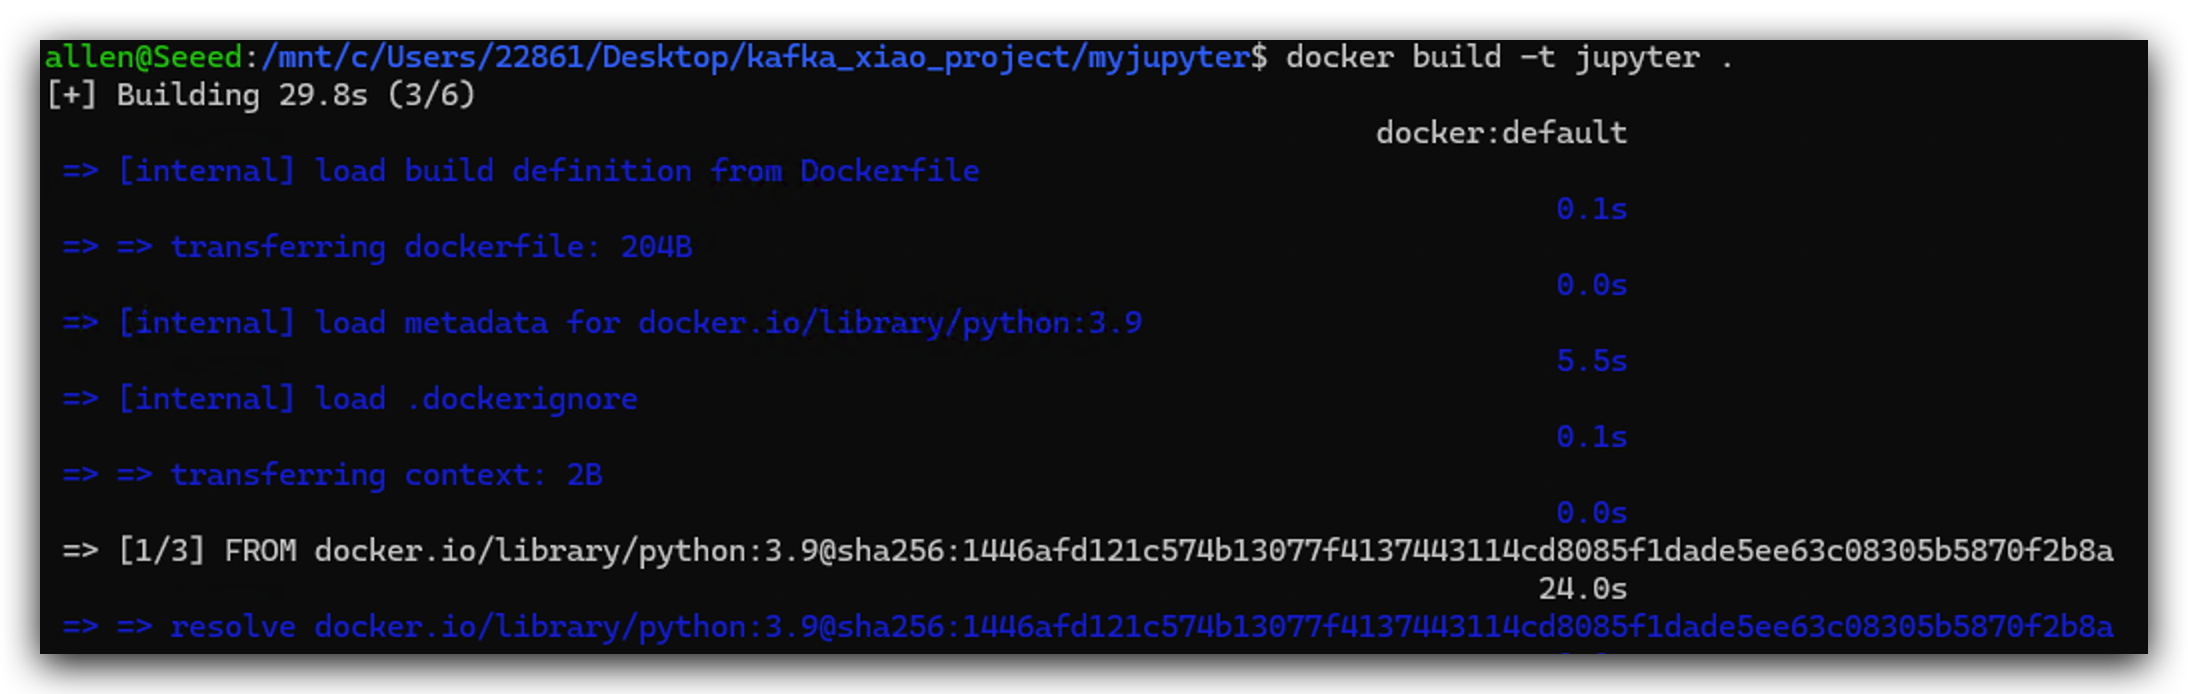
- Build jupyter docker image.
docker build -t jupyter .
Step 5. Launch Docker Cluster
We can use docker-compose.yml to build docker cluster. Each service in docker-compose stands for a independent computer and we use kafka-net to connect them each other.
- So first we need to create docker-compose.yml.
services:
  zookeeper:
    container_name: zookeeper
    hostname: zookeeper
    image: docker.io/bitnami/zookeeper
    ports:
      - "2181:2181"
    environment:
      - ALLOW_ANONYMOUS_LOGIN=yes
    networks:
      - kafka-net

  kafka:
    container_name: kafka
    hostname: kafka
    image: docker.io/bitnami/kafka
    ports:
      - "9092:9092"
      - "9093:9093"
    environment:
      - KAFKA_CFG_ZOOKEEPER_CONNECT=zookeeper:2181
      - KAFKA_CFG_BROKER_ID=0
      - ALLOW_PLAINTEXT_LISTENER=yes
      - KAFKA_CFG_LISTENER_SECURITY_PROTOCOL_MAP=INTERNAL:PLAINTEXT,EXTERNAL:PLAINTEXT
      - KAFKA_CFG_LISTENERS=INTERNAL://kafka:9092,EXTERNAL://localhost:9093
      - KAFKA_CFG_ADVERTISED_LISTENERS=INTERNAL://kafka:9092,EXTERNAL://localhost:9093
      - KAFKA_CFG_INTER_BROKER_LISTENER_NAME=INTERNAL
    depends_on:
      - zookeeper
    networks:
      - kafka-net

  jupyter:
    image: jupyter:latest
    depends_on:
      - kafka
    volumes:
      - ./myjupyter:/notebook
    ports:
      - "8888:8888"
    environment:
      - JUPYTER_ENABLE_LAB=yes
    networks:
      - kafka-net

  pyserver:
    image: pyserver:latest
    depends_on:
      - kafka
    volumes:
      - ./myserver/app.py:/app/app.py
    ports:
      - "5001:5001"
    networks:
      - kafka-net

networks:
  kafka-net:
    driver: bridge
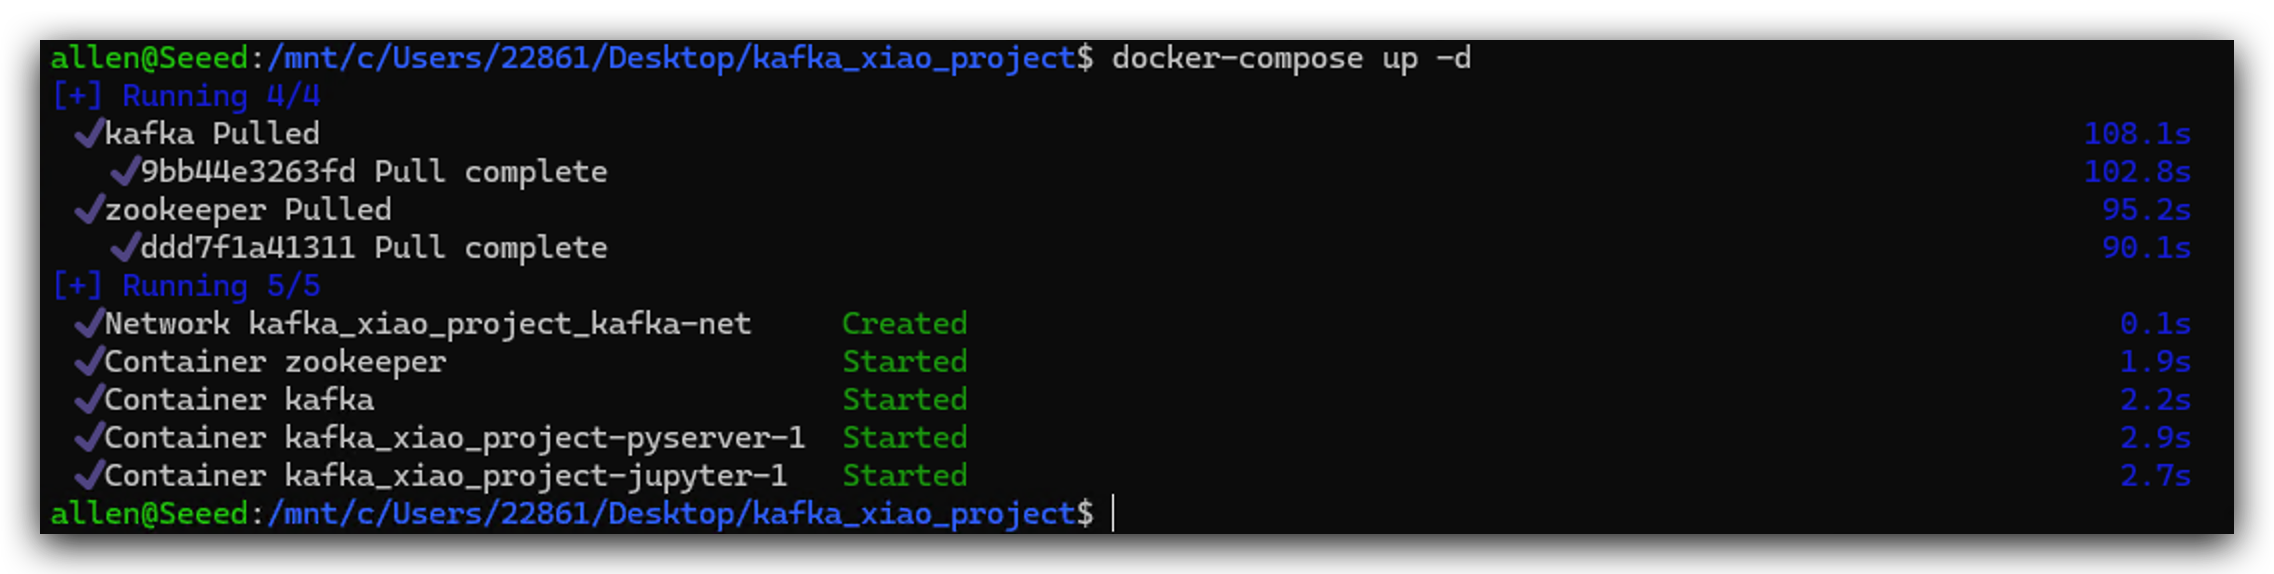
- And then we launch this docker cluster by running the following command.
docker-compose up -d
It is possible that the port is occupied, you can change the port from 5001 to 5002 etc, or close the application that occupies the port.
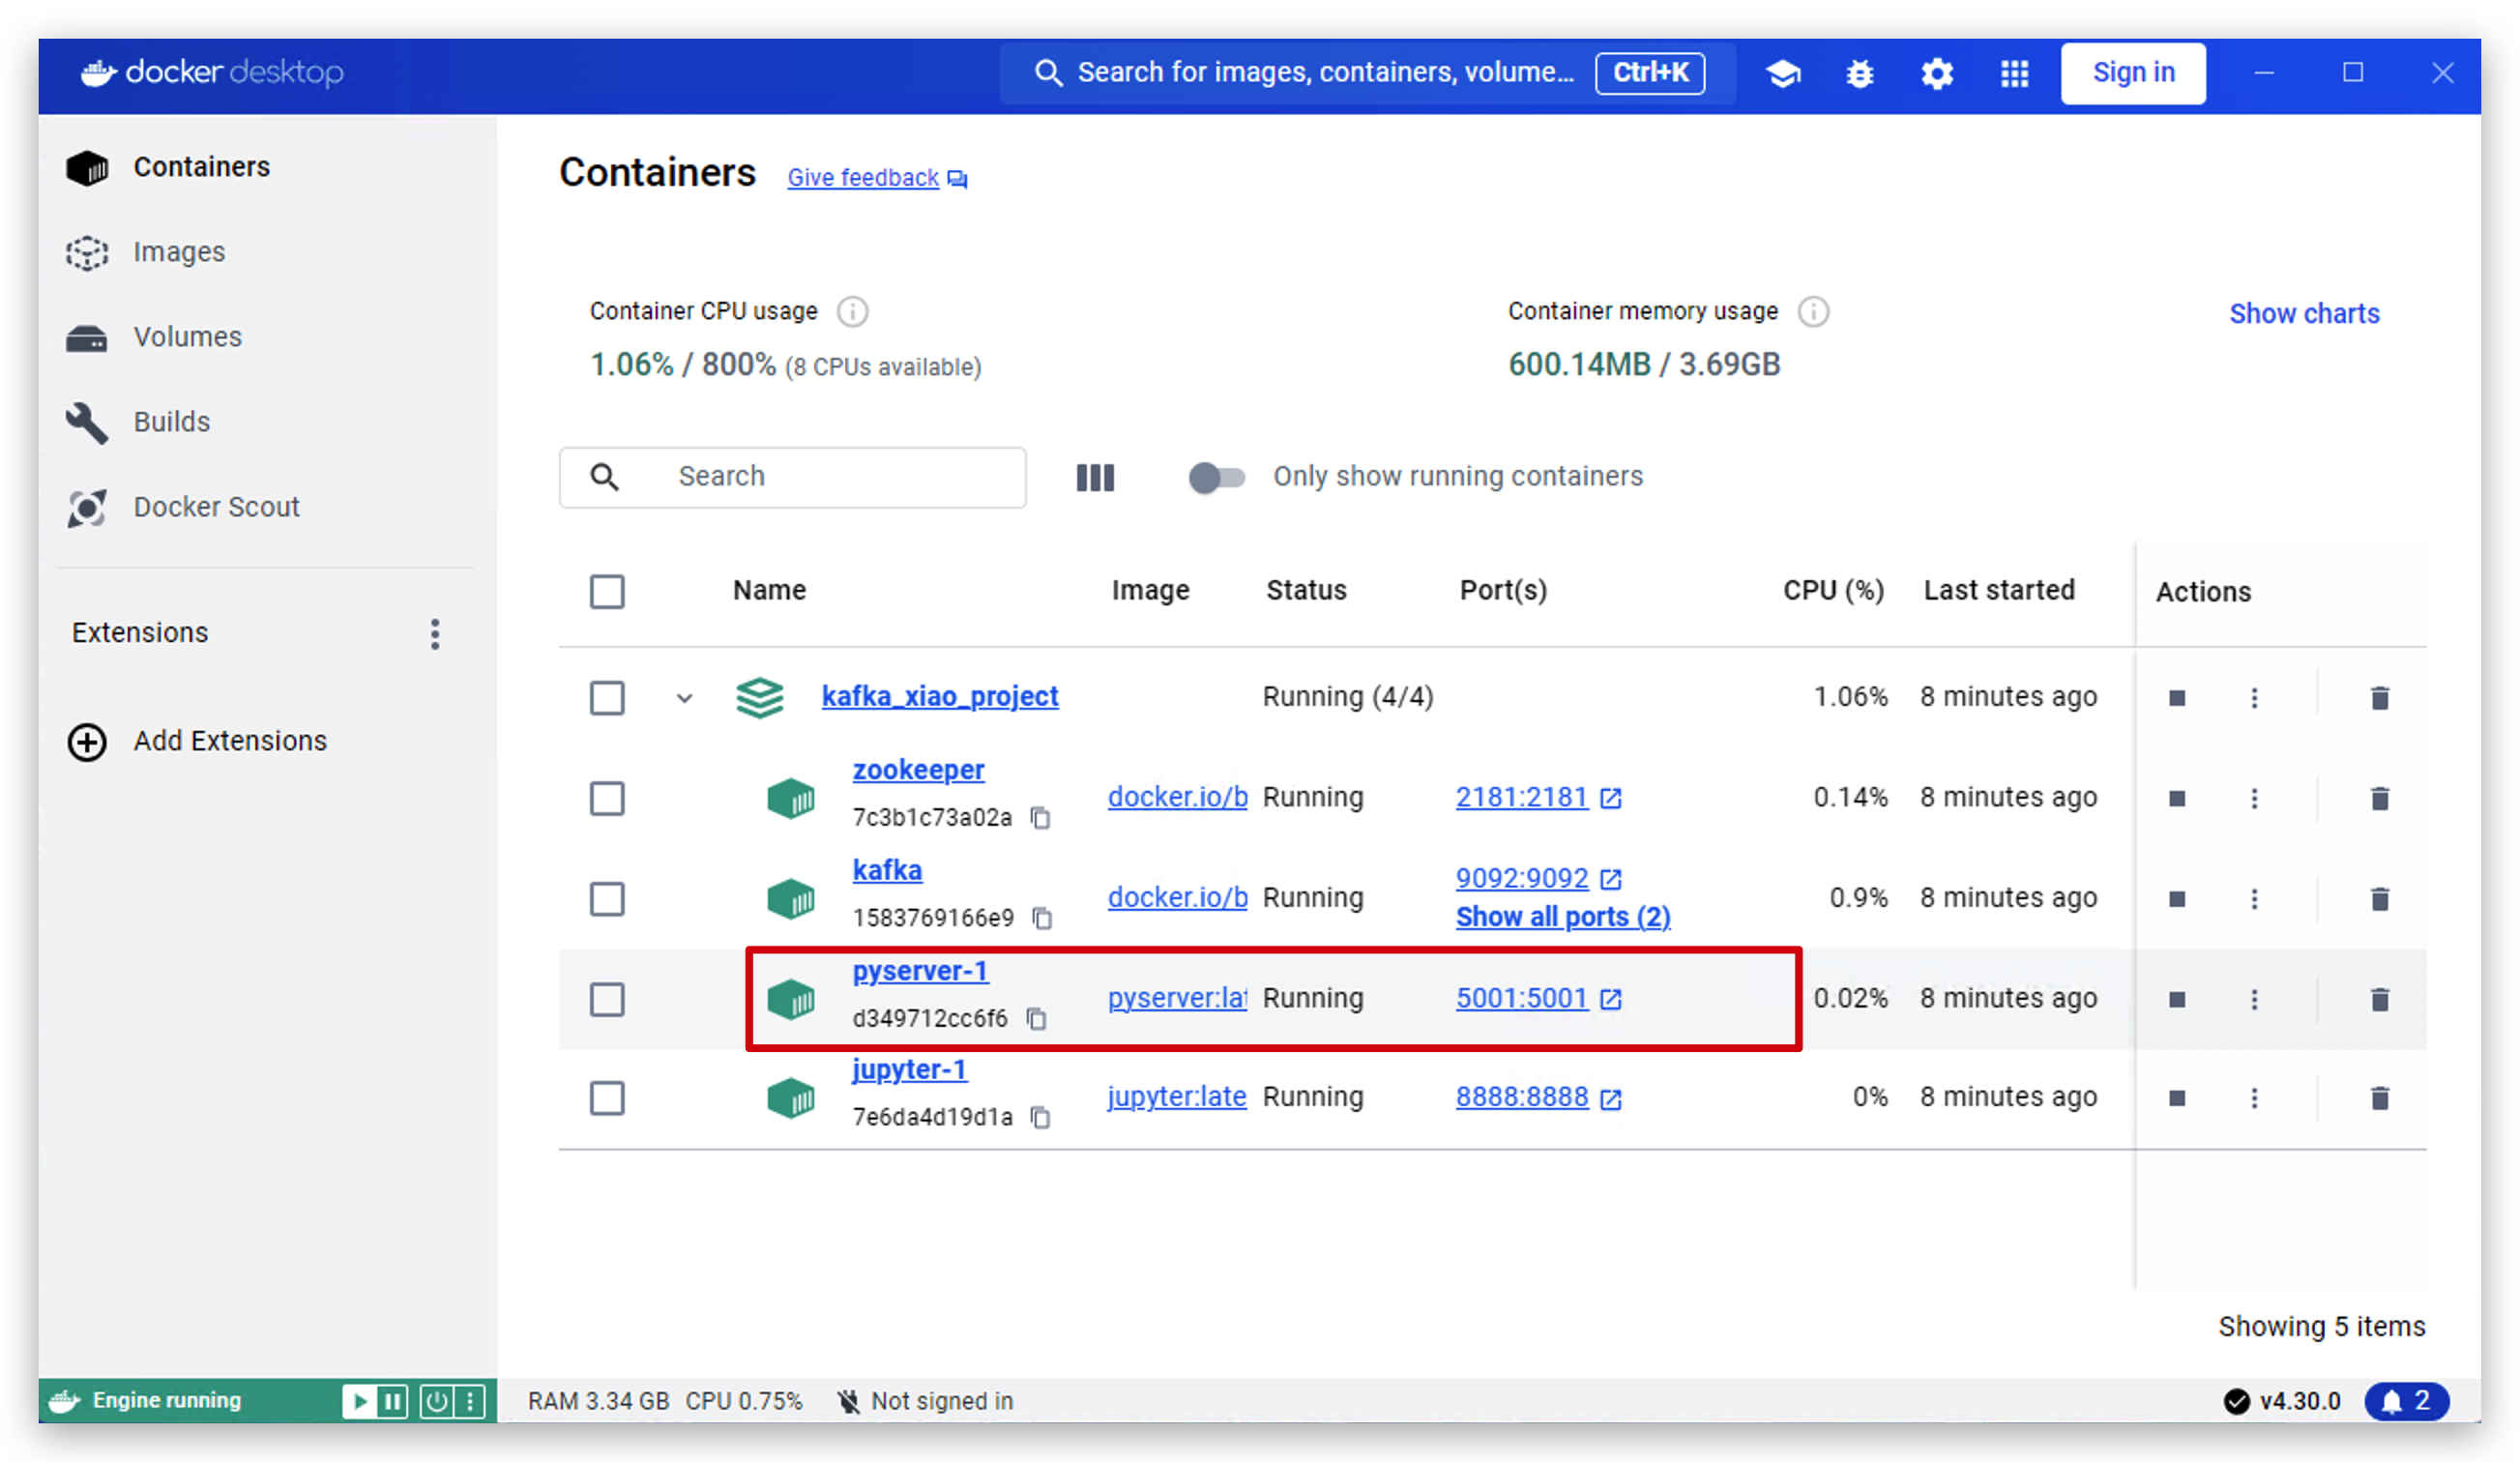
- In next several operations we are going to test if it works well. First we open software docker desktop and click into pyserver.
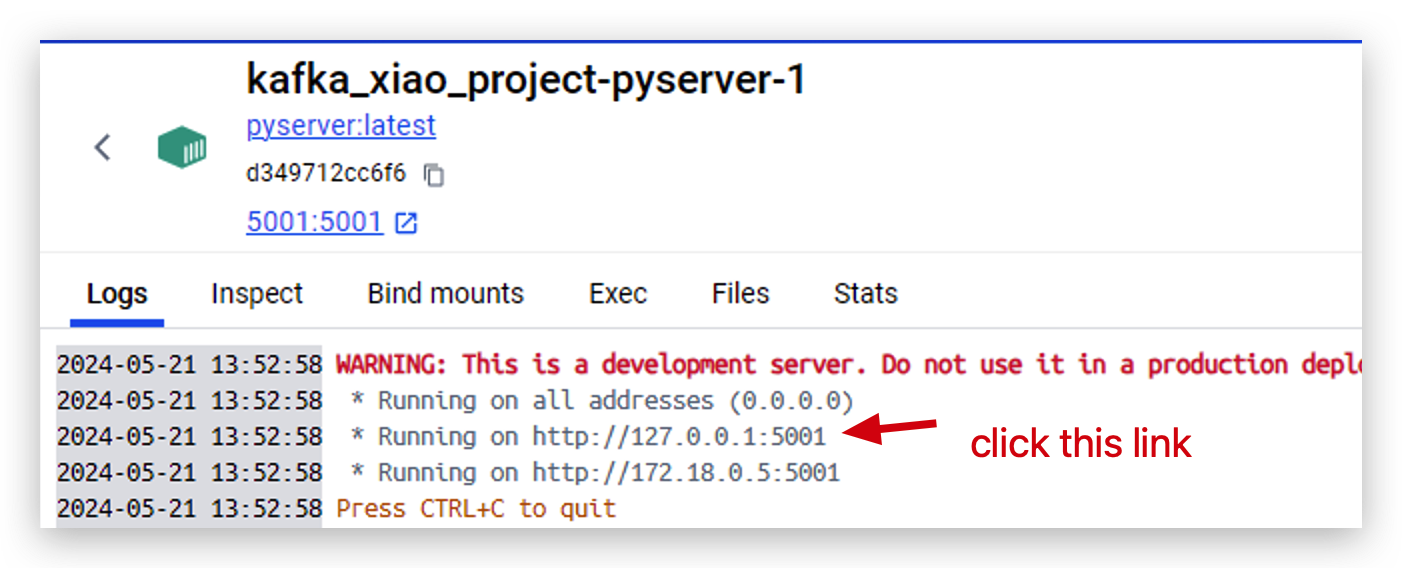
- Now the server is running on
http://127.0.0.1:5001. Click this link to open it.
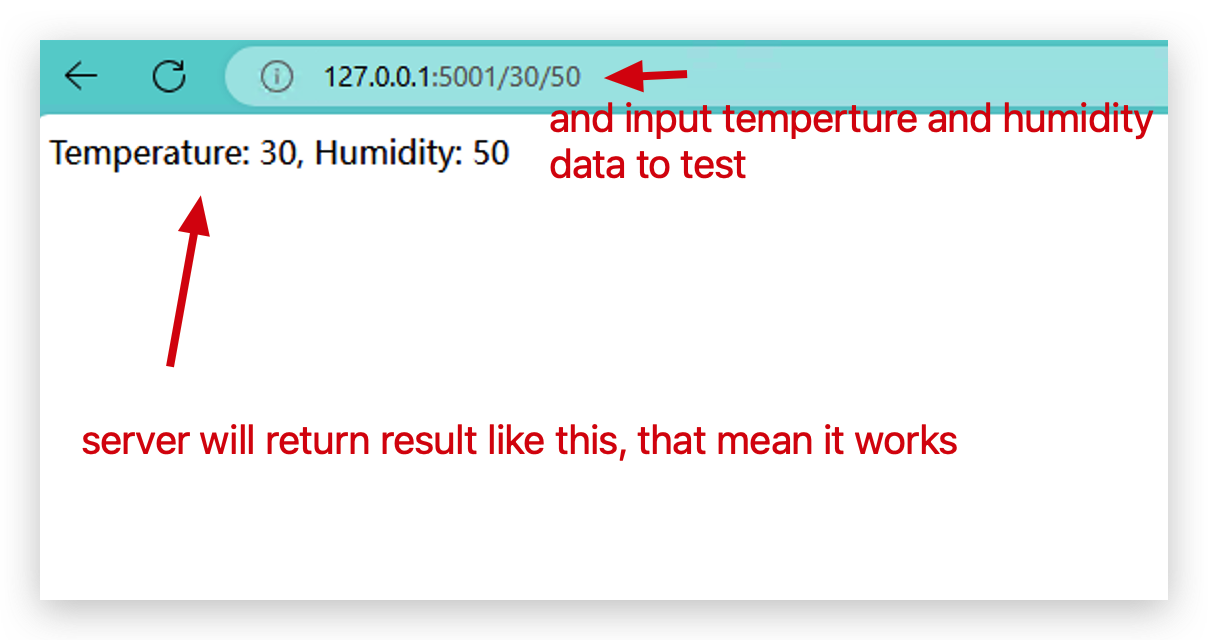
- And then input two parameter like this format to test if docker cluster is working well.
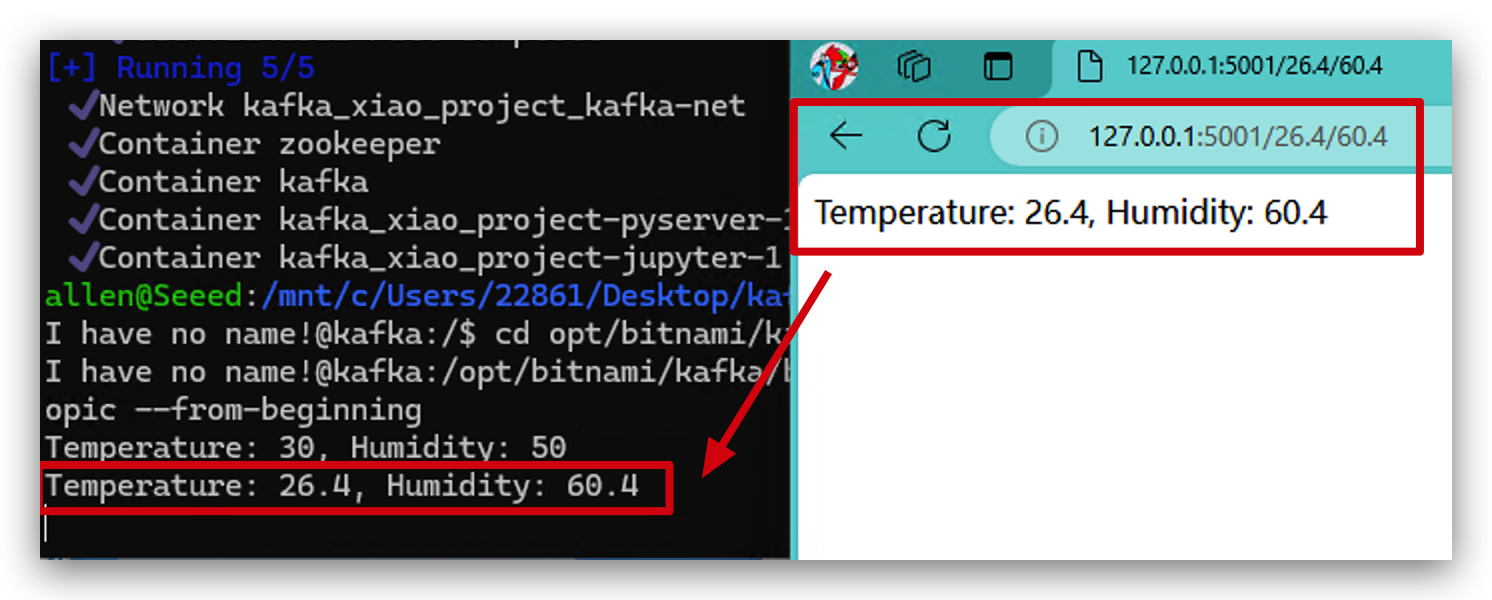
- We go inside Kafka to take a look if the data were send Kafka.
docker exec -it kafka bash

cd opt/bitnami/kafka/bin/

kafka-console-consumer.sh --bootstrap-server localhost:9093 --topic my_topic --from-beginning

- We can try again with different parameter and you can see the data was send to Kafka immediately. Now, Congratulations! You docker cluster is working perfectly.
Step 7. Test Kafka by Python
This step is mainly about how to use Python manipulate Kafka. You also can skip this step. No impact on overall project operations.
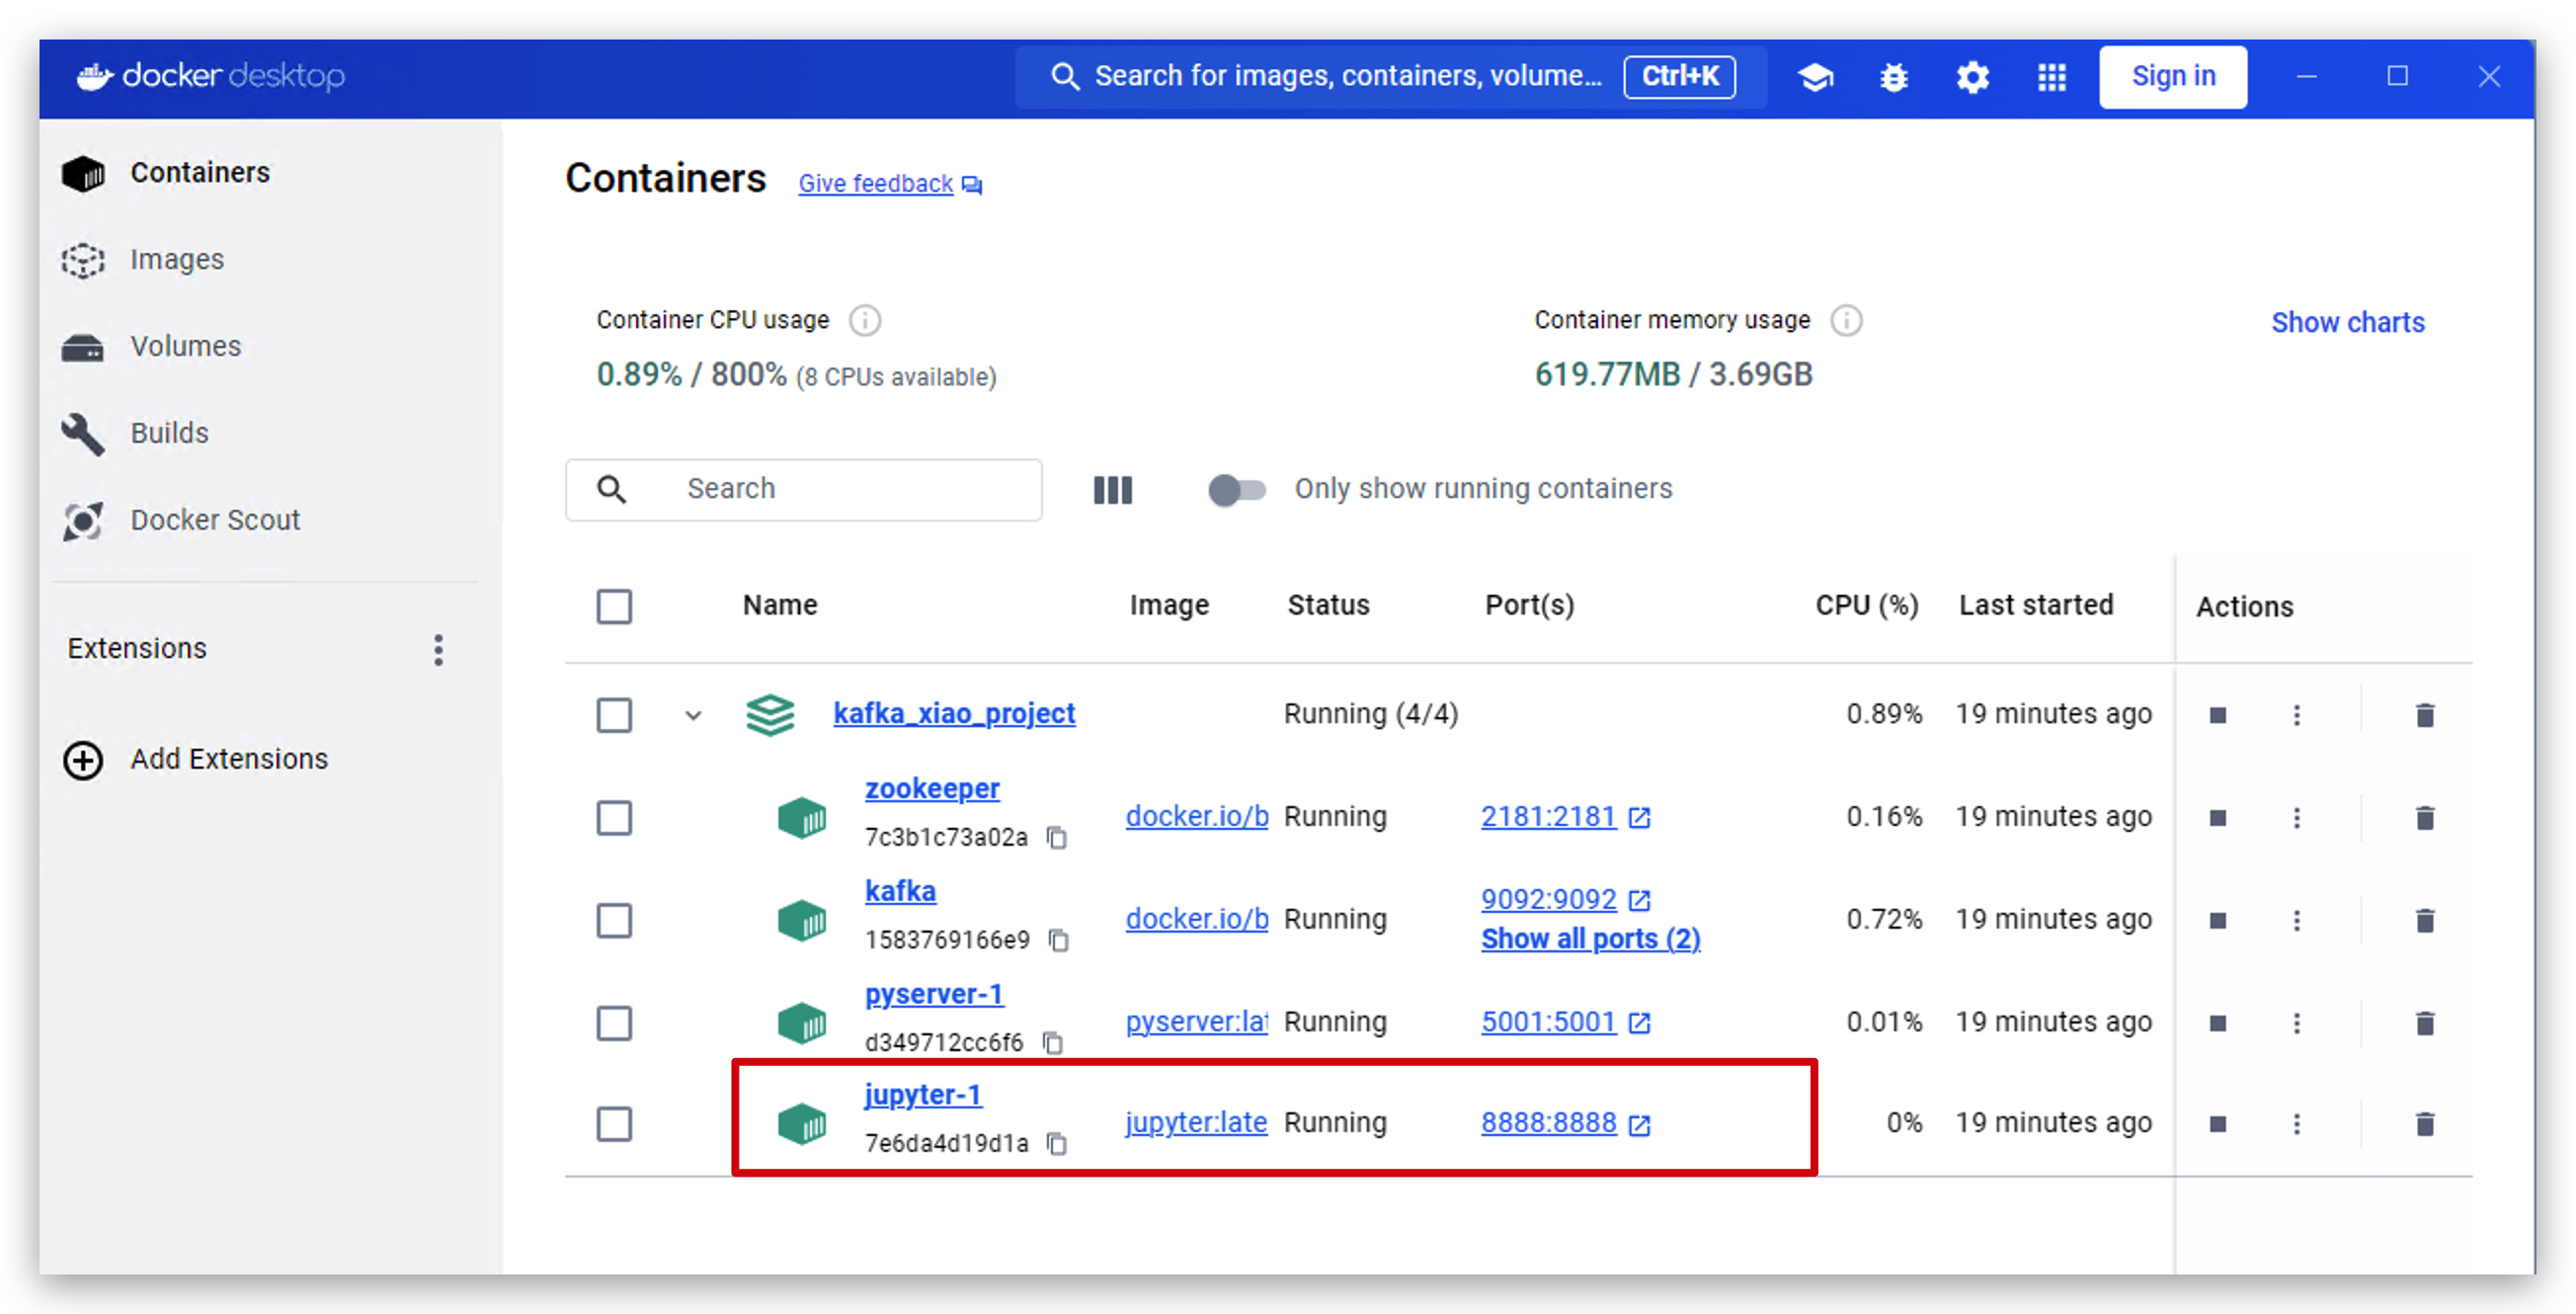
- Open docker desktop and click into jupyter.
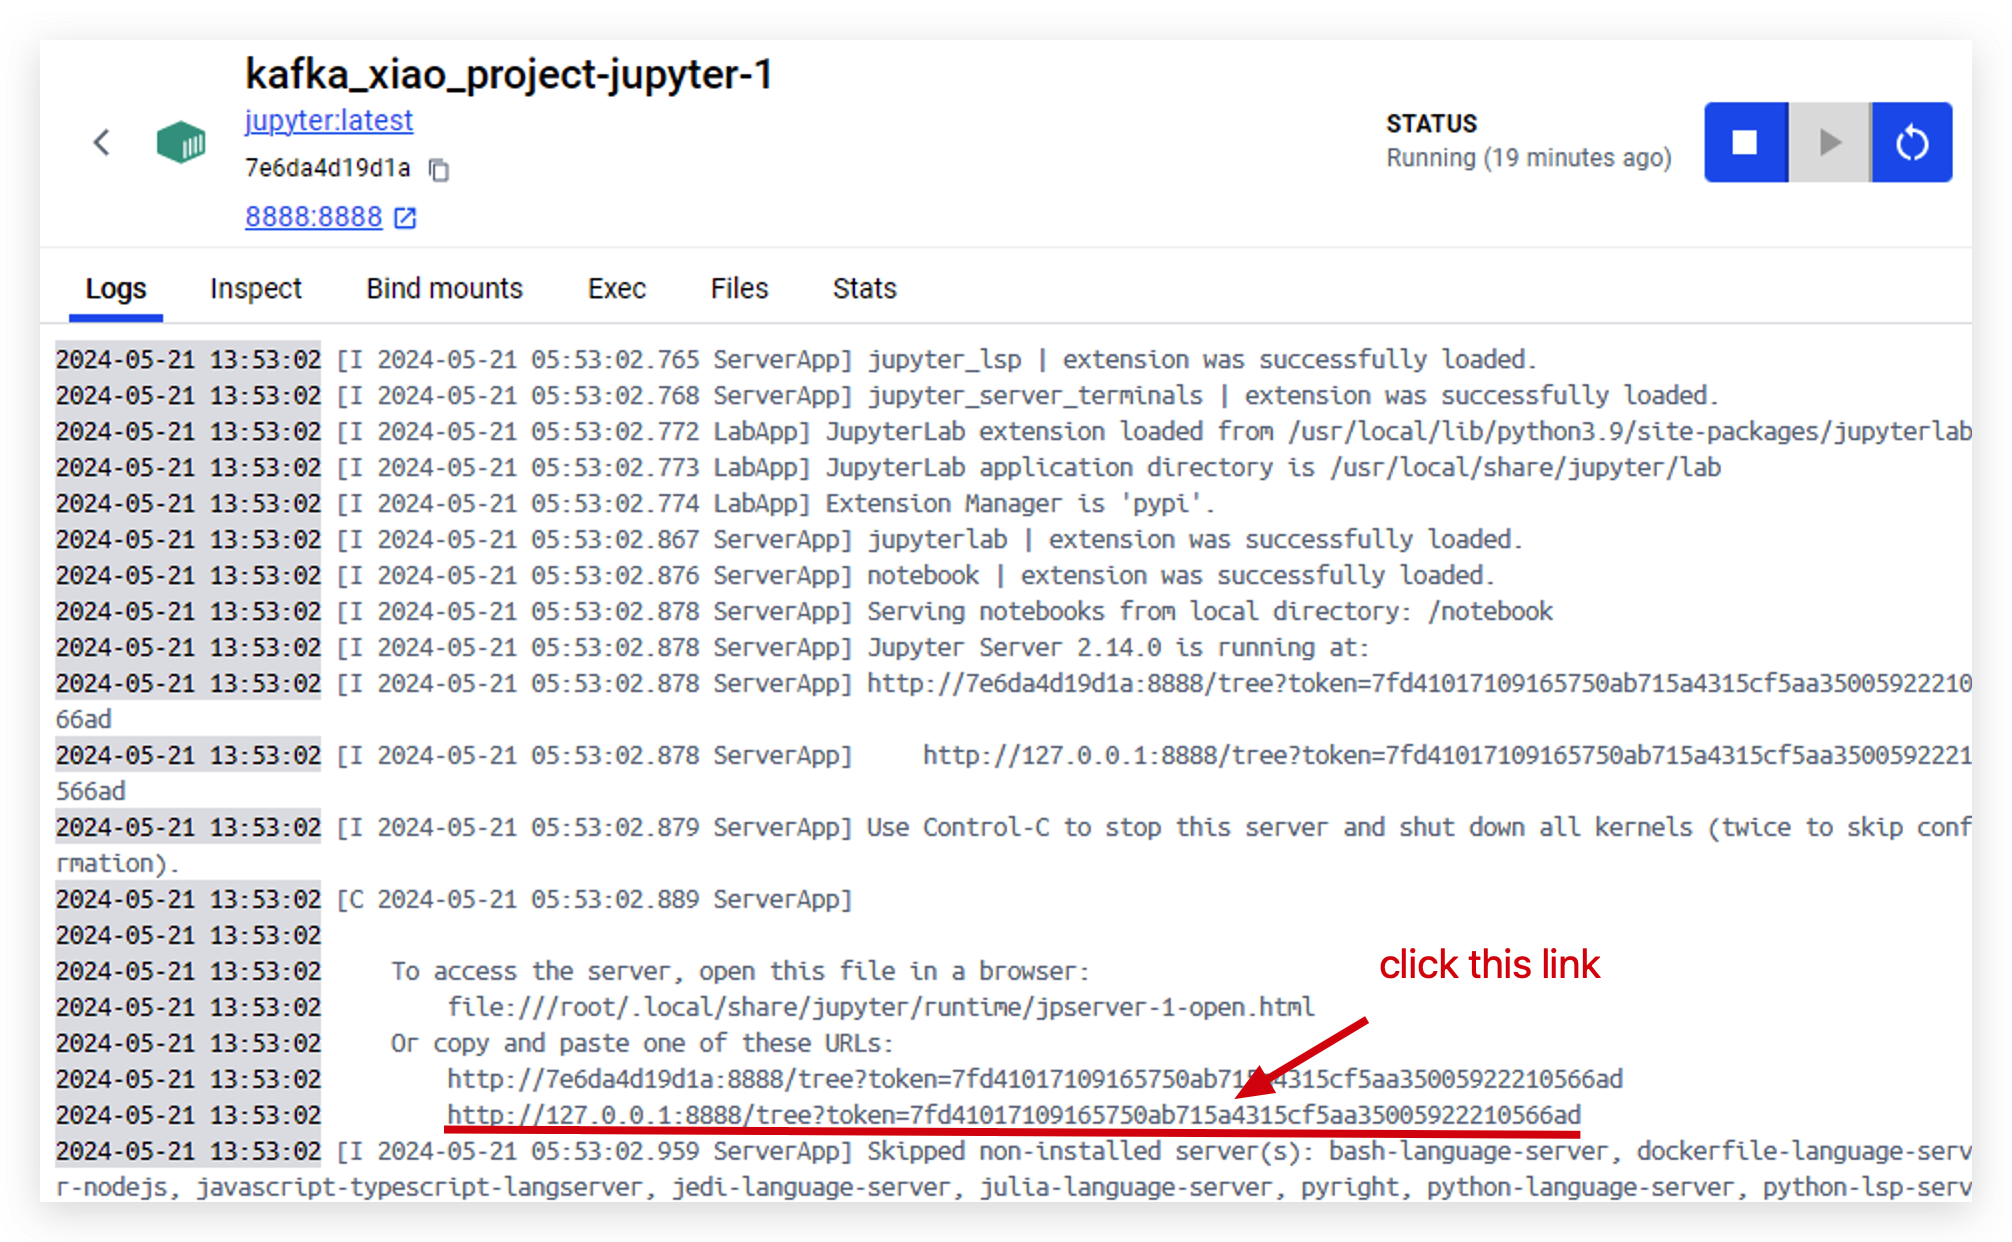
- click this link to access jupyter.
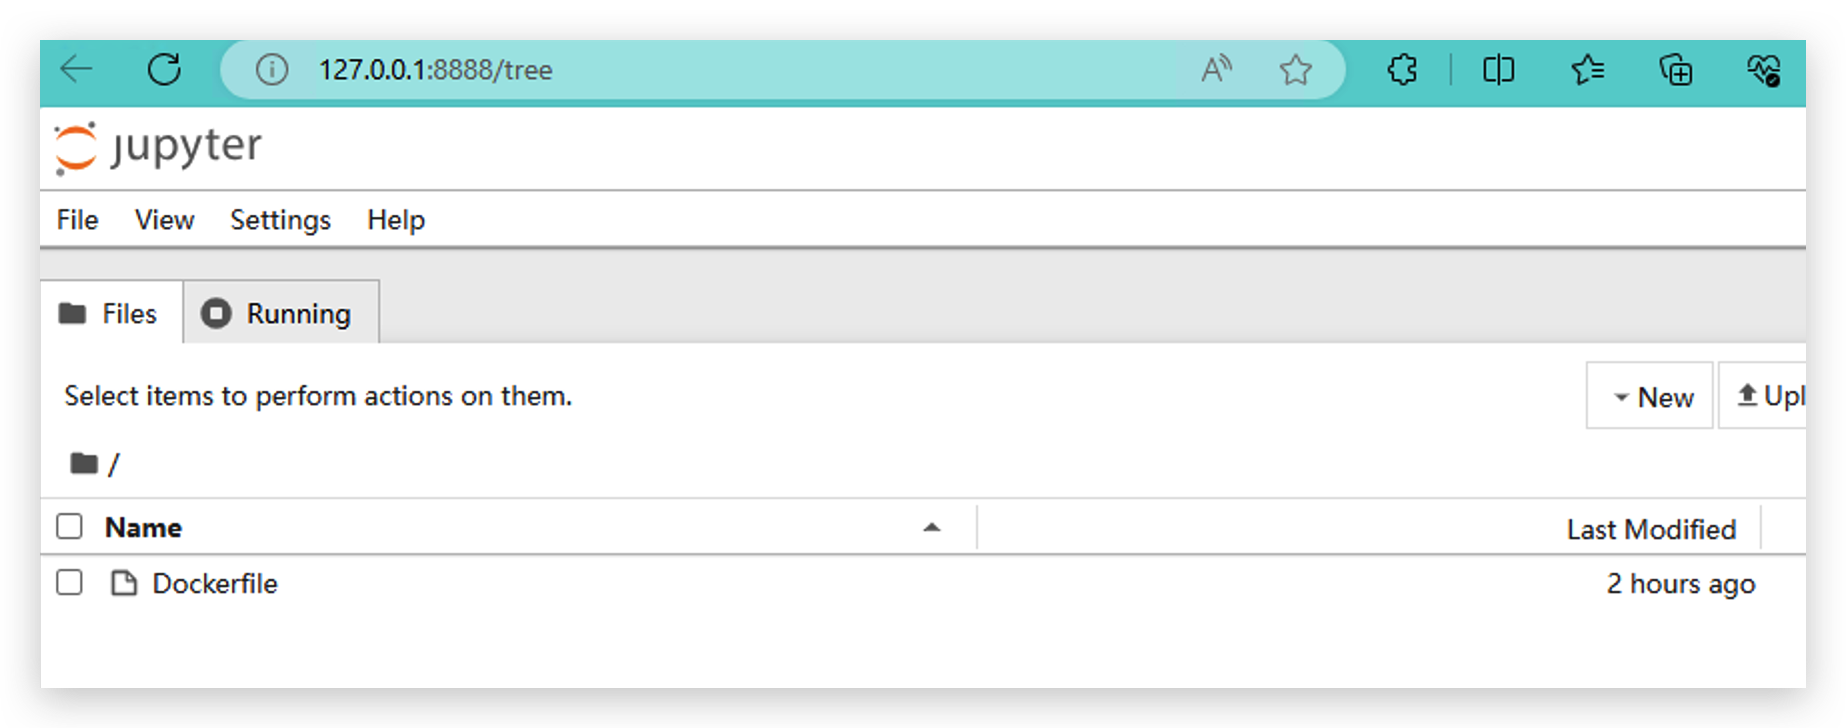
- when you access jupyter successfully, you will see this page.
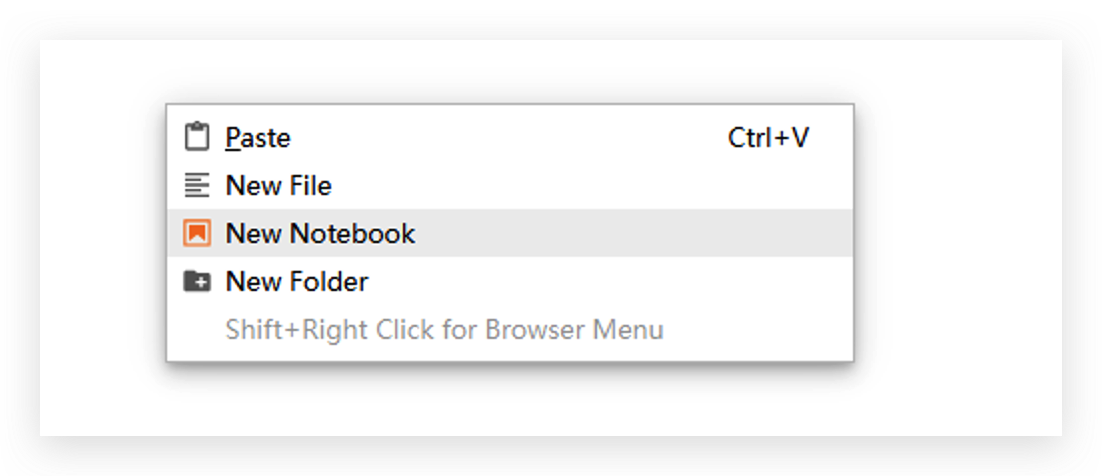
- Click the right mouse button and create New Notebook, using Python3(ipykernel).
- Install kafka-python library by running
pip install kafka-python.
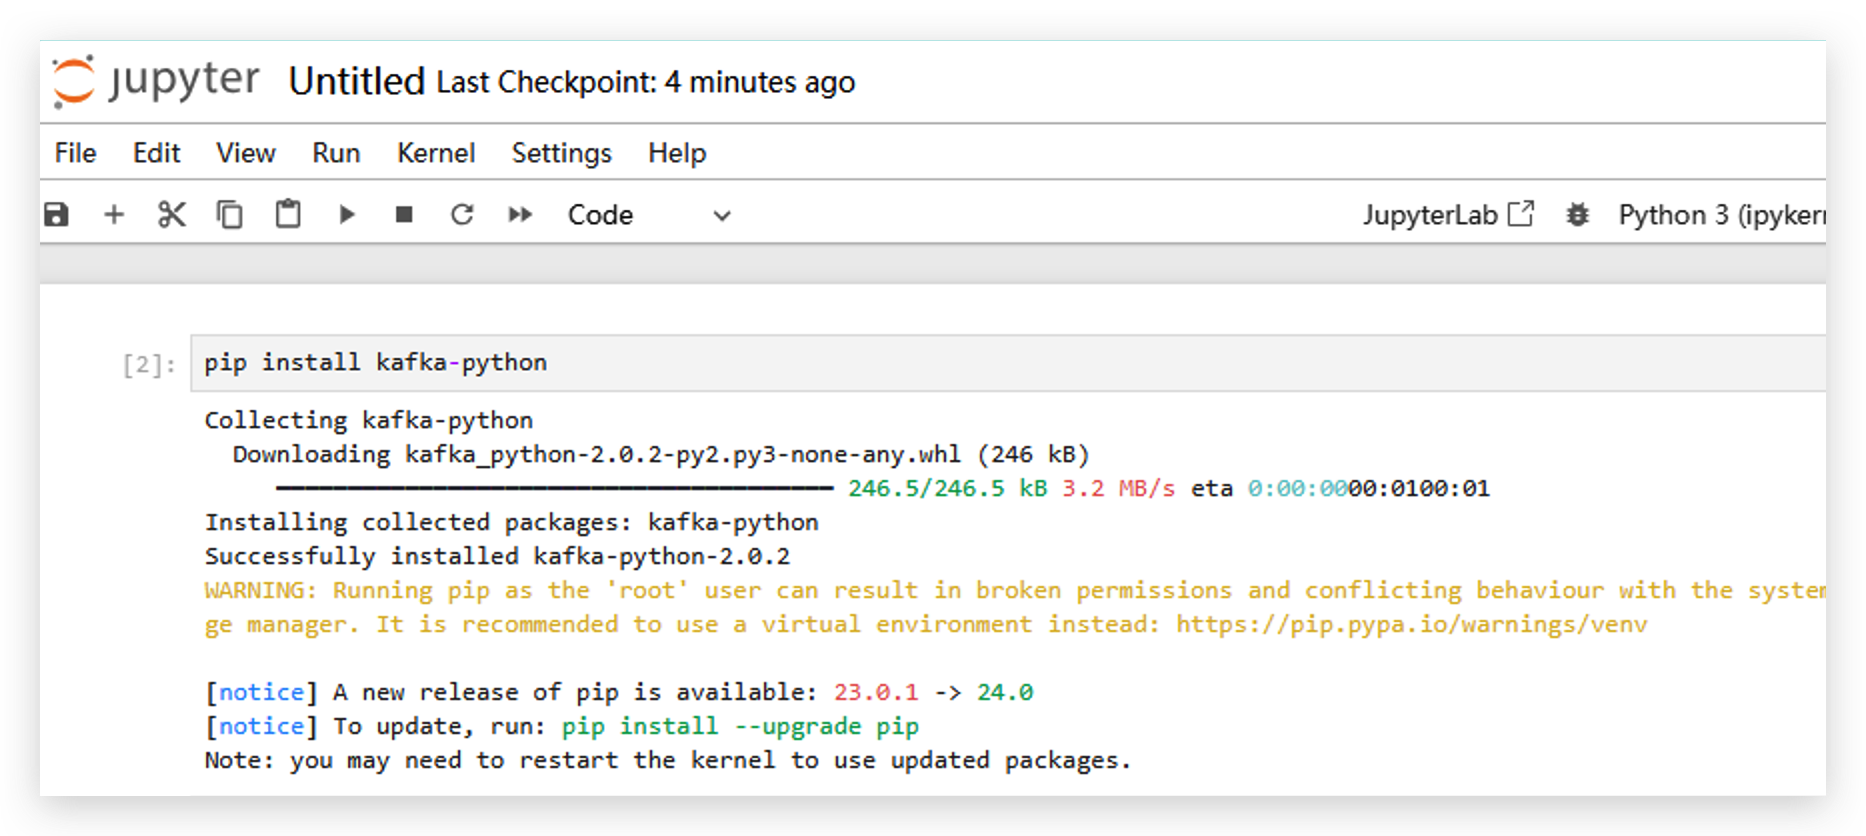
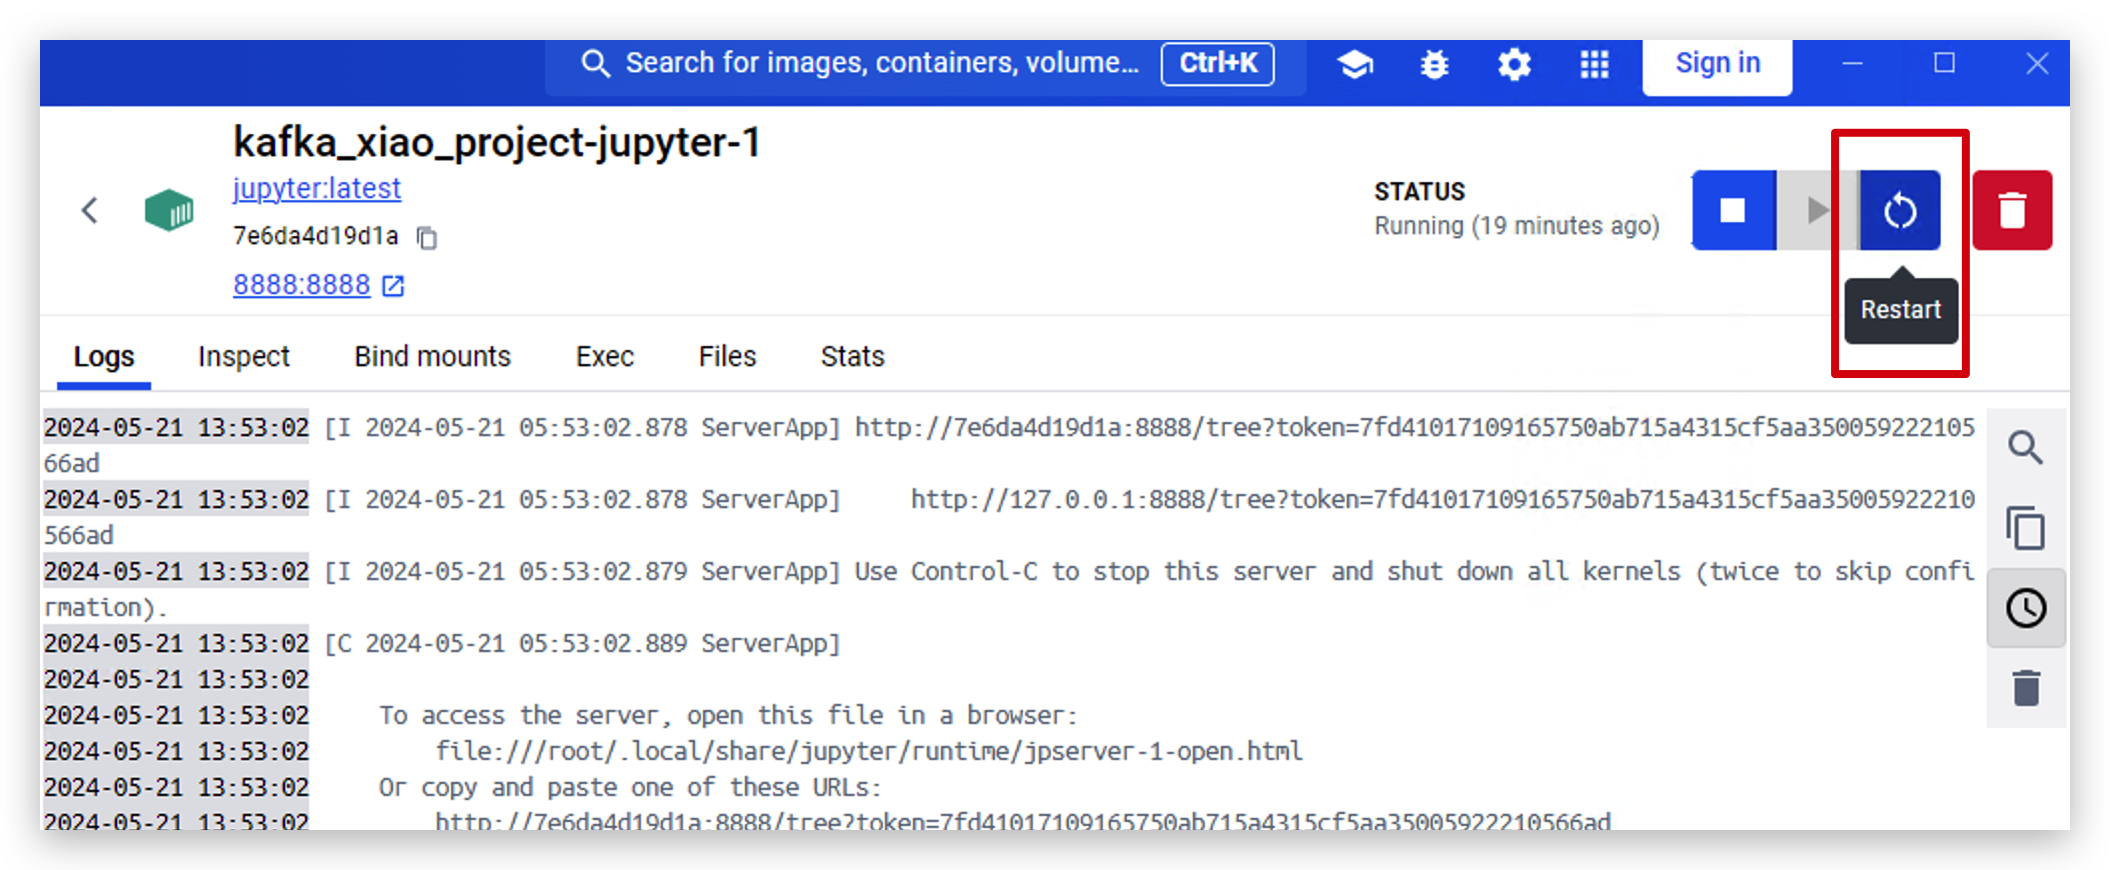
- After installing that library, we need to restart jupyter.
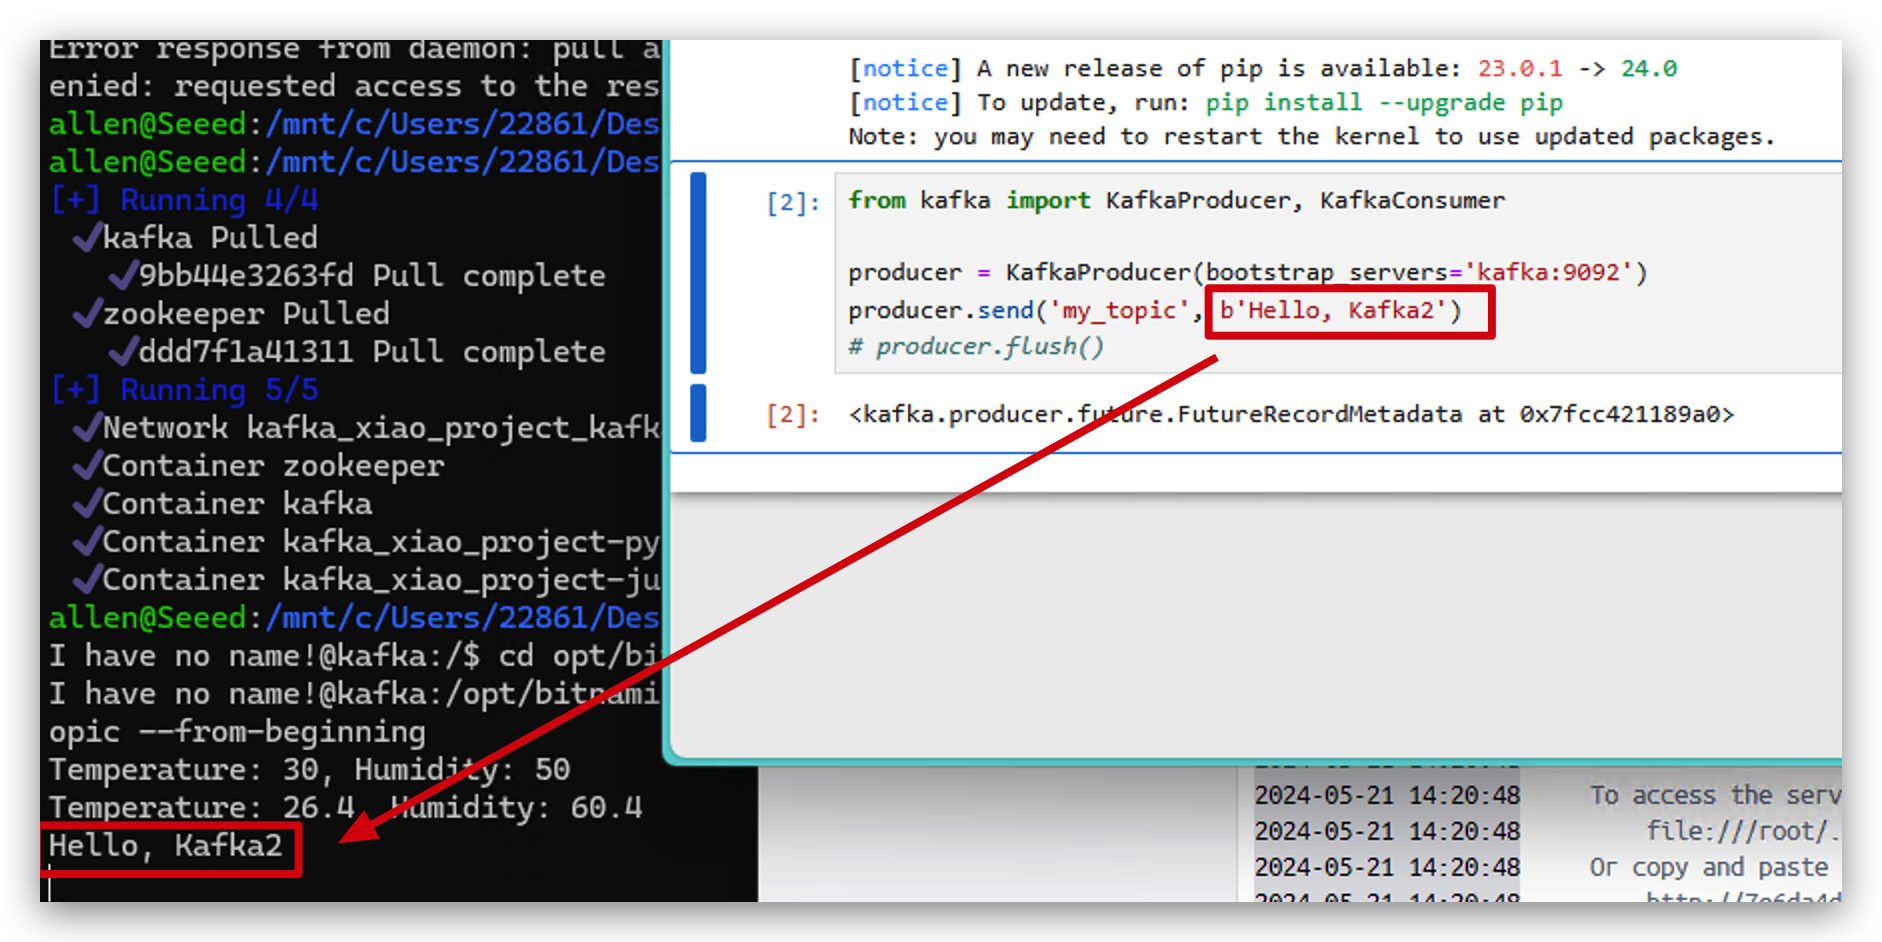
- Now running the following code to send some data to Kafka by Python.
from kafka import KafkaProducer, KafkaConsumer

#initialize producer
producer = KafkaProducer(bootstrap_servers='localhost:9093')
#send message
producer.send('my_topic', b'Hello, Kafka2')
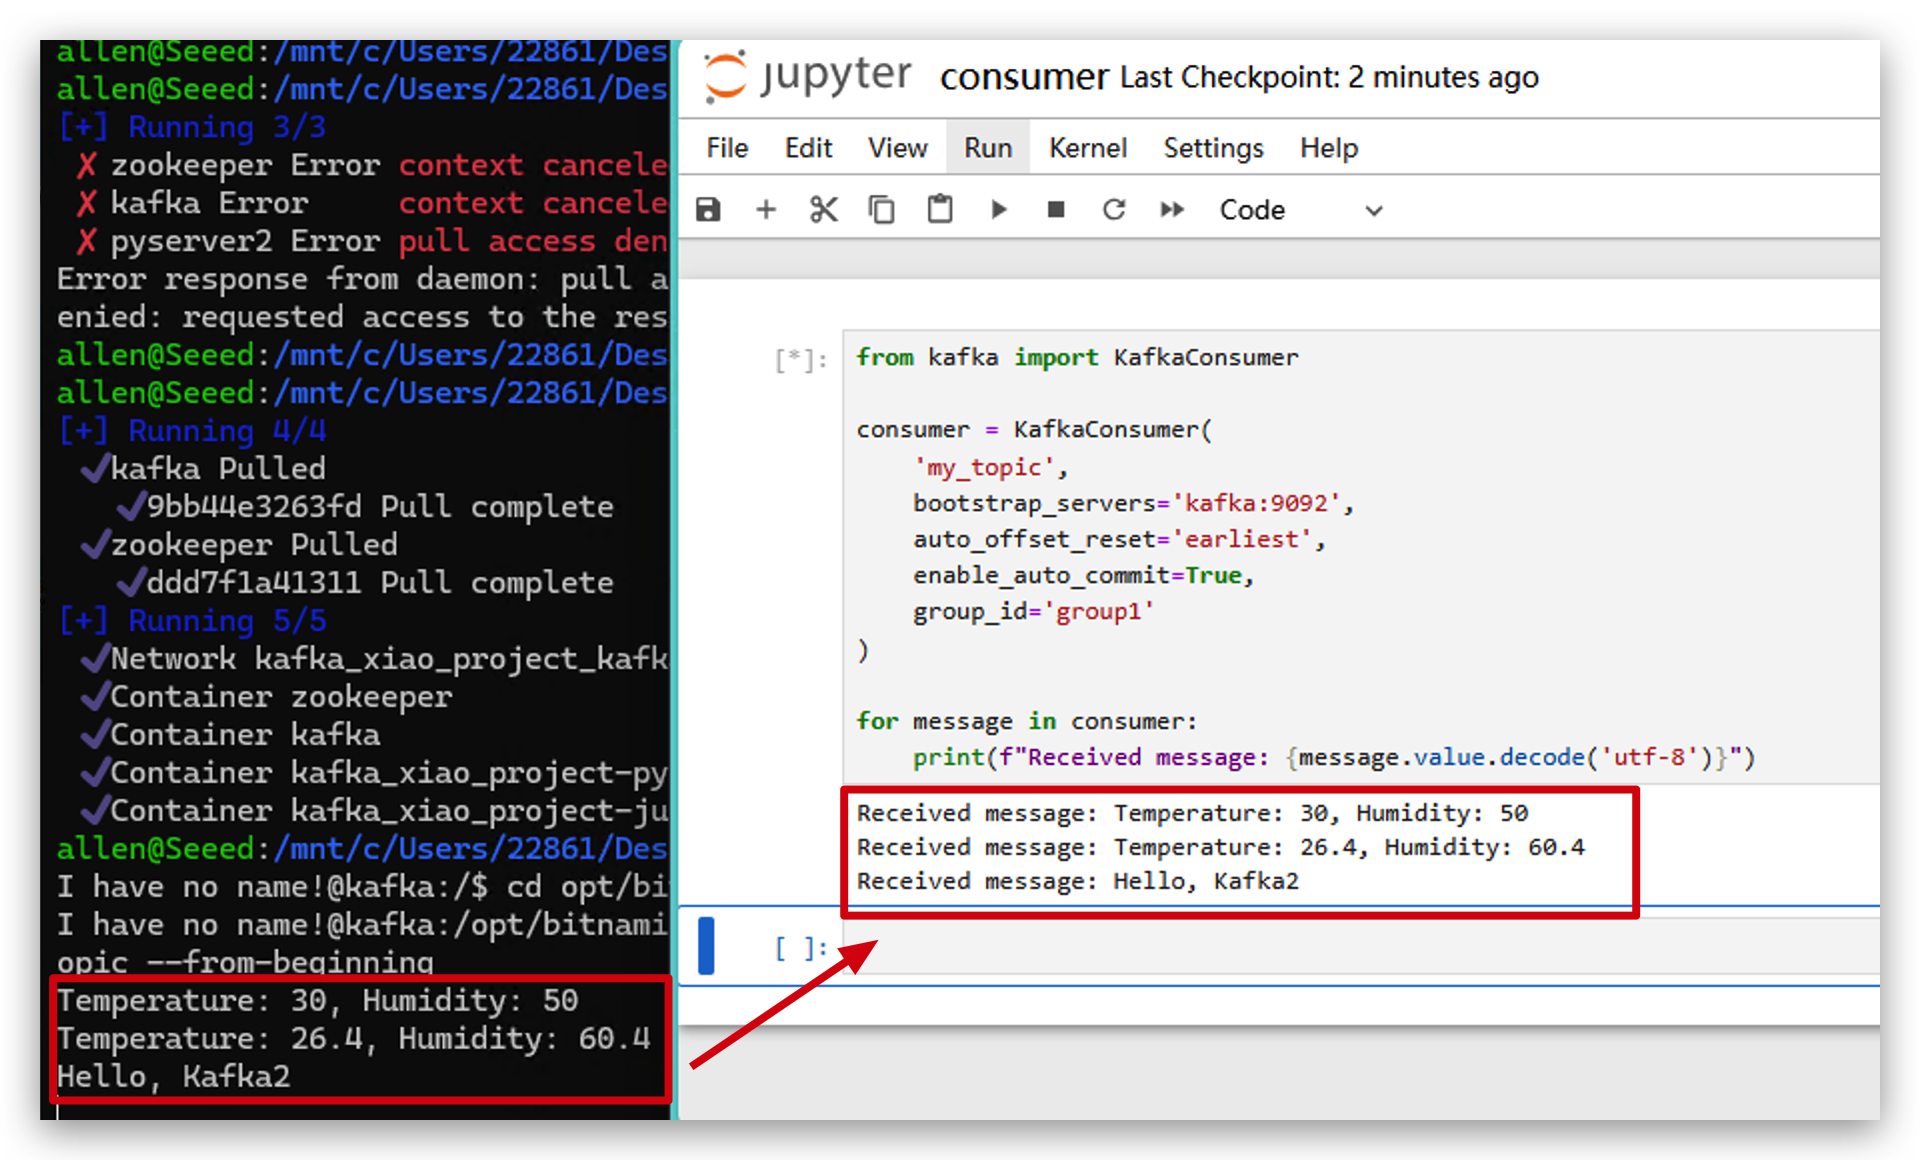
- Also you can check those data in kafka.
from kafka import KafkaConsumer

# initialize consumer
consumer = KafkaConsumer(
    'my_topic',
    bootstrap_servers='localhost:9093',
    auto_offset_reset='earliest',
    enable_auto_commit=True,
    group_id='group1'
)

# receive data and print
for message in consumer:
    print(f"Received message: {message.value.decode('utf-8')}")
XIAO ESP32C6 and Apache Kafka
Kafka is a distributed streaming platform that enables the real-time processing of data streams at scale. It allows for the publish-subscribe messaging of data between systems, providing fault tolerance, persistence, and high throughput. Kafka is widely used for building real-time data pipelines and streaming applications across various domains.
Now, we are going to use XIAO ESP32C6 and DHT20 temperature and humidity sensor to collect data and send to Kafka in real time.
Step 8. Collect Data And Send To Apache Kafka
- Copy the following code to your Arduino IDE.
#include <WiFi.h>
#include <HTTPClient.h>

//Change to your wifi name and password here.
const char* ssid = "Maker_2.4G";
const char* password = "15935700";

//Change to your computer IP address and server port here.
const char* serverUrl = "http://192.168.1.175:5001";

void setup() {
  Serial.begin(115200);

  WiFi.begin(ssid, password);

  while (WiFi.status() != WL_CONNECTED) {
    delay(1000);
    Serial.println("Connecting to WiFi...");
  }

  Serial.println("Connected to WiFi");
}

void loop() {
  if (WiFi.status() == WL_CONNECTED) {
    HTTPClient http;

    //Create access link
    String url = serverUrl;
    url += "/";
    url += "30.532";  // tempertature
    url += "/";
    url += "60.342";  // humidity

    http.begin(url);

    int httpResponseCode = http.GET();

    //Get http response and print
    if (httpResponseCode == 200) {
      String response = http.getString();
      Serial.println("Server response:");
      Serial.println(response);
    } else {
      Serial.print("HTTP error code: ");
      Serial.println(httpResponseCode);
    }

    http.end();
  } else {
    Serial.println("WiFi disconnected");
  }

  delay(5000);  // access server in every 5s.
}
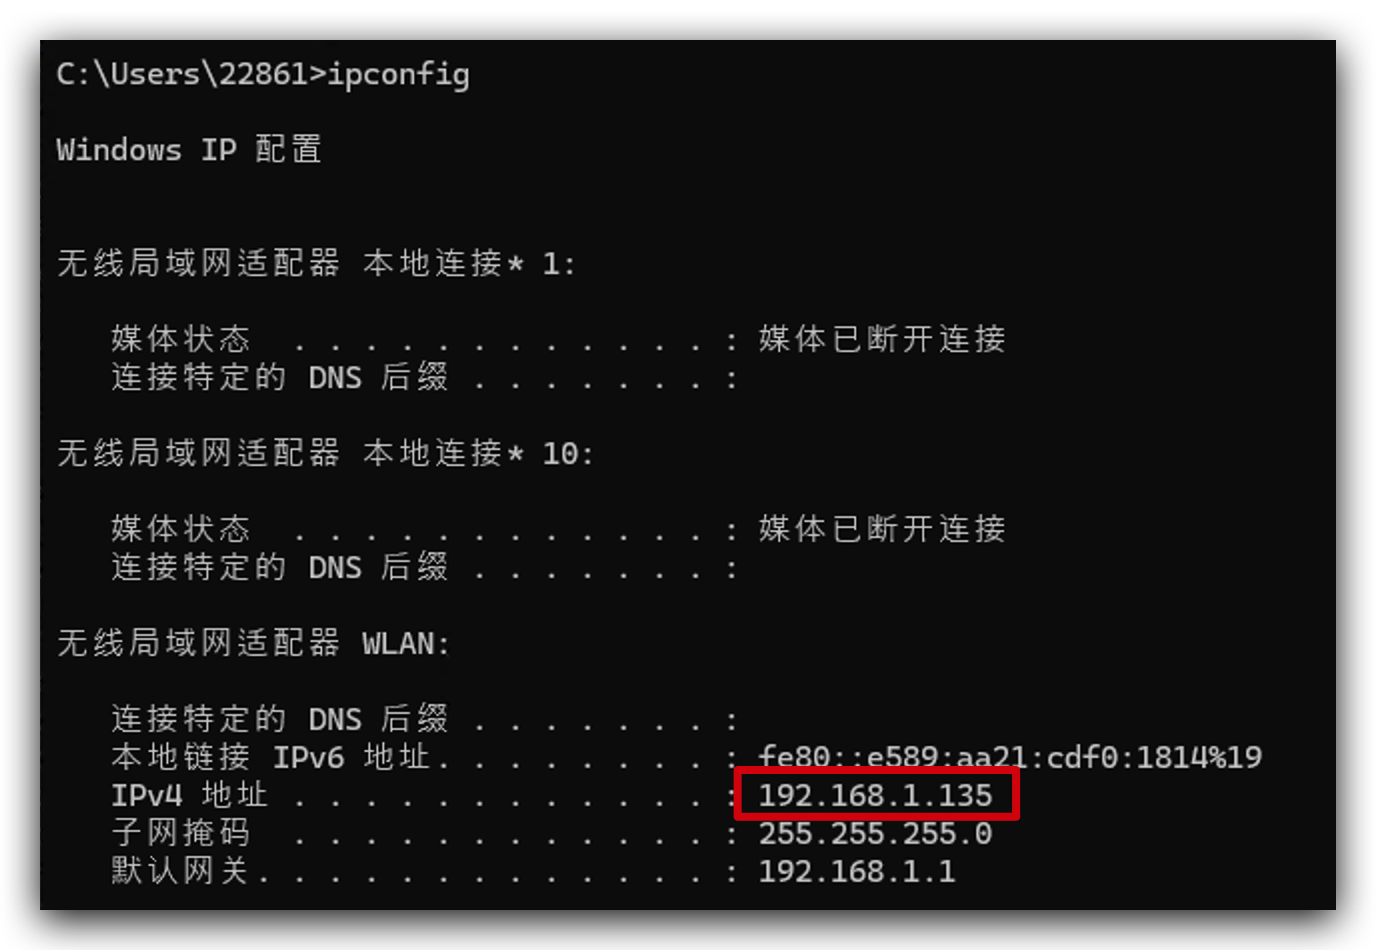
If you don't know what is your computer IP address. You can run ipconfig(Windows) or ifconfig | grep net(Mac or Linux) to check it.
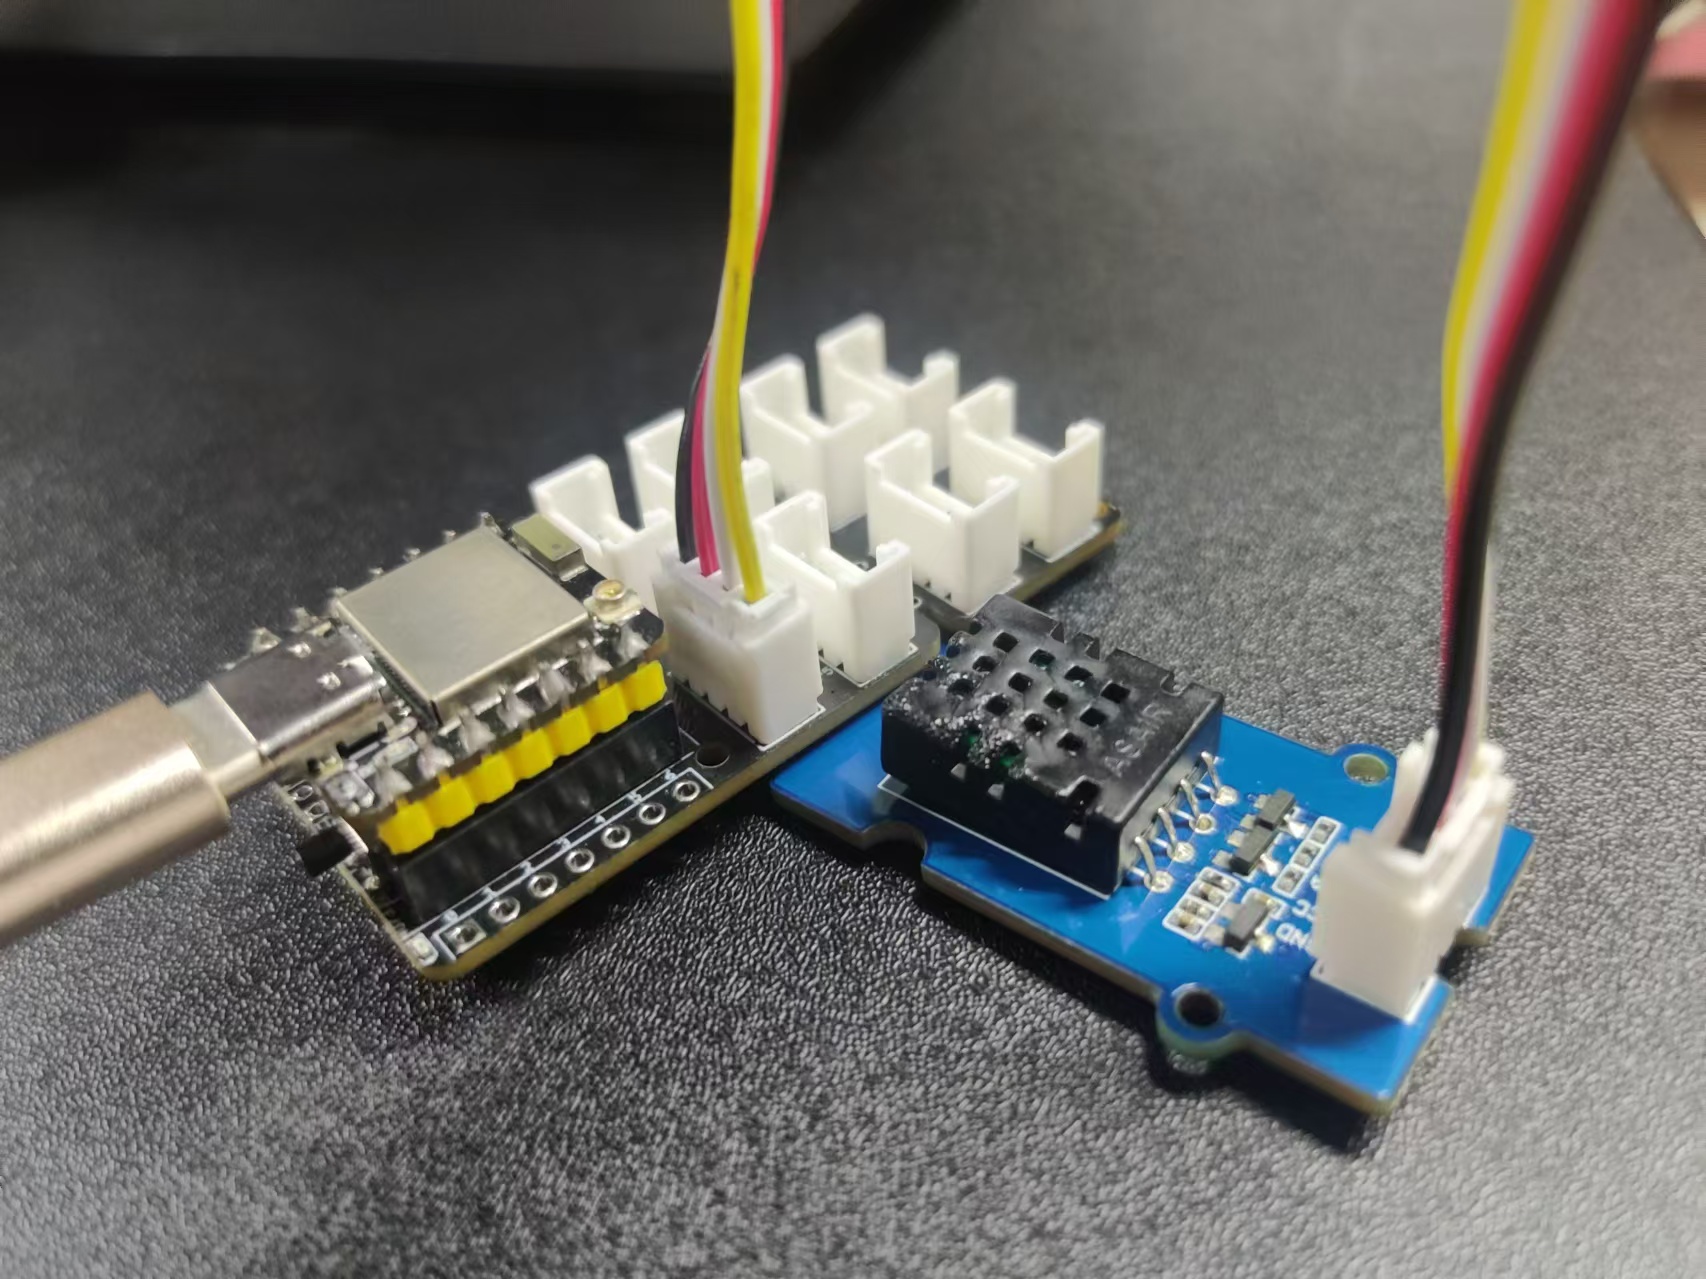
- Use Type-C cable connect your computer to C6 and use Grove cable connect XIAO extension board I2C port to DHT20 sensor.
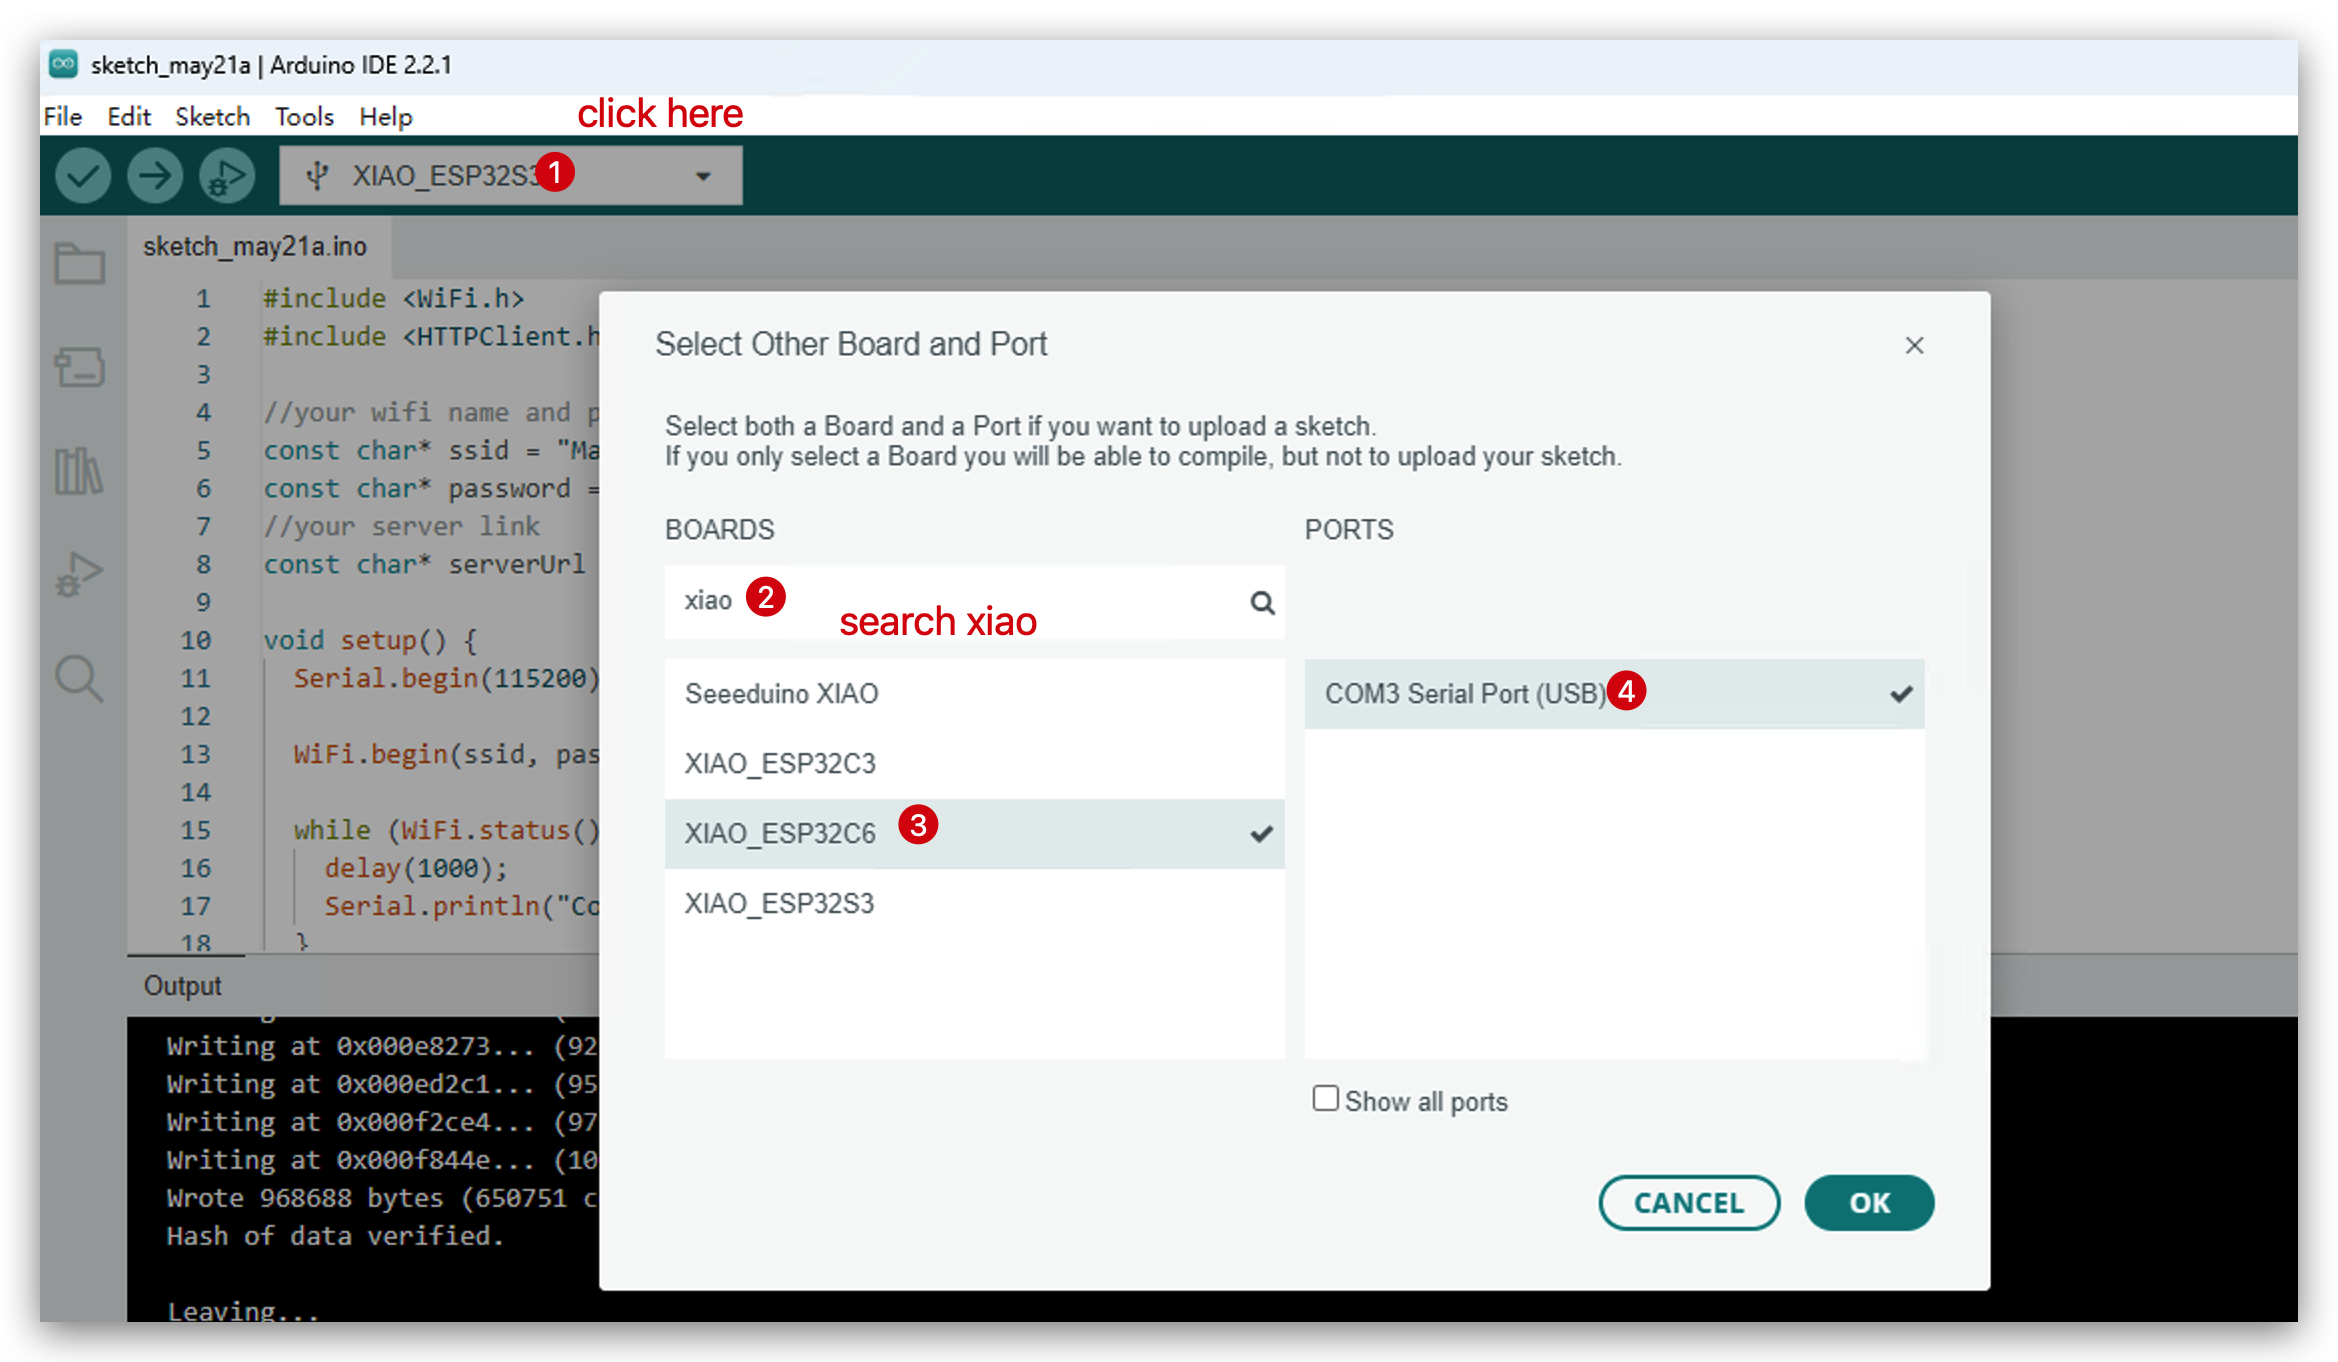
- Choose your development board.
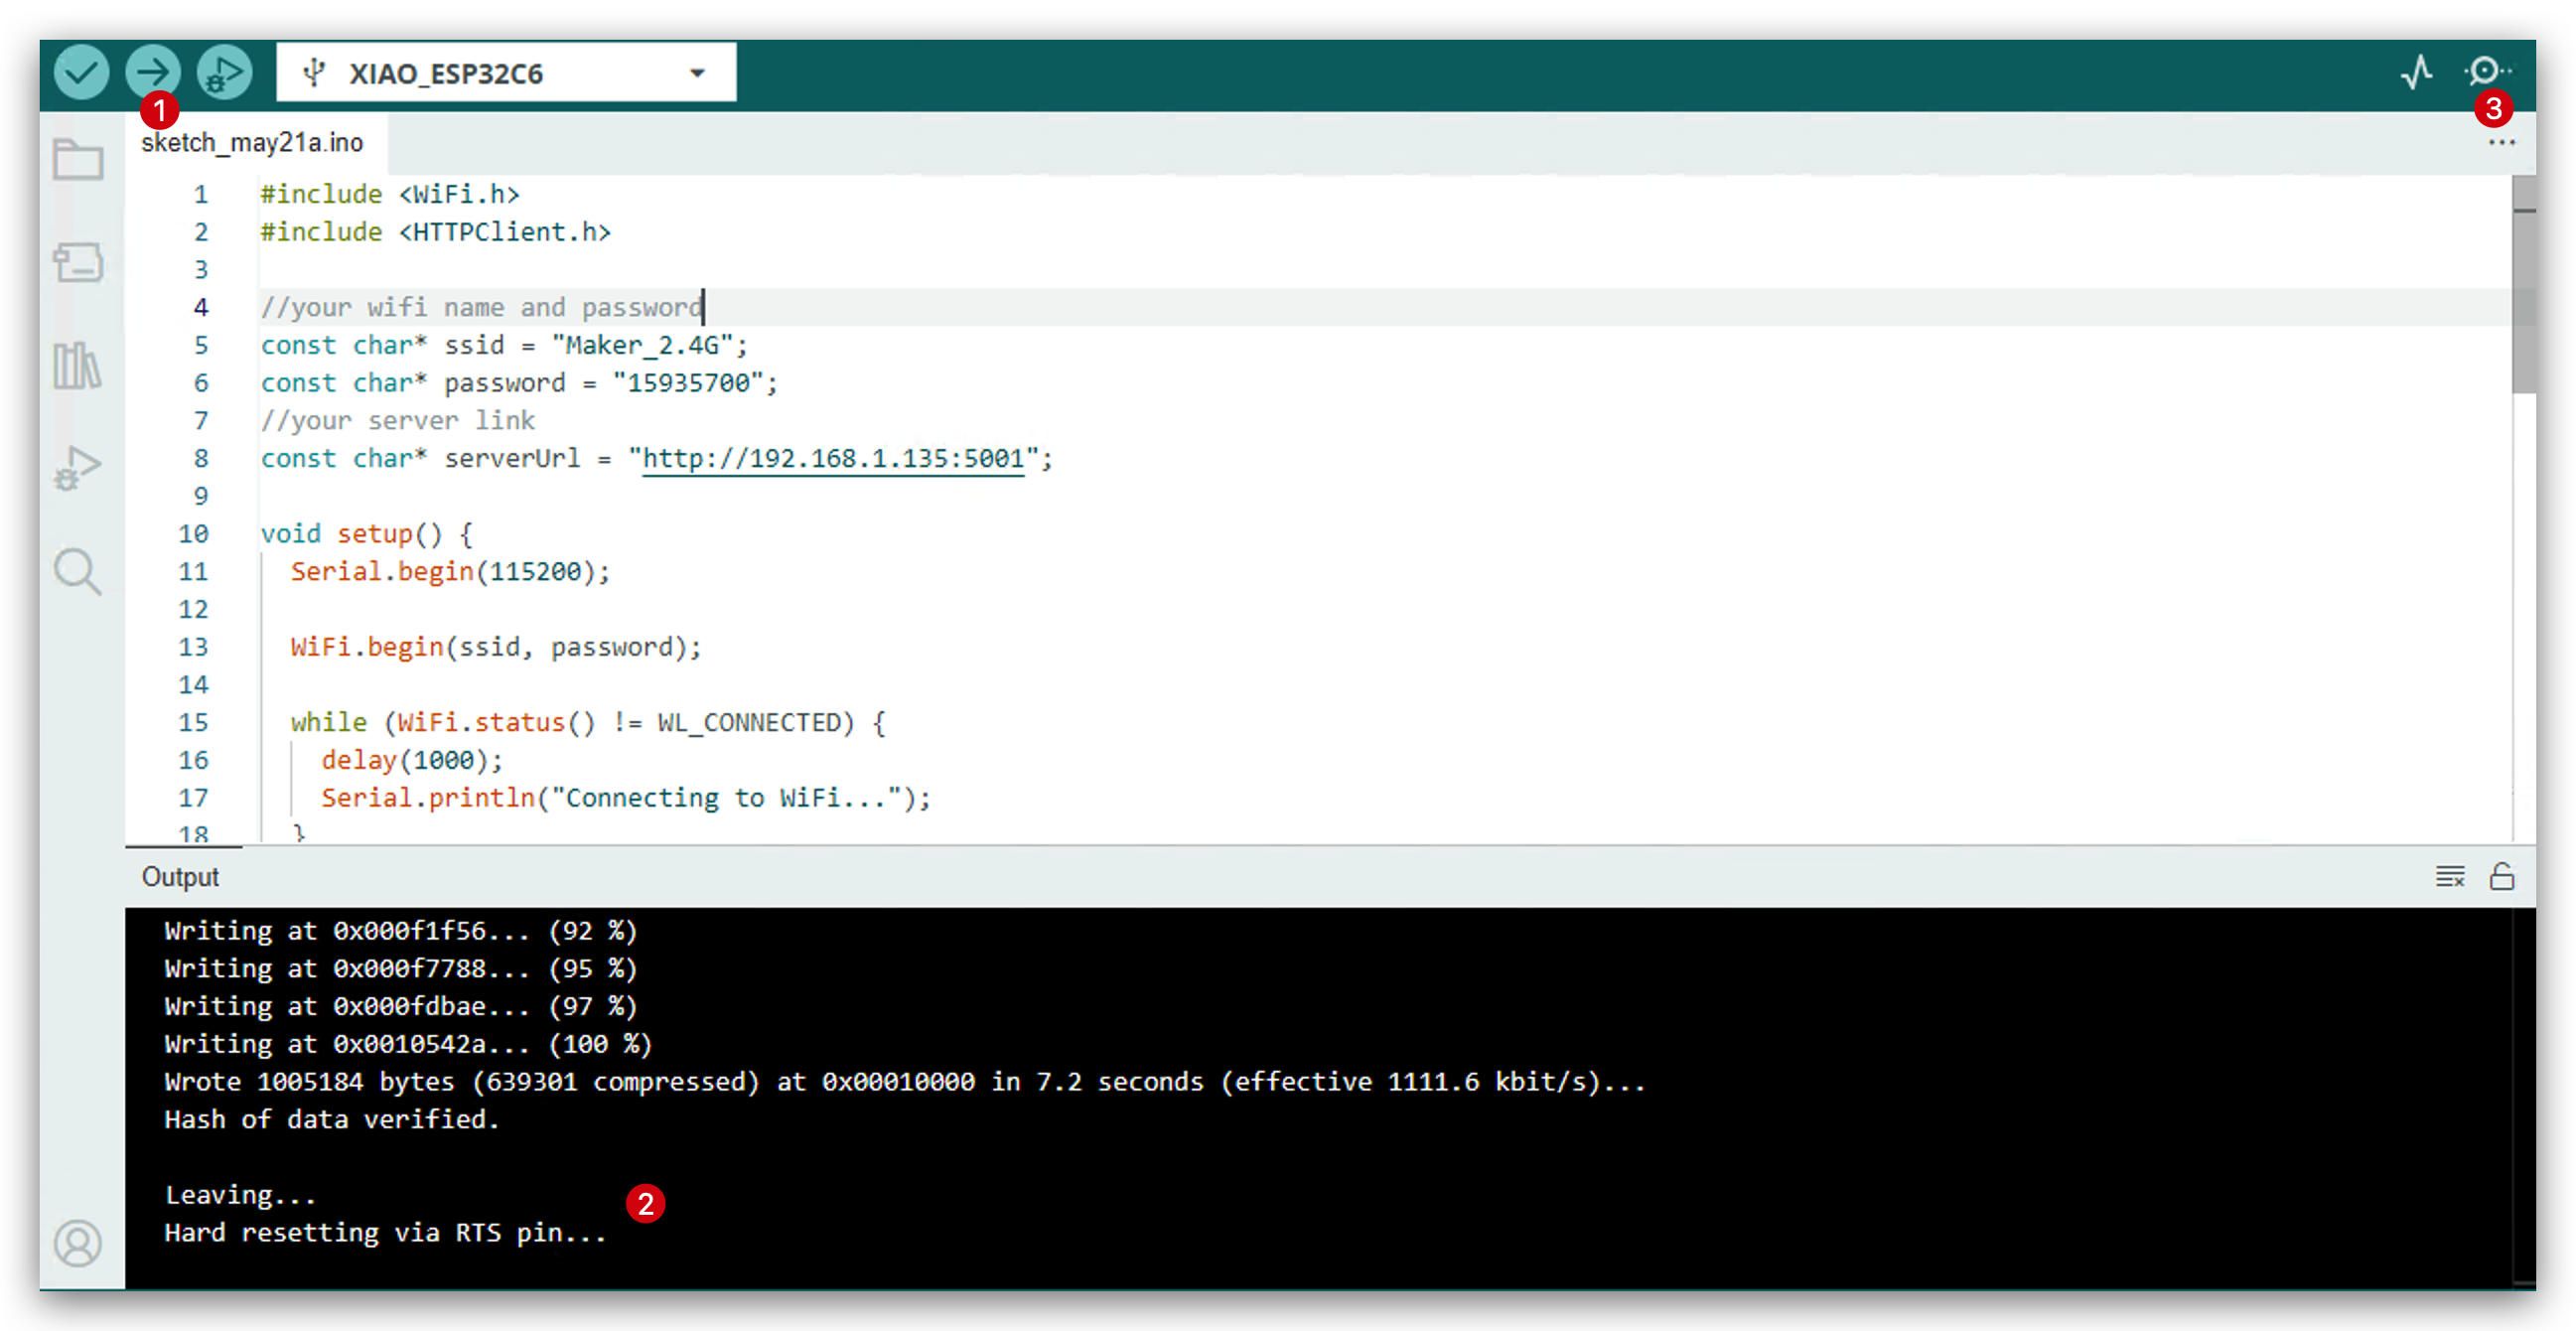
- Upload the code and open serial monitor.
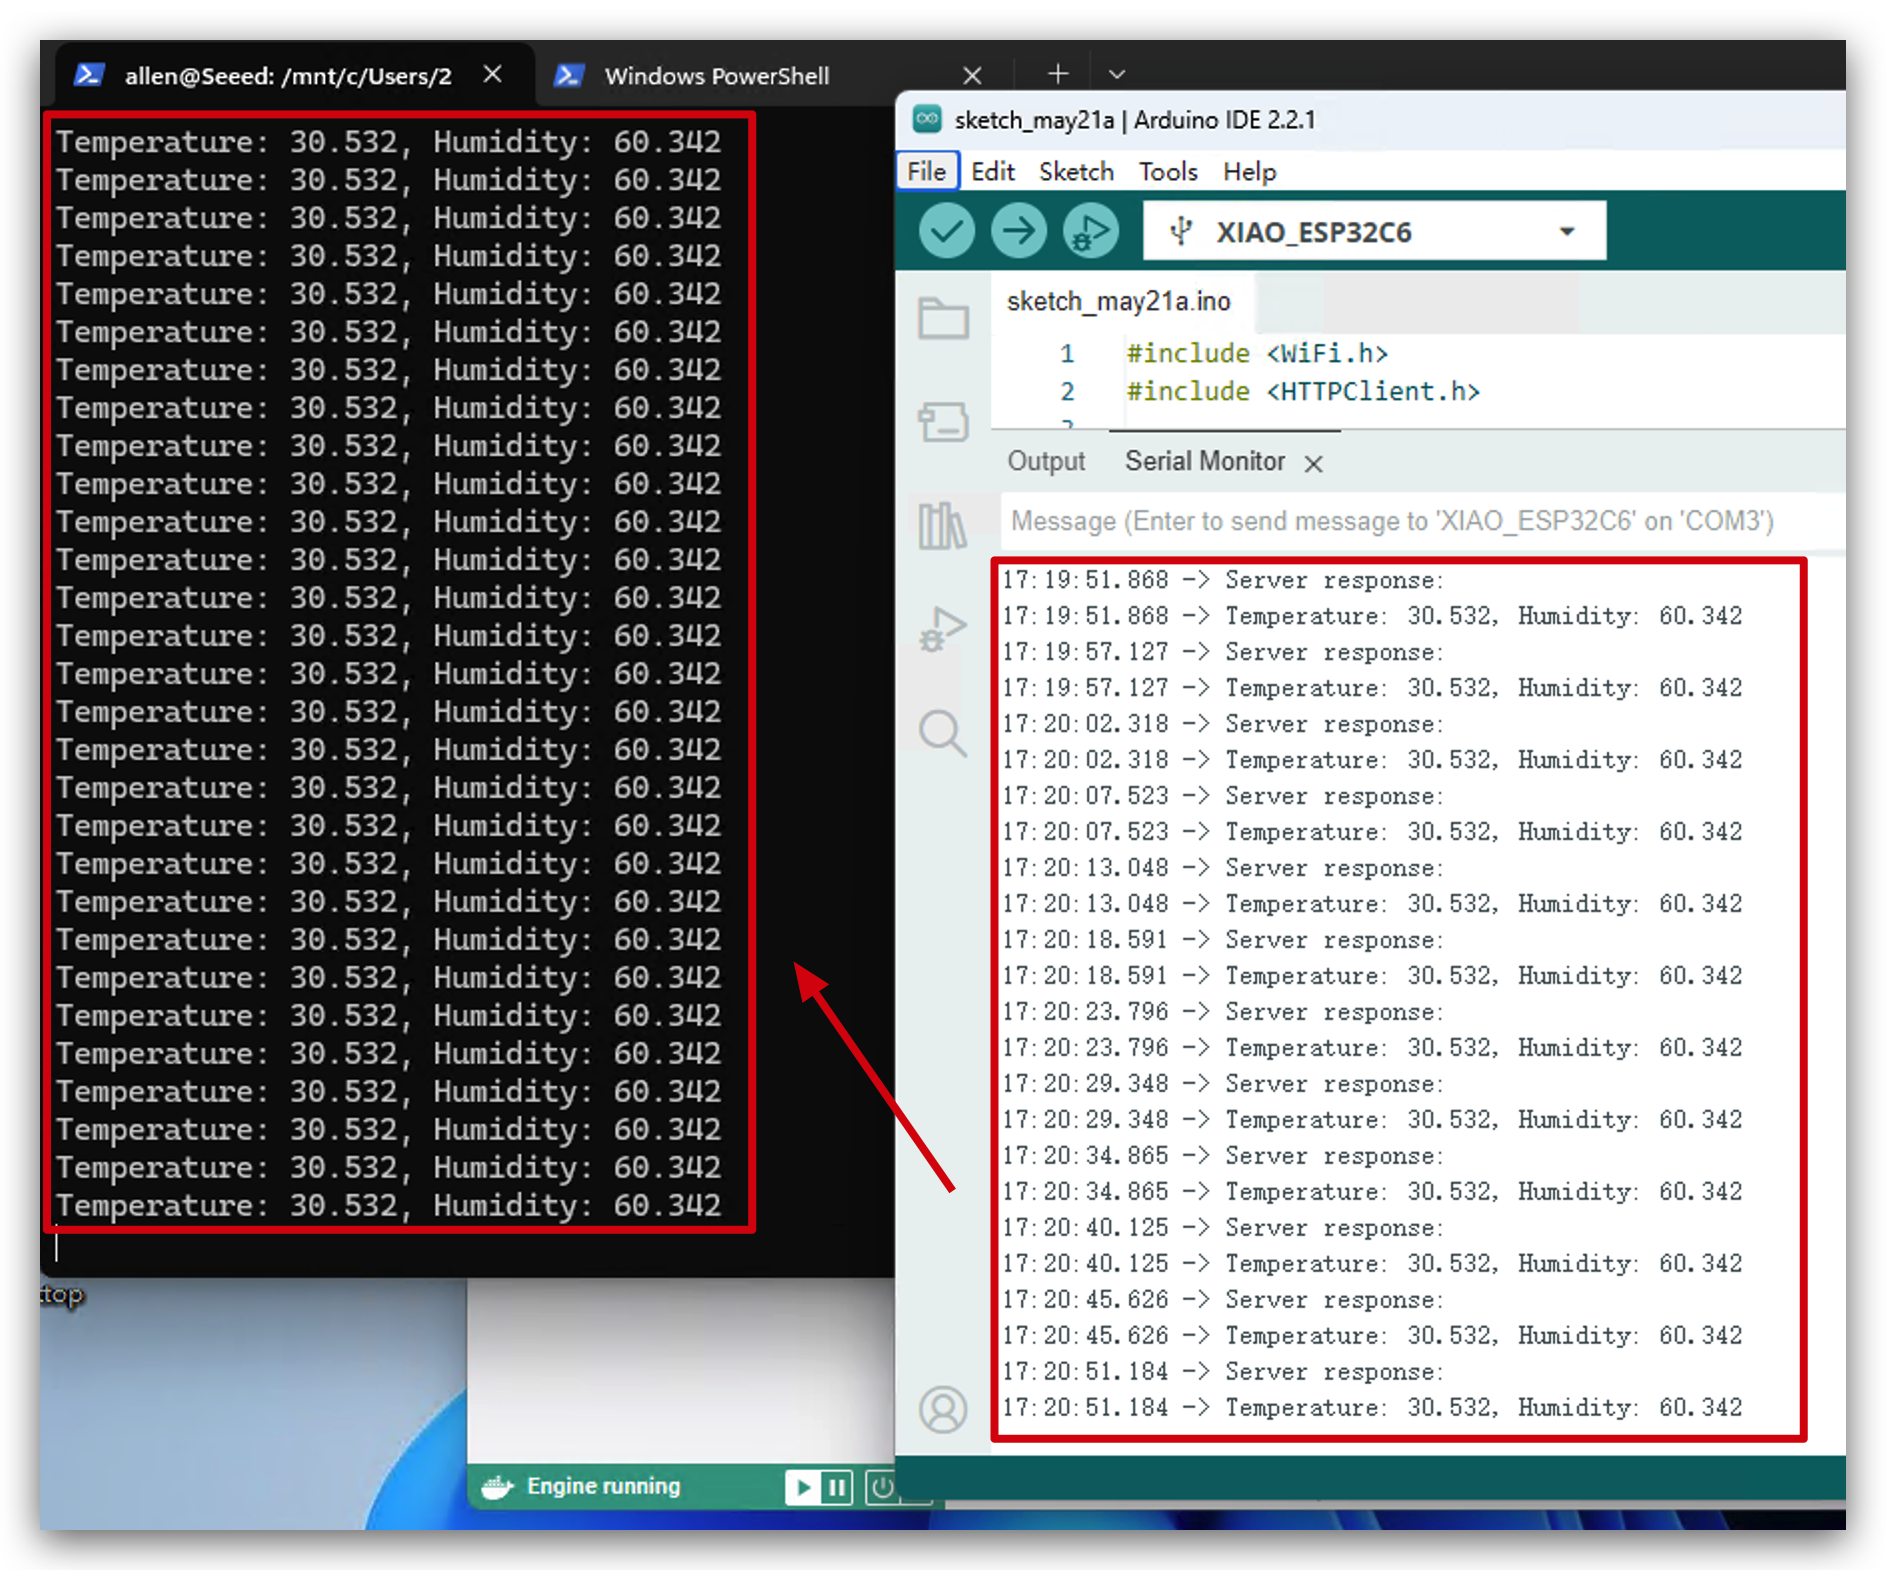
- Open your Windows PowerShell that running kafka. Now you will see enviroment data is sending to Kafka. Congratulations! You run this project successfully!
Resources
- [Link] Apache Kafka Introduction
Tech Support & Product Discussion
Thank you for choosing our products! We are here to provide you with different support to ensure that your experience with our products is as smooth as possible. We offer several communication channels to cater to different preferences and needs.