XIAO ESP32-S3 with MicroBlocks
MicroBlocks
MicroBlocks is a blocks-language that makes it easy for beginners (9 years to adults) to program microcontrollers. Yet in spite of its apparent simplicity, MicroBlocks is a powerful programming language with better performance than MicroPython; the ability to control GPIO pins and interface to peripherals via I2C, SPI, and serial; and nearly 200 extension libraries. In fact, some hardware designers prefer MicroBlocks for rapid prototyping and testing because of its fast, interactive development cycle.
XIAO ESP32S3 Pinout and Hardware Features
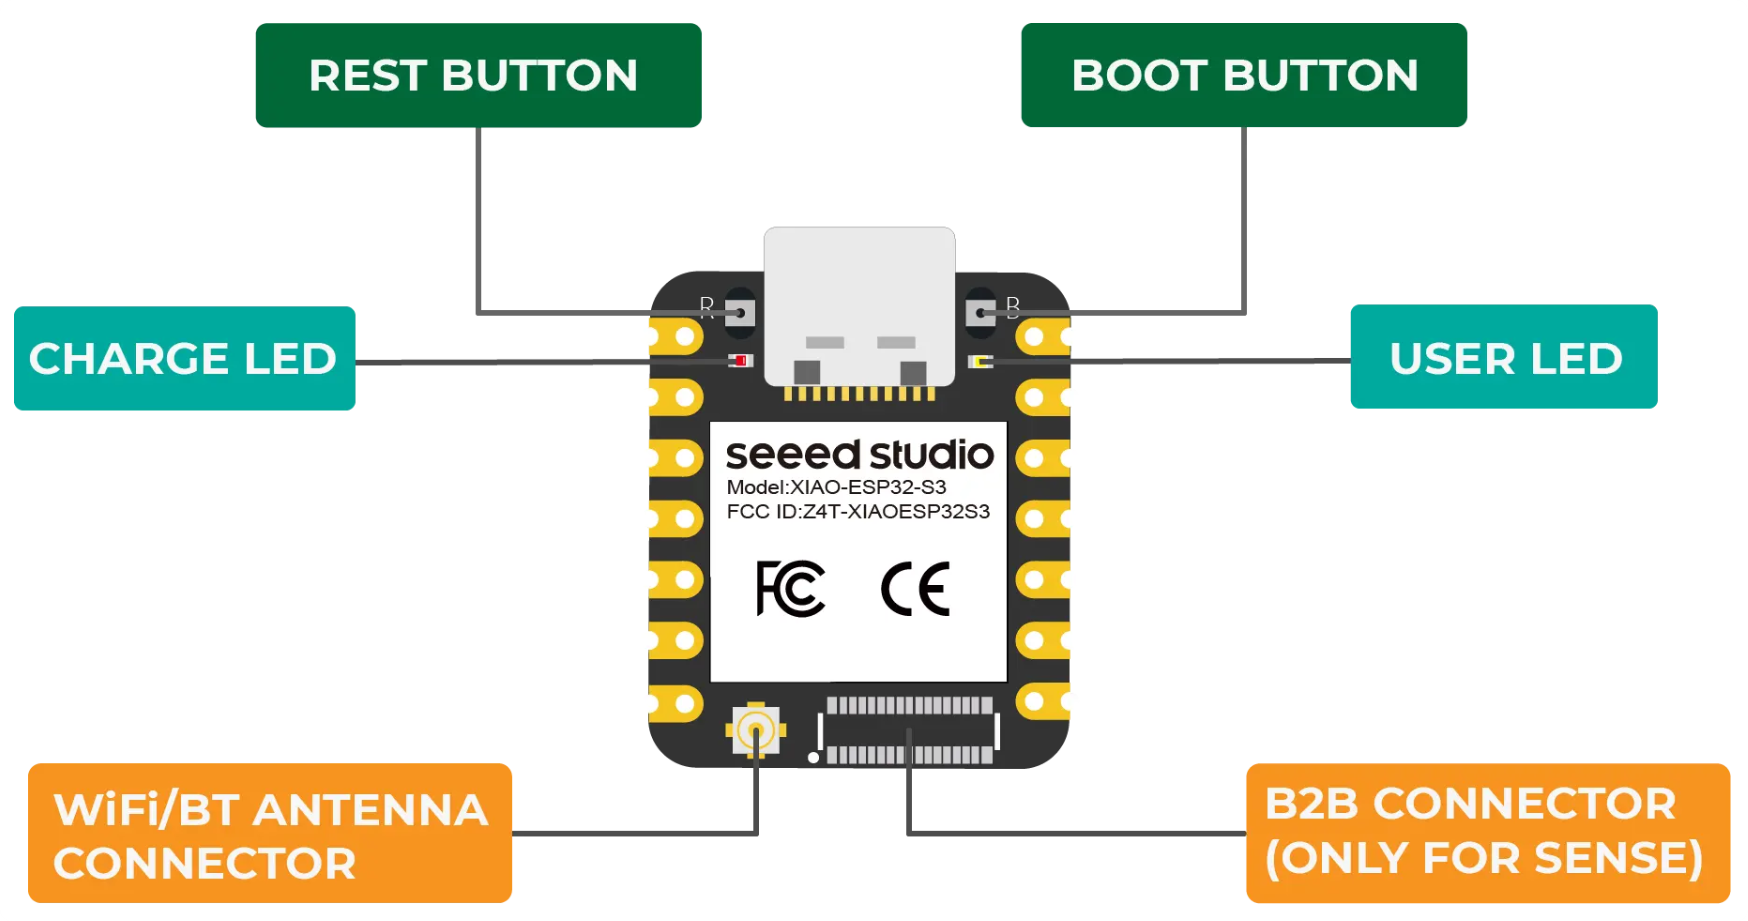
This board offers both Wi-Fi and BLE connectivity via an external antenna (provided).
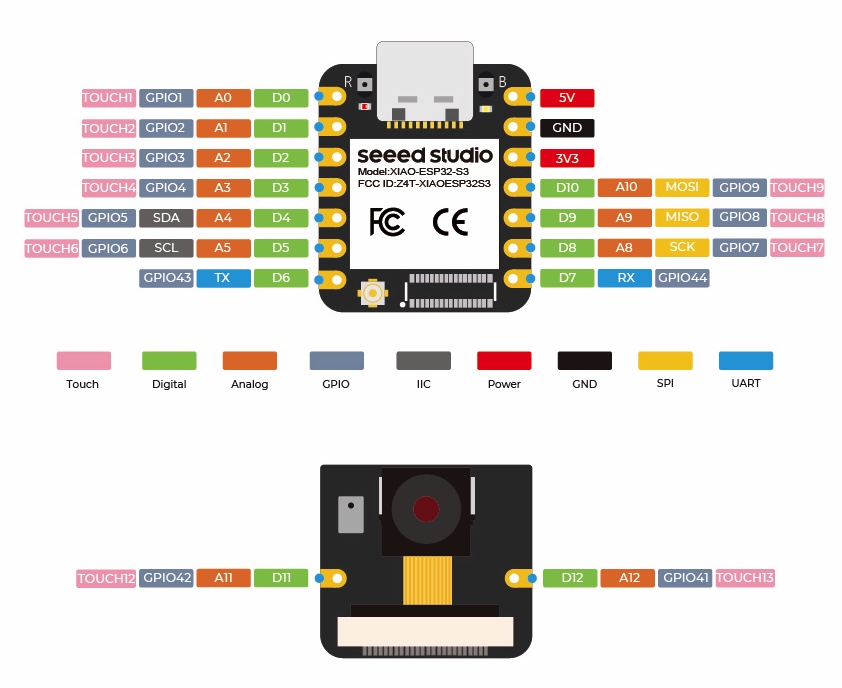
The board has 11 GPIO pins (pins 0..10). The Sense version has two extra GPIO pins on the camera board (pins 11..12). Pins 0..5 and 8..10 can be analog inputs.
Pin 13 is the yellow user LED (inverted).
The Sense version includes an extension board with a camera (either an OV2640 camera with 1600x1200 resolution or an OV3660 with 2048x1536 resolution) and a digital microphone.
Note: Camera support has not yet been implemented in MicroBlocks but may be added in the future.
Installing the MicroBlocks Firmware
The MicroBlocks firmware for this board can be installed directly from the MicroBlocks editor.
Connect the board to your computer with a data USB cable (not a power-only cable).
Run the MicroBlocks editor in a Chrome or Edge browser.
Enable "advanced mode" in the gear menu:
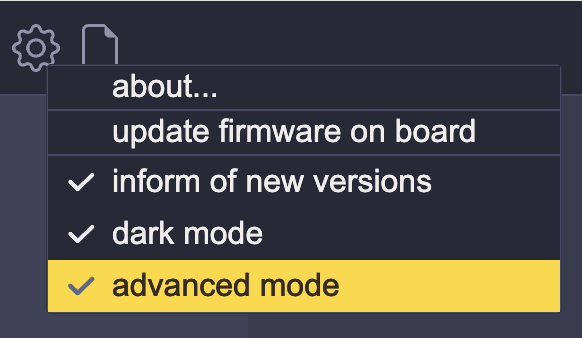
Select install ESP firmware from microblocks.fun from the expanded gear menu:

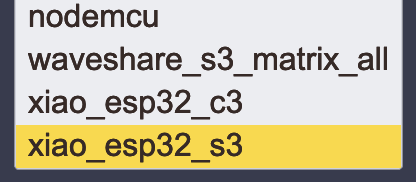
Select xiao esp32 s3:
When prompted, use the "Connect" button (plug icon) to open a USB connection to the board. When the firmware installation process begins, a progress indicator will appear:
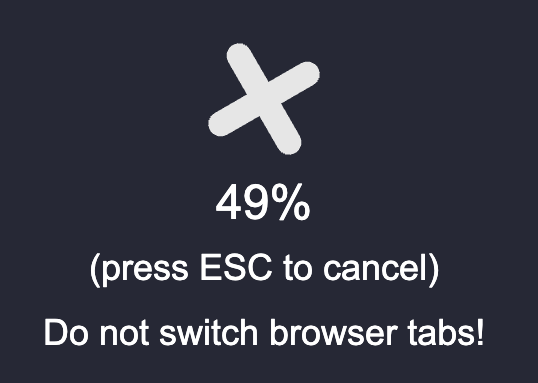
Firmware installation takes 30 to 60 seconds. Do not switch browser tabs until it is complete.
Once the firmware is installed, you can connect to the board to MicroBlocks and start coding!
Bootloader Mode
It is usually not necessary to manually enter bootloader mode when installing MicroBlocks firmware on ESP32 boards.
To enter bootloader mode, if needed, hold down the B (boot) button while pressing and releasing the R (reset) button. You can also connect the board to your computer while holding down the B button.
The tiny B and R buttons on either side of the USB connector are tricky; you may need to use your fingernail or a small tool to press them.
Connecting the board to MicroBlocks
Connect the board to your computer with a data USB cable (not a power-only cable).
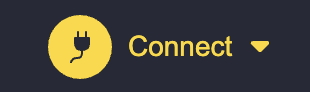
Run the MicroBlocks editor in a Chrome or Edge browser. Click the connect (plug icon) button:
Select connect (USB) from the menu:
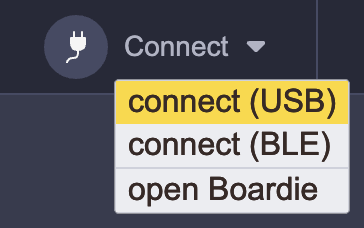
Note: You can also connect wirelessly by selecting connect (BLE) in the connect menu.
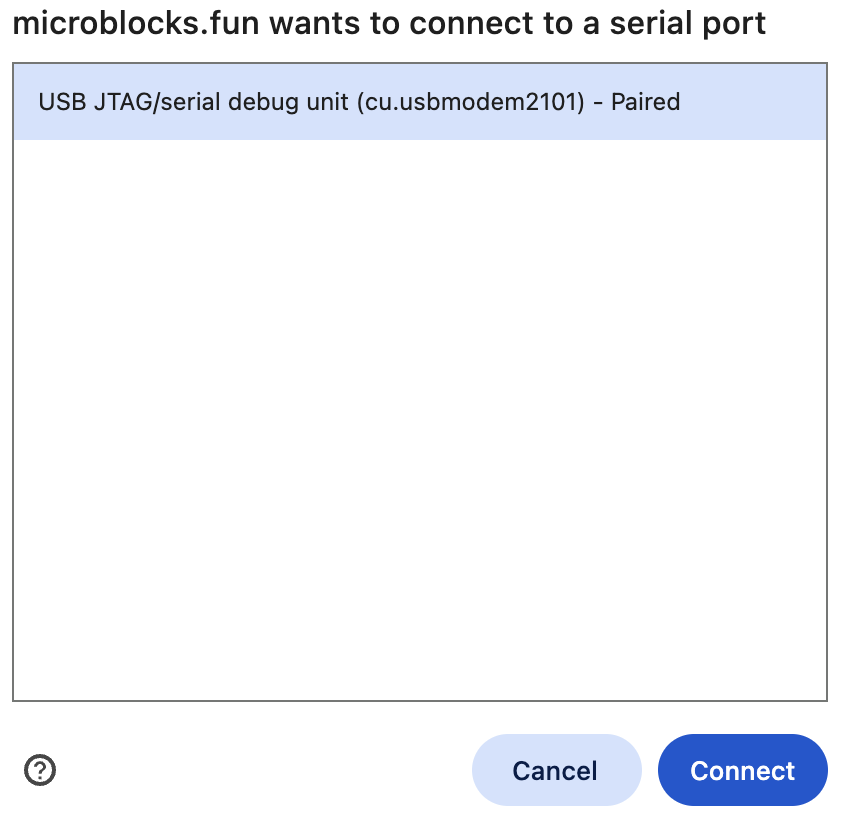
Select your board from the dialog and click the connect button:
A green circle and the board name will appear when the board is connected:
Coding in MicroBlocks
MicroBlocks is a live coding environment so you can test as you code. Click on blocks and scripts to run them. Drag blocks into the scripting pane and assemble them to create scripts.
Your code is stored in persistent flash memory and can run even when the board is not connected to the MicroBlocks editor. Scripts under a when started block run when the board is powered.
MicroBlocks supports concurrency. Up to ten scripts can run at the same time.
In addition to its many built-in blocks, MicroBlocks has nearly 200 libraries that support additional features and peripherals. Click the Add Library button to add libraries.
Example
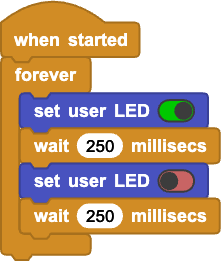
This script will blink the yellow user LED:
The Blocks Reference includes many additional examples.
Project Demo
For a more comprehensive demonstration, maker Zeller has created a Mood Player using the XIAO ESP32S3, XIAO Expansion Board, along with Grove Speaker and Grove Button accessories. With MicroBlocks, you can create your favorite patterns and music without writing complex code. A step-by-step tutorial with detailed instructions can be found on Hackster.
Special Thanks
Special thanks to John at MicroBlocks for writing the article.