Project Overview
This wiki has been updated: https://wiki.seeedstudio.com/xiao_esp32s3_with_micropython/
CircuitPython is an ideal programming language for XIAO ESP32S3 as it simplifies physical computing projects. Based on Python, it has beginner-friendly syntax and includes modules for accessing hardware like sensors and displays. Since CircuitPython already supports the ESP32S3 chip, this project attempts to compile CircuitPython on Seeed Studio XIAO ESP32S3 Board.
XIAO ESP32S3 with OLED Display
Hardware Preparation
I am using Seeed Studio XIAO ESPS3 and Seeed Studio Grove OLED Display 0.96 as the hardware here.
| Seeed Studio XIAO ESP32S3 | Seeed Studio Grove OLED Display 0.96 |
|---|---|
 |  |
Software Preparation
I am using Thonny IDE software(Windows) and some related libraries and files.
| Thonny IDE | related files(libraries) |
|---|---|
Getting Started
Download XIAO ESP32S3 Circuitpython Firmware
Circuitpython Firmwares 9.1.1 and 9.20 Alpha for XIAO ESP32S3 Sense
Connect the XIAO ESP32S3 board to PC under the BootLoader Mode
The specific method is:
-
Step 1. Press and hold the BOOT button on the XIAO ESP32S3 without releasing it.
-
Step 2. Keep the BOOT button pressed and then connect to the computer via the data cable. Release the BOOT button after connecting to the computer.
-
Step 3. Upload the Blink program to check the operation of the XIAO ESP32S3.
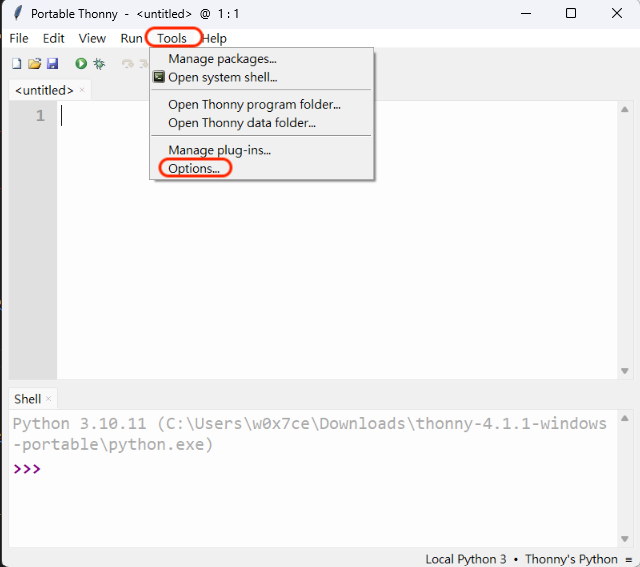
Open Thonny and Configure the options
- After running Thonny, navigate "Tools -> Options" and click the "Options" selection
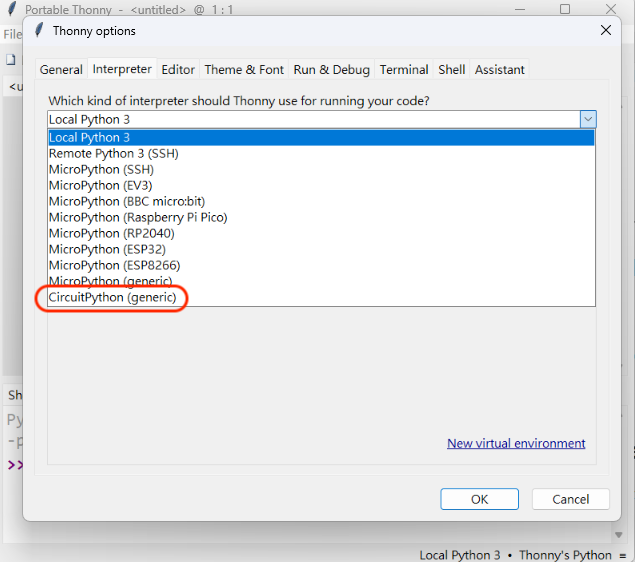
- Select "Interpreter" option and click the "CircuitPython (generic)" selection
Flash CircuitPython firmware to the XIAO ESP32S3 board
- Click on "(esptool)" in Thonny. It will prompt you to download the latest CircuitPython firmware and flash it to the board.
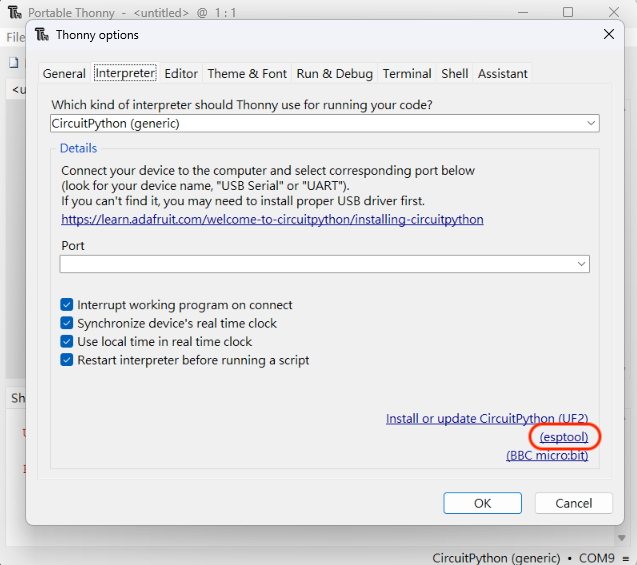
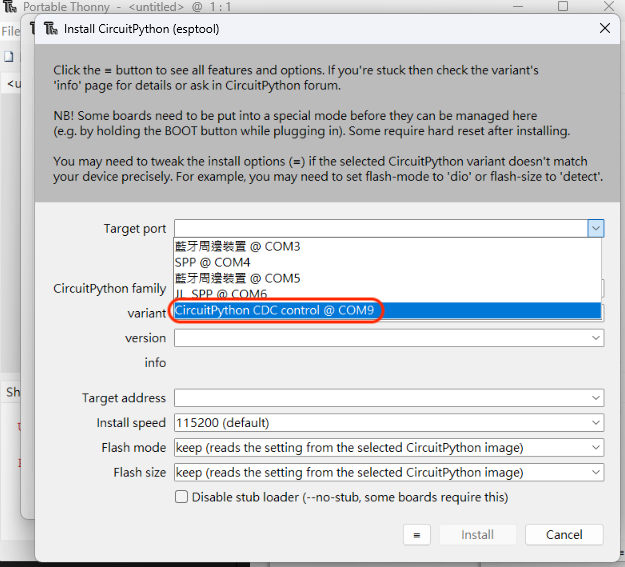
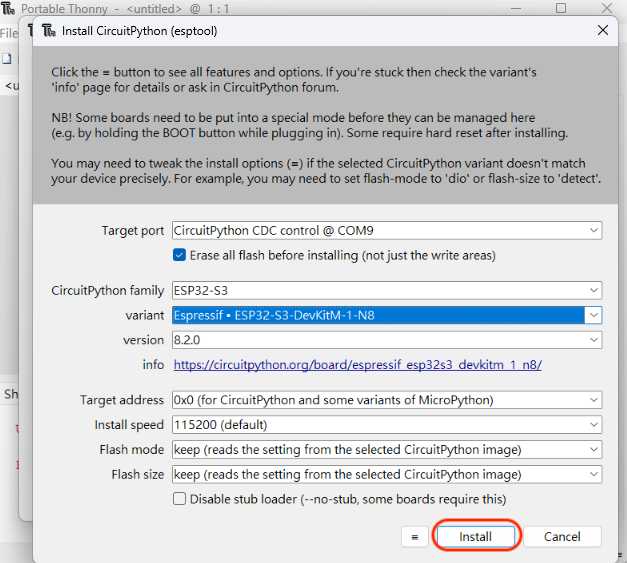
- The "(esptool)" in Thonny is shown like below and fisrtly choose the right "Target port".
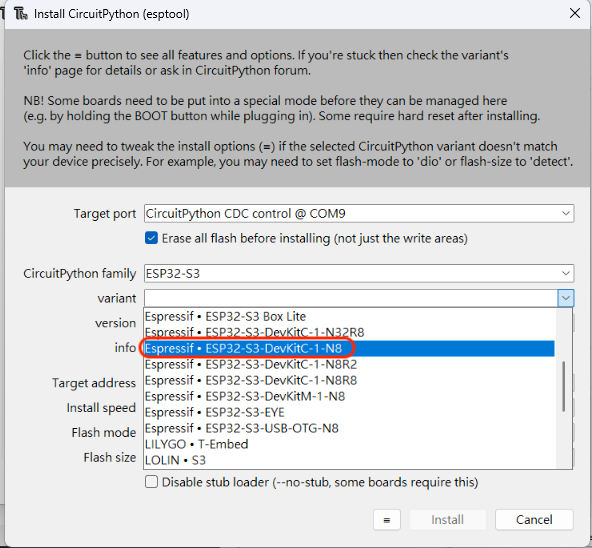
- Select the CircuitPython family as "ESP32-S3" and Select the icon with the three horizontal lines next to the install button, to include the Firmware you downloaded. Eg. (seeed_xiao_esp32s3_911.bin or seeed_xiao_esp32s3_920.bin)
- Thonny will fill the reset and you can click the "Install" now.
- After a while showing "Done", the window can be closed.
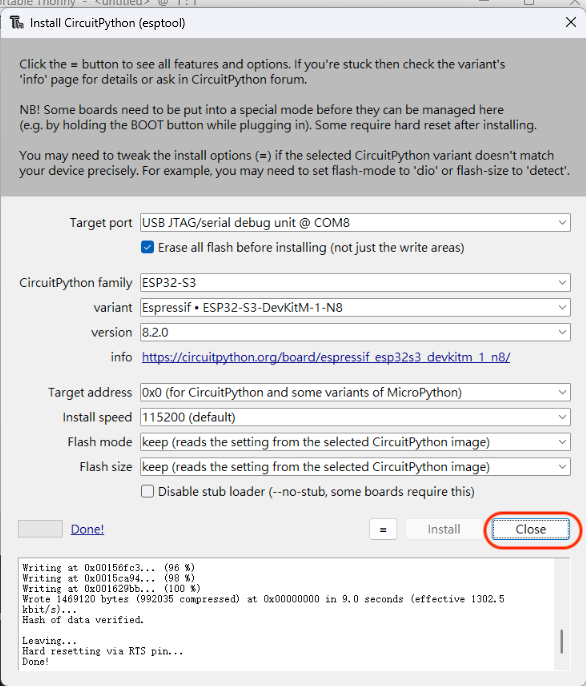
- There will be a "CIRCUITPY" driver on the PC, which shows the board has successfully been flashed.
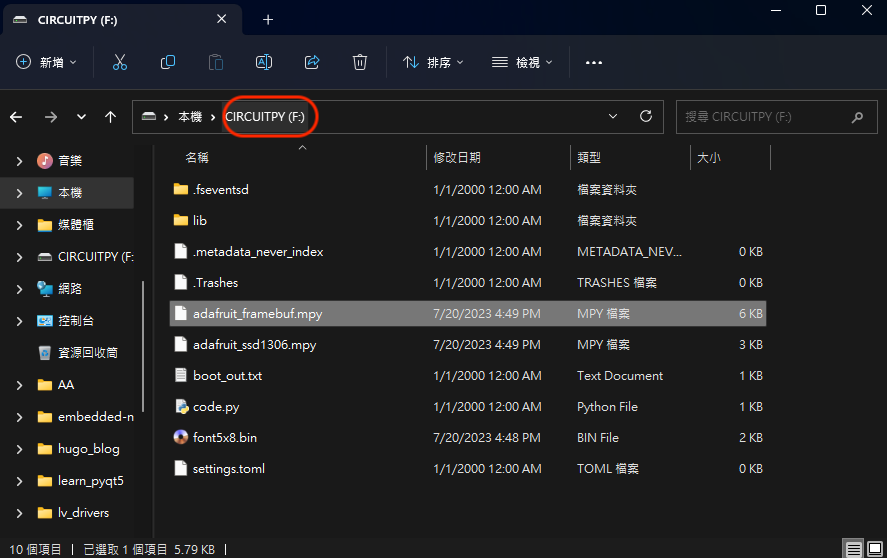
Add the related files(libraries) to the "CIRCUITPY" driver
Copy all the files from the related files(library) to the "CIRCUITPY" driver.
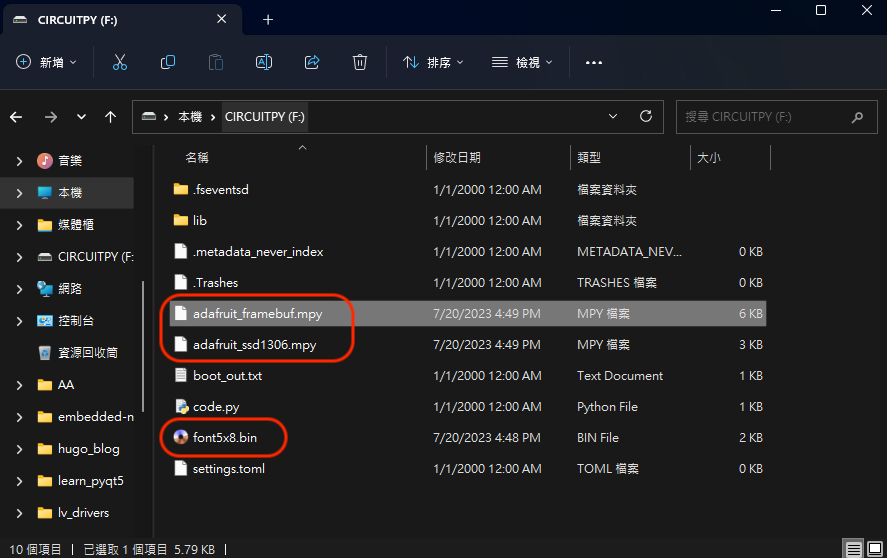
The "adafruit_ssd1306.mpy" file and "adafruit_framebuf.mpy" file are necessary while using "Seeed Studio Grove OLED Display 0.96"
The adafruit_framebuf library uses a font file named font5x8.bin to render text. This file needs to be accessible within the environment where your code is executed.
Write code(IIC) and upload to achieve OLED display
- After adding the files, I can now import the adafruit_ssd1306 library into the code using the command import adafruit_ssd1306 and the environment is now configured to drive the OLED display. The code is shown below:
from board import *
from busio import I2C
import busio
import adafruit_ssd1306
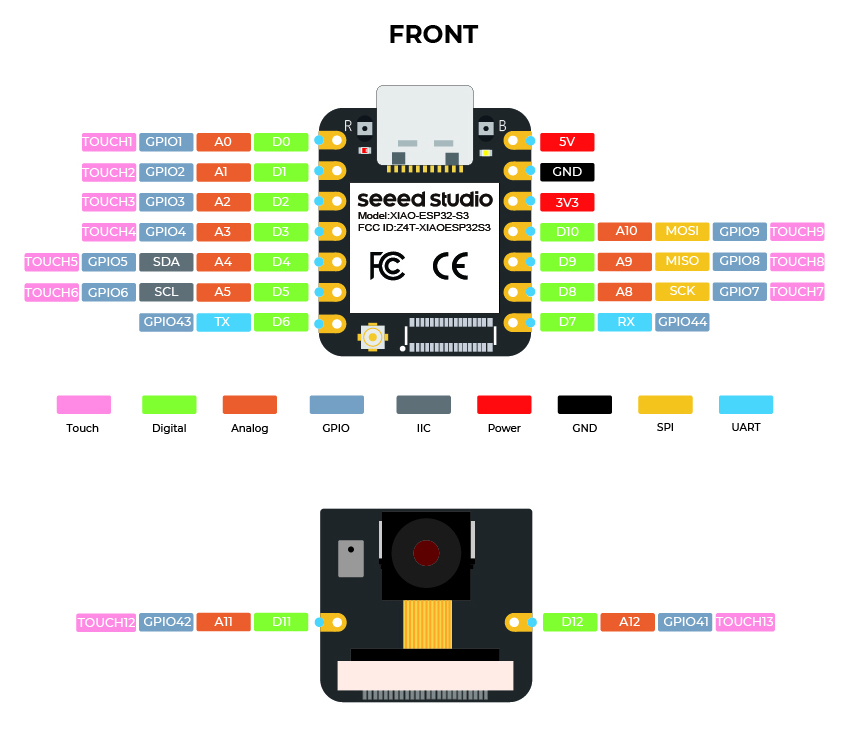
i2c = I2C(IO6,IO5) # Initialize I2C communication using IO6 and IO5 pins
# Create a display object with 128x64 resolution and an I2C address of 0x3C
display = adafruit_ssd1306.SSD1306_I2C(128, 64, i2c, addr=0x3C)
# Clear the display
display.fill(0)
display.show()
# Write text on the display
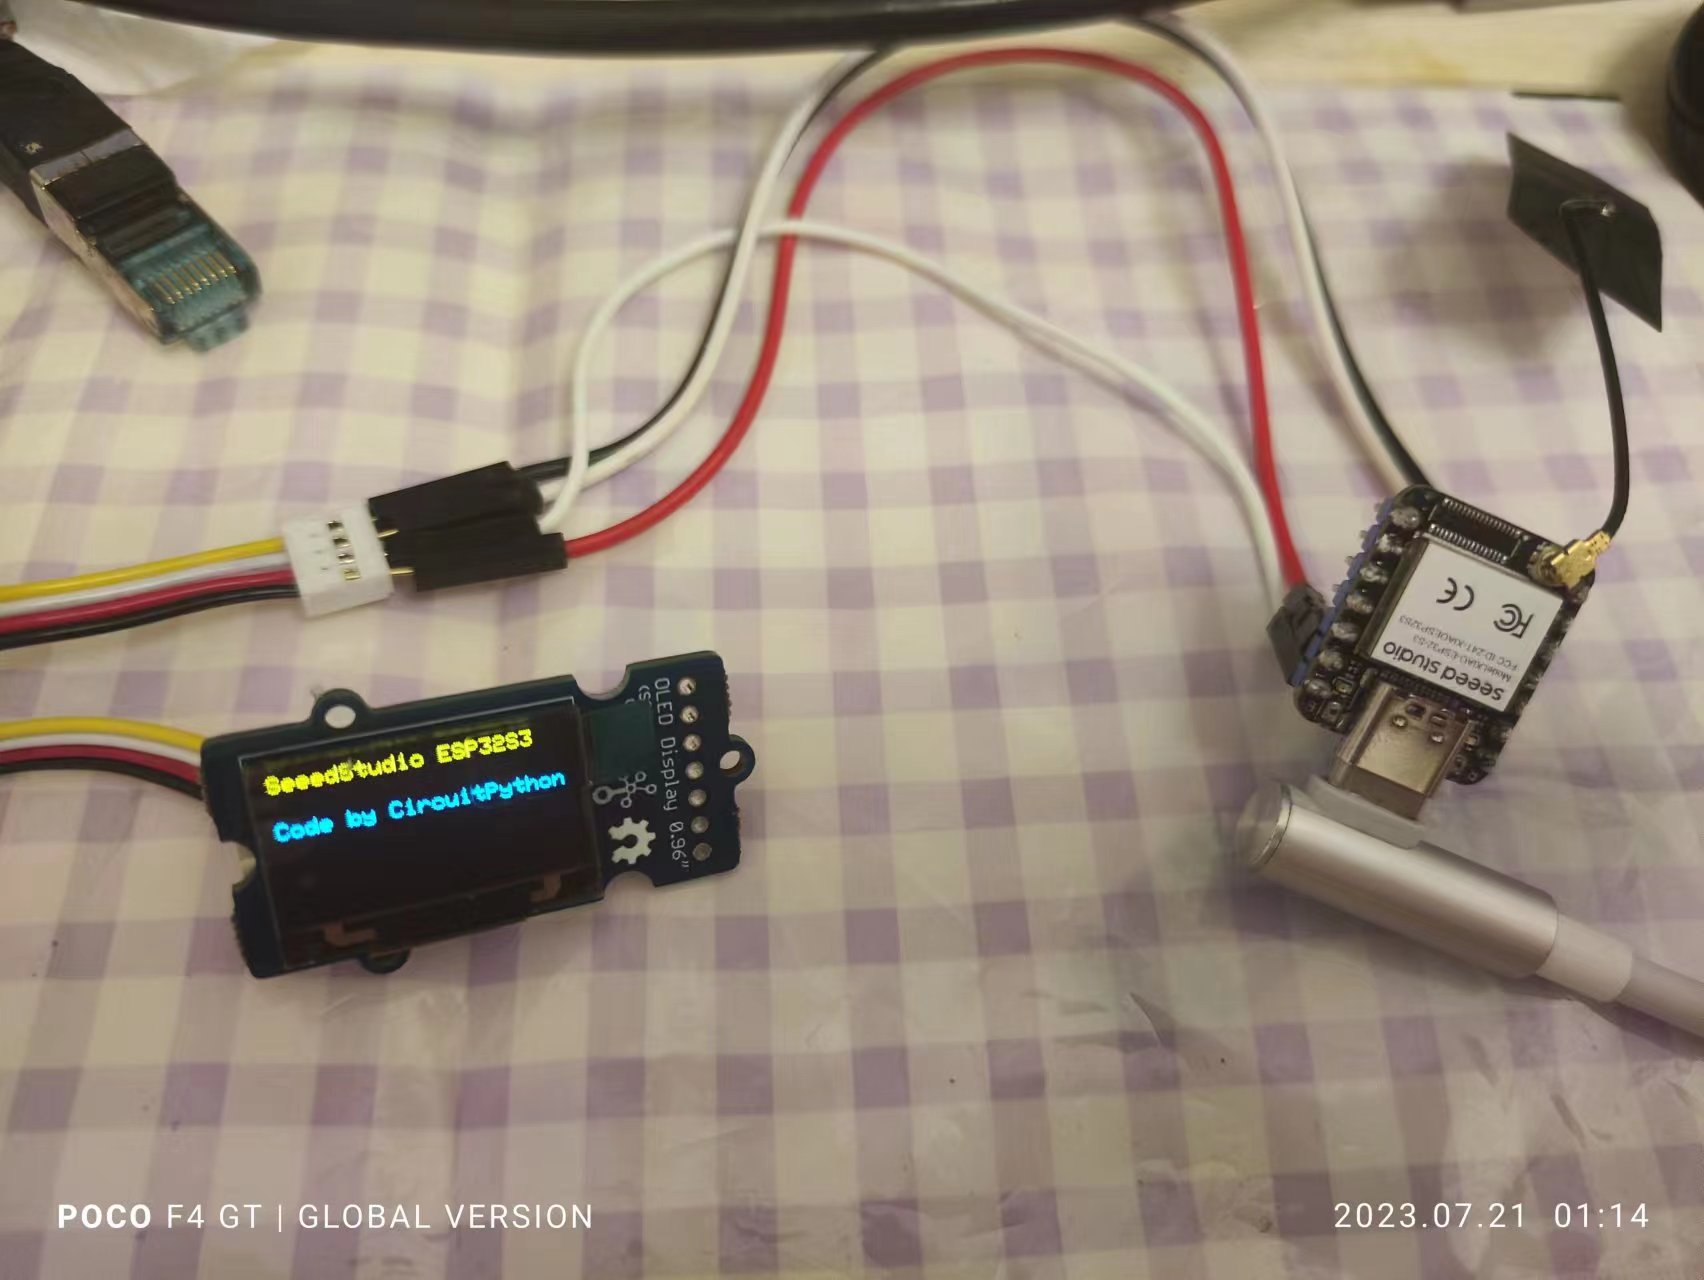
display.text('SeeedStudio ESP32S3', 0, 0 , 1)
display.text('Code by CircuitPython!', 0, 20 , 2)
display.show()
- Upload the code by clicking the "Run" buttion
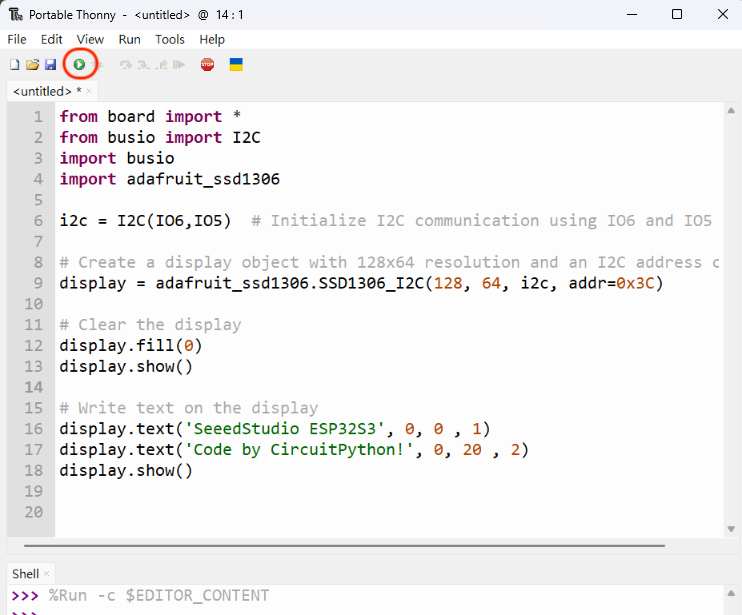
- The final result
XIAO ESP32S3 Sense with Using XIAO Round Display with Sense Camera
Hardware Preparation
| Seeed Studio XIAO ESP32S3 Sense | Round Display for XIAO |
|---|---|
 | 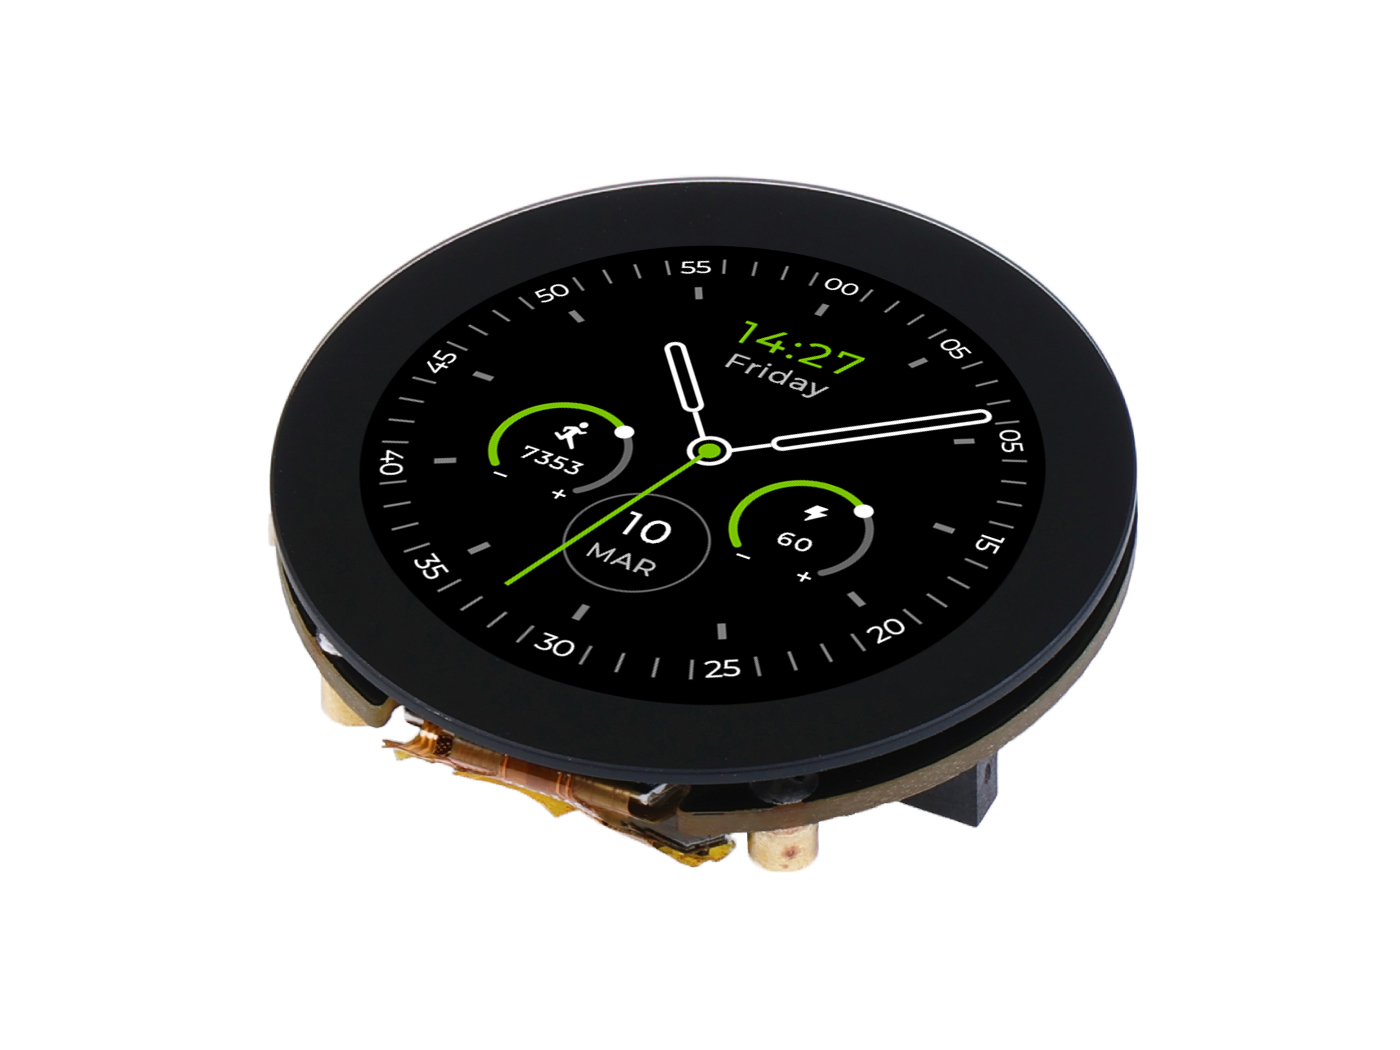 |
Software Preparation
- Install firmware to XIAO ESP32S3 Sense.
| Firmware |
|---|
- Install necessary modules and dependencies.
You allways could install CircuitPython libraries using the tool circup, from Adafruit. When installed, you just type to install any libraries.
# install circup
pip install setuptools
pip install circup
pip install --upgrade circup
# install module to library
circup install gc9a01 adafruit_ticks
Getting Started
After install all libraries, needed, just type the code to code.py or main.py to CIRCIUTPY, bellow to see Camera Frame at Round Display.
import board
import busio
import displayio
import espcamera
import adafruit_ticks
import gc9a01
import struct

i2c = busio.I2C(board.SCL, board.SDA)
spi = busio.SPI(clock=board.SCK, MOSI=board.MOSI)
cam_i2c = busio.I2C(board.CAM_SCL, board.CAM_SDA)

tft_dc  = board.D3
tft_cs  = board.D1
tft_bl  = board.D6

display_bus = displayio.FourWire(spi, command=tft_dc, chip_select=tft_cs)
display = gc9a01.GC9A01(display_bus, width=240, height=240, rotation=0)

# Appears that this example does not use Displayio at all
# print frame directly on display_bus to be faster
# so, rotation setting not works...

main = displayio.Group()
display.root_group = main

# Camera Init
cam = espcamera.Camera(
    data_pins=board.CAM_DATA,
    external_clock_pin=board.CAM_XCLK,
    pixel_clock_pin=board.CAM_PCLK,
    vsync_pin=board.CAM_VSYNC,
    href_pin=board.CAM_HREF,
    pixel_format=espcamera.PixelFormat.RGB565,
    frame_size=espcamera.FrameSize.R240X240,
    i2c=cam_i2c,
    external_clock_frequency=20_000_000,
    framebuffer_count=2,
    grab_mode=espcamera.GrabMode.WHEN_EMPTY)

# Sending init bytes to display_bus
display_bus.send(36, struct.pack(">hh", 0, 239))
display_bus.send(42, struct.pack(">hh", 0, 239))
display_bus.send(43, struct.pack(">hh", 0, 80+239))
display.auto_refresh = False

t0 = adafruit_ticks.ticks_ms()

while True:
    frame = cam.take(1)
    if isinstance(frame, displayio.Bitmap):
        display_bus.send(44, frame)
        t1 = adafruit_ticks.ticks_ms()
        fps = 1000 / adafruit_ticks.ticks_diff(t1, t0)
        print(f"{fps:3.1f}fps")  # typically runs at about 25fps
        t0 = t1
What's more
- The related files are all from the assembled Adafruit CircuitPython library bundle form https://circuitpython.org/libraries and you can find all the supported hardware files using CircuitPython.
- The "font5x8.bin" file is from here
- Firmware for Round Display and camera
✨ Contributor Project
- This project is supported by the Seeed Studio Contributor Project.
- Thanks Isaac's efforts and your work will be exhibited.
- And Djair Guilherme.
Tech Support & Product Discussion
Thank you for choosing our products! We are here to provide you with different support to ensure that your experience with our products is as smooth as possible. We offer several communication channels to cater to different preferences and needs.