XIAO nRF54L15 with PlatformIO

PlatformIO Introduce
PlatformIO stands as a powerful and highly extensible development ecosystem designed for embedded systems. It seamlessly integrates support for a vast array of development boards and microcontrollers, offering unparalleled flexibility. What sets PlatformIO apart is its remarkable scalability: even if your specific board isn't natively supported, its architecture allows for straightforward custom board definitions.
Crucially, PlatformIO bridges the gap for developers familiar with Arduino, enabling the compilation and deployment of Arduino-style code by simply including the relevant libraries. This guide will walk you through the process of setting up PlatformIO for your XIAO nRF54L15 and demonstrate how to compile, upload, and monitor sample code, making complex Zephyr RTOS development remarkably accessible.
Setting Up PlatformIO for XIAO nRF54L15
Follow these streamlined steps to configure your development environment and deploy your first application on the XIAO nRF54L15 Sense.
Install PlatformIO IDE Extension for VS Code
If you haven't already, install the PlatformIO IDE extension directly within Visual Studio Code. This powerful extension transforms VS Code into a comprehensive embedded development environment.
-
Open VS Code.
-
Go to the Extensions view (Ctrl+Shift+X or Cmd+Shift+X).
-
Search for "PlatformIO IDE" and click Install.
Create a New PlatformIO Project
Here you can choose any one of the development version to create a project file, I take XIAO ESP32 C3 for example.
| Operation one | Operation two |
|---|---|
 |  |
Configure platformio.ini for XIAO nRF54L15 Zephyr Support
Once your project is created, locate the platformio.ini file in the root of your project directory (visible in the VS Code Explorer on the left). This file is the heart of your PlatformIO project configuration.

| Operation three |
|---|
You need to replace the entire content of your platformio.ini file with the following configuration:
[env:seeed-xiao-nrf54l15]
platform = https://github.com/Seeed-Studio/platform-seeedboards.git
framework = zephyr
board = seeed-xiao-nrf54l15
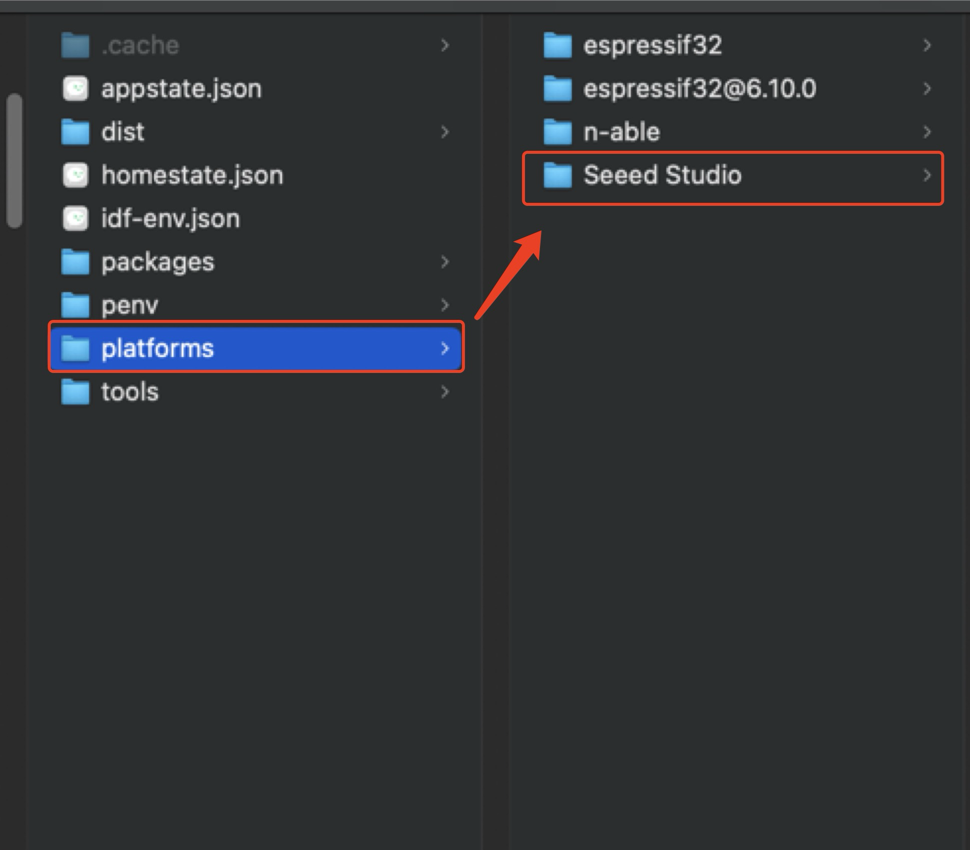
If you previously downloaded other XIAO libraries, you must manually delete them before modifying the platform.ini file and re-downloading the required libraries.
Mac Path:
/Users/YourName/.platformio/platforms
Window Path:
C:\Users\000.platformio\platforms\Seeed Studio
| Operation four |
|---|
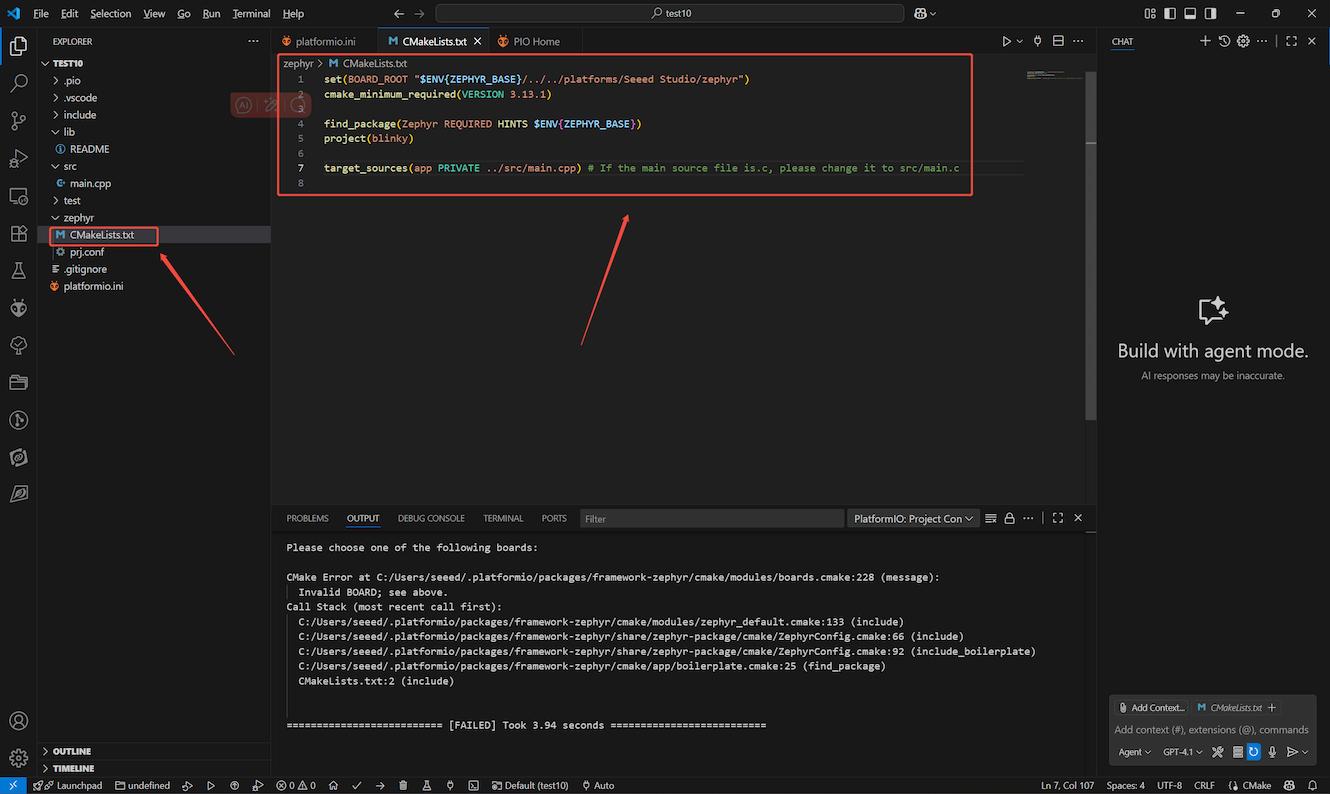
You need to replace the content of cMakeLists.txt with the following configuration
set(BOARD_ROOT "$ENV{ZEPHYR_BASE}/../../platforms/Seeed Studio/zephyr")
cmake_minimum_required(VERSION 3.13.1)

find_package(Zephyr REQUIRED HINTS $ENV{ZEPHYR_BASE})
project(blinky)

target_sources(app PRIVATE ../src/main.cpp) # If the main source file is.c, please change it to src/main.c
Then re-save the platformio.ini file (Ctrl+S or Cmd+S) and wait for it to load completely.
Compile and Upload Your First Blink Example
Now, let's test your setup with a classic "Blink" example. This code will toggle the built-in LED on your XIAO nRF54L15.
Replace the content of your src/main.cpp (or src/main.c) file with the following Zephyr-compatible C code:
Next we compile and burn using this code
/*
 * Copyright (c) 2016 Intel Corporation
 *
 * SPDX-License-Identifier: Apache-2.0
 */

 #include <zephyr/kernel.h>
 #include <zephyr/device.h>
 #include <zephyr/drivers/gpio.h>
 #include <nrfx_power.h>

 /* 1000 msec = 1 sec */
 #define SLEEP_TIME_MS   1000

 /* The devicetree node identifier for the "led0" alias. */
 #define LED0_NODE DT_ALIAS(led0)

 static const struct gpio_dt_spec led = GPIO_DT_SPEC_GET(LED0_NODE, gpios);

 int main(void)
 {
	 int ret;
	 bool led_is_on = true;
	nrfx_power_constlat_mode_request();
	 if (!gpio_is_ready_dt(&led)) {
		 return -1;
	 }

	 ret = gpio_pin_configure_dt(&led, GPIO_OUTPUT_ACTIVE);
	 if (ret < 0) {
		 return ret;
	 }

	 while (1) {
		 ret = gpio_pin_set_dt(&led, (int)led_is_on);
		 if (ret < 0) {
			 return ret;
		 }
		 led_is_on = !led_is_on;
		 k_msleep(SLEEP_TIME_MS);
	 }

	 return 0;
 }
Now, connect your XIAO nRF54L15 to your computer via USB. In VS Code:
-
Build: Click the "Build" icon (checkmark) in the PlatformIO toolbar at the bottom of VS Code, or use the PlatformIO sidebar: PROJECT TASKS -> your_project_name -> General -> Build.
-
Upload: After a successful build, click the "Upload" icon (right arrow) in the PlatformIO toolbar, or use the PlatformIO sidebar: PROJECT TASKS -> your_project_name -> General -> Upload.
| Operation five |
|---|
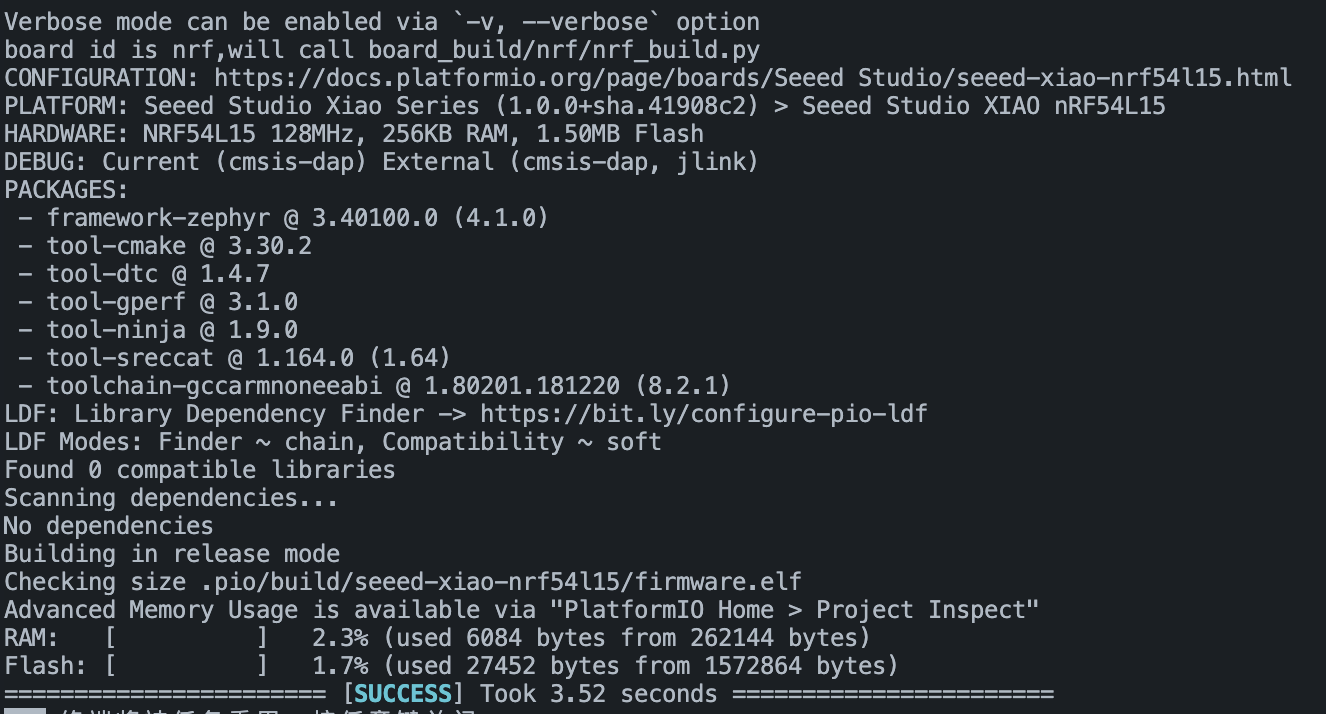
The output in the terminal should indicate a successful compilation and burning process.
Observe the Result
After a successful upload, your XIAO nRF54L15's built-in LED should begin blinking at a 1-second interval.
Tech Support & Product Discussion
Thank you for choosing our products! We are here to provide you with different support to ensure that your experience with our products is as smooth as possible. We offer several communication channels to cater to different preferences and needs.