XIAO SAMD21 with MicroBlocks
MicroBlocks
MicroBlocks is a blocks-language that makes it easy for beginners (9 years to adults) to program microcontrollers. Yet in spite of its apparent simplicity, MicroBlocks is a powerful programming language with better performance than MicroPython; the ability to control GPIO pins and interface to peripherals via I2C, SPI, and serial; and nearly 200 extension libraries. In fact, some hardware designers prefer MicroBlocks for rapid prototyping and testing because of its fast, interactive development cycle.
XIAO SAMD21 Pinout and Hardware Features
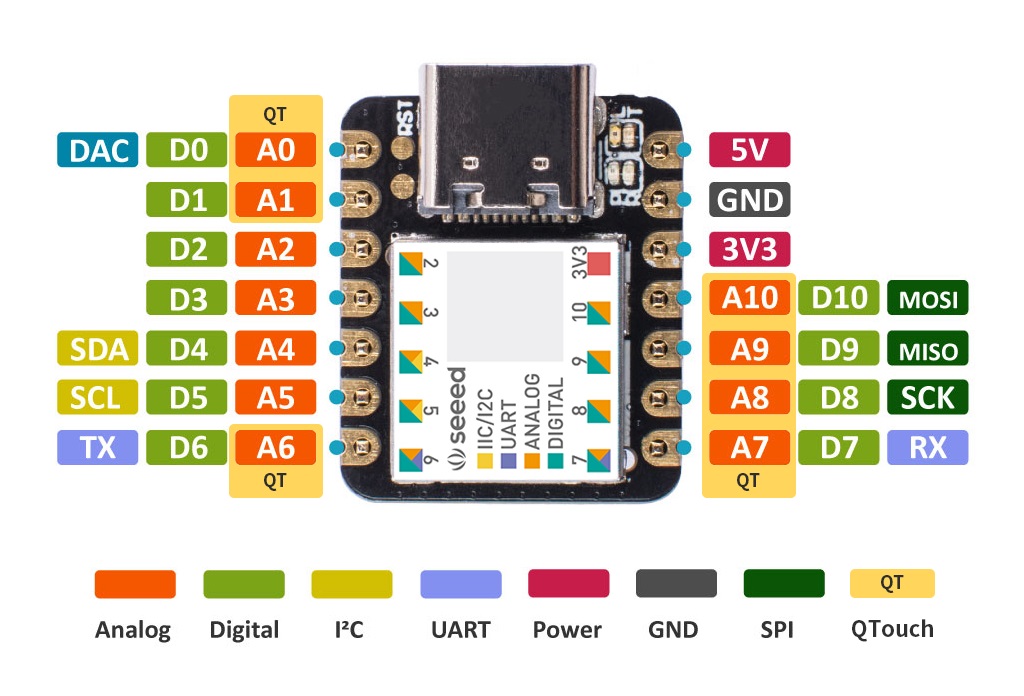
Like all XIAO boards, this board has 11 GPIO pins, pins 0..10. All pins can be used for analog input and digital and analog output. Pins 1..10 support pulse width modulation (PWM) output, as on other Xiao boards.
Unlike other boards, pin 0 on this board is a 10-bit digital-to-analog converter (DAC). Setting pin 0 to a number between 0 and 1023 makes the pin output a steady voltage between 0 and 3.3 volts. (In contrast, PWM outputs a series of digital pulses where the number determines the pulse width.) The DAC pin can be used to generate audio or other analog signals.
This board has a yellow user LED (pin 13) and blue RX/TX LEDs (pins 11 and 12). All LEDs are inverted: set the associated pin LOW to turn the LED on.
The RX/TX LEDs can be used by MicroBlocks, with a caveat. MicroBlocks is constantly exchanging data with the board, so the RX/TX LEDs would flash brightly when using the MicroBlocks editor. Since that flashing is distracting, the RX/TX LEDs are disabled by default and only enabled when a script sets the associated pin. With that in mind, the RX/TX LEDs can be useful when the IDE is not connected.
Installing the MicroBlocks Firmware
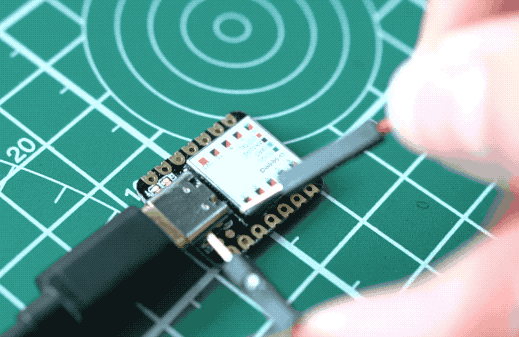
Entering bootloader mode on this board is tricky since there is no boot button. Use a wire to short the two RST pin contacts on the left of the USB port twice, quickly:
When successful, the yellow user LED light will fade on and off slowly, and a virtual USB drive named Arduino will appear.
Download the firmware file, from the MicroBlocks firmware folder then drag the file onto the virtual USB drive.
The firmware will install and, after a few seconds, the virtual USB drive will disappear. You can ignore any warning that the disk was not ejected properly.
Connecting the board to MicroBlocks
Connect the board to your computer with a data USB cable (not a power-only cable).
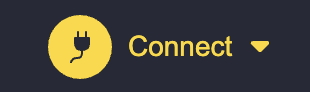
Run the MicroBlocks editor in a Chrome or Edge browser. Click the connect (plug icon) button:
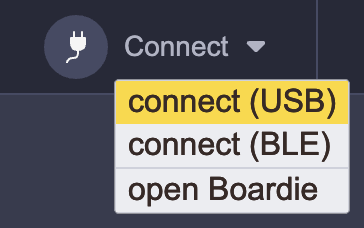
Select connect (USB) from the menu:
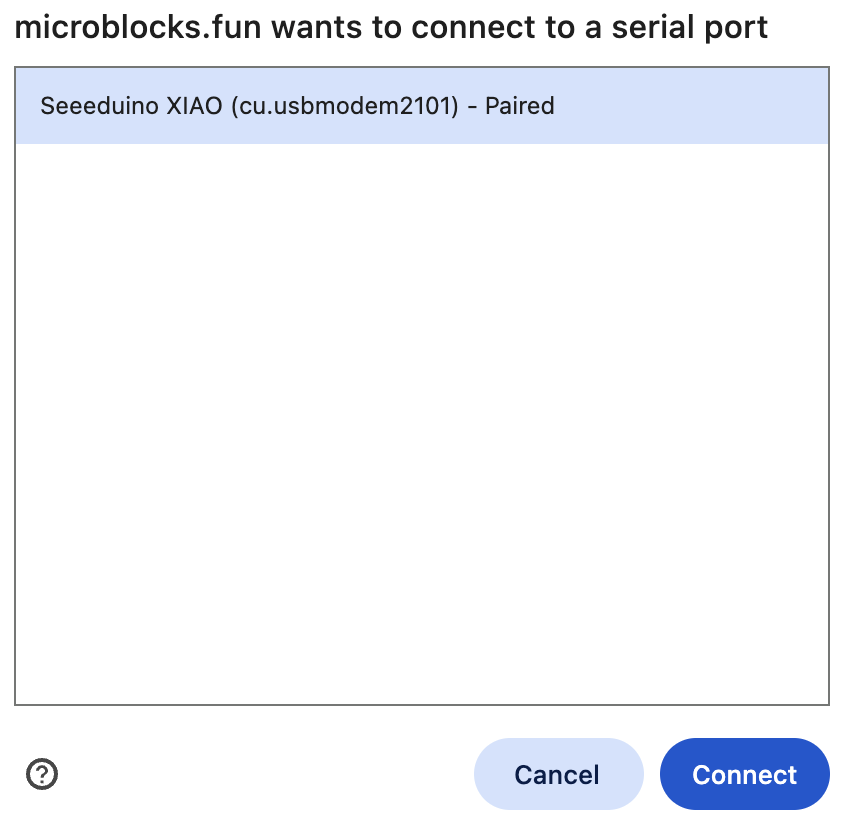
Select your board from the dialog and click the connect button:
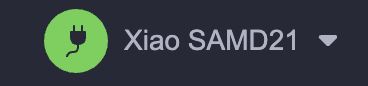
A green circle and the board name will appear when the board is connected:
Coding in MicroBlocks
MicroBlocks is a live coding environment so you can test as you code. Click on blocks and scripts to run them. Drag blocks into the scripting pane and assemble them to create scripts.
Your code is stored in persistent flash memory and can run even when the board is not connected to the MicroBlocks editor. Scripts under a when started block run when the board is powered.
MicroBlocks supports concurrency. Up to ten scripts can run at the same time.
In addition to its many built-in blocks, MicroBlocks has nearly 200 libraries that support additional features and peripherals. Click the Add Library button to add libraries.
Example
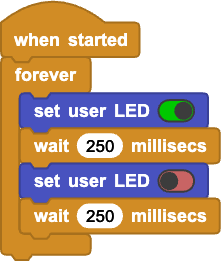
This script will blink the yellow user LED:
The Blocks Reference includes many additional examples.
Project Demo
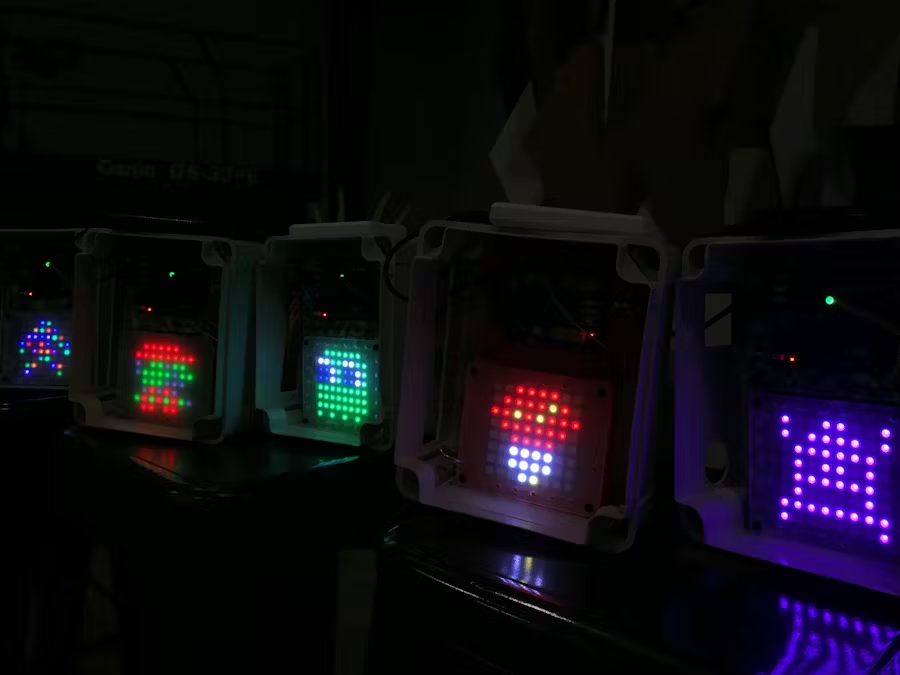
For a more comprehensive project demo, the maker Luis has built a 8x8 LED Neo-pixel device using XIAO SAMD21, Grove Shield for XIAO and a LED Matrix, which you can use the MicroBlocks to paint stunning pixel patterns without writing complex code. A step by step tutorial can be found on Hackster.
Special Thanks
Special thanks to John at MicroBlocks for writing the article.