Connect to Home Assistant via the Zigbee of the XIAO ESP32C6
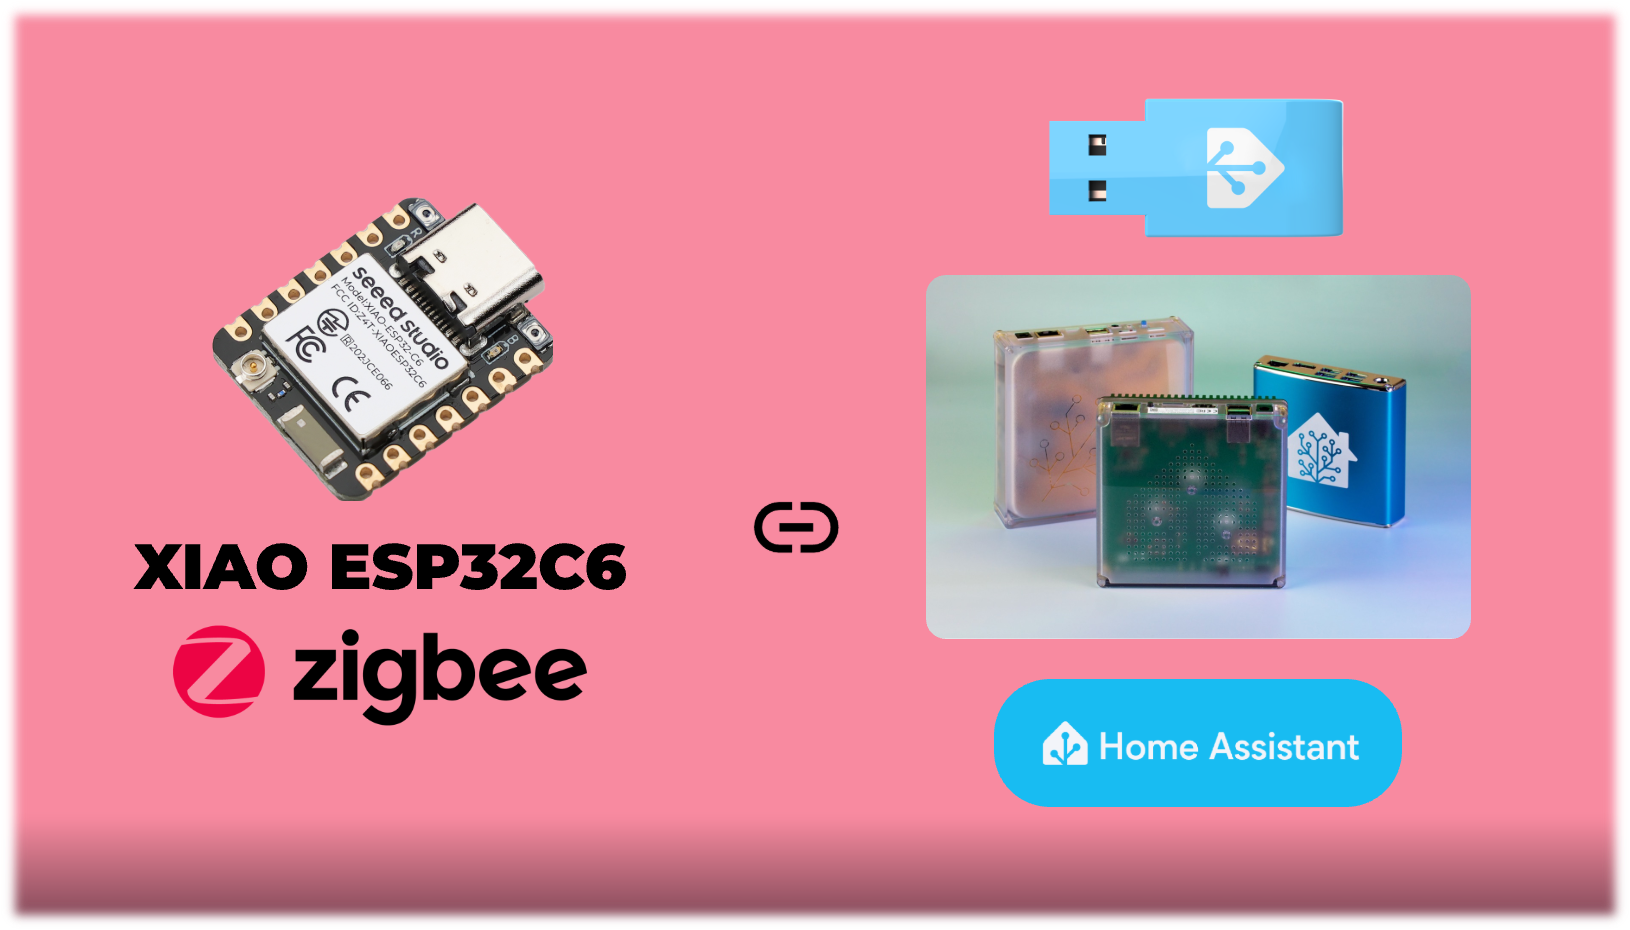
The integration of Zigbee devices into smart home ecosystems has become increasingly popular due to Zigbee's low power consumption, reliability, and ease of use. In this wiki, we’ll guide you through connecting the XIAO ESP32C6 to Home Assistant via its Zigbee functionality. By the end of this guide, you’ll have a working demo where the XIAO ESP32C6 acts as a Zigbee device that can be controlled directly from Home Assistant's dashboard.
This tutorial highlights the use of Espressif's Zigbee SDK (Arduino) and demonstrates how to develop and integrate your own Zigbee devices into Home Assistant.
Materials Needed
To follow along with this guide, you’ll need the following:
- Home Assistant Green: A dedicated Home Assistant hardware device for managing your smart home.
- Home Assistant Connect ZBT-1: A Zigbee coordinator to enable Zigbee network creation and communication.
- XIAO ESP32C6: A development board with Zigbee functionality enabled via Espressif’s SDK.
| Home Assistant Connect ZBT-1 | XIAO ESP32C6 | Home Assistant Green |
|---|---|---|
 |  |  |
Step-by-Step Guide
The first two steps refer to the official tutorial for the Home Assistant Connect ZBT-1, and you can also read its tutorial content via the link here.
Step 1. Install the Connect ZBT-1 on Home Assistant Green
Plug the Home Assistant Connect ZBT-1 into the USB extension cable. Plug the extension cable into your Home Assistant Green.
USB 3.0 ports and USB 3.0 drives can cause interference with 2.4 GHz protocols, including the ones provided by Home Assistant Connect ZBT-1. It is important to use the USB extension cable and to position the Home Assistant Connect ZBT-1 away from possible interference sources.
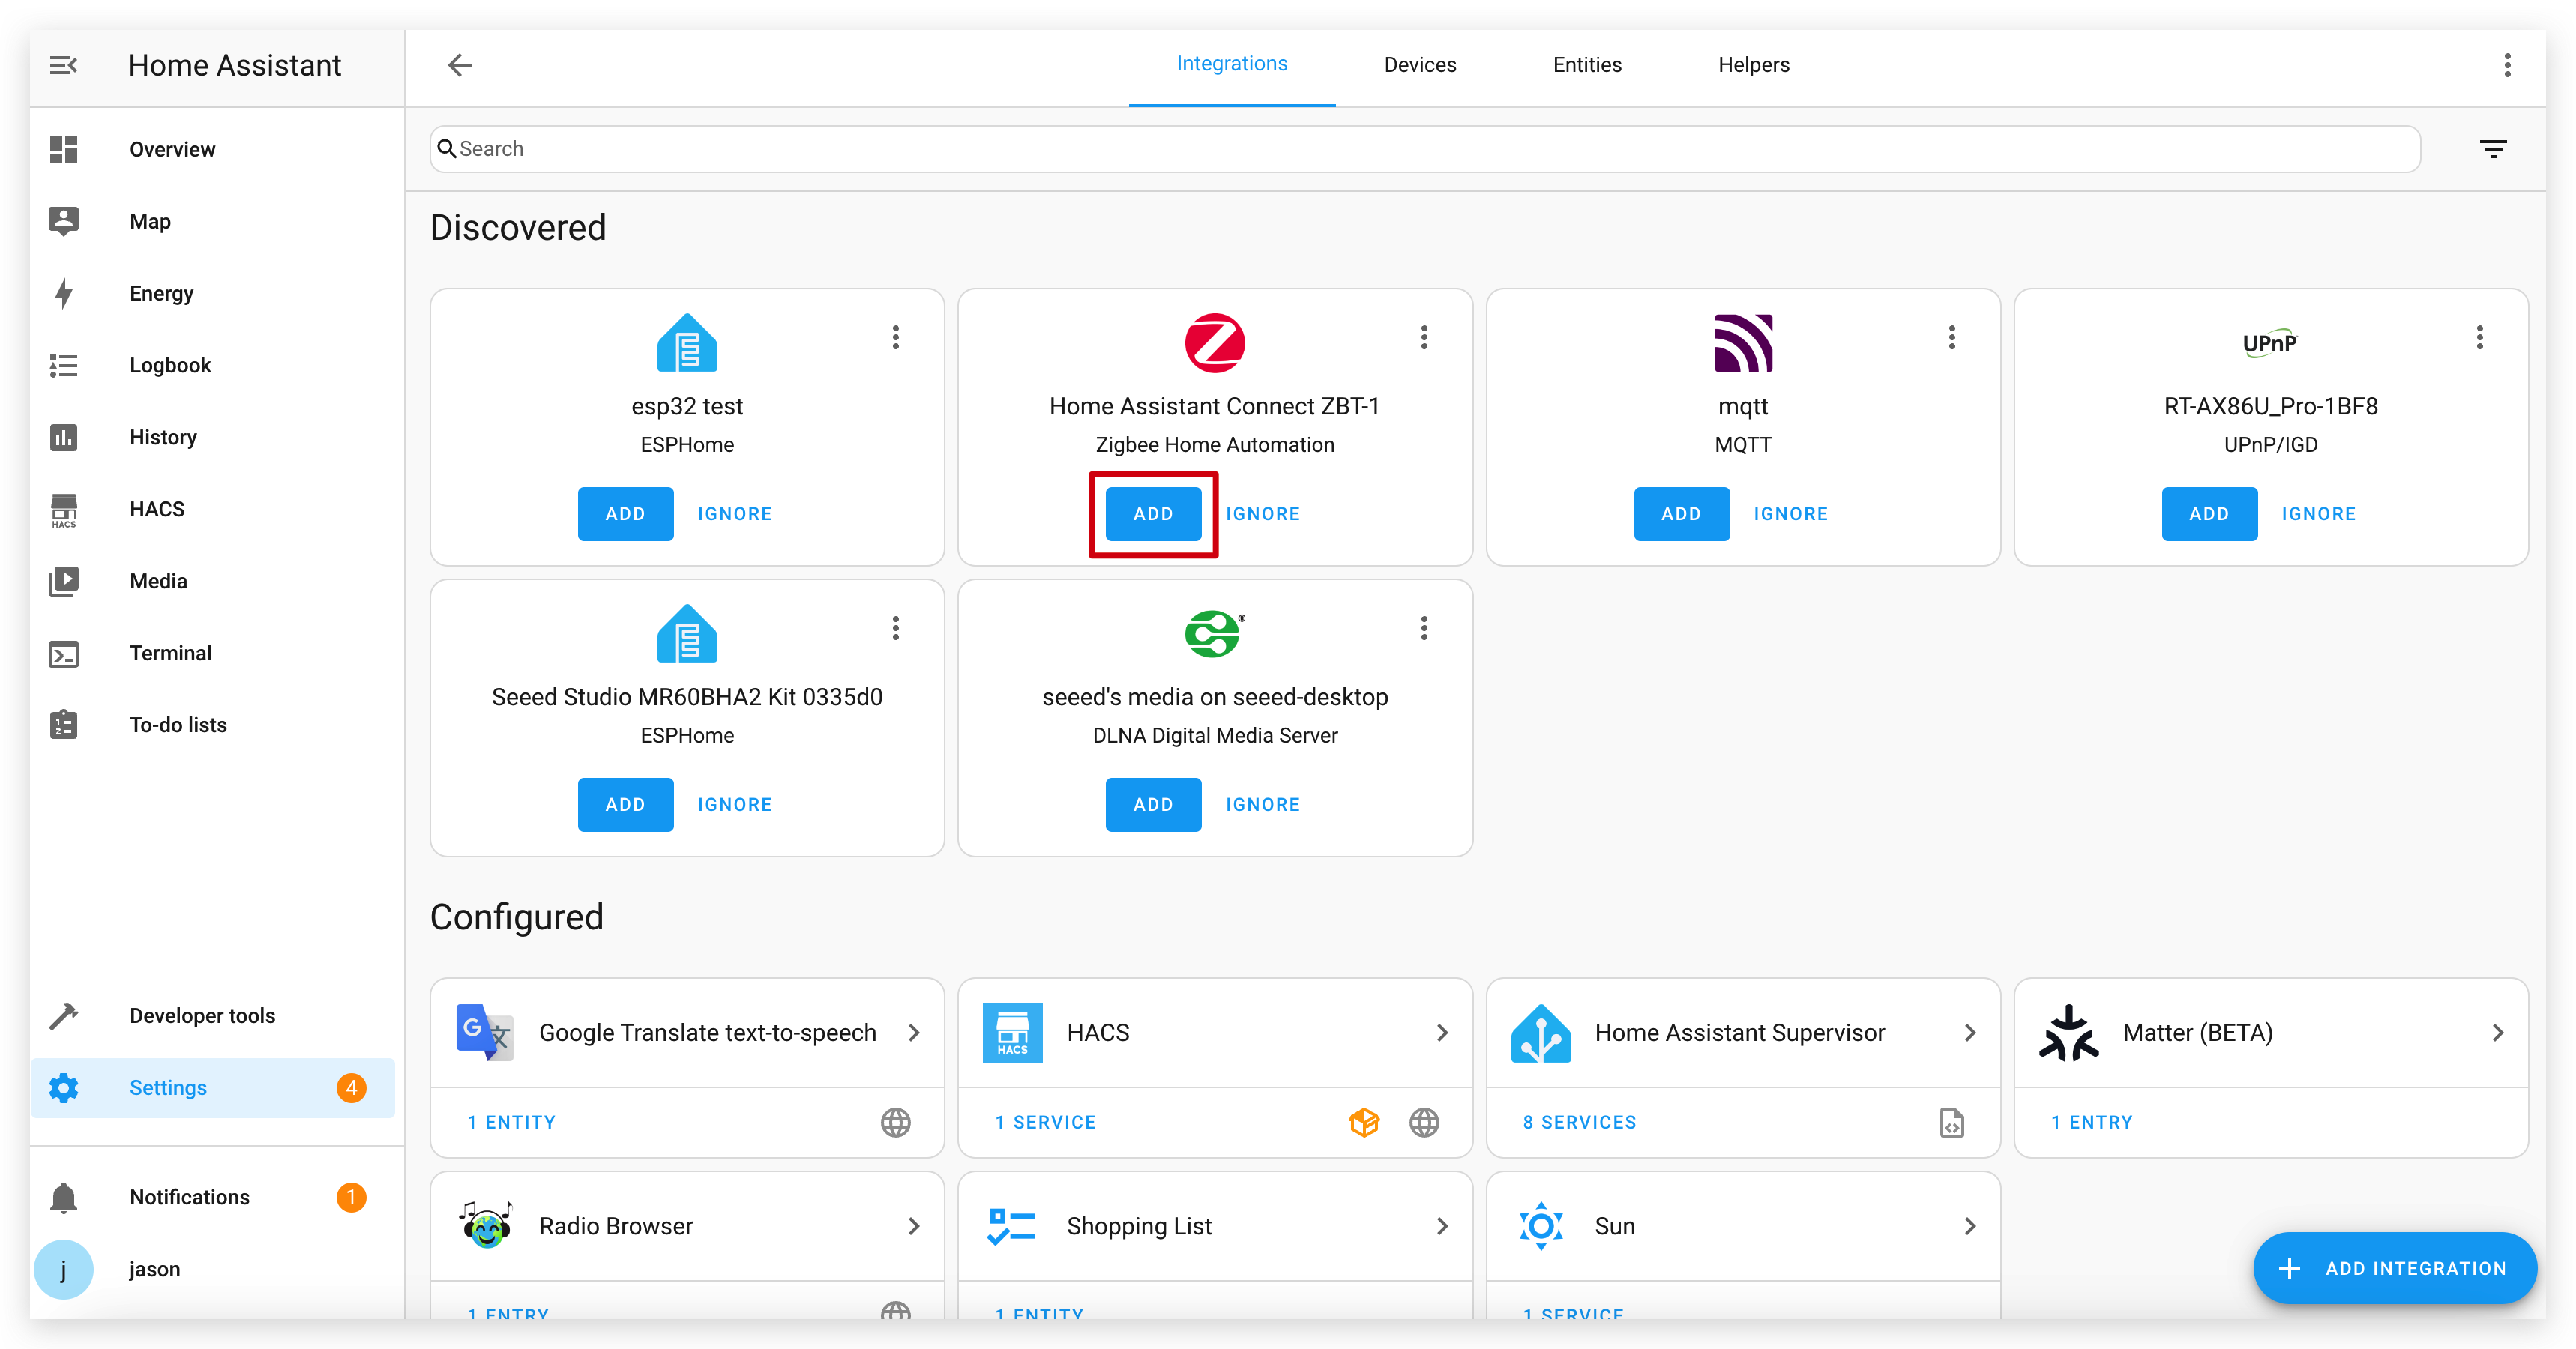
- Navigate to Settings in the Home Assistant interface.
- Go to Devices & Services and locate the Zigbee integration.
- Connect ZBT-1 should now have been discovered.
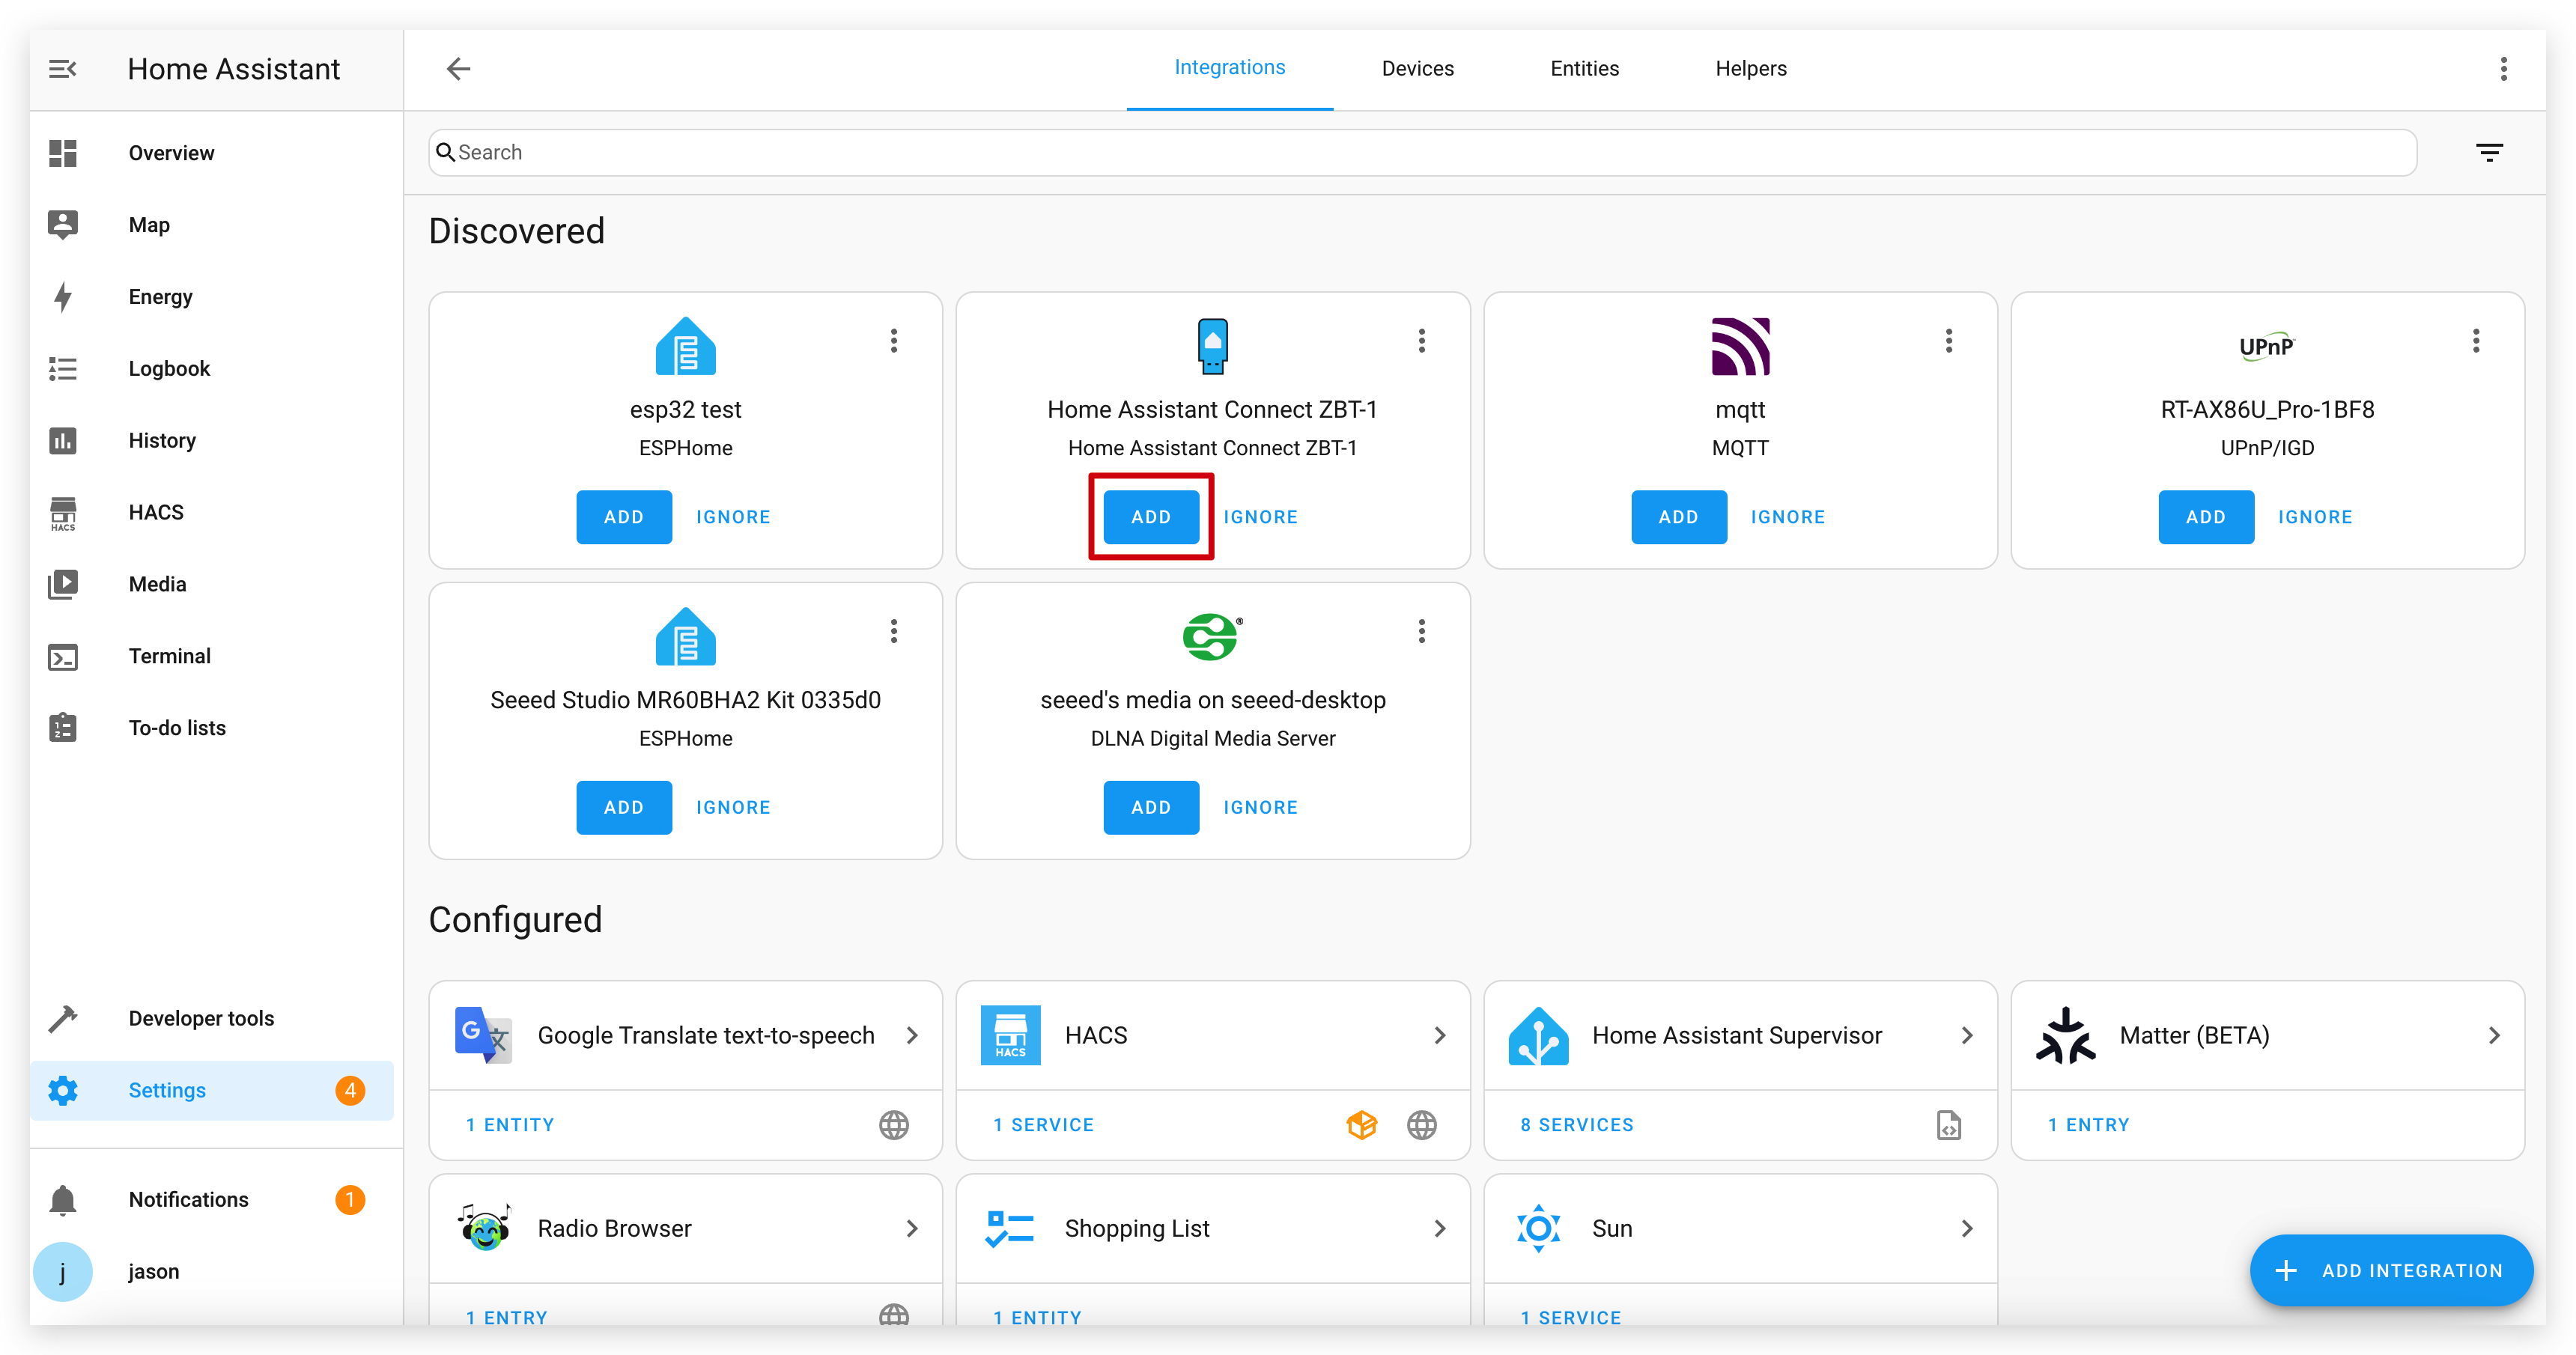
- Select ADD.
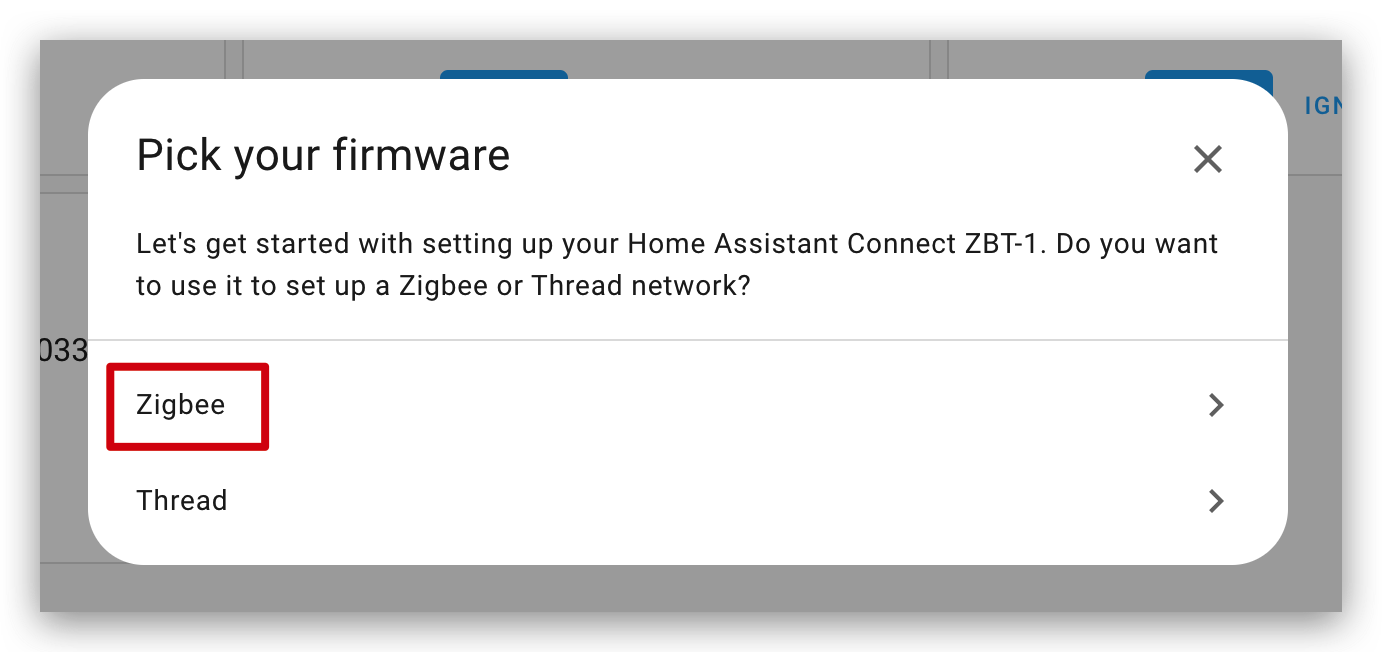
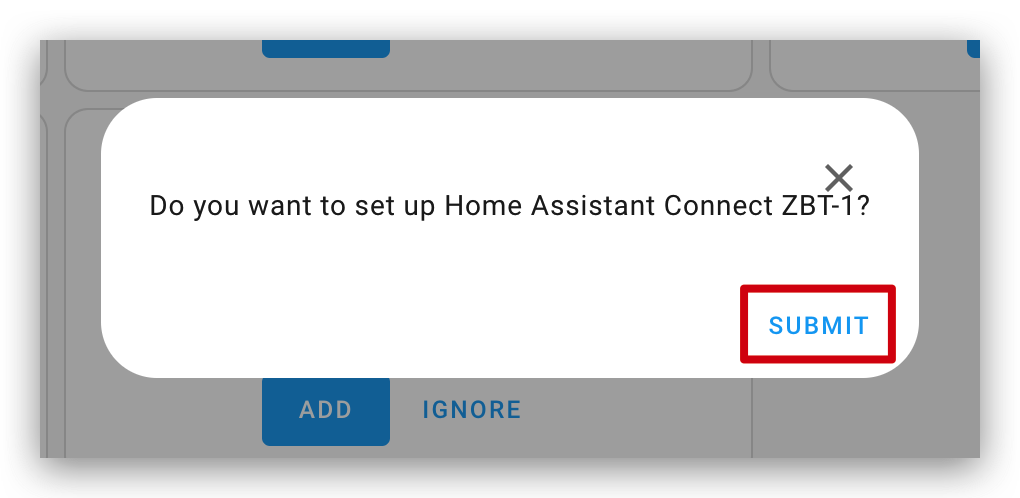
- In the dialog, select Zigbee.
- Select Submit to complete the setup of the Connect ZBT-1 integration.
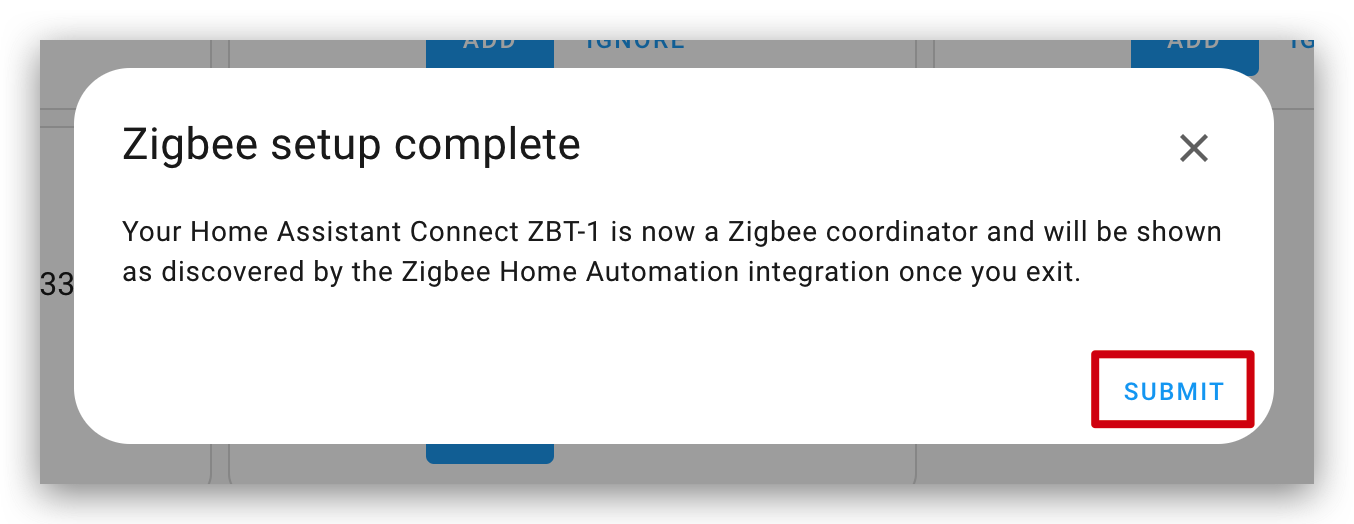
- Your Connect ZBT-1 is now a Zigbee coordinator.
Step 2. Create a New Zigbee Network Using Connect ZBT-1
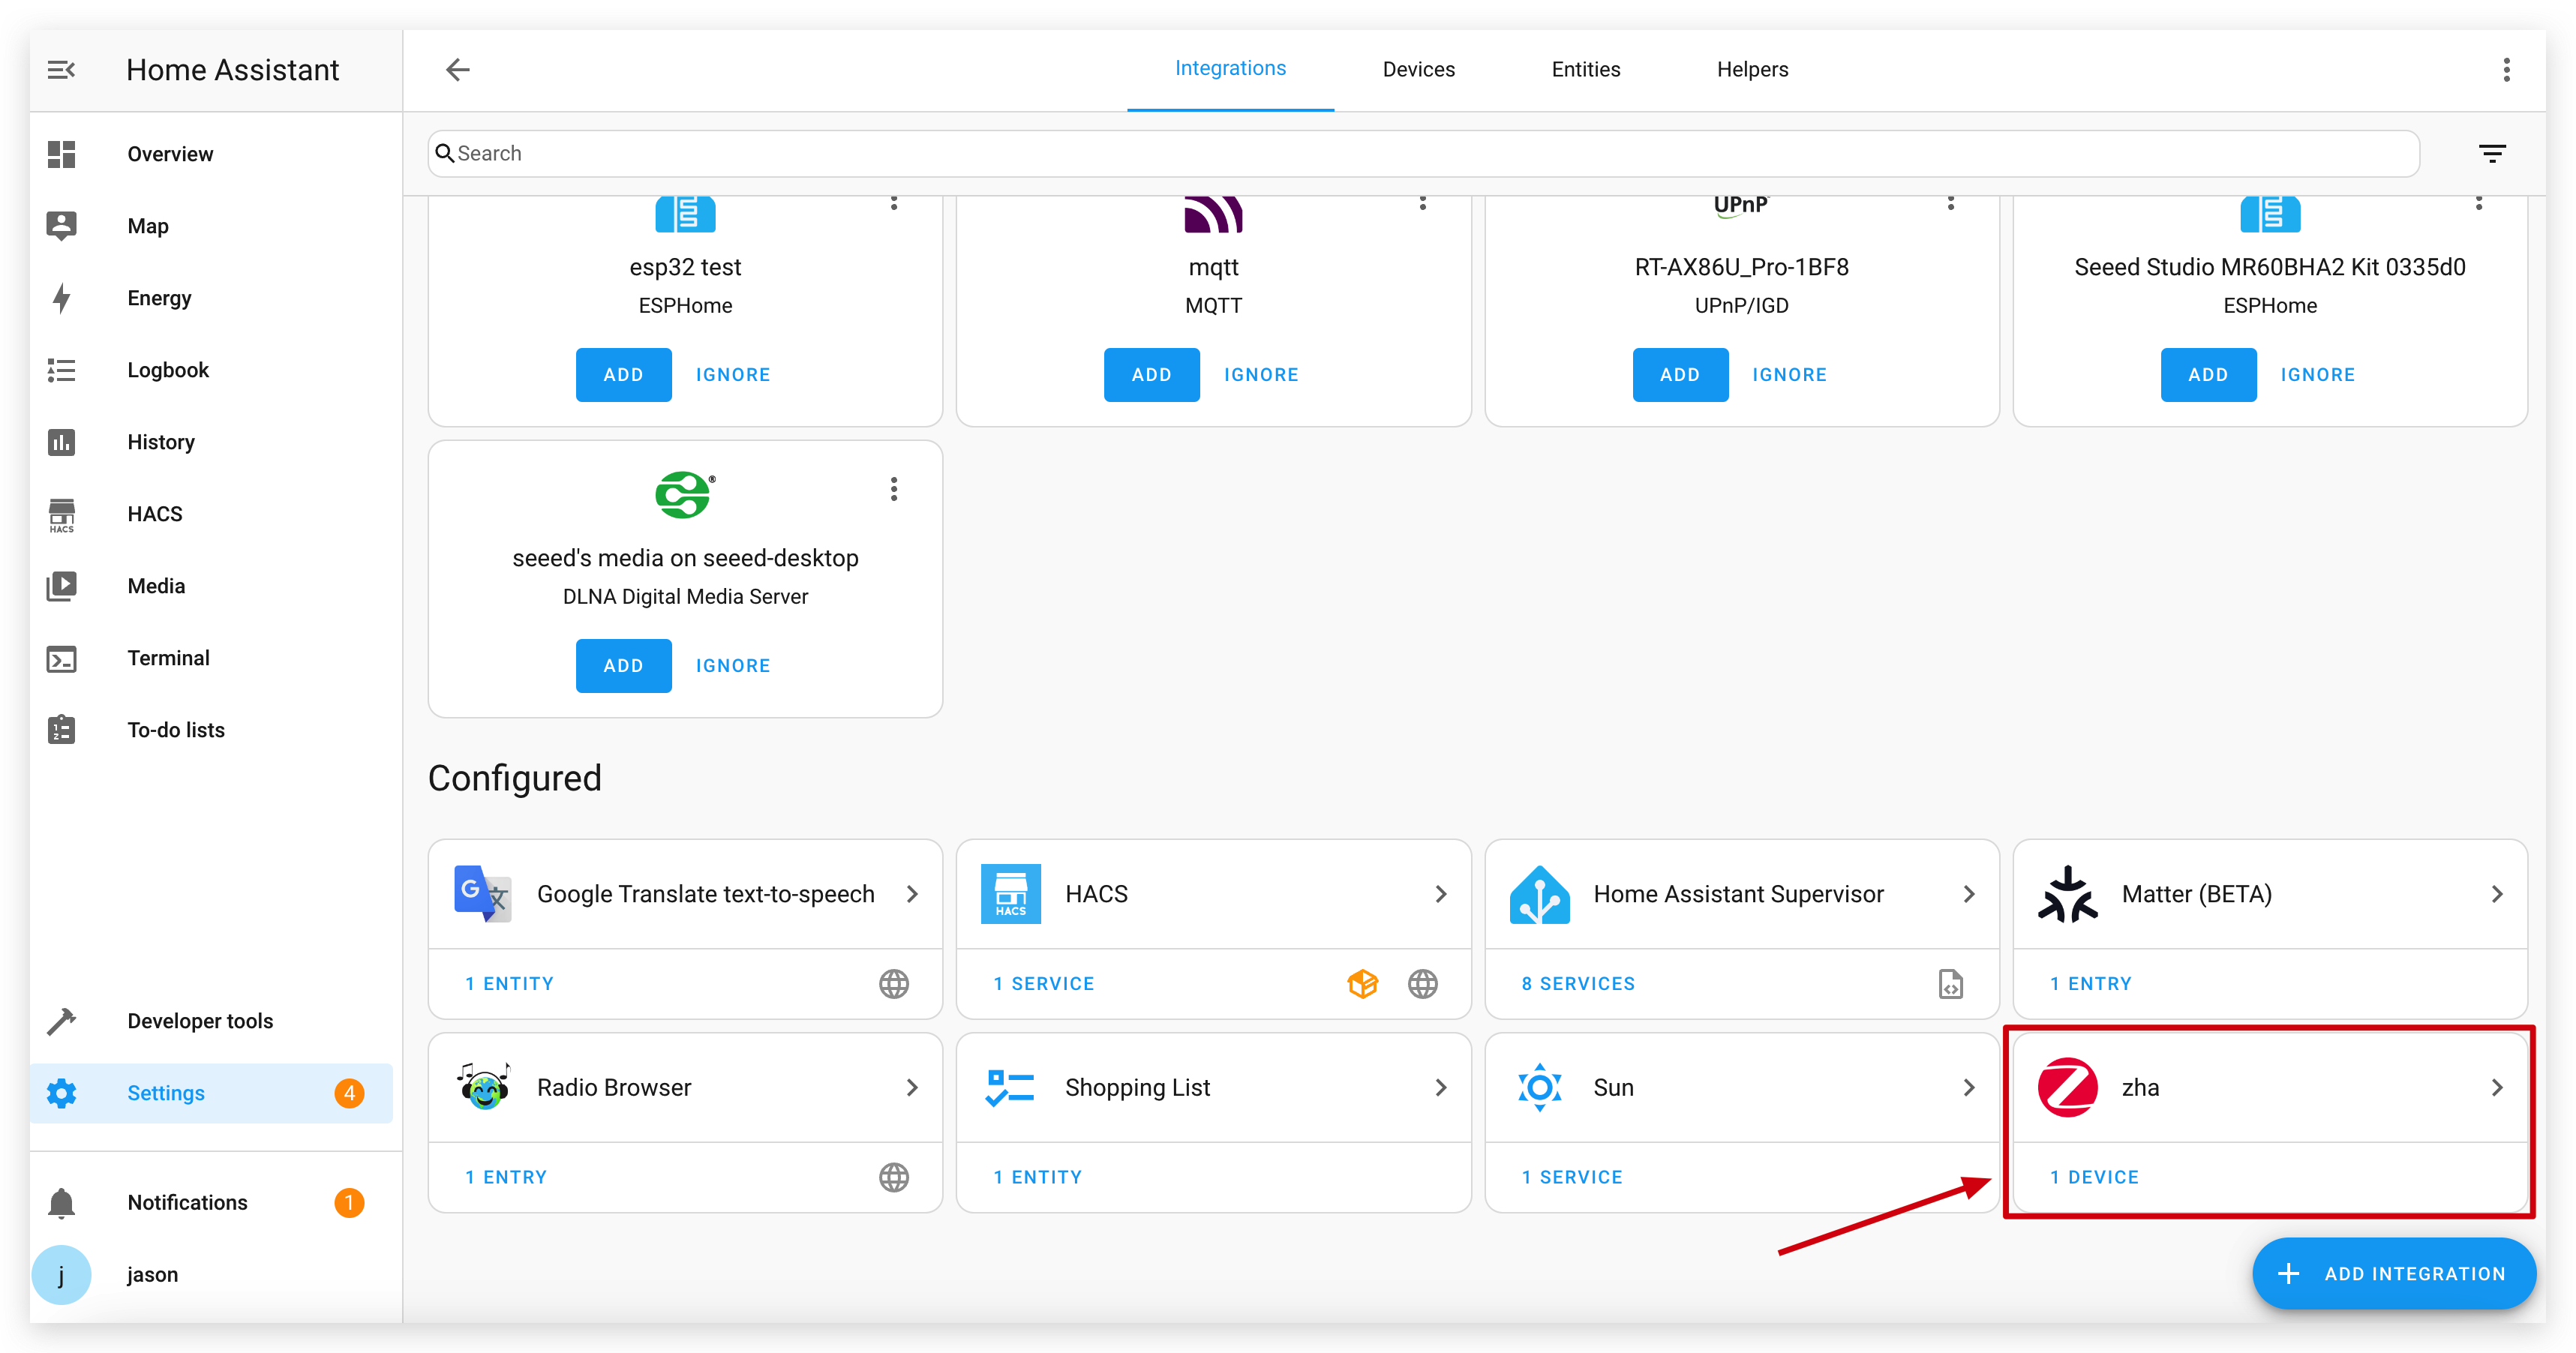
- Navigate to Settings in the Home Assistant interface.
- Go to Devices & Services and locate the Zigbee integration.
- Connect ZBT-1 will be shown in your Zigbee Home Automation integration. Select ADD.
- To confirm, select Submit.
- Select Create network.

- Follow the prompts to initialize the Zigbee coordinator and prepare it for pairing with Zigbee devices.
Step 3. Flash the XIAO ESP32C6 with the Zigbee Example Program
- Set Up Arduino IDE:
- Install the latest version of the Arduino IDE and add support for the XIAO ESP32C6 by including the Espressif board package.
If you are using the XIAO ESP32C6 for the first time, please read the wiki link below to add the development board correctly.
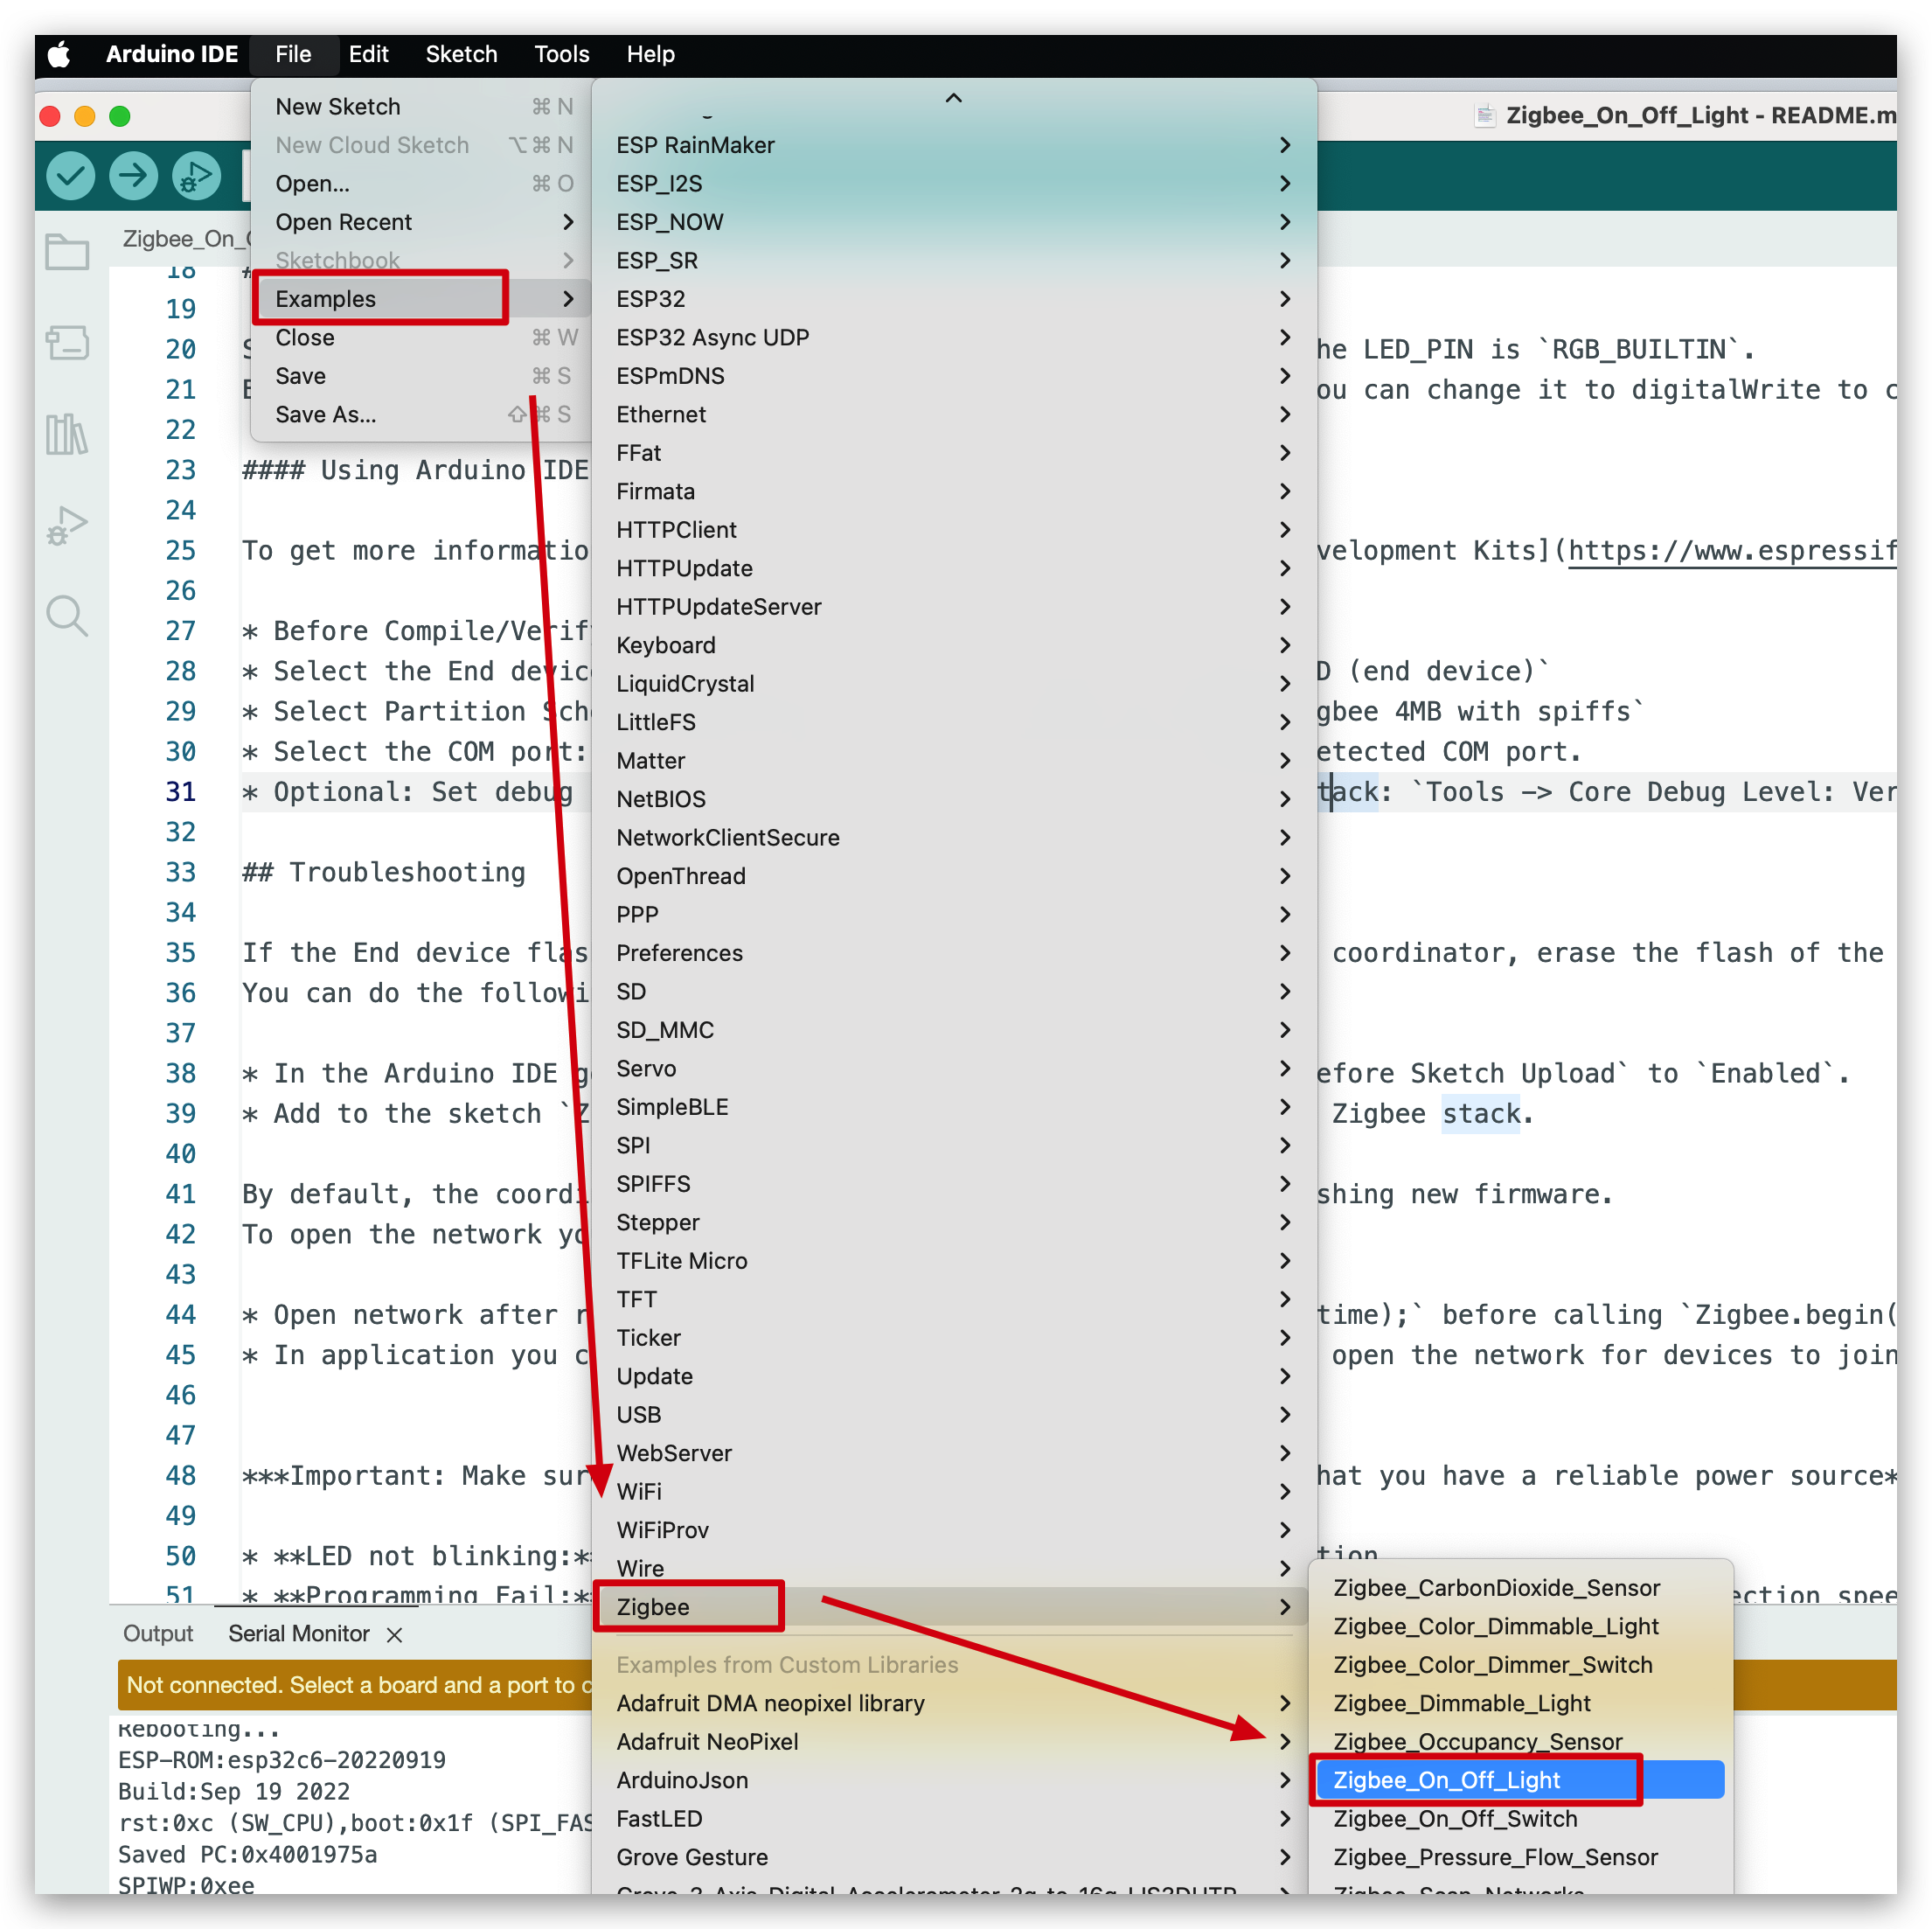
- Load the Zigbee_On_Off_Light Example:
- Please select the correct development board model: XIAO_ESP32C6.
- Open the
Zigbee_On_Off_Lightexample from the Arduino IDE.
We recommend that you use the latest esp32-arduino on-board package to get the most up-to-date and stable Zigbee example programs.
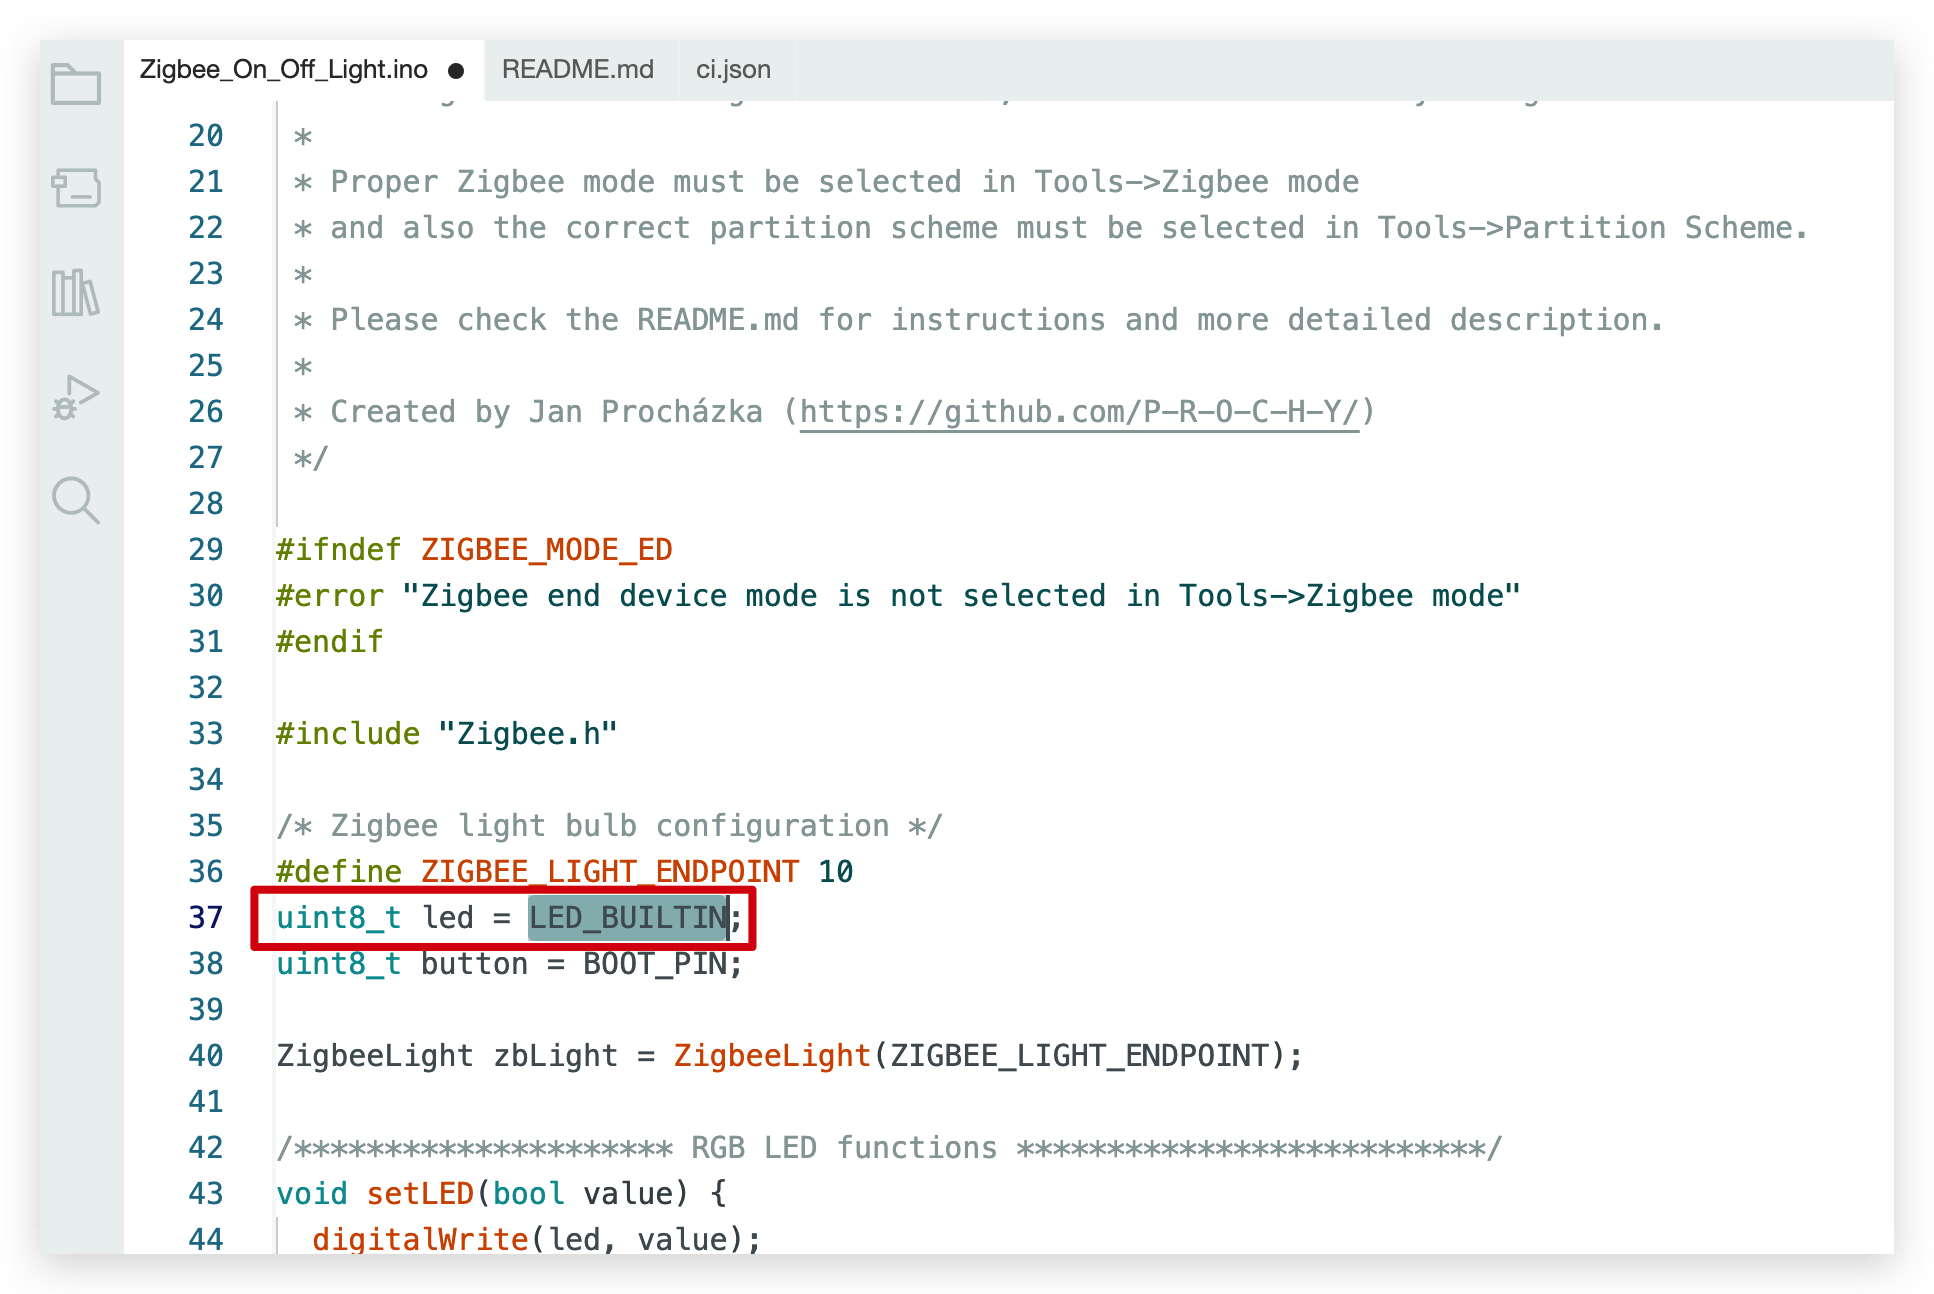
- In this example, we will be using the on-board LED monochrome lights on the XIAO ESP32C6, so we need to make changes to the LED pins on the program. Modify the code to replace
RGB_BUILTINwithLED_BUILTINto utilize the onboard LED indicator.
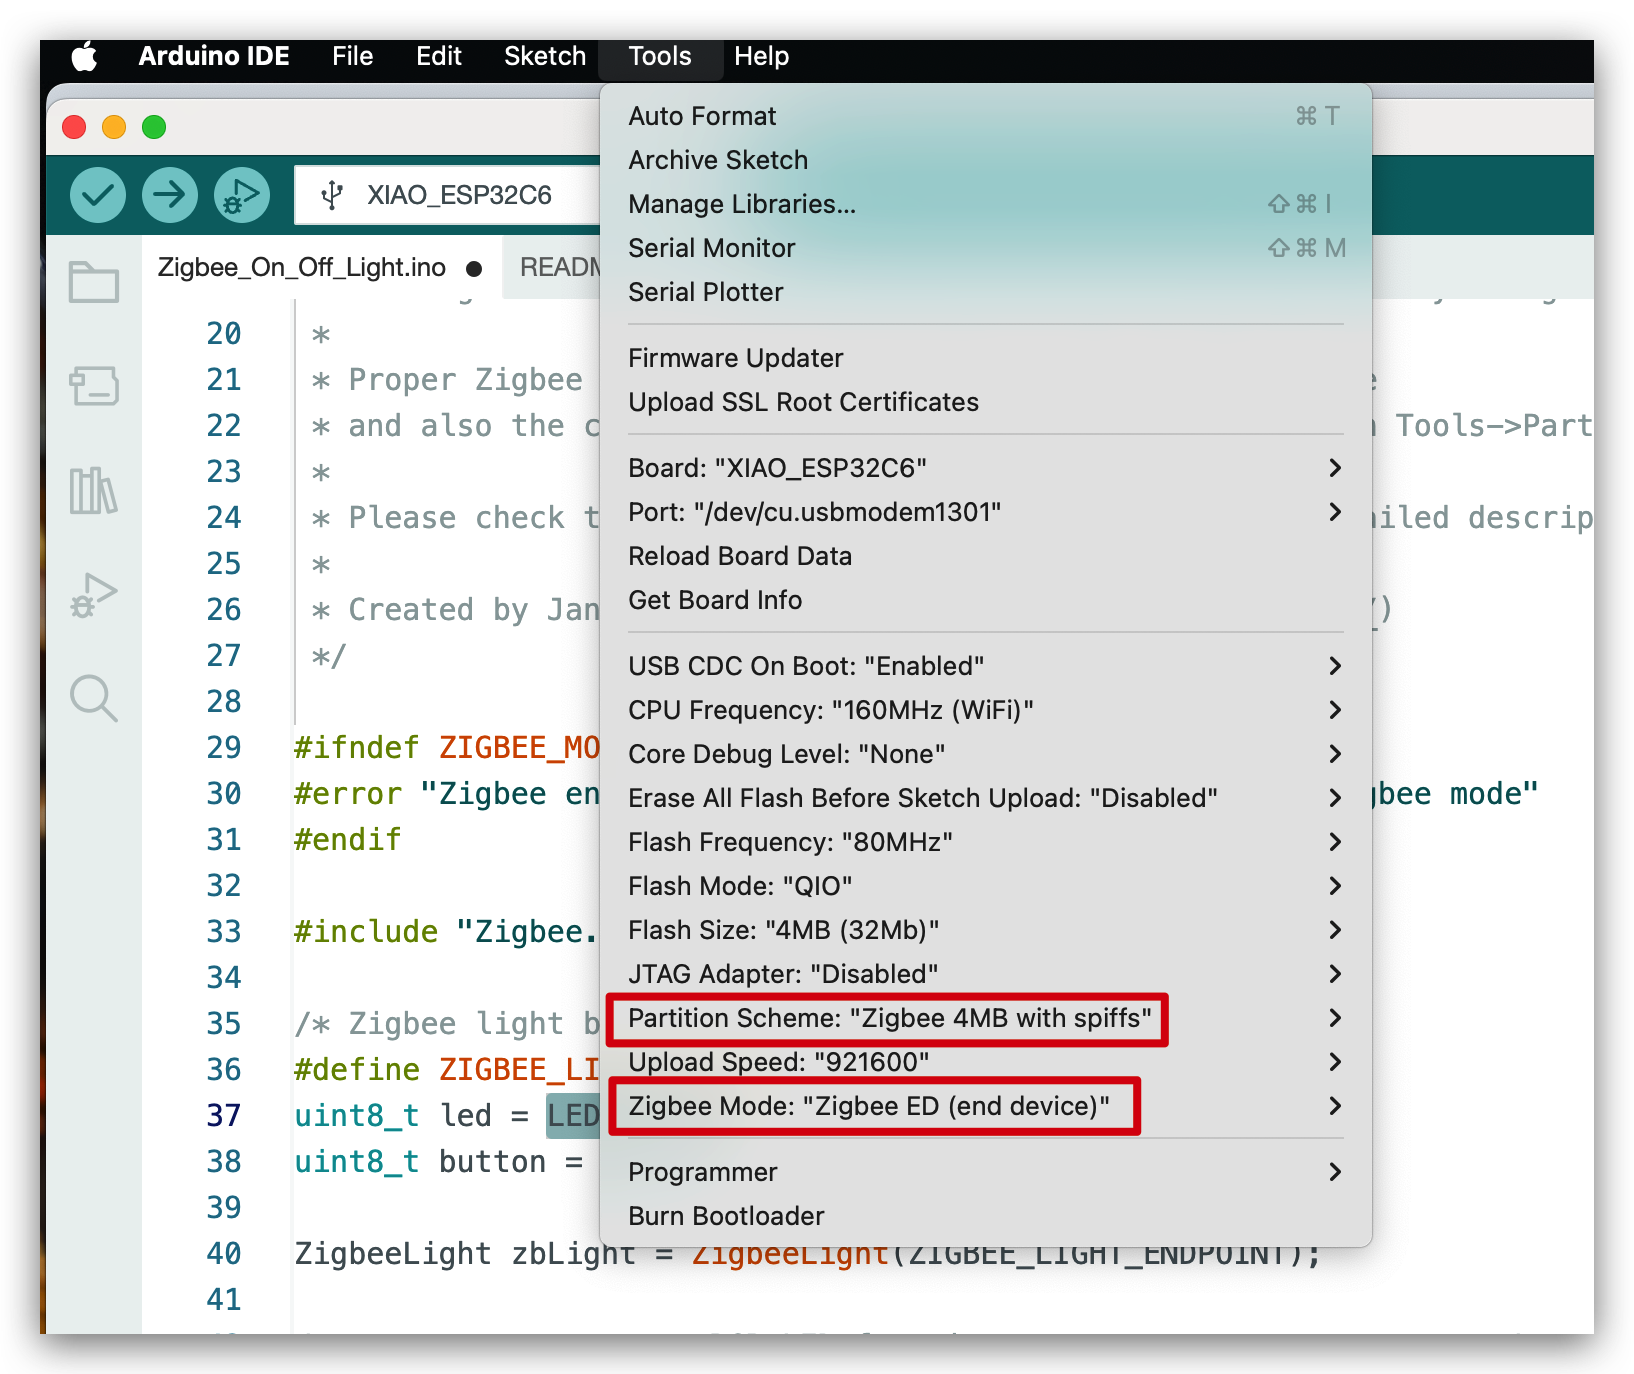
- Configure Zigbee Settings:
- Set the Zigbee mode to ZIGBEE_MODE_ED (End Device).
- Adjust the partition scheme for Zigbee:
Navigate toTools -> Partition Schemeand select Zigbee 4MB with spiffs.
- Upload the Program:
- Connect the XIAO ESP32C6 to your computer via a USB-C cable.
- Compile and upload the modified example program to the XIAO ESP32C6.
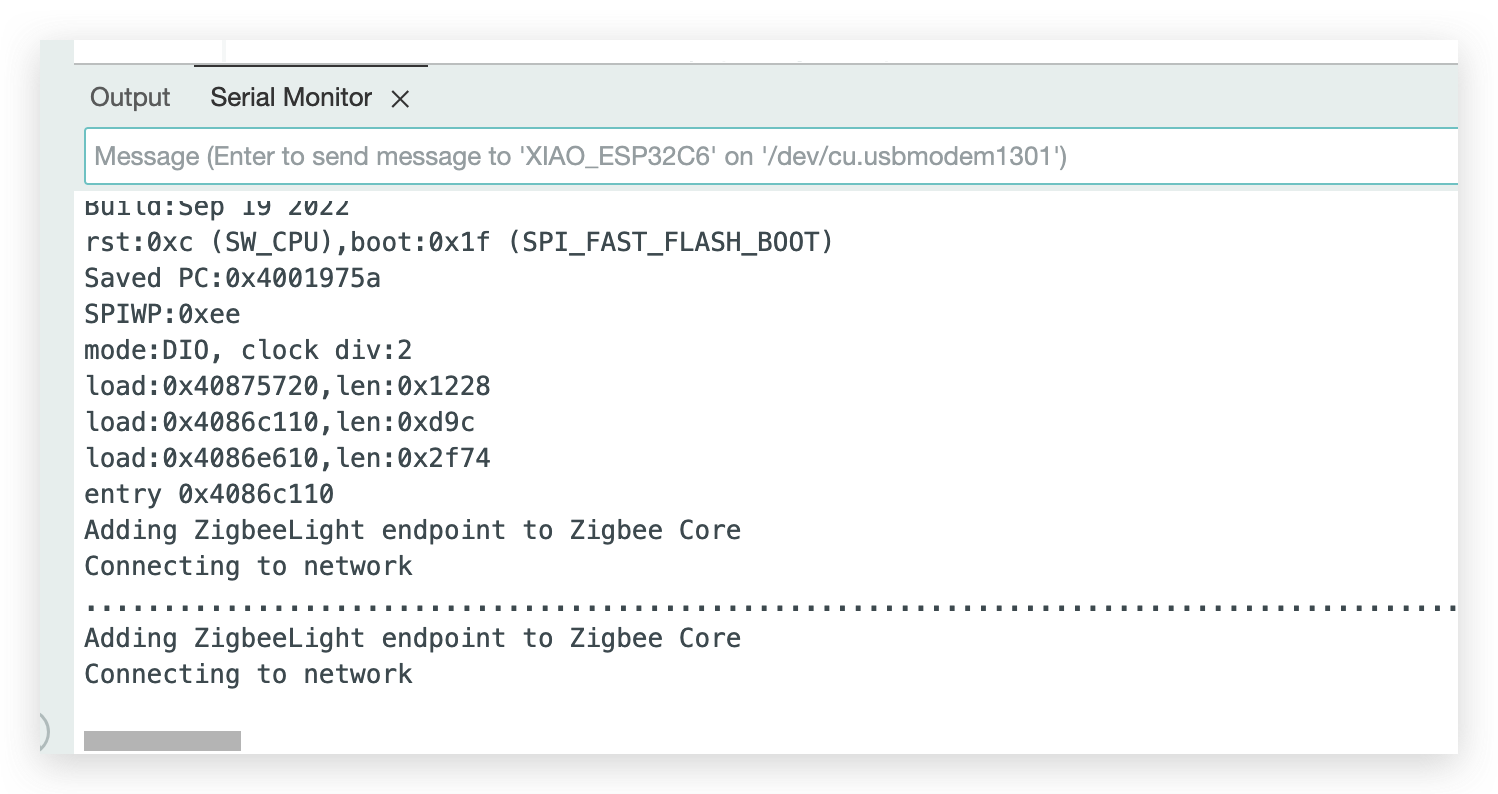
- If the XIAO is working properly then you should see the serial message shown below. If you see the XIAO rebooting constantly, please check if the Zigbee settings are correct or update the version of the development board on-board package.
Step 4. Discover the XIAO ESP32C6 in Home Assistant
- In the Home Assistant interface, navigate to Settings -> Devices & Services.
- Select the Zigbee integration (name: ZHA).
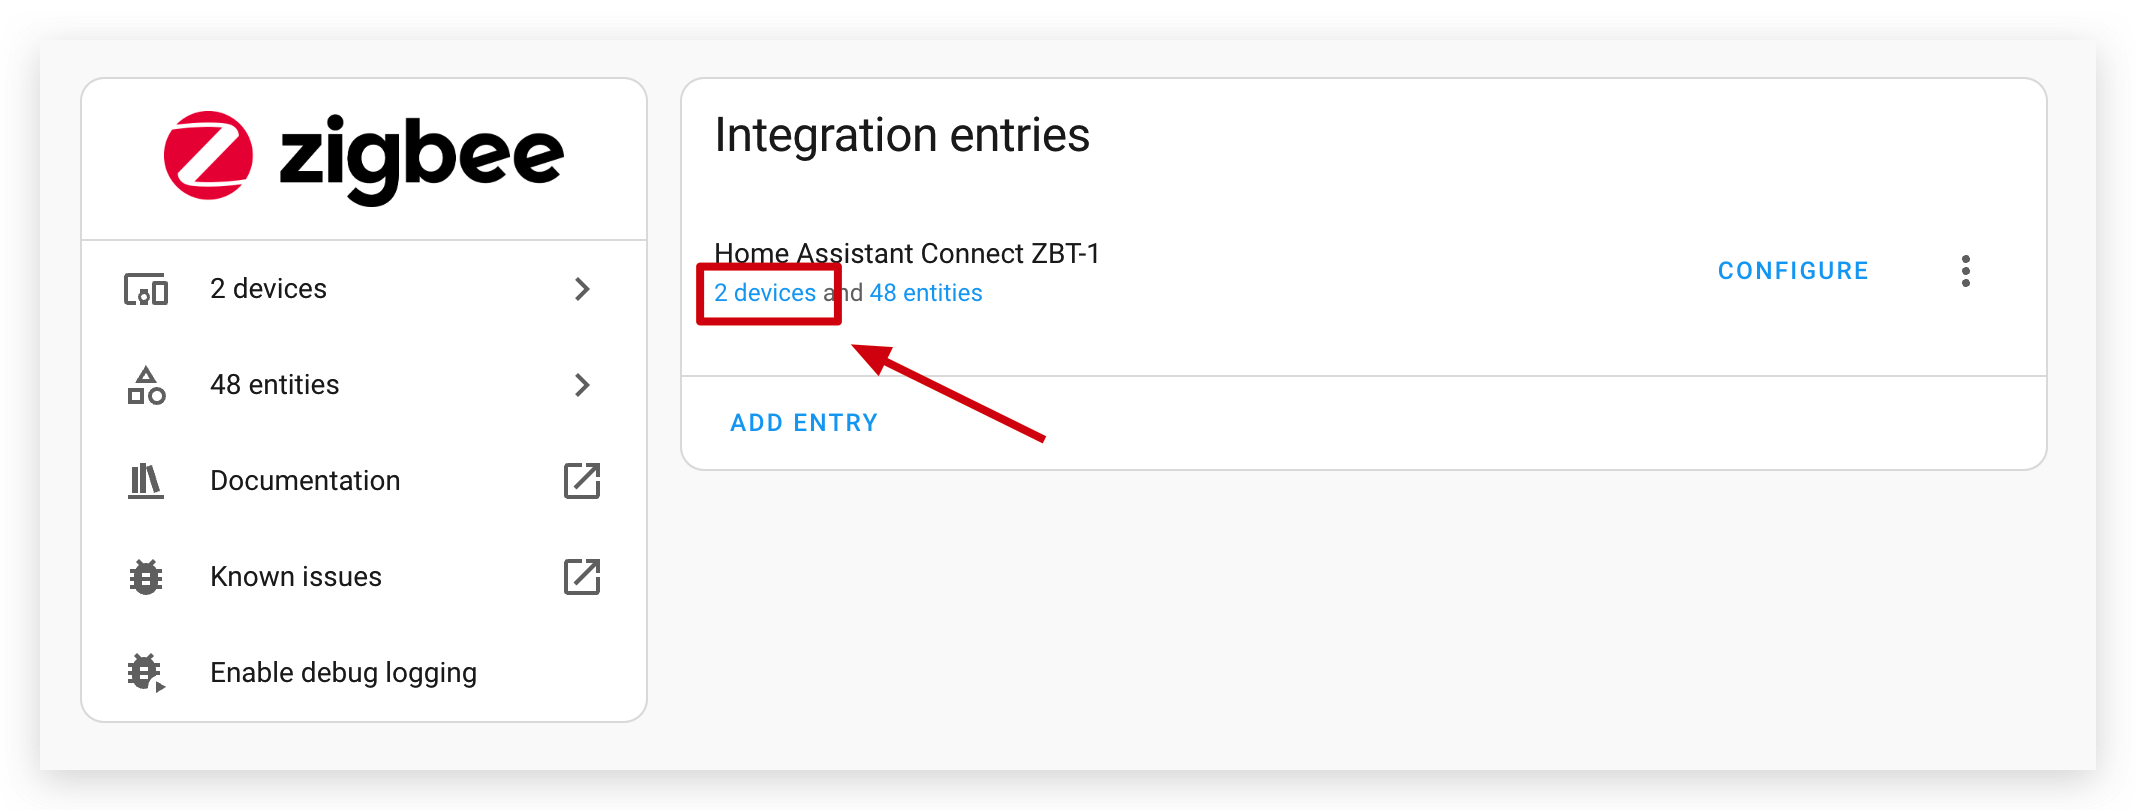
- Click Nabu Casa HA Connect ZBT-1.
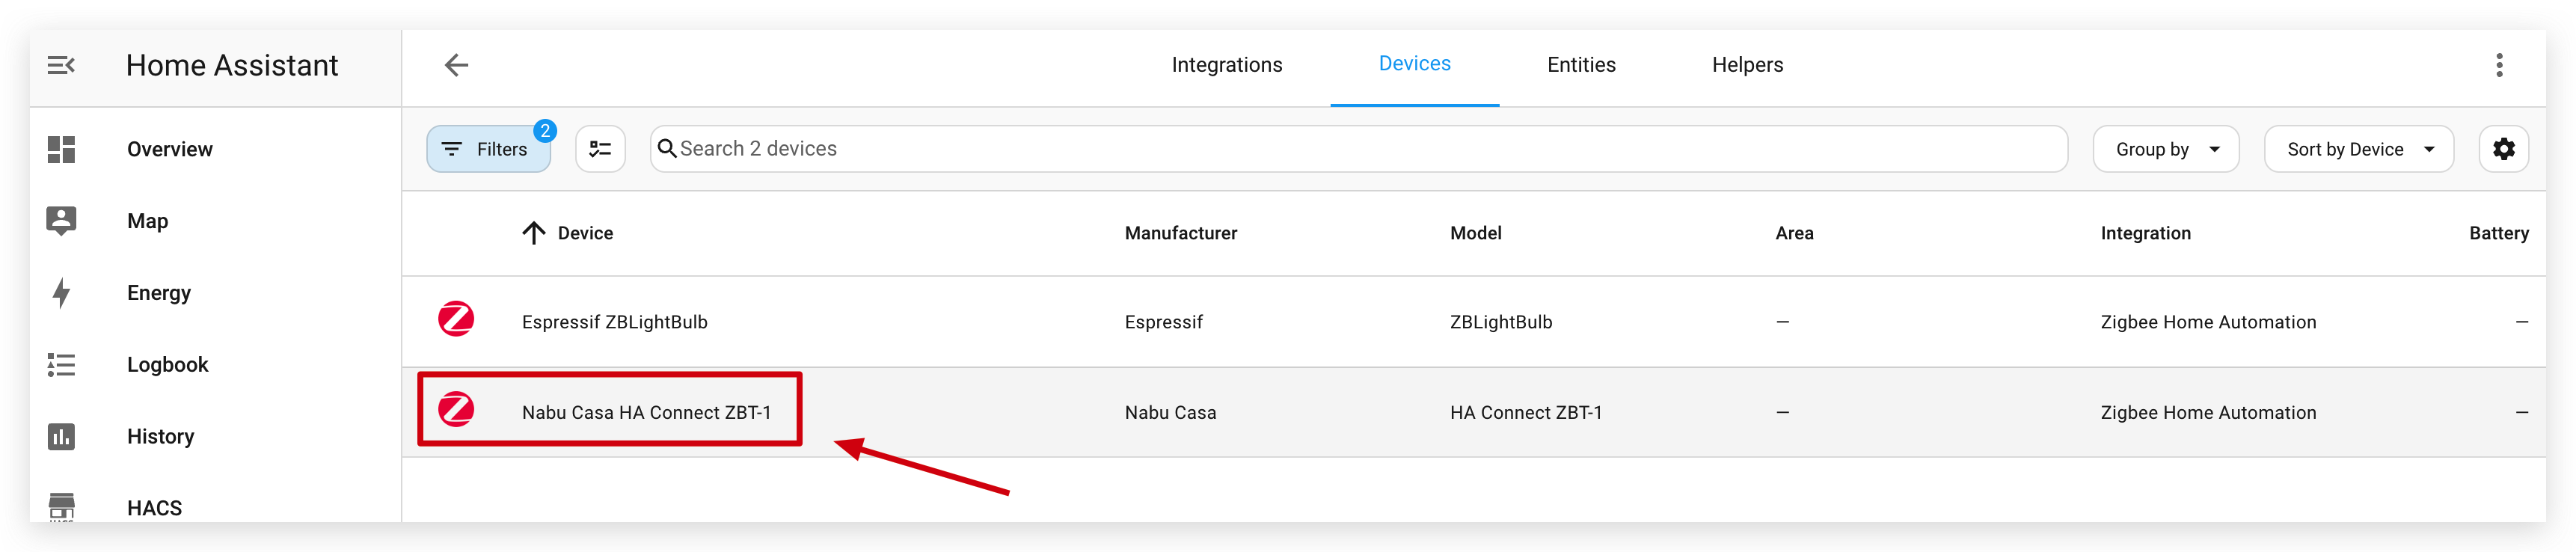
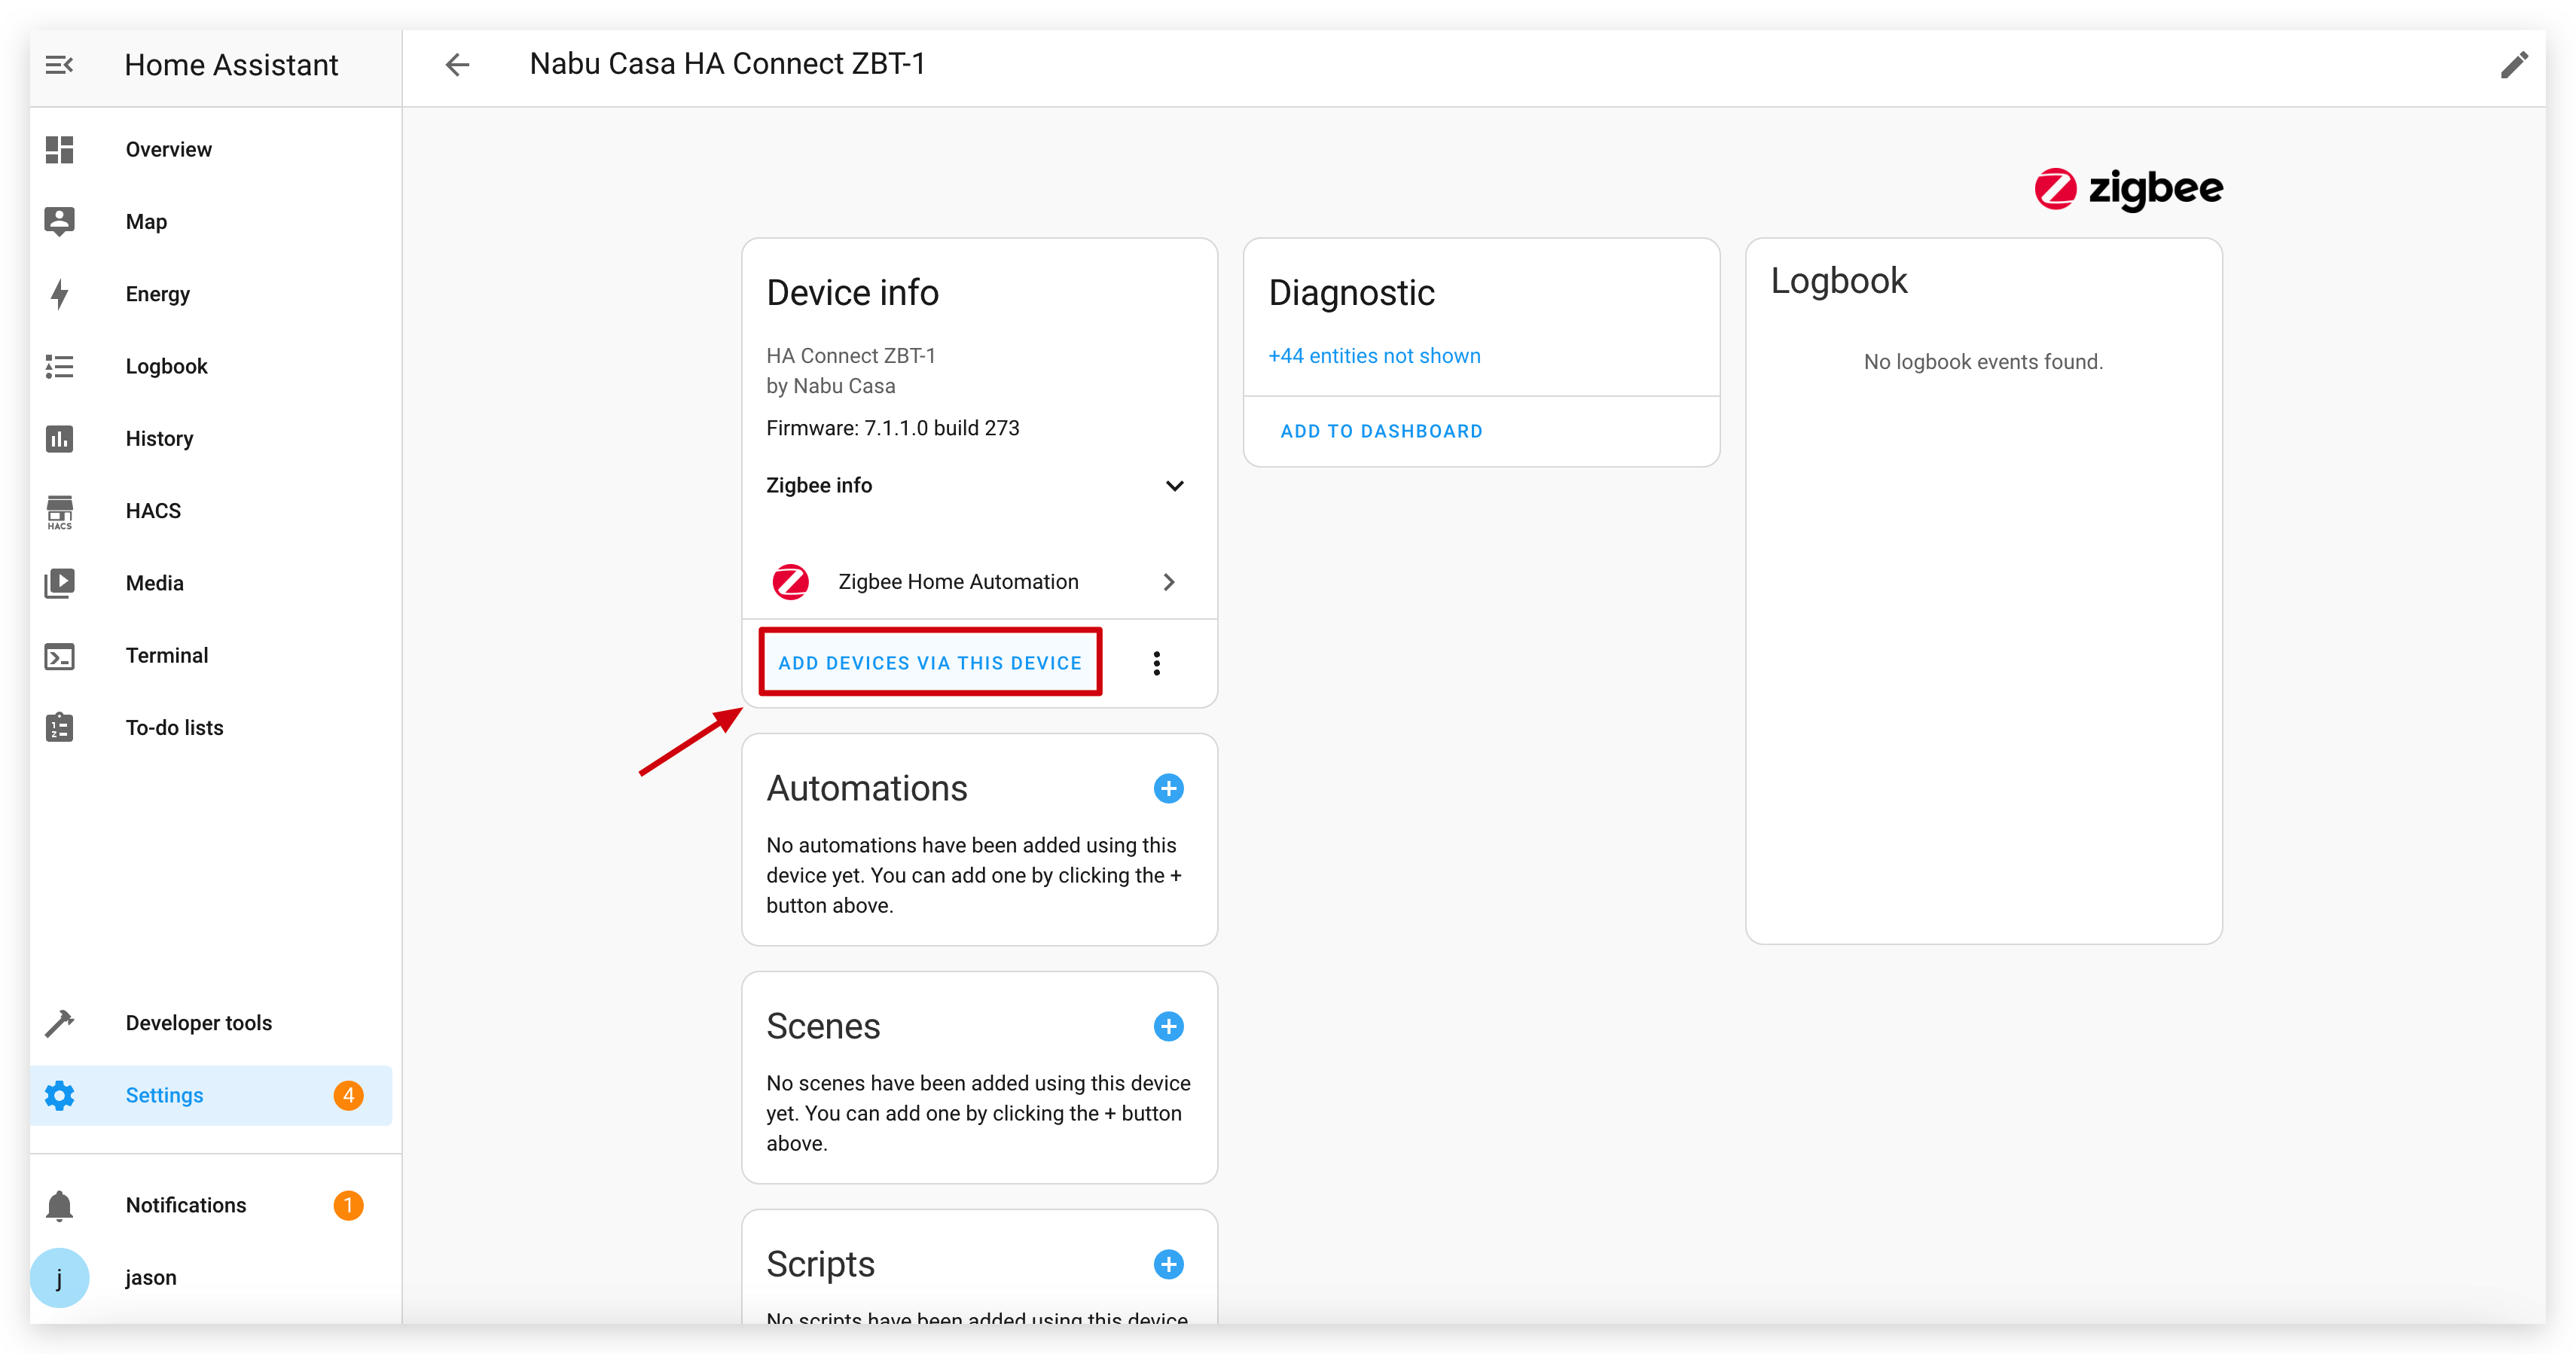
- Inside the device details page of Connect ZBT-1, you can see ADD DEVICE VIA THIS DEVICE, please click on it to go to the device finding and pairing page of Zigbee.
- Wait for a moment, and the XIAO ESP32C6 will appear in the list of discovered Zigbee devices.
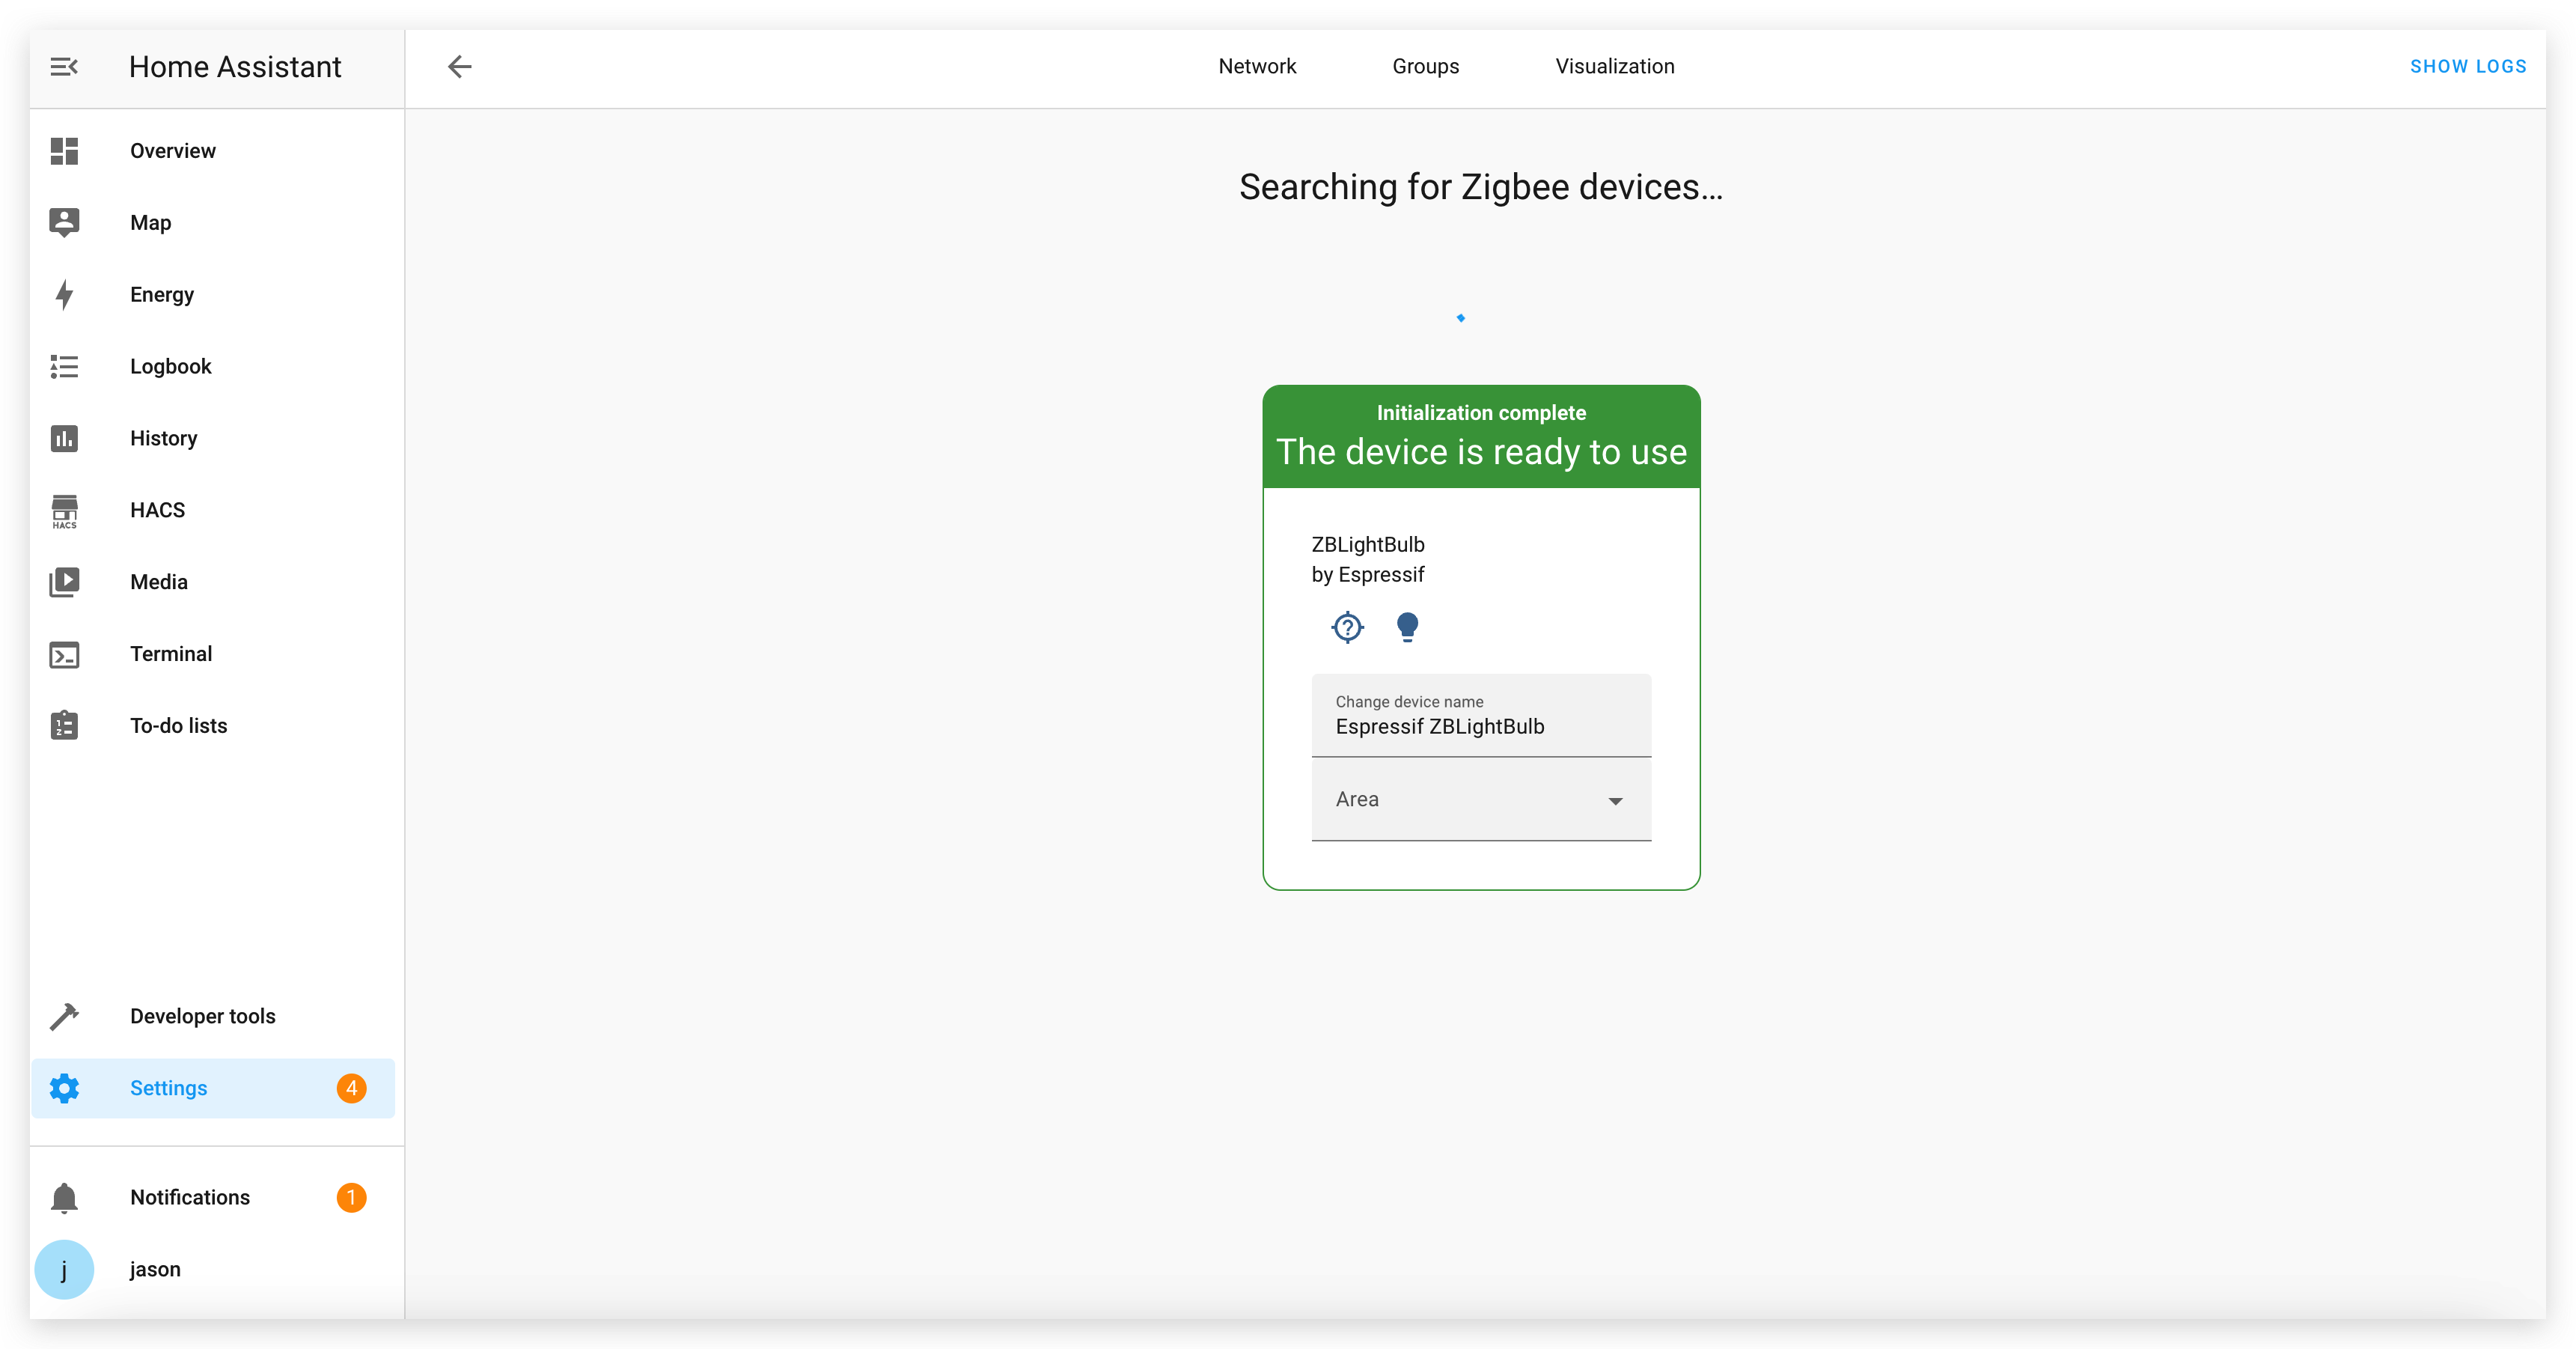
You can set a name and location for it on this page.
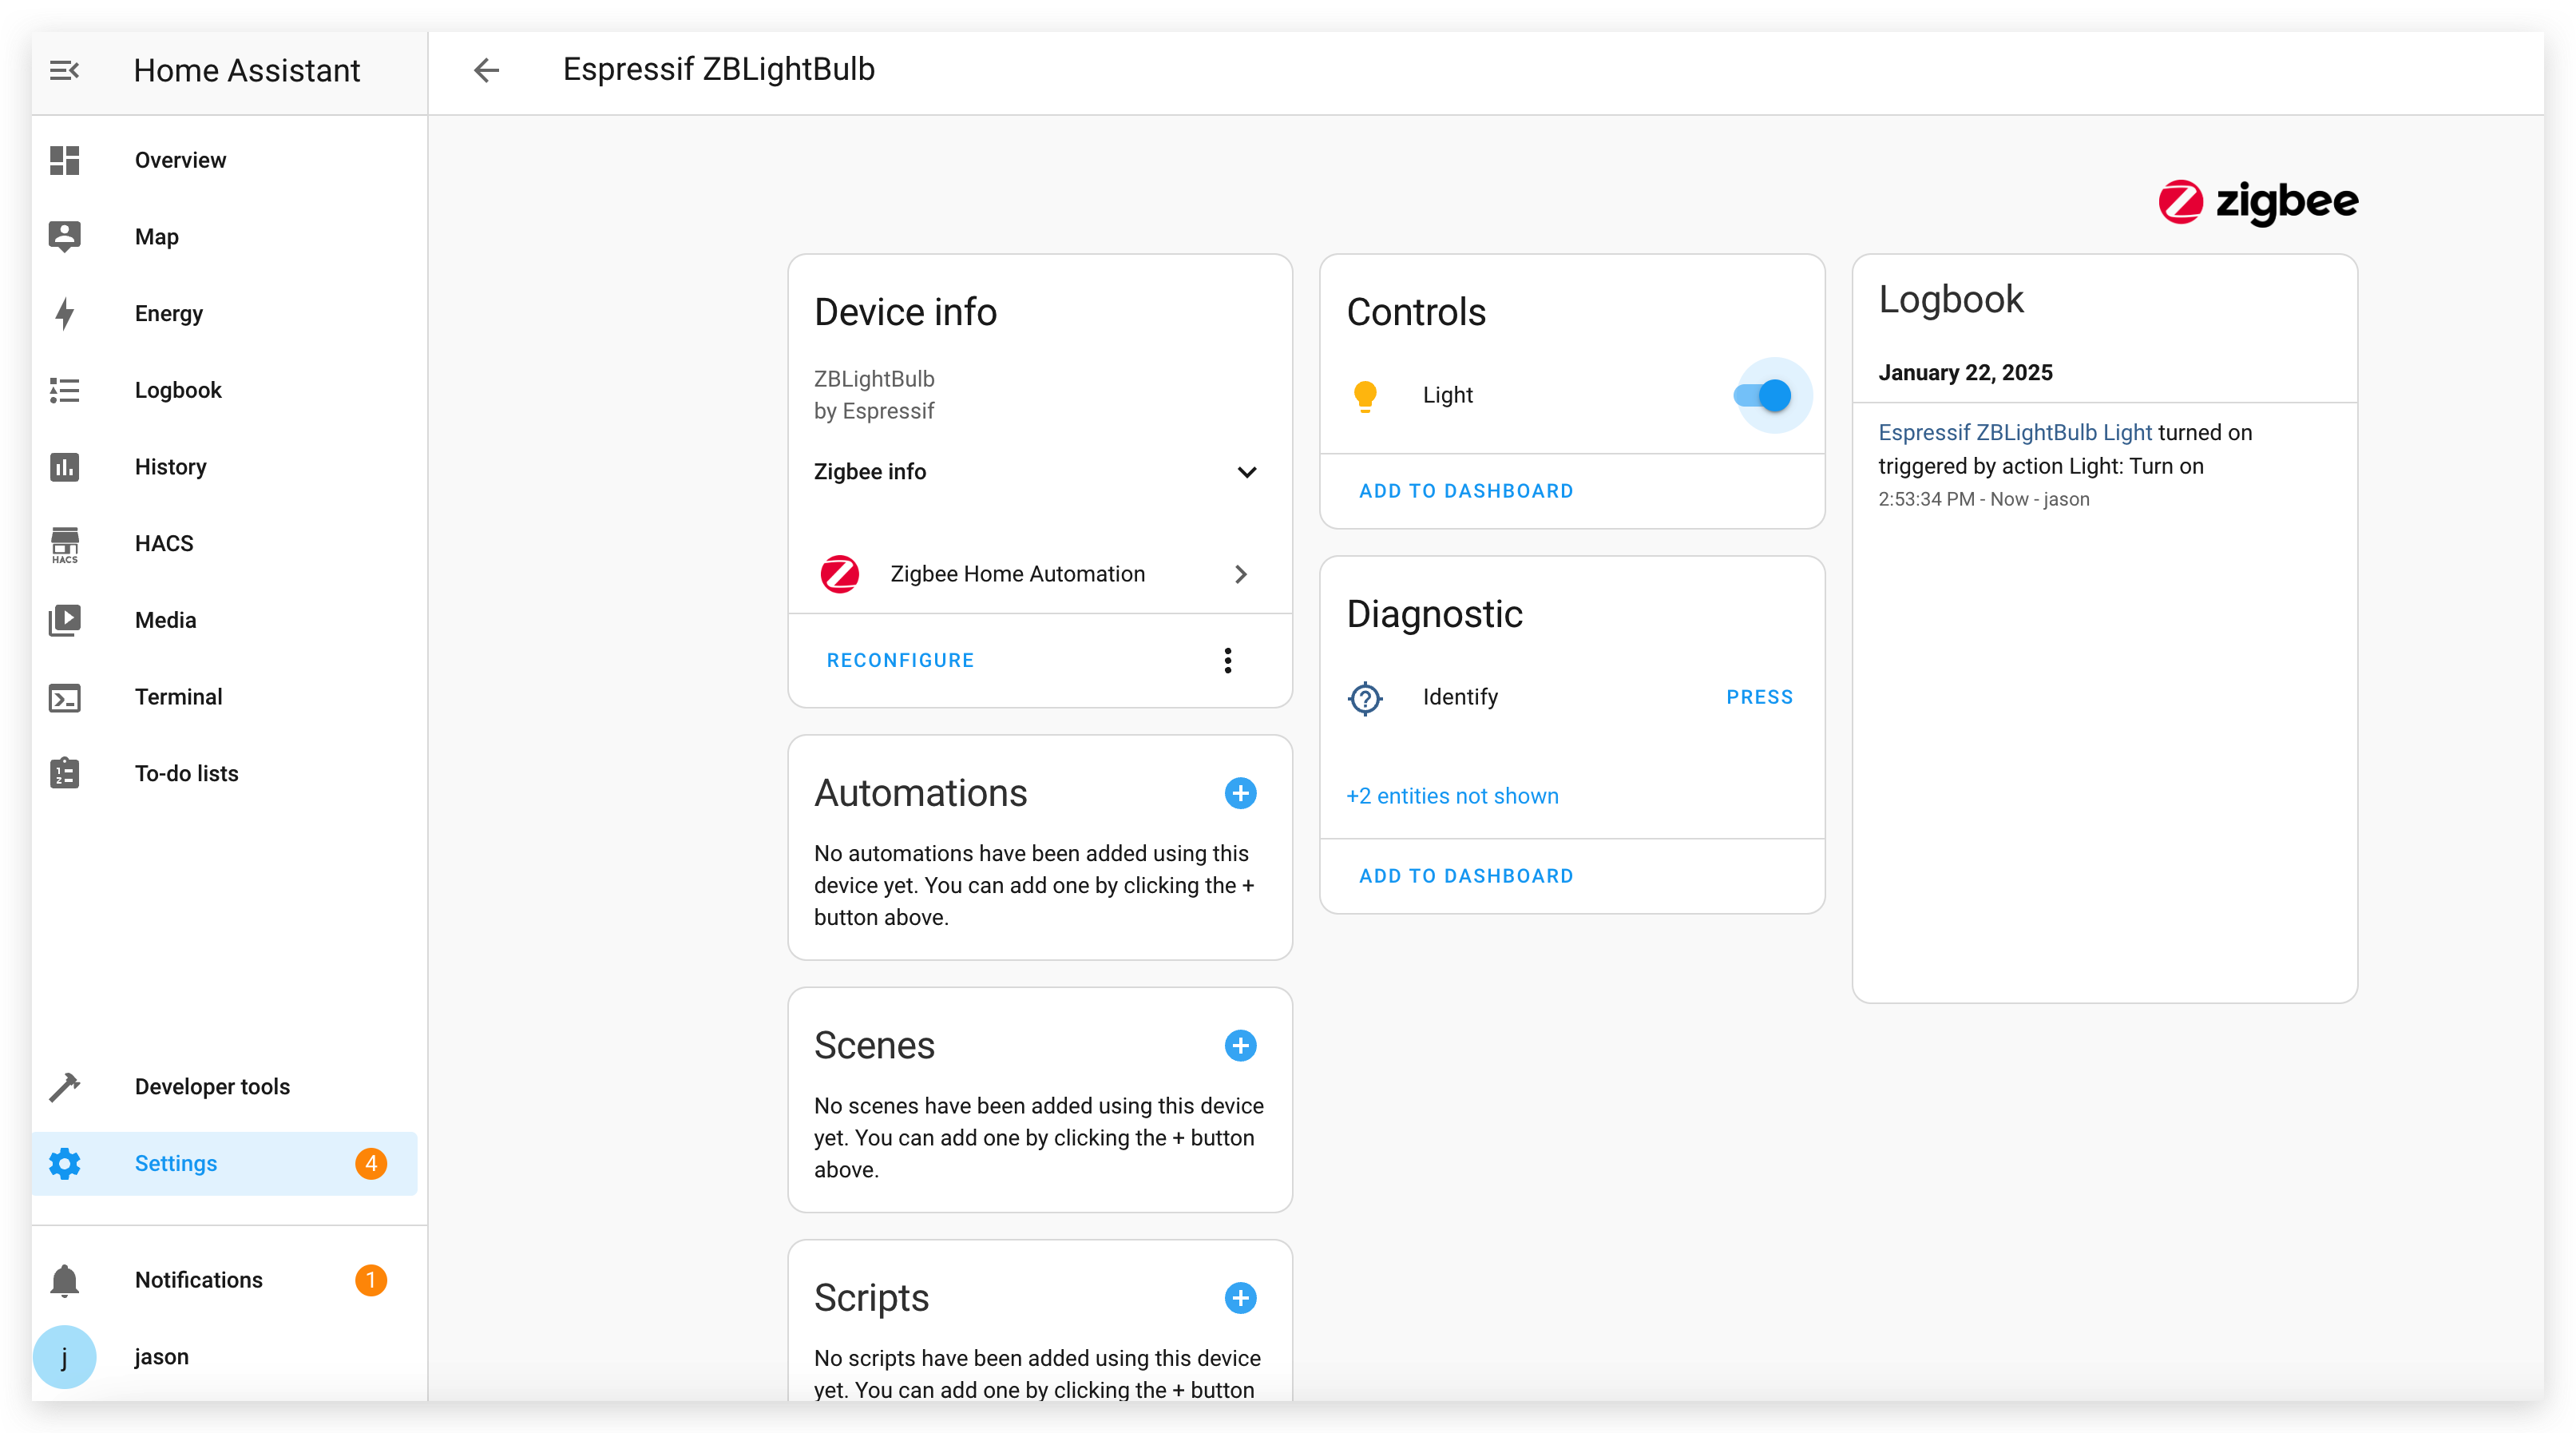
- You can then find this device on the ZHA's device page and add his entity to the dashboard.
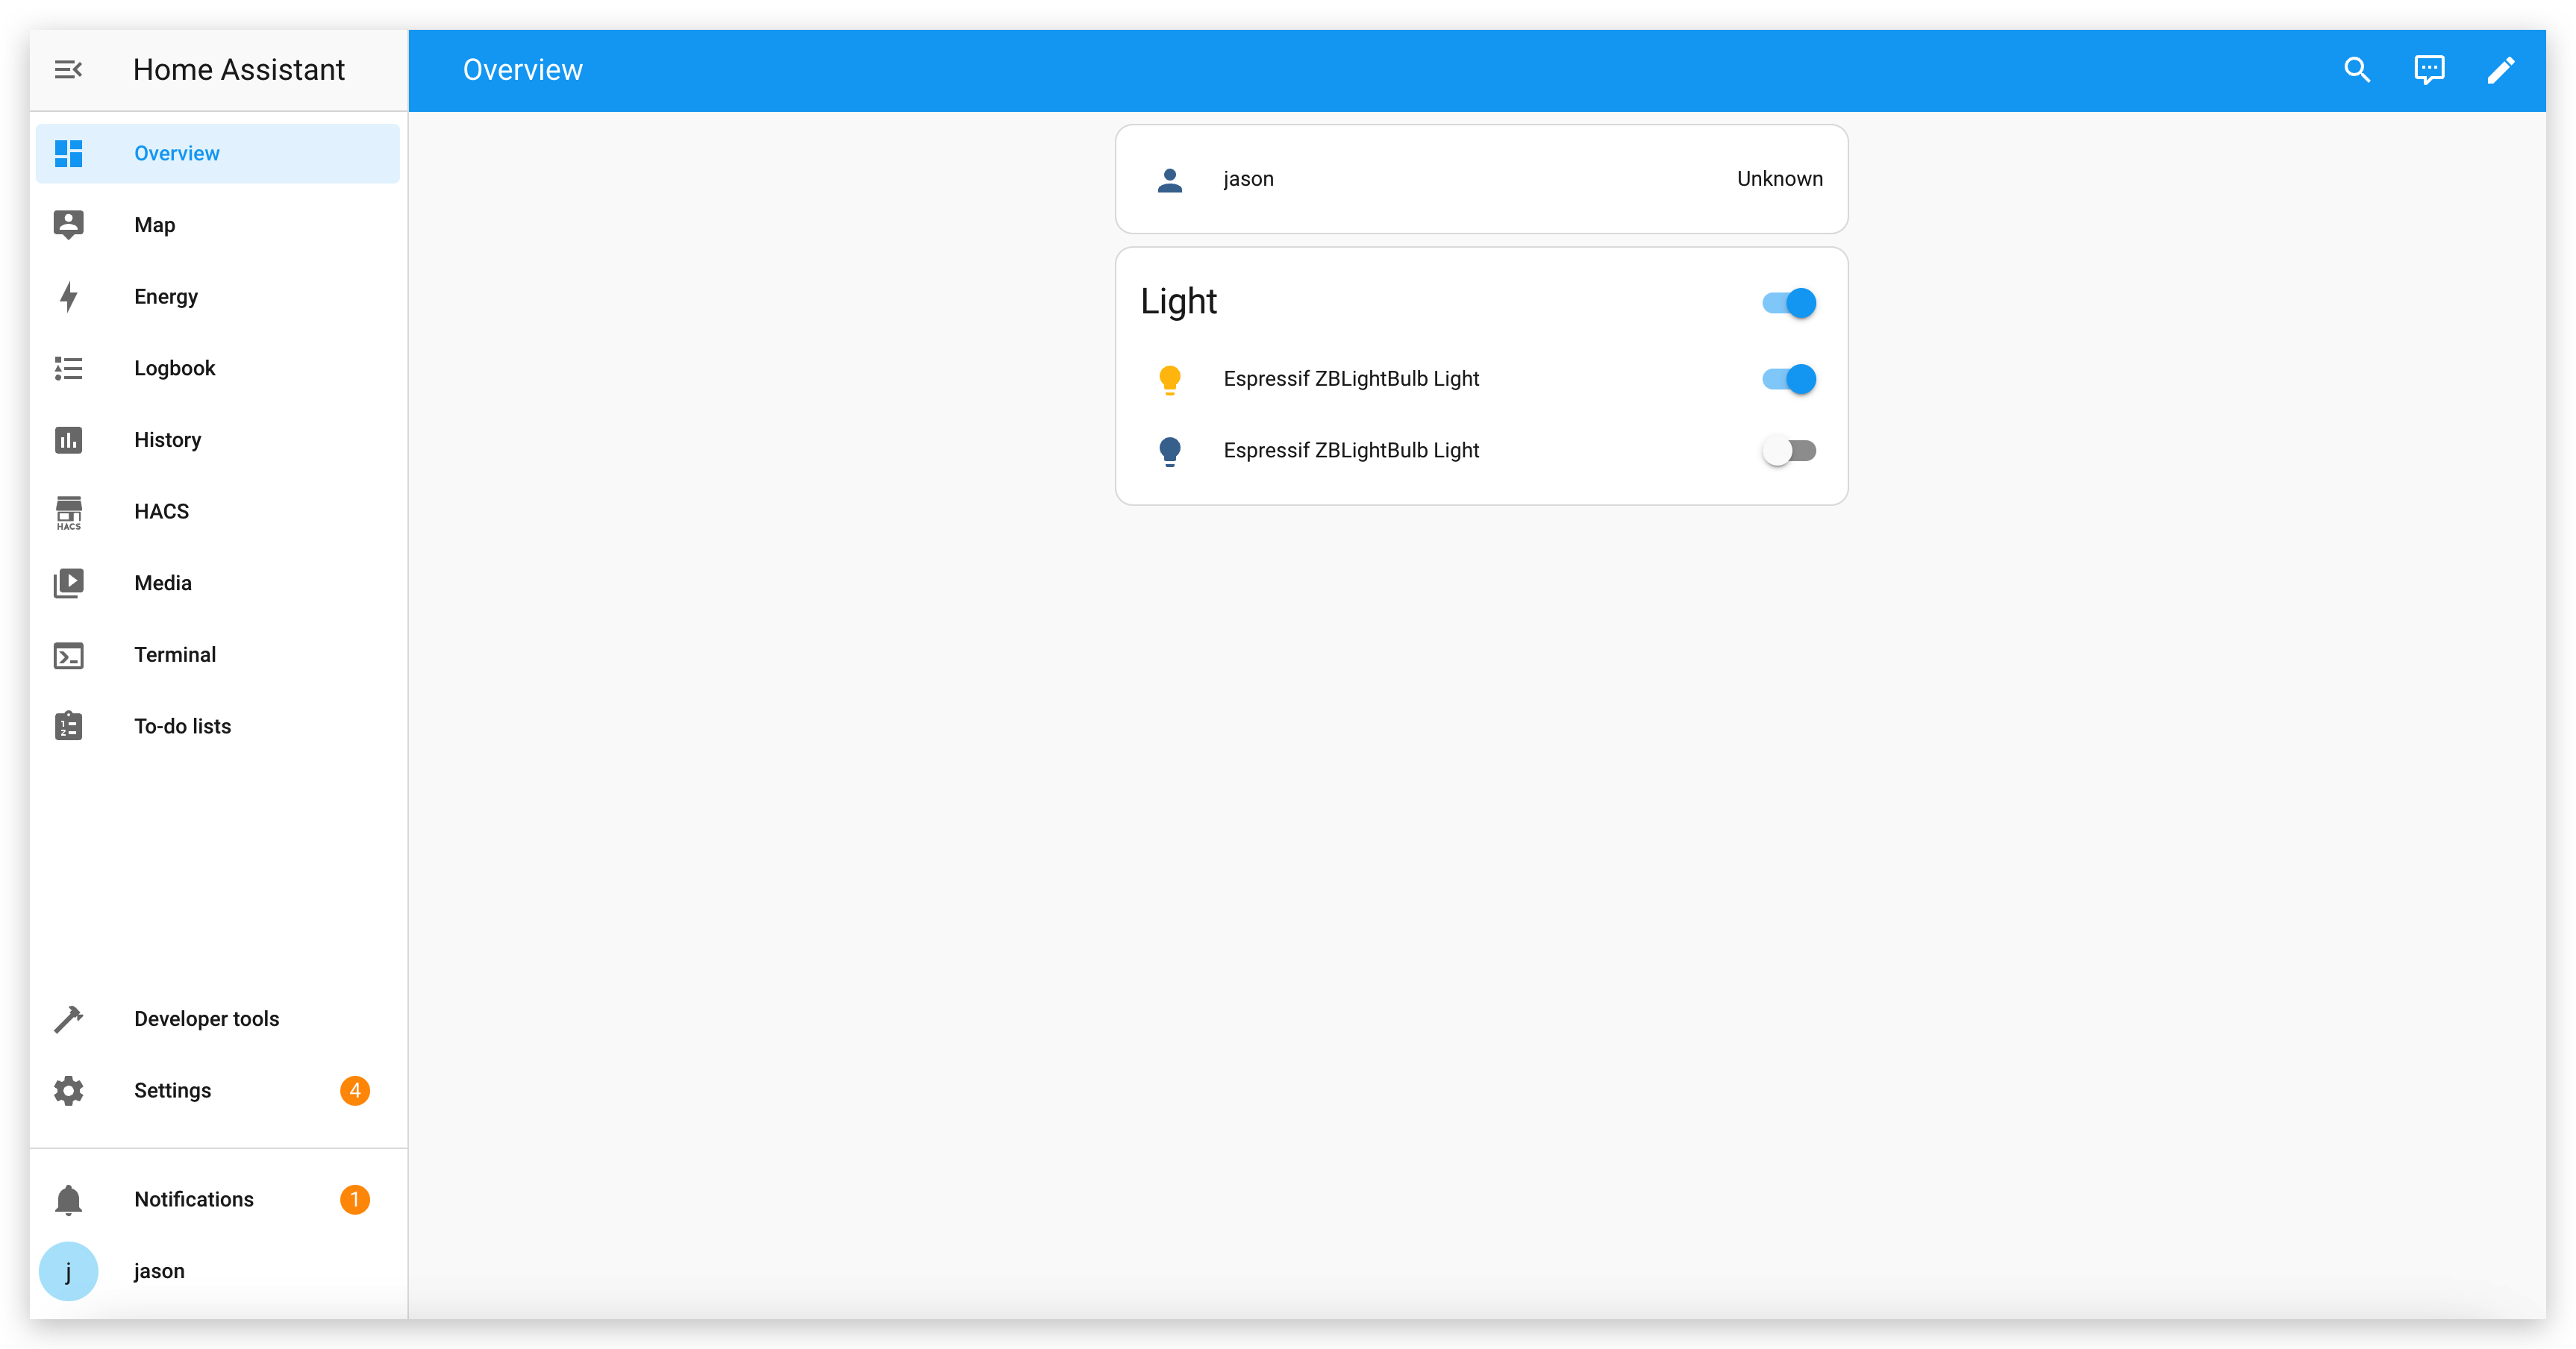
Step 5. Add the XIAO ESP32C6 to the Dashboard
- Once the XIAO ESP32C6 is discovered, add it to your Home Assistant dashboard.
- You can now control the XIAO ESP32C6 (e.g., toggle the onboard LED) directly from Home Assistant.
Conclusion
Espressif provides a diverse range of Zigbee device types and an extensive Zigbee SDK, enabling developers to create their own Zigbee devices with ease. By following this tutorial, you’ve learned how to integrate the XIAO ESP32C6 into Home Assistant using Zigbee, adding a custom device to your smart home ecosystem.
With the flexibility of Espressif’s Zigbee SDK, you can start building your own Zigbee devices for a variety of applications and features, and seamlessly add them to Home Assistant for centralized control. Happy building!
Tech Support & Product Discussion
Thank you for choosing our products! We are here to provide you with different support to ensure that your experience with our products is as smooth as possible. We offer several communication channels to cater to different preferences and needs.