Overview
LoRaWAN Basics
LoRaWAN (Long Range Wide Area Network) is a low-power, long-range wireless communication protocol specifically designed for Internet of Things (IoT) applications. It provides long-distance and low-power communication capabilities for IoT devices.The key feature of LoRaWAN includes:
- Long-range communication
- Low power consumption
- Deployed either publicly or privately
- large-scale device connectivity
Due to these characteristics, it is widely applied in smart agriculture,smart city,environmental monitoring and other wireless sensing applications.

To learn more about LoRaWAN, click here.
SenseCAP LoRaWAN Starter Kit
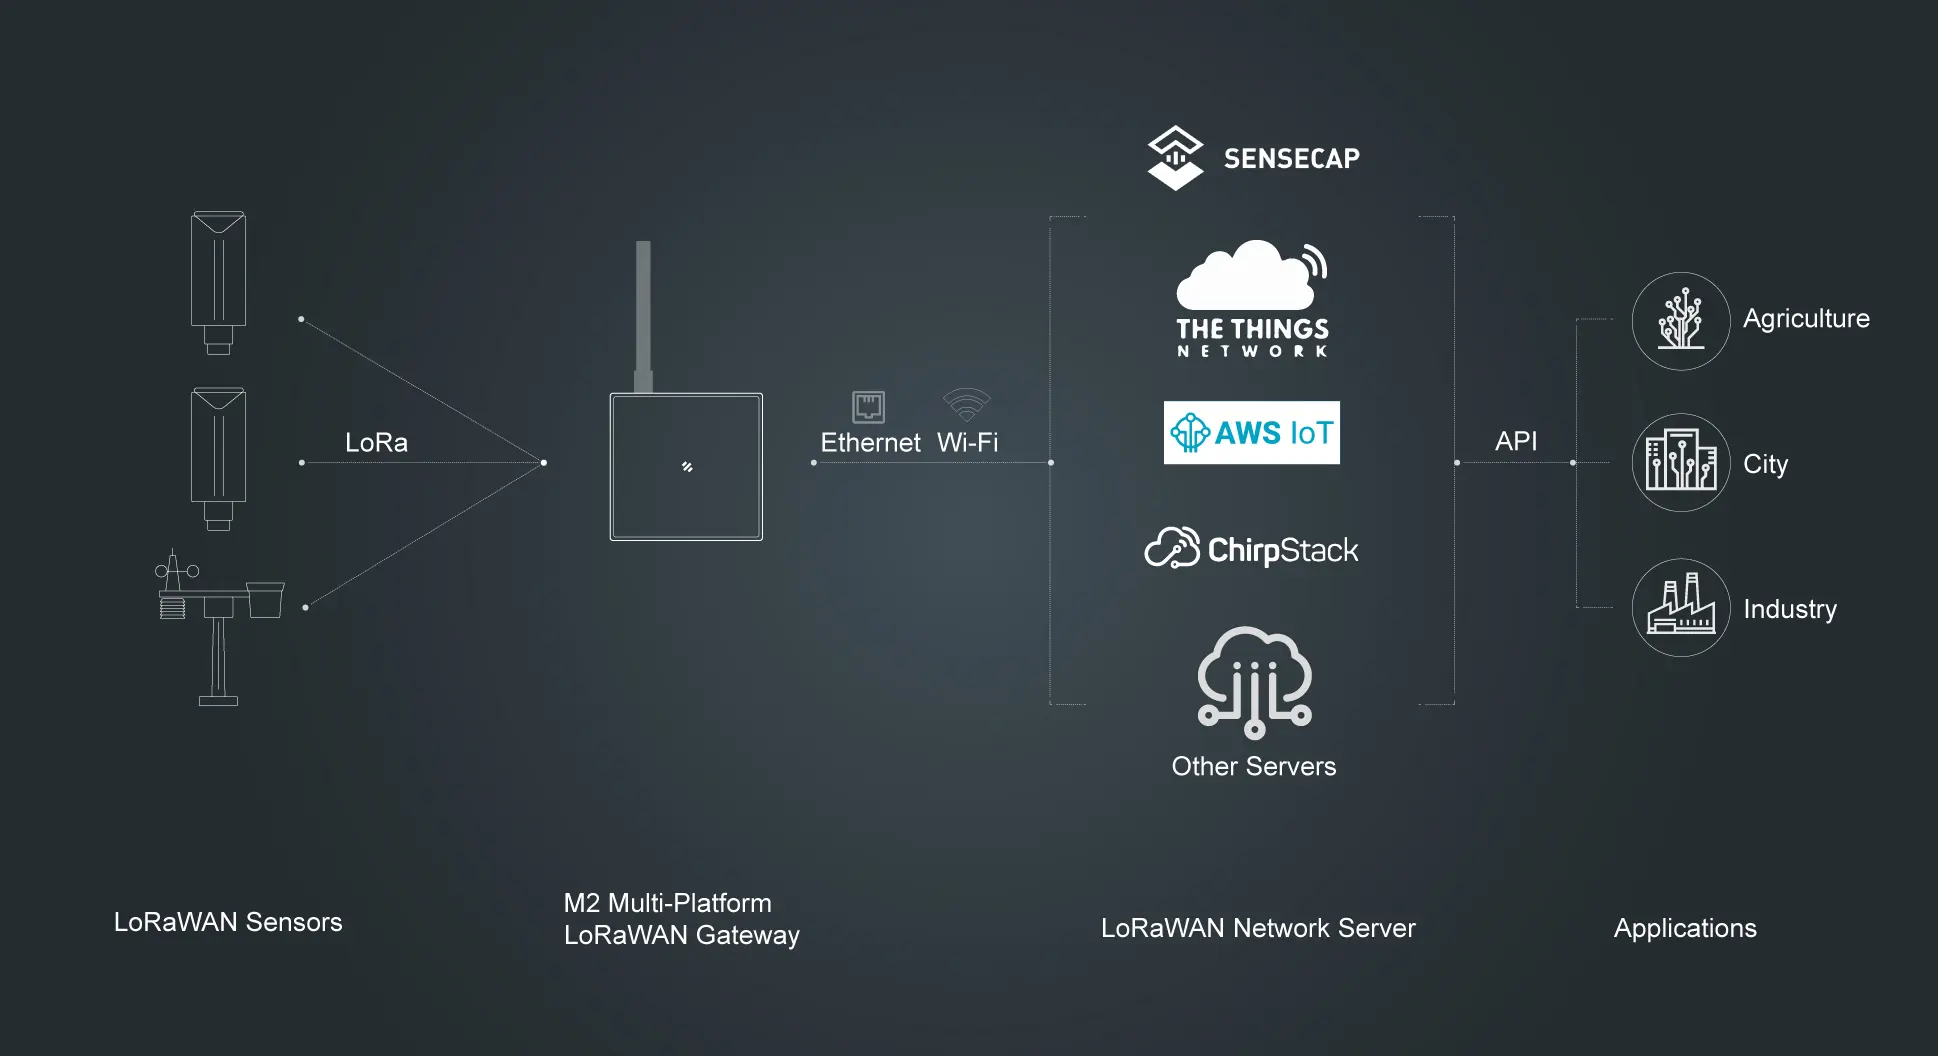
SenseCAP LoRaWAN Starter Kit is aim to facilitate users in rapidly acquiring and applying practical knowledge of LoRaWAN.The kit includesNM2 Multiple platform gateway,XIAOS3,Grove Wio-E5,Temperature & Humidity Sensor,Moisture Sensor, other expandable Grovesenables users to engage in hands-on learning of LoRaWAN architecture and empowers them to further develop their own projects.
As a LoRaWAN Starter Kit,it includes all components of the LoRaWAN architecture, including nodes, gateways, and even SenseCAP cloud platform.The kit offers a comprehensive set of features that allow you to fully experience LoRaWAN technology. With this kit, you can engage in various practical activities such as distance testing, network testing, and project development. It provides a complete solution that enables you to delve into all aspects of LoRaWAN, validating its performance and functionality through real-world applications. Whether you are a beginner or an experienced developer, this kit caters to your learning and hands-on needs in the realm of LoRaWAN.
Relevant Products:
| Name | Description |
|---|---|
| S210x | A series of wireless LoRaWAN® industrial sensors. |
| S2100 datalogger | Can connect to MODBUS-RTU RS485/Analog/GPIO sensors and transmit data from sensors to the LoRaWAN network |
| M2 Multi-Platform LoRaWAN Indoor Gateway | A standard LoRaWAN® gateway that supports connecting to different network servers |
| Wio-E5 Dev Kit | An easy-to-use compact development toolset for you to unlock the powerful performance of the Wio-E5 STM32WLE5JC LoRa module. |
Get Started
Preparation
hardware
Electronic Components
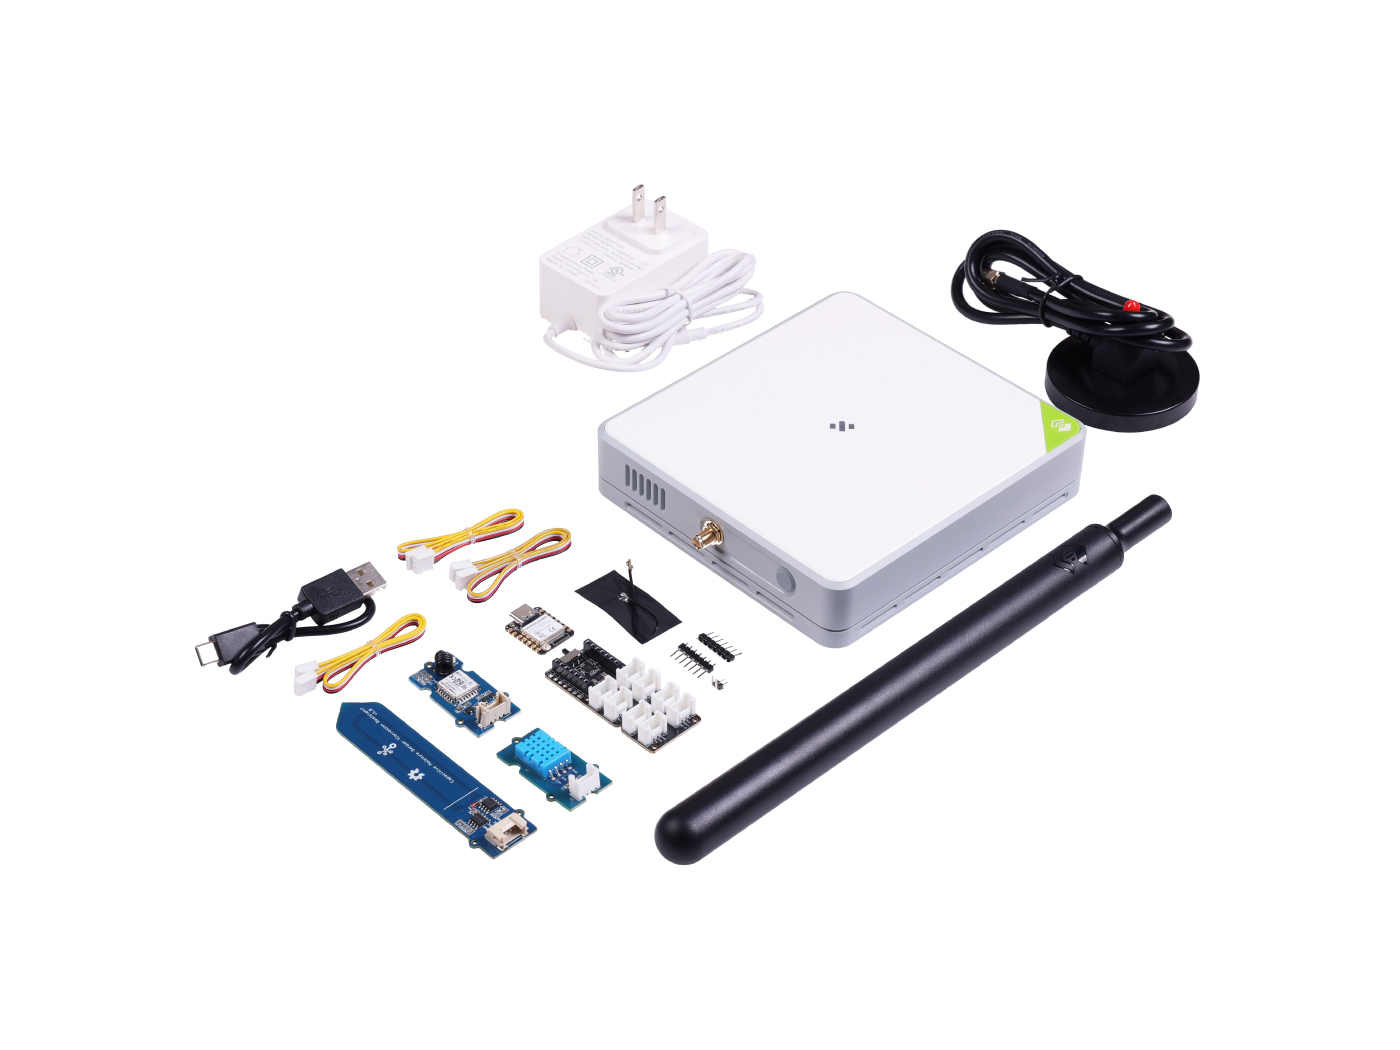
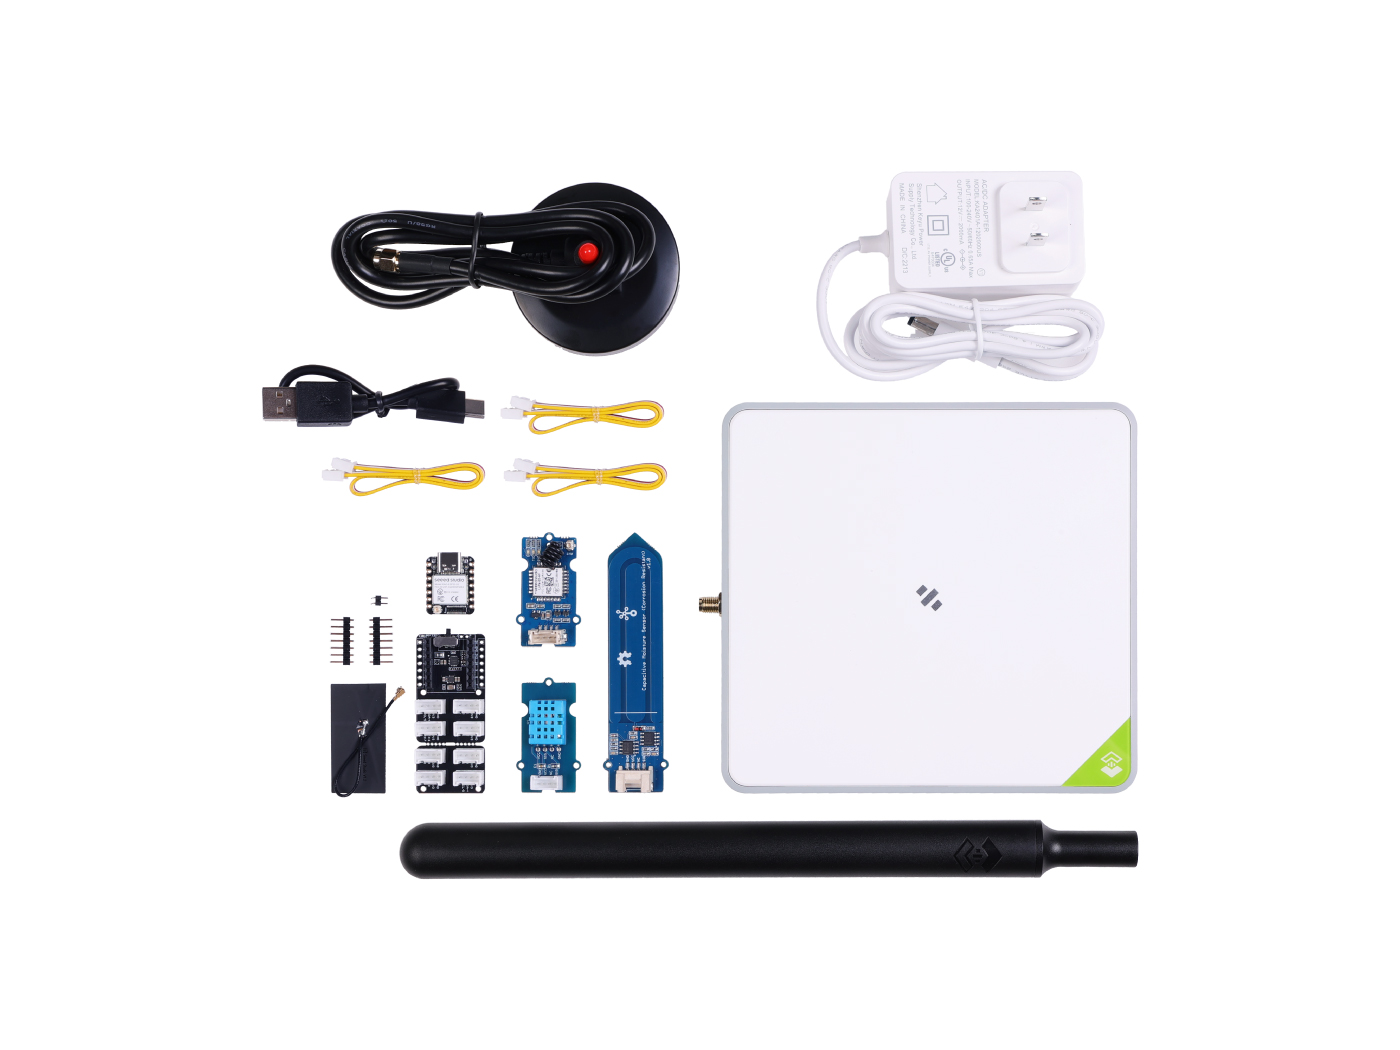
The kit should include the following electronic components. Please check if they are complete.**
**
Before starting the project, you need to solder the headers on the XIAO board and install the antenna.
Solder header
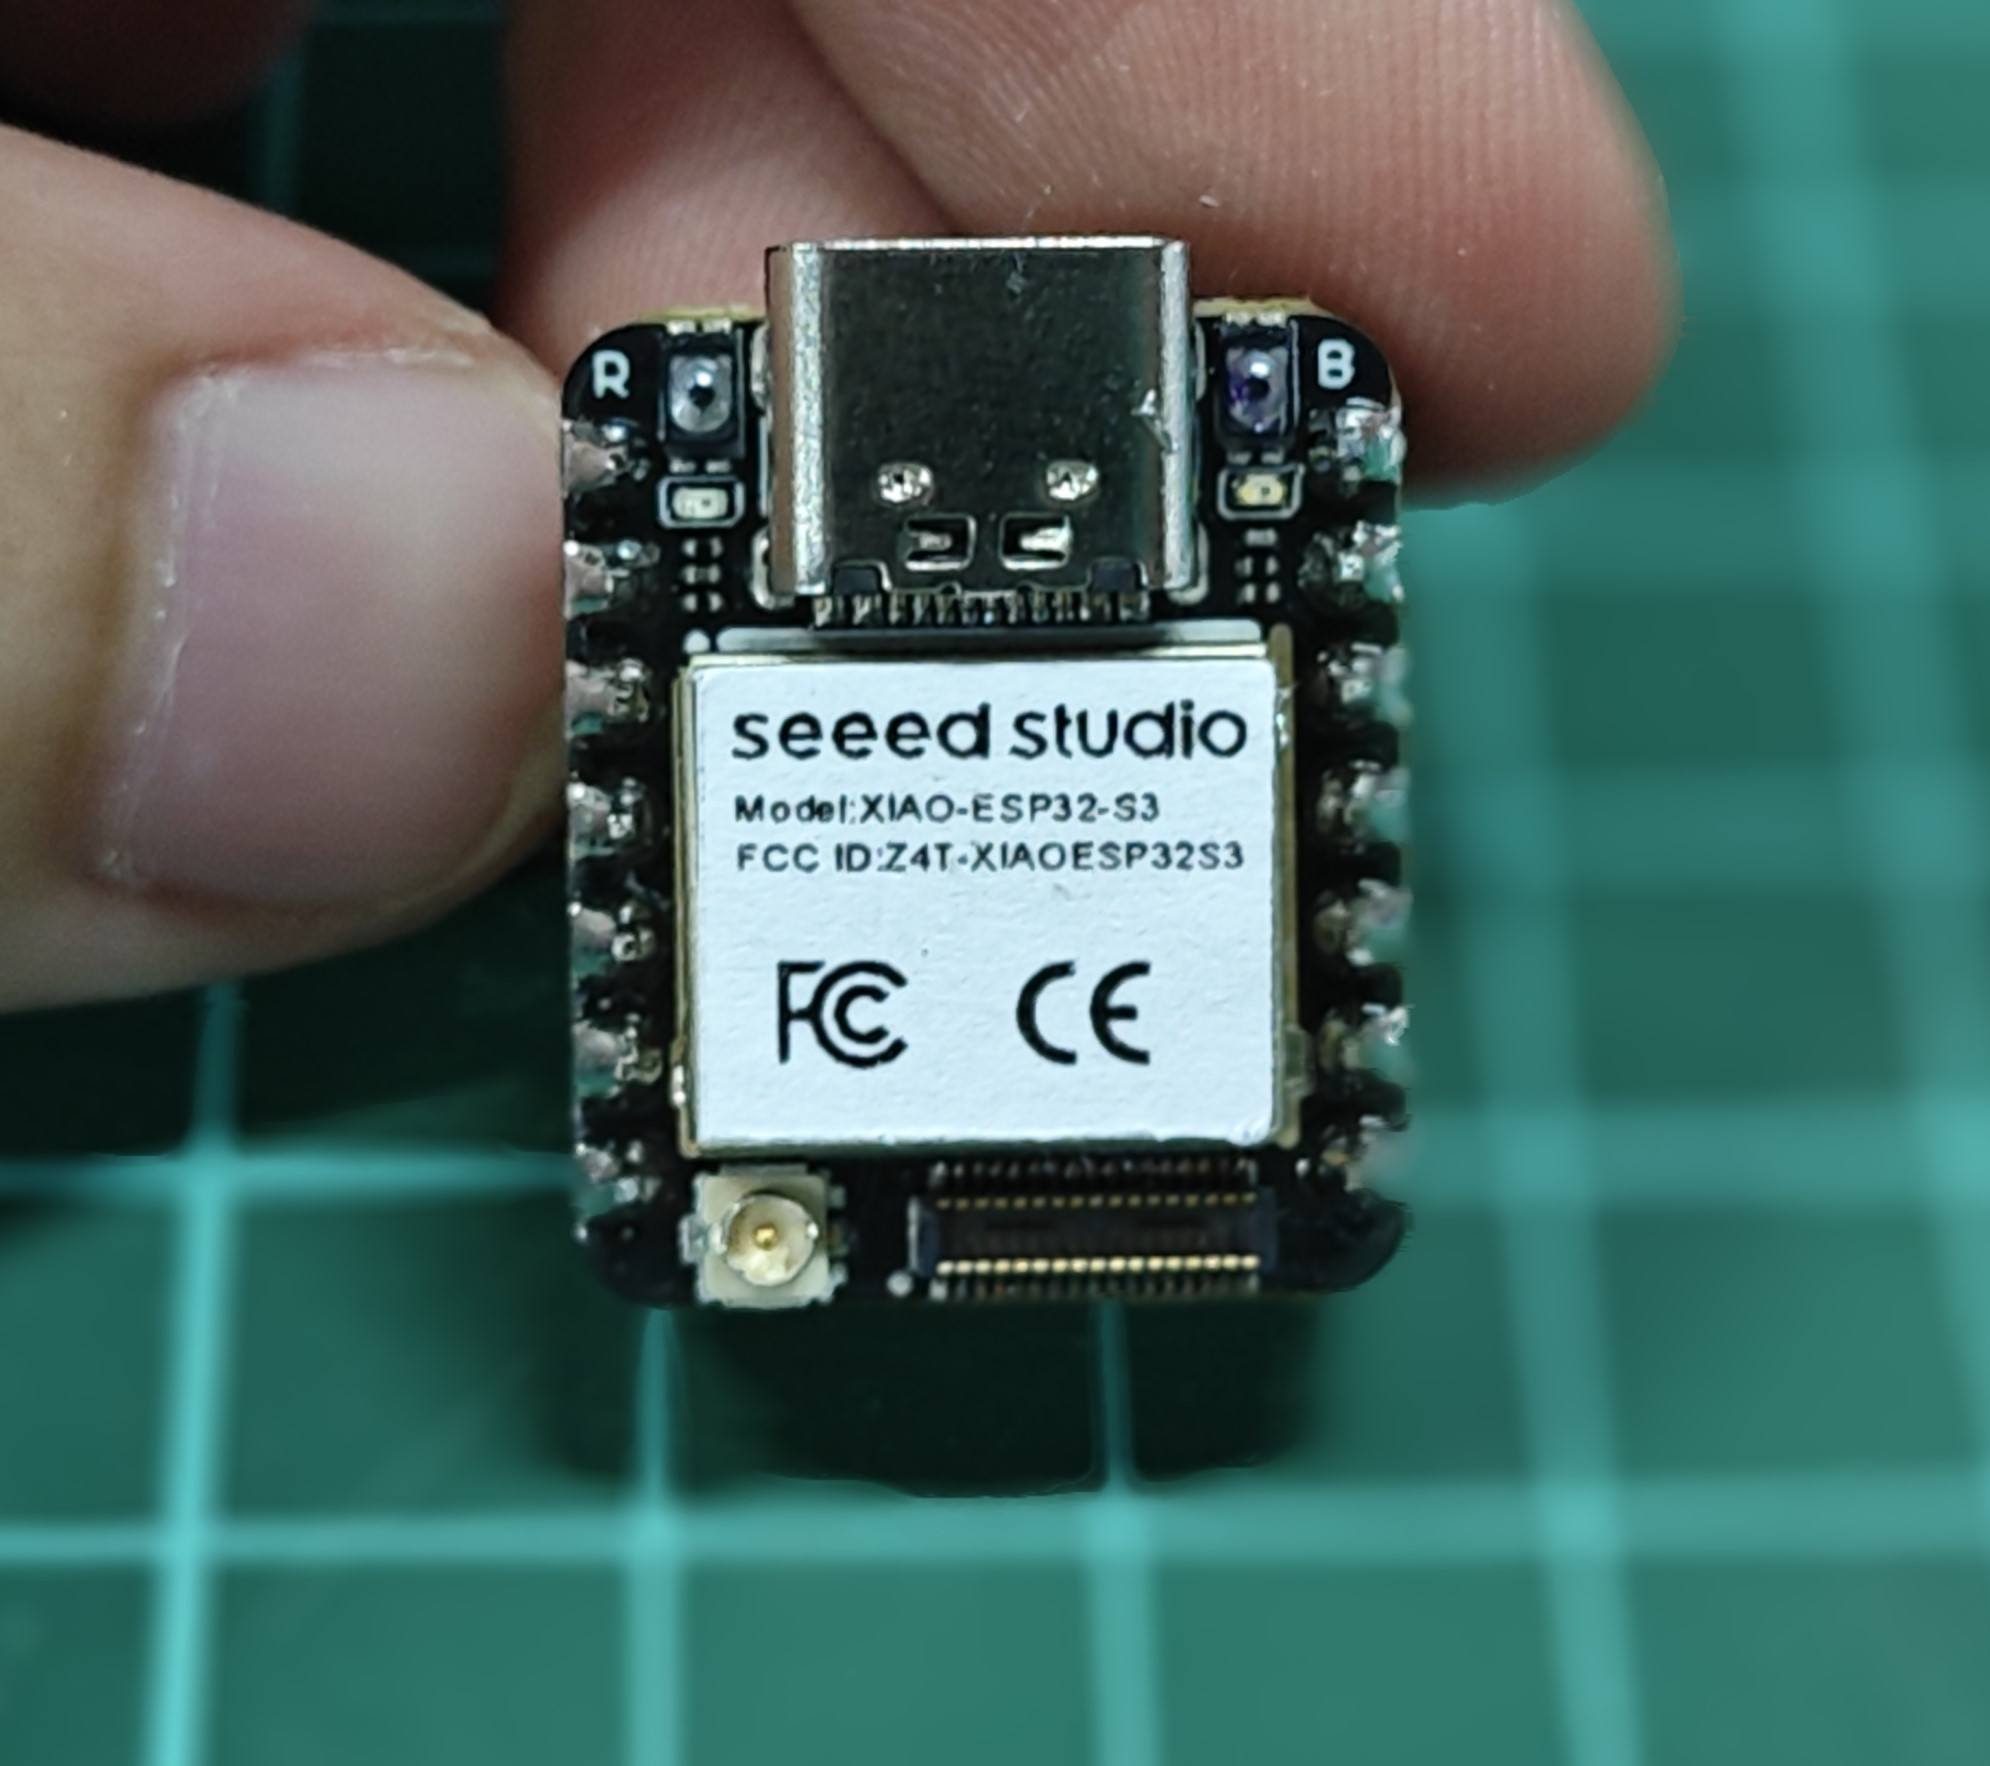
XIAO ESP32S3 is shipped without pin headers by default, you need to prepare your own pin headers and solder it to the corresponding pins of XIAO so that you can connect to the expansion board or sensor.
Due to the miniature size of XIAO ESP32S3, please be careful when soldering headers, do not stick different pins together, and do not stick solder to the shield or other components. Otherwise, it may cause XIAO to short circuit or not work properly, and the consequences caused by this will be borne by the user.
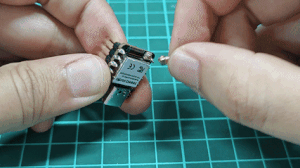
Installation of antenna
On the bottom left of the front of XIAO ESP32S3, there is a separate "WiFi/BT Antenna Connector". In order to get better WiFi/Bluetooth signal, you need to take out the antenna inside the package and install it on the connector.
There is a little trick to the installation of the antenna, if you press down hard on it directly, you will find it very difficult to press and your fingers will hurt! The correct way to install the antenna is to put one side of the antenna connector into the connector block first, then press down a little on the other side, and the antenna will be installed.
Remove the antenna is also the case, do not use brute force to pull the antenna directly, one side of the force to lift, the antenna is easy to take off.
Software
You have the option to choose our built-in SenseCAP cloud platform or use a third-party LoRaWAN Network Server like The Things Network. We recommend using the SenseCAP cloud platform for the best user experience. Below are the relevant links.
- Click to open the SenseCAP Portal Web page
Scan to down load SenseCAP Mate APP

Quick & No-code Initiation with LoRaWAN Starter Kit
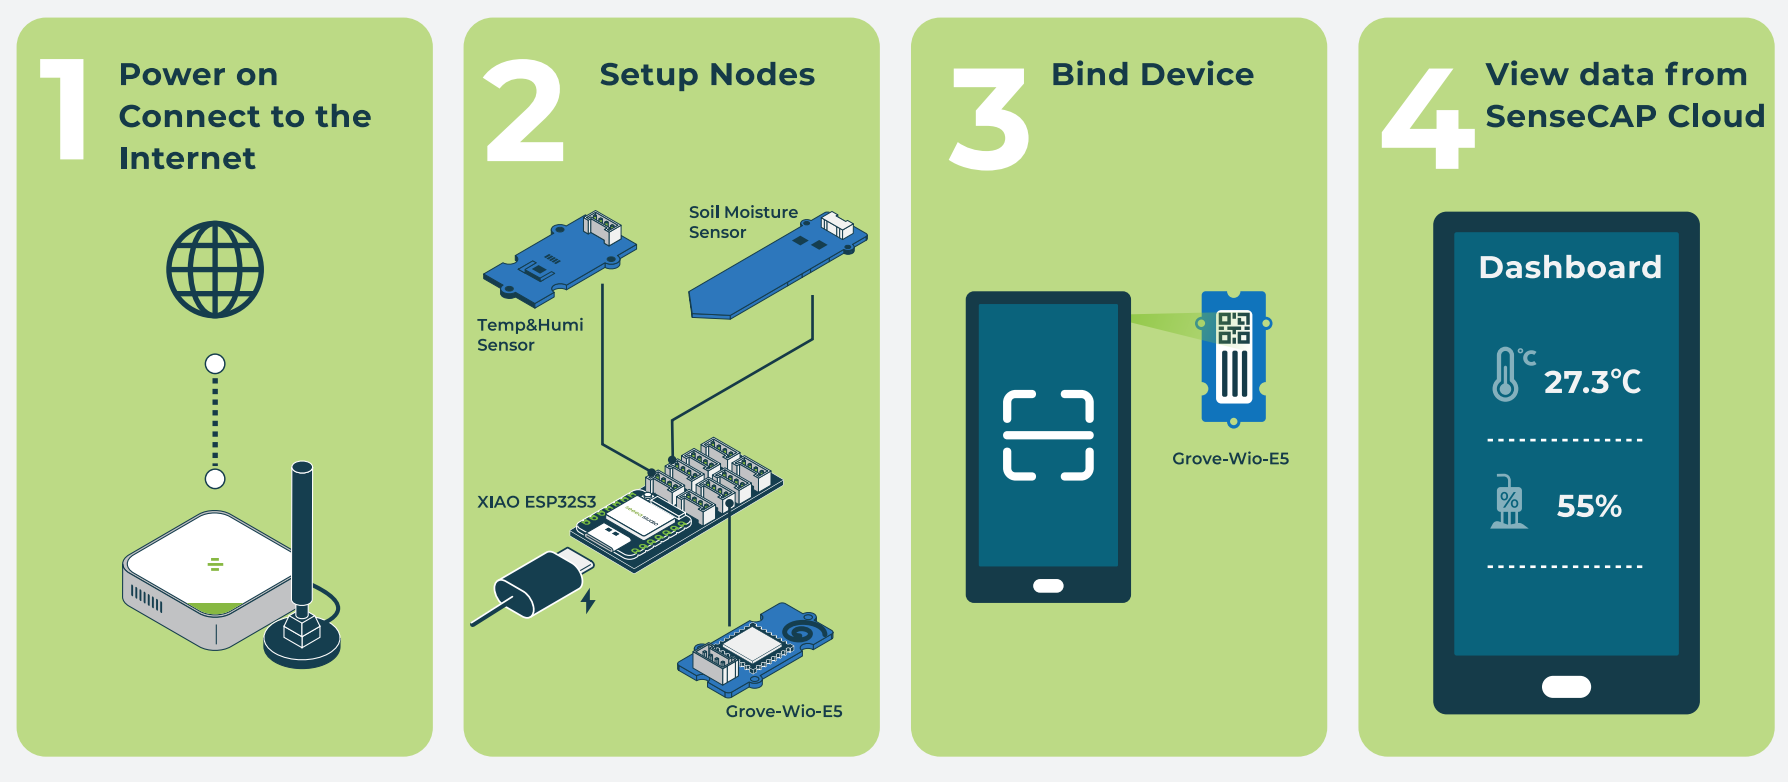
Step 1 Power on and Connect to Internect
The kit includes SenseCAP Multi-Platform LoRaWAN Indoor Gateway(SX1302) - EU868 - Seeed Studio which is a standard LoRaWAN® gateway that supports connecting to different network servers. It can be used not only for personal LoRa development but also in conjunction with industrial sensors. In this wiki, the datastream will go through SenseCAP Cloud. The default model running on this gateway is SenseCAP so you don't need to do extra setting, just power on the gateway and connect to Internet by ETH or WIFI.
Connect to ETH Cable
The fast way - Connect the Ethernet cable to the Ethernet port, and the indicator onthetop will show solid green if the gateway is successfully connected to the Internet.
Connected to WIFI via Luci
There are two ways for users to login Luci configuration page.:
Access via router
- Connect your gateway to a Ethernet cable, and connect your PCtothe same router.

Note: Your PC and device should be connected to the same router/network.
- Check the IP Address of your device on your router admin page.
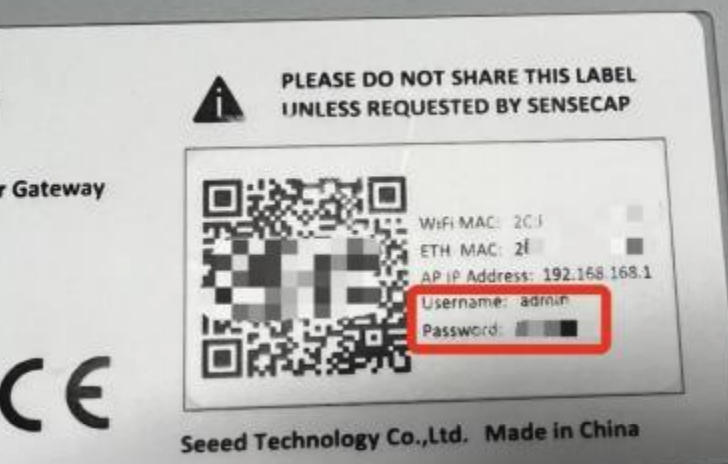
- Get your device Username and Password: You can find the Username and Password on your device label.
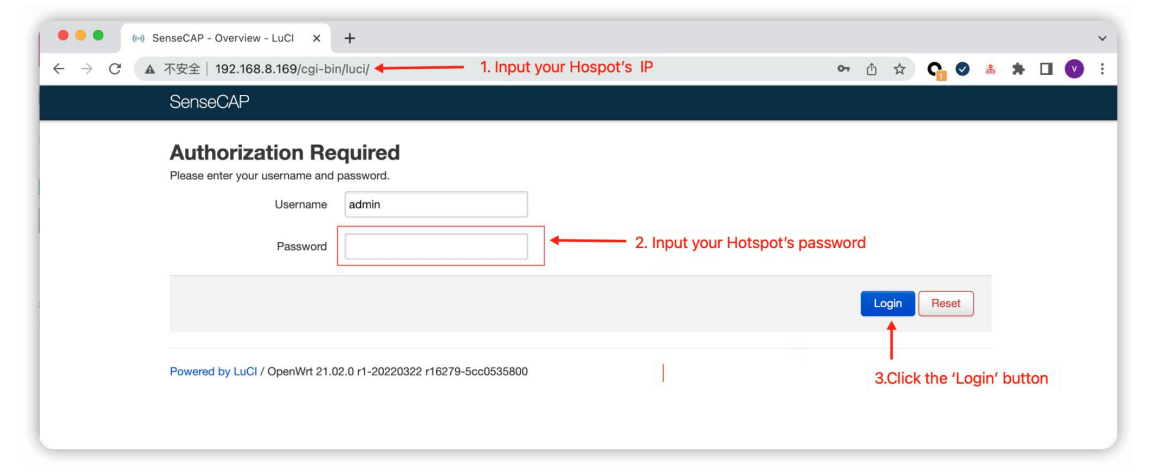
- Input the IP Address of your device in a browser to enter the Luci page. Then input your device username and password to login.
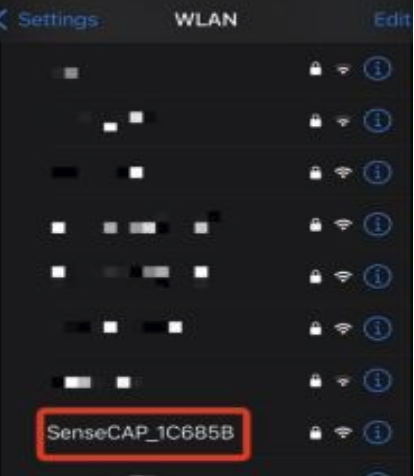
Access via device AP hotspot
- Press the button for 5s until the blue indicator flashes slowly to enter the configuration mode.
- AP hotspot name is SenseCAP_XXXXXX (6-figure MAC address),default password is 12345678; connect your computer to this AP hotspot.
Get your device Username and Password You can find the Username and Password on your device label.
Input the IP Address (192.168.168.1) in your browser to enter the Local Console. Then input your device username and password, and click the Login button.
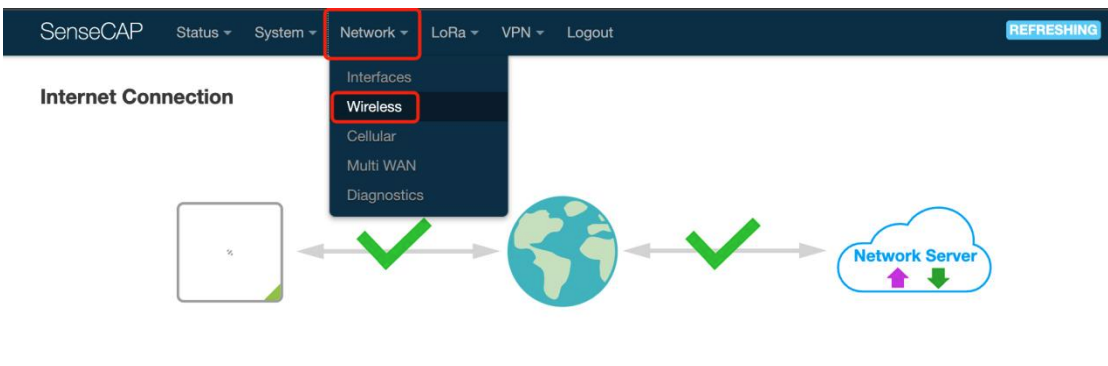
Connect to WIFI
Click on Network - Wireless
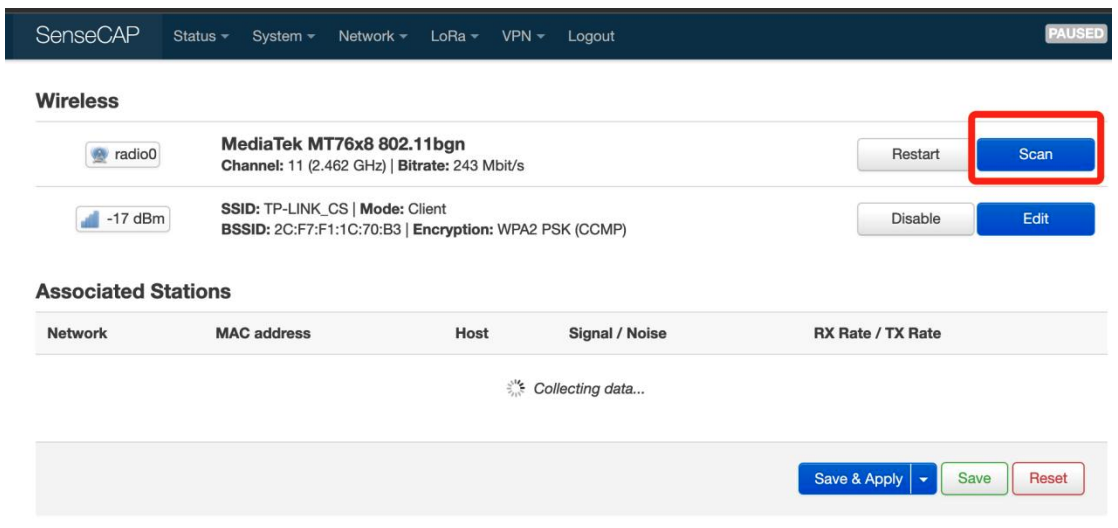
Click on the Scan button to scan the WIFI.
Select your WI-FI to join the network.
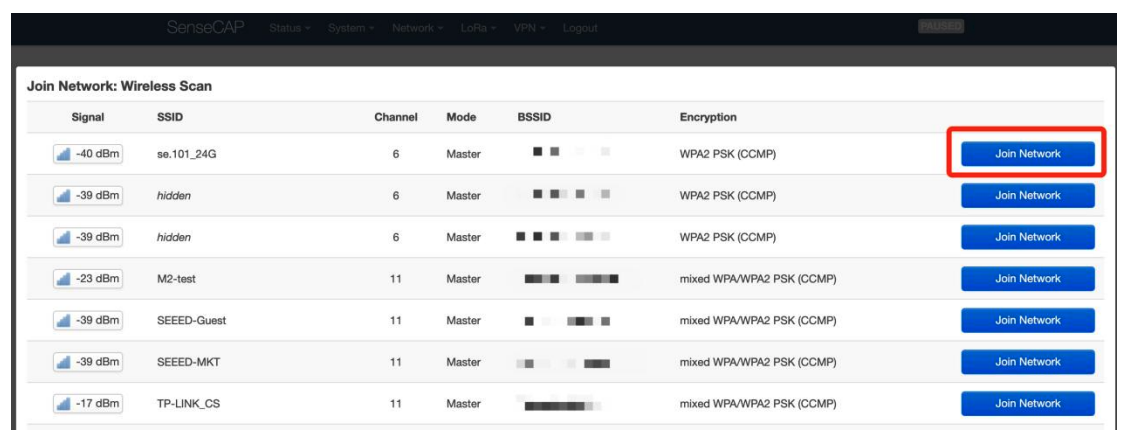
Submit the Wi-Fi password, and then click Submit and Save.
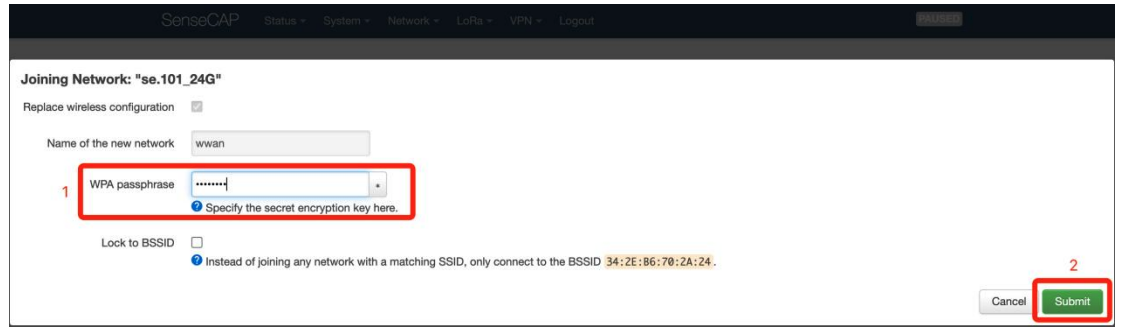
Then click Save and Apply to apply your settings.
The indicator on the top will show solid green if the gateway is successfully connected to the WIFI.
Step2 Connect Nodes
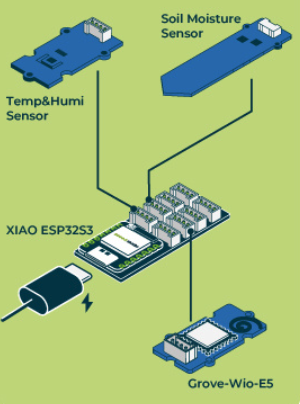
Insert the Grove-Capacitive Soil Moisture Sensor, Temperature & Humidity Sensor & Grove-Wio-E5 Wireless module to XIAO Expansion Board.
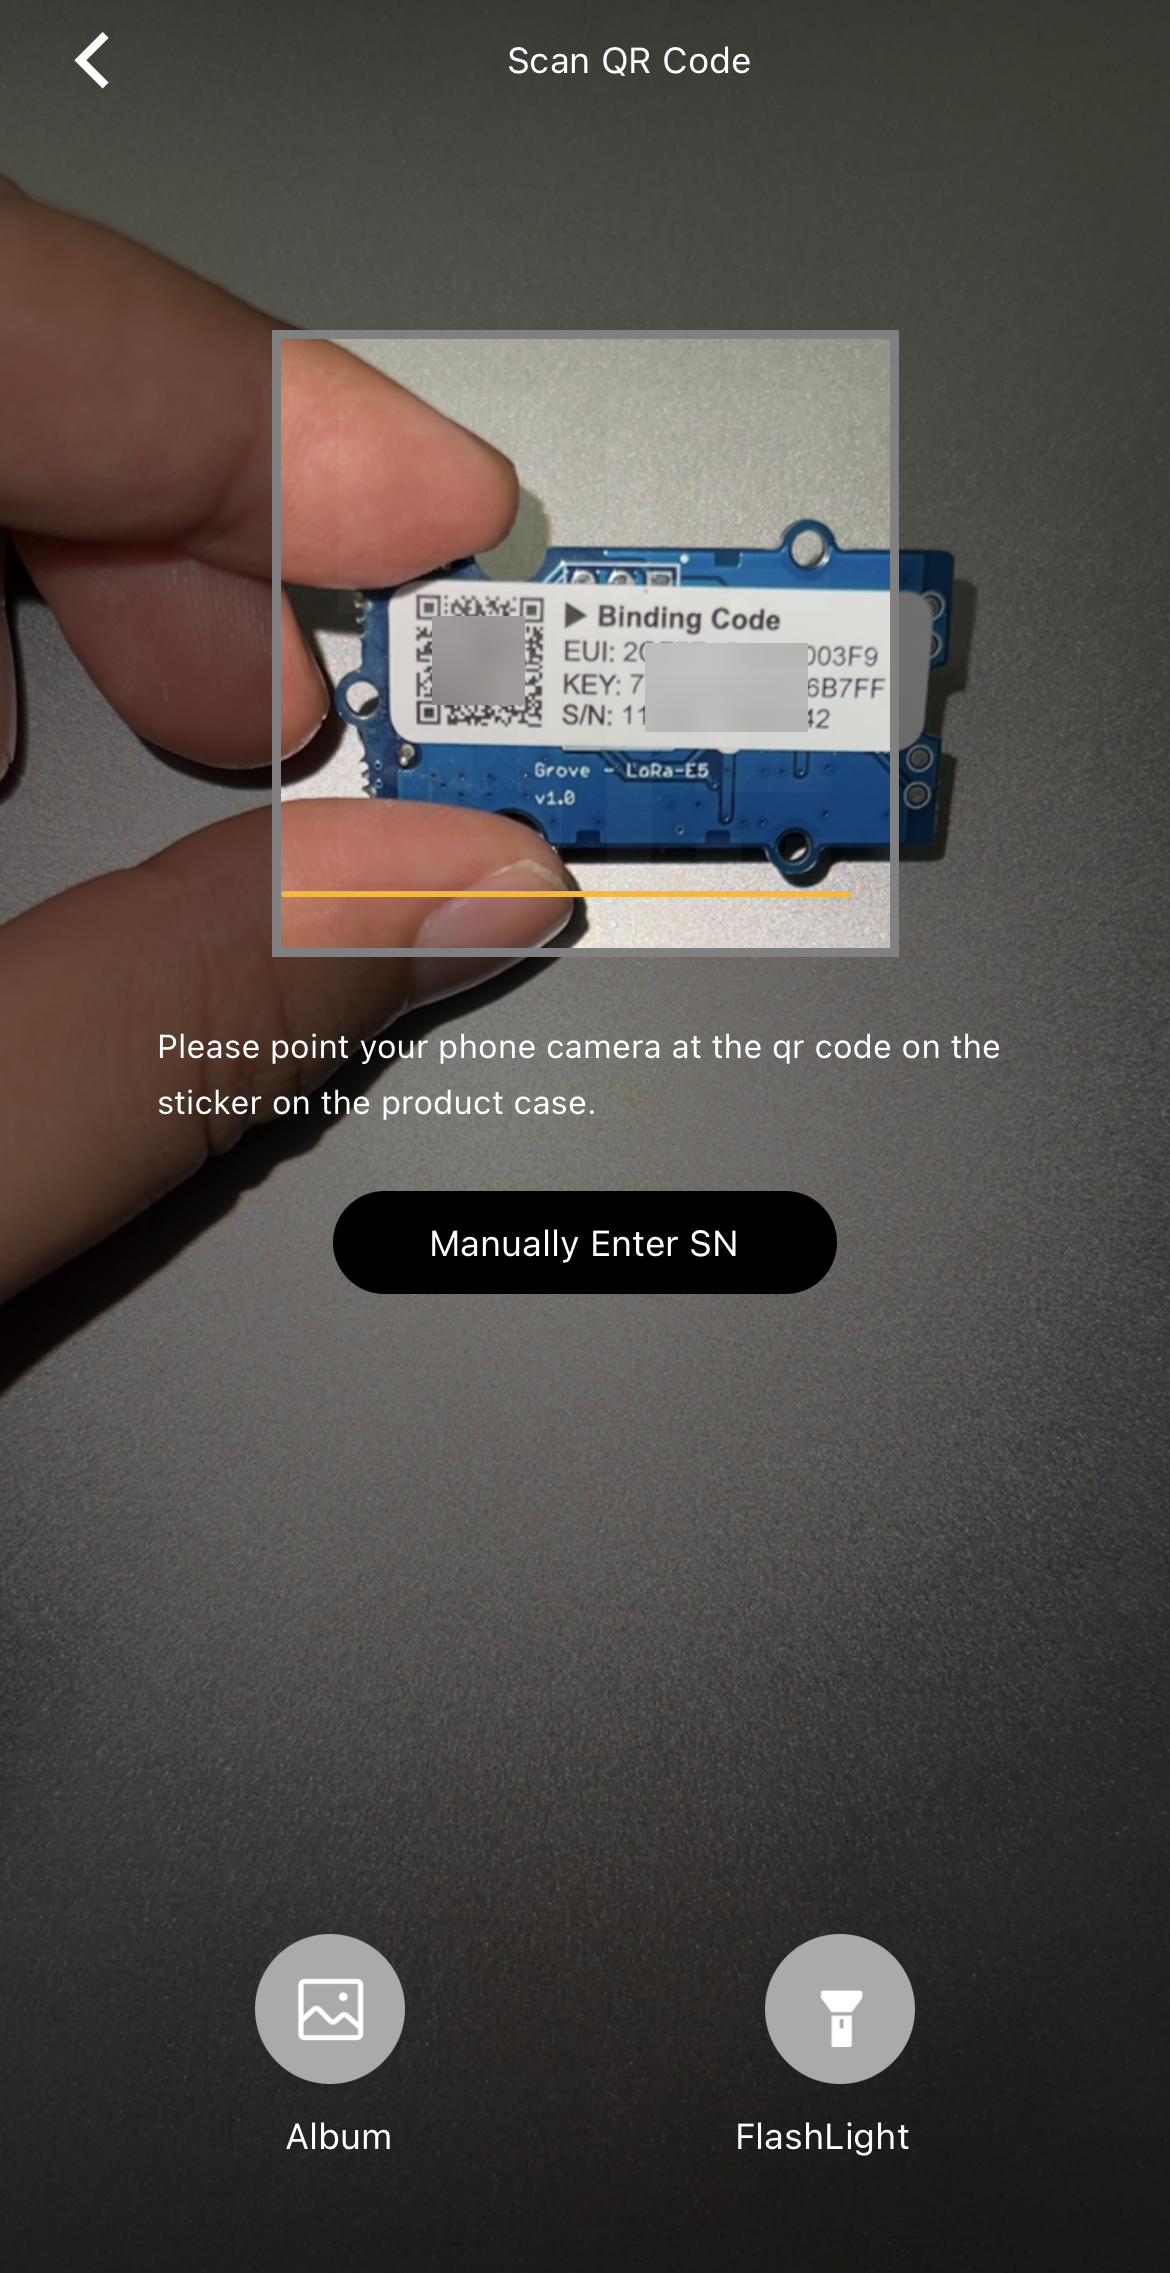
Step 3 Scan QR Code of Grove-Wio-E5
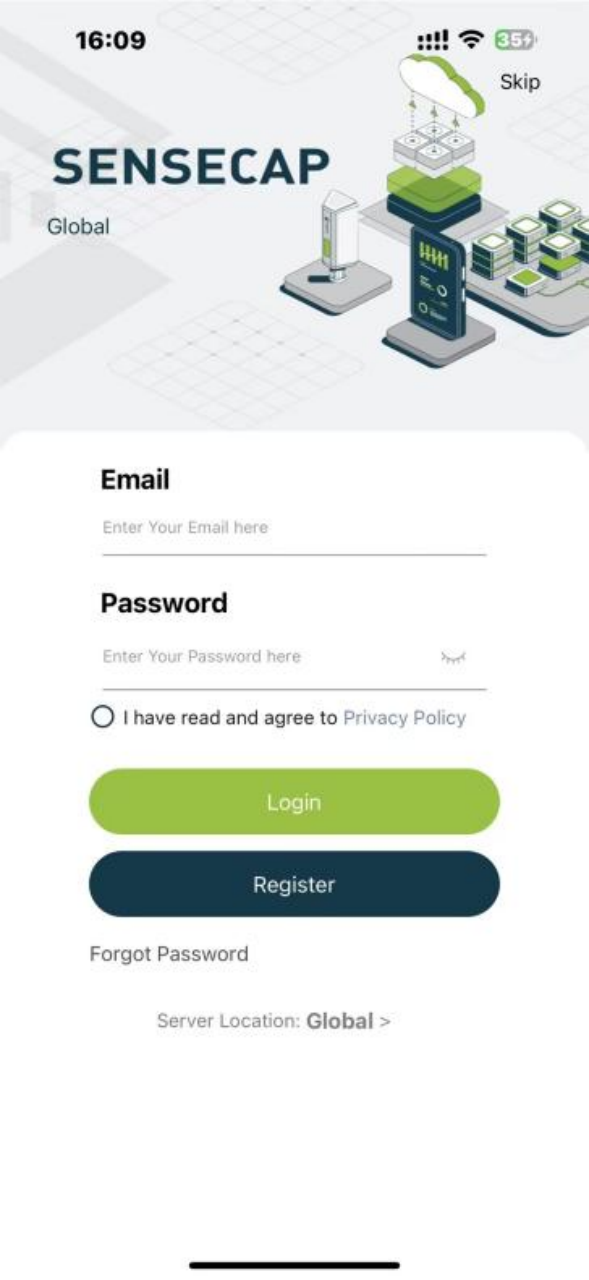
Open the SenseCAP Mate APP after downloading the corresponding version of the APP according to all the mobile systems you use. if it is your first time to use the SenseCAP platform, please register an account first.

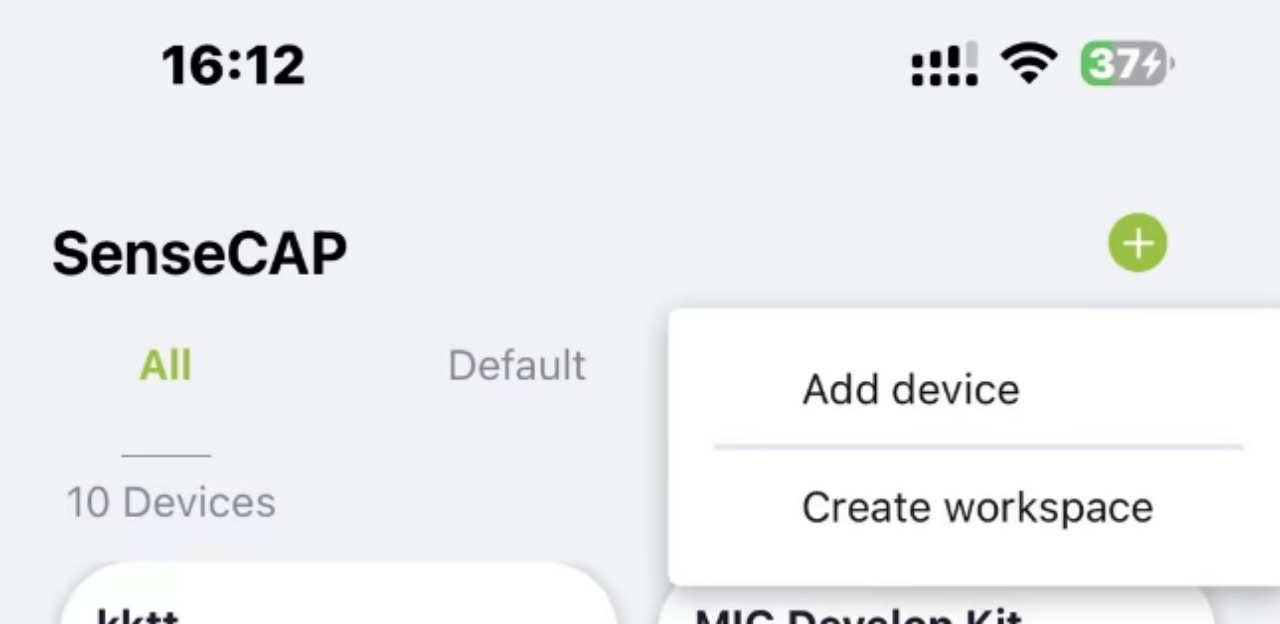
Click the + in the upper right corner and select Add device to bind the Grove - Wio-E5.
Align the box in the center of the camera with the QR code on the back of the Grove - Wio-E5 to scan the code to bind your kit. Please note that the QR code on the front of the Wio E5 should not be scanned.
Step 4 View data
After successful binding using the SenseCAP Mate App, you will see the sensor data displayed on the app.

The SenseCAP Mate App will not automatically refresh the data information, you will need to manually scroll down on the sensor page to refresh the data. If you do not see new data for more than 10 minutes, you can try restarting the Wio Terminal by toggling down the side button once.