Automatic intergrate all your SenseCAP Sensors to Home Assistant

1. SenseCAP M2 Multi-Platform Configuration
1.1 LoRa Network Configuration
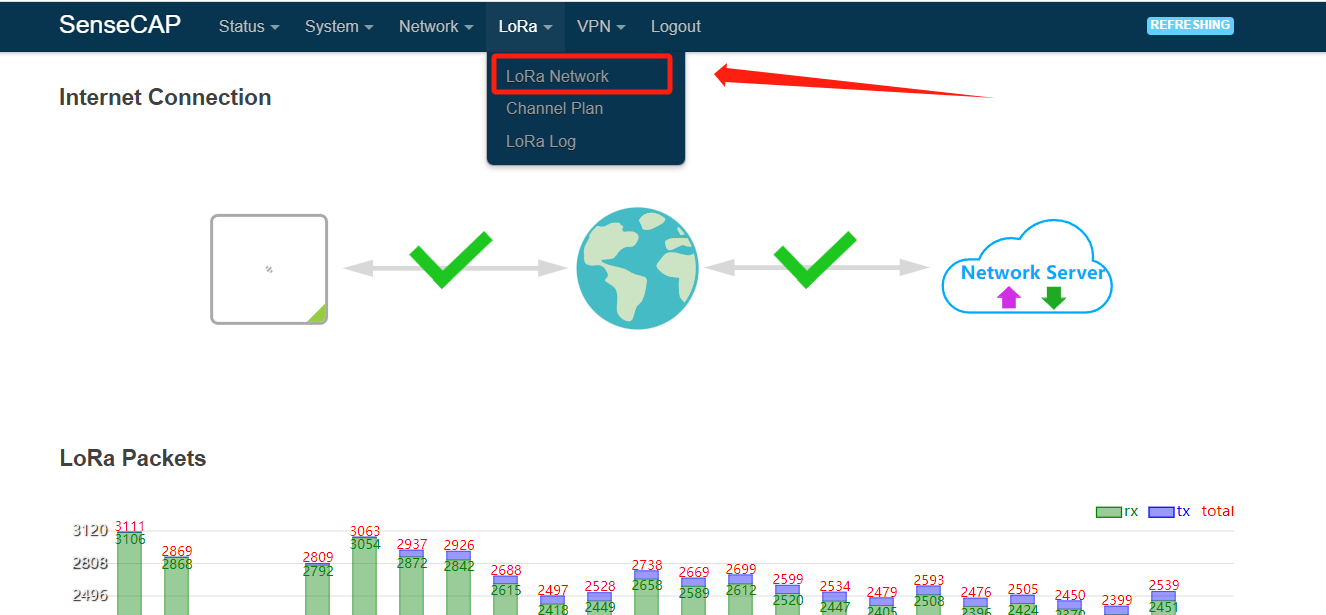
Step 1. Click LoRa and choose LoRa Network
Step 2. Choose Local Network Server mode and fill your MQTT host information (Include your host, username, password and port). Then Click Save&&Apply
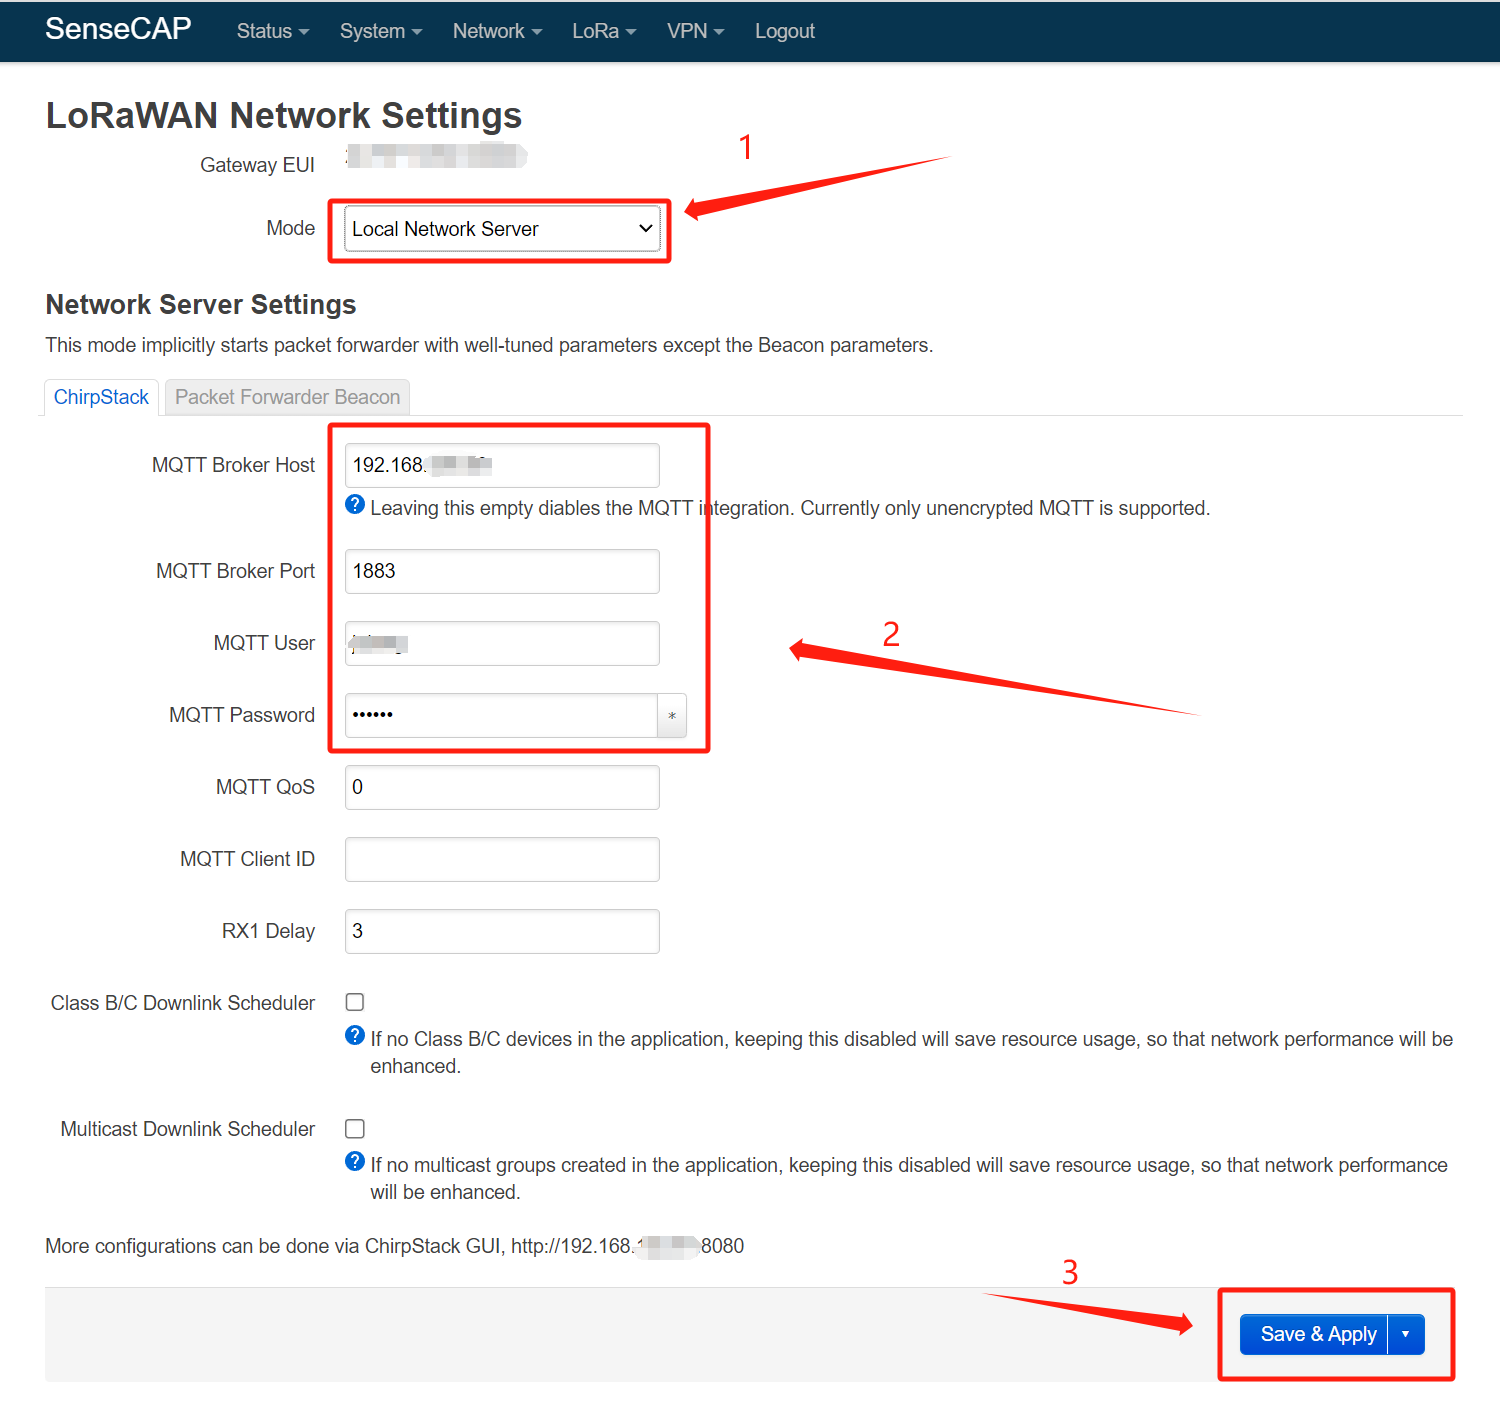
At this point we have finished the server mode setup, and we wiil configure the ChirpStack later.
1.2 ChirpStack Configuration
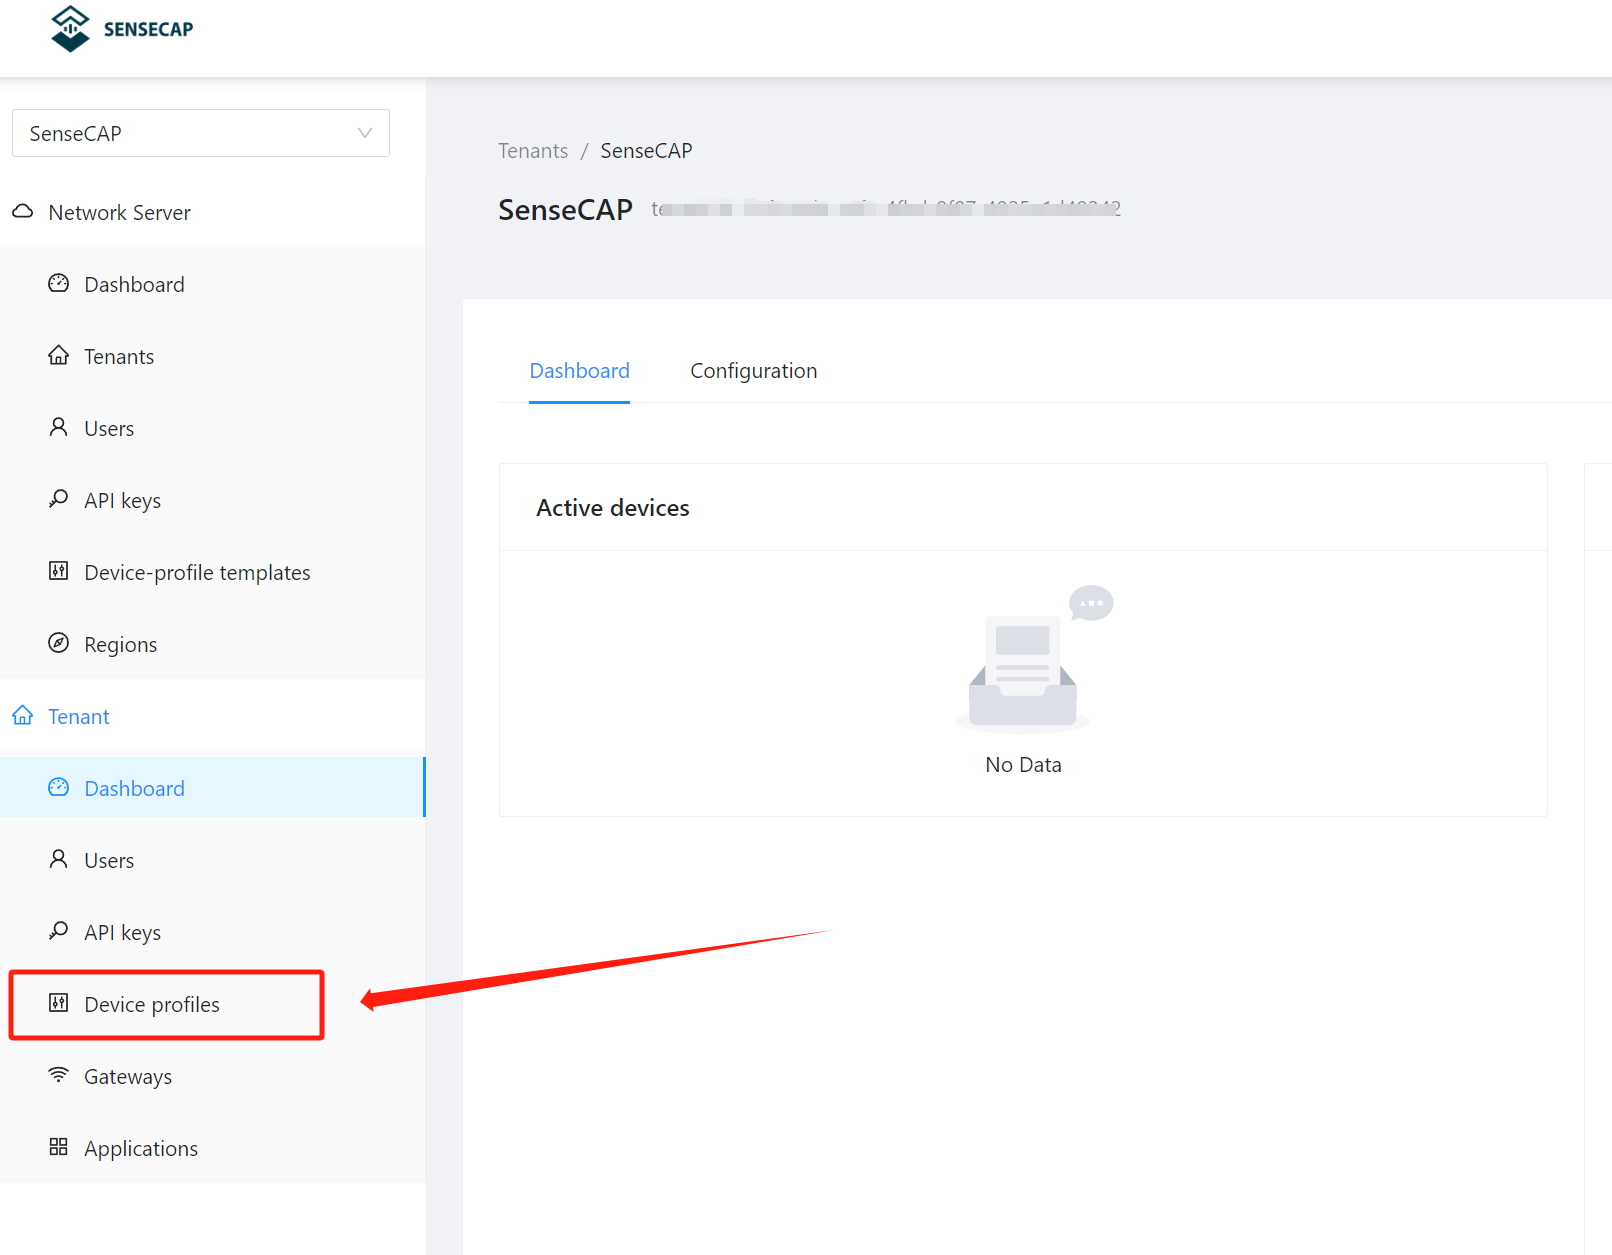
Step 1. Open the ChirpStack configuration page, then Click Device profiles
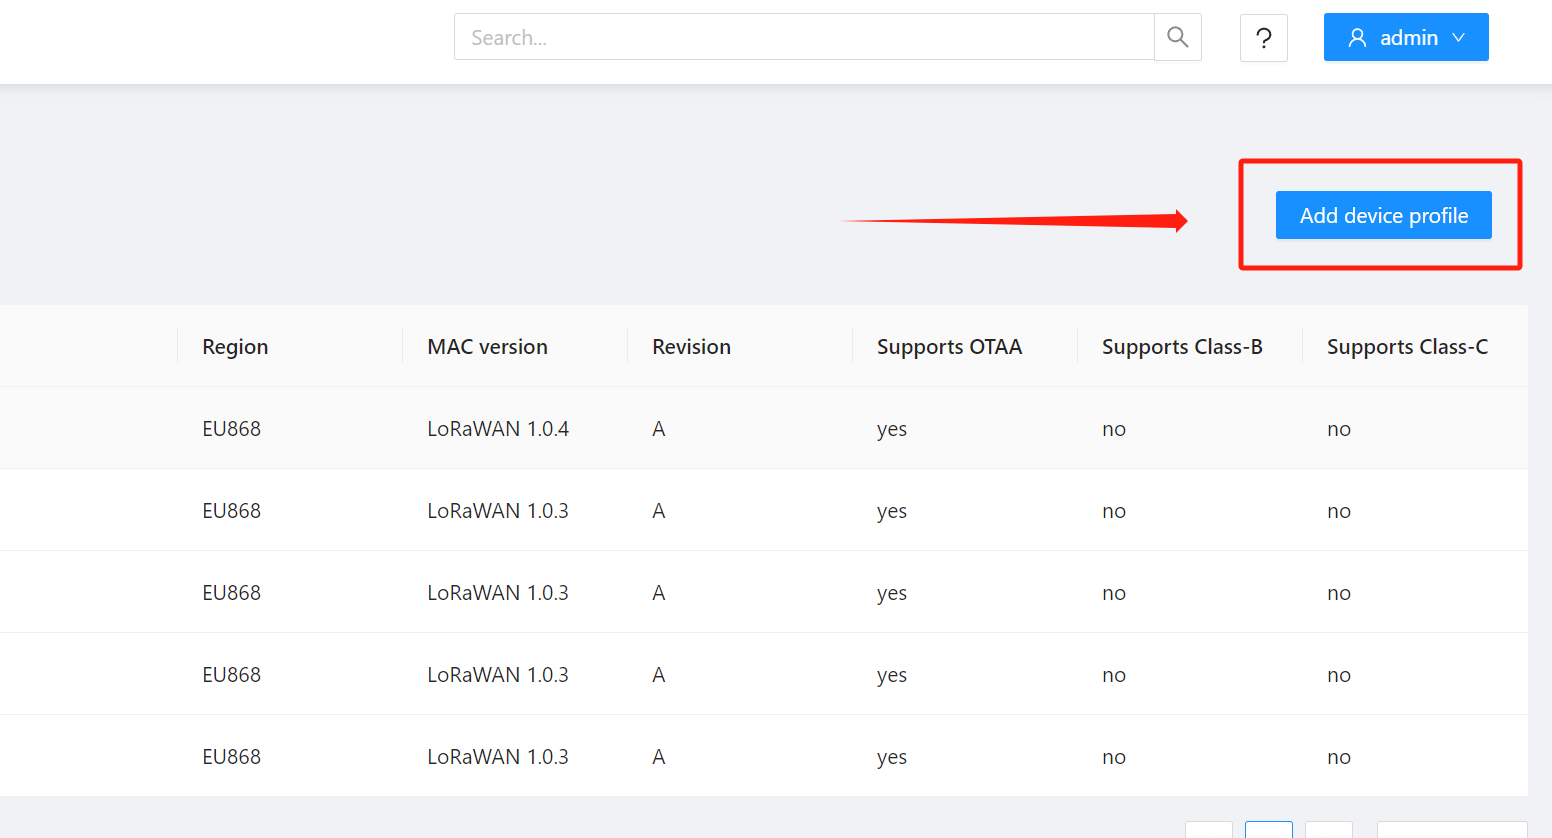
Step 2. Click Add device profile
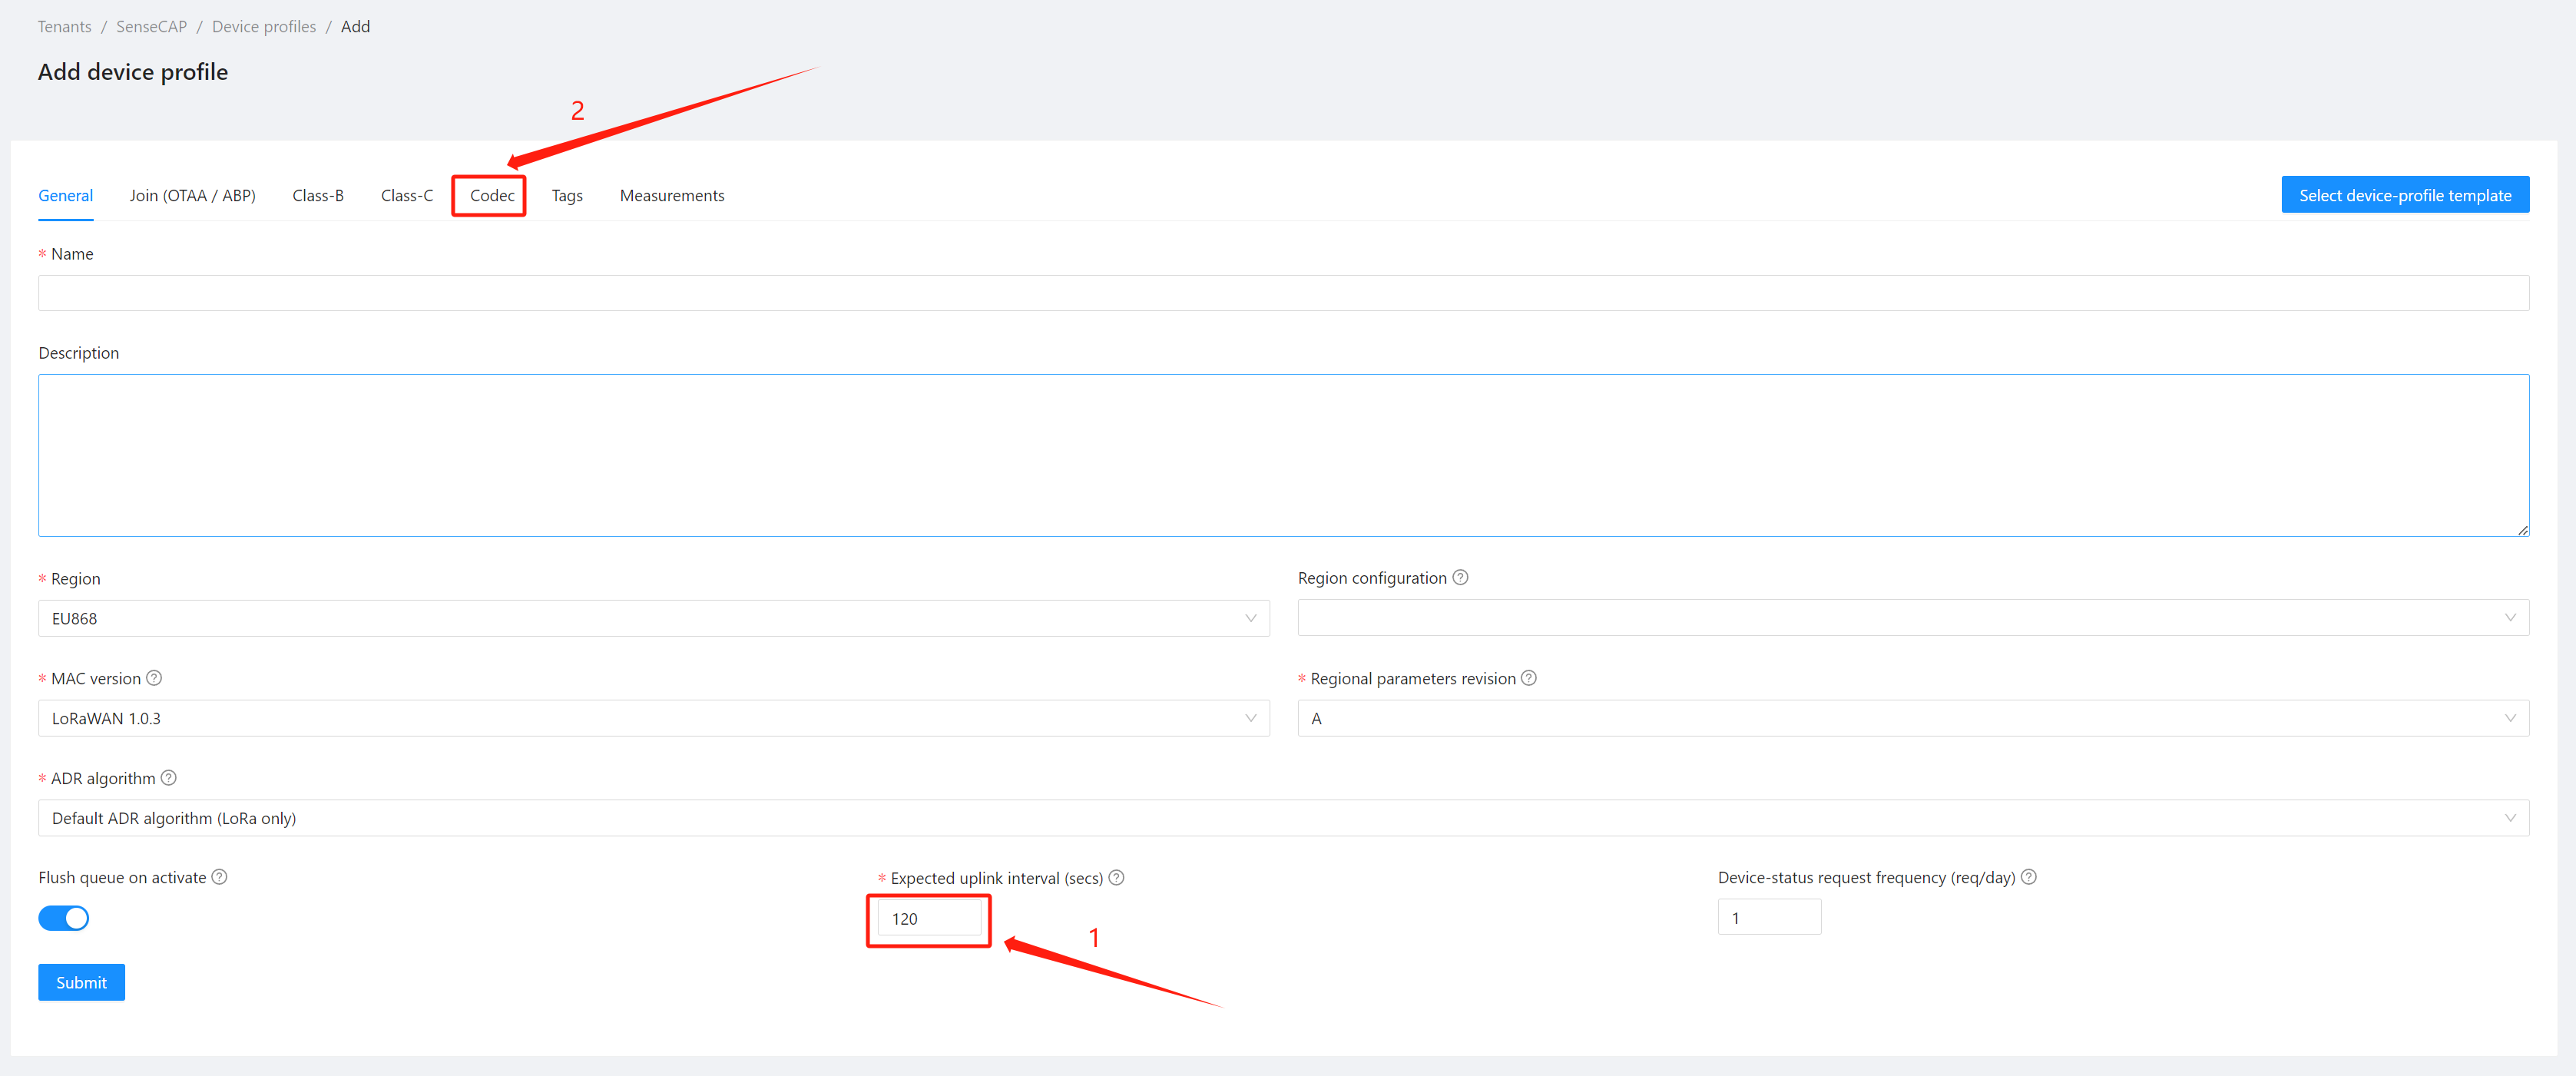
Step 3. First, fill in the device profile according to your SenseCAP configuration: Name, Region, MAC version, and Regional parameters revision, in which the Expected uplink interval needs to be changed to 120, and this one can be adjusted according to your own requirements. In the second step, we Click the Codec at the top
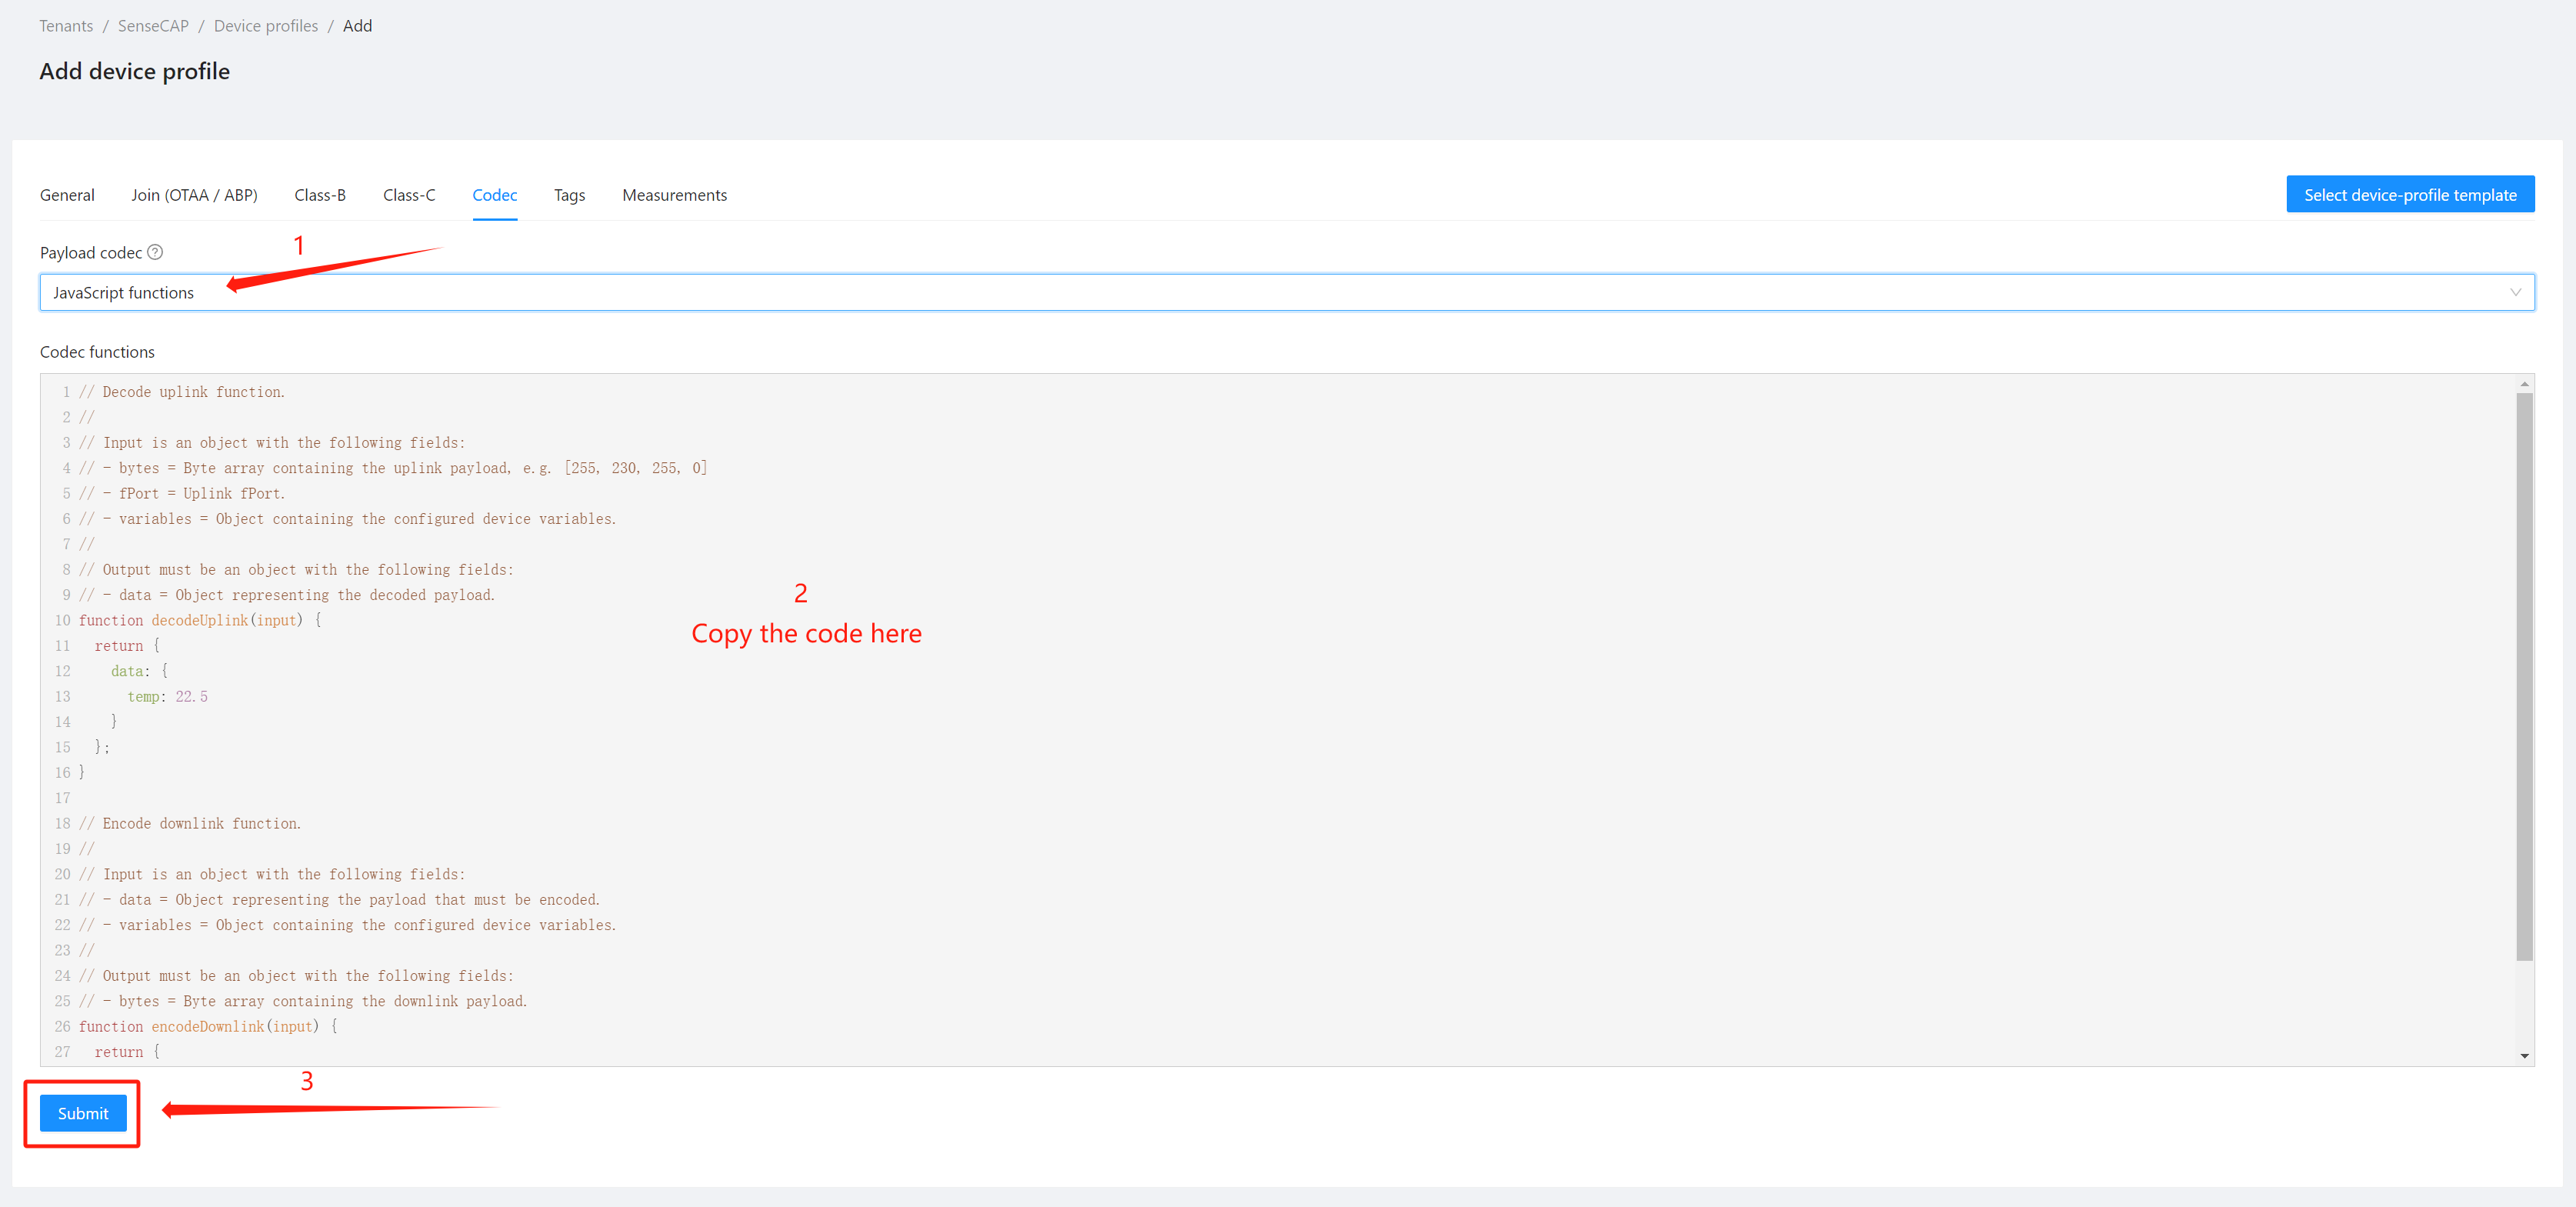
Step 4. In this step, we need to choose the decoder according to our Sensor model, the code can be found Here. We need to select the code in the TTN folder as our decoder.
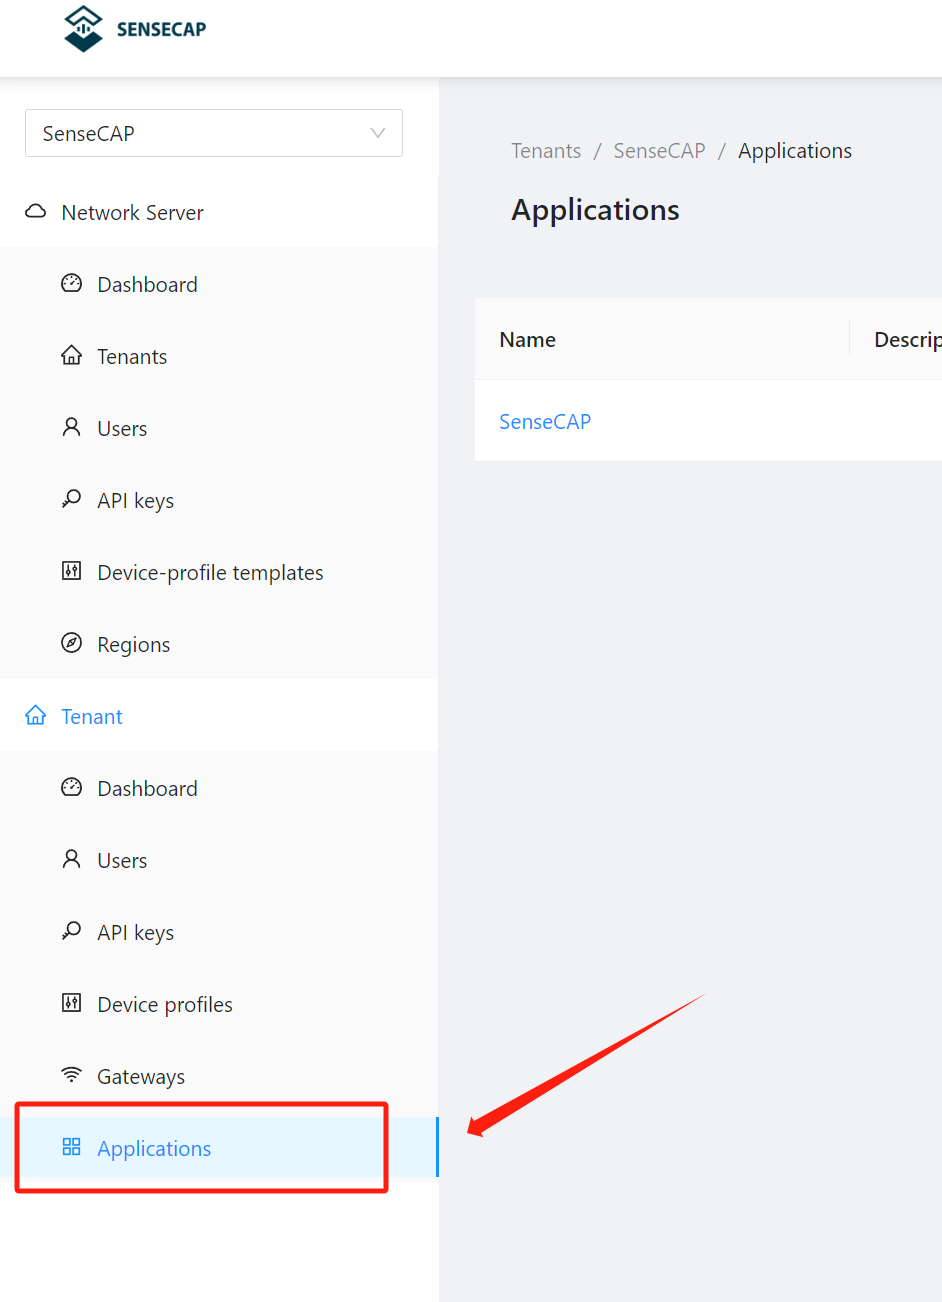
Step 5. Next step, we are going to add devices. Click Applications
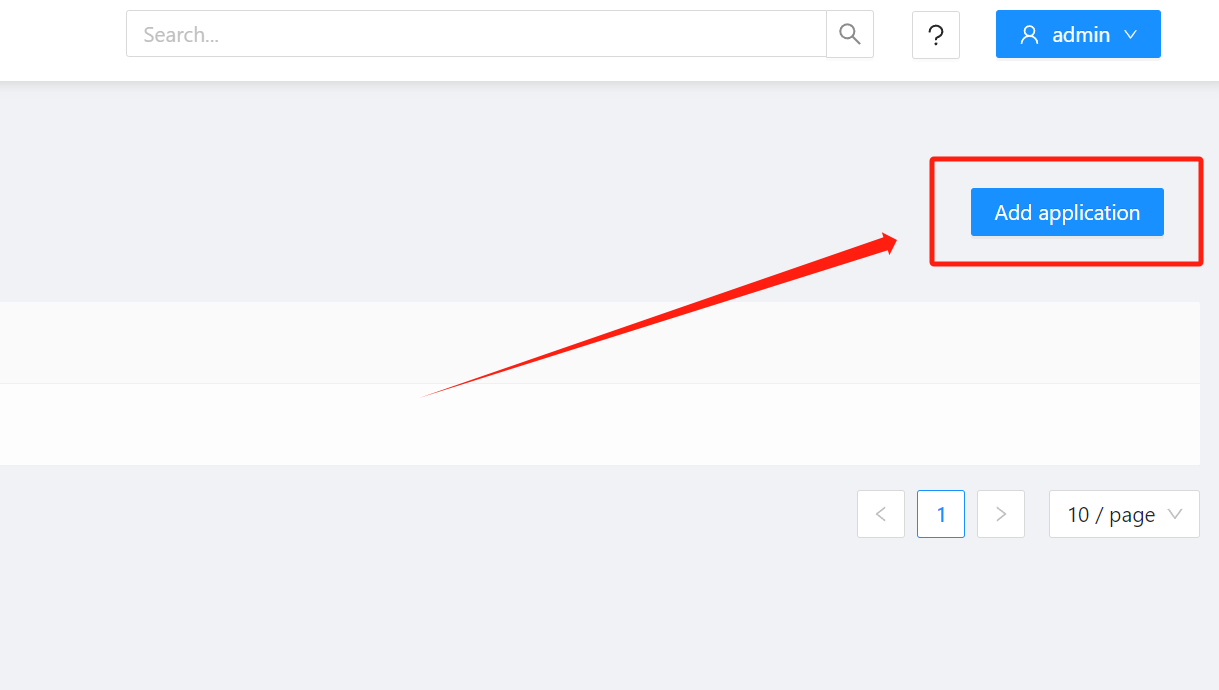
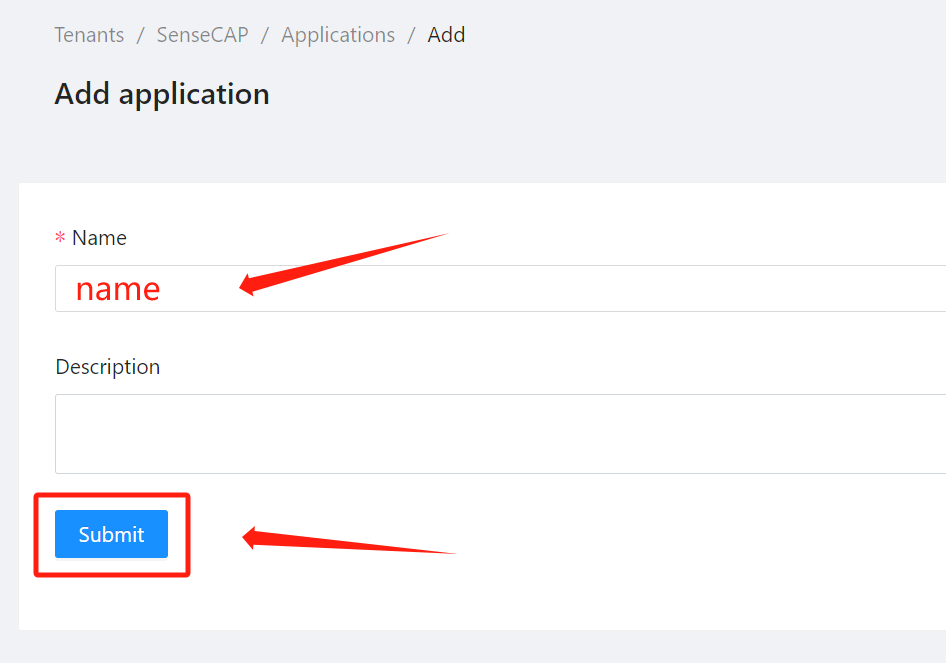
Step 6. Click Add applications
Step 7. Fill the application information and Click Submit
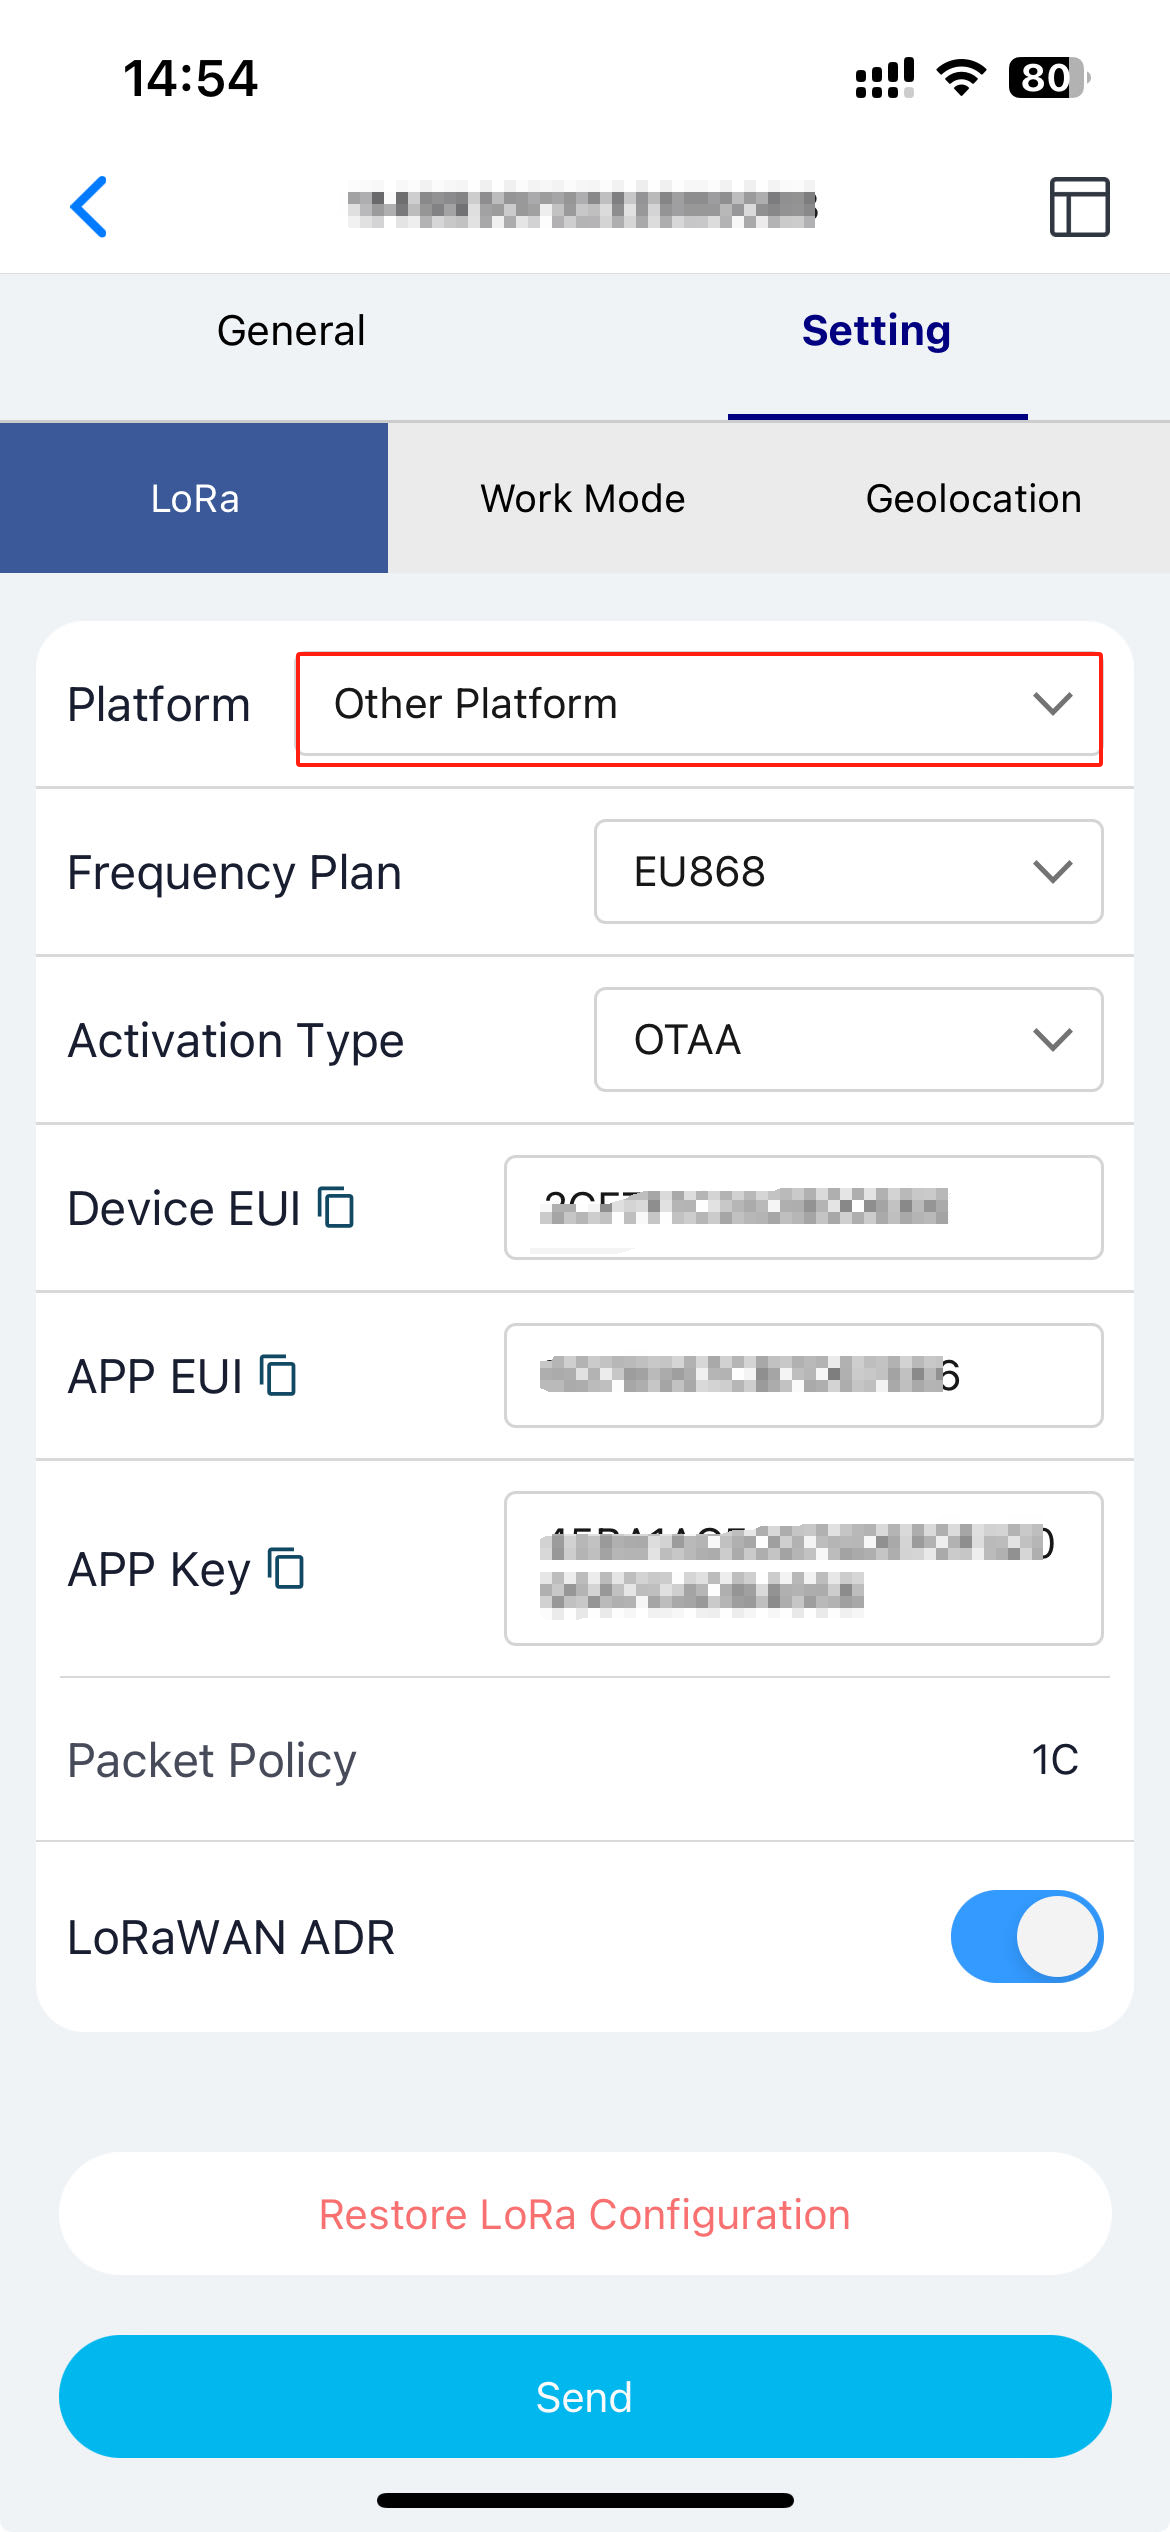
Step 8. Use the SenseCAP Mate APP to configure Sensor, Set the Platform to Other Platform
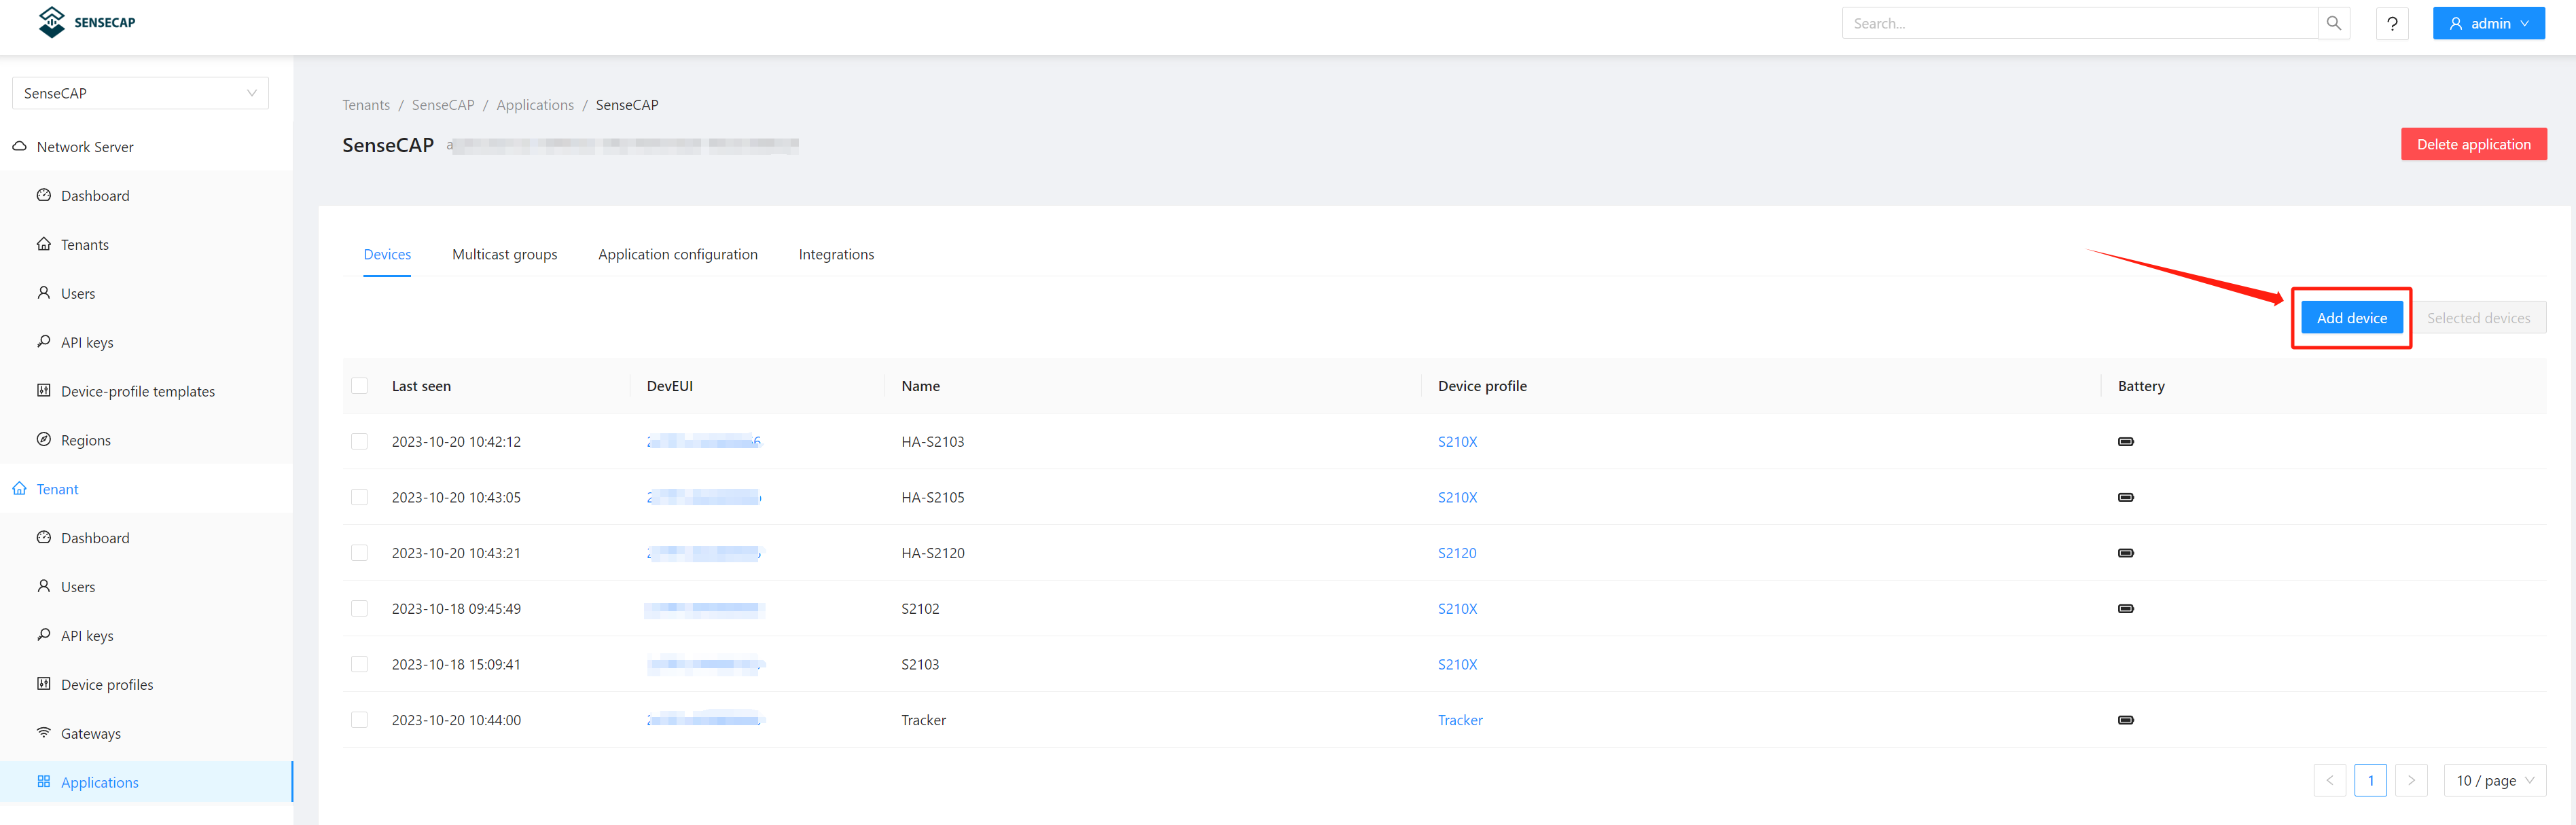
Step 9. Click Add device
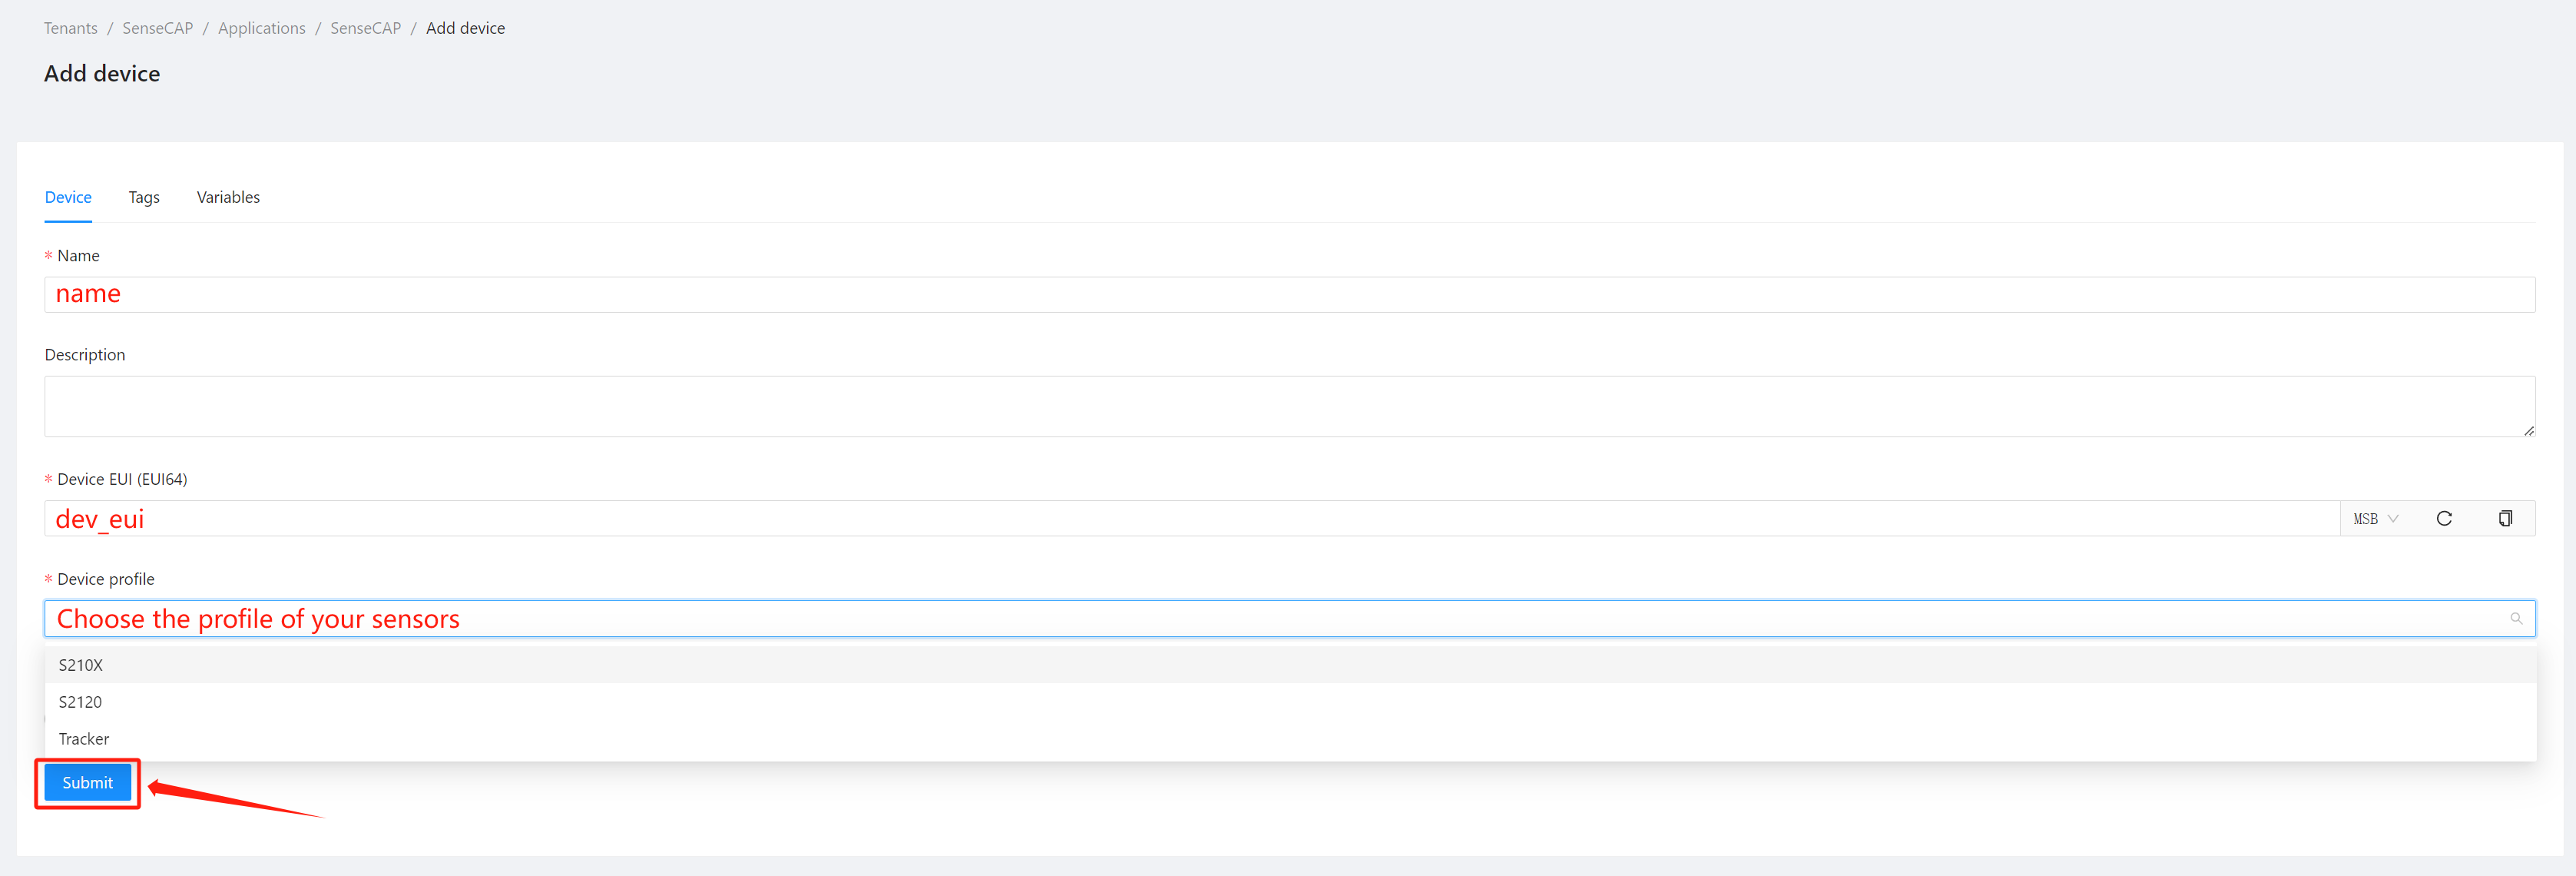
Step 10. Fill your device information and Click Submit
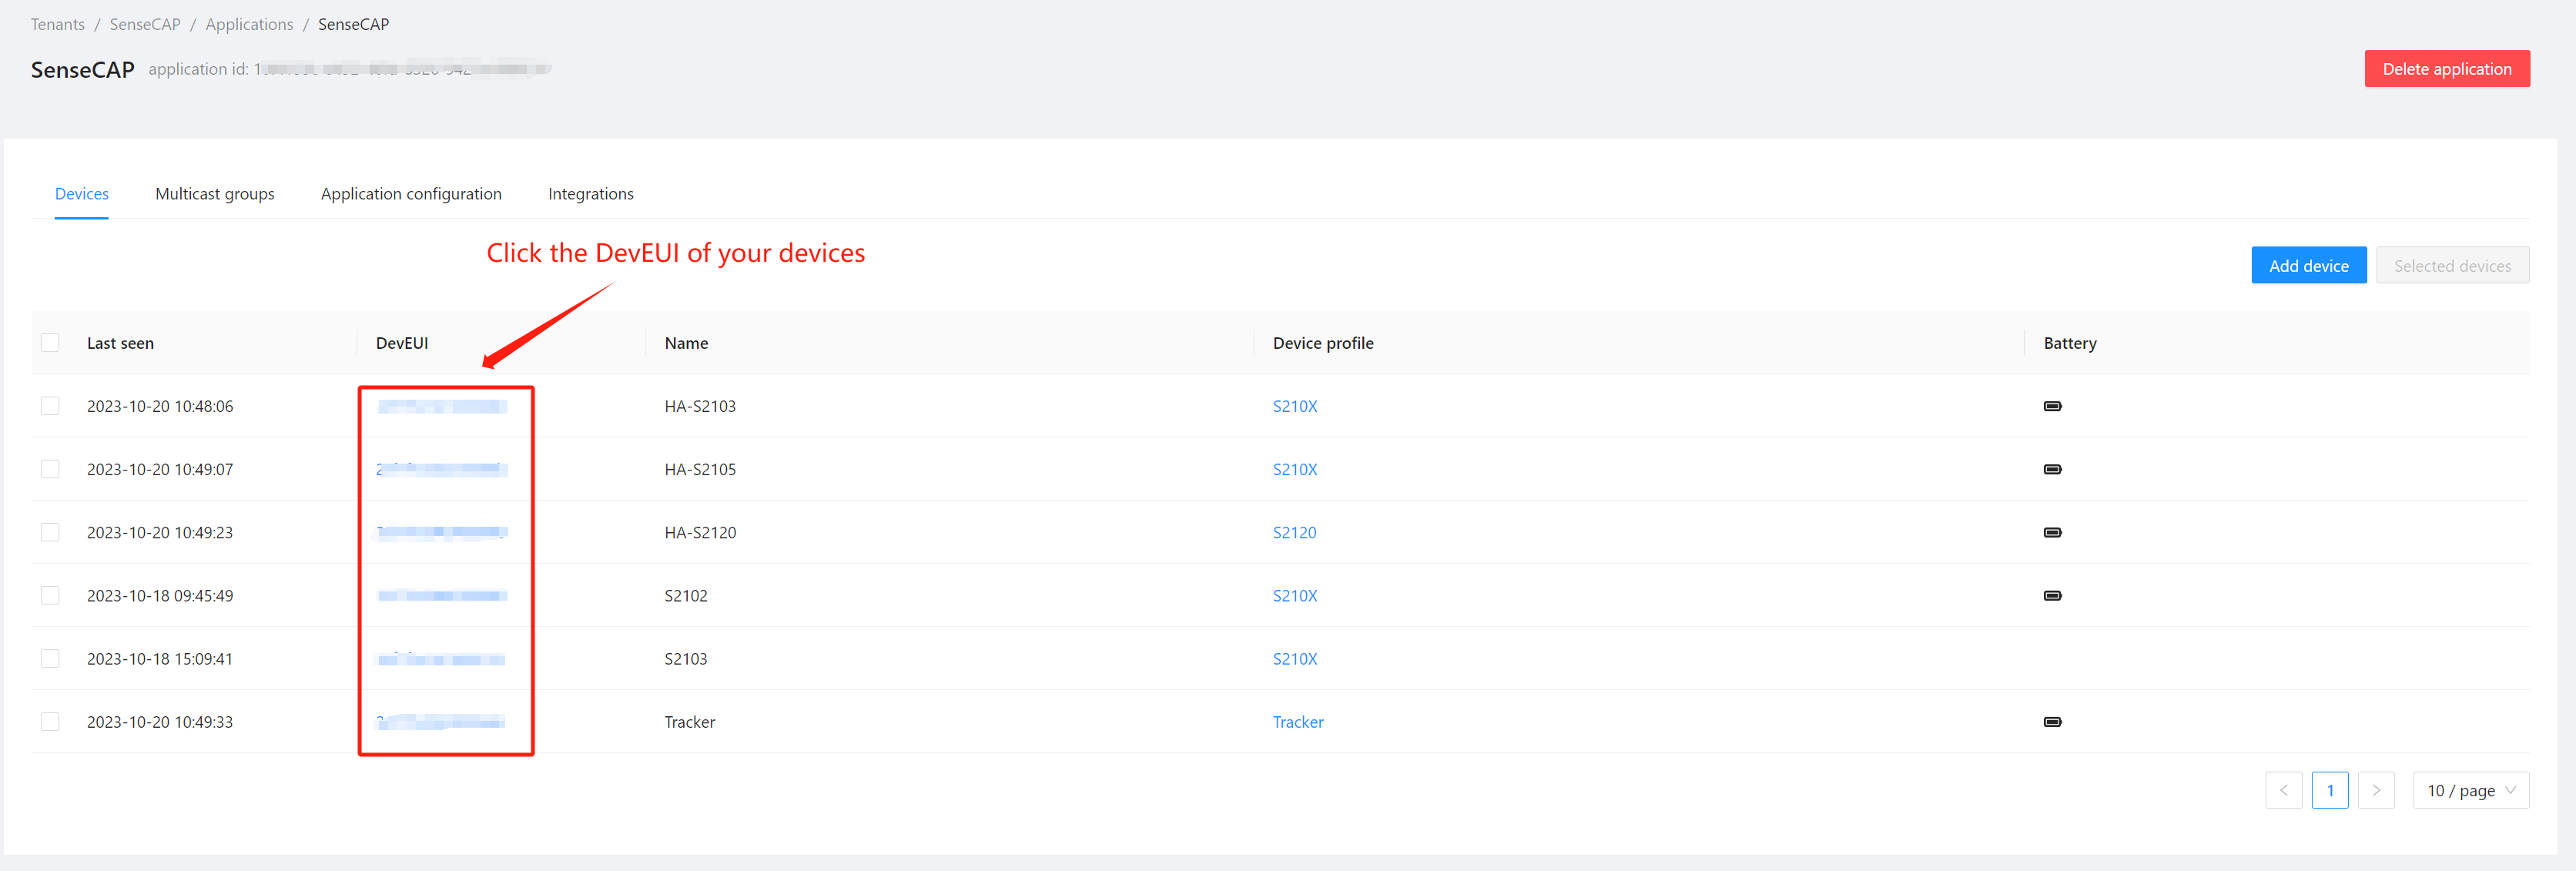
Step 11. Click the DevEUI of your devices to turn the page
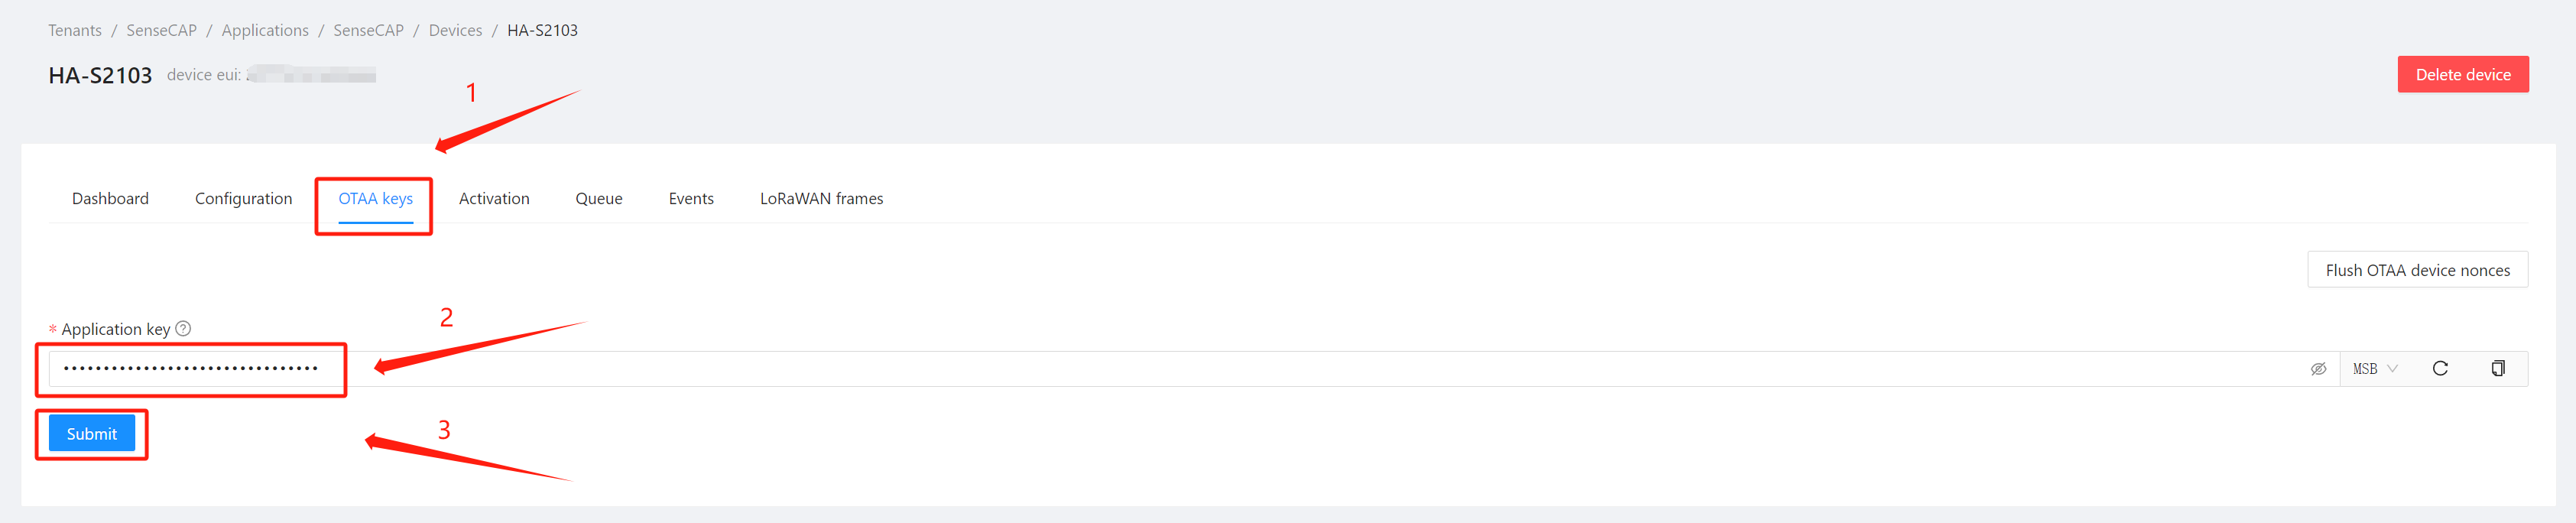
Step 12. Click OTAA keys and enter your Application key of the SenseCAP Sensor. Then Click Submit
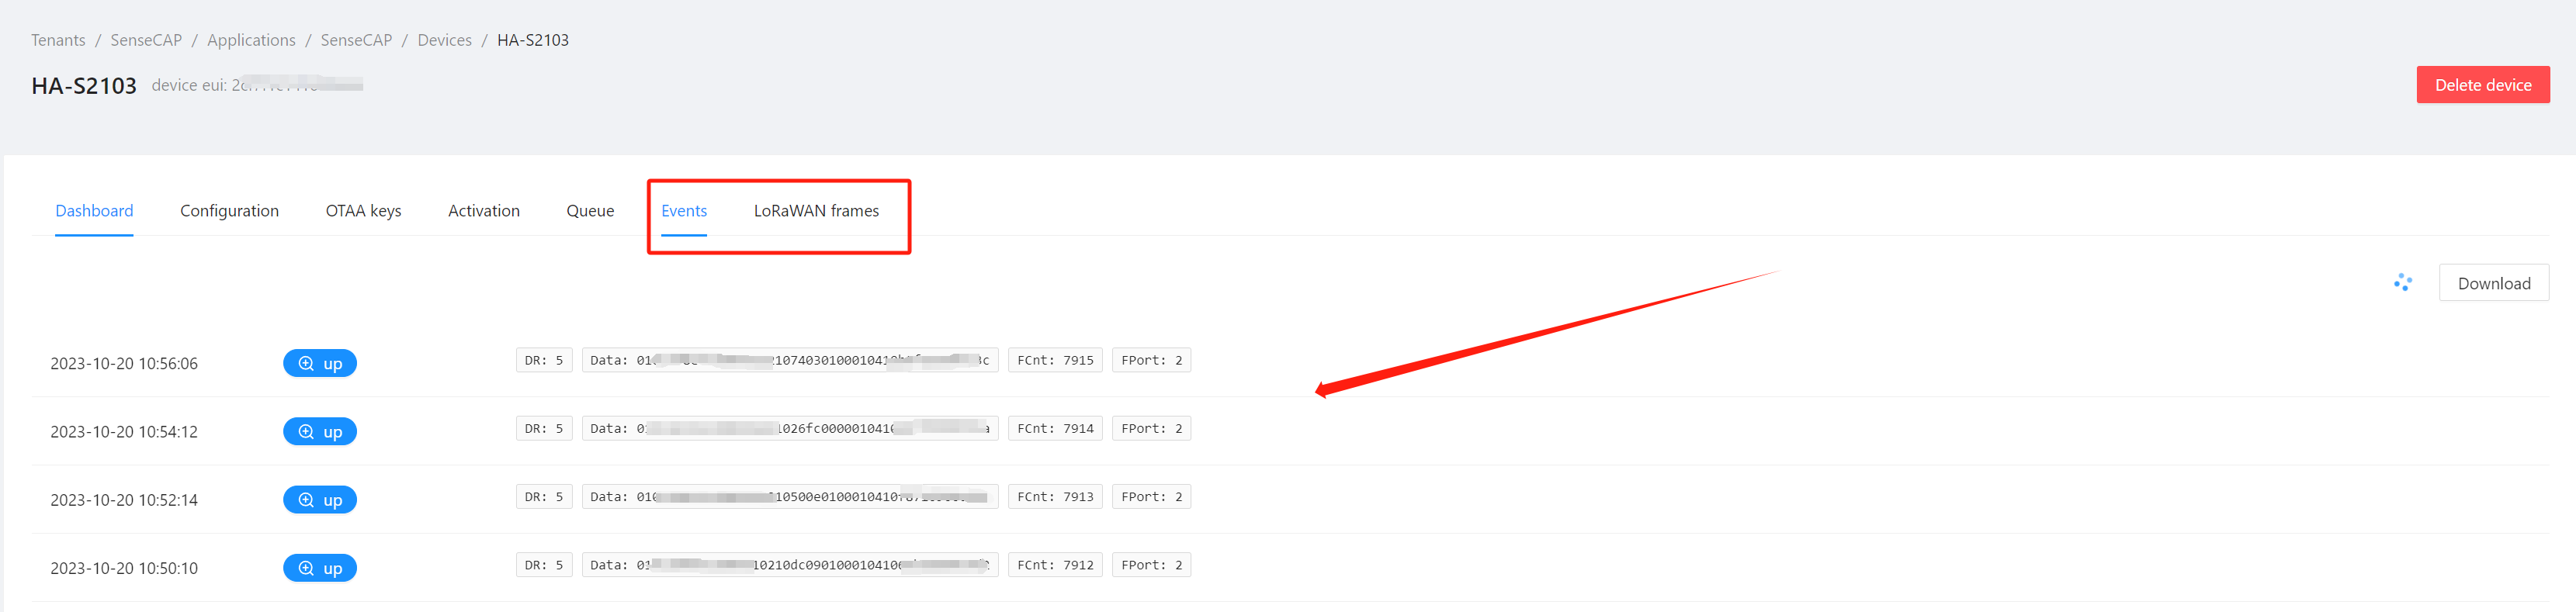
Step 13. Activate your SenseCAP Sensor and wait for it to automatically connect to LoRaWAN. Then you can see the data uploaded by the sensor in the Events and LoRaWAN frames
Step 14. At this point, we have completed all configurations of the M2 gateway.
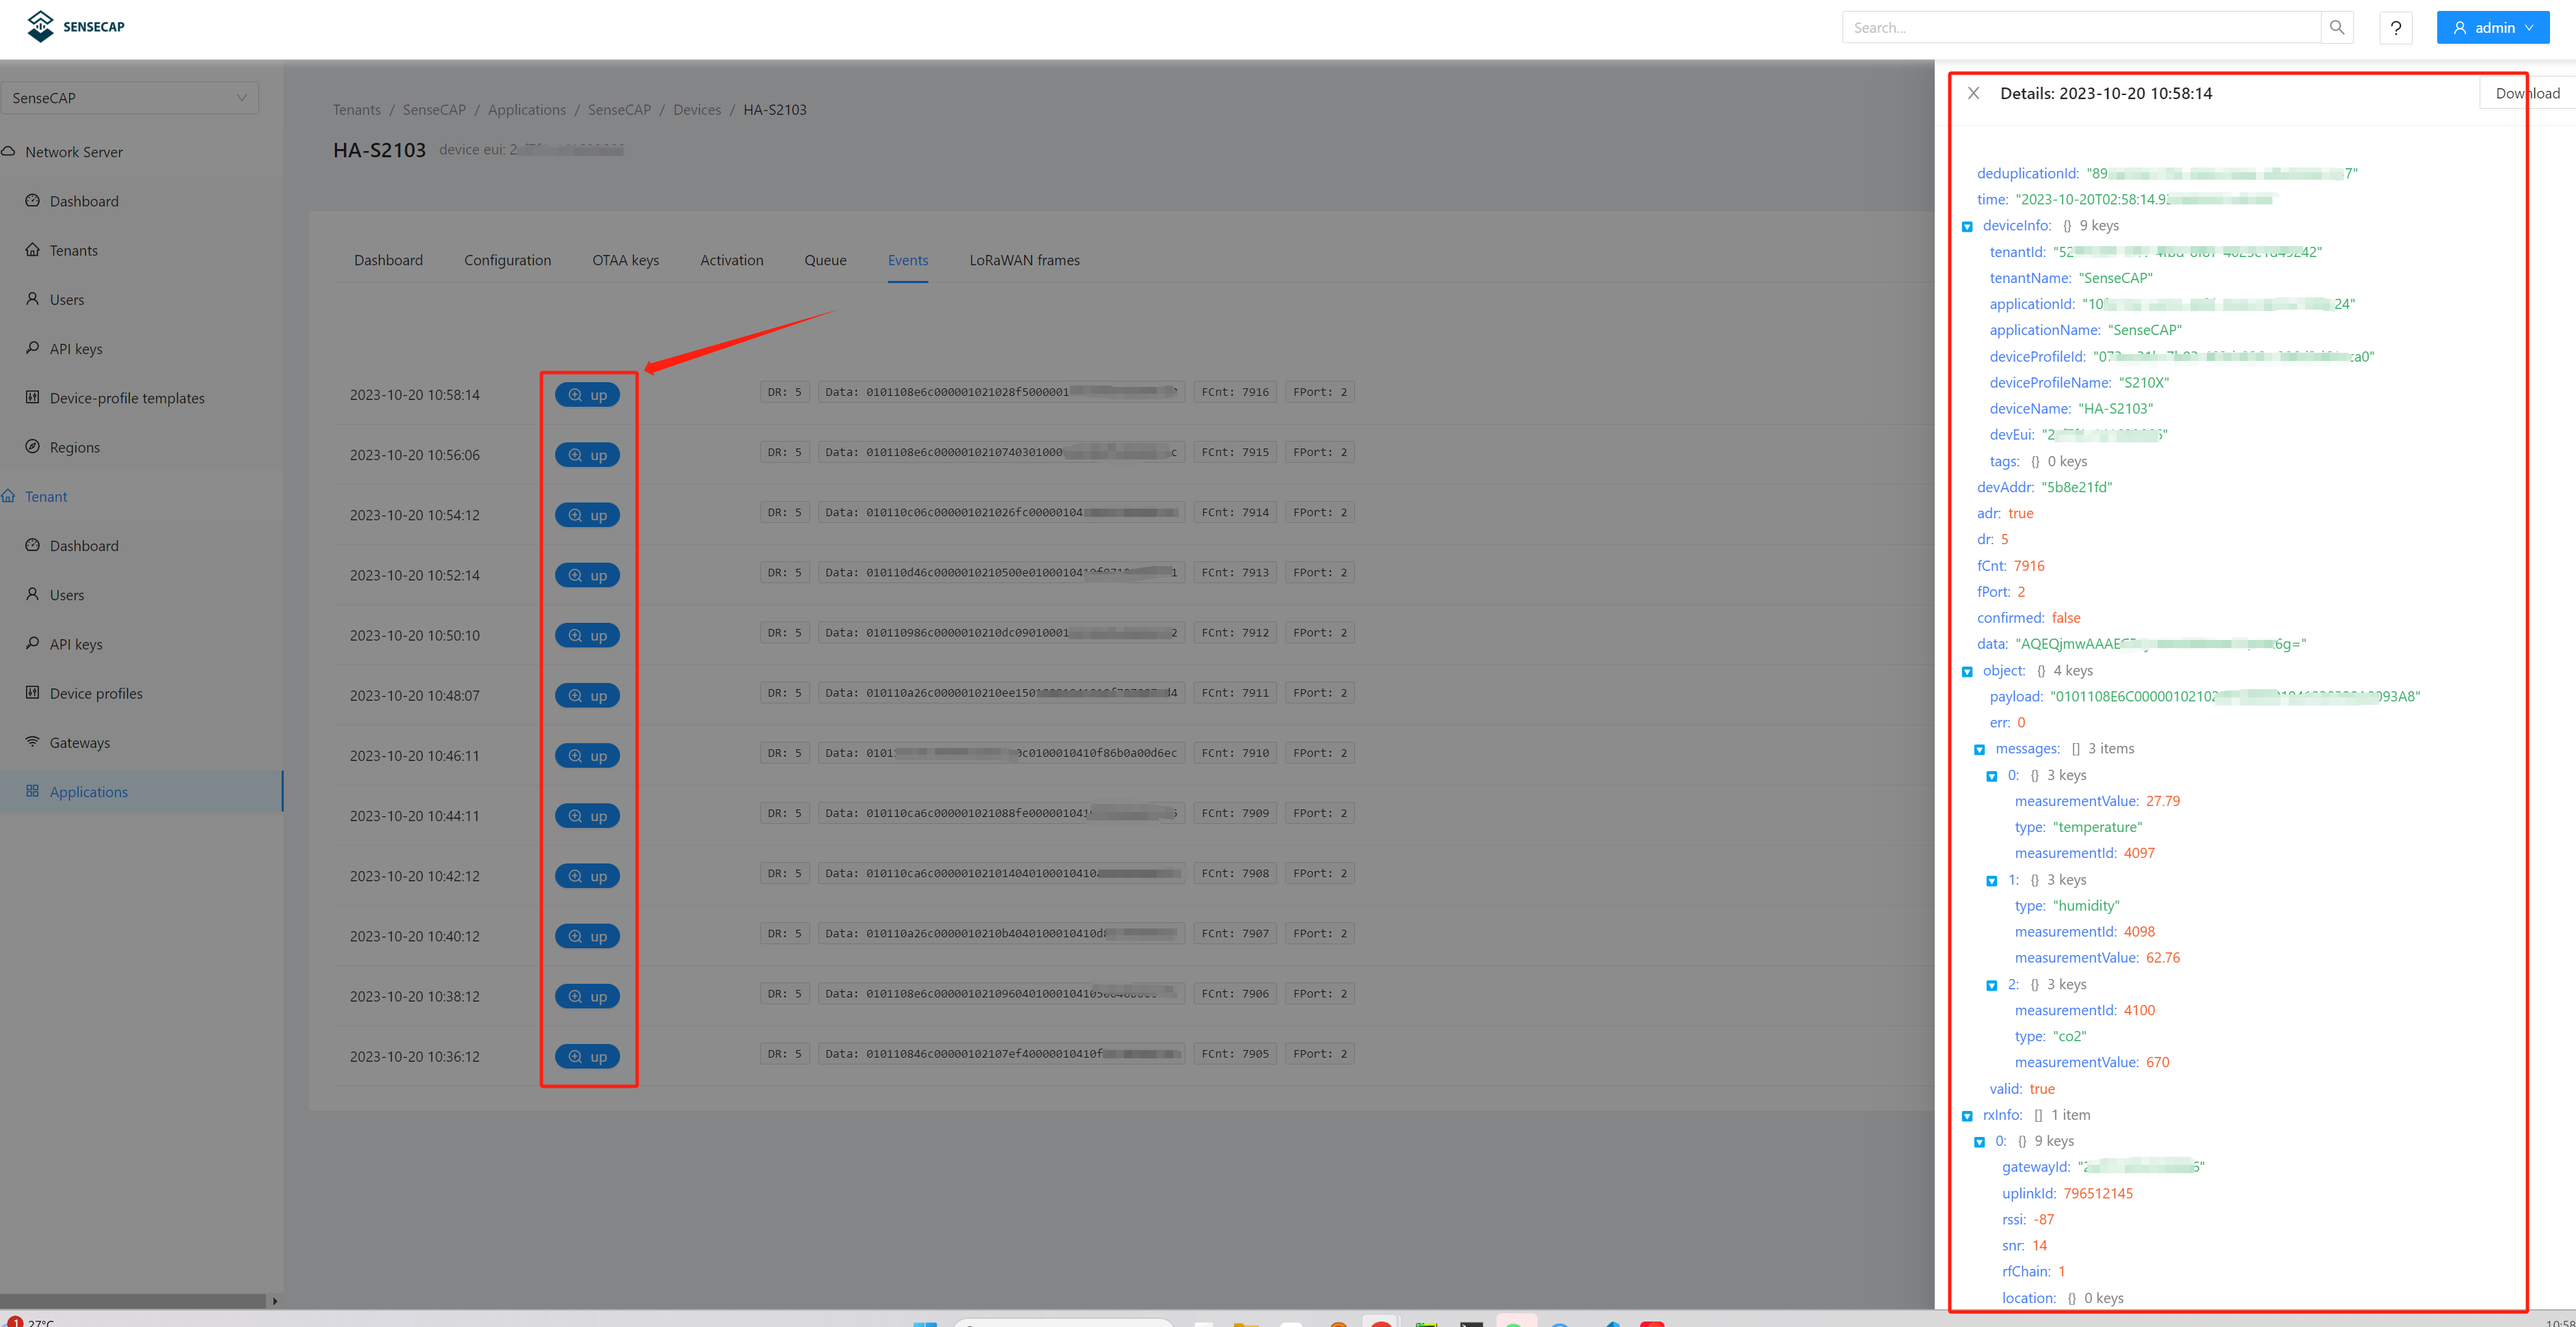
When adding a device to the M2 gateway for the first time, wait at least 2-5 minutes until the data reported by up can be seen in Events. Then the device addition initialization is complete. Then we can configure the Home Assistant plug-in.
2. Home Assistant Configuration
2.1 Install
1.HACS
First installation
1.HACS > Integrations >
2.Click on top right corner > Custom repositories :
  Repository: https://github.com/Seeed-Solution/home-assistant-SenseCAP.git
  Category: Intergration
3.Click ADD
4.HACS > Integrations > ➕ EXPLORE & DOWNLOAD REPOSITORIES > Seeed Studio-SenseCAP > DOWNLOAD THIS REPOSITORY

- Update component
HACS > Integrations >
Seeed Studio-SenseCAP> UPDATE / Redownload
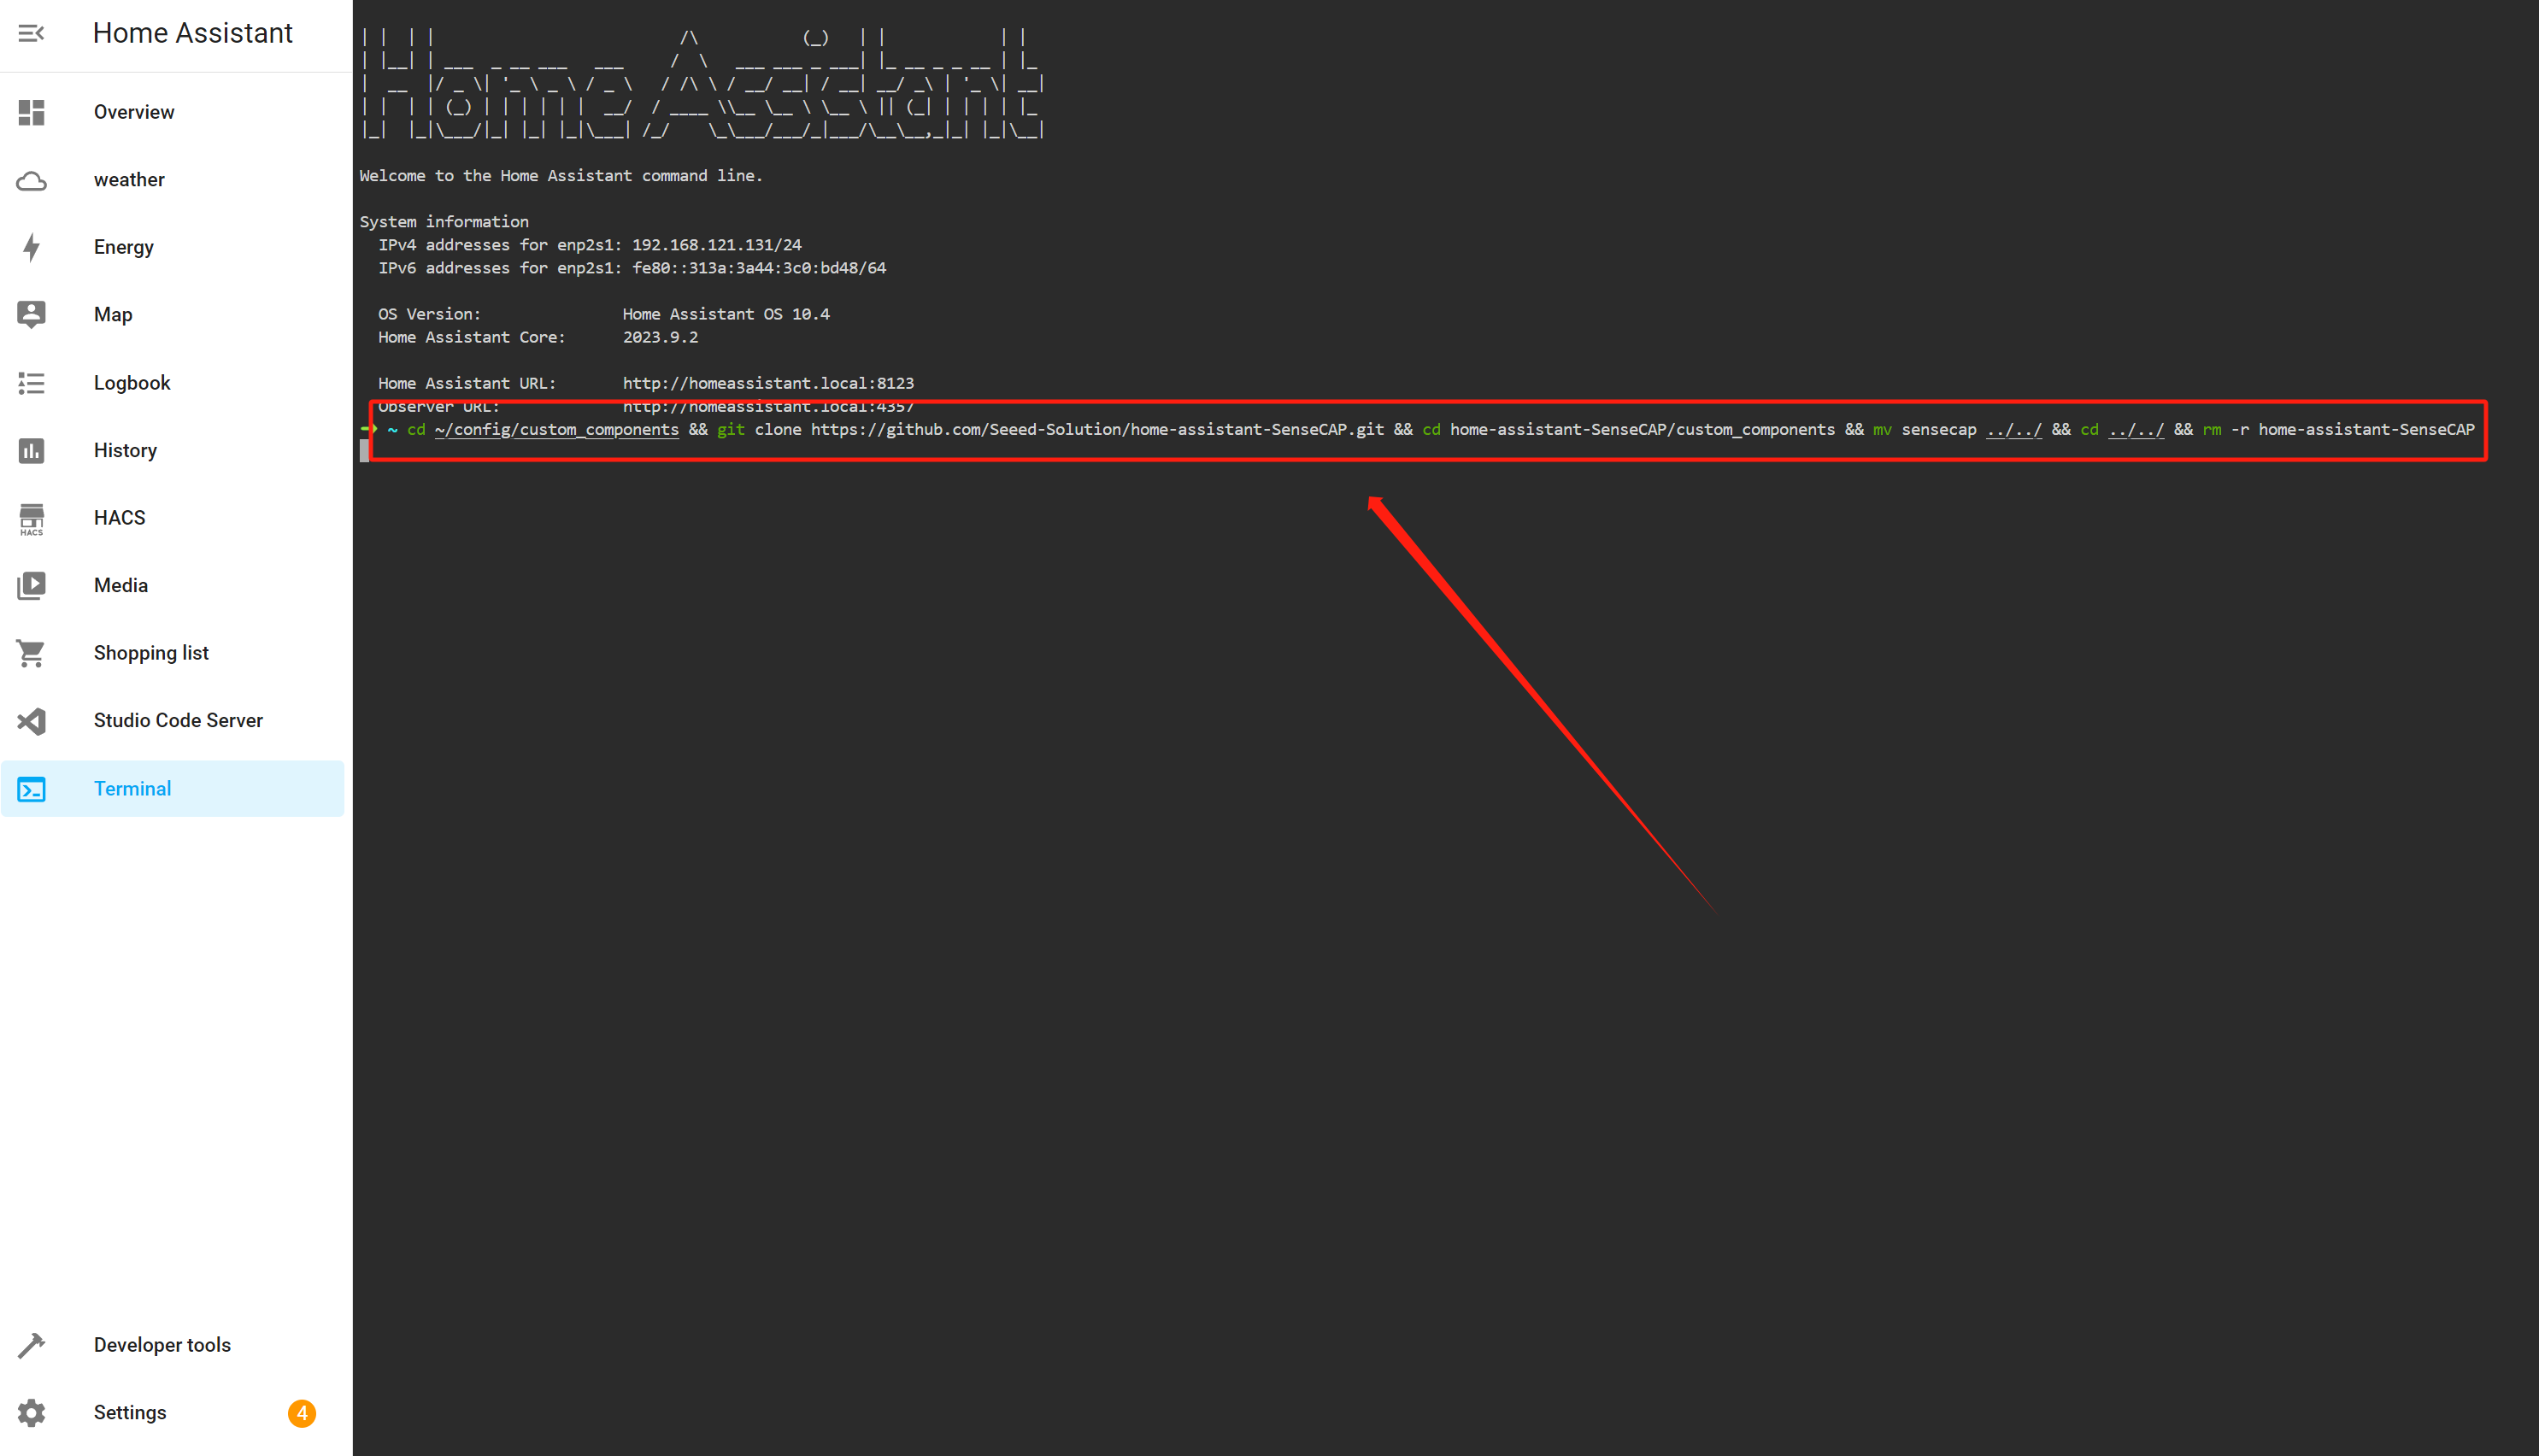
2.Install via SSH & Web Terminal add-on
- Open SSH Terminal and enter the following command:
cd ~/config/custom_components && git clone https://github.com/Seeed-Solution/home-assistant-SenseCAP.git && cd home-assistant-SenseCAP/custom_components && mv sensecap ../../ && cd ../../ && rm -r home-assistant-SenseCAP
- Restart HA core
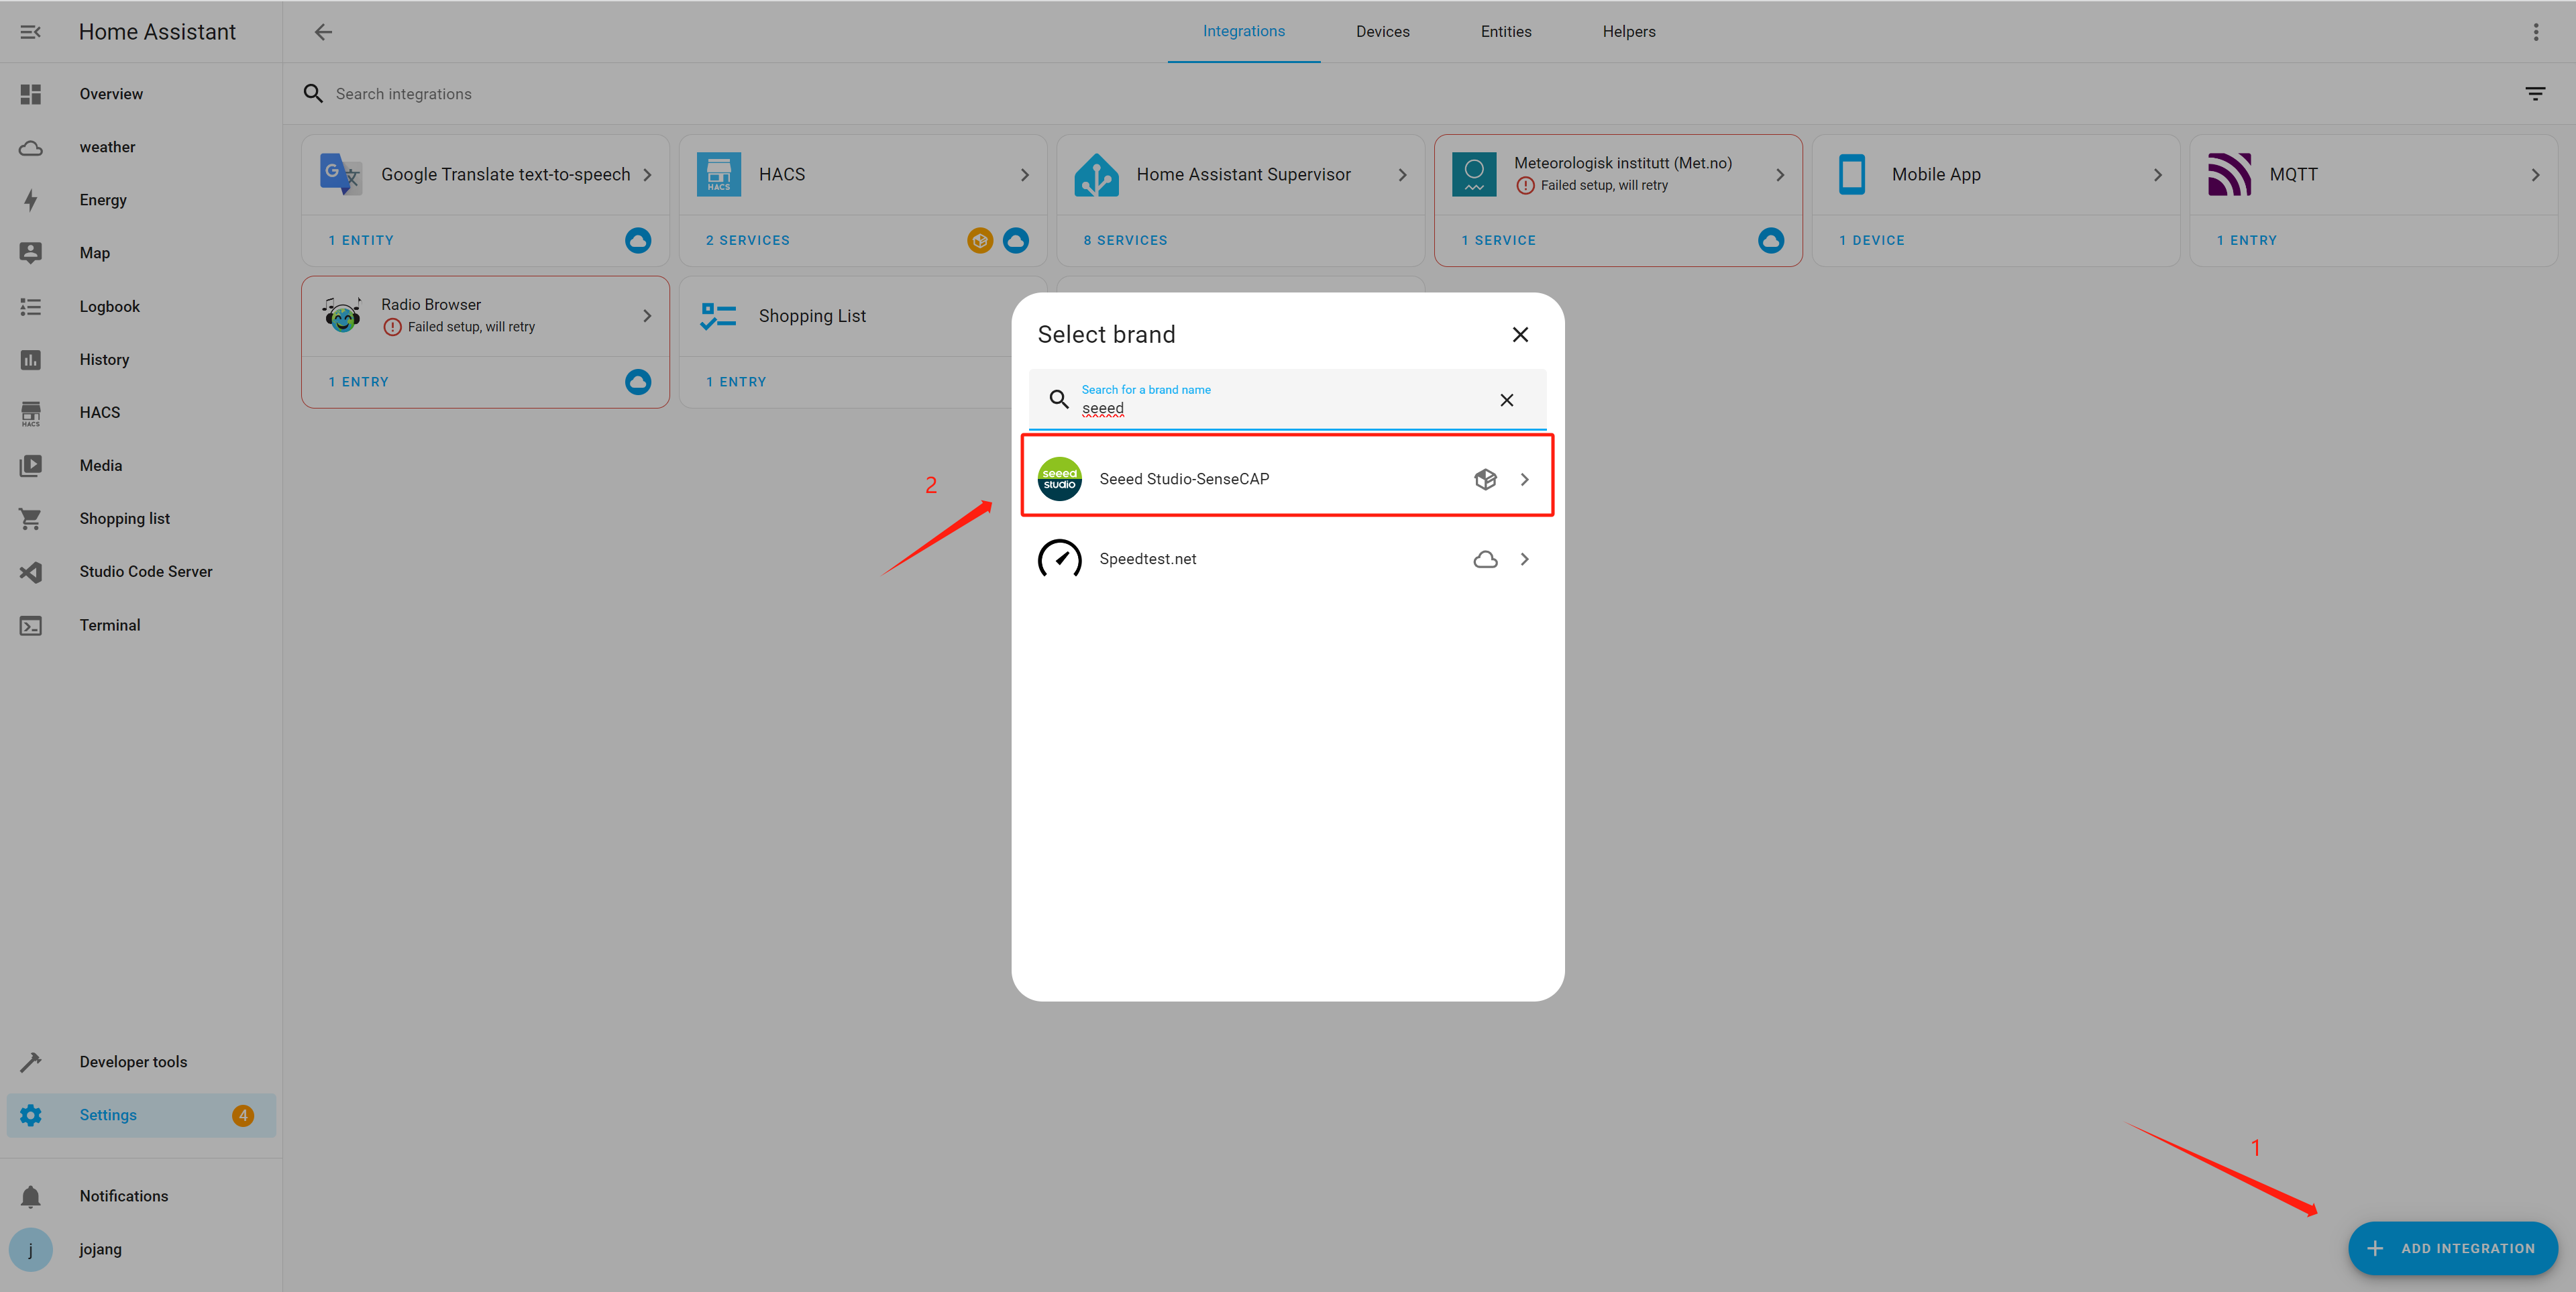
- Add Integration
2.2 Configuration
Enter your MQTT information and Click SUBMIT

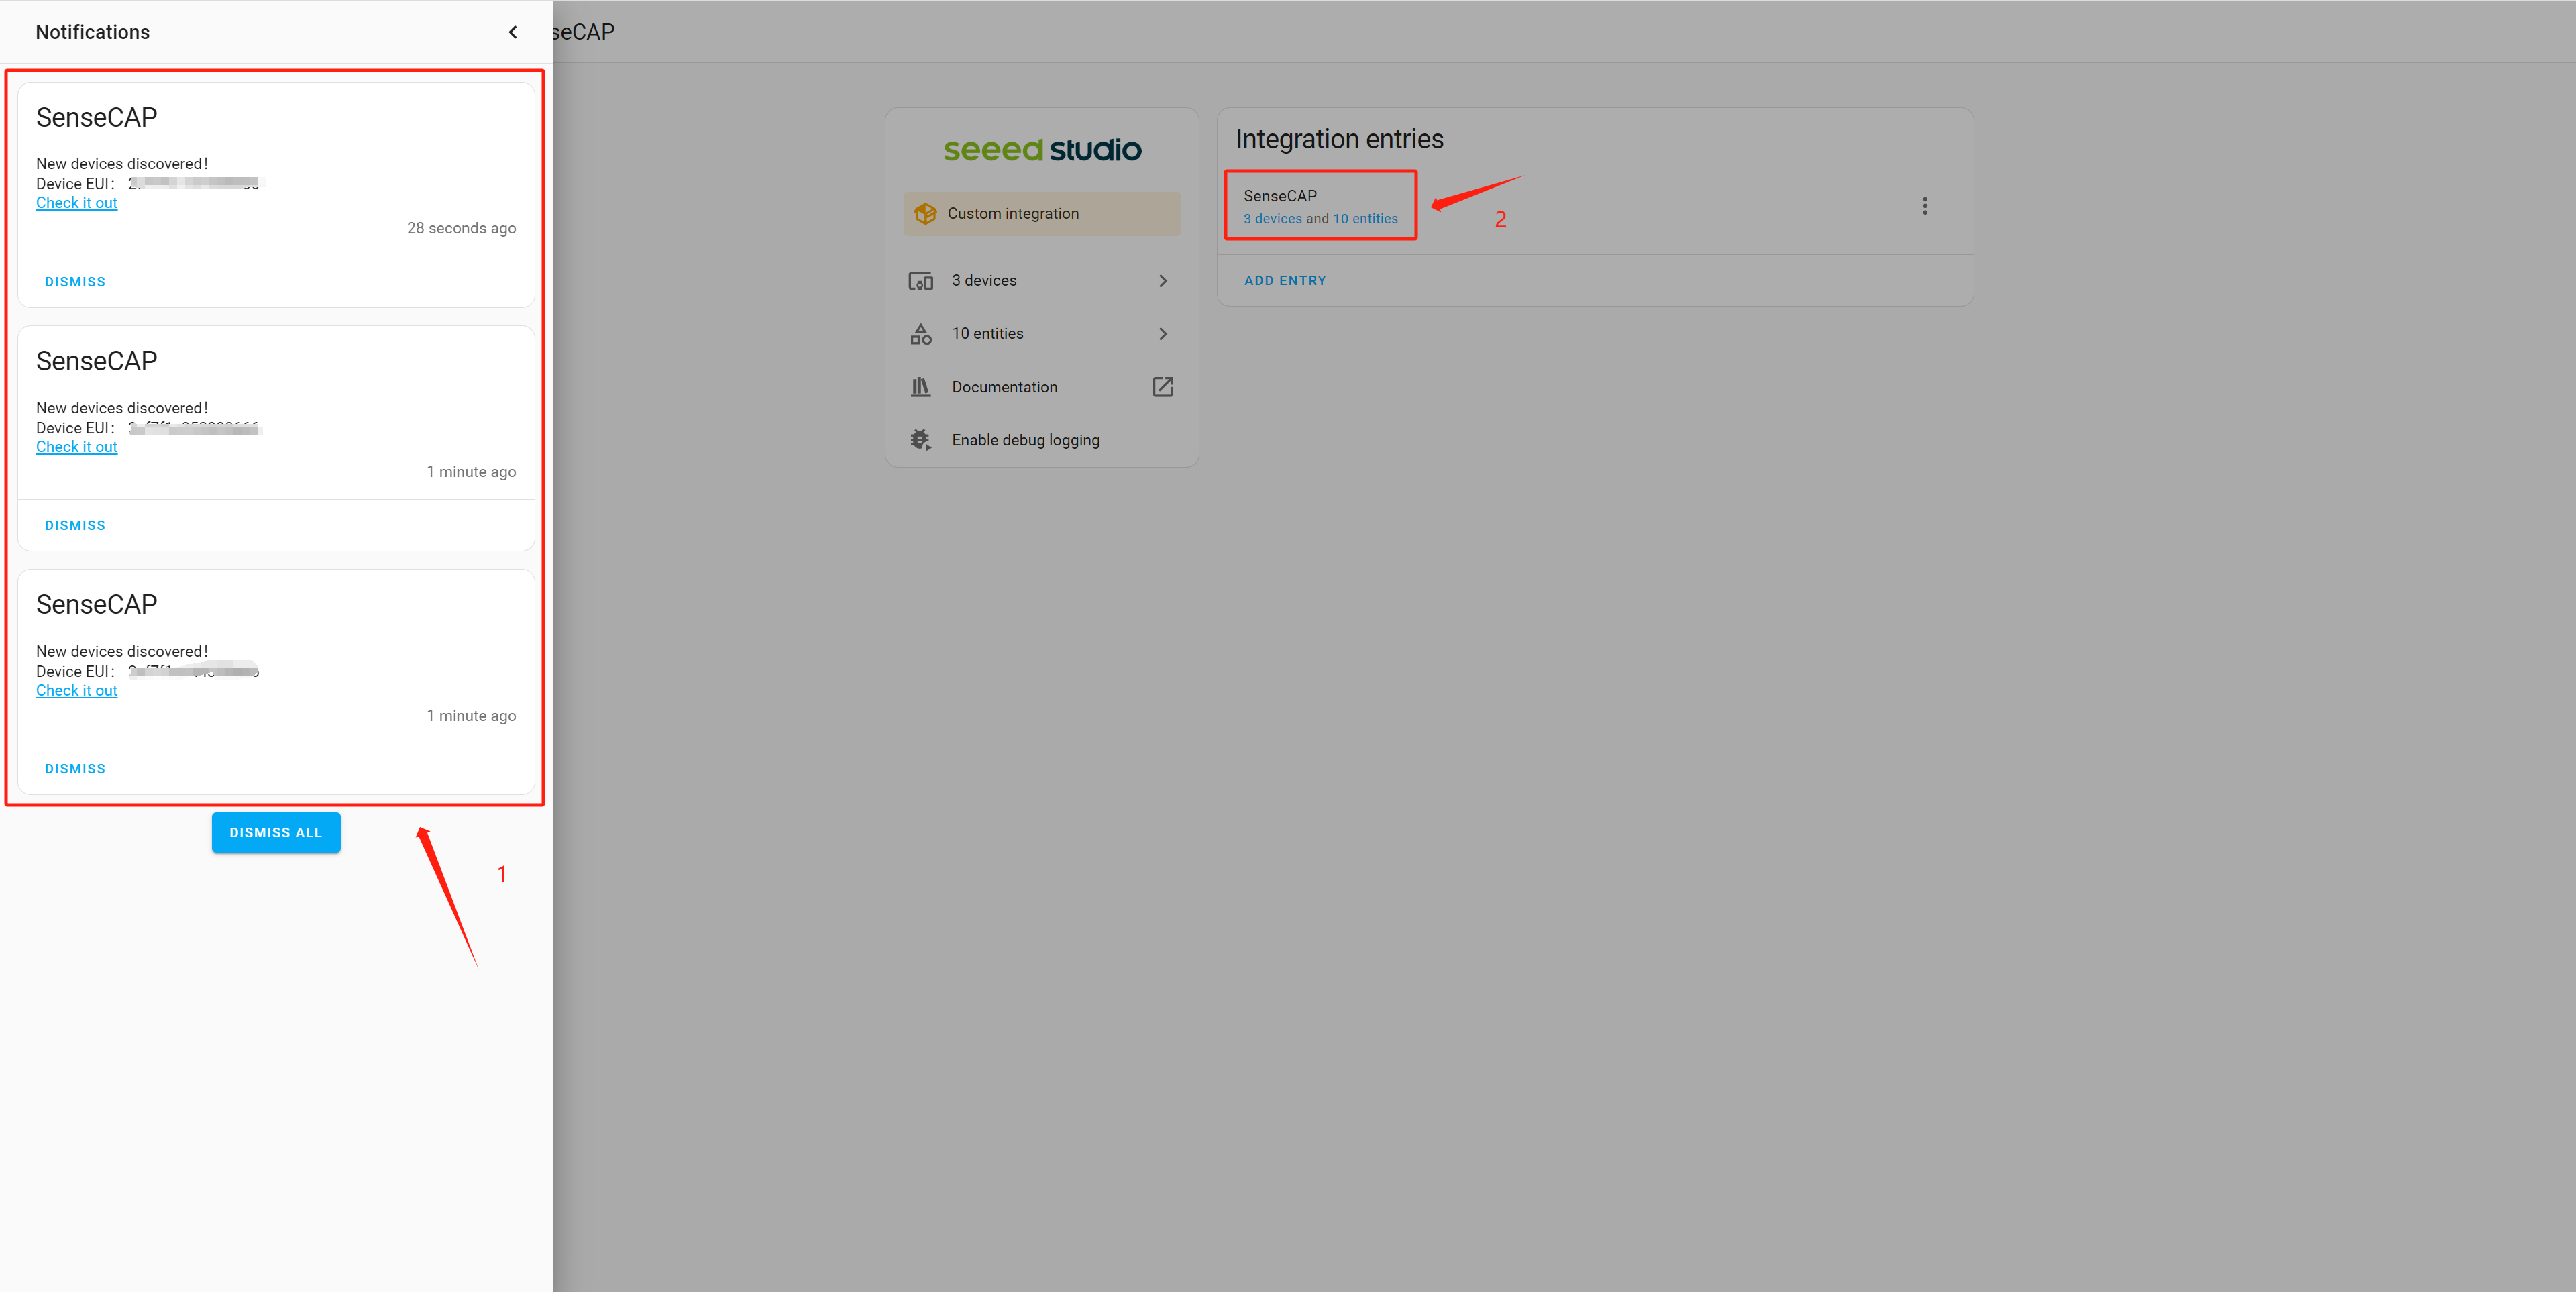
Waiting for few minutes (The Uplink time depends on your setting in M2 Chirpstack and SenseCAP Mate APP), and Click Notifications in the left sidebar. Then we can see the SenseCAP Sensors have been automatically added to HA. Click Check it out and turn to the Integration
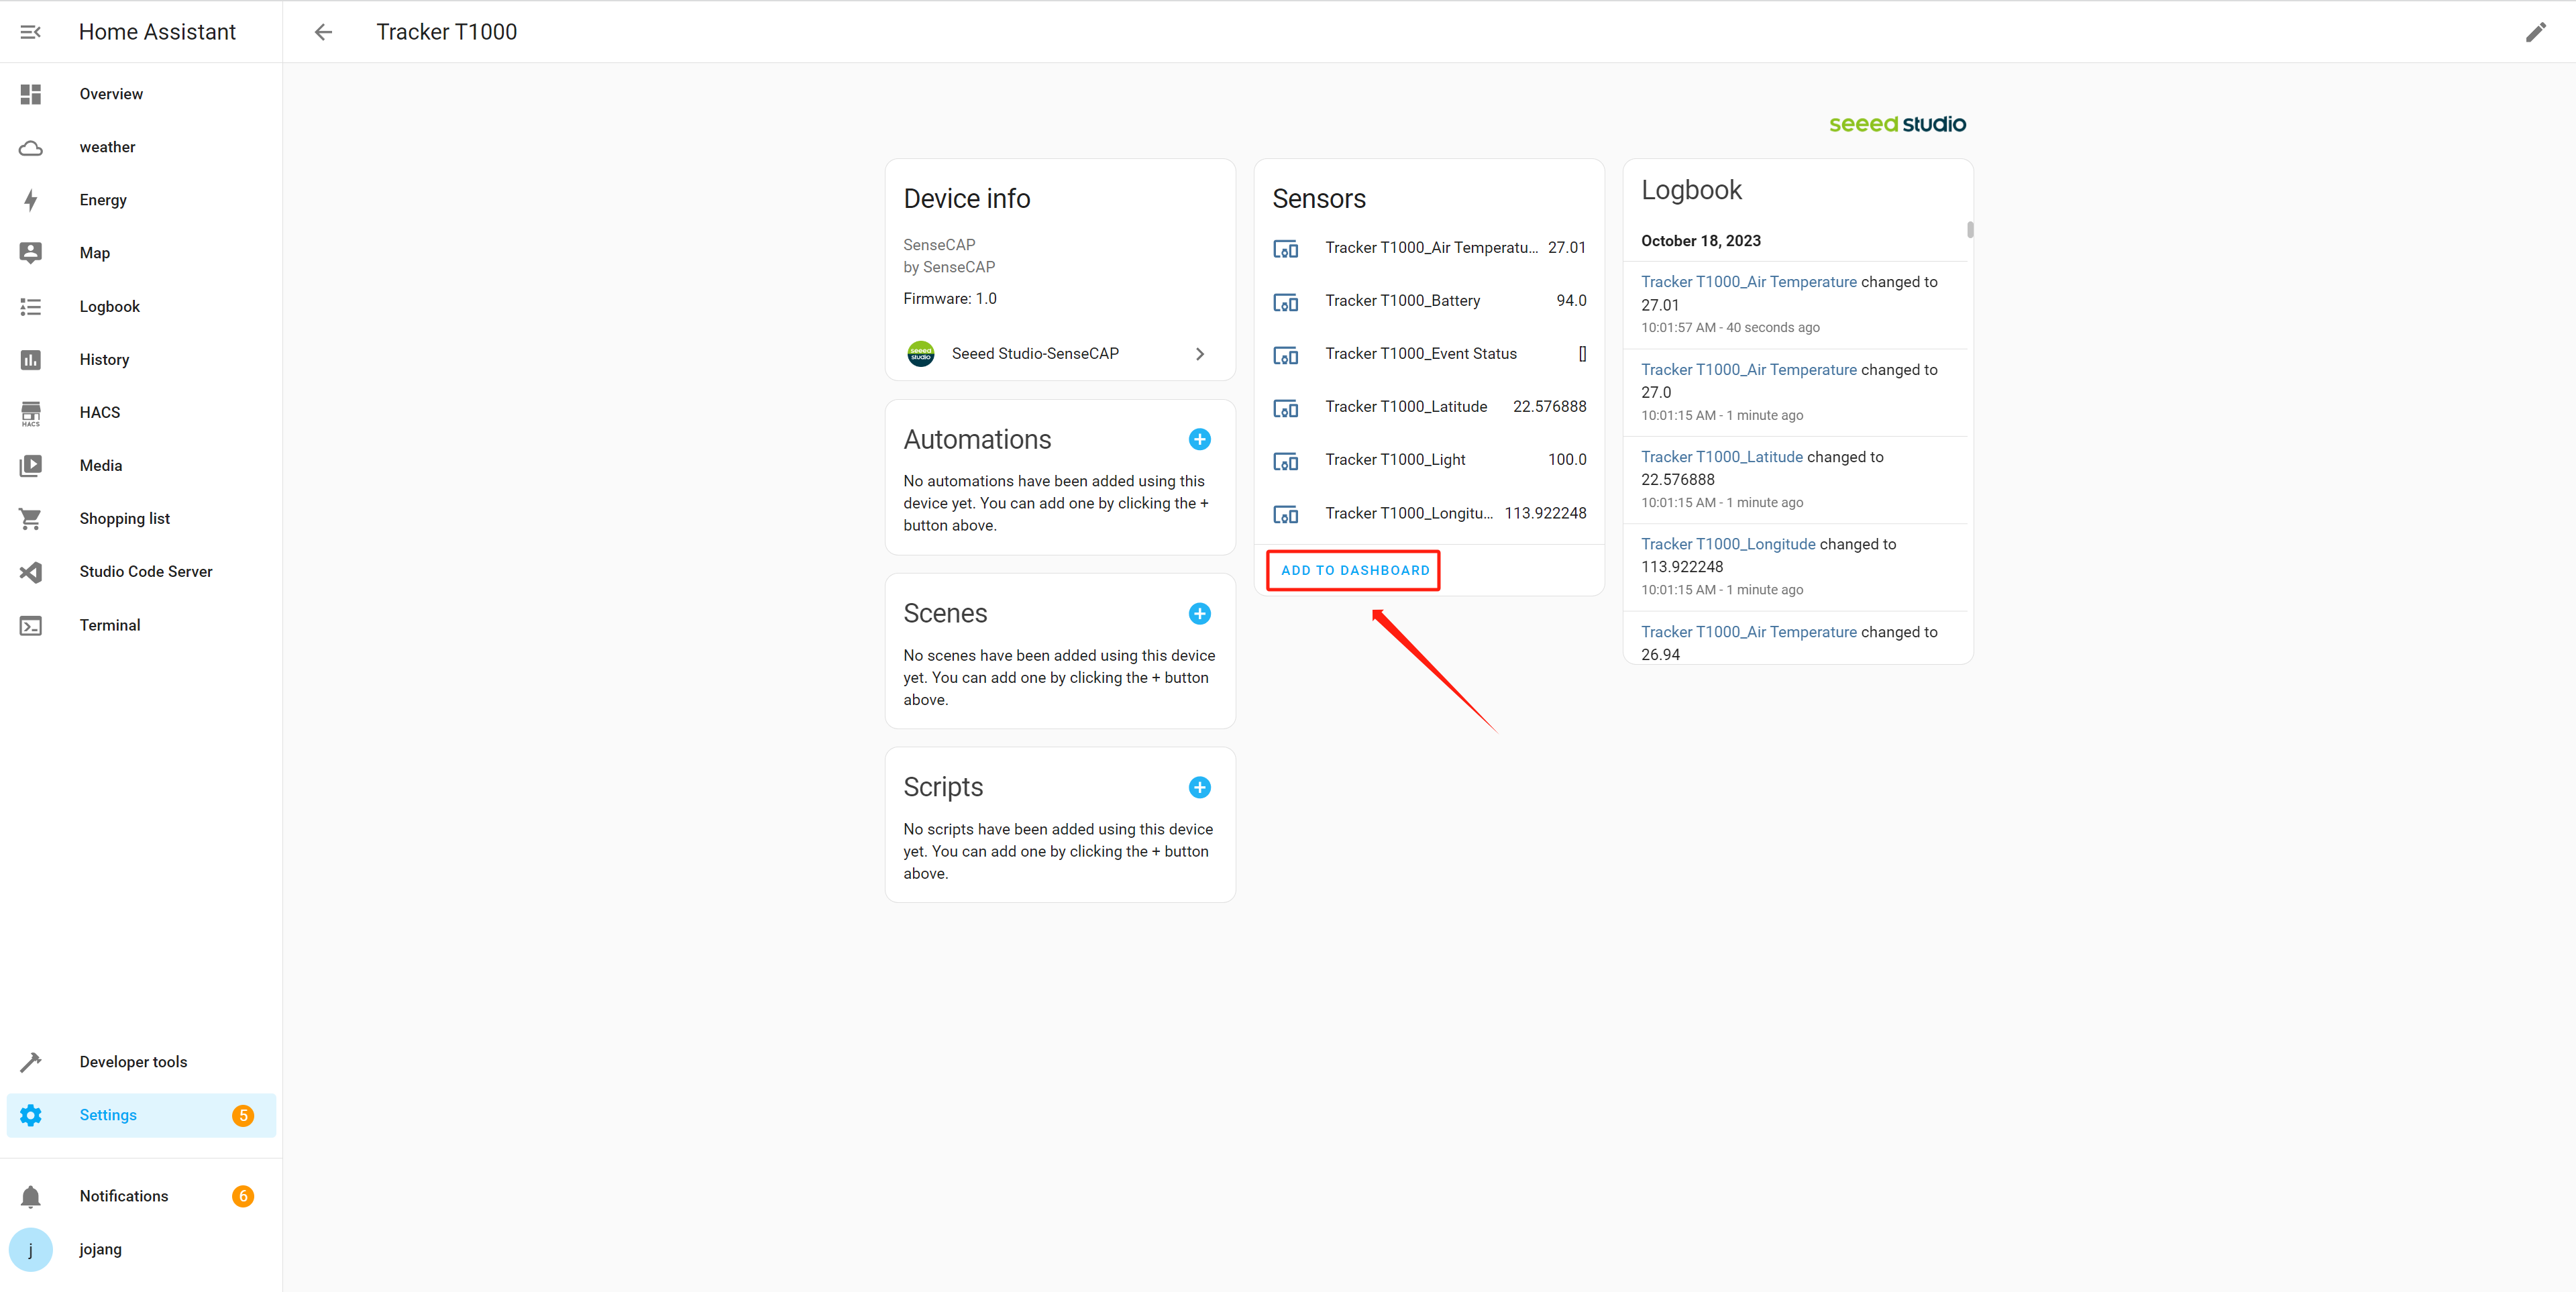
Click on one of the devices and we can see that all of the entities have been automatically created and added to the device. Click ADD TO DASHBOARD so as to add all the entites of entire device directly to the dashboard through the form of cards
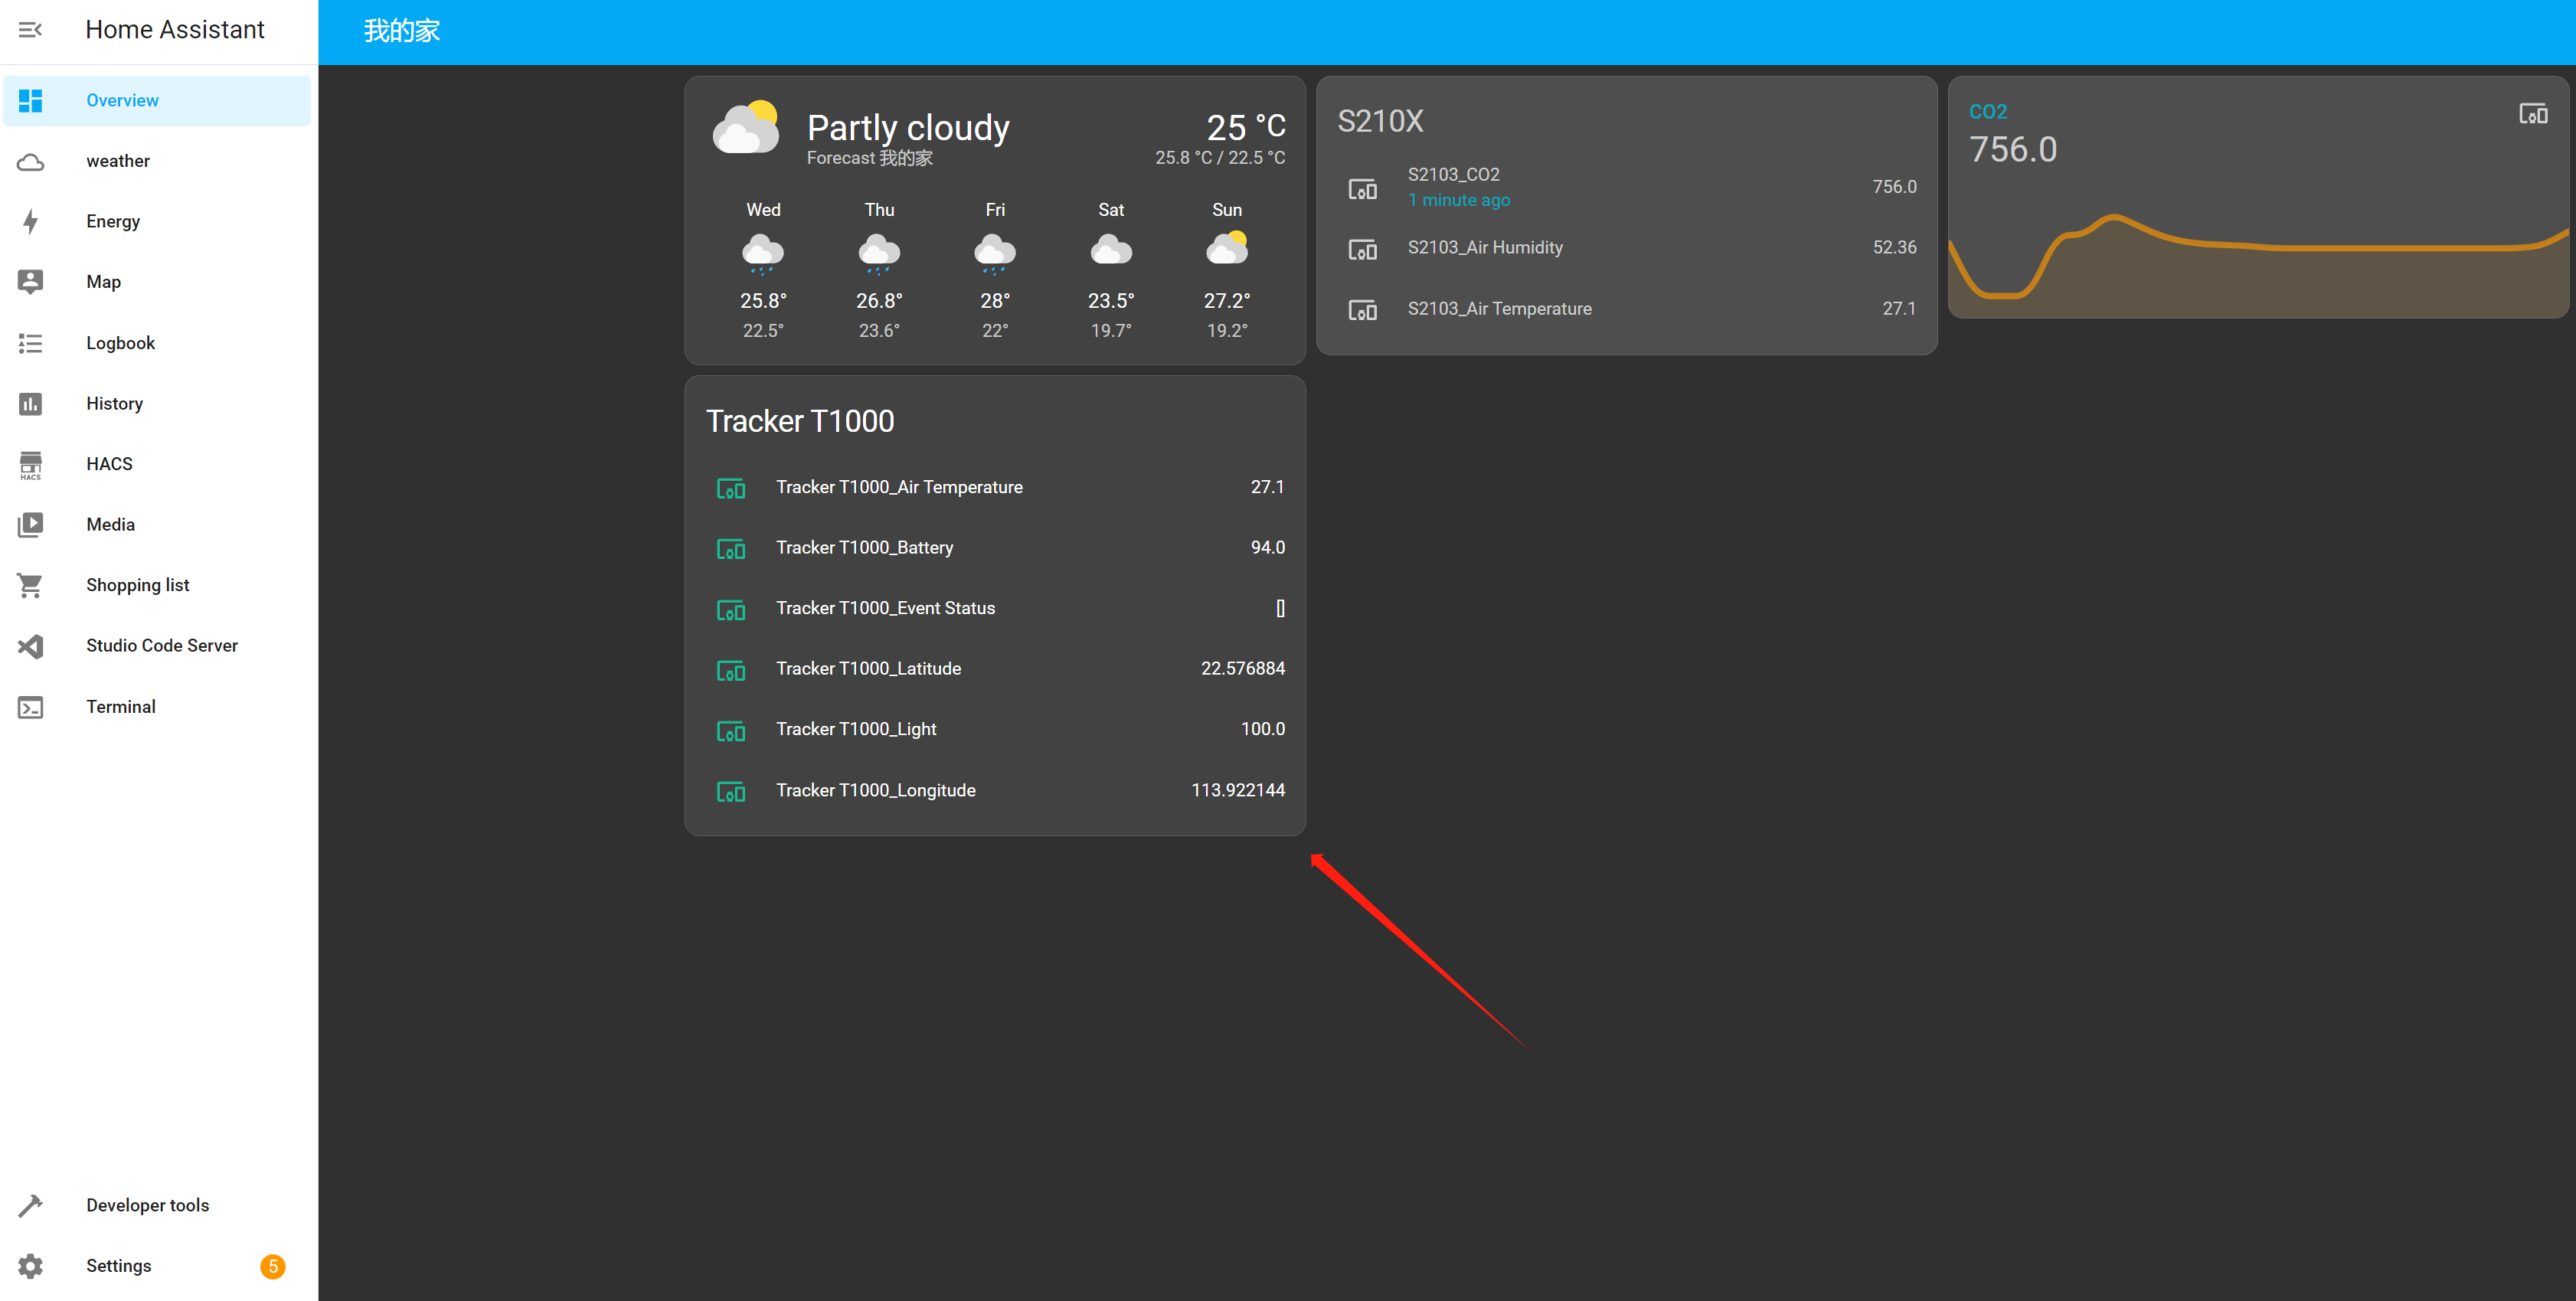
- Go to Overview and we can find the card we just added
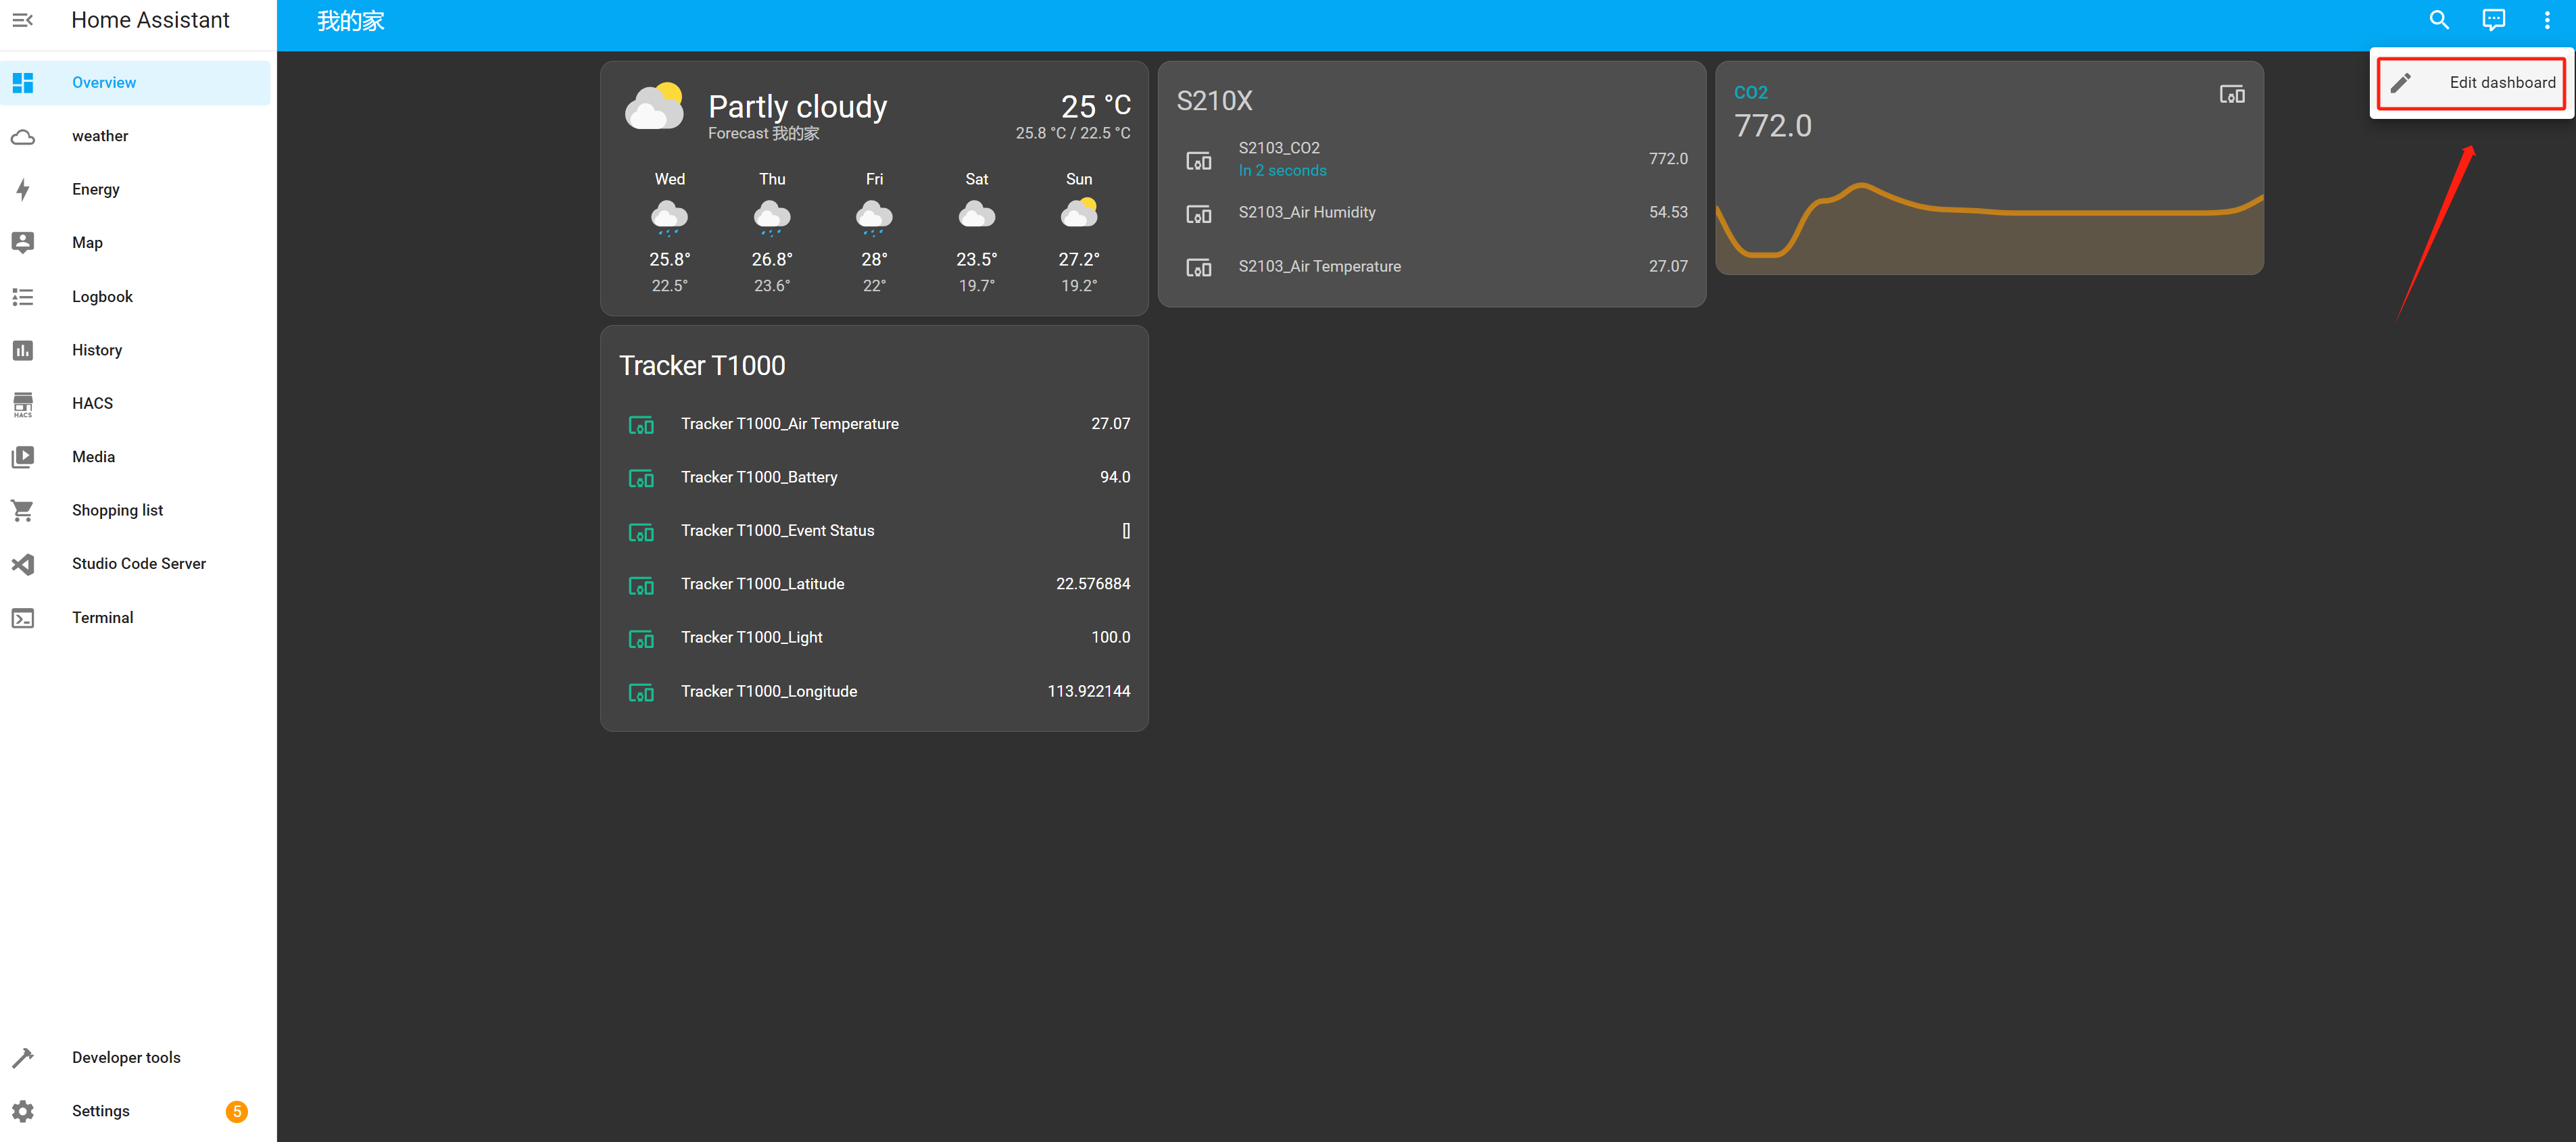
- Click Edit dashboard
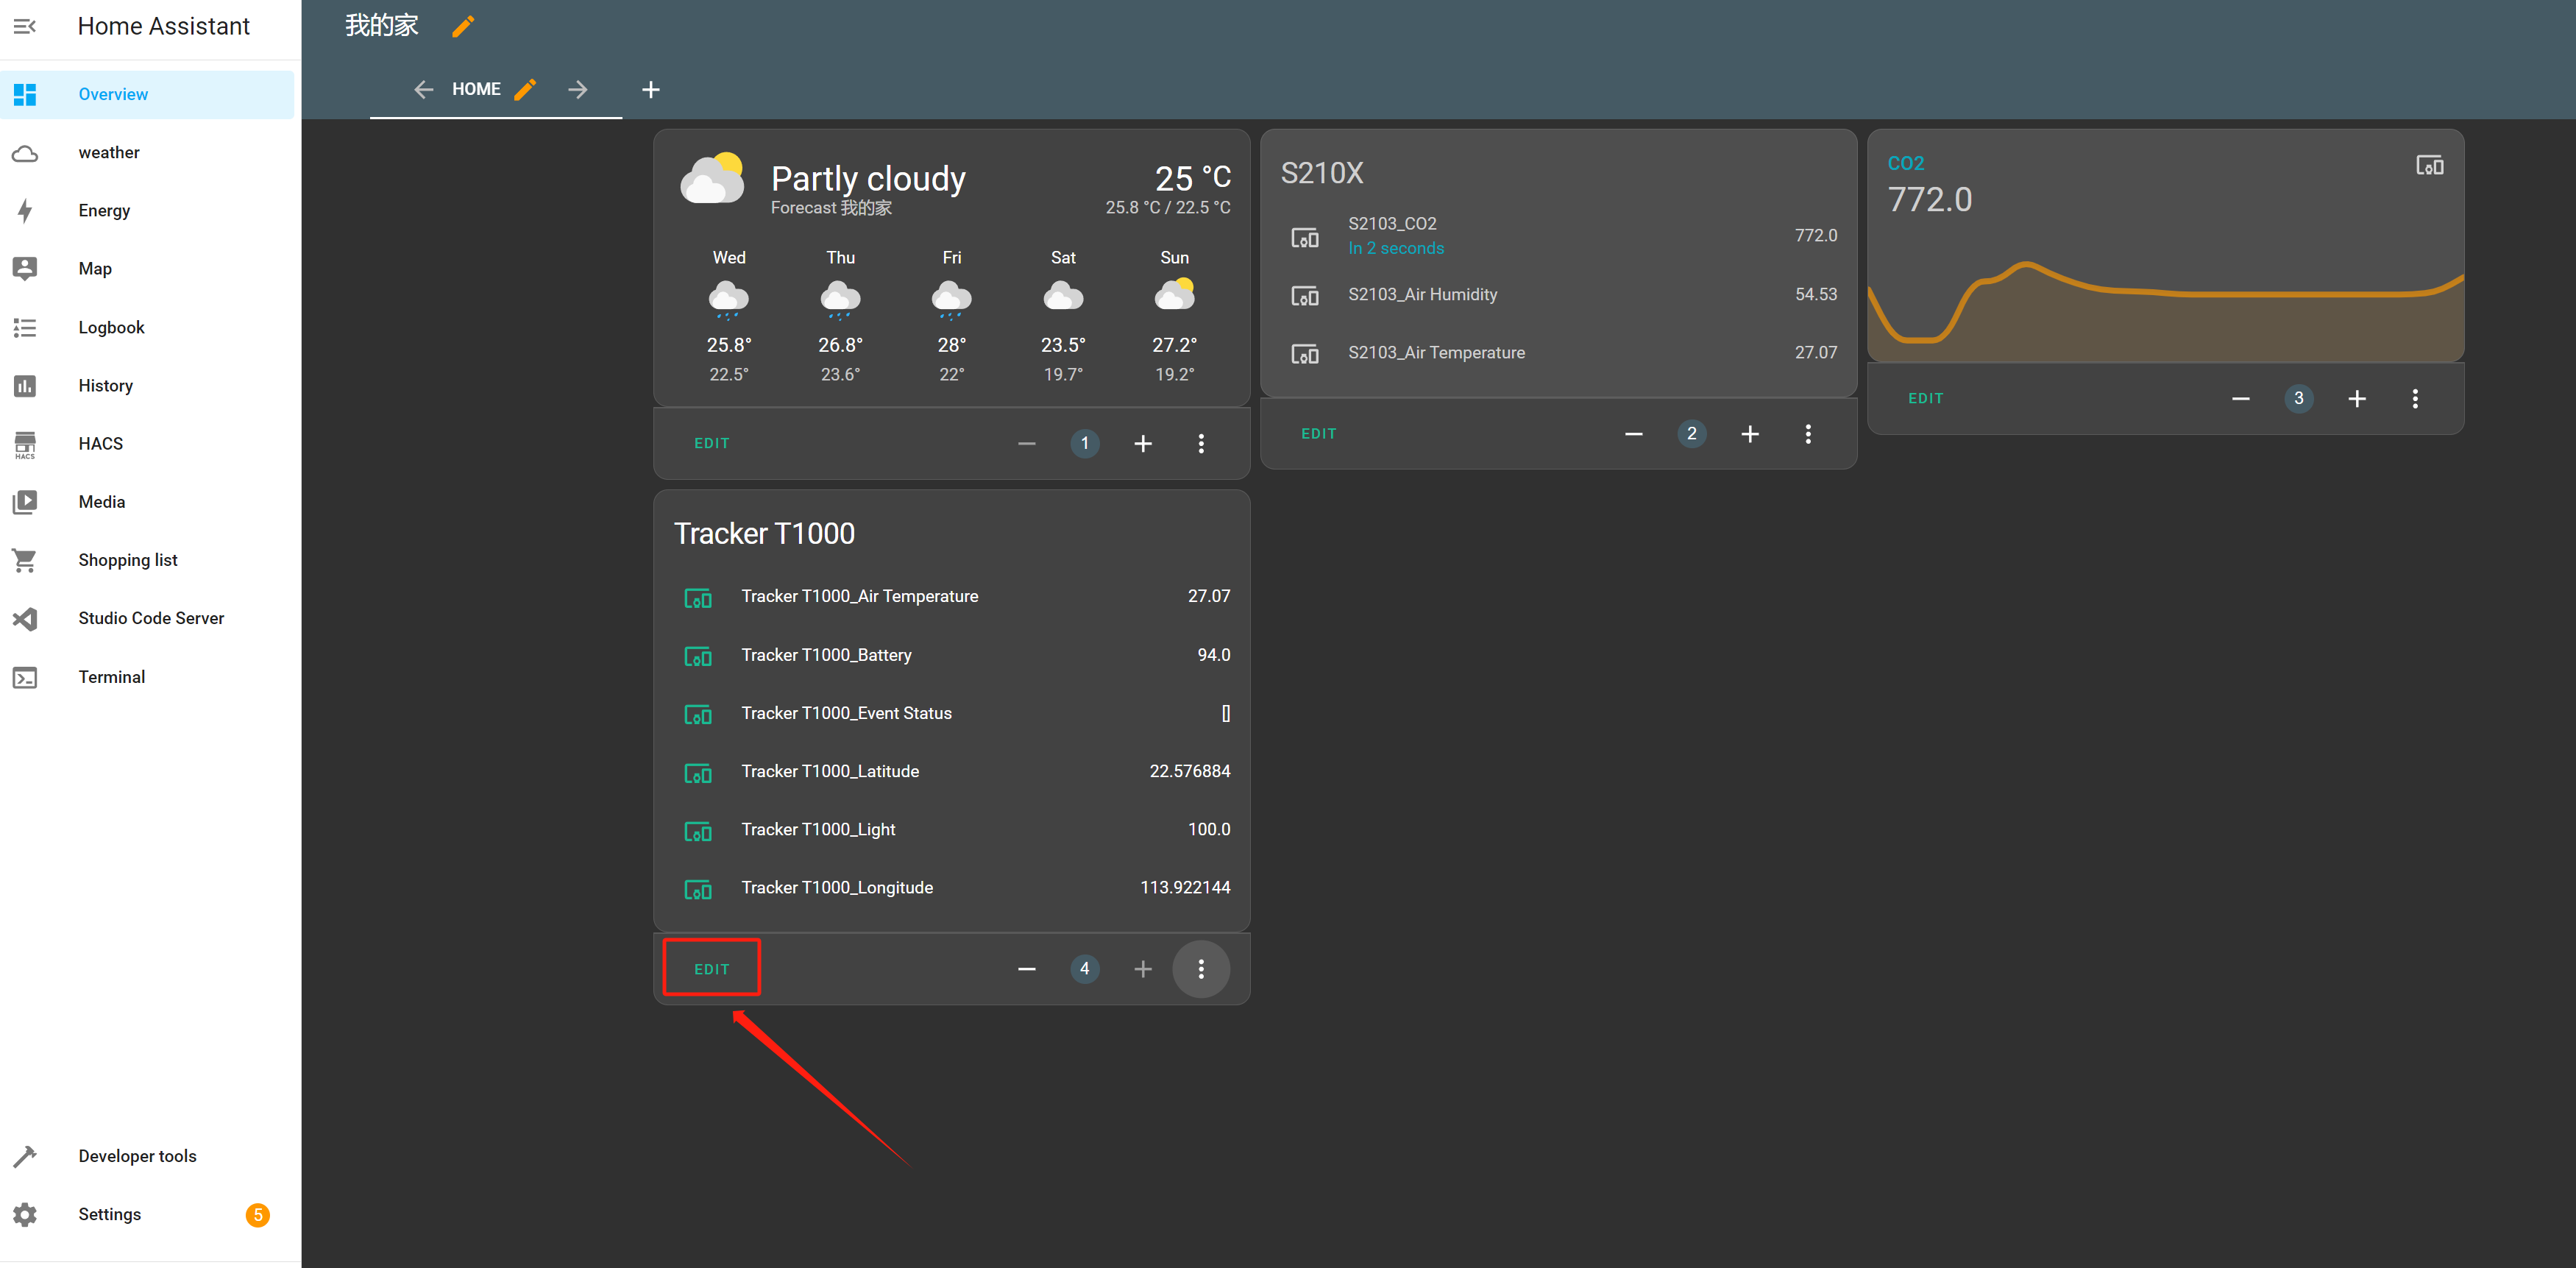
- Click EDIT to edit
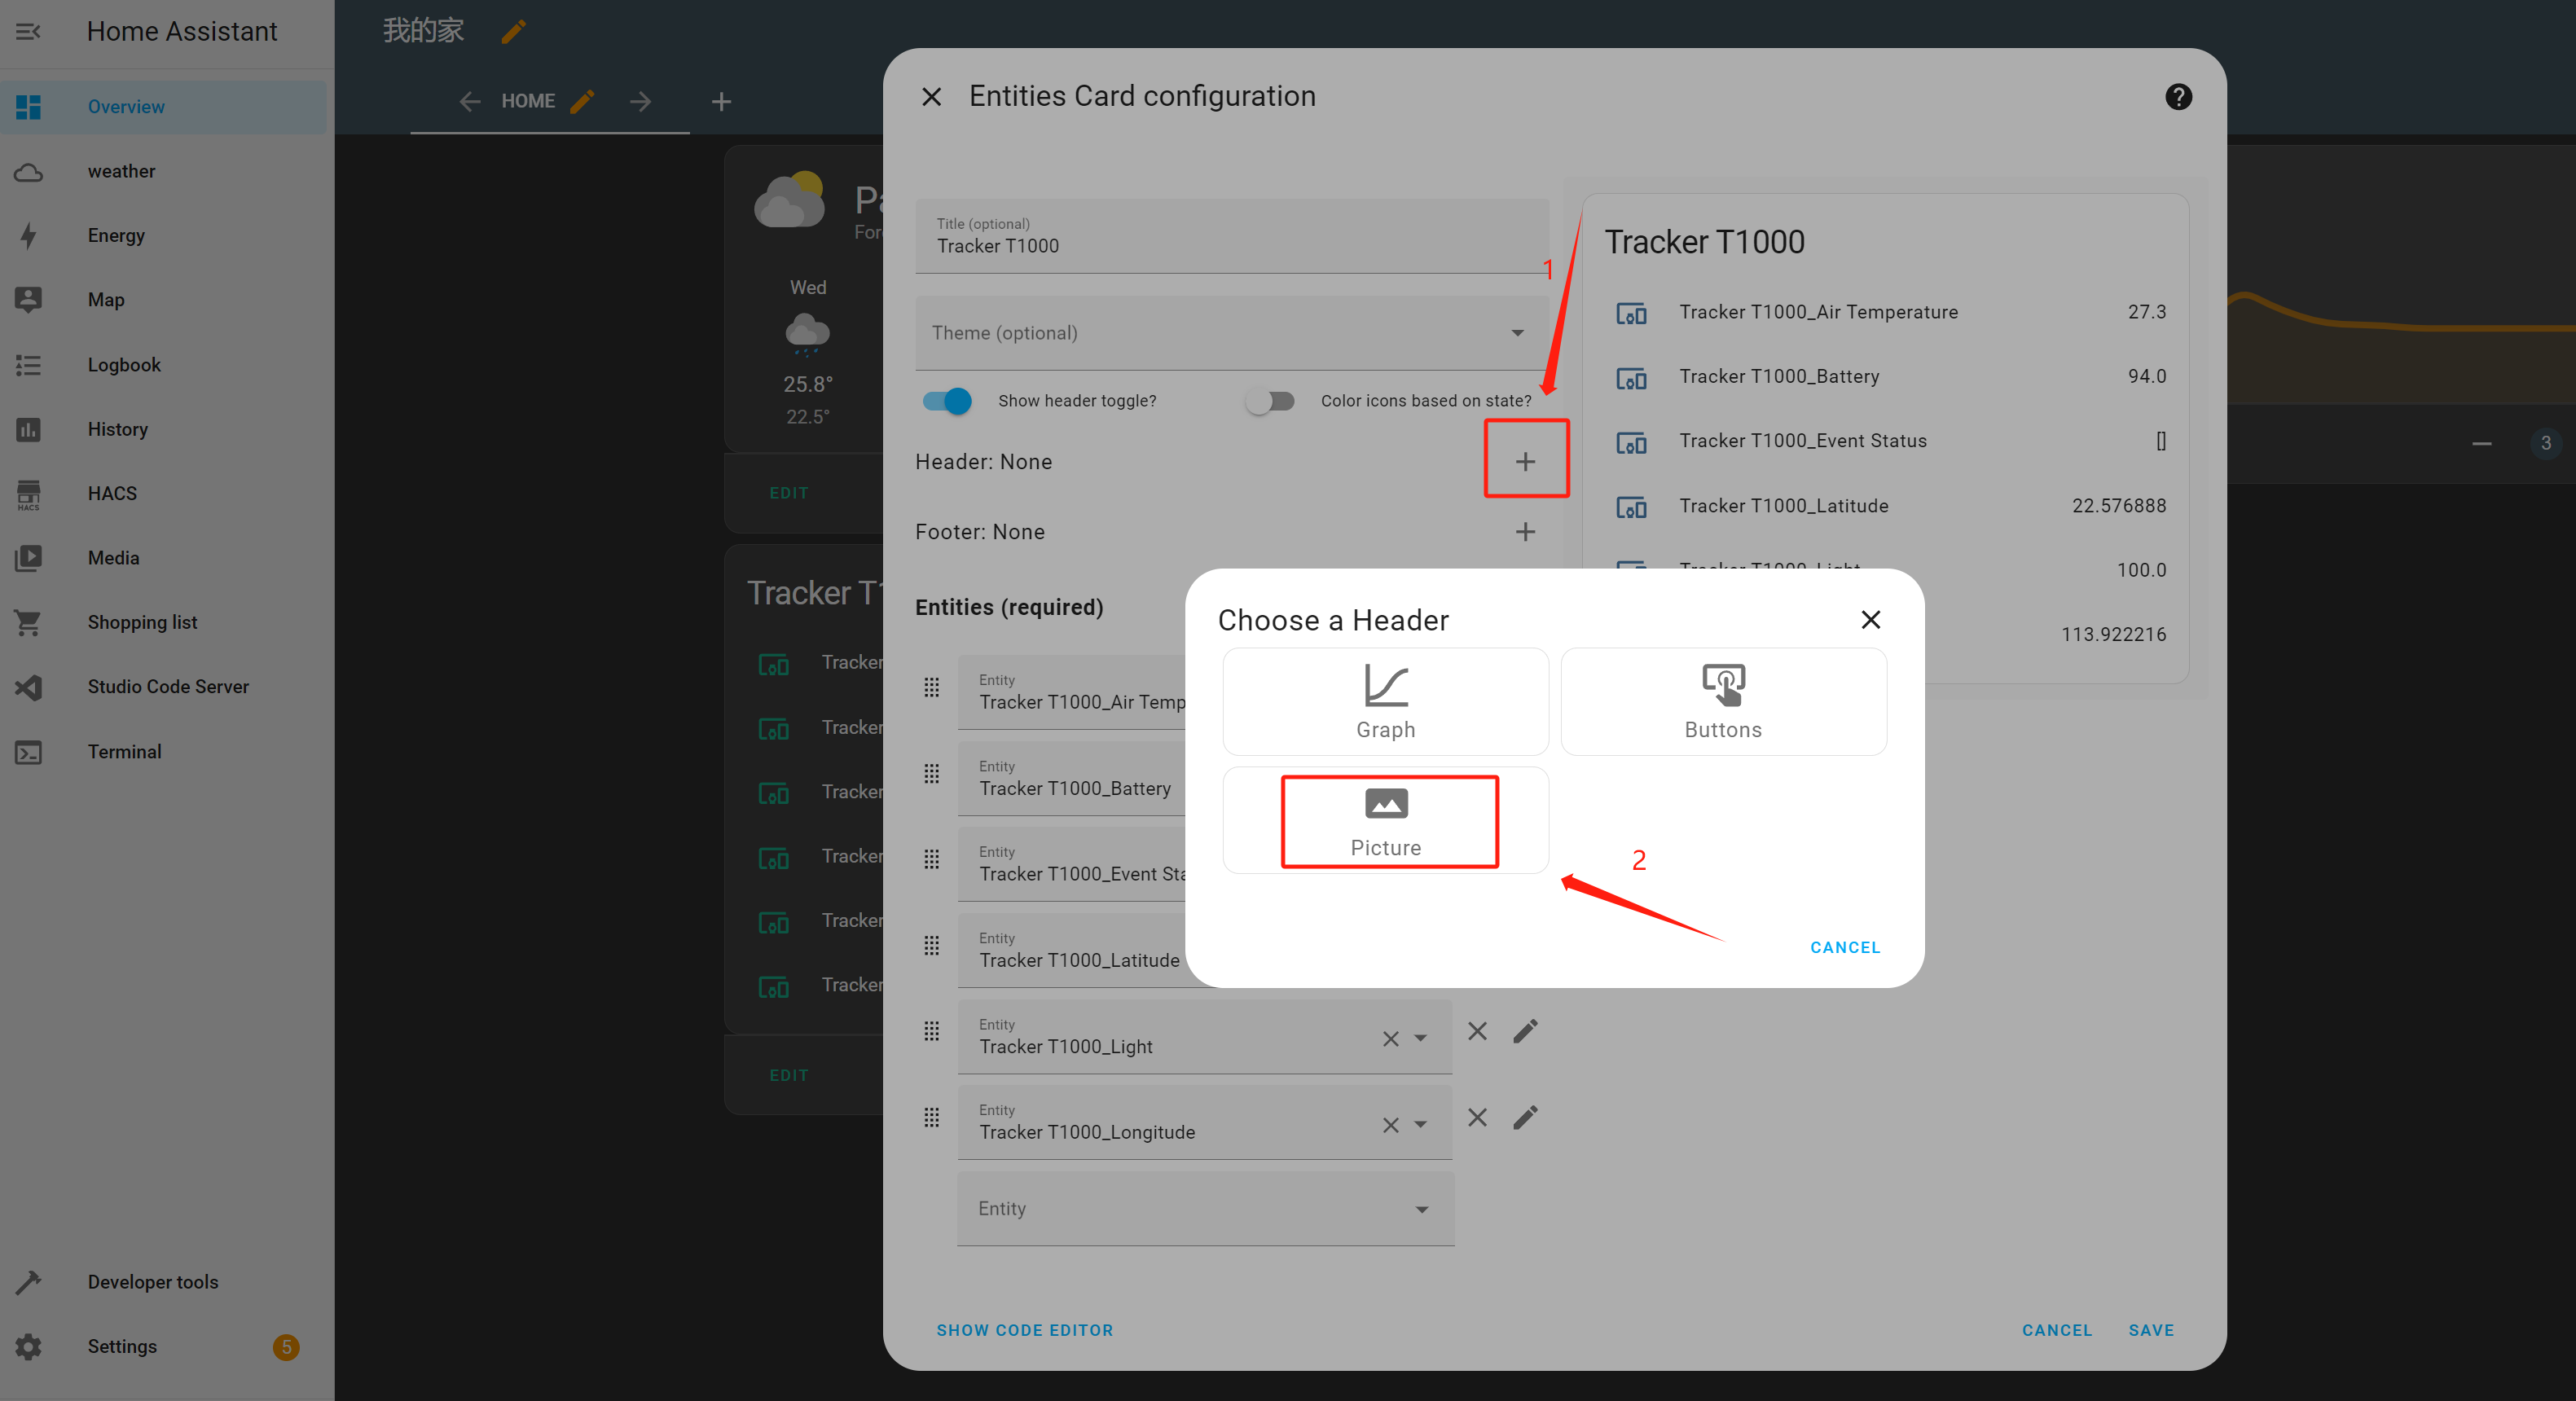
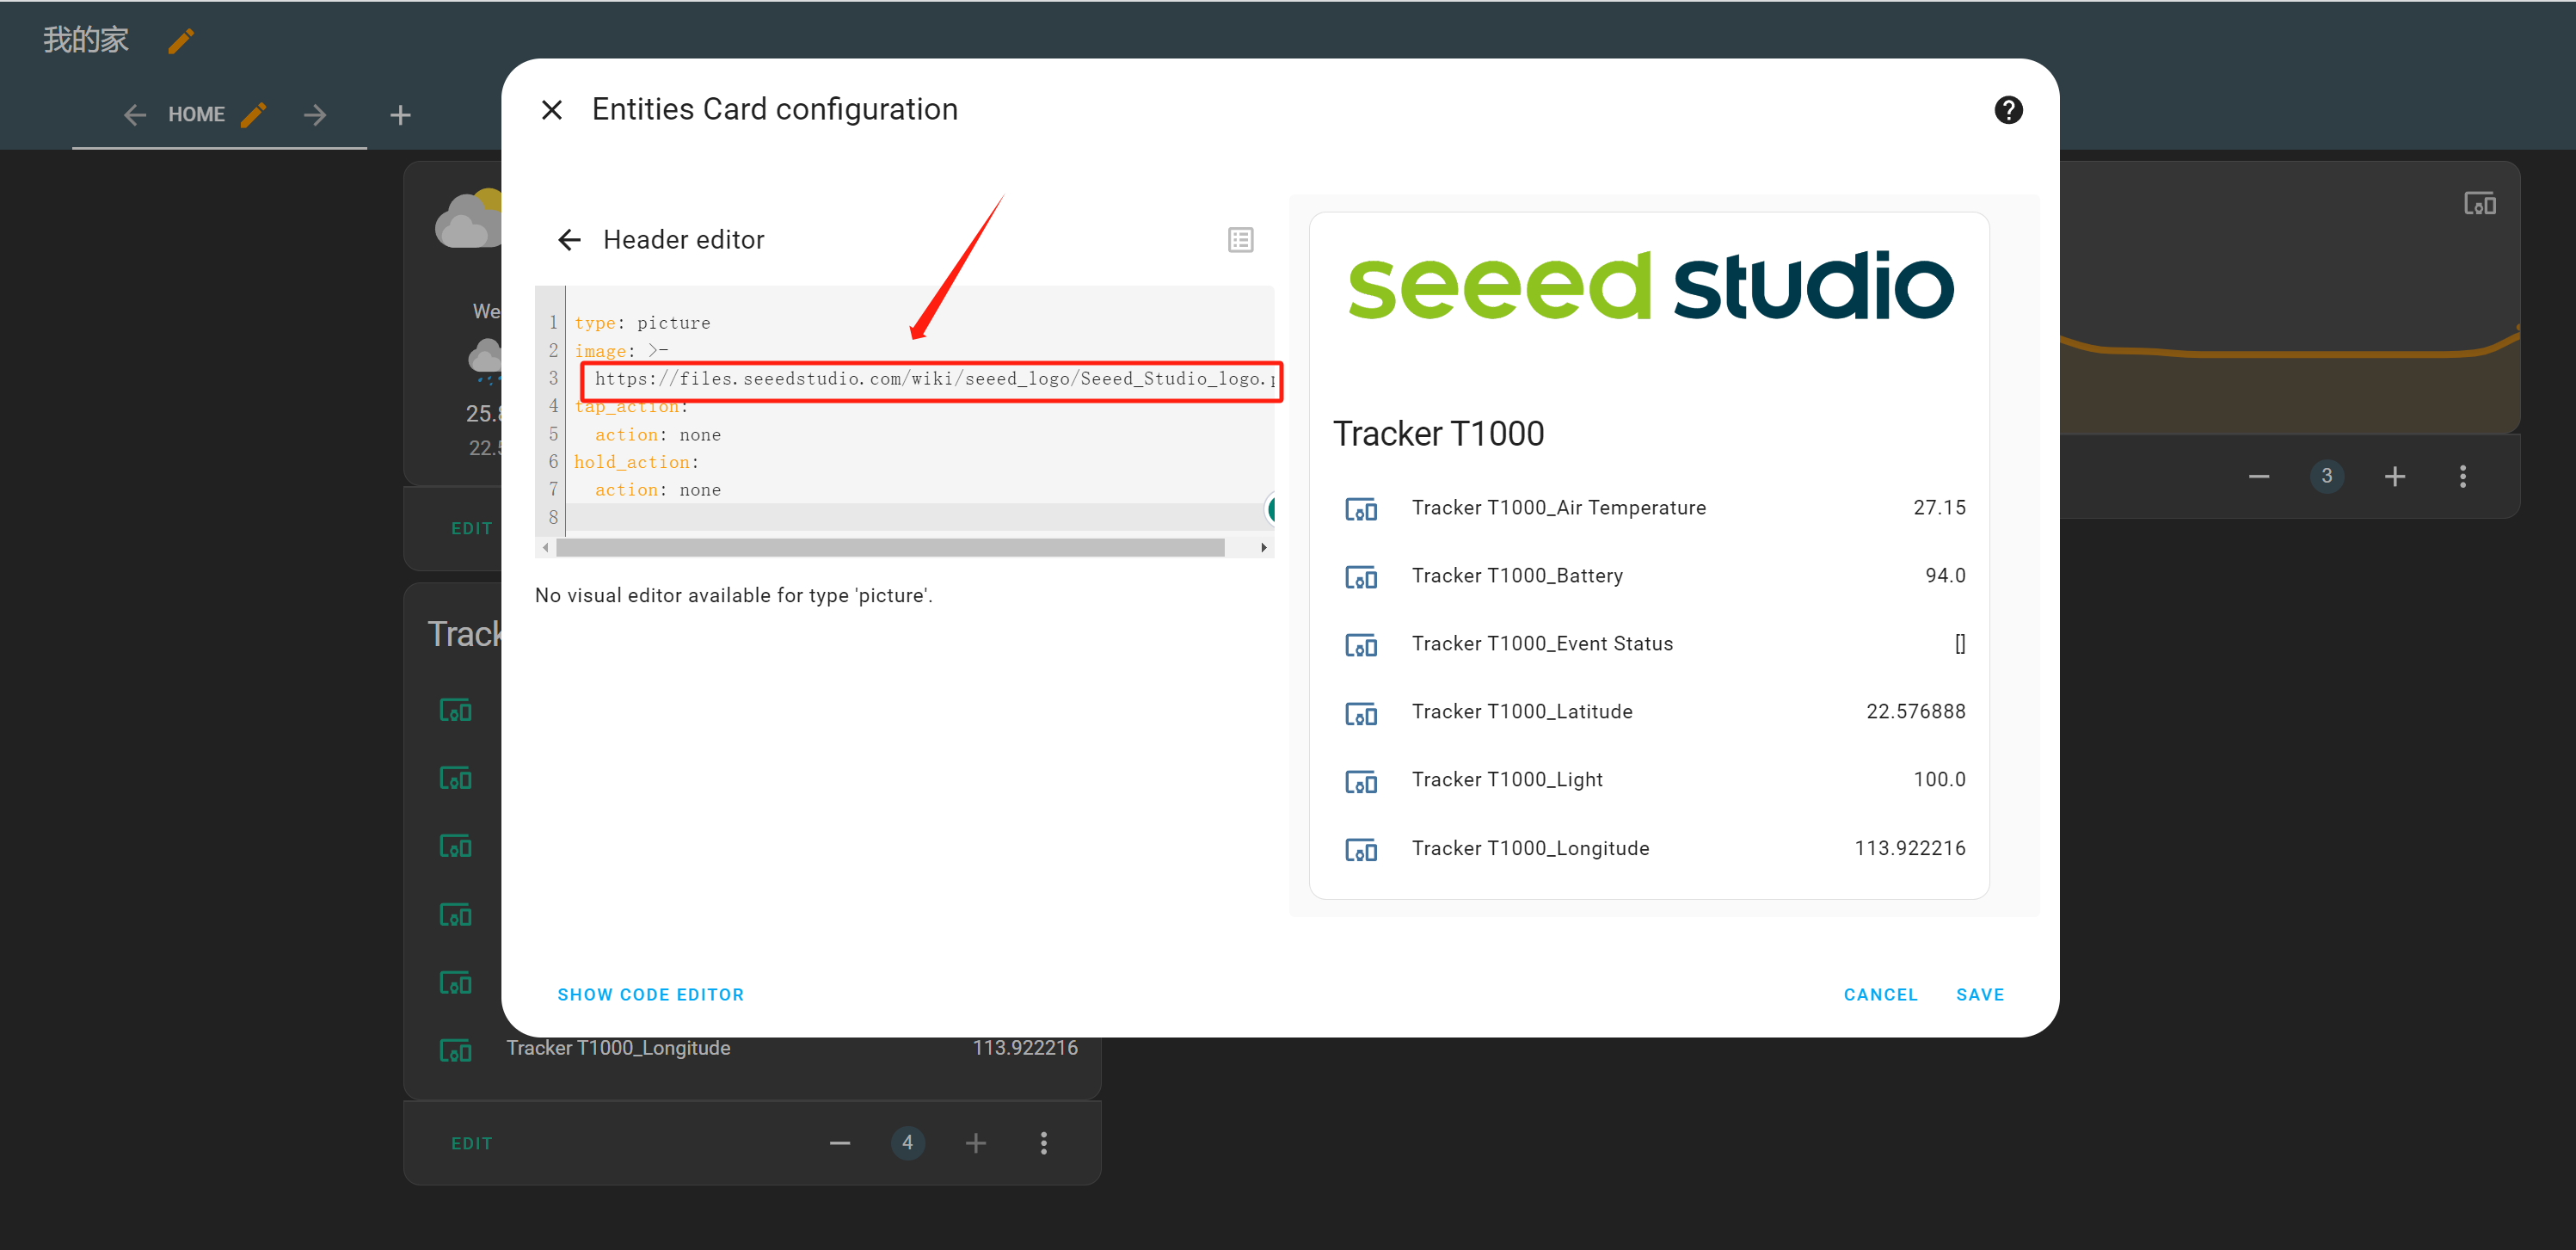
- We can add a header Picture to decorate the card
- Replace the url to yours in order to display your favorite picture
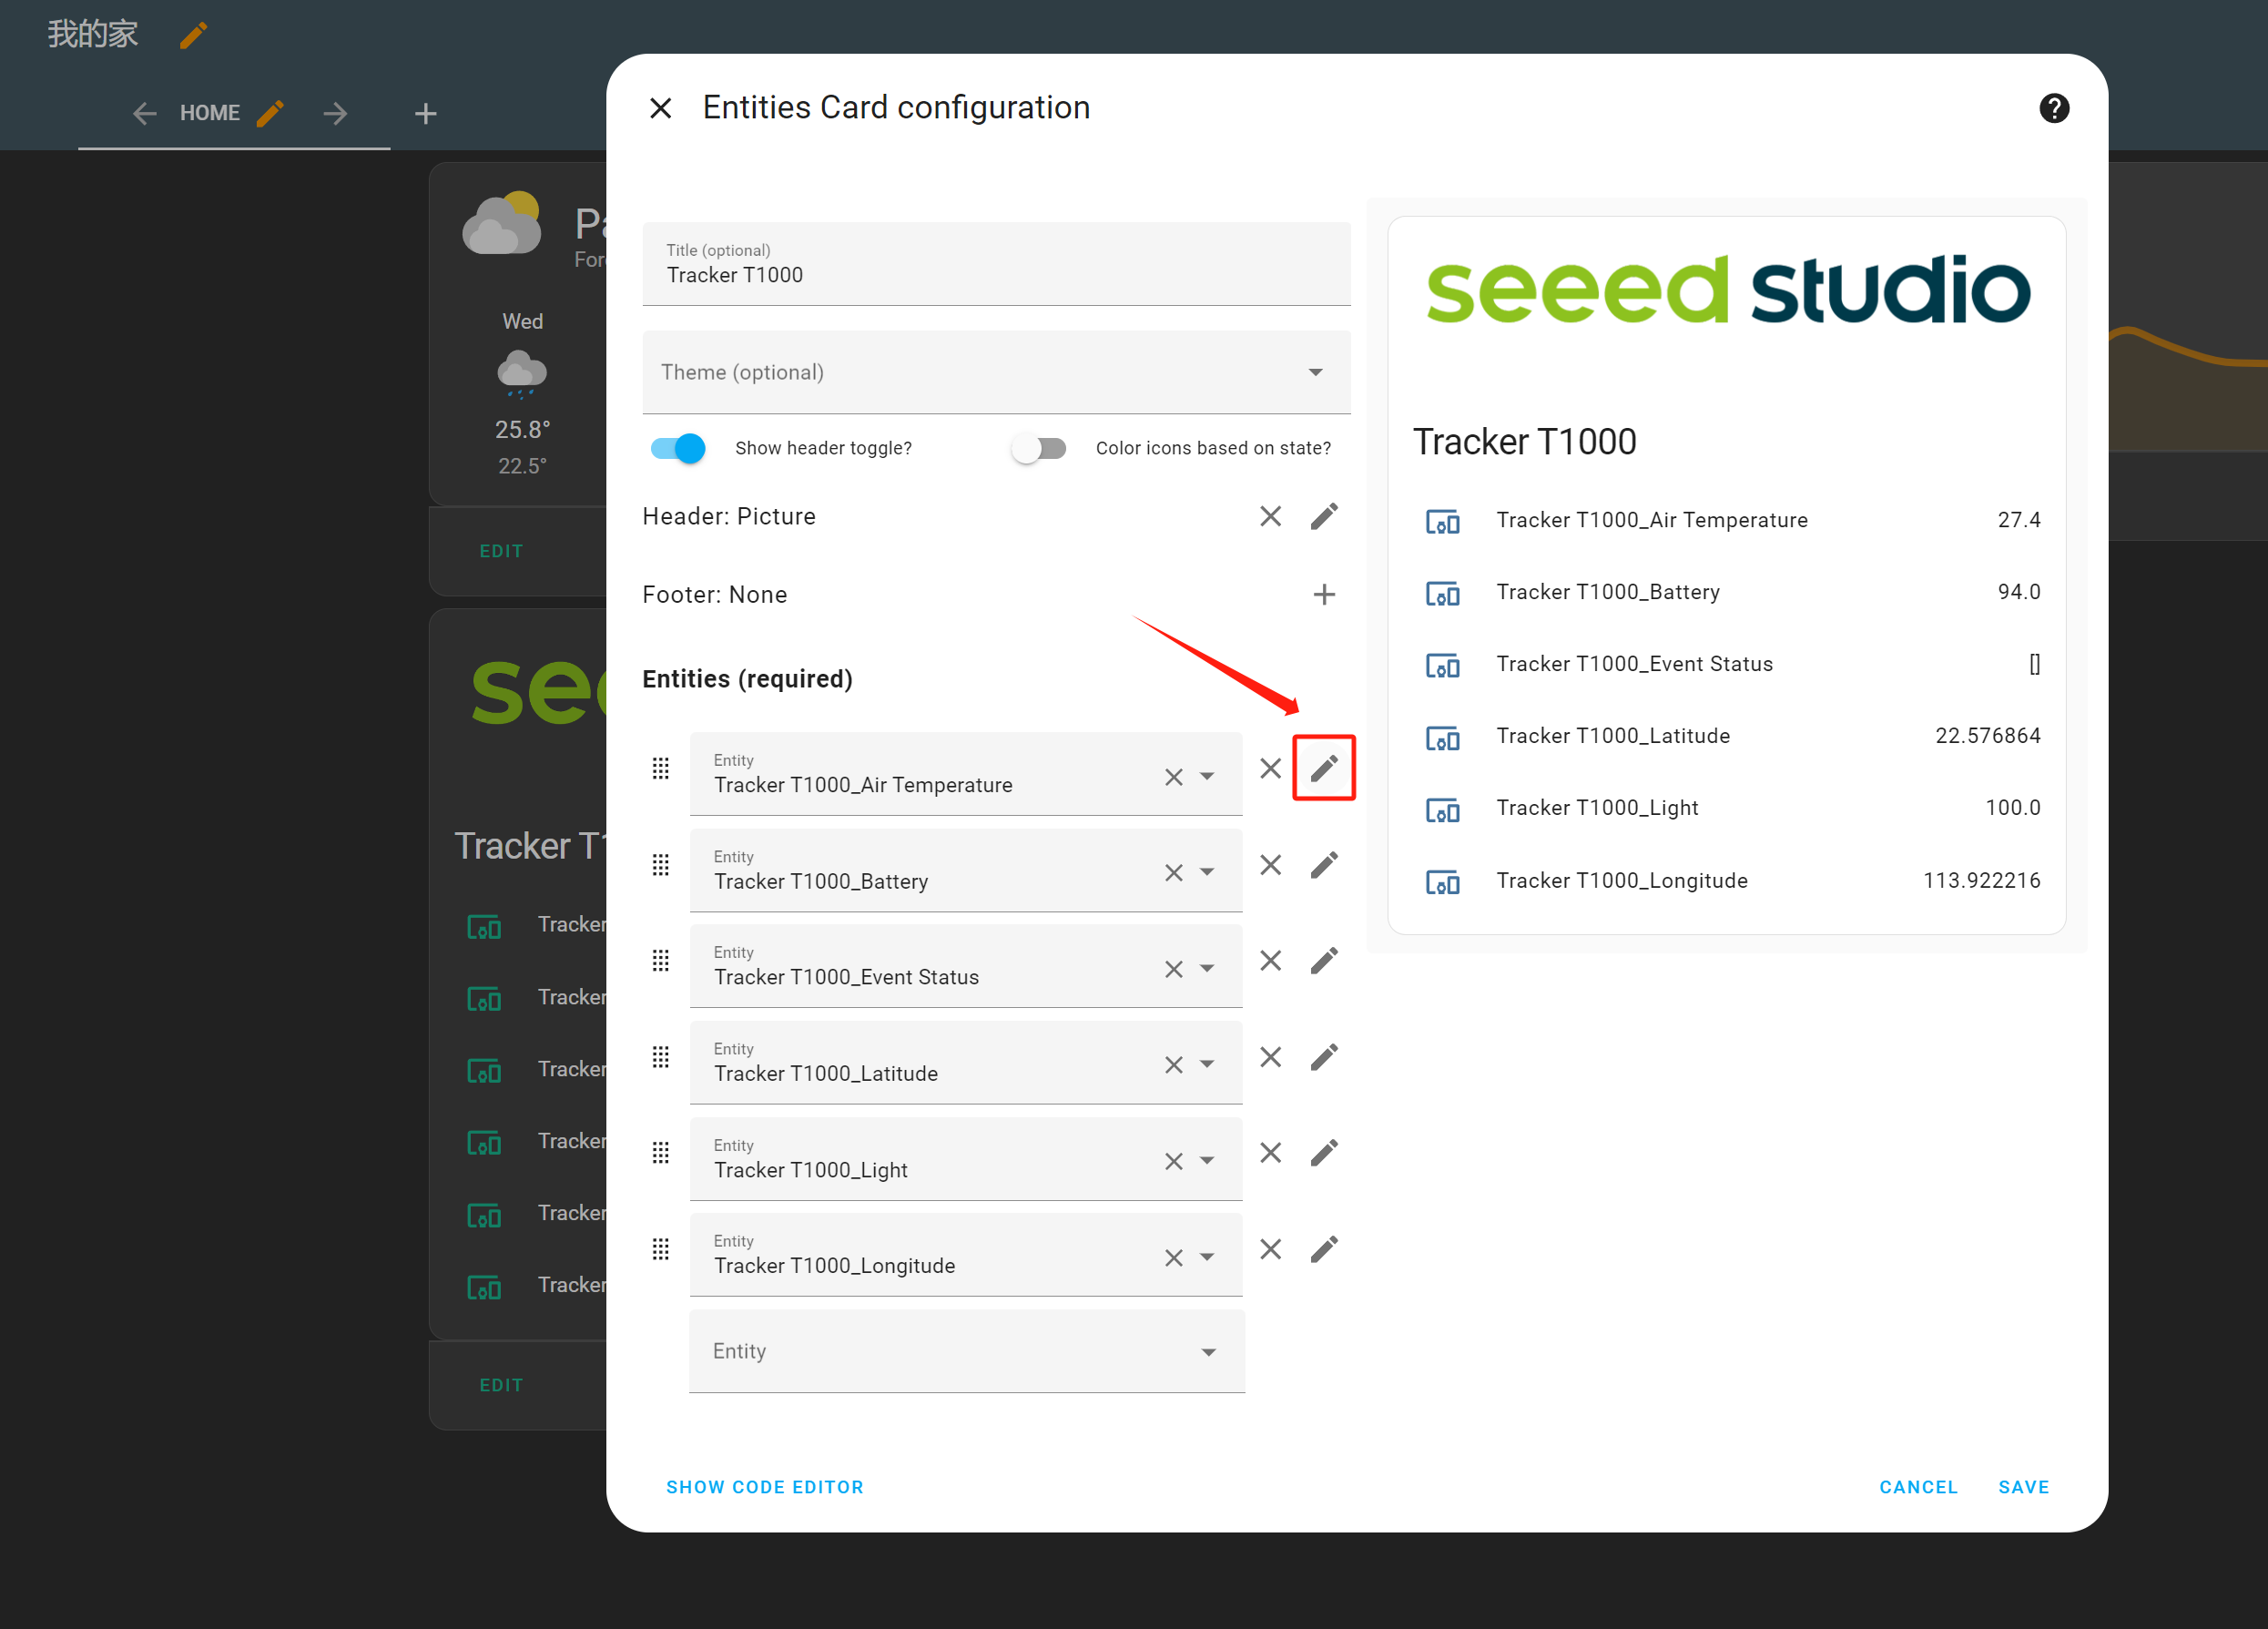
- Choose the entity to modify
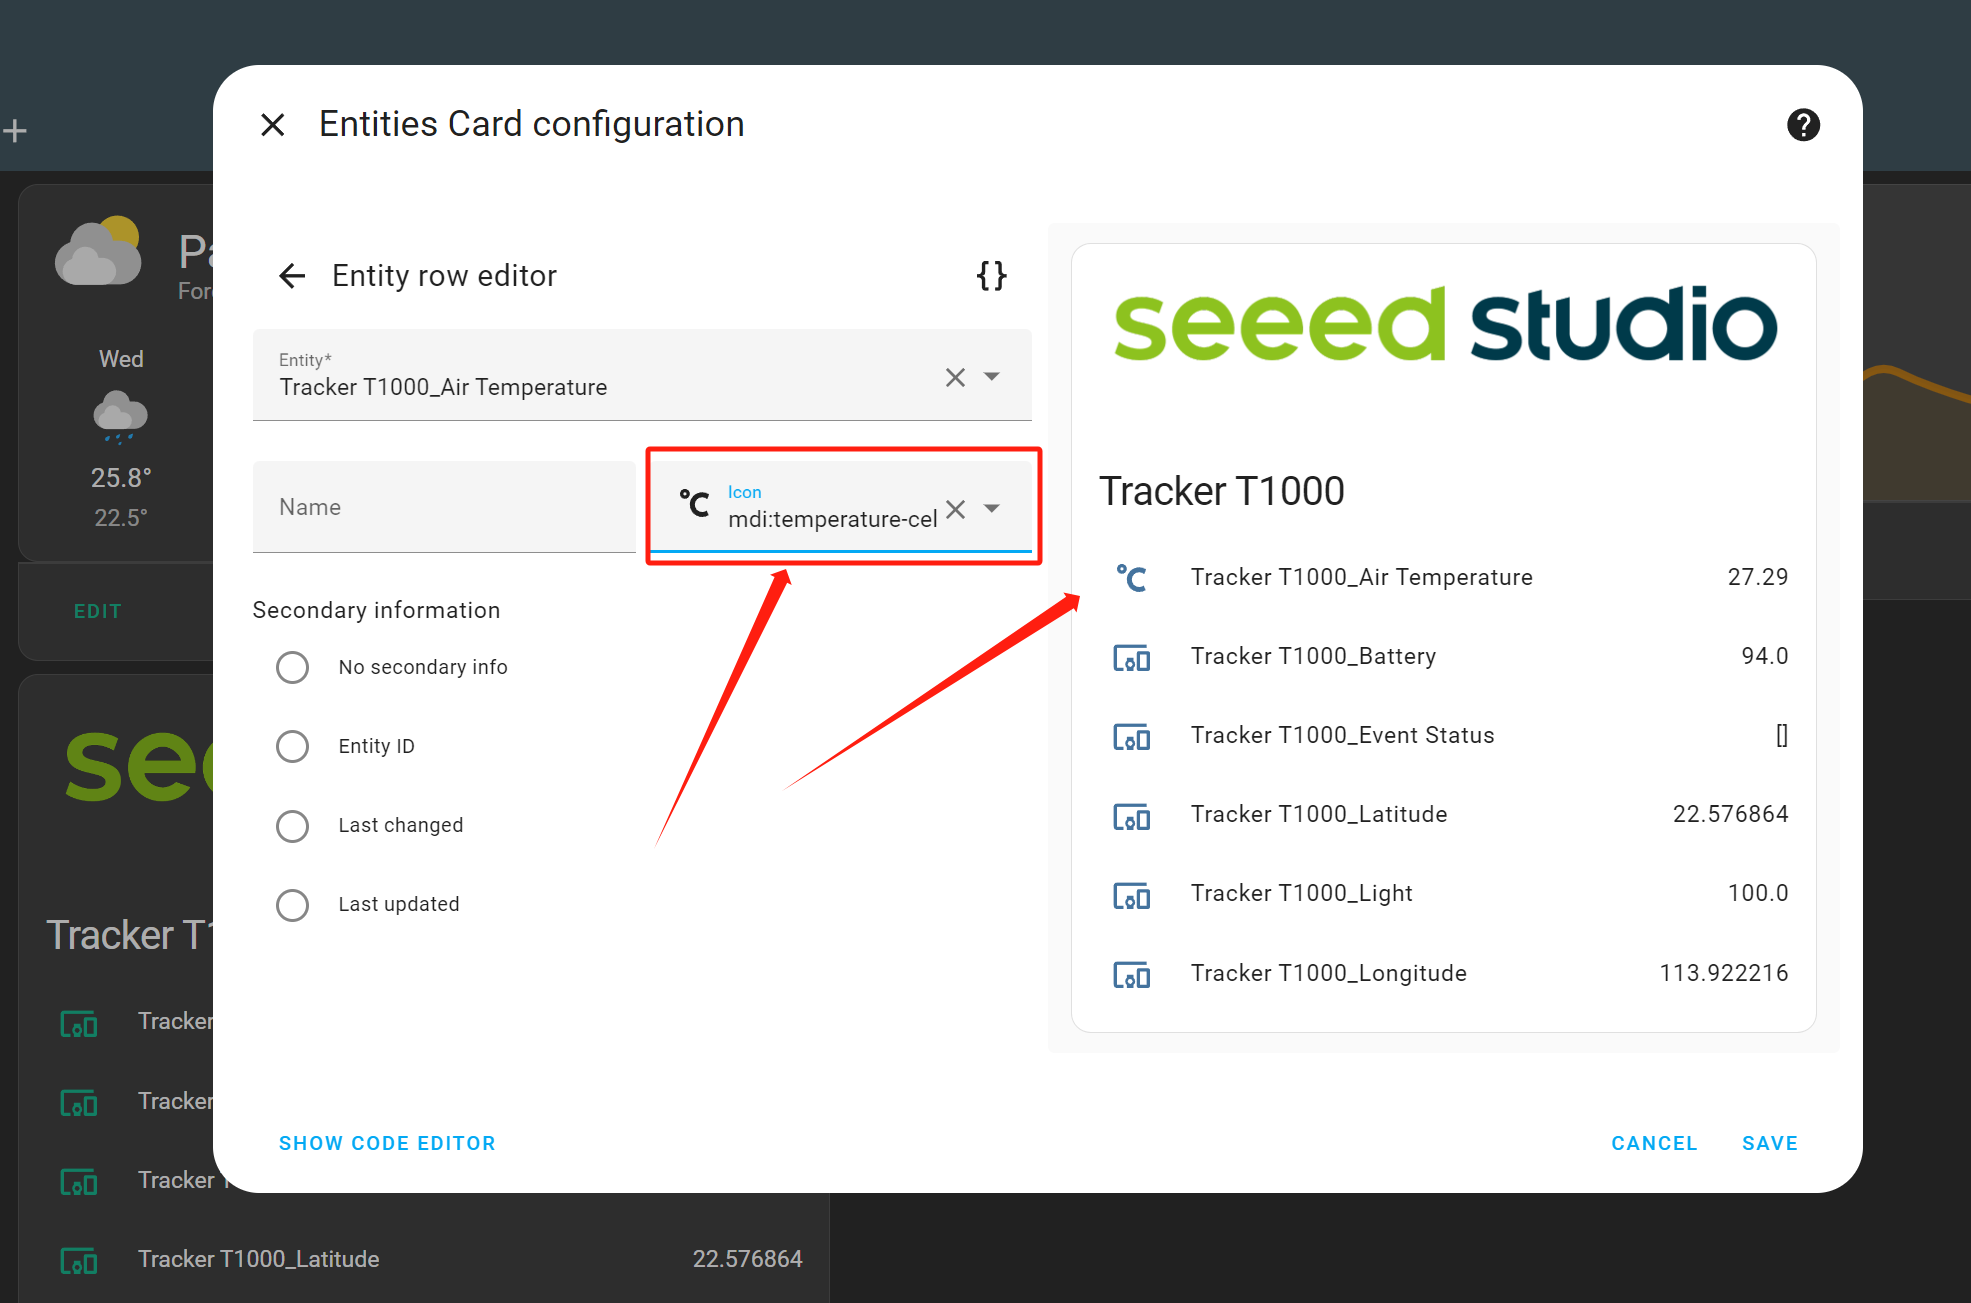
- Change the icon to one that is similar to the type of sensor entity
- We have now completed the entire plugin configuration process here. Subsequently, you can perform custom optimizations according to your own requirements
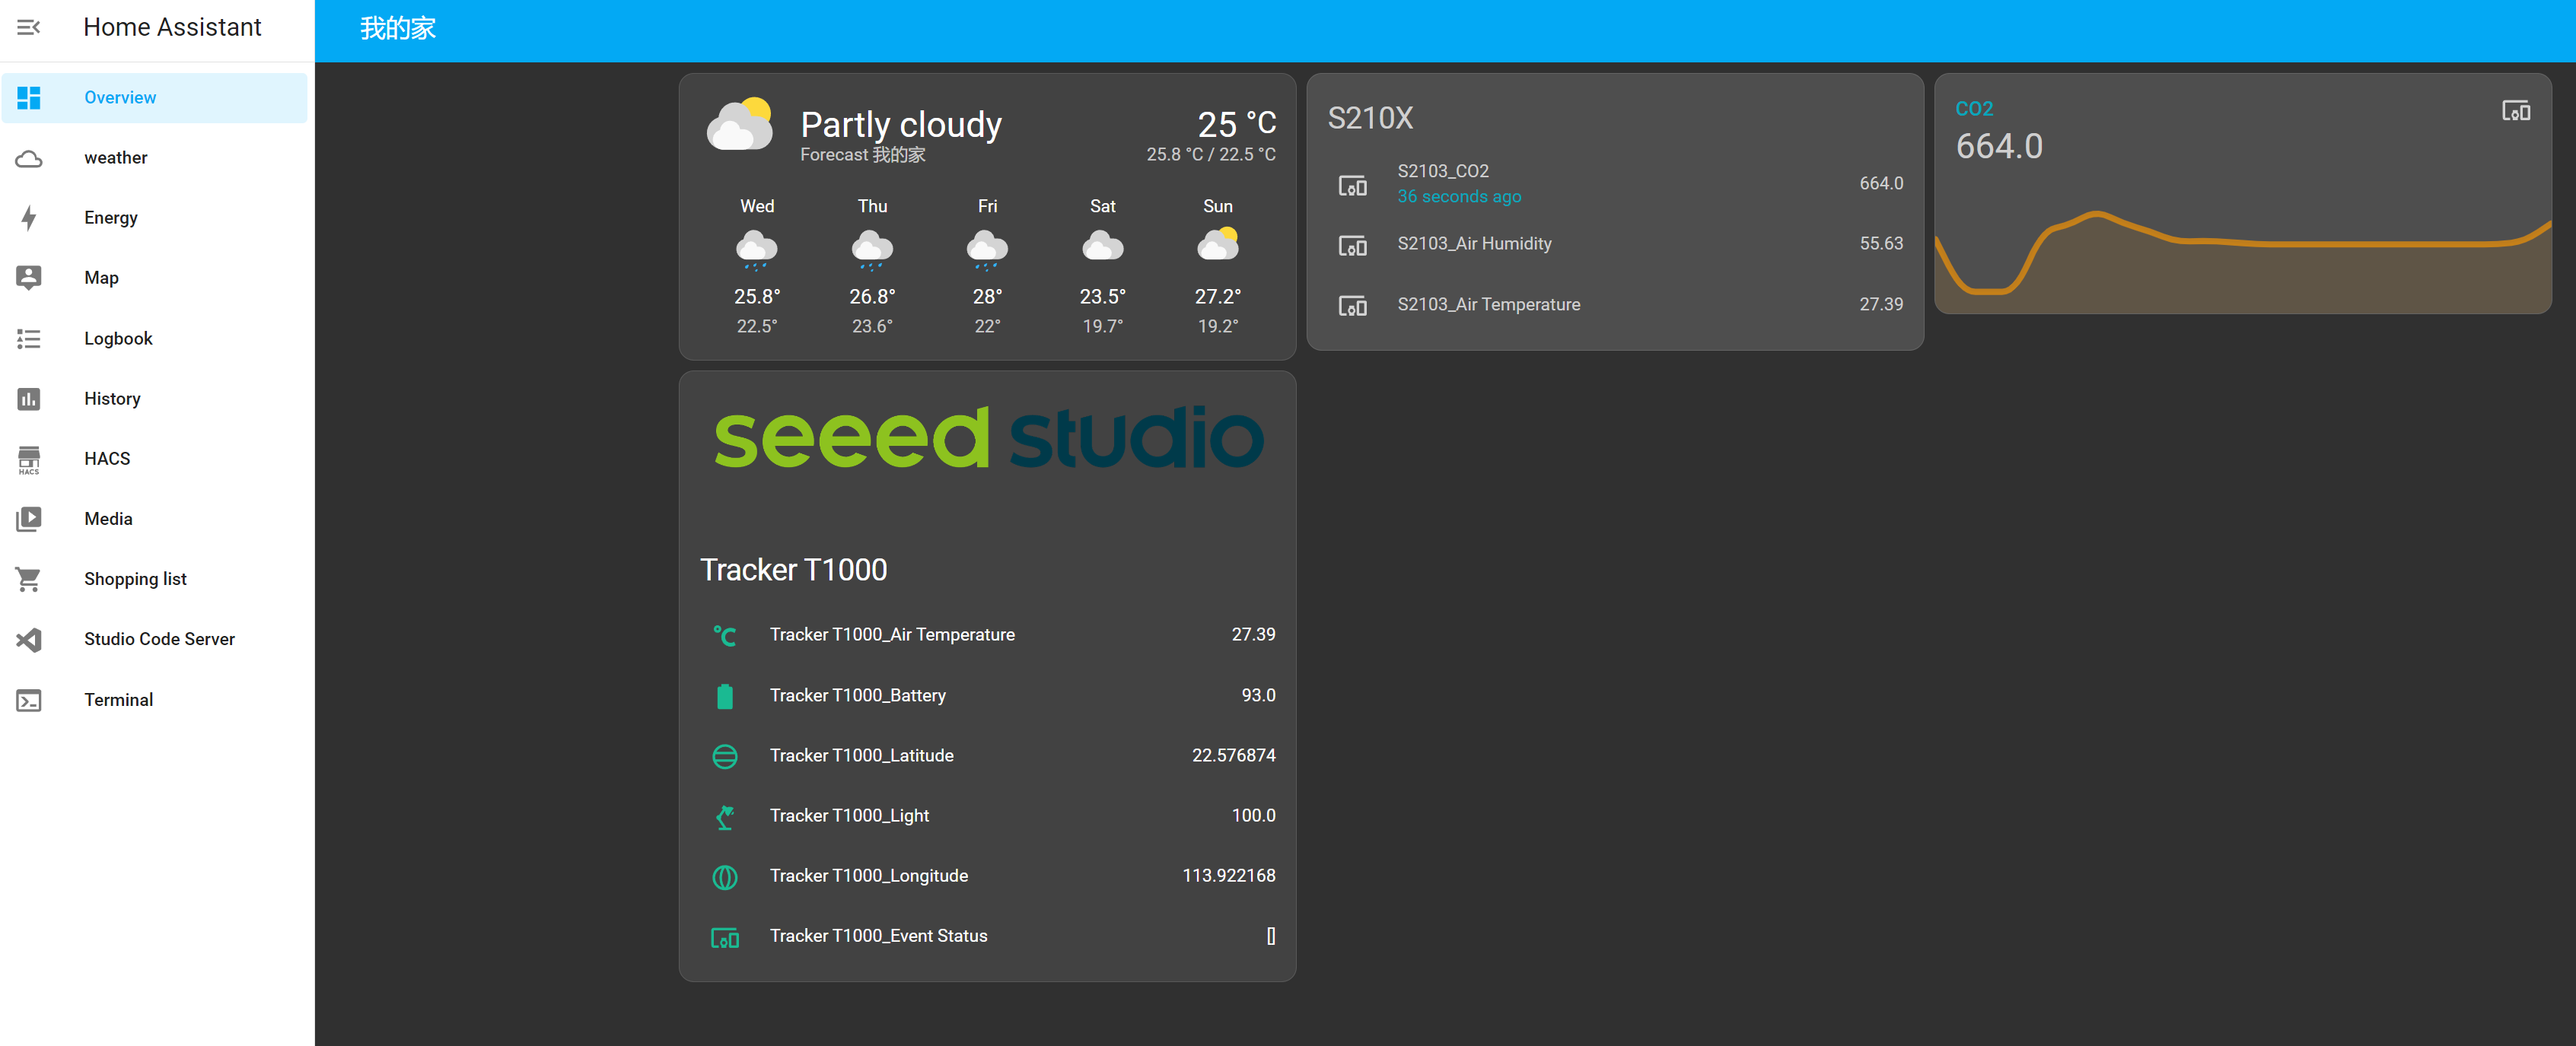
- Here are the visual representations of the effects on the "Overview" page after adding various models of SenseCAP sensors.
The aforementioned constitutes the complete step-by-step tutorial for integrating SenseCAP into the Home Assistant platform. Home Assistant has the capability to seamlessly integrate different types of devices from various platforms into a single ecosystem, facilitating cross-platform interoperability. This holds profound significance for the comprehensiveness of the smart home ecosystem. Presently, Seeed has also become a part of the extensive Home Assistant community, enabling the integration of our SenseCAP devices into the platform. We believe that this endeavor will contribute to the further strengthening and growth of the Internet of Things ecosystem !
The SenseCAP for Home Assistant intergration is completely open source, and you can download the source code project here: https://github.com/Seeed-Solution/home-assistant-SenseCAP.git.
Tech Support & Product Discussion
Thank you for choosing our products! We are here to provide you with different support to ensure that your experience with our products is as smooth as possible. We offer several communication channels to cater to different preferences and needs.