Wio Terminal Displaying Accelerator Readings
Overview
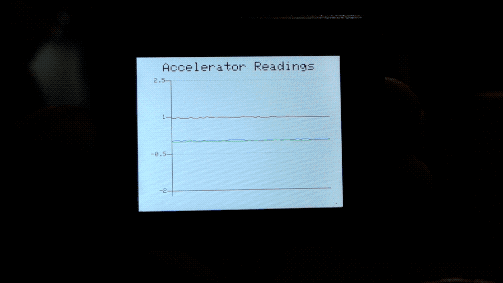
This example demonstrates how to draw line graph on Wio Terminal. In this example, the 3-axis accelerator readings(3 sets of data) are plotted into one line graph to show the real-time positioning of the Wio Terminal!
Features
3-axis accelerator readings displaying in one Line graph
Real time positioning of the Wio Terminal
Arduino libraries needed
Visit Seeed_Arduino_Linechart and download the entire repo to your local drive.
Install the on-board accelerator library
Seeed_Arduino_LIS3DHTR, Please visit Seeed_Arduino_LIS3DHTR for more information.
Arduino Instructions
Download the
AcceratorReadings.inofile and upload to your Wio Terminal throughArduino IDE. Make sure you installed all the libraries.Move Wio Terminal in different axis and see what it displays, and you could also open
Serial Plotterto check the effect!
Code
- To initialize LCD and Accelerator
#include"LIS3DHTR.h" //include the accelerator library
#include"seeed_line_chart.h" //include the line chart library

TFT_eSPI tft;
LIS3DHTR<TwoWire>  lis;

#define MAX_SIZE 50 //maximum size of data
doubles accelerator_readings[3];
TFT_eSprite spr = TFT_eSprite(&tft);  // Sprite

void setup() {
    tft.begin();
    tft.setRotation(3);
    spr.createSprite(TFT_HEIGHT,TFT_WIDTH);
    spr.setRotation(3);

    lis.begin(Wire1);
    lis.setOutputDataRate(LIS3DHTR_DATARATE_25HZ);
    lis.setFullScaleRange(LIS3DHTR_RANGE_2G);

    Serial.begin(115200);
}
- Reading Accelerator data and loading data
Please refer to Line Charts for more information.
void loop() {
    spr.fillSprite(TFT_WHITE);
    float x_raw = lis.getAccelerationX();
    float y_raw = lis.getAccelerationY();
    float z_raw = lis.getAccelerationZ();
    ...

    if (accelerator_readings[0].size() == MAX_SIZE) {
      for (uint8_t i = 0; i<3; i++){
        accelerator_readings[i].pop(); //this is used to remove the first read variable
      }
    }

    accelerator_readings[0].push(x_raw); //store x-axis readings
    accelerator_readings[1].push(y_raw); //store y-axis readings
    accelerator_readings[2].push(z_raw); //store z-axis readings
    ...
}
- Title configurations
Please refer to Line Charts for more information.
auto header =  text(0, 0)
            .value("Accelerator Readings")
            .align(center)
            .valign(vcenter)
            .width(spr.width())
            .thickness(2);

header.height(header.font_height(&spr) * 2);
header.draw(&spr); // Header height is the twice the height of the font
- Line Chart configurations
To draw multiple lines in one graph, you can pass doubles array into the line graph like content.value({doubles[0],doubles[1],doubles[2]...}) as shown below. Can also set the color for each line using .color() where the order of color will match the order of data passing.
auto content = line_chart(20, header.height()); //(x,ywhere the line graph begins
     content
            .height(spr.height() - header.height() * 1.5) //actual height of the line chart
            .width(spr.width() - content.x() * 2) //actual width of the line chart
            .based_on(-2.0) //Starting point of y-axis, must be a float
            .show_circle(false) //drawing a cirle at each point, default is on.
            .value({accelerator_readings[0],accelerator_readings[1], accelerator_readings[2]}) //passing through the data to line graph
            .max_size(MAX_SIZE)
            .color(TFT_BLUE, TFT_RED, TFT_GREEN)
            .backgroud(TFT_WHITE)
            .draw(&spr);
Complete code
#include"LIS3DHTR.h" //include the accelerator library
#include"seeed_line_chart.h" //include the line chart library

TFT_eSPI tft;
LIS3DHTR<TwoWire>  lis;

#define MAX_SIZE 50 //maximum size of data
doubles accelerator_readings[3];
TFT_eSprite spr = TFT_eSprite(&tft);  // Sprite

void setup() {
    tft.begin();
    tft.setRotation(3);
    spr.createSprite(TFT_HEIGHT,TFT_WIDTH);
    spr.setRotation(3);

    lis.begin(Wire1);
    lis.setOutputDataRate(LIS3DHTR_DATARATE_25HZ);
    lis.setFullScaleRange(LIS3DHTR_RANGE_2G);

    Serial.begin(115200);
}

void loop() {
    spr.fillSprite(TFT_WHITE);
    float x_raw = lis.getAccelerationX();
    float y_raw = lis.getAccelerationY();
    float z_raw = lis.getAccelerationZ();

    //This is used to print out on Serial Plotter, check Serial Plotter!
    Serial.print(x_raw);
    Serial.print(",");
    Serial.print(y_raw);
    Serial.print(",");
    Serial.println(z_raw);

    if (accelerator_readings[0].size() == MAX_SIZE) {
      for (uint8_t i = 0; i<3; i++){
        accelerator_readings[i].pop(); //this is used to remove the first read variable
      }
    }
    accelerator_readings[0].push(x_raw); //read variables and store in data
    accelerator_readings[1].push(y_raw);
    accelerator_readings[2].push(z_raw);

    //Settings for the line graph title
    auto header =  text(0, 0)
                .value("Accelerator Readings")
                .align(center)
                .valign(vcenter)
                .width(spr.width())
                .thickness(2);

    header.height(header.font_height(&spr) * 2);
    header.draw(&spr); // Header height is the twice the height of the font

  //Settings for the line graph
    auto content = line_chart(20, header.height()); //(x,y) where the line graph begins
         content
                .height(spr.height() - header.height() * 1.5) //actual height of the line chart
                .width(spr.width() - content.x() * 2) //actual width of the line chart
                .based_on(-2.0) //Starting point of y-axis, must be a float
                .show_circle(false) //drawing a cirle at each point, default is on.
                .value({accelerator_readings[0],accelerator_readings[1], accelerator_readings[2]}) //passing through the data to line graph
                .max_size(MAX_SIZE)
                .color(TFT_BLUE, TFT_RED, TFT_GREEN)
                .backgroud(TFT_WHITE)
                .draw(&spr);

    spr.pushSprite(0, 0);
    delay(50);
}