Accessing and Controlling ODYSSEY - X86J41x5 40-Pin GPIO
This tutorial demonstrates how to access and control the 40-pin GPIO of ODYSSEY - X86J41x5 under Linux (Ubuntu). With this, you can start to build your IoT projects using ODYSSEY - X86J41x5 with ease!
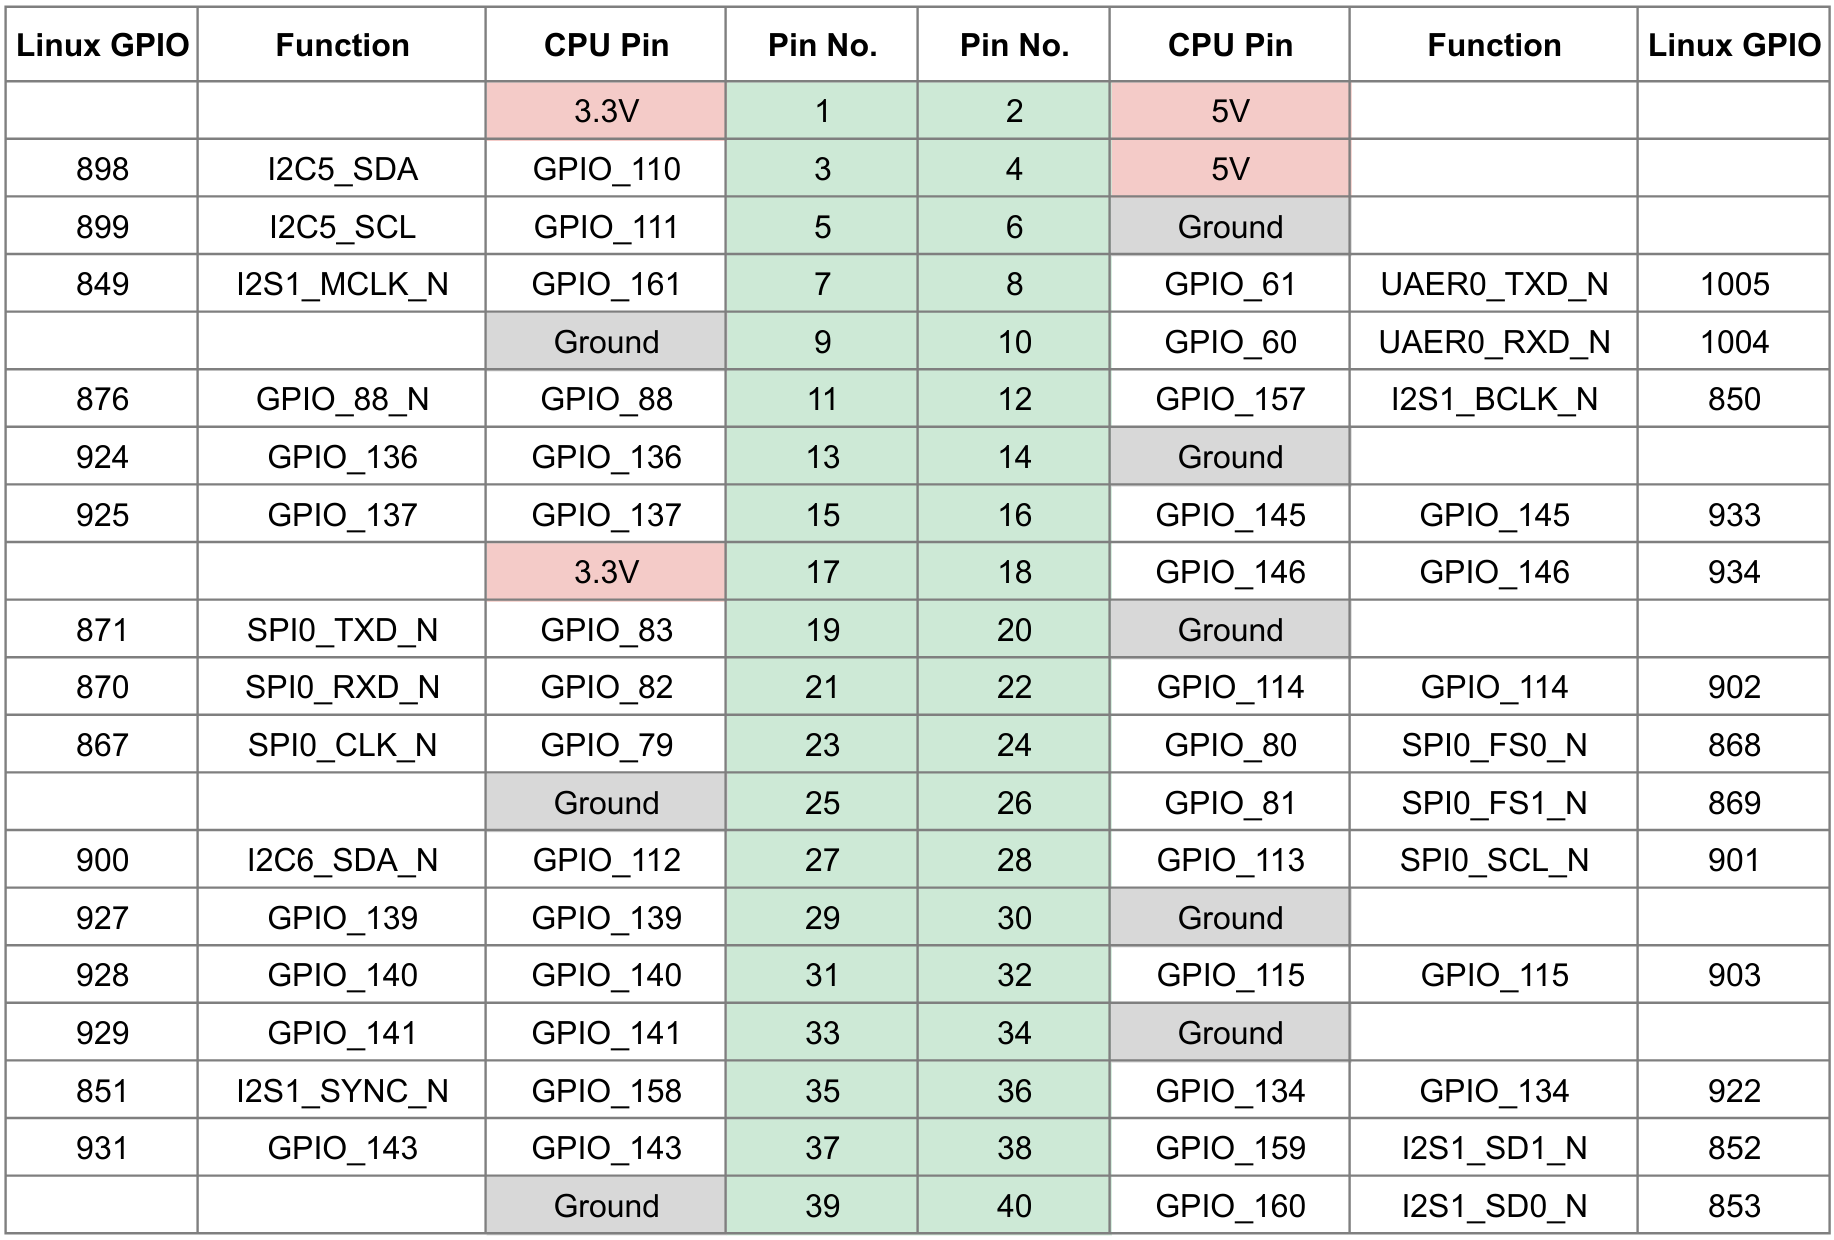
40-Pin GPIO Pinout Diagram
Ubuntu 18.04
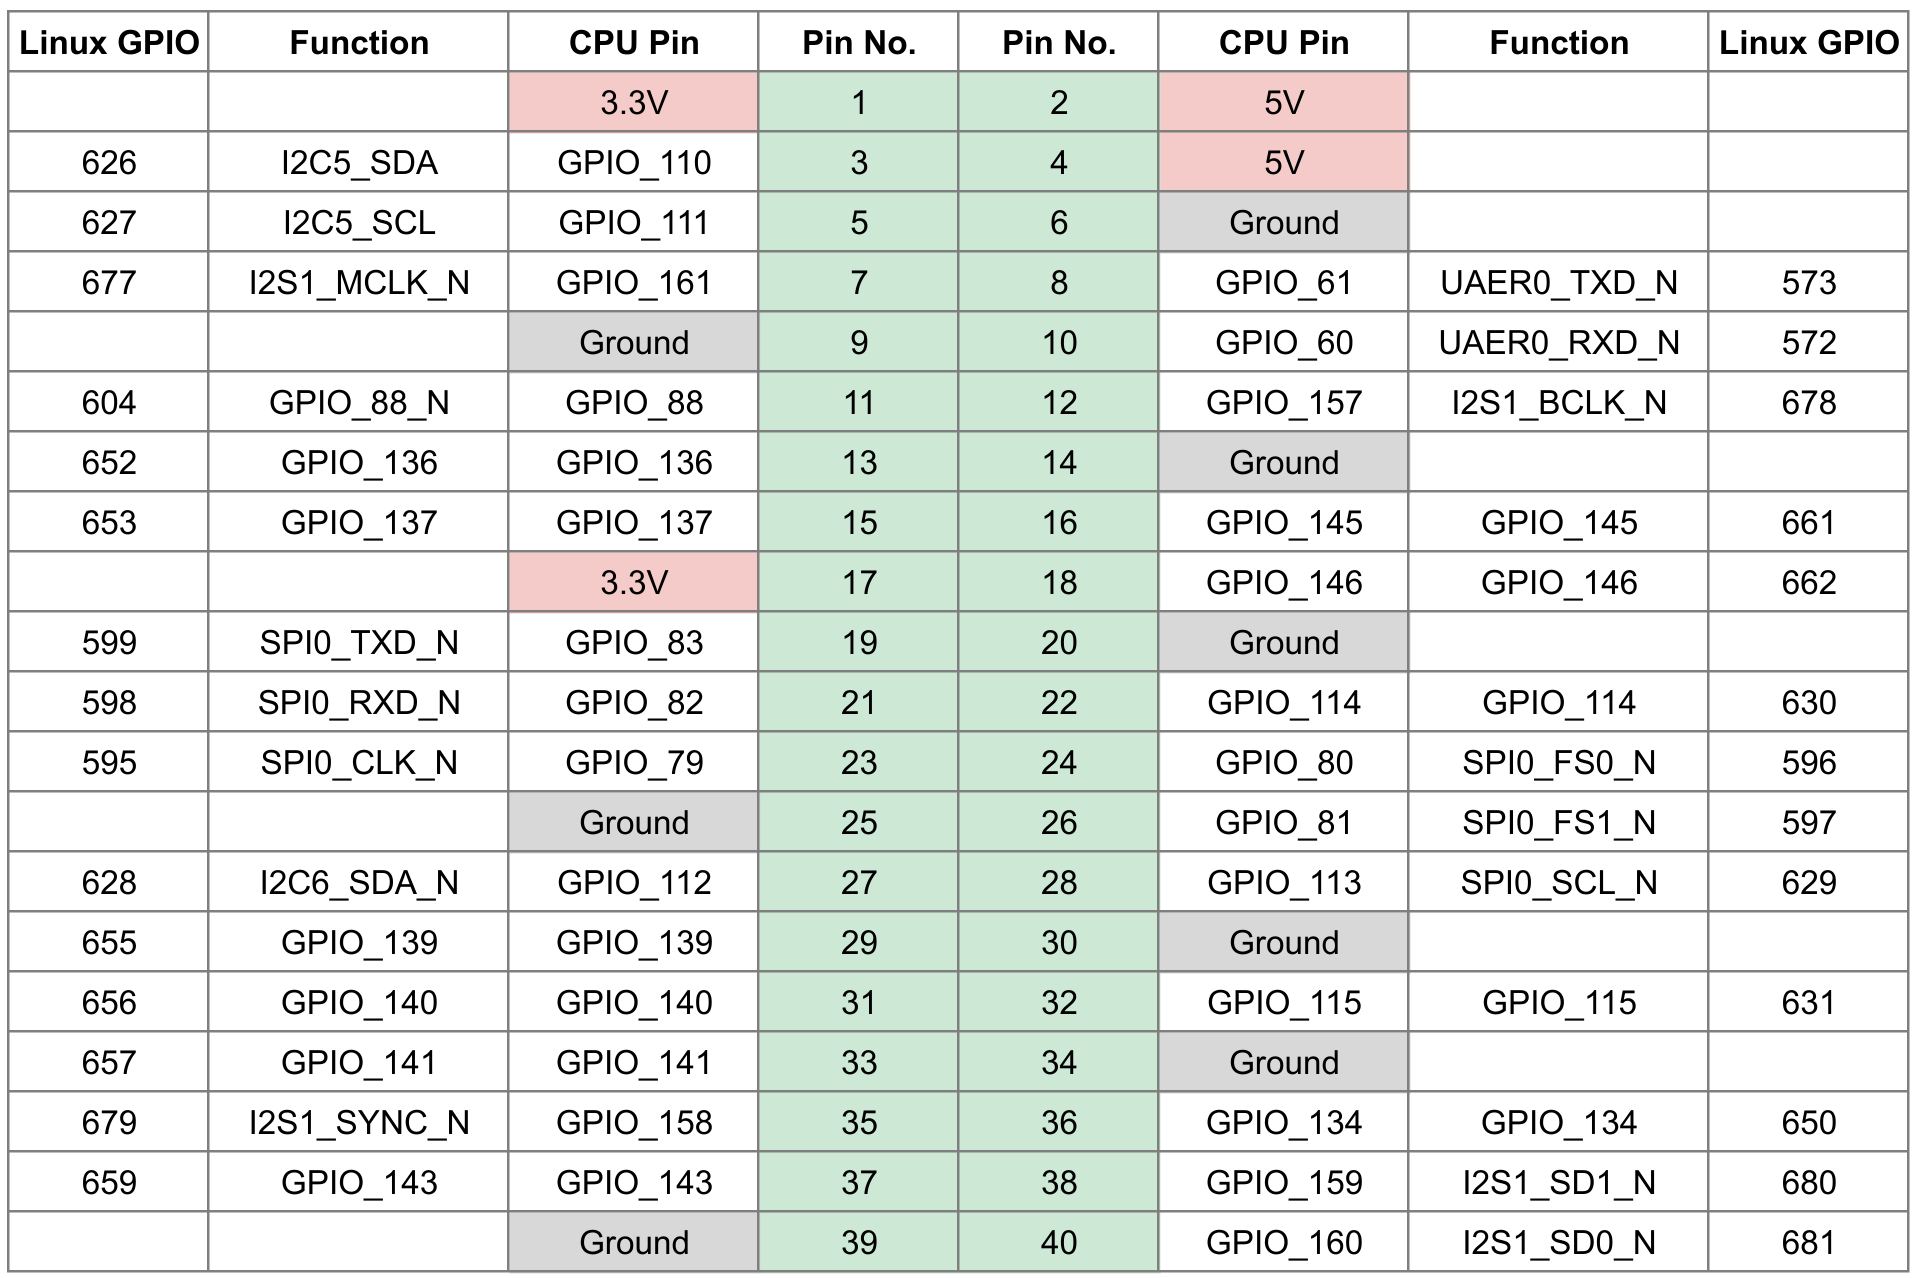
Ubuntu 20.04
Ubuntu 22.04
GPIO
The default pins on the ODYSSEY - X86J41x5 are configured to function mode so for example the pin 3 is set to I2C at default instead of GPIO mode. If you preferde using GPIO at default please check below.
The 40-Pin GPIO has been equipped with bidirectional level conversion, and the current must not exceed 1 mA when in use. This means that the IO current is quite low.
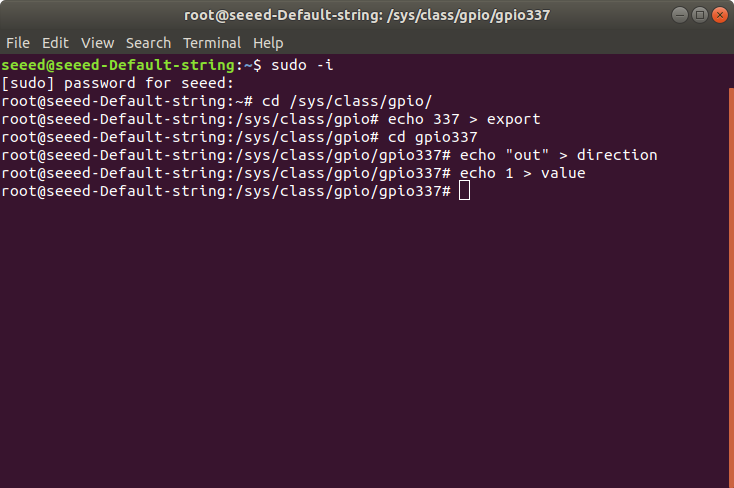
You can use the GPIO or change the function mode pin to GPIO using the Linux sysfs GPIO interface. Let's take pin 7 for example, the following code will turn on a LED module connected to Pin 7:
sudo -i
cd /sys/class/gpio
echo 337 > export
cd gpio337
echo "out" > direction
echo 1 > value
To switch the LED off:
echo 0 > value
After finishing with using the GPIO, need to unexport it:
echo "in" > direction
cd ..
echo 337 > unexport
Interrupts
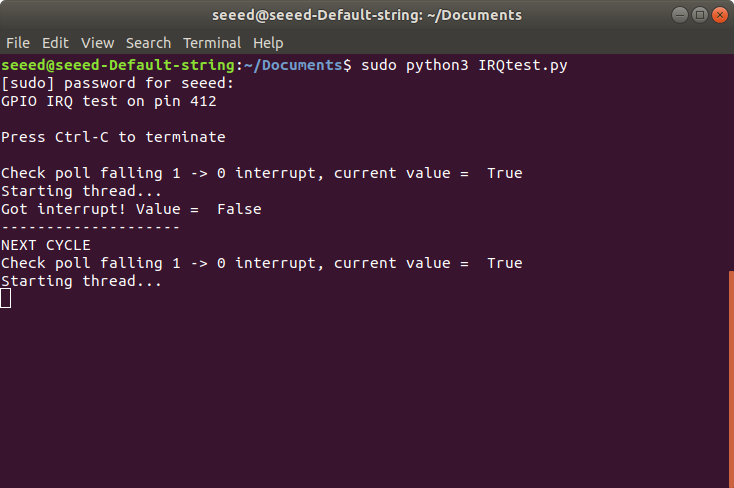
To test interrupts on ODYSSEY - X86J41x5, please follow the instructions below:
Here I used the python-periphery to access GPIO interface in userspace Linux (Linux GPIO numbering).
- Install python3-pip.
sudo apt install python3-pip
- Install python-periphery.
sudo pip3 install python-periphery
-
Download the IRQtest test script to your local drive.
-
Change the directory to where the downloaded script is and run the test script:
sudo python3 IRQtest.py
Changing pins to default GPIO mode
If you prefer 40-pin to be in default GPIO, you can do this by changing setting in the BIOS.
-
Reboot your ODYSSEY - X86J41x5 and keep pressing DEL key while booting up to enter BIOS menu.
-
Navigate to Advanced -> HAT Configuration.
-
Change function GPIO to GPIO mode as you preferred!
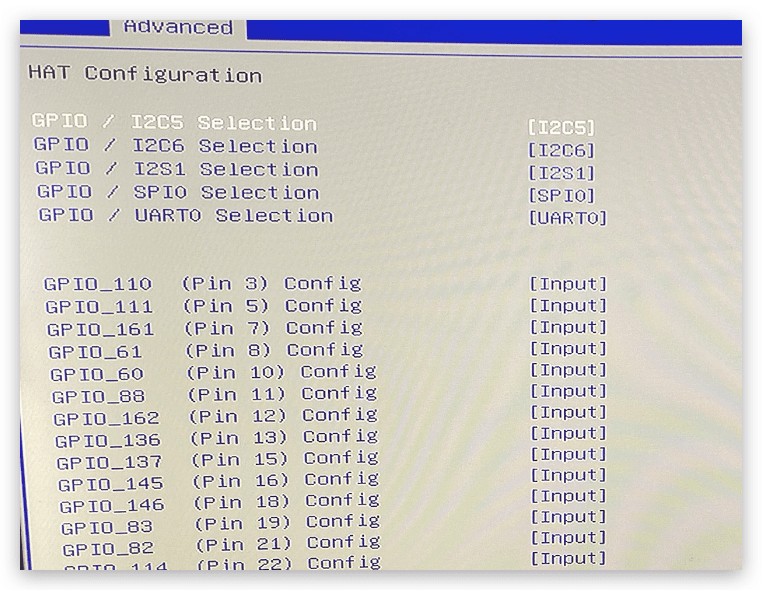
Note: You can also set other GPIO to output by default.
Using Grove Base Hat for Simple Control
You can also use Grove Base Hat for Raspberry Pi for simple digital signals. I.e. The I2C and UART ports cannot be used for now (The firmware of Grove Base Hat for Odyssey-X86 is being developed, and will be released very soon).
Let's take D5 port on Grove Base Hat for example:
Note: This is referring to the Raspberry Pi's BCM numbering system -> BCM5. So for now to use for Odyssey-X86, need to figure out its physical pins, which is actually physical Pin No. 29. Refernece: Raspberry Pinouts.
So the physical pins for using D5 on the Grove Base Hat connected to Odyssey-X86 is 29 which is the linux GPIO 415.
Now, we can use the same methods as above to control this GPIO:
sudo -i
cd /sys/class/gpio
echo 415 > export
cd gpio415
echo "out" > direction
echo 1 > value
To unexport, follow the same steps as before.
UART
To check the UART devices on ODYSSEY - X86J41x5, please run the following command:
ls /sys/bus/pci/devices/0000\:00\:18.?/dw-apb-uart.*/tty/ | grep tty
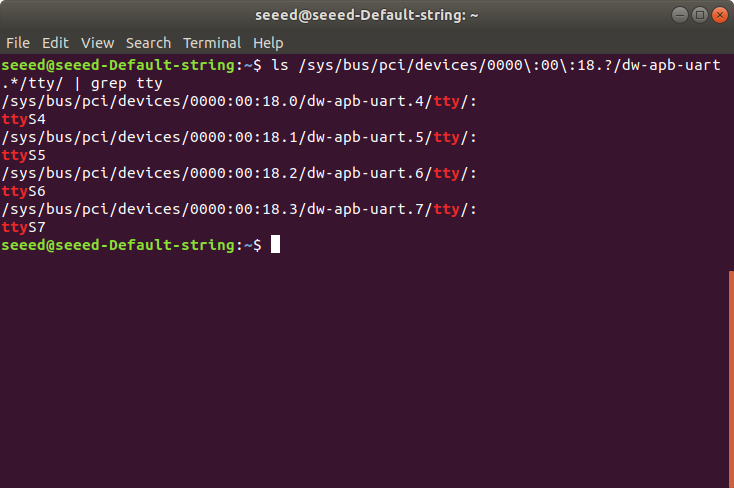
The ttyS4 is associated with the UART Pin on the 40-pin header (Pin 8 and Pin 10). To access from these pins, please follow:
sudo apt install screen
sudo screen /dev/ttyS4/ 115200
I2C
The Default I2C Speed for ODYSSEY - X86J41x5 is 1MB/s, which cannot be configured.
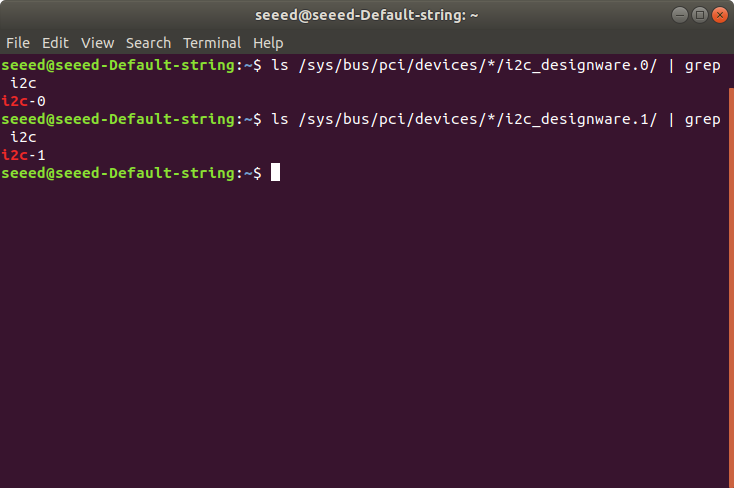
To identify I2C ports on ODYSSEY - X86J41x5, you can execute the following command:
- i2c_designware.0 -> I2C channel on Pin 27 and 28 (I2C6_SDA and I2C6_SCL)
ls /sys/bus/pci/devices/*/i2c_designware.0/ | grep i2c
- i2c_designware.1 -> I2C channel on Pin 3 and 5 (I2C5_SDA and I2C5_SCL)
ls /sys/bus/pci/devices/*/i2c_designware.1/ | grep i2c
And to detect peripherals connected to I2C channel 0 do the following command:
sudo apt install i2c-tools
sudo i2cdetect -r -y 0
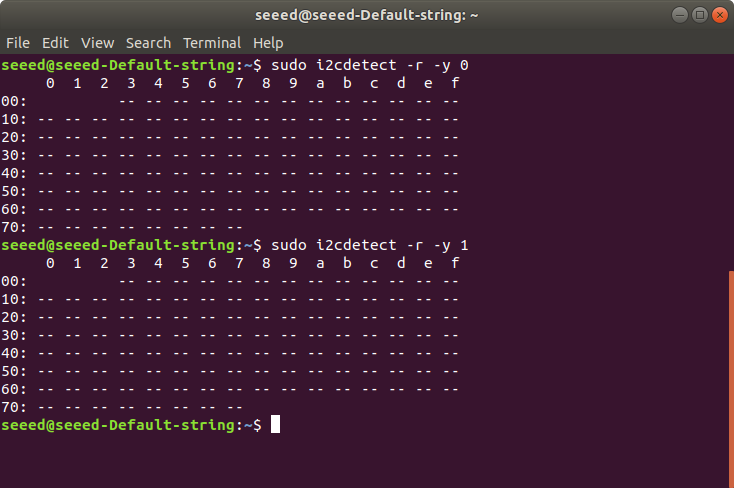
Note: For I2C Channel 1, change the last argument 0 to 1.
SPI
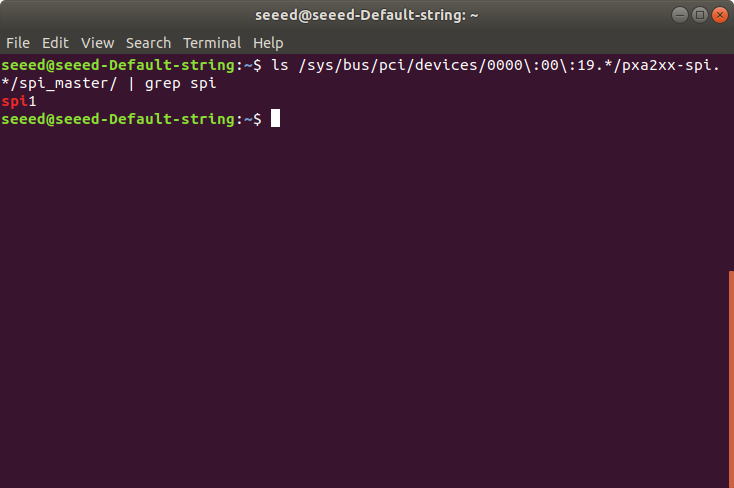
SPI devices can be identified by running the following command:
ls /sys/bus/pci/devices/0000\:00\:19.*/pxa2xx-spi.*/spi_master/ | grep spi
Enabling SPI in Userspace
To enable SPI devices access by users, please follow the belowings:
-
Download the zip file here and un-zip to your local drive.
-
Go into the directory that you un-zipped the file:
chmod +x acpi-add acpi-upgrades install_hooks
sudo ./install_hooks && sudo acpi-add spidev*
- Reboot your ODYSSEY - X86J41x5.
Now you will be able to check SPI devices inside /dev
ls /dev/spi*

Tech Support & Product Discussion
Thank you for choosing our products! We are here to provide you with different support to ensure that your experience with our products is as smooth as possible. We offer several communication channels to cater to different preferences and needs.