Grove - Moisture Sensor
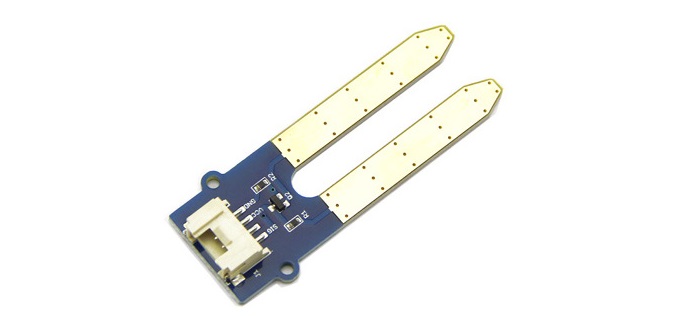
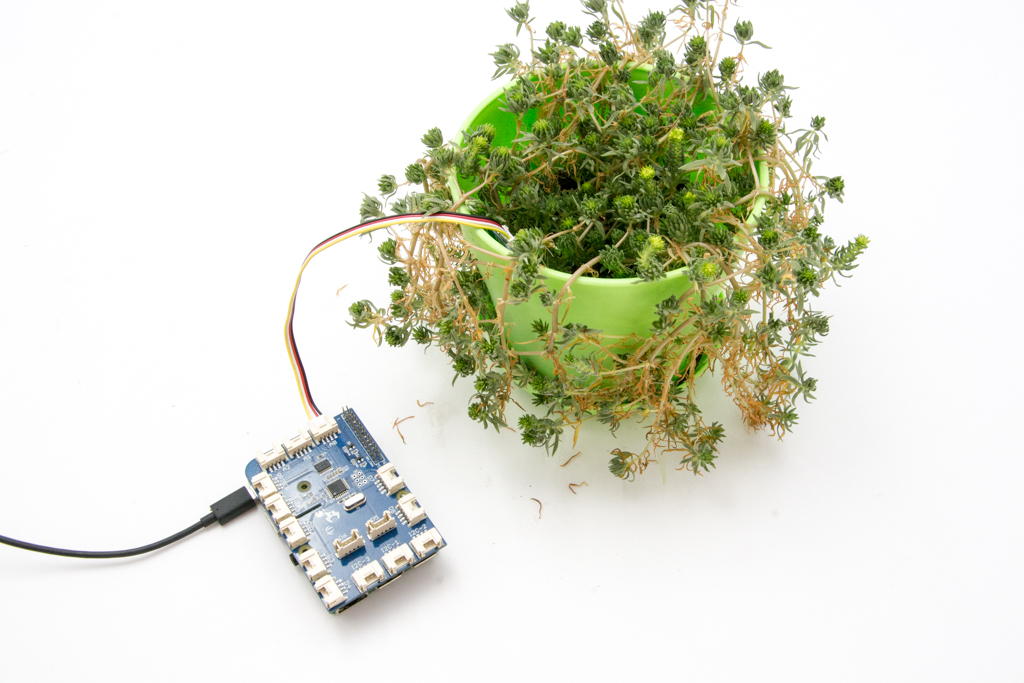
This Moisture Senor can be used for detecting the moisture of soil or judge if there is water around the sensor, let the plant in your garden able to reach out for human's help when they are thirsty. This sensor is very easy to use, you can just simply insert in into the soil and read the data. With this sensor, you can make a small project that can let the plant send a message to you like " I am thirsty now, please feed me some water."
![]()
Version
| Product Version | Changes | Released Date |
|---|---|---|
| Grove - Moisture Sensor V1.4 | Initial | June 2014 |
Upgradable to Industrial Sensors
With the SenseCAP S2110 controller and S2100 data logger, you can easily turn the Grove into a LoRaWAN® sensor. Seeed not only helps you with prototyping but also offers you the possibility to expand your project with the SenseCAP series of robust industrial sensors.
SenseCAP S210x series industrial sensors provide an out-of-box experience for environmental sensing. Please refer to the S2105 Wireless Soil Moisture, Temperature, and EC Sensor with higher performance and robustness for soil condition monitoring. The series includes sensors for soil moisture, air temperature and humidity, light intensity, CO2, EC, and an 8-in-1 weather station. Try the latest SenseCAP S210x for your next successful industrial project.
| SenseCAP Industrial Sensor |
 |
| S2105 Soil Moisture & Temp & EC |
Features
- Soil moisture sensor based on soil resistivity meansurement
- Easy to use
- 2.0 cm X 6.0 cm grove module
More details about Grove modules please refer to Grove System
Specification
| Item | Condition | Min | Typical | Max | Unit |
|---|---|---|---|---|---|
| Voltage | - | 3.3 | - | 5 | V |
| Current | - | 0 | - | 35 | mA |
| Output Value | Sensor in dry soil, Sensor in humid soil,Sensor in water | 0, 300, 700, | - | 300, 700, 950 | - |
Platforms Supported
| Arduino | Raspberry Pi |
|---|---|
The platforms mentioned above as supported is/are an indication of the module's software or theoritical compatibility. We only provide software library or code examples for Arduino platform in most cases. It is not possible to provide software library / demo code for all possible MCU platforms. Hence, users have to write their own software library.
Application Ideas
- Botanical Gardening
- Moisture Sensoring
- Consistency Measurement
Getting Started
If this is the first time you work with Arduino, we firmly recommend you to see Getting Started with Arduino before the start.
Play With PlatformIO
Hardware
- Step 1. Prepare the below stuffs:
| XIAO ESP32 C3 | Seeed Studio Grove Base for XIAO | Grove - Soil Moisture Sensor |
|---|---|---|
 |  |  |
| Get One Now | Get One Now | Get One Now |
- Step 2. Connect Grove-Moisture Sensor to port A0 of Seeed Studio Grove Base for XIAO.
- Step 3. Plug XIAO into Seeed Studio Grove Base for XIAO.
- Step 4. Connect XIAO to PC via a USB cable.
Software
- Step 1. Copy the code into PlatformIO
int sensorPin = A0;
int sensorValue = 0;

void setup() {
    Serial.begin(9600);
}
void loop() {
    // read the value from the sensor:
    sensorValue = analogRead(sensorPin);
    Serial.print("Moisture = " );
    Serial.println(sensorValue);
    delay(1000);
}
- Step 2. We will see the moisture display on terminal as below.
Moisture = 0
Moisture = 31
Moisture = 48
Moisture = 139
Moisture = 155
Moisture = 124
Moisture = 236
Moisture = 218
Moisture = 215
Moisture = 221
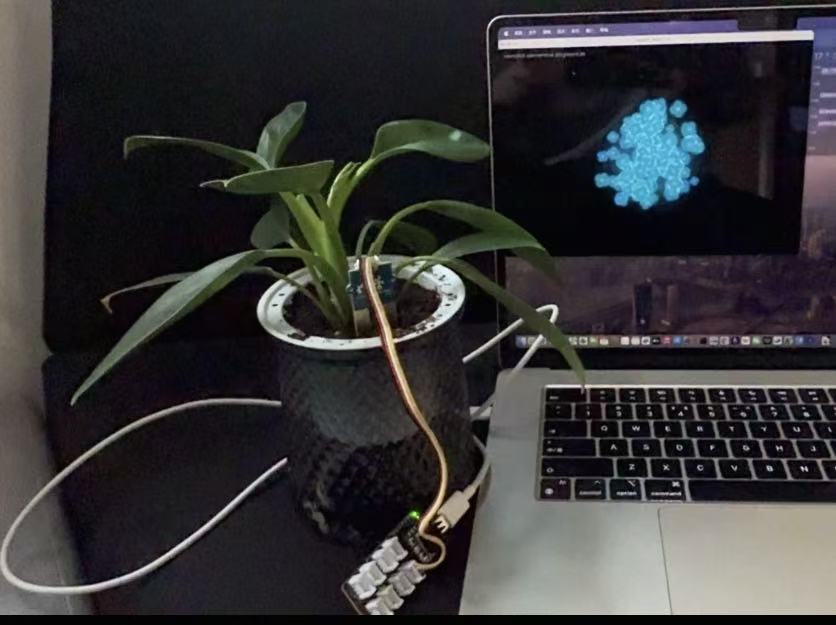
You can find some practical or artistic demonstrations in the "Wiki & Learn" section of the product details page.
Play With Arduino
Hardware
- Step 1. Prepare the below stuffs:
| Seeeduino V4.2 | Base Shield | Grove-Moisture Sensor |
|---|---|---|
 |  |  |
| Get One Now | Get One Now | Get One Now |
- Step 2. Connect Grove-Moisture Sensor to port A0 of Grove-Base Shield.
- Step 3. Plug Grove - Base Shield into Seeeduino.
- Step 4. Connect Seeeduino to PC via a USB cable.
If we don't have Grove Base Shield, We also can directly connect Grove-Moisture Sensor to Seeeduino as below.
| Seeeduino | Grove-Moisture Sensor |
|---|---|
| 5V | Red |
| GND | Black |
| Not Conencted | White |
| A0 | Yellow |
Software
- Step 1. Copy the code into Arduino IDE and upload. If you do not know how to upload the code, please check how to upload code.
int sensorPin = A0;
int sensorValue = 0;

void setup() {
    Serial.begin(9600);
}
void loop() {
    // read the value from the sensor:
    sensorValue = analogRead(sensorPin);
    Serial.print("Moisture = " );
    Serial.println(sensorValue);
    delay(1000);
}
- Step 2. We will see the moisture display on terminal as below.
Moisture = 0
Moisture = 31
Moisture = 48
Moisture = 139
Moisture = 155
Moisture = 124
Moisture = 236
Moisture = 218
Moisture = 215
Moisture = 221
Play with Codecraft
Hardware
Step 1. Connect a Grove - Moisture Sensor to port A0 of a Base Shield.
Step 2. Plug the Base Shield to your Seeeduino/Arduino.
Step 3. Link Seeeduino/Arduino to your PC via an USB cable.
Software
Step 1. Open Codecraft, add Arduino support, and drag a main procedure to working area.
If this is your first time using Codecraft, see also Guide for Codecraft using Arduino.
Step 2. Drag blocks as picture below or open the cdc file which can be downloaded at the end of this page.
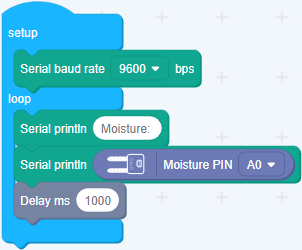
Upload the program to your Arduino/Seeeduino.
When the code finishes uploaded, you will see the moisture value displayed in the Serial Monitor.
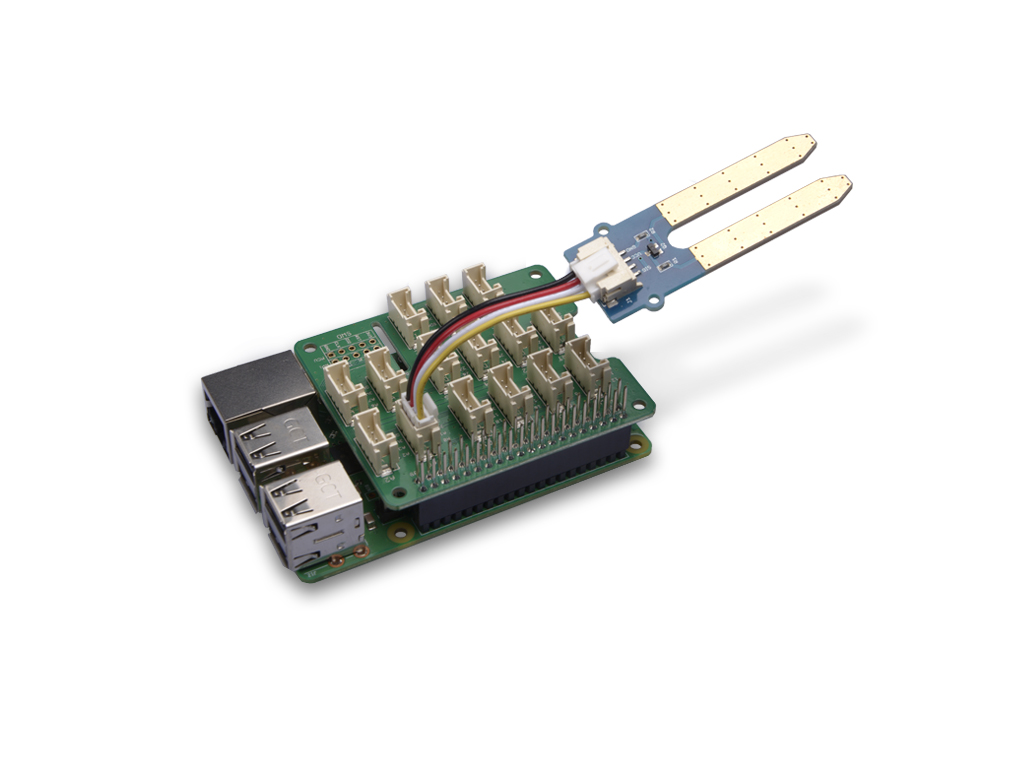
Play With Raspberry Pi (With Grove Base Hat for Raspberry Pi)
Hardware
- Step 1. Things used in this project:
| Raspberry pi | Grove Base Hat for RasPi | Grove - Moisture Sensor |
|---|---|---|
 |  | |
| Get ONE Now | Get ONE Now | Get ONE Now |
- Step 2. Plug the Grove Base Hat into Raspberry Pi.
- Step 3. Connect the Grove - Moisture Sensor to the A0 port of the Base Hat.
- Step 4. Connect the Raspberry Pi to PC through USB cable.
Software
- Step 1. Follow Setting Software to configure the development environment.
- Step 2. Download the source file by cloning the grove.py library.
cd ~
git clone https://github.com/Seeed-Studio/grove.py
- Step 3. Excute below command to run the code.
cd grove.py/grove
python grove_moisture_sensor.py 0
Following is the grove_moisture_sensor.py code.
#!/usr/bin/env python
# -*- coding: utf-8 -*-
#
# The MIT License (MIT)
#
# Grove Base Hat for the Raspberry Pi, used to connect grove sensors.
# Copyright (C) 2018  Seeed Technology Co.,Ltd.
'''
This is the code for
    - Grove - Moisture Sensor <https://www.seeedstudio.com/Grove-Moisture-Sensor-p-955.html>`_

Examples:

    .. code-block:: python

        import time
        from grove.grove_moisture_sensor import GroveMoistureSensor

        # connect to alalog pin 2(slot A2)
        PIN = 2

        sensor = GroveMoistureSensor(PIN)

        print('Detecting moisture...')
        while True:
            m = sensor.moisture
            if 0 <= m and m < 300:
                result = 'Dry'
            elif 300 <= m and m < 600:
                result = 'Moist'
            else:
                result = 'Wet'
            print('Moisture value: {0}, {1}'.format(m, result))
            time.sleep(1)
'''
import math
import sys
import time
from grove.adc import ADC

__all__ = ["GroveMoistureSensor"]

class GroveMoistureSensor:
    '''
    Grove Moisture Sensor class

    Args:
        pin(int): number of analog pin/channel the sensor connected.
    '''
    def __init__(self, channel):
        self.channel = channel
        self.adc = ADC()

    @property
    def moisture(self):
        '''
        Get the moisture strength value/voltage

        Returns:
            (int): voltage, in mV
        '''
        value = self.adc.read_voltage(self.channel)
        return value

Grove = GroveMoistureSensor


def main():
    from grove.helper import SlotHelper
    sh = SlotHelper(SlotHelper.ADC)
    pin = sh.argv2pin()

    sensor = GroveMoistureSensor(pin)

    print('Detecting moisture...')
    while True:
        m = sensor.moisture
        if 0 <= m and m < 300:
            result = 'Dry'
        elif 300 <= m and m < 600:
            result = 'Moist'
        else:
            result = 'Wet'
        print('Moisture value: {0}, {1}'.format(m, result))
        time.sleep(1)

if __name__ == '__main__':
    main()
If everything goes well, you will be able to see the following result:
pi@raspberrypi:~/grove.py/grove $ python grove_moisture_sensor.py 0
Detecting moisture...
Moisture value: 0, Dry
Moisture value: 1, Dry
Moisture value: 25, Dry
Moisture value: 3, Dry
Moisture value: 0, Dry
Moisture value: 0, Dry
Moisture value: 0, Dry
Moisture value: 0, Dry
Moisture value: 0, Dry
Moisture value: 1, Dry
^CTraceback (most recent call last):
  File "grove_moisture_sensor.py", line 74, in <module>
    main()
  File "grove_moisture_sensor.py", line 71, in main
    time.sleep(1)
KeyboardInterrupt
You can use this sensor to detect the air quality. Press ++ctrl+c++ to quit.
You may have noticed that for the analog port, the silkscreen pin number is something like A1, A0, however in the command we use parameter 0 and 1, just the same as the digital port. So please make sure you plug the module into the correct port, otherwise, there may be pin conflicts.
Play With Raspberry Pi(with GrovePi_Plus)
Hardware
- Step 1. Prepare the below stuffs:
| Raspberry pi | GrovePi_Plus | Grove-Moisture Sensor |
|---|---|---|
|  | |
| Get One Now | Get One Now | Get One Now |
- Step 2. Plug the GrovePi_Plus into Raspberry.
- Step 3. Connect Grove-Moisture Sensor to A0 port of GrovePi_Plus.
- Step 4. Connect the Raspberry to PC through USB cable.
Software
- Step 1. Follow Setting Software to configure the development environment.
- Step 2. Git clone the Github repository.
cd ~
git clone https://github.com/DexterInd/GrovePi.git
- Step 3. Excute below commands to use the Grove-Moisture Sensor to meansure the moisture.
cd ~/GrovePi/Software/Python
python grove_moisture_sensor.py
Here is the grove_moisture_sensor.py code.
#  Here are suggested sensor values:
#   Min  Typ  Max  Condition
#   0    0    0    sensor in open air
#   0    20   300  sensor in dry soil
#   300  580  700  sensor in humid soil
#   700  940  950  sensor in water


import time
import grovepi

# Connect the Grove Moisture Sensor to analog port A0
# SIG,NC,VCC,GND
sensor = 0

while True:
    try:
        print(grovepi.analogRead(sensor))
        time.sleep(.5)

    except KeyboardInterrupt:
        break
    except IOError:
        print ("Error")
- Step 4. We will see the moisture display on terminal as below.
pi@raspberrypi:~/GrovePi/Software/Python $ python grove_moisture_sensor.py
0
90
130
150
160
218
238
Play With TI LaunchPad
Hardware
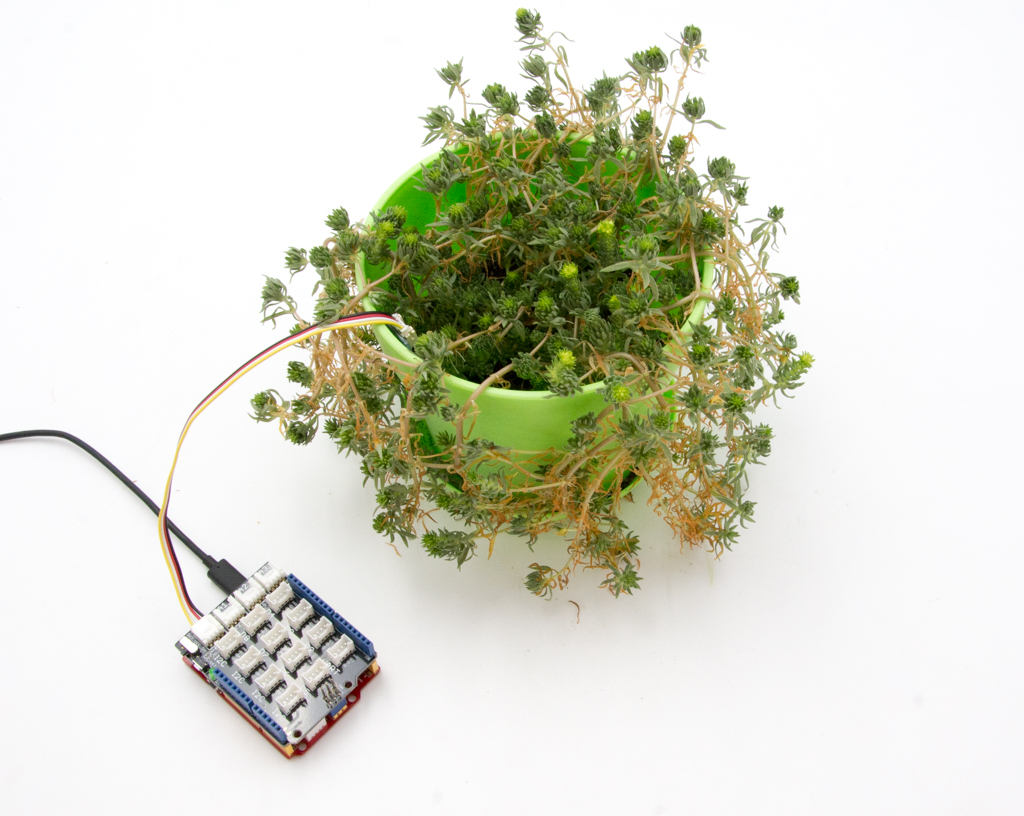
The following sketch demonstrates a simple application of sensing the moisture in soil.With this, you can know whether a plant needs water or not by observing the results that the sensor outputs
Software
/*
Moisture-Sensor
The following sketch demonstrates a simple application of sensing
the moisture of the soil. You can know whether a plant needs water
or not by observing the results that the sensor outputs.
The circuit:
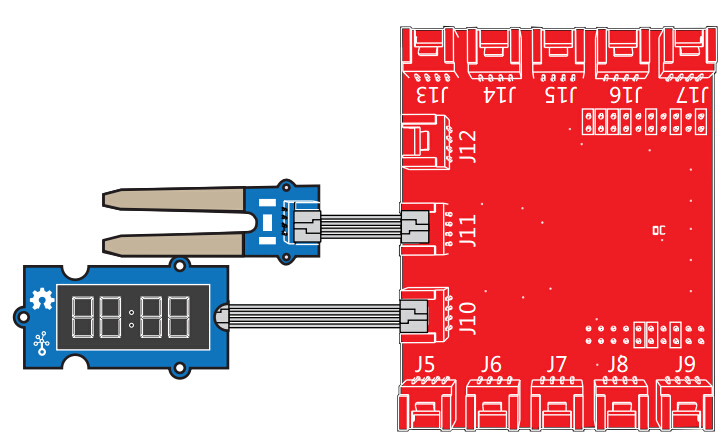
* Moisture-Sensor attached to pin 24 (J6 plug on Grove Base BoosterPack)
* one side pin (either one) to ground
* the other side pin to +VCC
* LED anode (long leg) attached to RED_LED
* LED cathode (short leg) attached to ground
- NOTE:
This example code is in the public domain.
https://www.seeedstudio.com/wiki/Grove_-_Moisture_Sensor
*/
#include "TM1637.h"
/* Macro Define */
#define CLK 39 /* 4-digital display clock pin */
#define DIO 38 /* 4-digiral display data pin */
#define BLINK_LED RED_LED /* blink led */
#define MOISTURE_PIN 24 /* pin of moisture sensor */
#define THRESHOLD_VALUE 300 /* threshold for watering the flowers */
#define ON HIGH /* led on */
#define OFF LOW /* led off */
#define _handle_led(x) digitalWrite(BLINK_LED, x) /* handle led */
/* Global Varibles */
TM1637 tm1637(CLK, DIO); /* 4-digital display object */
int analog_value = 0; /* varible to store the value coming from rotary angle
sensor */
int8_t bits[4] = {0}; /* array to store the single bits of the value */
/* the setup() method runs once, when the sketch starts */
void setup() {
/* Initialize 4-digital display */
tm1637.init();
tm1637.set(BRIGHT_TYPICAL);
/* declare the red_led pin as an OUTPUT */
pinMode(BLINK_LED, OUTPUT);
}
/* the loop() method runs over and over again */
void loop() {
analog_value = analogRead(MOISTURE_PIN); /* read the value from the sensor */
/* if the value is smaller than threshold, turn on led */
if(analog_value < THRESHOLD_VALUE) {
_handle_led(ON);
} else {
_handle_led(OFF);
}
memset(bits, 0, 4); /* reset array when we use it */
for(int i = 3; i >= 0; i--) {
/* get single bits of the analog value */
bits[i] = analog_value % 10;
analog_value = analog_value / 10;
tm1637.display(i, bits[i]); /* display by 4-digital display */
}
delay(200);
}
FAQs
Q1: What does the output mean? voltage or counts?
A1: The output is voltage values. When using analogRead(), 5V will be divided by 1023. So the output value = Vout * 1023/5. The higher output voltage is, the higher moisture there is.
Schematic Online Viewer
Resources
-
[Eagle&PDF]Grove - Moisture Sensor v1.4 Schematic
-
[Codecraft]CDC File
Projects
Plant Monitoring System using AWS IoT: If you plan on a vacation, here is a great project to track the temperature and soil moisture of your Plant using dweet.io and AWS IoT.
Tech Support & Product Discussion
Thank you for choosing our products! We are here to provide you with different support to ensure that your experience with our products is as smooth as possible. We offer several communication channels to cater to different preferences and needs.