4-Channel 16-Bit ADC for Raspberry Pi (ADS1115)
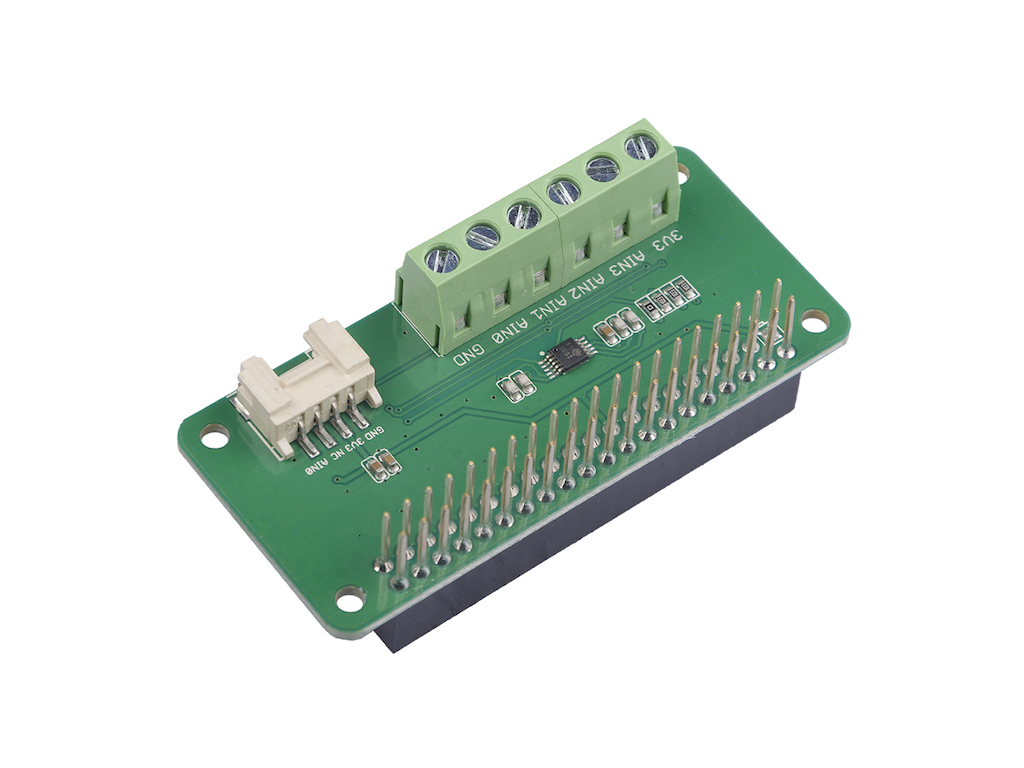
The analog-to-digital converter(ADC) is a common accessory for Raspberry Pi. This is a 4-channel ADC based on Texas Instrument's ADS1115, which is a precision, low-power, 16-bit ADC chip. We make this ADC into a compact Raspberry Pi Zero form factor and integrated an analog Grove connector so that you can also use analog Grove modules with it.

Version
| Product Version | Changes | Released Date |
|---|---|---|
| 4-Channel 16-Bit ADC for Raspberry Pi (ADS1115) | Initial | Sep 2018 |
Feature
- LOW current consumption:
- Continuous Mode: Only 150μA
- Single-Shot Mode: Auto Shut-Down
- Wide supply voltage range
- Input multiplexer (MUX) that provides two differential or four single-ended inputs.
- Programmable comparator
- Internal low-drift voltage reference
- Internal oscillator
- Internal PGA
- Programmable data rate: 8SPS to 860SPS
- I2C-compatible serial interface
- Support Raspberry Pi 3B/3B+/4
Specification
| Item | Value |
|---|---|
| Supply Voltage | 3.3V / 5V |
| Analog input current | 100mA(momentary) 10mA(continuous) |
| Storage temperature | -60~150℃ |
| Maximum junction temperature | 150℃ |
| Interface | I2C |
| I2C address | 0x48(defult) 0x49~0x4B(configurable) |
| Size | L: 65mm W: 30mm H: 20mm |
| Weight | 36.5g |
| Package size | L: 140mm W: 78mm H: 27mm |
| Gross Weight | 37g |
There are 4 possible I2C addresses of this grove, from 0x48 to 0x4B. The default I2C address is 0x48. You can change the I2C address by doing some soldering.

If SDA(corresponding address 0x4A) is used as the device address, hold the SDA line low for at least 100 ns after the SCL line goes low to make sure the device decodes the address correctly during I2C communication.
Typical applications
- Portable instrumentation
- Consumer goods
- Battery monitoring
- Temperature measurement
- Factory automation and process controls
Hardware Overview
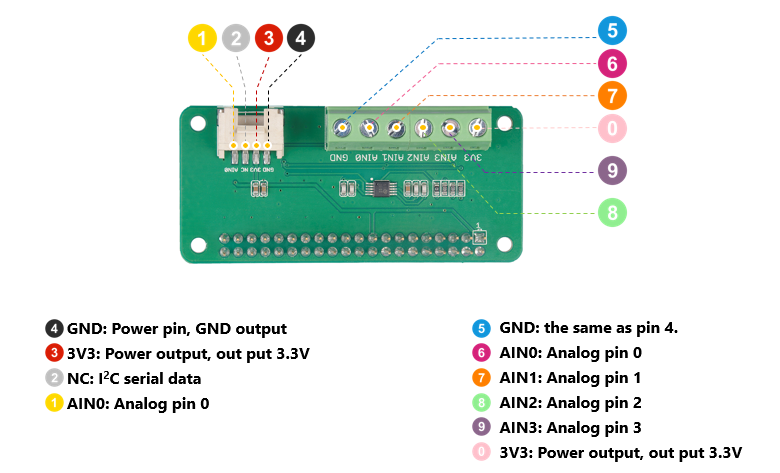
Pin Out
Platforms Supported
| Arduino | Raspberry Pi | |||
|---|---|---|---|---|
Getting Started
Hardware
Materials required
| Raspberry pi | 4-Channel 16-Bit ADC for Raspberry Pi(ADS1115) |
|---|---|
 |  |
| Get ONE Now | Get ONE Now |
Software
In this section, we will introduce you how to install the driver and how to enable I2C.
Enable I2C As I2C is not turned on by default, we need to configure I2C by hand.
- Step 1. Power up the Raspberry Pi.
- Step 2. Open raspi-config by typing following command in terminal.
sudo raspi-config
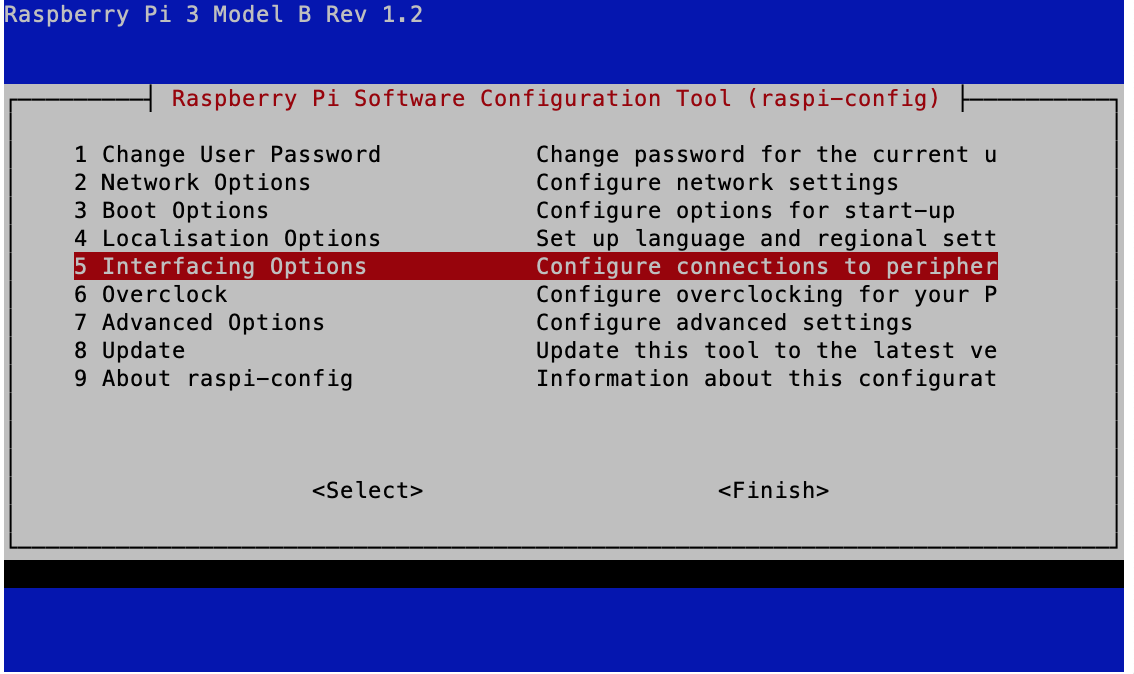
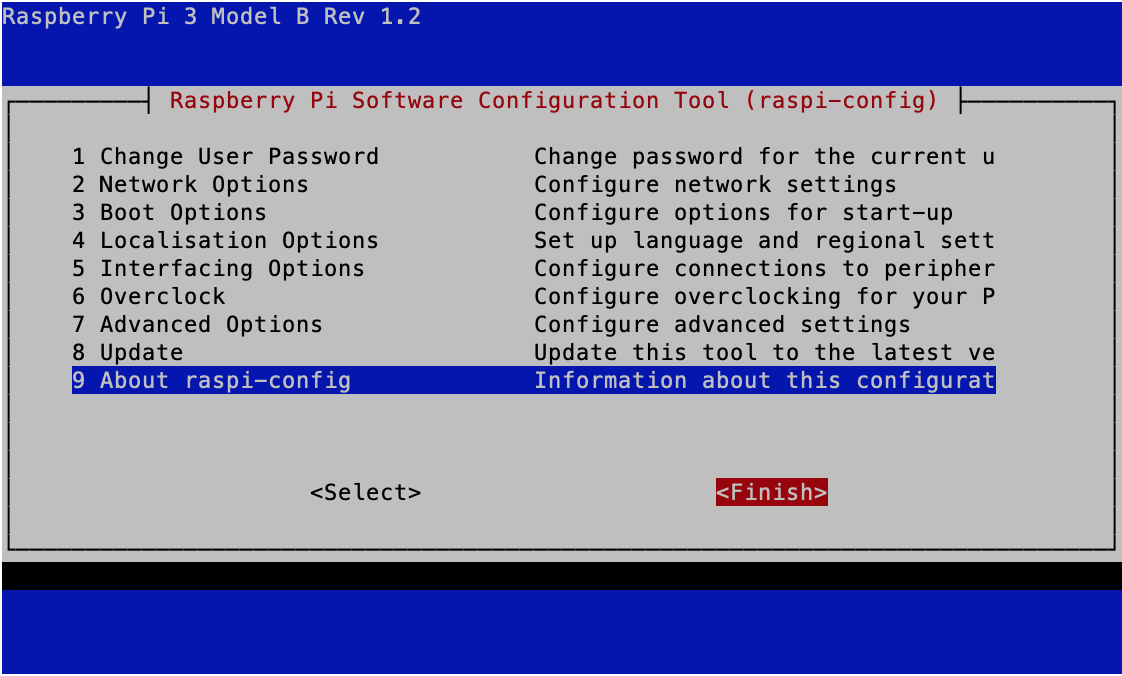
- Step 3. Arrow down to 5 interfacing Options and press "enter" to select.
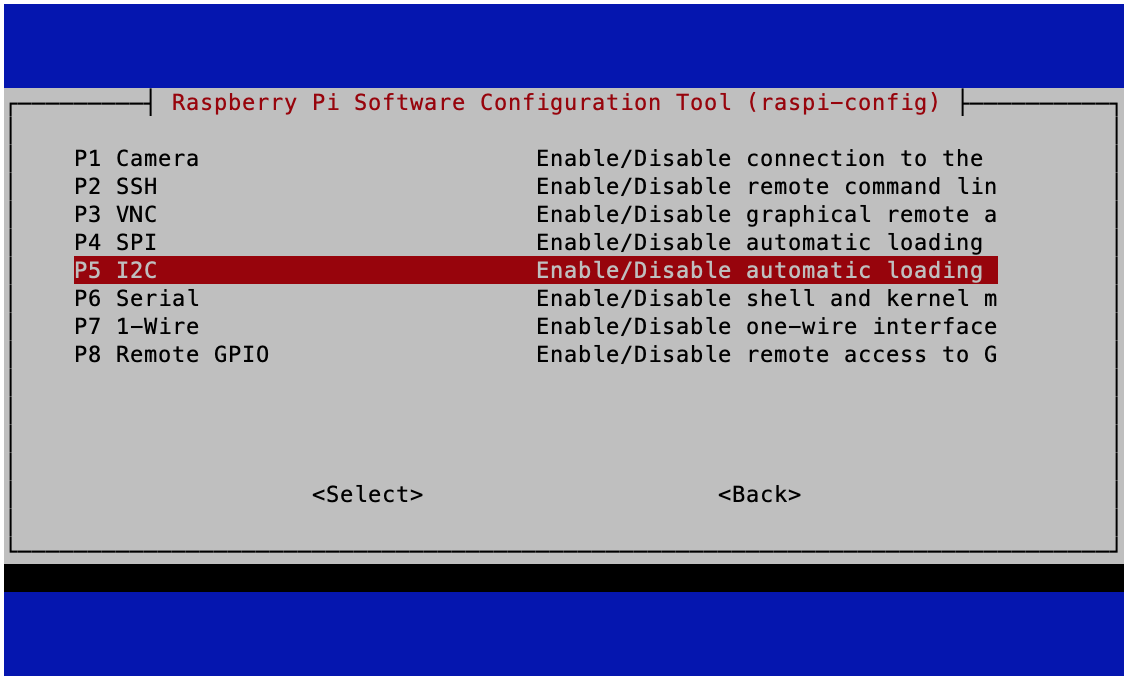
- Step 4. Arrow down to P5 I2C and press "enter" to select.
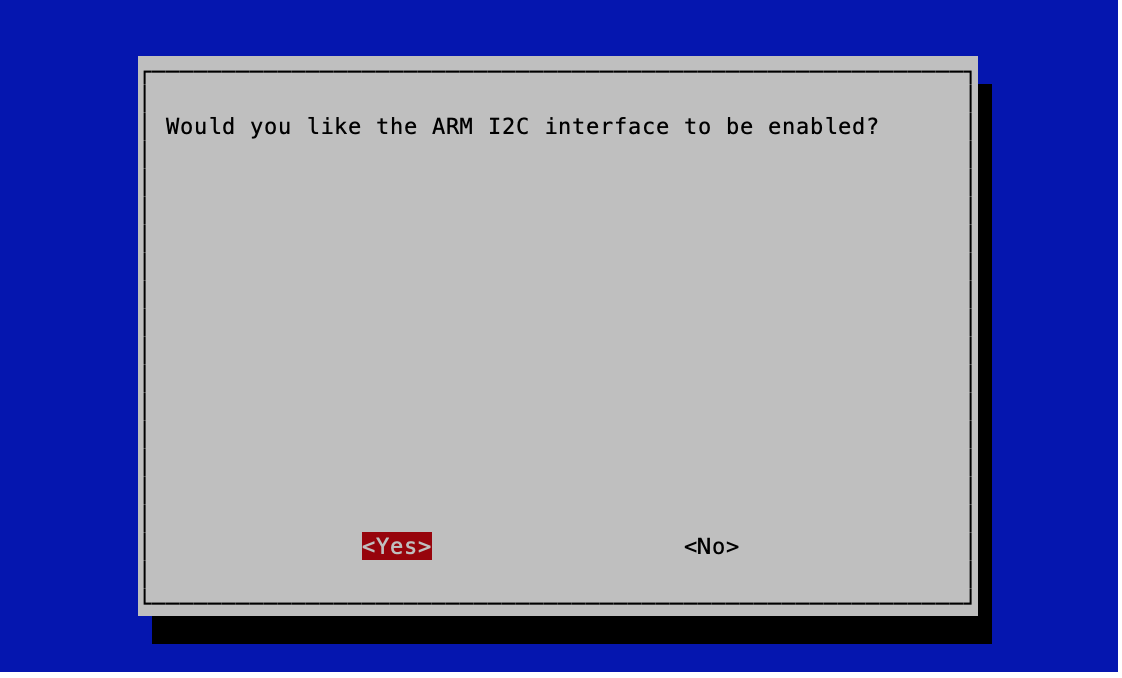
- Step 4. Select "Yes" to enable it.
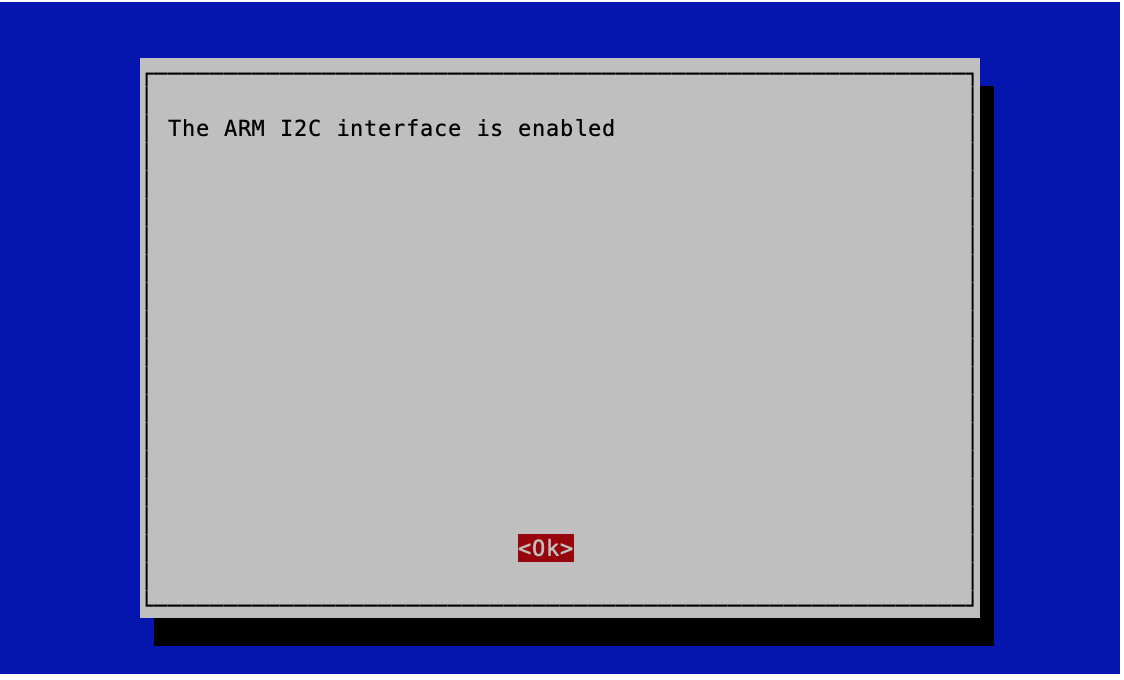
- Step 5. Select "Ok".
- Step 6. Select "Finish" to save the changes.
Installation
- To check the I2C is enabled in Raspberry Pi.
Navigate to the config.txt file by running the following in the terminal:
cd /boot
sudo nano config.txt
-
Make sure there is line stating of
dtparam=i2c_arm=onin the file. -
The default I2C speed is 100 kHz. You can increase it to 400 kHz like by adding the following line to the config file:
dtparam=i2c_arm_baudrate=400000
- Then to use the ads1115-overlay add the following to
config.txt:
dtoverlay=ads1115
- After that you need to provide parameters to the overlay to configure the driver. To enable all 4 channels of the ADC in single-ended mode, add the following:
dtparam=cha_enable
dtparam=chb_enable
dtparam=chc_enable
dtparam=chd_enable
- Save the file and reboot your raspberry pi.
If you reboot the system with those changes to config.txt you will see the following kernel modules:
- Run the following to check the kernel modules:
lsmod | grep ads
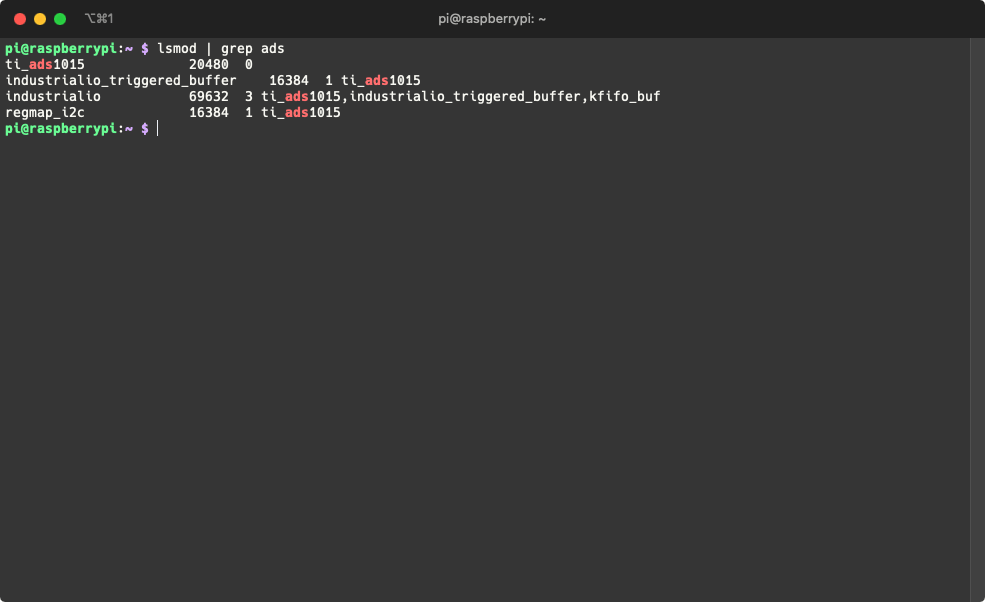
Note that the ADS1115 uses the same kernel as ADS1015.
We can see that the ADS1115 is already there and can be used by Industrial IO.
- Navigate to the Industrial IO folder:
cd /sys/bus/iio/devices/iio\:device0/
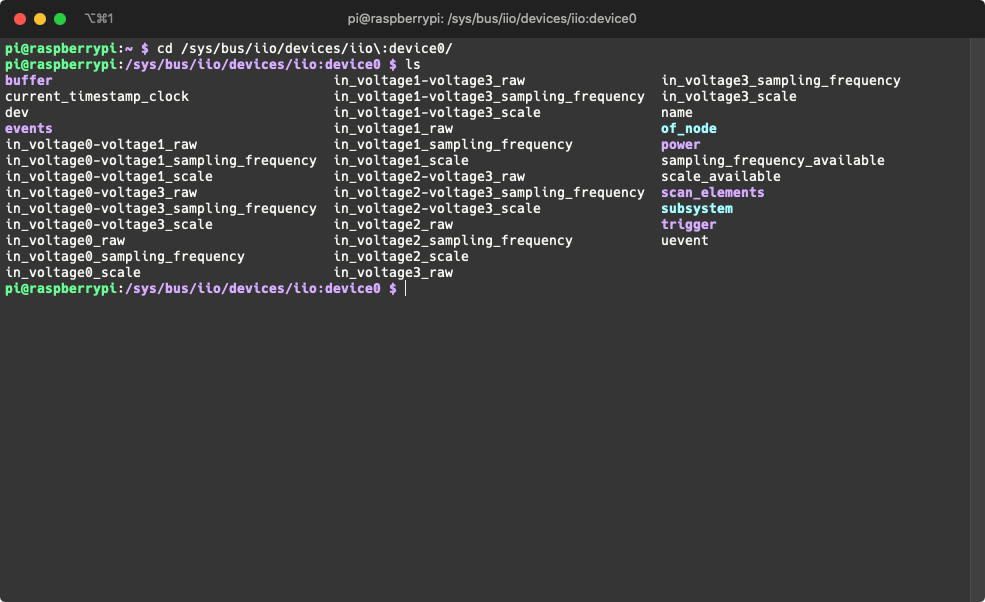
- Now you may access these hardware config files easily:
cat in_voltage0-voltage1_raw
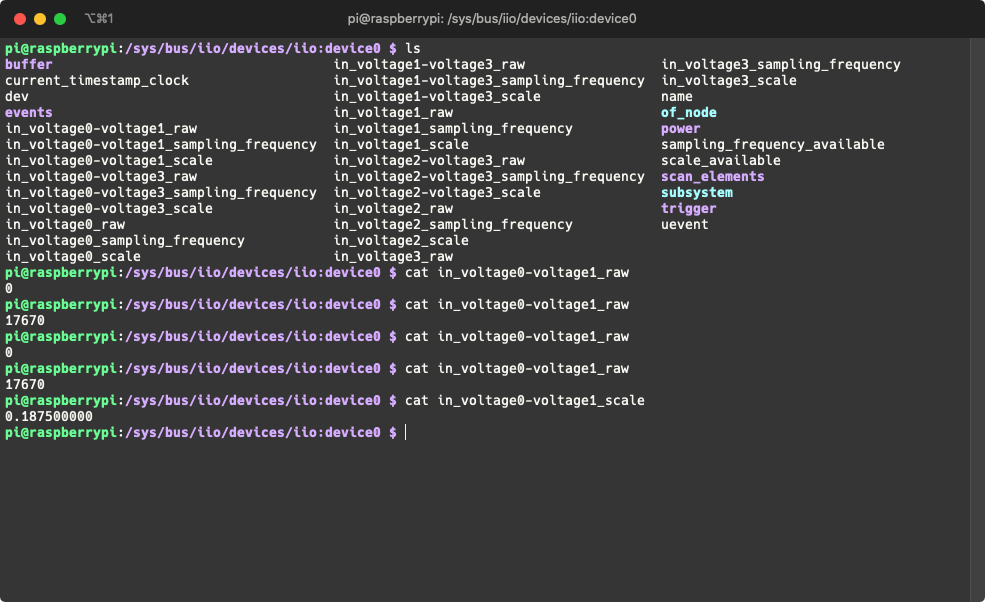
Channel 0 and 1 using scale of 0.1875mV. Measured potential difference is 17670 * 0.1875mv = 3.3V
This adding kernel method allows you to develop your own shell or python script using the ADS1115!
Schematic Online Viewer
Resources
-
[Zip] 4-Channel 16-Bit ADC for Raspberry Pi (ADS1115) Eagle Files
-
[Zip] 4-Channel 16-Bit ADC for Raspberry Pi (ADS1115) Software Library
-
[PDF] Datasheet ADS1115
Tech Support & Product Discussion
.
Thank you for choosing our products! We are here to provide you with different support to ensure that your experience with our products is as smooth as possible. We offer several communication channels to cater to different preferences and needs.