Grove - Infrared Receiver
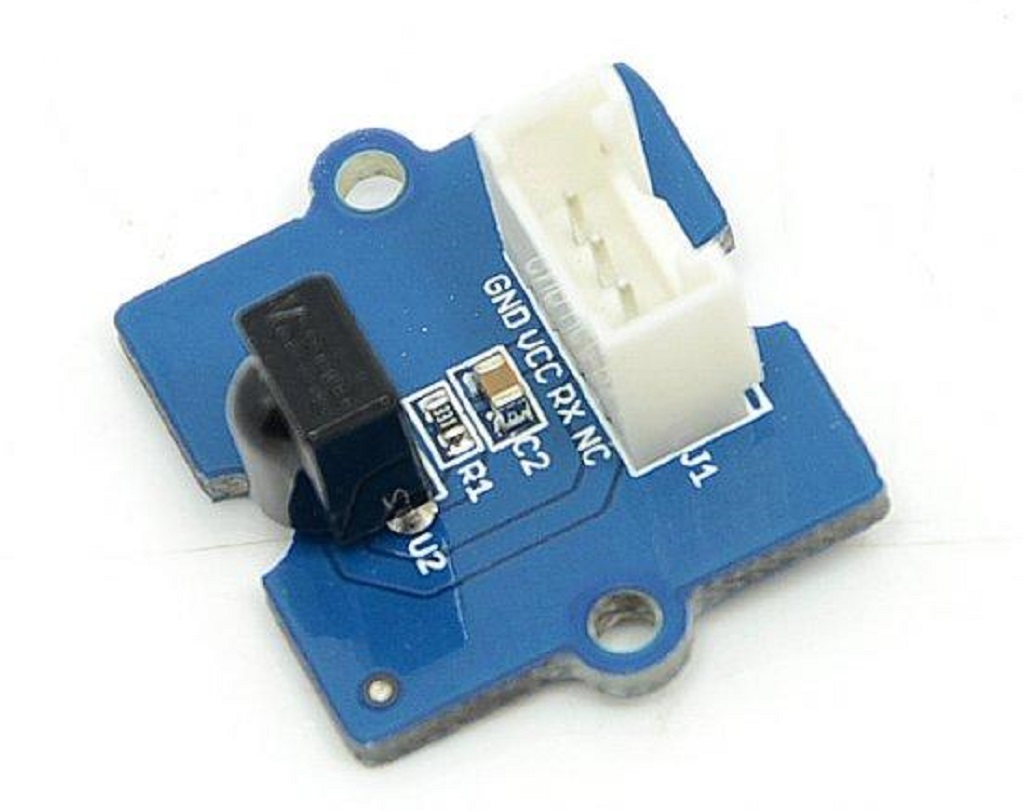
The Infrared Receiver is used to receive infrared signals and also used for remote control detection. There is an IR detector on the Infrared Receiver which is used to get the infrared light emitted by the Infrared Emitter. The IR detector have a demodulator inside that looks for modulated IR at 38 KHz. The Infrared Receiver can receive signals well within 10 meters. If more than 10 meters , the receiver may not get the signals. We often use the two Groves-the Infrared Receiver and the Grove - Infrared Emitter to work together.

Version
| Product Version | Changes | Released Date |
|---|---|---|
| Grove - Infrared Receiver v1.0 | Initial | Nov. 01 2015 |
| Grove - Infrared Receiver v1.1 | Change the Silkscreen | Jul. 24 2016 |
Specifications
- Voltage: 3.3-5V
- Distance:10m
More details about Grove modules please refer to Grove System
Platforms Supported
| Arduino | Raspberry Pi | |||
|---|---|---|---|---|
The platforms mentioned above as supported is/are an indication of the module's software or theoritical compatibility. We only provide software library or code examples for Arduino platform in most cases. It is not possible to provide software library / demo code for all possible MCU platforms. Hence, users have to write their own software library.
Getting Started
The Grove - Infrared Emitter can send data while Grove - Infrared Receiver will receive them.
Play With Arduino
If this is the first time you work with Arduino, we firmly recommend you to see Getting Started with Arduino before the start.
Hardware
- Step 1. Prepare the below stuffs:
| Seeeduino V4.2 | Base Shield | Grove - Infrared Emitter | Grove - Infrared Receiver |
|---|---|---|---|
 |  |  |  |
| Get One Now | Get One Now | Get One Now | Get One Now |
-
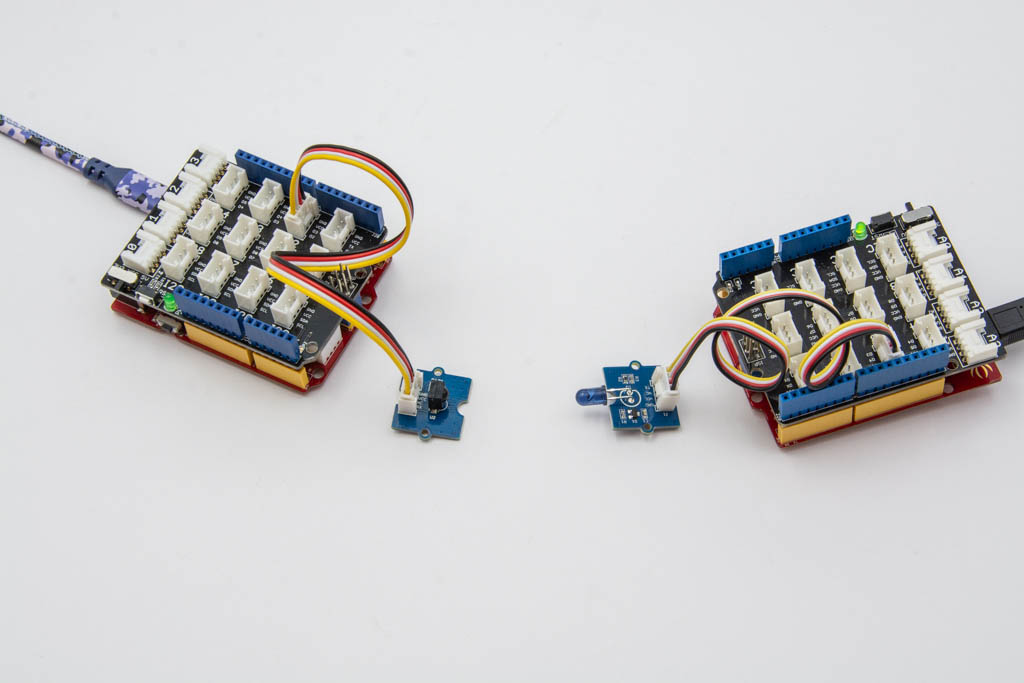
Step 2. Connect Grove - Infrared Emitter to port D3 of one Grove-Base Shield.
-
Step 3. Connect Grove - Infrared Receiver to port D2 of the other Grove-Base Shield.
-
Step 4. Plug Grove - Base Shield into Seeeduino.
-
Step 5. Connect Seeeduino to PC via a USB cable.
If we don't have Grove Base Shield, We also can directly connect this module to Seeeduino as below.
| Seeeduino | Grove - Infrared Emitter |
|---|---|
| 5V | Red |
| GND | Black |
| Not Conencted | White |
| D3 | Yellow |
| Seeeduino | Grove - Infrared Receiver |
|---|---|
| 5V | Red |
| GND | Black |
| Not Conencted | White |
| D2 | Yellow |
Software
-
Step 1. Download the Seeed_Arduino_IR from Github.
-
Step 2. Refer How to install library to install library for Arduino.
Copy the following Send Example Code to the Arduino IDE:
Send Example Code:
/* send.ino Example sketch for IRLib2
 *  Illustrates how to send a code.
 */
#include <IRLibSendBase.h>    // First include the send base
//Now include only the protocols you wish to actually use.
//The lowest numbered protocol should be first but remainder
//can be any order.
#include <IRLib_P01_NEC.h>
#include <IRLib_P02_Sony.h>
#include <IRLibCombo.h>     // After all protocols, include this
// All of the above automatically creates a universal sending
// class called "IRsend" containing only the protocols you want.
// Now declare an instance of that sender.

IRsend mySender;

#define IR_SEND_PWM_PIN D3

void setup() {
  Serial.begin(9600);
  delay(2000); while (!Serial); //delay for Leonardo
  Serial.println(F("Every time you press a key is a serial monitor we will send."));
}

void loop() {
  if (Serial.read() != -1) {
    //send a code every time a character is received from the
    // serial port. You could modify this sketch to send when you
    // push a button connected to an digital input pin.
    //Substitute values and protocols in the following statement
    // for device you have available.
    mySender.send(SONY,0xa8bca, 20);//Sony DVD power A8BCA, 20 bits
    //mySender.send(NEC,0x61a0f00f,0);//NEC TV power button=0x61a0f00f
    Serial.println(F("Sent signal."));
  }
}
Copy the following Receive Example Code to the Arduino IDE:
Receive Example Code:
/* rawR&cv.ino Example sketch for IRLib2
 *  Illustrate how to capture raw timing values for an unknow protocol.
 *  You will capture a signal using this sketch. It will output data the
 *  serial monitor that you can cut and paste into the "rawSend.ino"
 *  sketch.
 */
// Recommend only use IRLibRecvPCI or IRLibRecvLoop for best results
#include <IRLibRecvPCI.h>

IRrecvPCI myReceiver(2);//pin number for the receiver

void setup() {
  Serial.begin(9600);
  delay(2000); while (!Serial); //delay for Leonardo
  myReceiver.enableIRIn(); // Start the receiver
  Serial.println(F("Ready to receive IR signals"));
}

void loop() {
  //Continue looping until you get a complete signal received
  if (myReceiver.getResults()) {
    Serial.println(F("Do a cut-and-paste of the following lines into the "));
    Serial.println(F("designated location in rawSend.ino"));
    Serial.print(F("\n#define RAW_DATA_LEN "));
    Serial.println(recvGlobal.recvLength,DEC);
    Serial.print(F("uint16_t rawData[RAW_DATA_LEN]={\n\t"));
    for(bufIndex_t i=1;i<recvGlobal.recvLength;i++) {
      Serial.print(recvGlobal.recvBuffer[i],DEC);
      Serial.print(F(", "));
      if( (i % 8)==0) Serial.print(F("\n\t"));
    }
    Serial.println(F("1000};"));//Add arbitrary trailing space
    myReceiver.enableIRIn();      //Restart receiver
  }
}
- Step 7. Open the Serial Monitor of Arduino IDE by click Tool-> Serial Monitor. Or tap the ++ctrl+shift+m++ key at the same time.
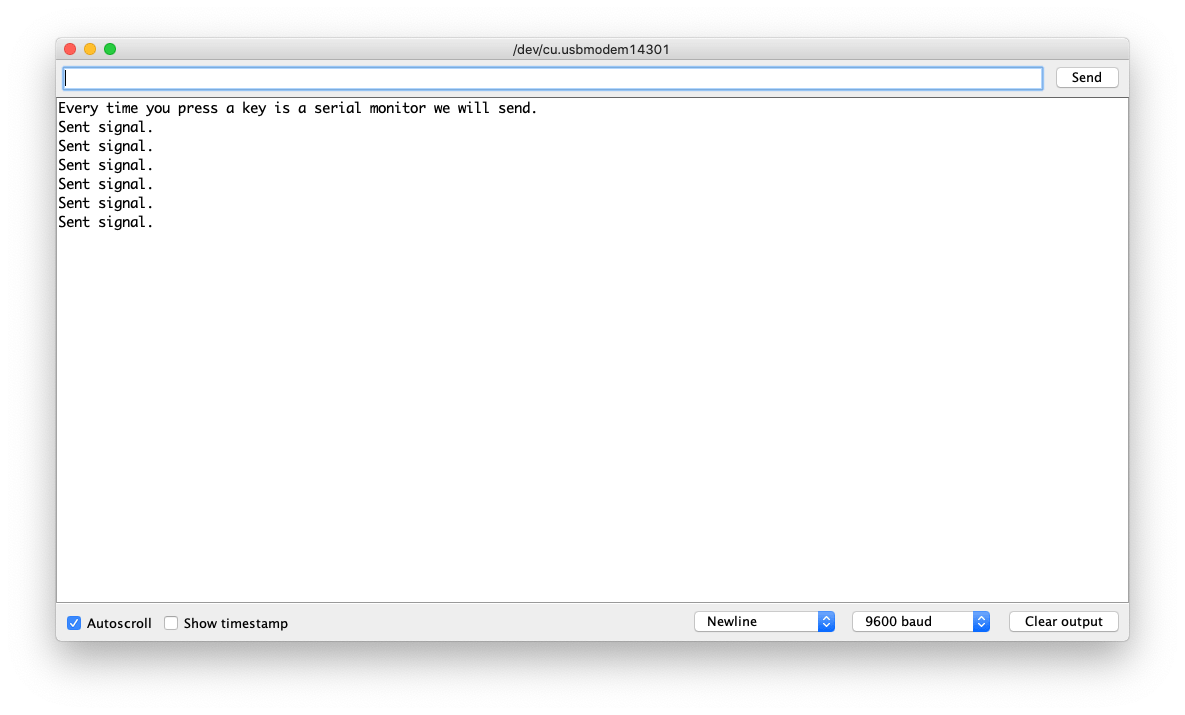
For the Send Example, the Serial should be like this:
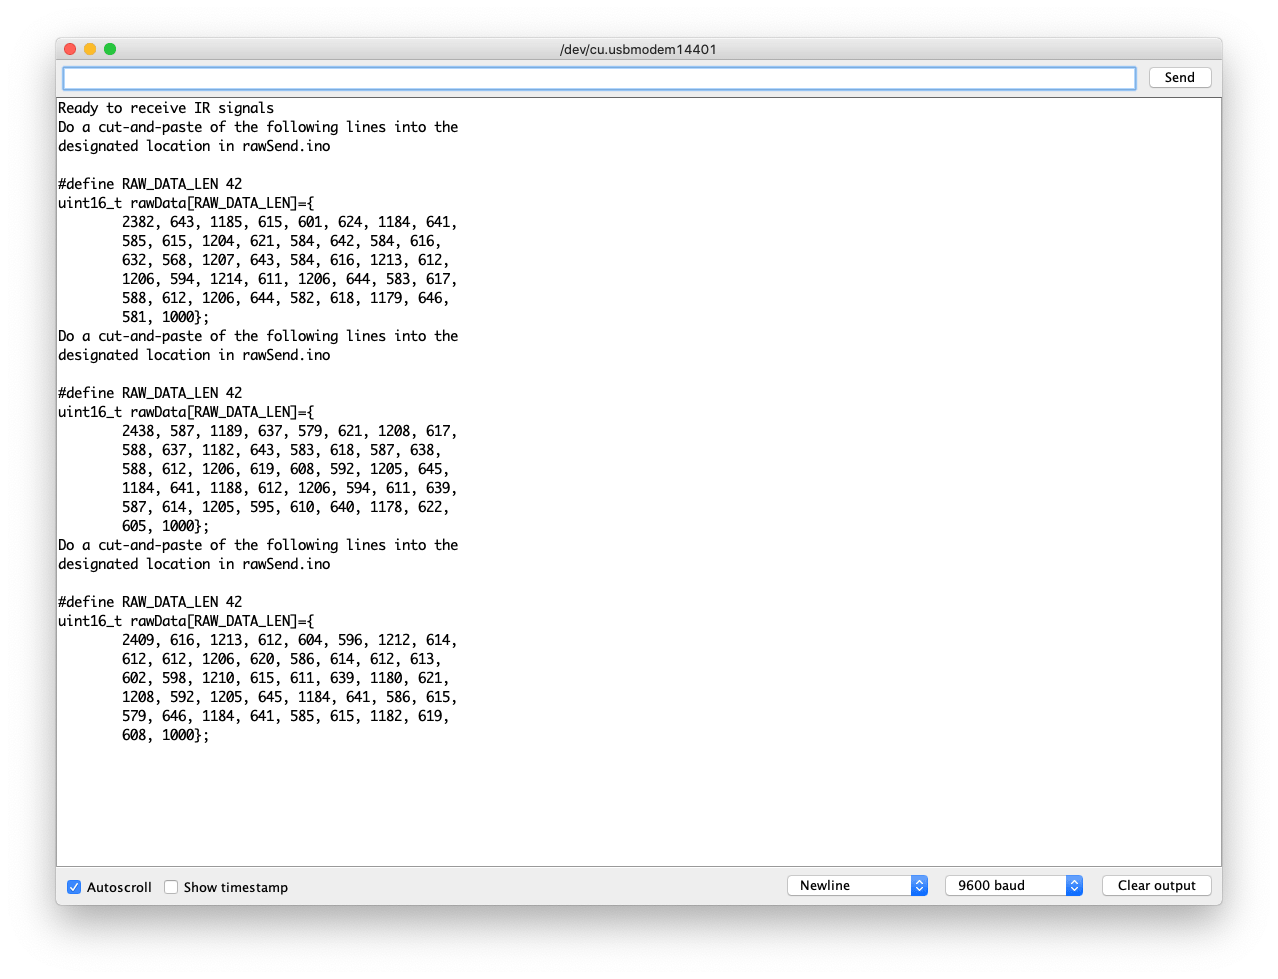
For the Receive Example, the Serial Monitor should be like this:
For more advanced usage of the library, please check Seeed_Arduino_IR.
Schematic Online Viewer
Resources
- [Zip] Grove - Infrared Receiver eagle files
- [Lib] IR Send and Receiver Library
- [Lib] IR Receive Library for LinkIt ONE
- [Pdf] TSOP282 Datasheet
Projects
IR LaunchPad to LaunchPad Communication: Send text from one LaunchPad to another using the Grove IR emitter and receiver!
Tech Support & Product Discussion
Upgradable to Industrial Sensors
With the SenseCAP S2110 controller and S2100 data logger, you can easily turn the Grove into a LoRaWAN® sensor. Seeed not only helps you with prototyping but also offers you the possibility to expand your project with the SenseCAP series of robust industrial sensors.
The IP66 housing, Bluetooth configuration, compatibility with the global LoRaWAN® network, built-in 19 Ah battery, and powerful support from APP make the SenseCAP S210x the best choice for industrial applications. The series includes sensors for soil moisture, air temperature and humidity, light intensity, CO2, EC, and an 8-in-1 weather station. Try the latest SenseCAP S210x for your next successful industrial project.
