Grove - Infrared Temperature Sensor
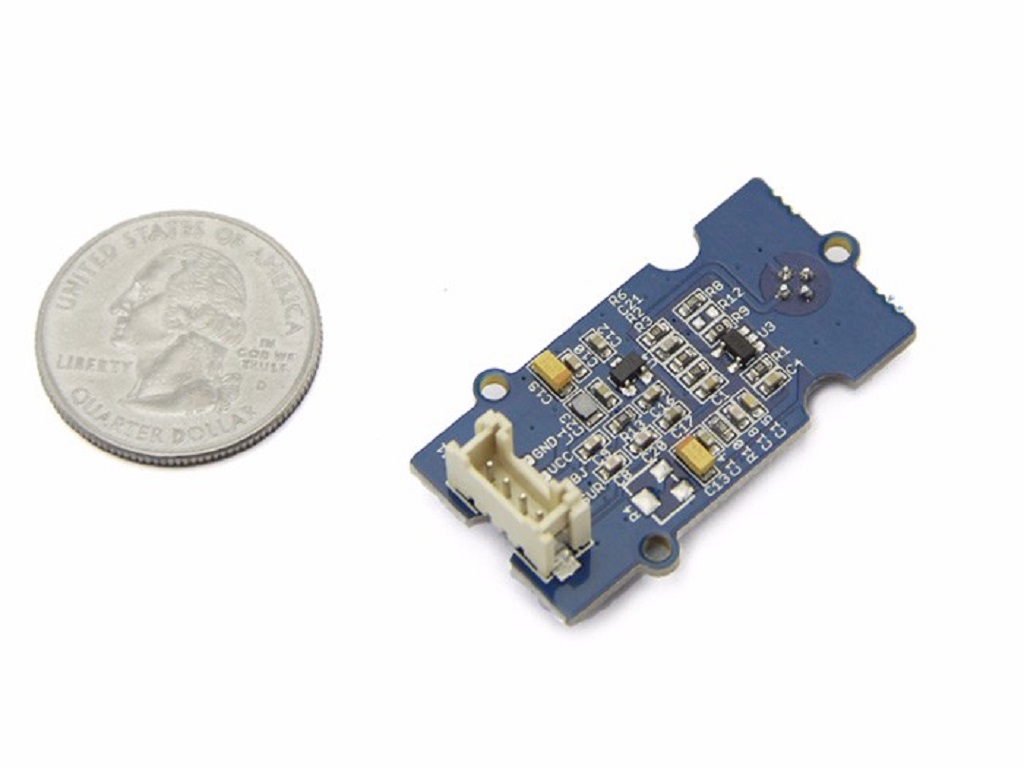
The Infrared temperature sensor is a non-contact temperature measure model. It is composed of 116 elements of thermocouple in series on a floating micro-membrane, the black Surface of the sensor is good to absorb the incident thermal infrared radiation, which might trigger a voltage response at output. This sensor outputs an analog voltage (0~1.1V) according to target temperature.
![]()
Version
| Product Version | Changes | Released Date |
|---|---|---|
| Grove - Infrared Temperature Sensor v1.0 | Initial | Dec. 11 2015 |
| Grove - Infrared Temperature Sensor v1.1 | Optimize the layout | Jul. 24 2016 |
| Grove - Infrared Temperature Sensor v1.2 | Change the power chip to make the power more stable | Feb. 10 2018 |
Specifications
- Voltage: 3-5V
- Measuring Current Supply: 160-200 uA
- Measuring Range: -10~100°C
- Holding Time: 2S
- Operating Temperature: -10~80 °C
- Storage Temperature: -35-80 °C
More details about Grove modules please refer to [Grove System](https://wiki.seeedstudio.com/Grove_System/)
Platforms Supported
| Arduino | Raspberry Pi | |||
|---|---|---|---|---|
The platforms mentioned above as supported is/are an indication of the module's software or theoritical compatibility. We only provide software library or code examples for Arduino platform in most cases. It is not possible to provide software library / demo code for all possible MCU platforms. Hence, users have to write their own software library.
Getting Started
Play With Arduino
The following sketch demonstrates a simple application of measure the measure the surrounding temperature around the sensor and the temperature of the target which is in front of the sensor. And print the result on the serial monitor.
If this is the first time you work with Arduino, we firmly recommend you to see Getting Started with Arduino before the start.
- Step 1. Prepare the following materials:
| Seeeduino V4.2 | Base Shield | Grove - Infrared Temperature Sensor |
|---|---|---|
 |  |  |
| Get One Now | Get One Now | Get One Now |
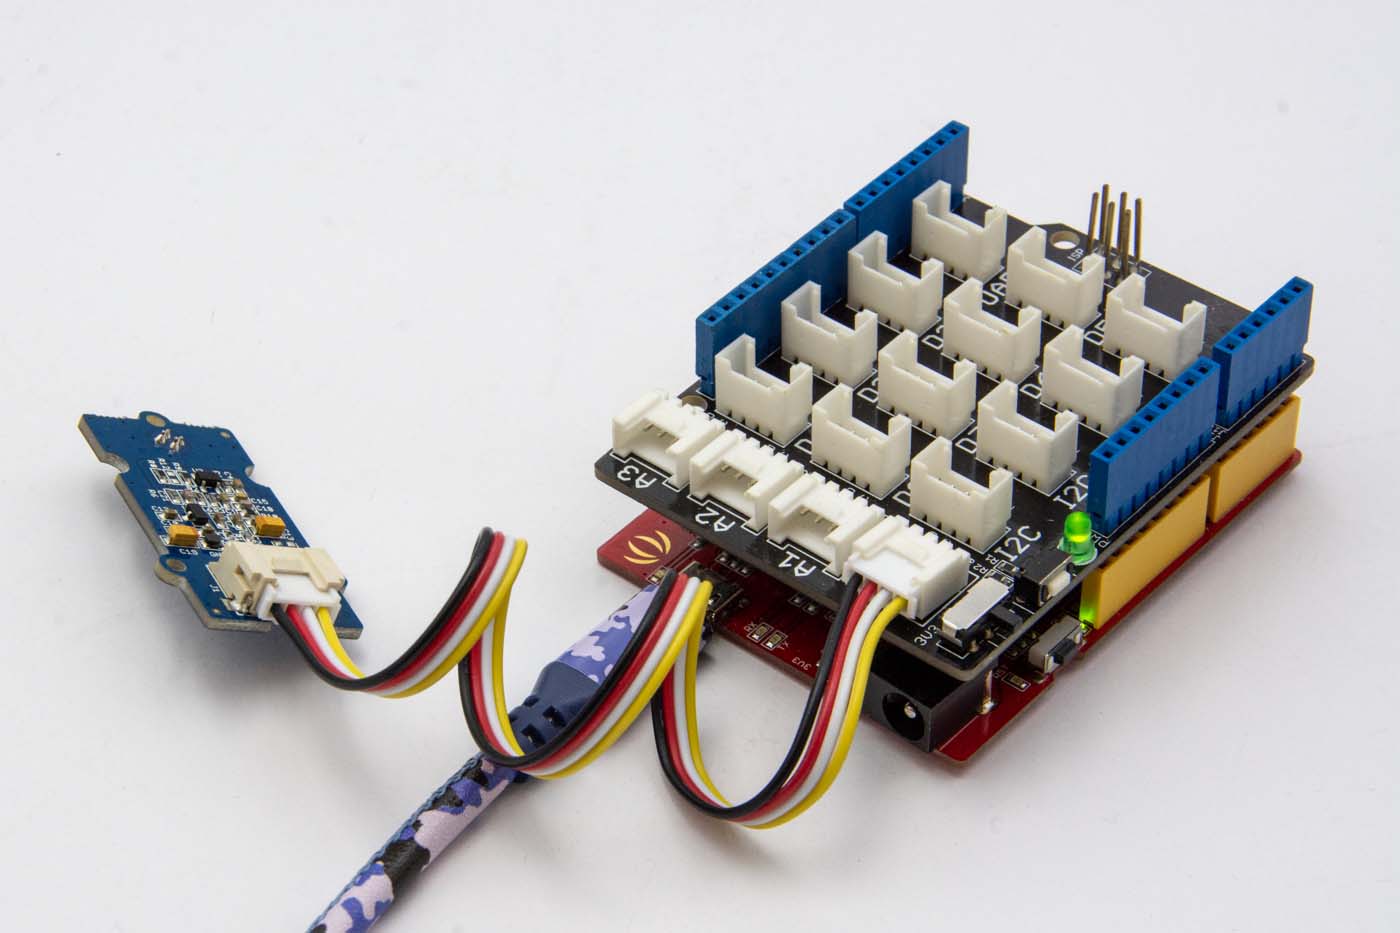
Step 2. Connect Grove - Infrared Temperature Sensor to port A0 of Grove-Base Shield.
Step 3. Plug Grove - Base Shield into Seeeduino.
Step 4. Connect Seeeduino to PC via a USB cable.
If we don't have Grove Base Shield, We also can directly connect Grove - Temperature and Humidity Sensor Pro to Seeeduino as below.
| Seeeduino | Grove - Infrared Temperature Sensor |
|---|---|
| 5V | Red |
| GND | Black |
| A1 | White |
| A0 | Yellow |
Software
- Step 1. Download the Demo Code,then double click it to open the demo.
Before measuring temperature, you need simple setting. Following the instruction below before your test and you will gain a accurately result.
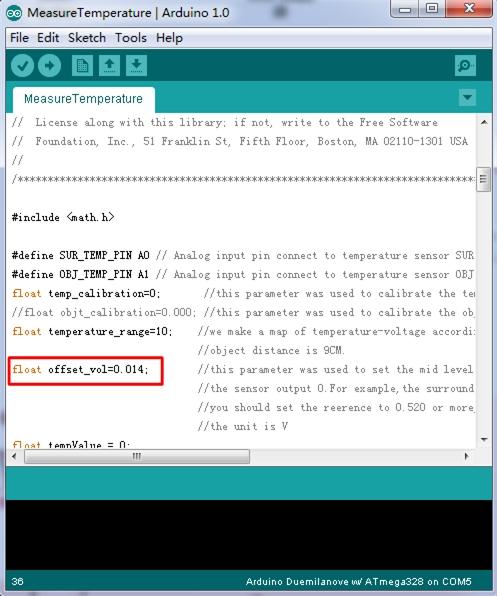
- Step 2. Regulate the sensor voltage
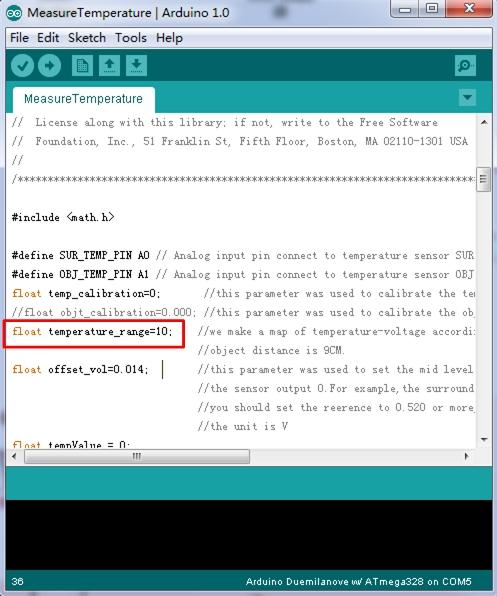
After uploading the demo program, make the sensor in normal environment more than 5 minutes that make the sensor temperature the same as surrounding temperature. Then open the serial monitor to check the voltage which the sensor output. Ideally, when the ambient temperature is equal to the temperature sensor, the infrared sensor (TP-538U) output is 0V.We should regulate the reference voltage which offset at 0.5V by hardware. As shown below, the sensor voltage is 0.014V, we just need to change the offset_vol value as0.014 which you obtain from the serial monitor in program.
- Step 3. Regulate the sensor detected distance
According to our experiment, the sensor's nominal measure distance is 9CM, but we can’t ensure all sensor have the same character. So if you want to have accurate result, you need to regulate it with Ice and water mixture to measure the 0℃, and use boiled water to regulate the 100℃. After that, you can obtain the effective distance of the sensor.
The specific method for measuring is fill with ice and water in a dark container which has a flat surface. Waiting for the container drop to 0℃, keep the sensor 9CM between object, move the sensor forward or back and check the result, if output is 0℃, note down the distance value. The same method to check boiled water. When you gain a pair of value, make a deal with average calculation. You can begin to measure in a rated distance which you just obtained now.
Now we can measure the surrounding temperature around the sensor. The sensor is apply in a nominal distance, you can have a try in other distance, but the distance-temperature diagram neither sensor’s manufacturer nor we obtained, you can draw it follow the two instructions above. We reserve variable "temperature_range" in demo code. We assume that the target distance is 3 cm, the coefficient which you measured may be 5 more or less. Wish you have a fun try.
1. The demo code does not support Atmega168.
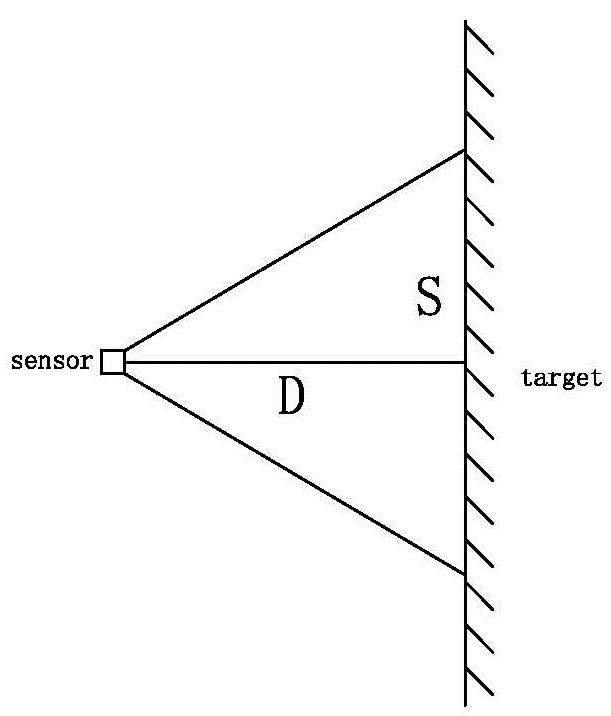
2. In order to gain a accurate measured, the distance(D) and target diament(S) rate D:S must less than 0.5.
Step 4. Upload the demo. If you do not know how to upload the code, please check How to upload code.
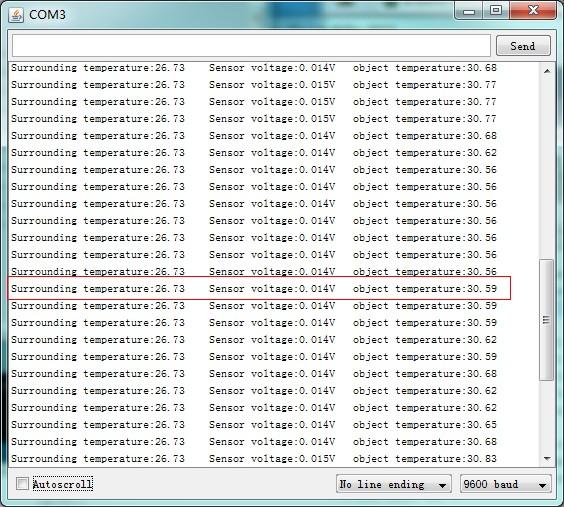
Step 5. Open the Serial Monitor of Arduino IDE by click Tool-> Serial Monitor. Or tap the ++ctrl+shift+m++ key at the same time. if every thing goes well, you will get the temperature.
The result should be like:
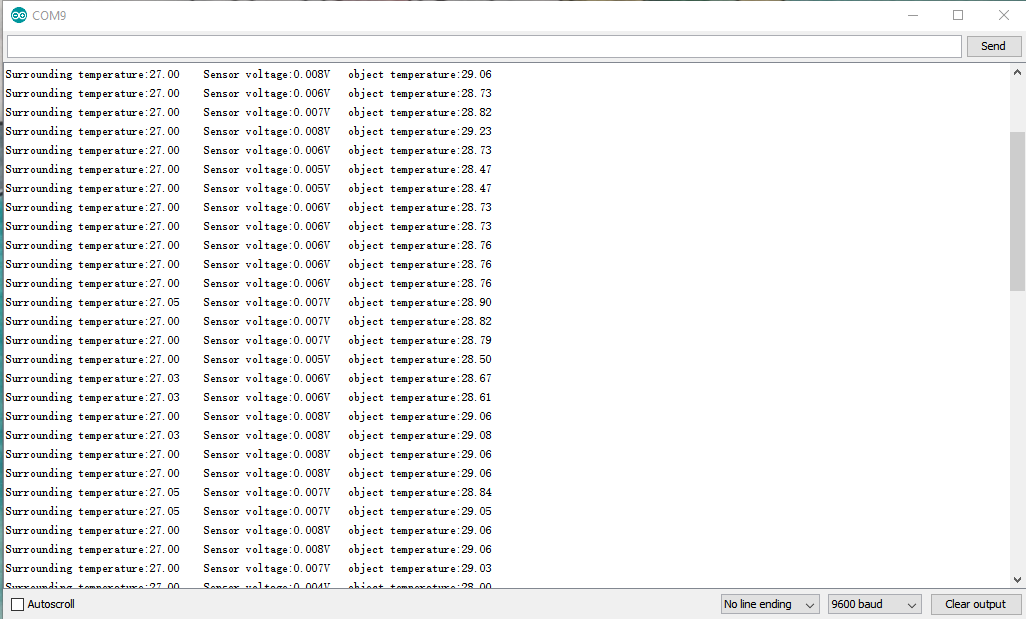
Grove-Infrared Temperature Sensor V1.0
Grove-Infrared Temperature Sensor V1.2
Resources
- [Zip] Grove-Infrared Temperature Sensor V1.2 Eagle File
- [Zip] Grove-Infrared Temperature Sensor V1.0 Eagle File
- [Zip] OTP-538U Datasheet
- [Zip] Demo Code
- [Zip] Infrared Temperature Demo Code with SerialLCD
Tech Support & Product Discussion
Upgradable to Industrial Sensors
With the SenseCAP S2110 controller and S2100 data logger, you can easily turn the Grove into a LoRaWAN® sensor. Seeed not only helps you with prototyping but also offers you the possibility to expand your project with the SenseCAP series of robust industrial sensors.
The IP66 housing, Bluetooth configuration, compatibility with the global LoRaWAN® network, built-in 19 Ah battery, and powerful support from APP make the SenseCAP S210x the best choice for industrial applications. The series includes sensors for soil moisture, air temperature and humidity, light intensity, CO2, EC, and an 8-in-1 weather station. Try the latest SenseCAP S210x for your next successful industrial project.
