reTerminal DM Getting Started with Node Red

Node-RED is a programming tool for wiring together hardware devices, APIs and online services in new and interesting ways. It provides a browser-based editor that makes it easy to wire together flows using the wide range of nodes in the palette that can be deployed to its runtime in a single-click.
— nodered.org
Since reTerminal DM is equipped with rich scalability and hybrid connectivity, such as Digital I/O, CAN bus, RS485, RS232 and powerful wireless communication capabilities such as WiFi, BLE, *4G, *LoRa®. Where Node-RED is one of the best low-code programming tool which could rule them all, and Thanks to the Node-RED Dashboard node which could be configured and utilised together with the 10.1" 10-point multi-touch high-sensitivity capacitive panel for the on-site Human Machine Interface purpose.
*4G and LoRa® modules does not come with reTerminal DM by default, please purchase the relevant modules accordingly.
Here is the getting started guide on how to setup, as well as getting familiar with the Node-RED interface together on reTerminal DM.
- For Raspbian OS User Please Go TO: Install Node-RED
- For Sensecraft Edge OS User Please Go TO: Getting Familiar with Node-RED, Since Sensecraft Edge OS comes with Node-RED preinstalled
Install and Setting up Node-RED On Raspbian OS
Once you have complete with the setup a new Operating System with reTerminal DM by Following the Install OS on reTerminal DM, please follow the steps below to setup the Node-RED.
Install Node-RED
-
STEP 1: Getting access to your reTerminal DM
-
option 1: Directly connect the Mouse and Keyboard
Please go ahead and open
TerminalAPP on you reTerminal DM.make sure your reTerminal DM is connected to internet.
-
option 2: by using SSH
Make sure your host computer could get access to the reTerminal DM via network and reTerminal DM is connected to internet
on Windows:
Please open PowerShell program and then type
ssh {USERNAME}@{RETERMINALDM_IP_ADDRESS}, please replace{USERNAME}and{RETERMINALDM_IP_ADDRESS}according to your setup:For Example in my case the
{USERNAME}ispiand{RETERMINALDM_IP_ADDRESS}is192.168.43.100:Then please enter the password for the
{USER}of the Operating System you have setup on your reTerminal DMeg: For Raspbian OS the default login credential is
- Username:
pi - Password:
raspberry
on Mac/Linux:
Please open Terminal APP and type
ssh {USERNAME}@{RETERMINALDM_IP_ADDRESS}, please replace{USERNAME}and{RETERMINALDM_IP_ADDRESS}according to your setup:For Example in my case the
{USERNAME}ispiand{RETERMINALDM_IP_ADDRESS}is192.168.43.100:Then please enter the password for the
{USER}of the Operating System you have setup on your reTerminal DMeg: For Raspbian OS the default login credential is
- Username:
pi - Password:
raspberry
- Username:
-
-
STEP 2: Install Node-RED:
The Node-RED team has prepared us with a All-IN-ONE script, which you could just enter the following command into the reTerminal DM native Terminal APP or in the SSH Shell from the step above.
bash <(curl -sL https://raw.githubusercontent.com/node-red/linux-installers/master/deb/update-nodejs-and-nodered)
There are many options on installing Node-RED with Raspberry Pi, you can explore the official guide, here we show you the all-in-one guide to install Node-RED on reTerminal DM.
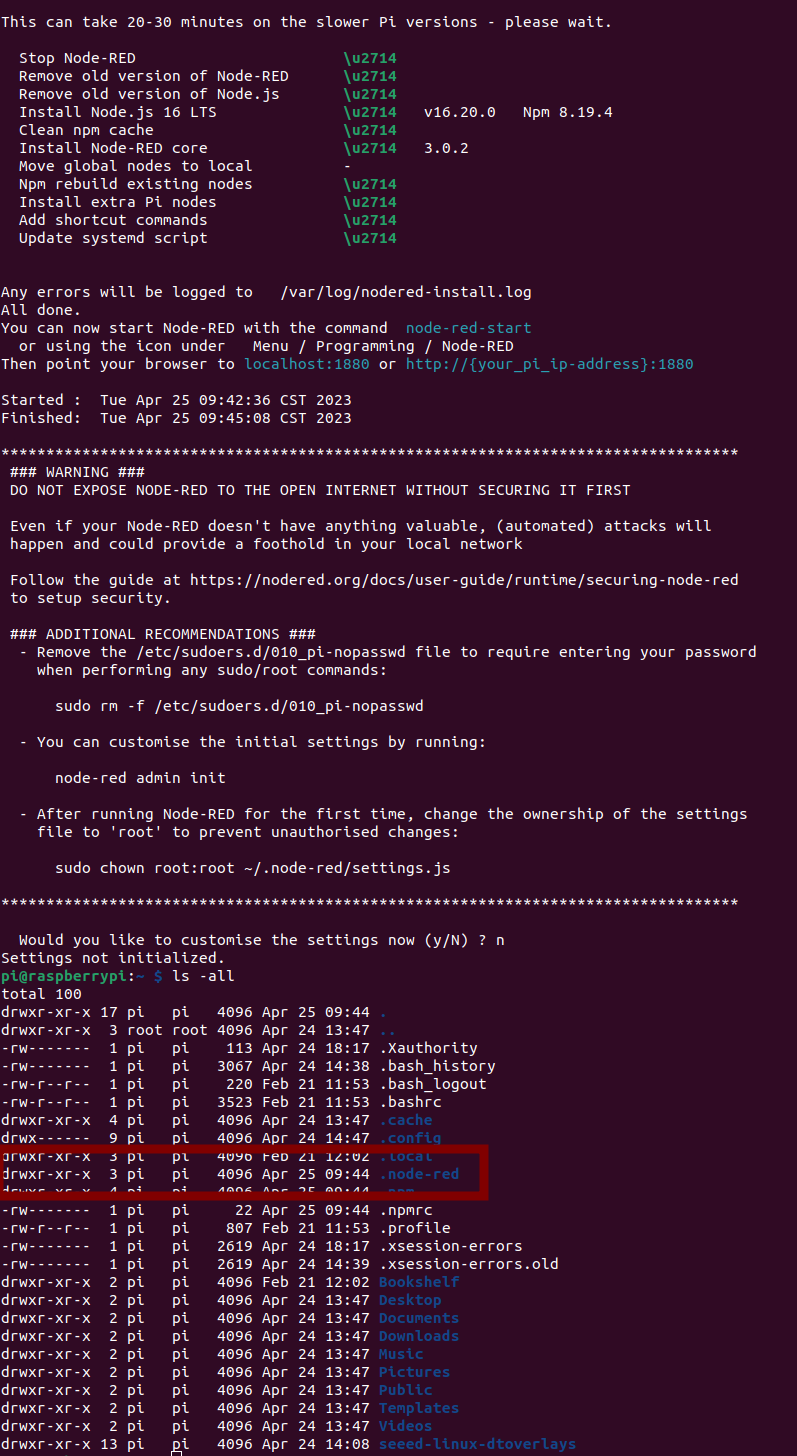
Once the installation process finished you should see a .node-red folder with ls -all commands as shown in the image below:
Setup Node-RED
Once you have installed Node-RED, please follow the steps below to setup and getting the Node-RED environment ready.
-
STEP 1: Start Node-RED:
After the installation with the All-IN-ONE script is complete, you can use follow commands accordingly:
Use
node-red-stopto stop Node-RED
Usenode-red-startto start Node-RED again
Usenode-red-logto view the recent log output
Usesudo systemctl enable nodered.serviceto autostart Node-RED at every boot
Usesudo systemctl disable nodered.serviceto disable autostart on bootSo to start the Node-RED editor you can run following command in the
TerminalAPP on reTerminal DM:node-red-startif you want to enable the node-RED as autostart service you could use
sudo systemctl enable nodered.servicecommand and you should see the the output as shown below.
-
STEP 2: Access Node-RED editor:
Now please open your favorite Web Browser and enter the url described as below:
- Option 1: Use
http://127.0.0.1:1880, if the web browser is running locally on your reTerminal DM. - Option 2: Use
http://{RETERMINALDM_IP_ADDRESS}:1880, if the web browser is running remotely on a host computer, please replace the{RETERMINALDM_IP_ADDRESS}with the ip address of reTerminal DM.
- Option 1: Use
Getting familiar with Node-RED
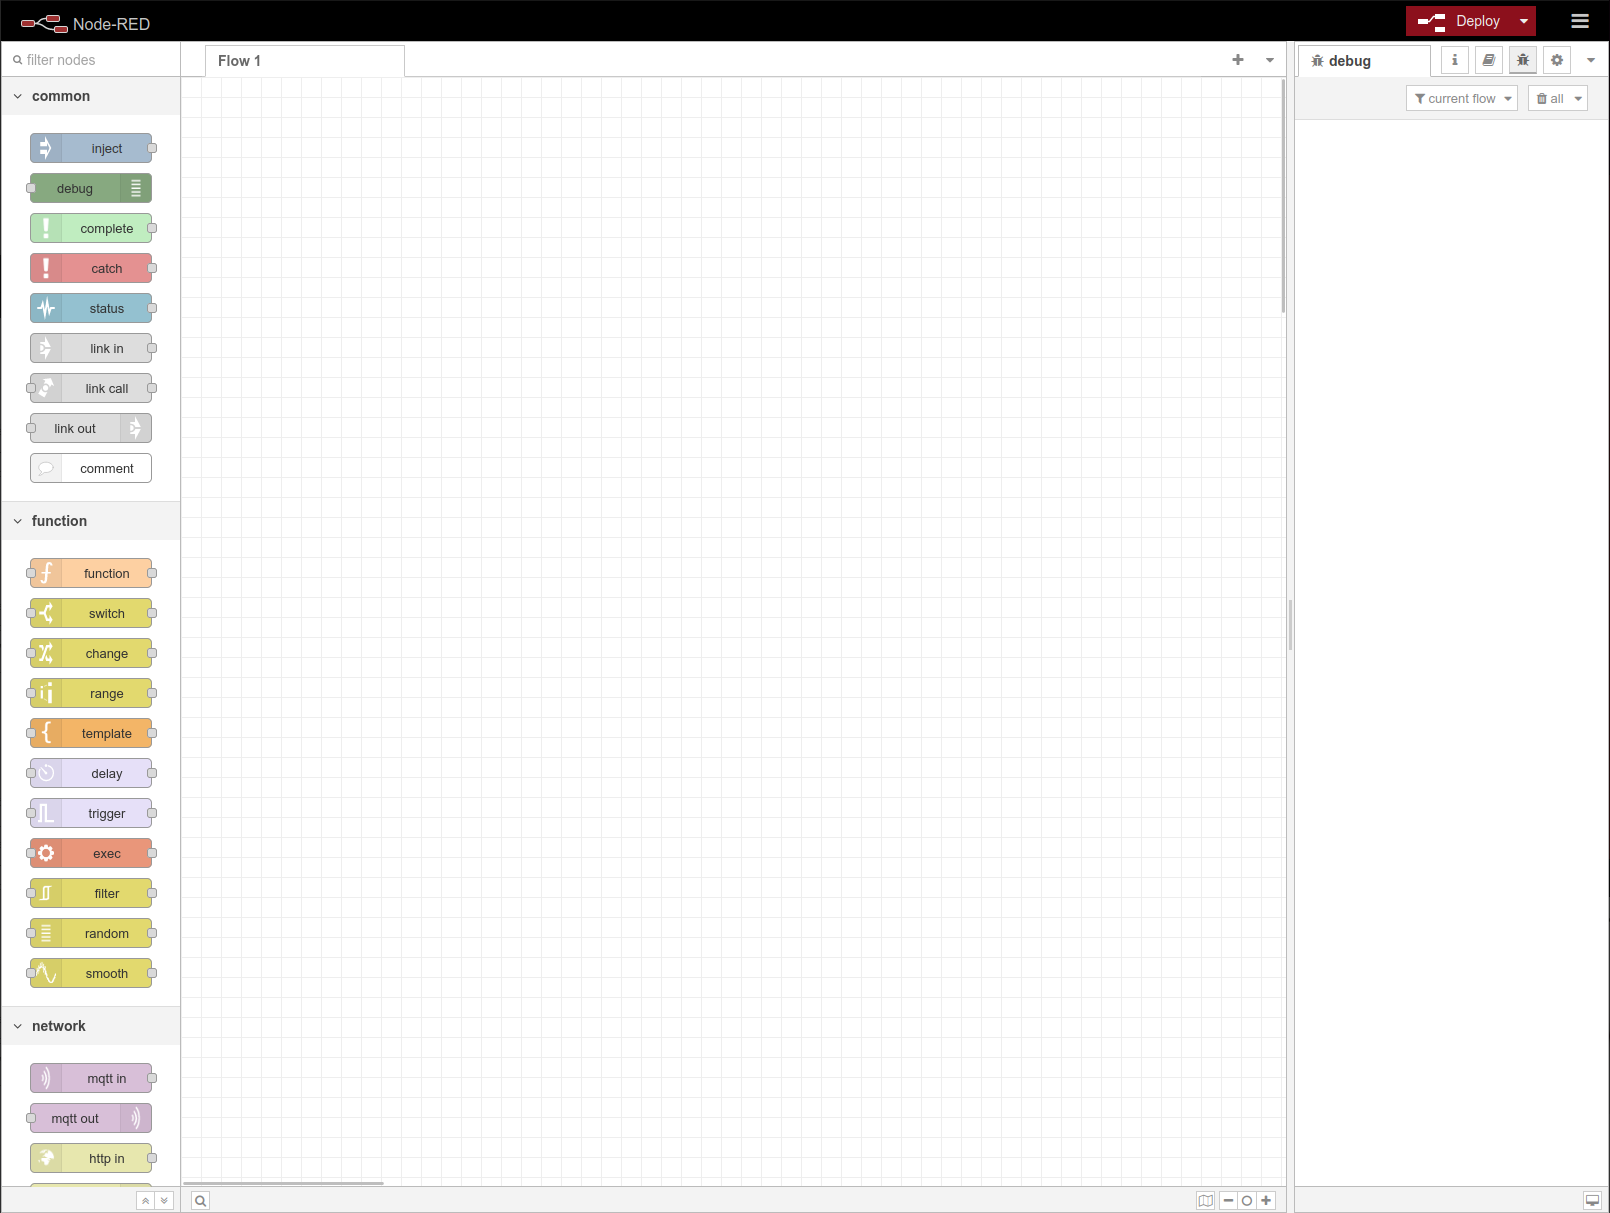
Now you should see the similar result as the image below:
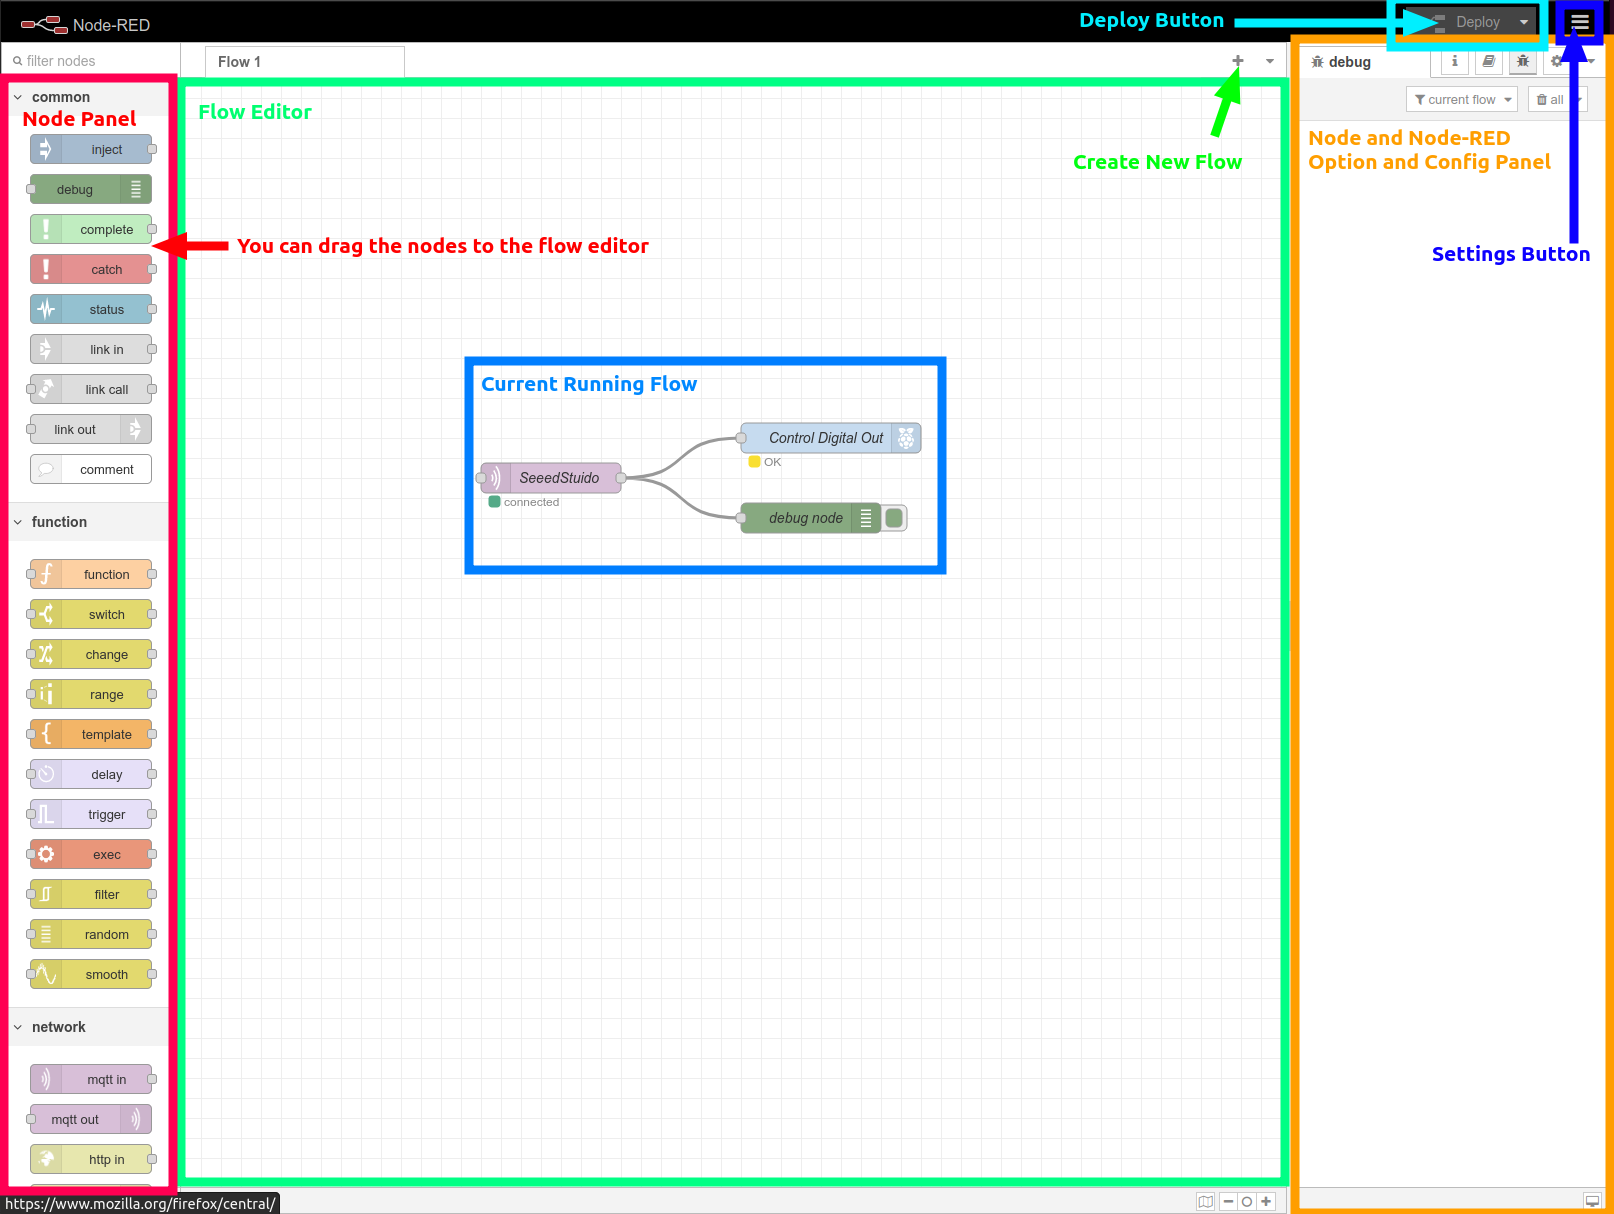
Node-RED editor Overview
Please get yourself familiar with the Node-RED editor.
The core Element of the Node-RED editor are listed:
- Node Panel
- Flow Editor
- Config Panel
- Settings Button
- Deploy Button
Install Nodes
There are two options on install Node-RED node modules, if you are using the SenseCraft EDGE OS please use the Node-RED editor method:
Option 1: Command line
STEP 1: Please go to Node-RED folder

cd .node-red/
STEP 2: Install Modbus Node
<div align="center"><img src="https://files.seeedstudio.com/wiki/reTerminalDM/node-red/npm-install-node.png" /></div><br />

```sh
npm install node-red-contrib-modbus
STEP 3: Once the node gets install, Please restart the Node-RED service with:

node-red-restart
Option 2: Node-RED editor
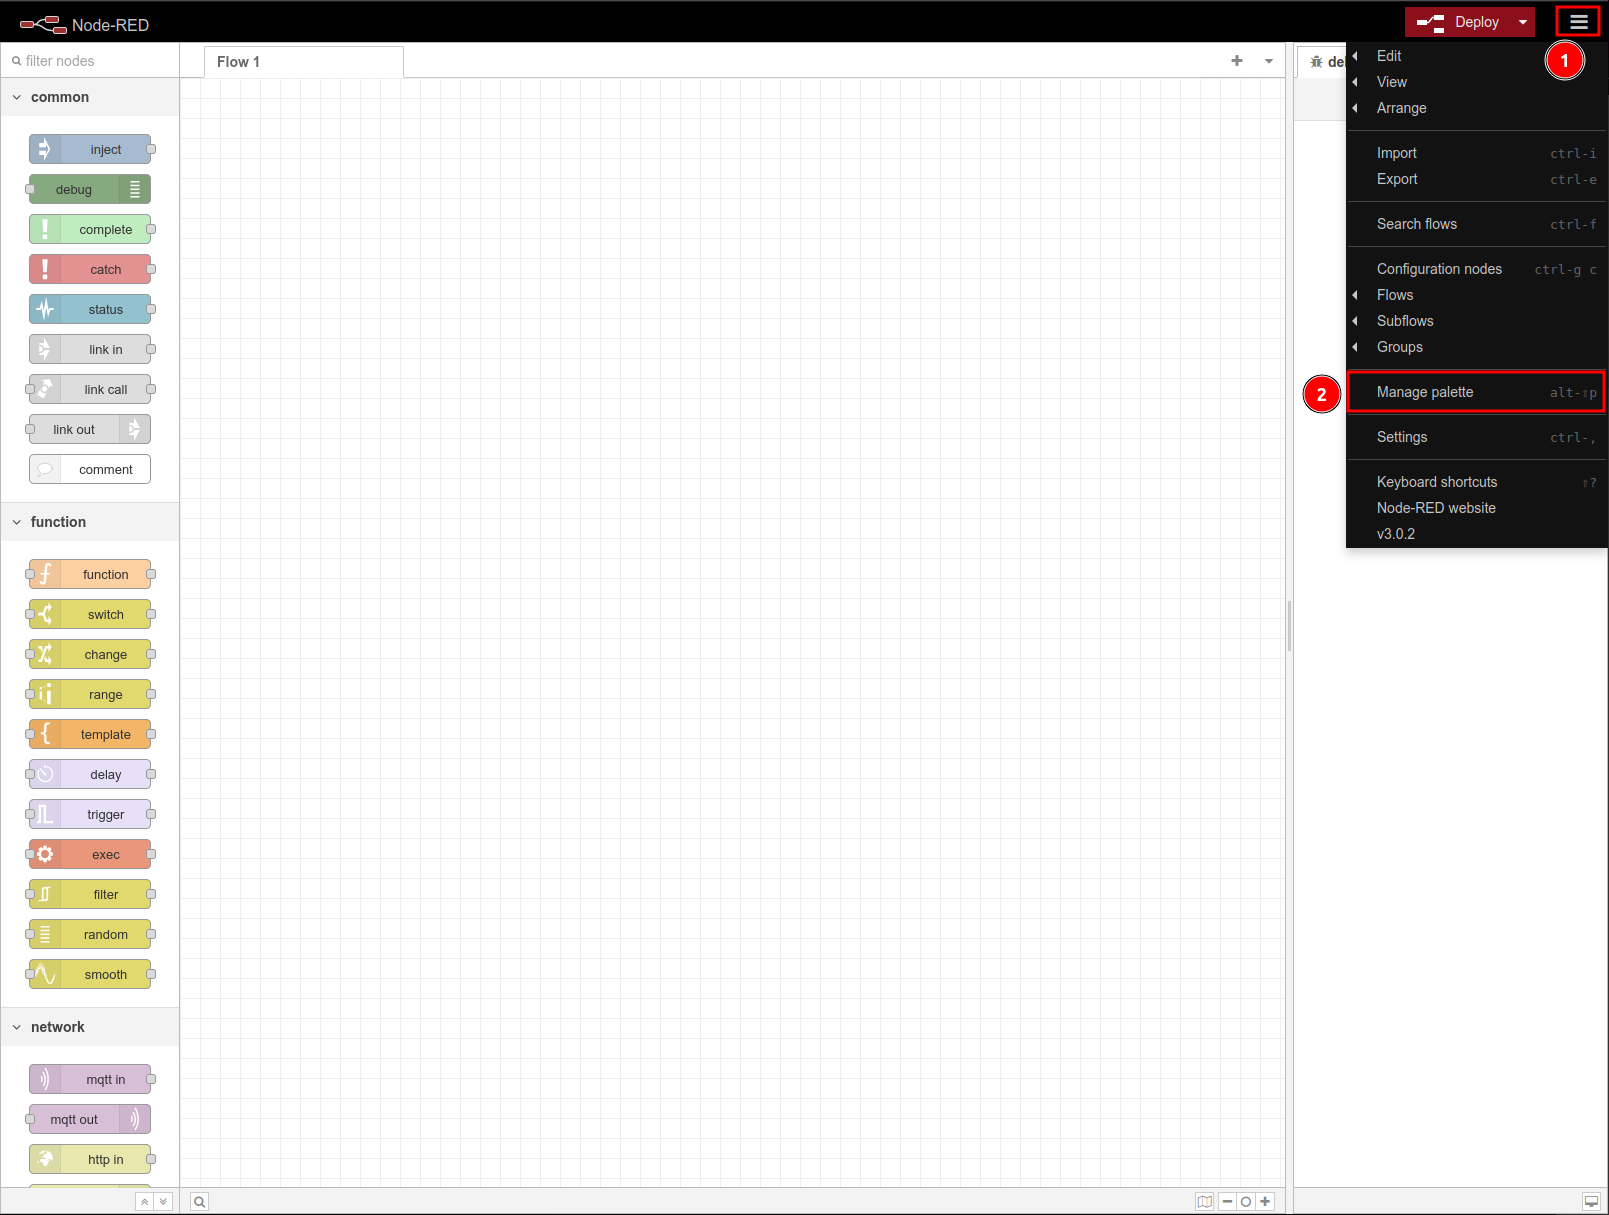
STEP 1: Click the Settings button with "three dash" icon located at the right corner and then select the Manage palette
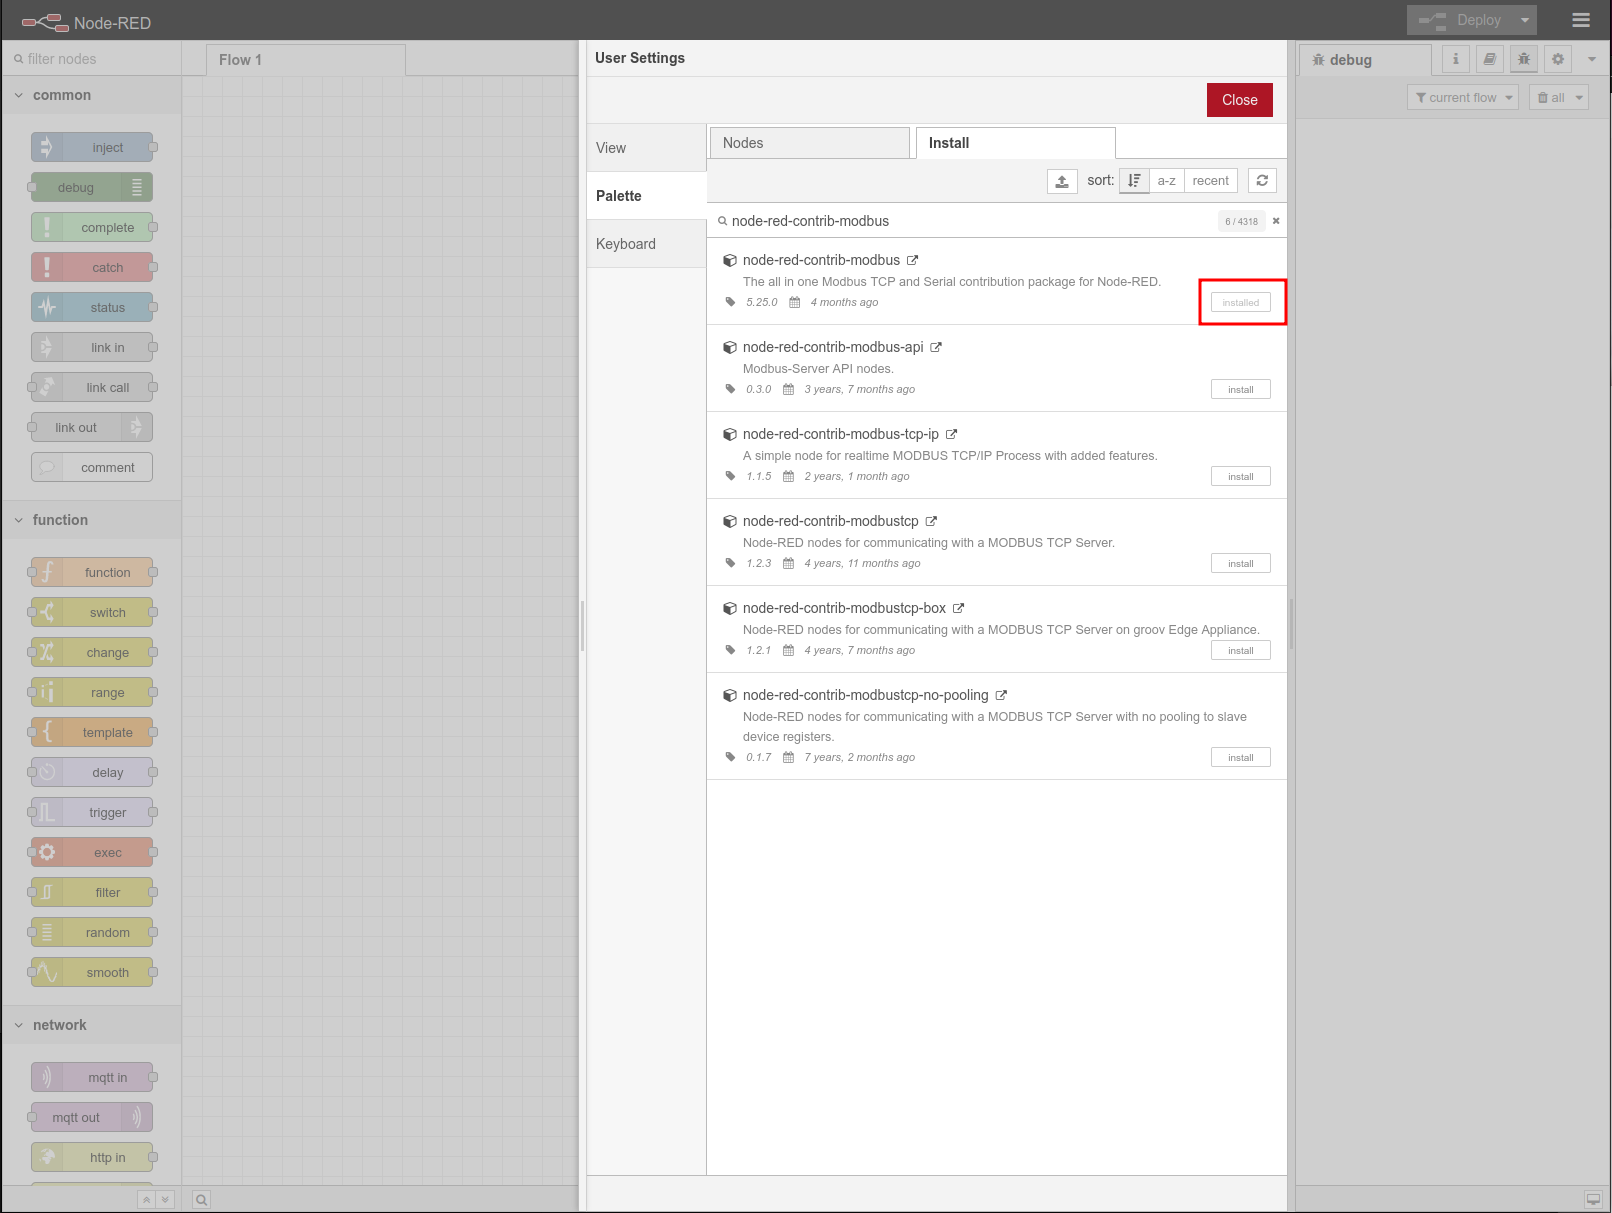
STEP 2: At the palette tab click Install tab
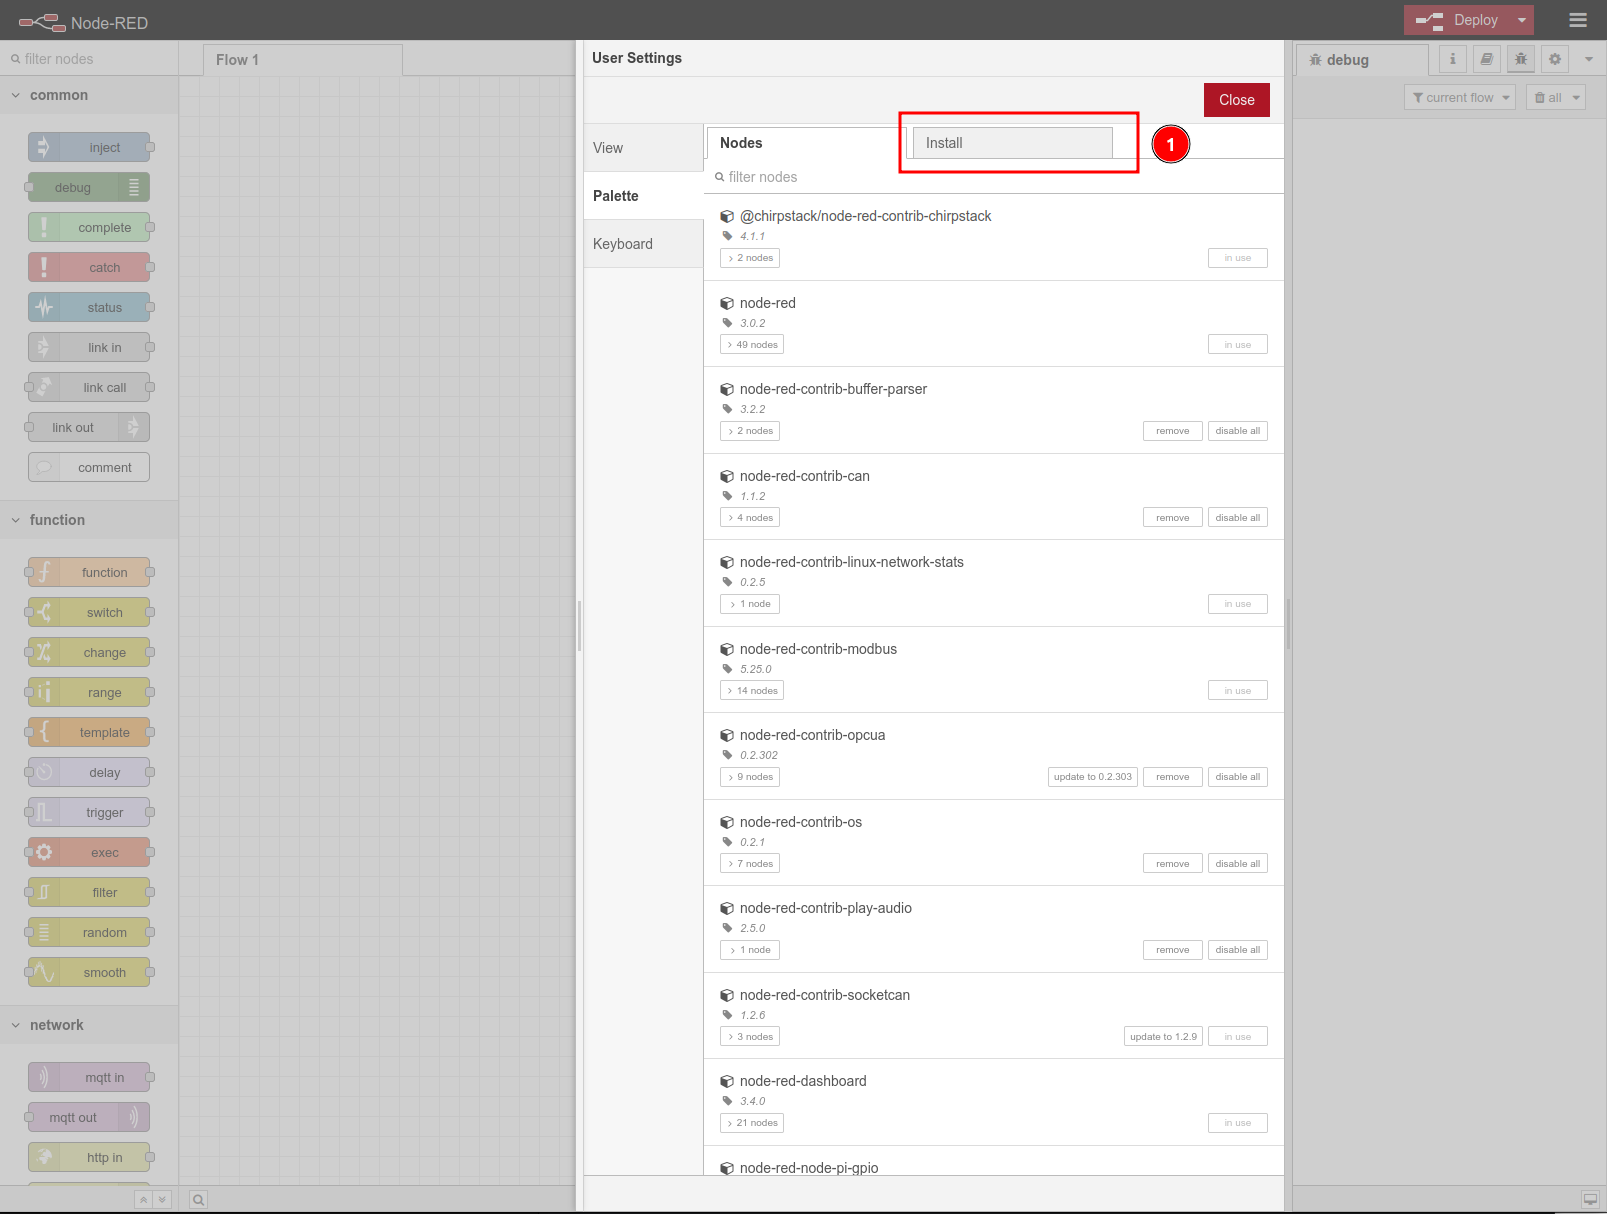
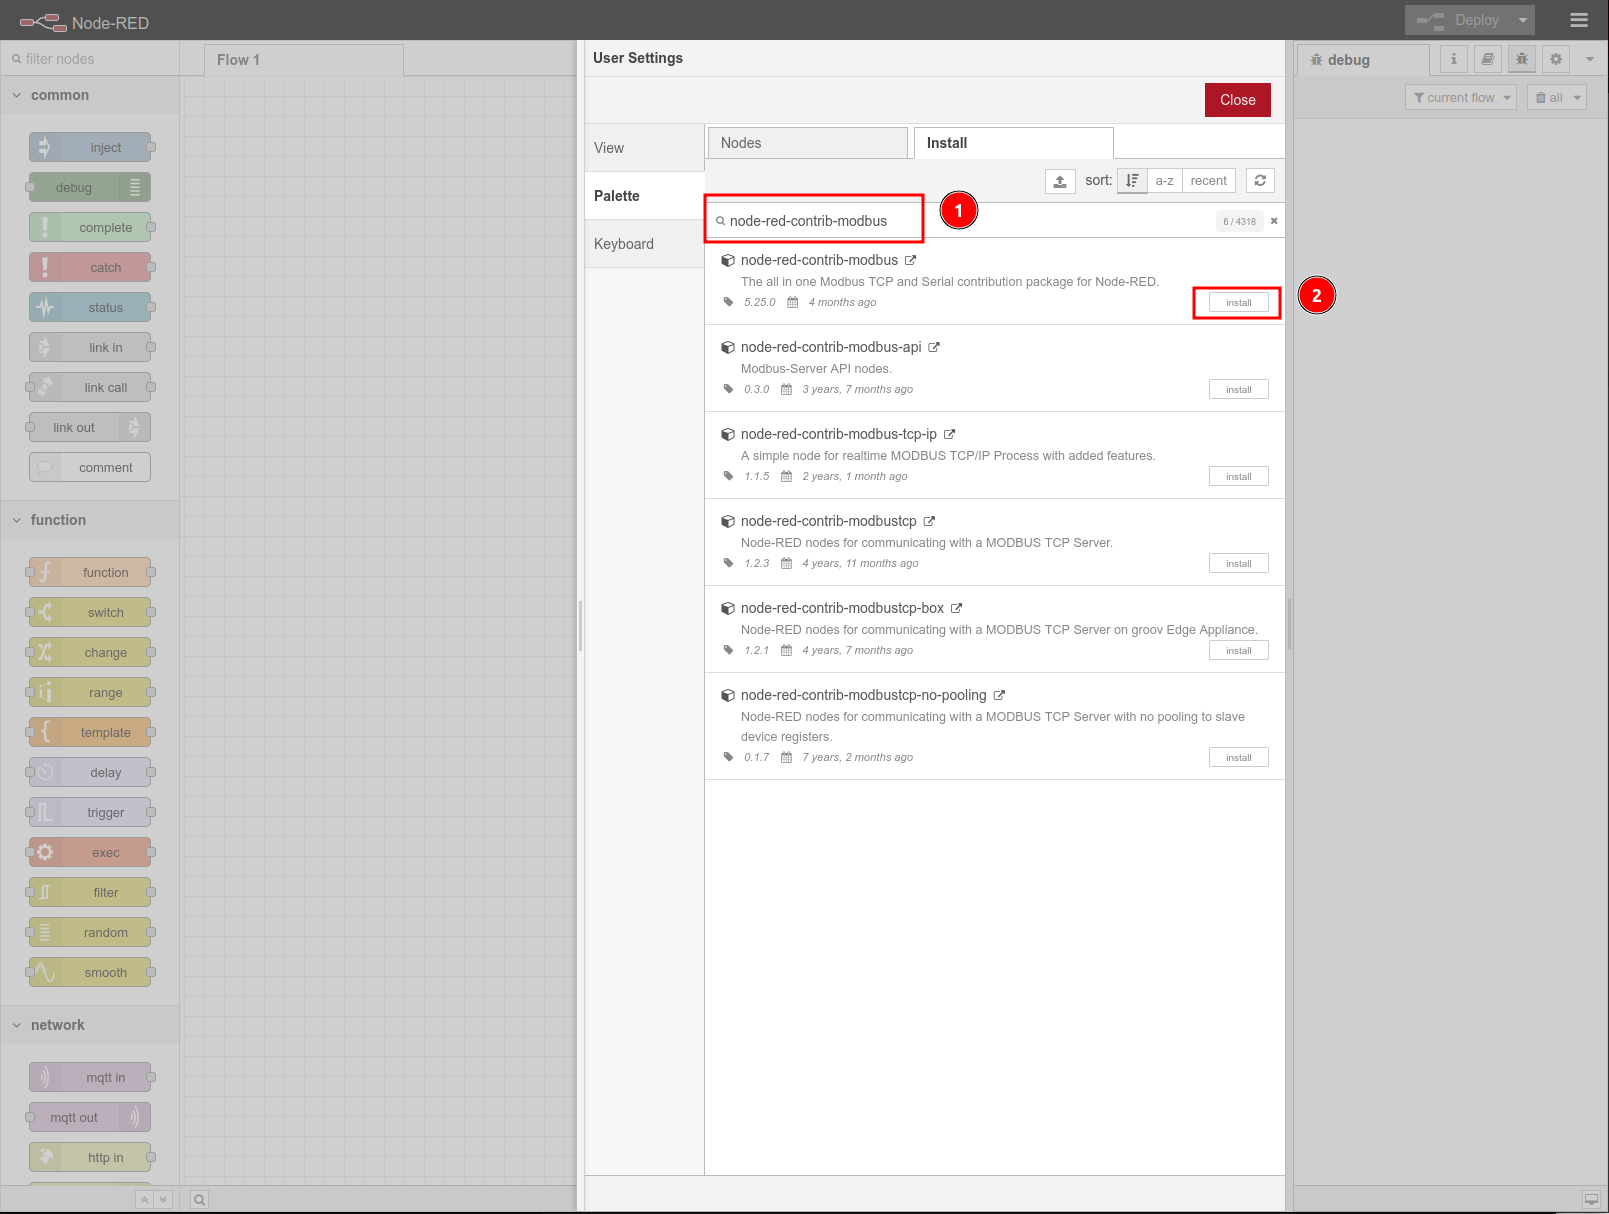
STEP 3: Search for the node in the node search bar and Click install button to install
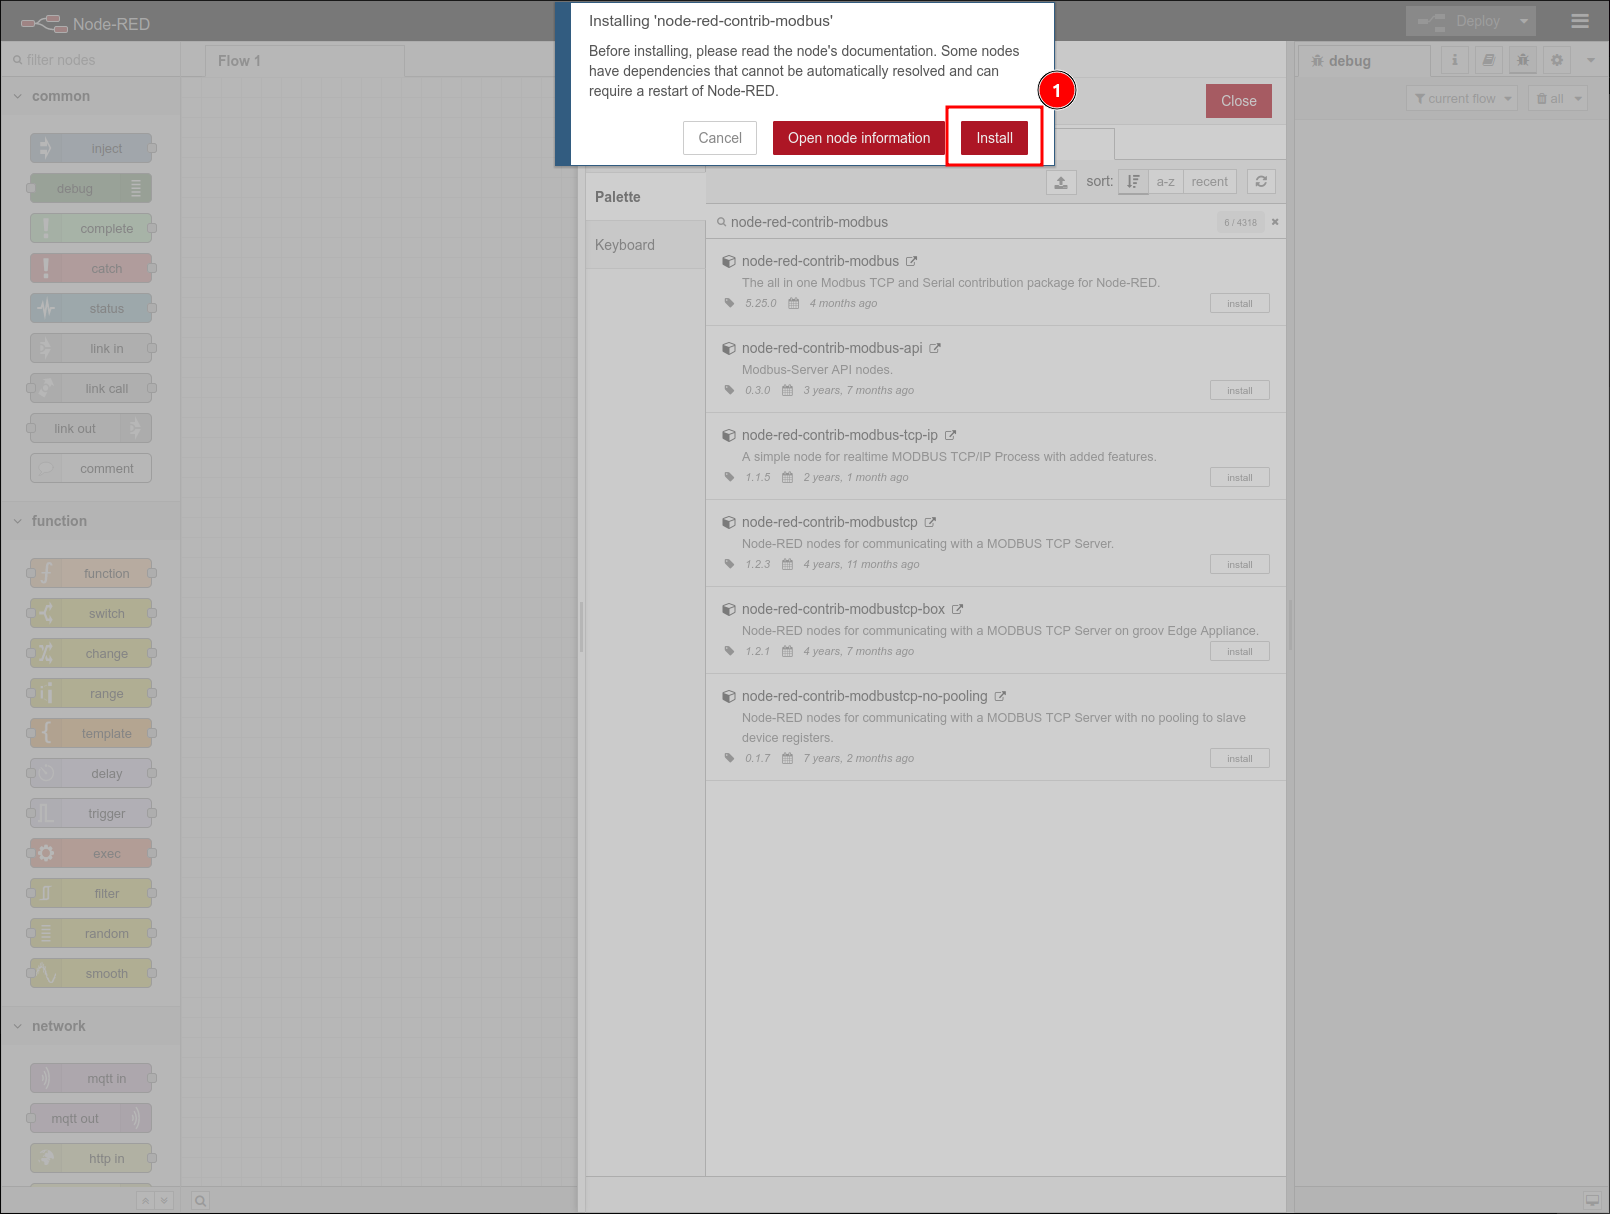
STEP 4: click on 'Install` button from the dropdown warning window to confirm install
STEP 5: Wait for the installation to complete and you should see the install button changed to installed
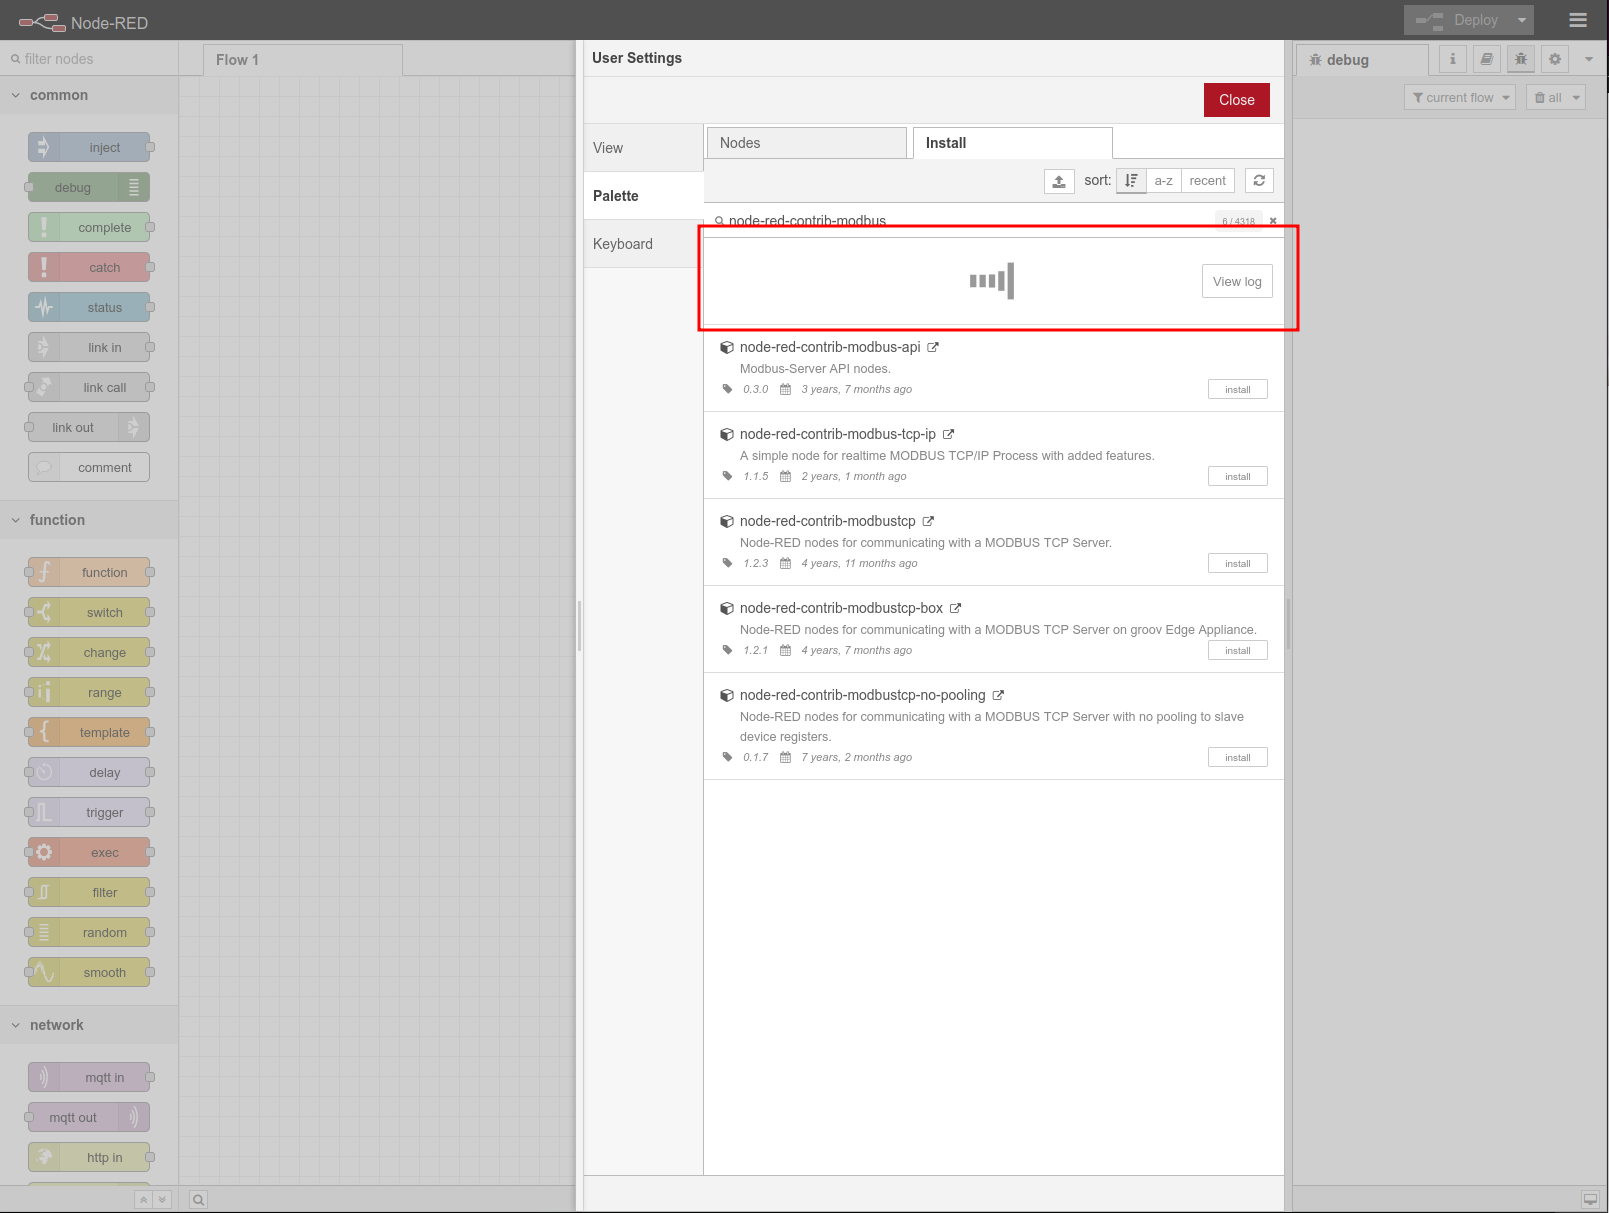
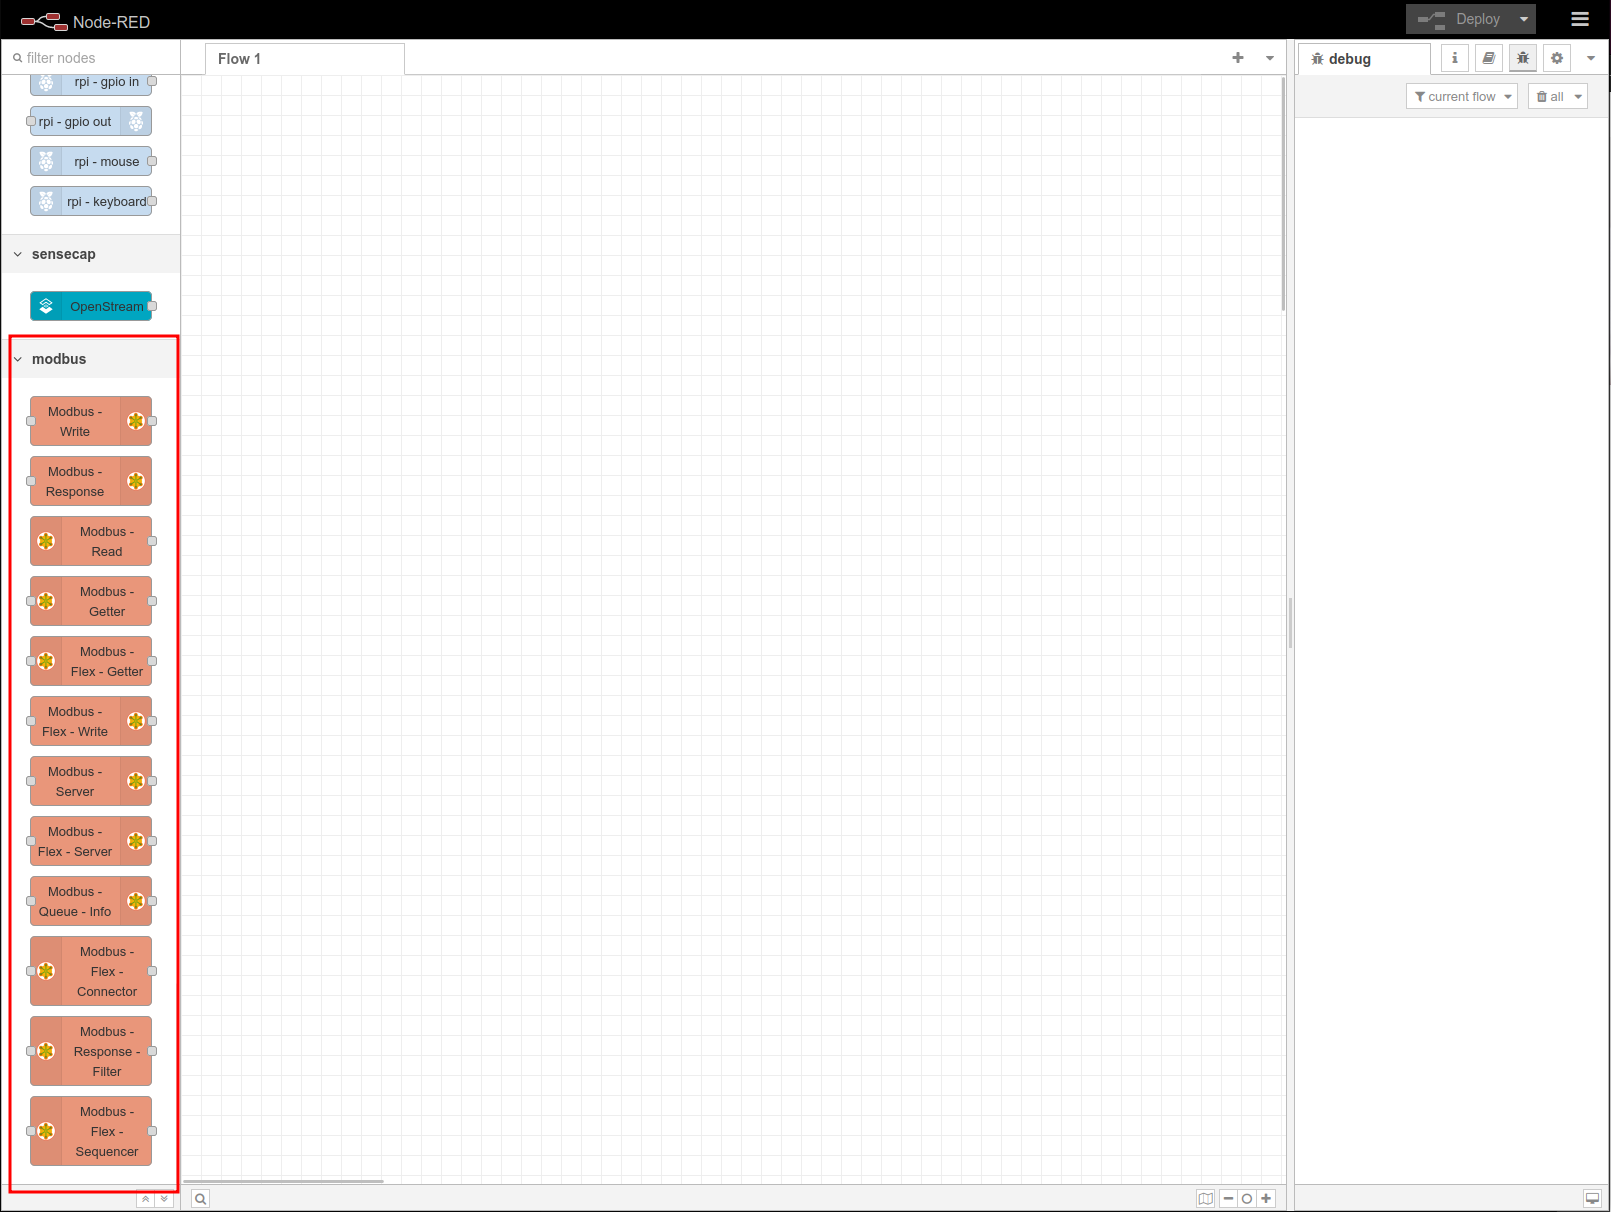
STEP 6: you should see the Modbus nodes in the side bar
reTerminal DM Supported Nodes
- reTerminal DM RS485 Port with Node-RED
- reTerminal DM MQTT with Node-RED
- reTerminal DM CAN BUS with Node-RED
Tech Support & Product Discussion
Thank you for choosing our products! We are here to provide you with different support to ensure that your experience with our products is as smooth as possible. We offer several communication channels to cater to different preferences and needs.