How to Set the API Key
Note: OpenAI API services may not be available in certain countries such as China, Iran, and Russia. Please refer to the list of supported countries and territories for more information.
Ensure that your network environment allows for connectivity to the OpenAI API.
Get a API key
- Step 1: Log in https://platform.openai.com/signup If you don't have an account already, you'll need to sign up for one.
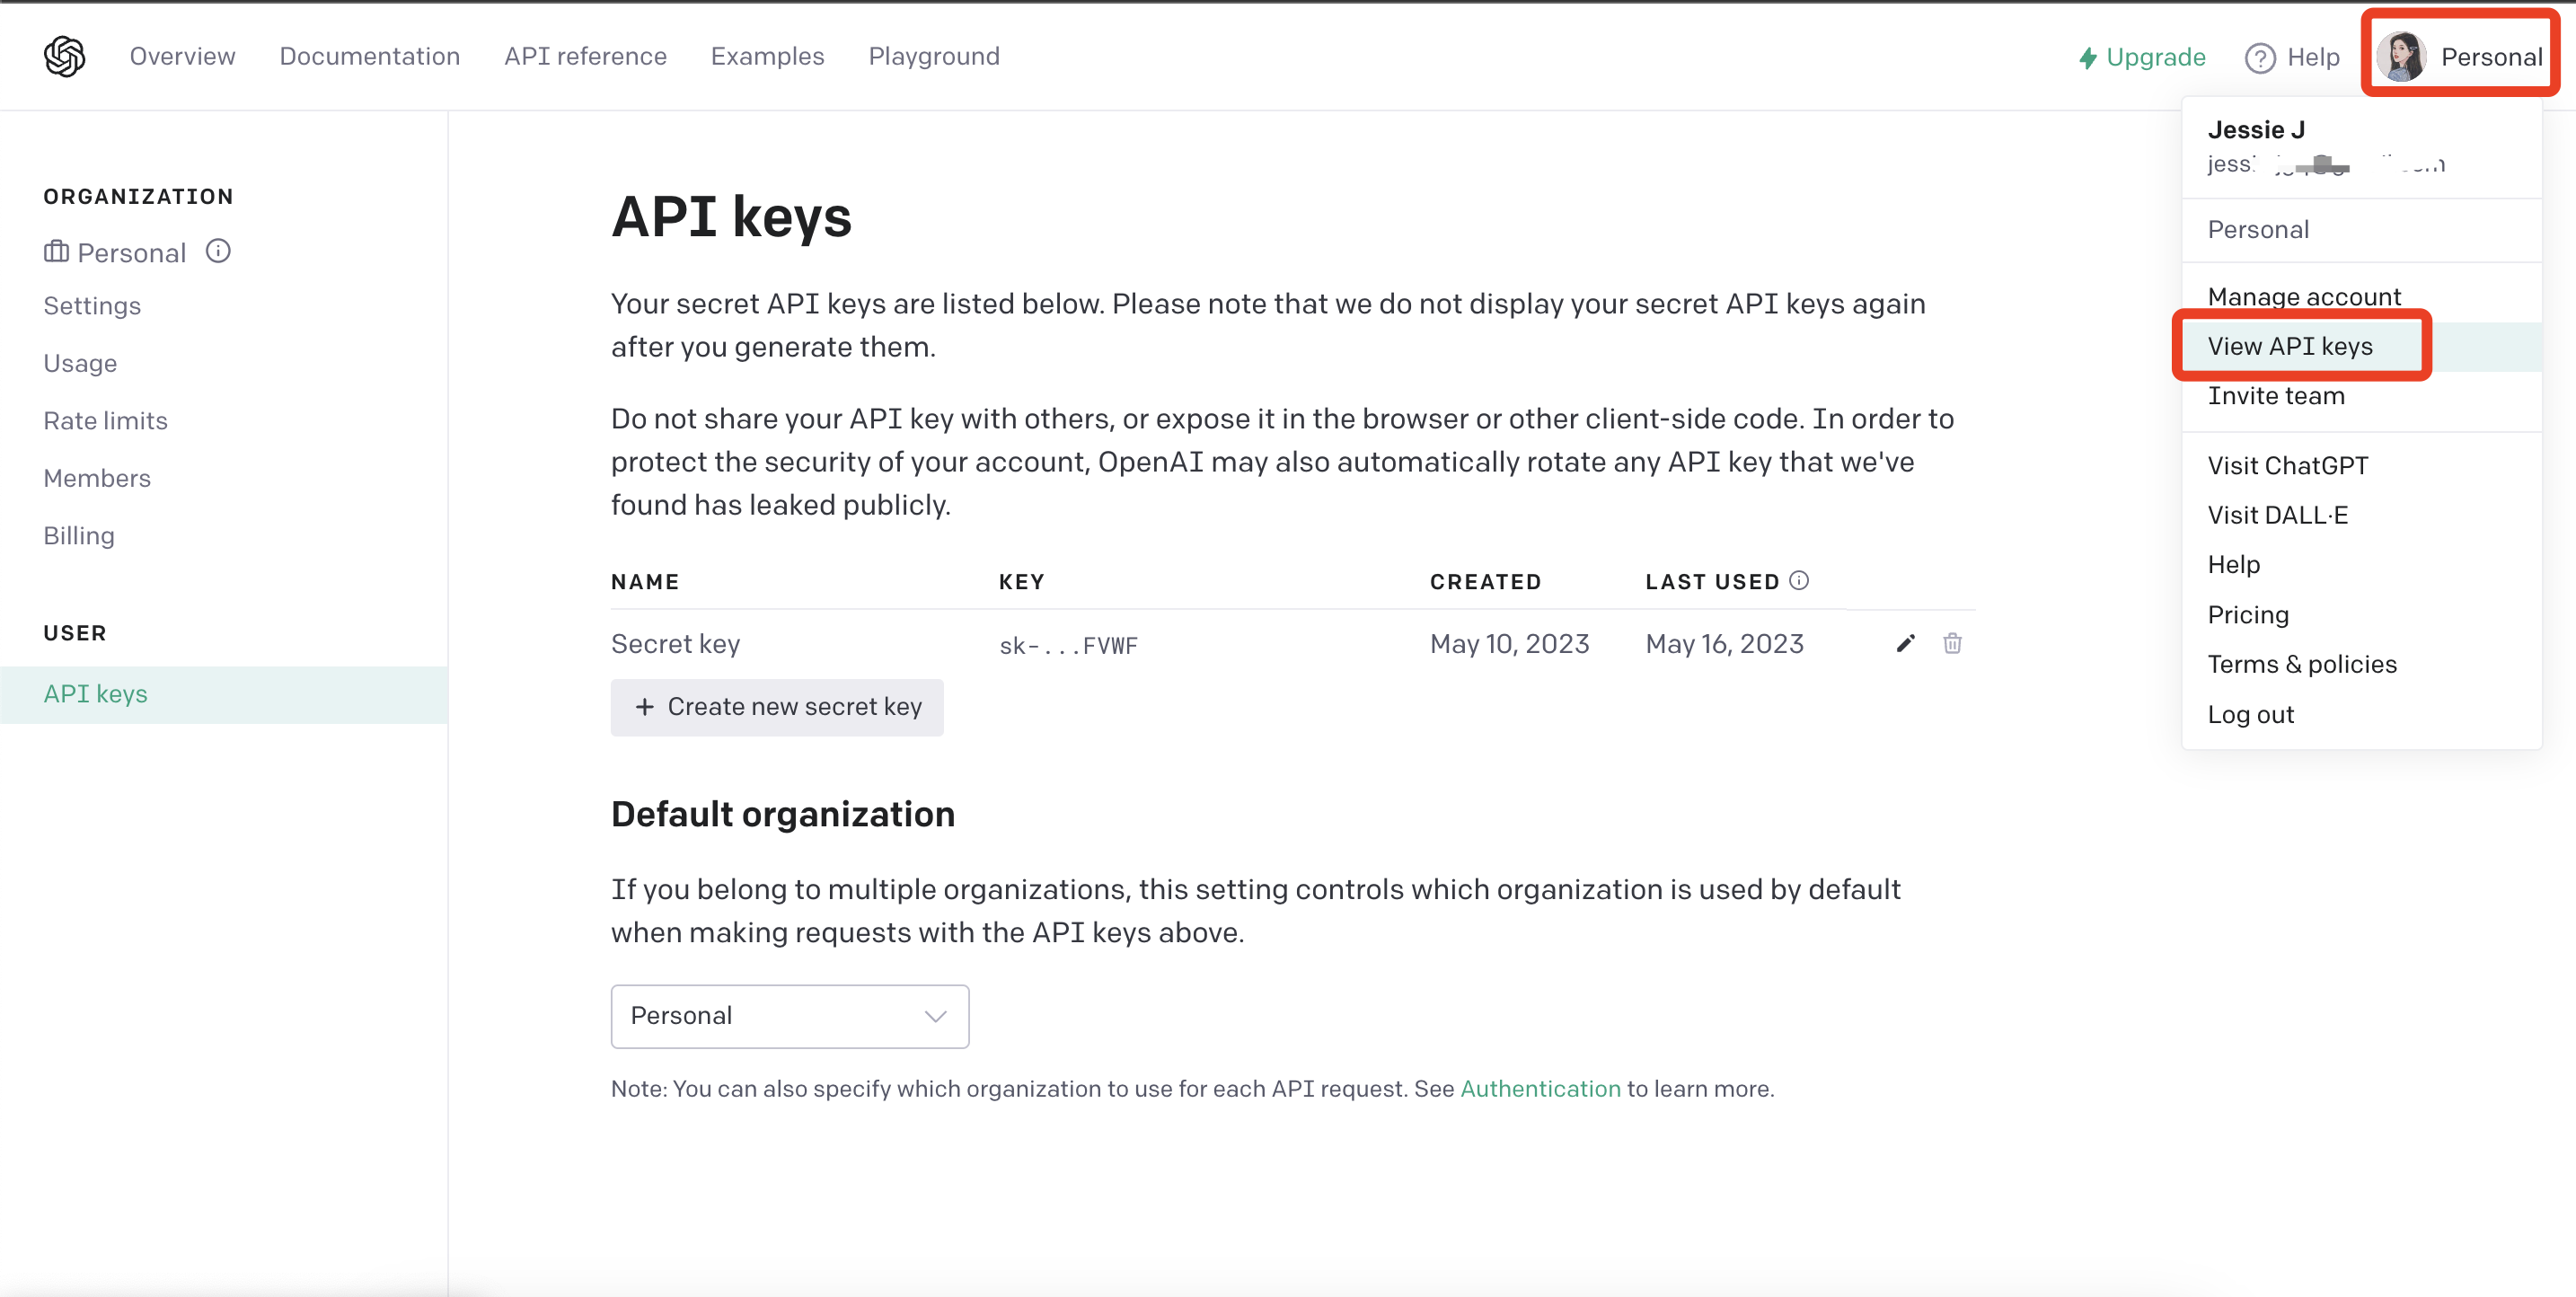
- Step 2: Visit your OpenAI key page or click the menu item "View API keys"
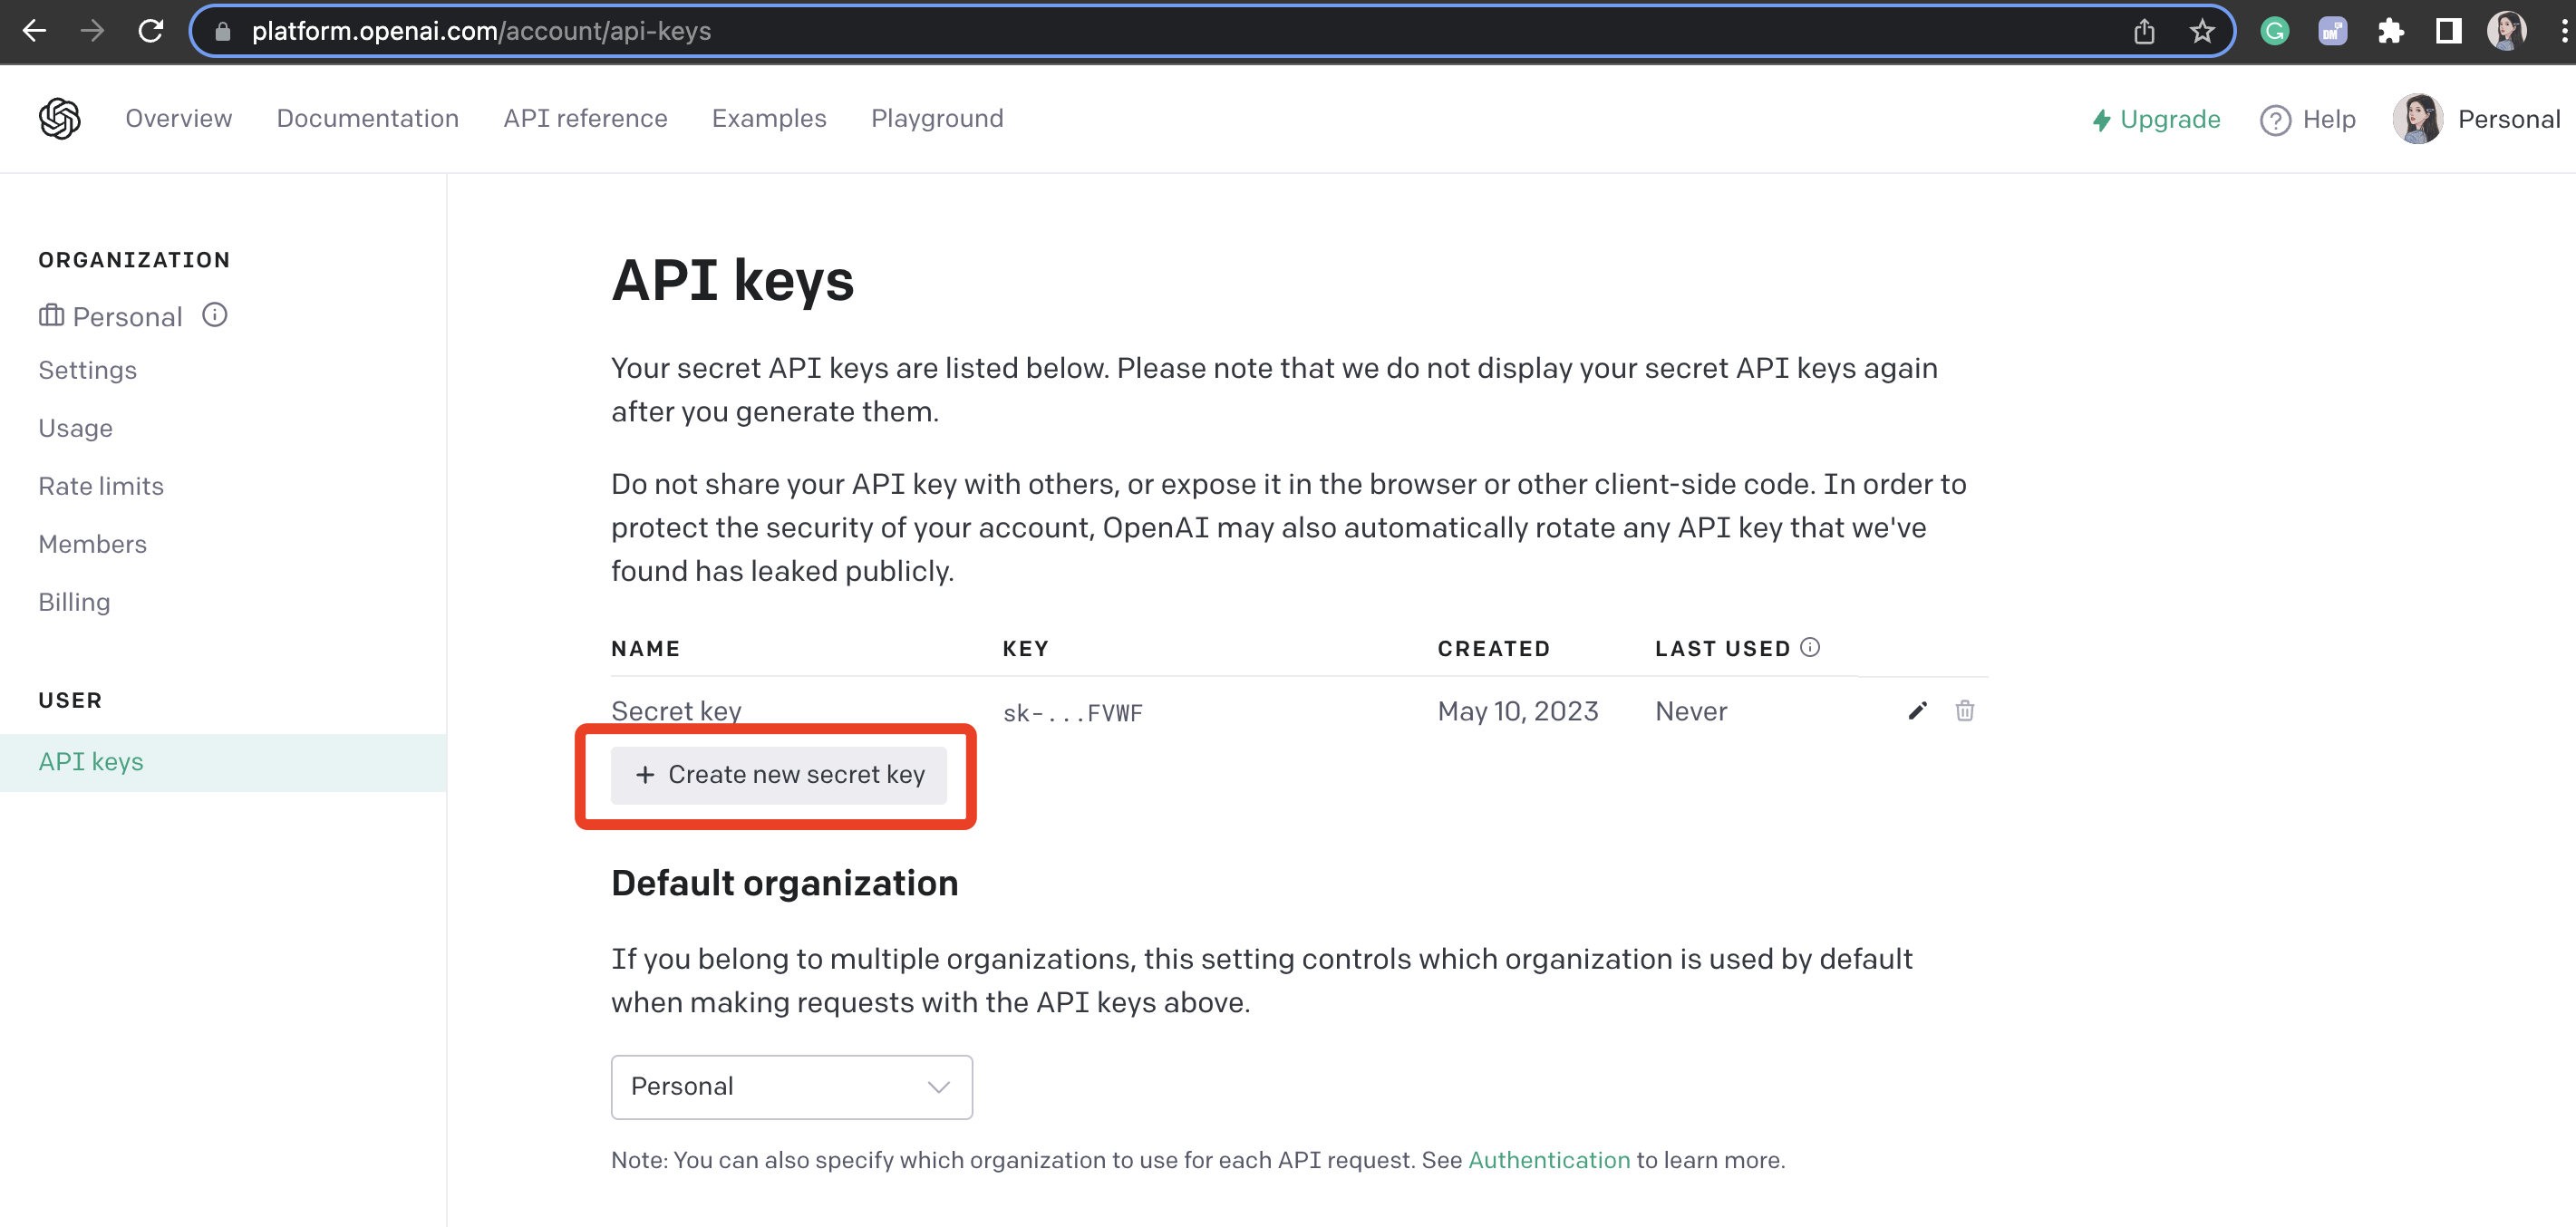
- Step 3: Create a new key by clicking the "Create new secret key" button. See the image for reference.
Rate limits: OpenAI enforces rate limits on the requests you can make to the API. These are applied over requests-per-minute, tokens-per-minute, or in the case of image models, images-per-minute.
Learn more in the rate limits documentation, or reference the default rate limits for your models.
Set a key
- Step 4: Connect to the Indicator via serial port (Here, Using the serial monitor tool provided by Arduino IDE).
Select the board and port.
- Board: Seeed INDICATOR RP2040
- Port: usbserial port
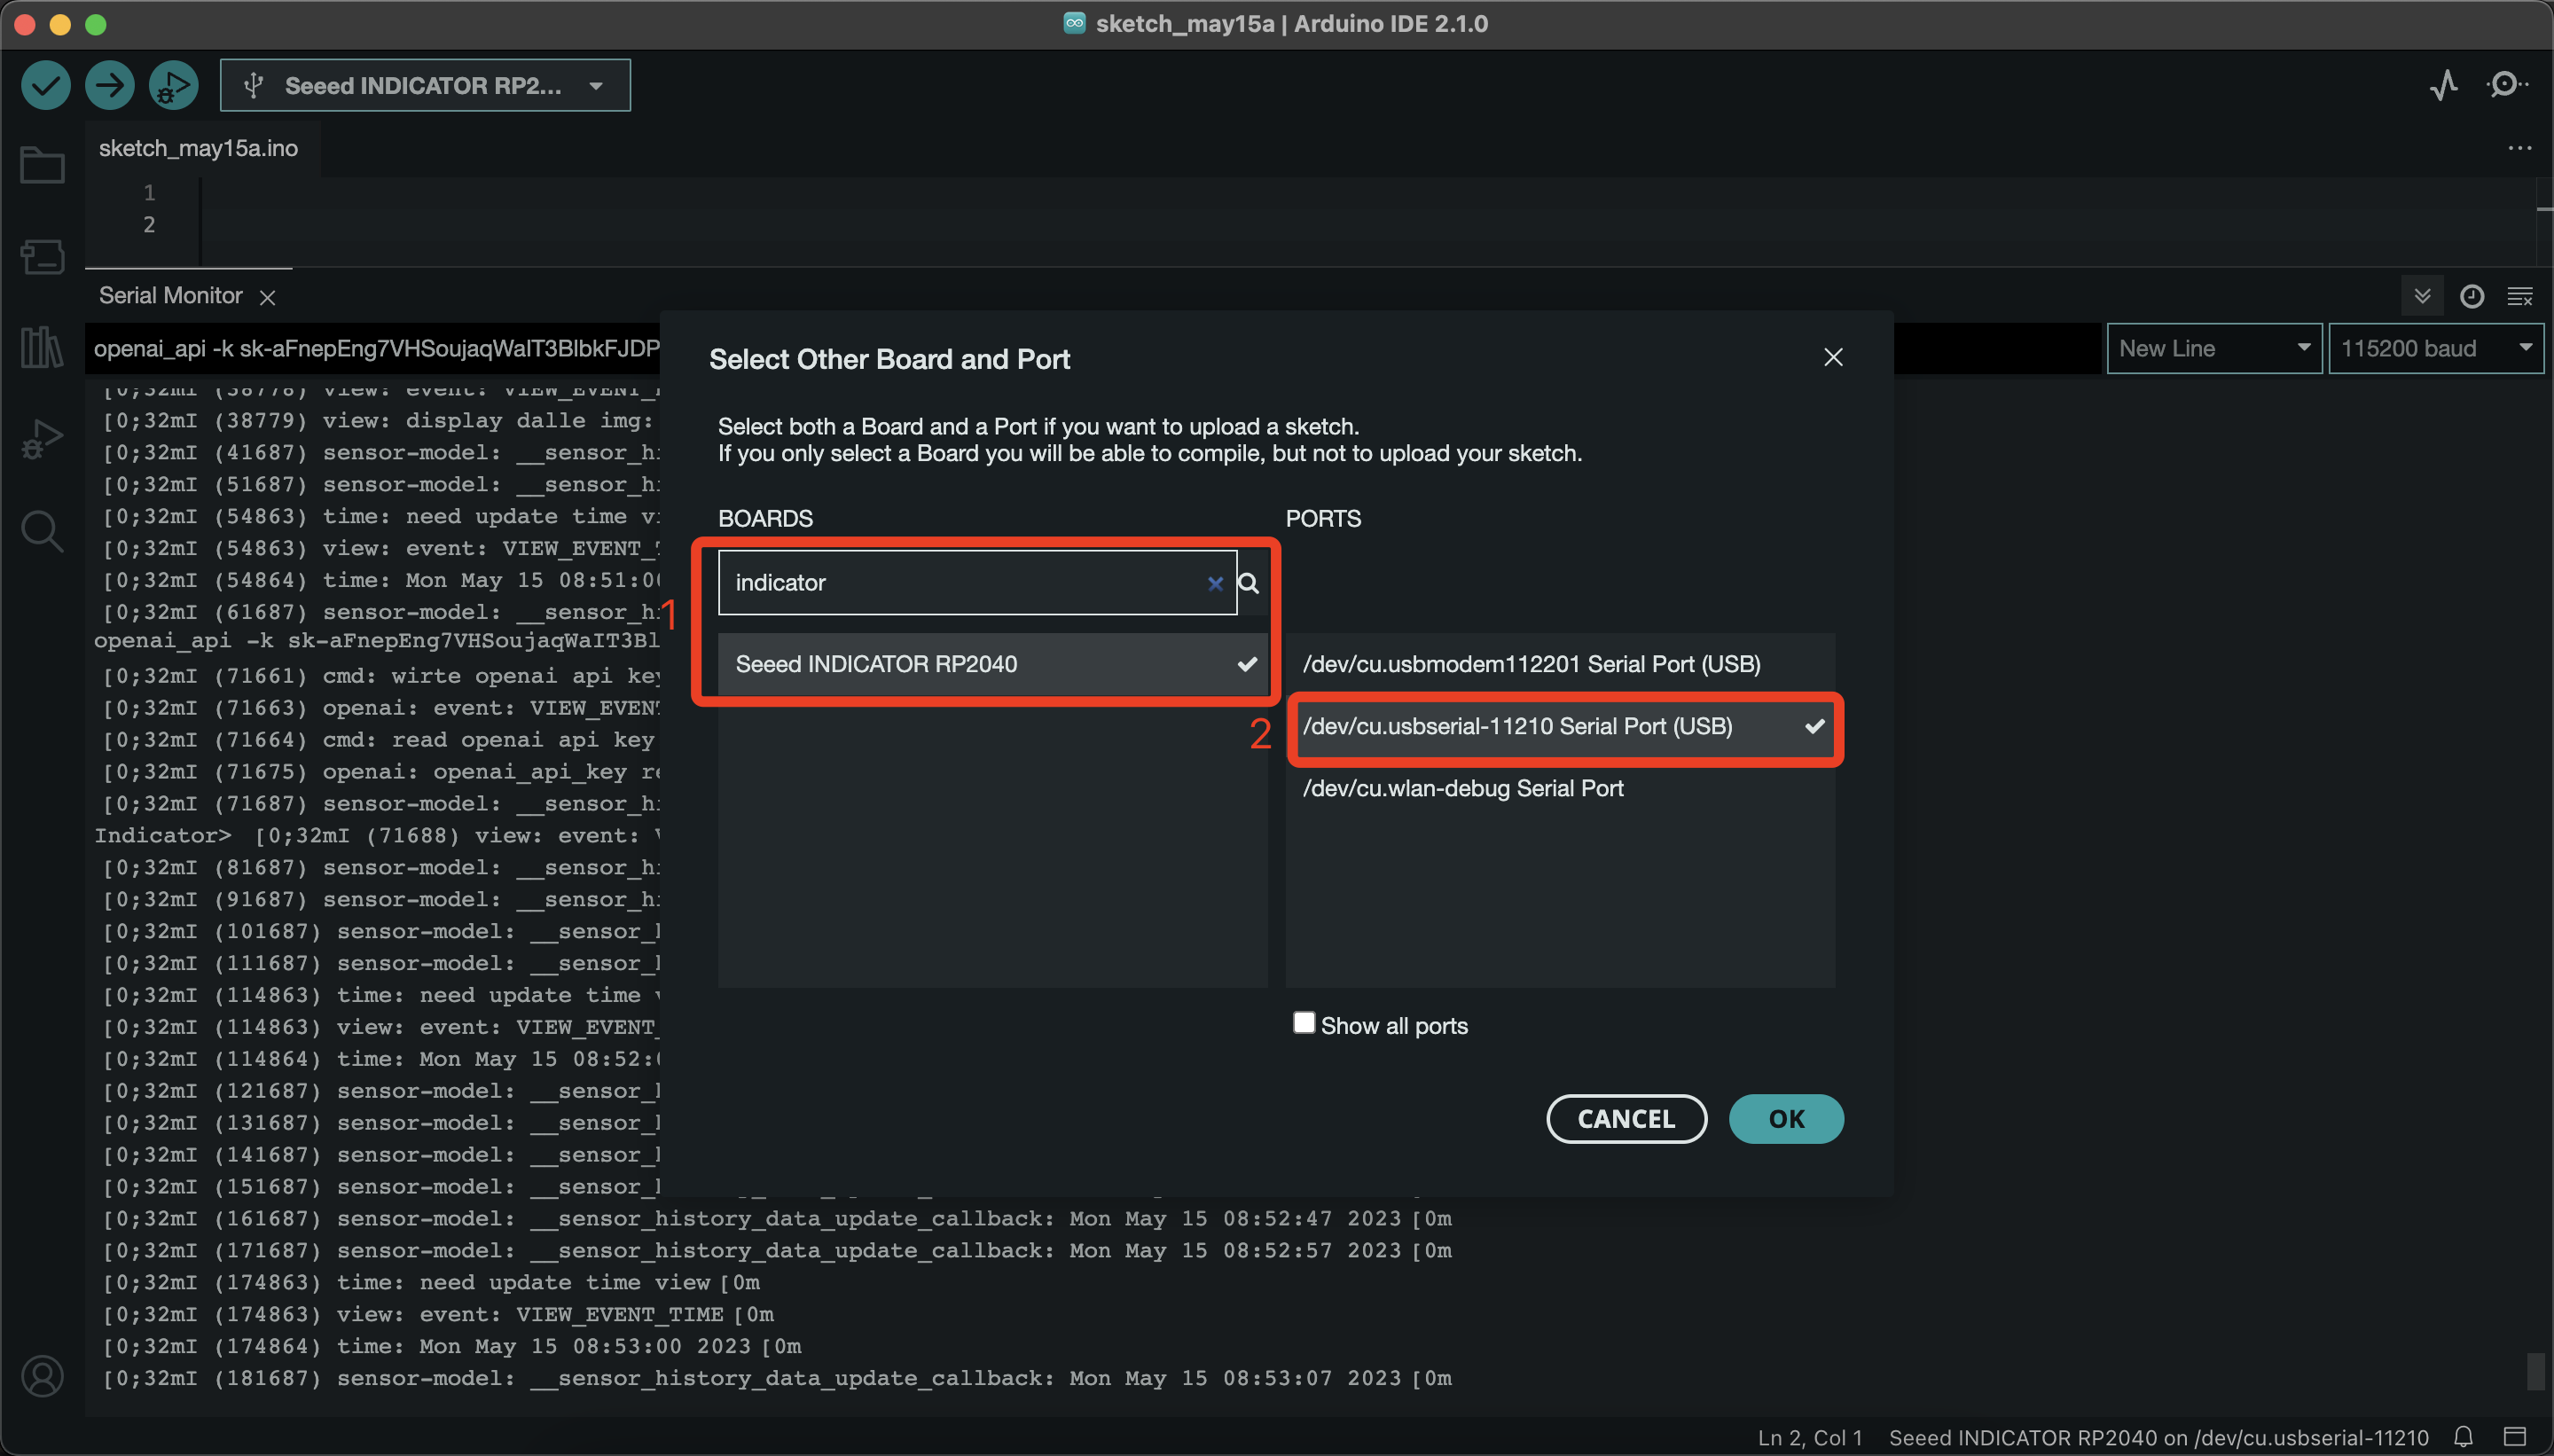
- Step 5: Open the port monitor.
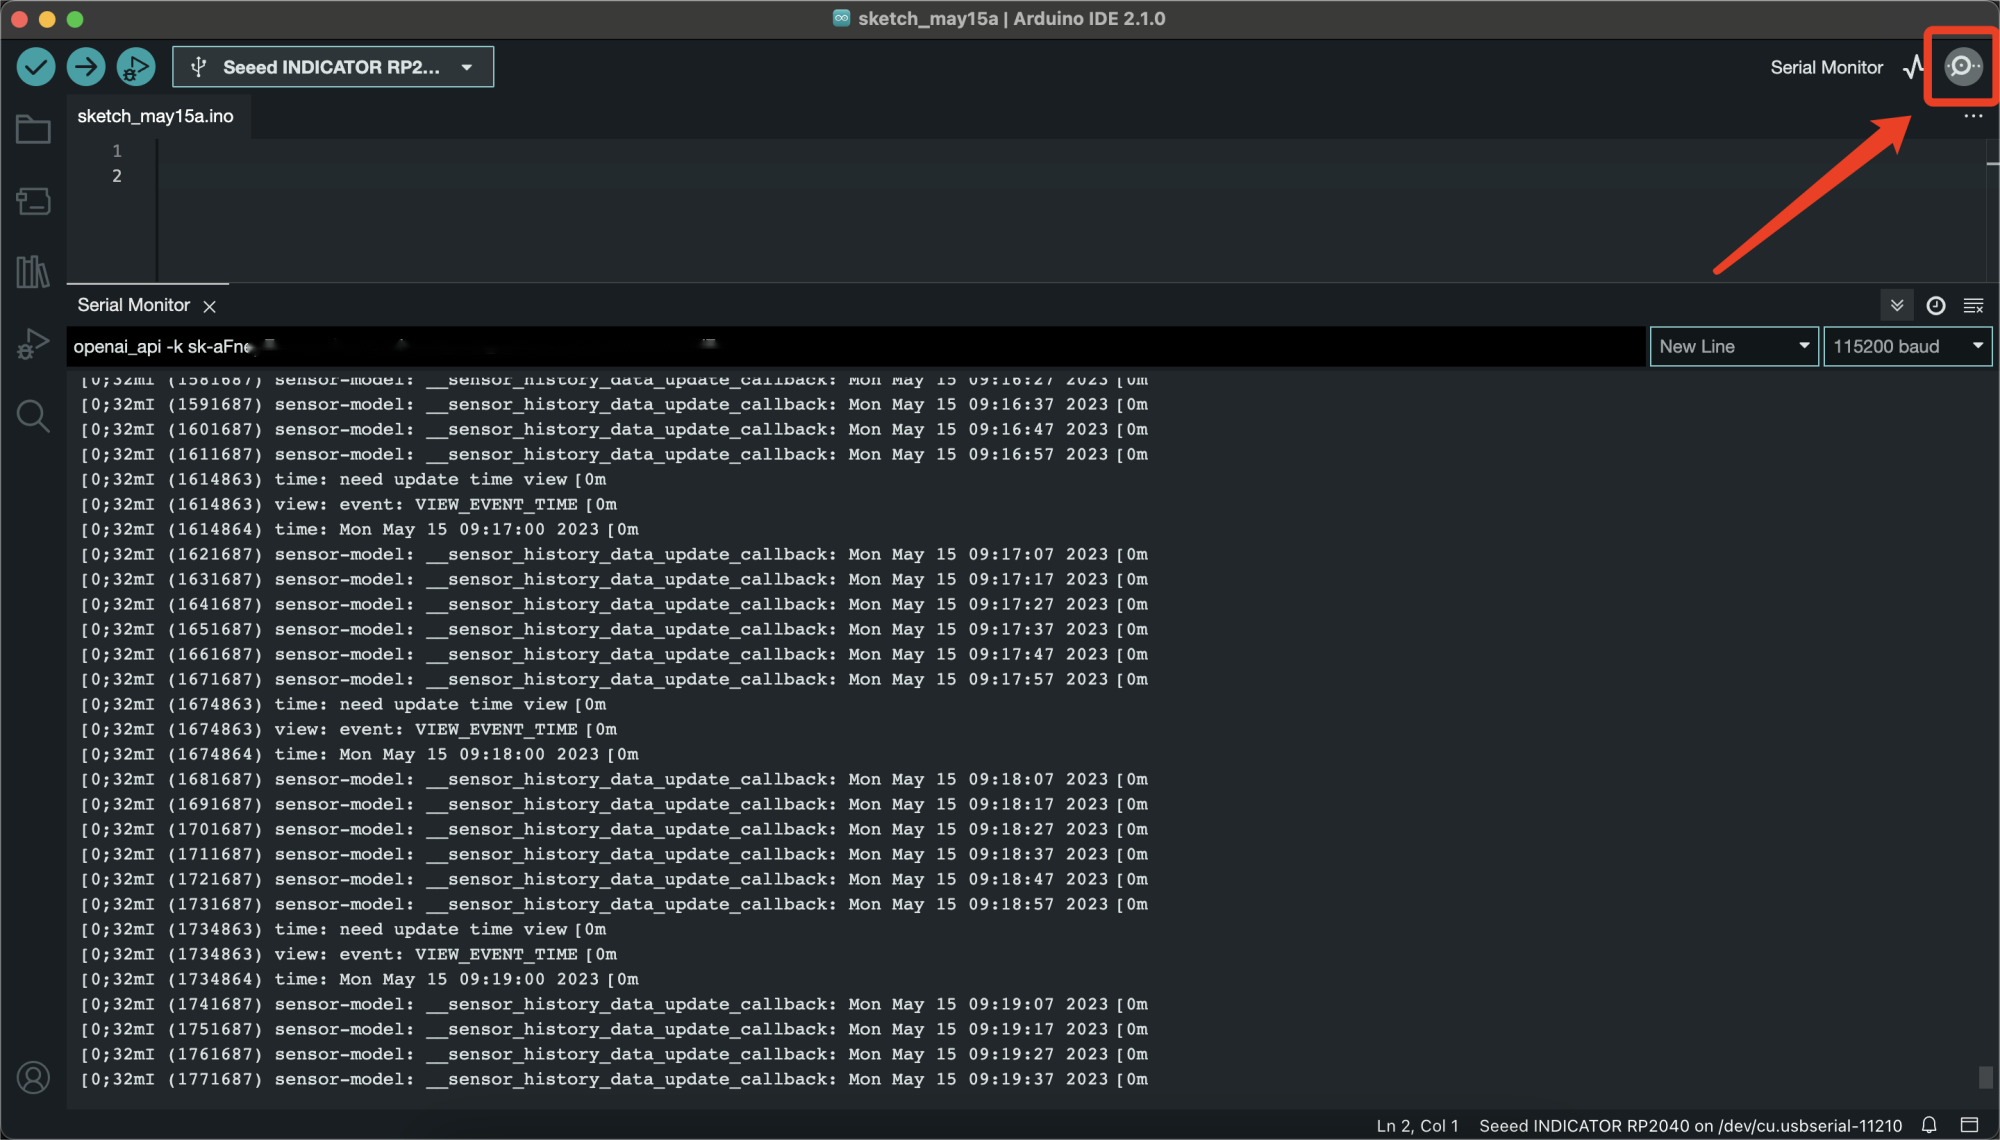
- Step 6: Send the following command to the device to set the APIKey:
openai_api -k {sk-your apikey}
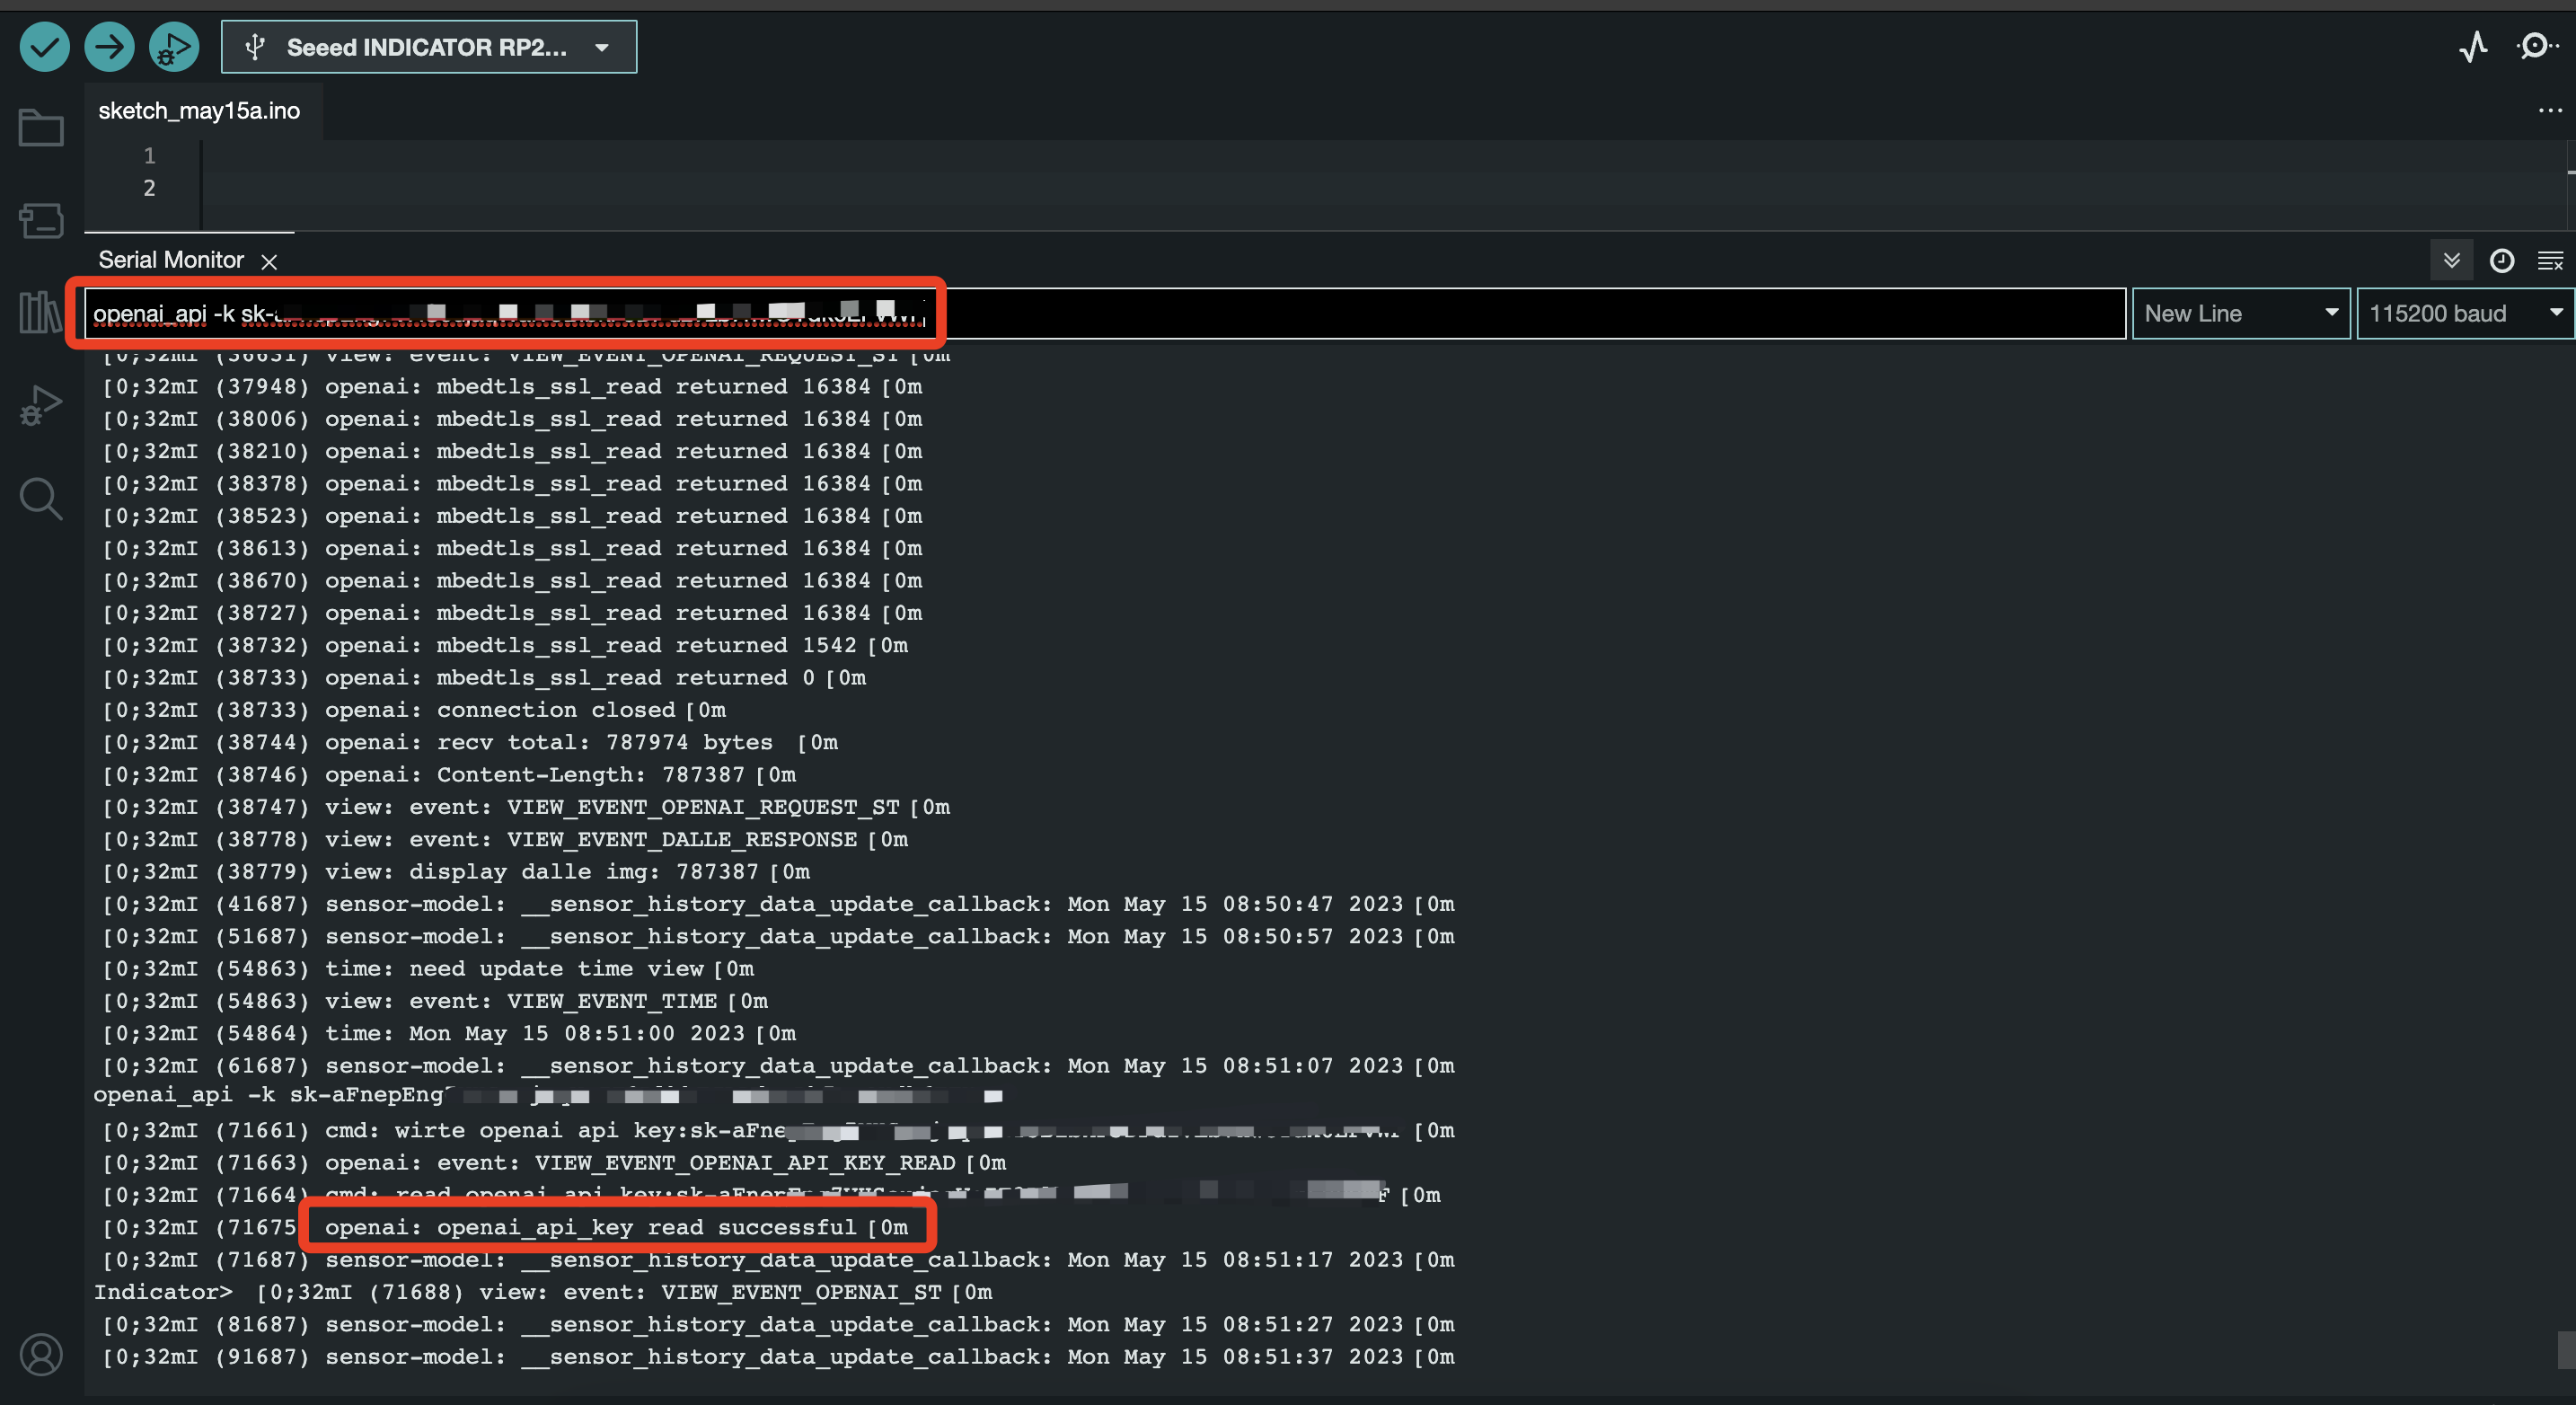
You will see the log shows: "openai_api_key read successful", then you are all set. Enjoy your AI journey now!
Tech Support
Need help with your SenseCAP Indicator? We're here to assist you!