The Things Indoor Gateway

Product Introduction
The Things Indoor Gateway is a The Things Network product featuring high reliability, high performance, and cost-effective. It is an 8-channel LoRaWAN gateway based on SX1308 with build-in ESP8266 WiFi connectivity. With multiple versions and various power outlets available, it satisfies a wide range of applications requiring dynamic coverage. As an IoT gateway designed by The Things Network, it enjoys all the superior functions TTN provides to its customers. And of course, this gateway is able to connect with the secure and collaborative Internet of Things Network which is built that spans across many countries around the globe to provide coverage to millions of people. The tool which a lot of people apply in their community is TTN Mapper. Therefore, you can use this gateway to become one of the contributors of this network by loading onto The Network Console, or enjoy the public community network built up by the other TTN gateways!
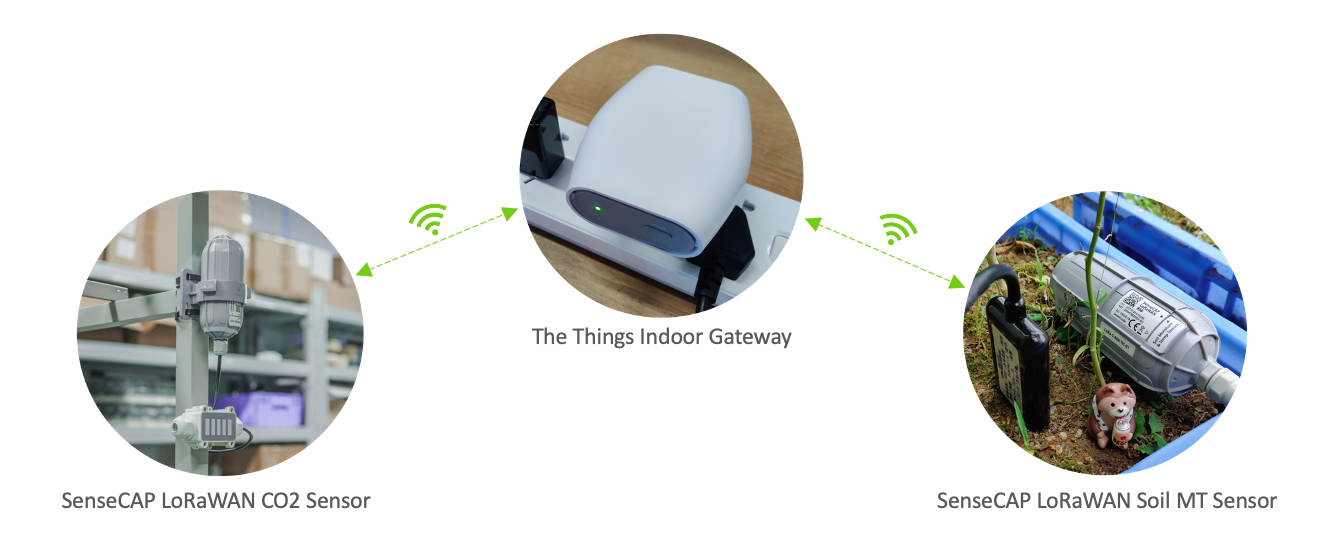
The Things Indoor gateway supports LoRaWAN 1.0.3 and therefore is compatible with other LoRaWAN sensors. Seeed Studio supplies many sensors focusing on various types of wireless environmental sensing applications. If you also need some sensors for outdoor scenarios measuring CO2, soil moisture, and temperature, just to list a few, SenseCAP sensors are your best choice.
With the use of The Things Indoor LoRaWAN WiFi Gateway, The Things Network Console, and SenseCAP LoRaWAN Sensors, you can easily build up your own IoT system at home, in your garden, in the office, supply chain, and factories. By following the step-by-step installment instruction provided below, you can set up the LoRaWAN gateway for your own in less than 5 mins and start your IoT journey!

Features
- Easy installment: back-haul over 802.11 b/g/n WiFi via ESP8266; Simple setup in less than 5 mins
- Globally Use: EU868, US915, and AU915 available; support LBT (Listen-Before-Talk)
- Advanced Software: Support the state-of-the-art BasicStation Protocol
- Great Reliability: Certified by CE/FCC/IC/RCM/WPC/RoHS
- Convenient: Compact design for carrying; can be powered up via multiple power options: both wall plugs and USB type C on 900mA work. Built-in omnidirectional antenna for domestic use
- Powerful capability: 8 channel LoRaWAN indoor gateway based on SX1308
Specifications
LoRa
| Parameter | Value |
|---|---|
| Chipset | Semtech SX1308 |
| Channels | 8 Channels |
| Receive Sensitivity | -140/-135 dBm (EU/US) |
| Transmit Power | Upto +27 dBM |
| LoRaWAN® Spec Version | V.1.0.3 |
| Packet Forwarder | Basic station protocol |
Wi-Fi
| Parameter | Value |
|---|---|
| SoC | ESP9266 |
| Mode | 802.11 b/g/n, Client Mode |
| Tx Power | +20 dBm |
| Frequency Bands | 2.4 GHz |
| WAN/LAN ports | - |
| USB Port | USB Type-C (900 mA) |
| Security | WPA/WPA2 |
| Dimensions | 908040 mm |
| Operating Temperature | 0-40℃ |
| Certification | CE/FC/IC/RCM/WPC/RoHS |
Other Specifications
| Parameter | Value |
|---|---|
| Interfaces | LED indicators |
| Antenna Type | Integrated |
| Frequency Band | AU915 |
Sources
- Get Started The Things Indoor Gateway
- The Things Indoor Gateway Datasheet
- Getting started in for AWS
The Things Indoor Gateway Get Started with SenseCAP
NOTE: If you don't know about SenseCAP, here is a brief intro:
Among the first launch of Seeed industrial IoT (IIoT) product series, SenseCAP is focusing on wireless environmental sensing applications: smart agriculture, precision farming, and smart city, to name a few. It consists of hardware products (sensors, data-loggers & gateways, etc.), software services (SenseCAP portal, mobile App, open dashboard), and API for device & data management. SenseCAP supports different communication protocols, such as LoRa, 2G, 4G, NB-IoT, and more.
To learn more, kindly click the SenseCAP Introduction
Step 1: Activate your TTIG Gateway
- Press the reset button (small button at the back of the gateway next to the USB-C port) for 5 seconds until the LED blinks rapidly GREEN-RED for a couple of times.
- Hold the SETUP (button at the top of the gateway, next to the LED) for 10 seconds until the LED blinks rapidly in RED.
- The gateway now exposes a WiFi AP whose SSID is MINIHUB-xxxxxx where xxxxxx is the last 6 digits of the gateway ID.
- The password for this network is printed on the back panel of the device under WiFi PW.
- Afterwards, access 192.168.4.1 on your browser to enter the WiFi config page.

- Select the WiFi network and enter the password if it's a closed network.
- Select the "Save and Reboot" option.
- If your config is right:
- The gateway will blink GREEN for a few seconds while it connects to this network.
- Then, it will blink GREEN-RED for a few seconds while it connects to the CUPS endpoint and fetches the necessary information to connect to the LNS traffic endpoint.
- If your configuration was successful, the LED will be solid GREEN which means that the gateway is connected to the LoRaWAN network and is ready to handle packets.
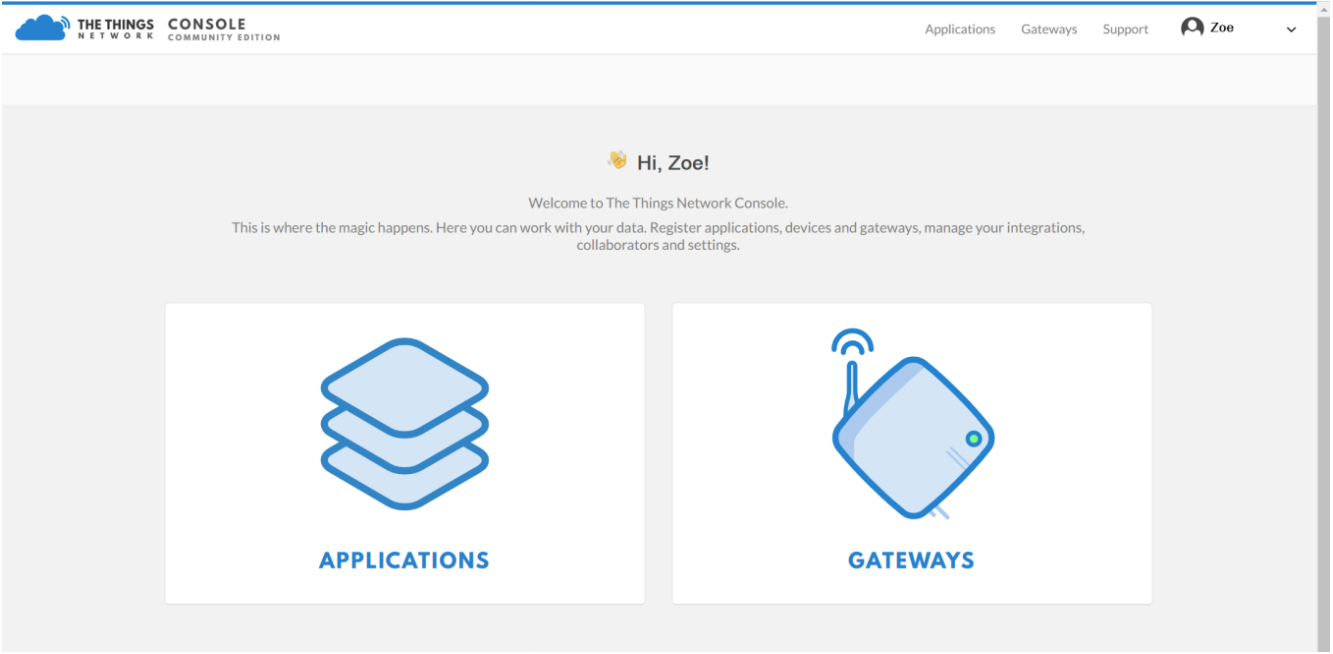
Step 2: Gateway Registration on TTN Console
Load into TTN website: https://www.thethingsnetwork.org and create your account, then access "Console" and first click on "Gateway".
Register your gateway:

- Gateway EUI: it is shown on the "Add Network" page 192.168.4.1

- Frequency Plan: View the labels on the gateway.
- Router: Select the router that is right for you.
- Register: Gateway Status displays connected, indicating successful registration

Step 3: Add SenseCAP sensors to the TTN Console
1. Obtain Device EUI, Device Code, App Key, and App EUI
- Device EUI and Device Code are on the SenseCAP product label.

- SenseCAP sensor device's AppEUI and AppKey have been flash into the device by Seeed. Use HTTP API to retrieve App EUI and App Key. You can use browser to issue an HTTP GET request.

In the API, replace the Device EUI and Device Code with your own Device EUI and Device Code respectively. And you will get the follwing response on the webpage which indicates your App EUI and App Key:

2. Add Application and AppEUI
- Enter the page "add application"

- Application ID: Enter a unique name.
- Description: Enter a description.
- Handler registration: select the same handler as the gateway router.
- Select Add Application to continue.


- Application → Application EUIS → Manage EUIs.
- Add EUI
- Enter the node's AppEui that you got in the previous step (step 3.1).
- Add EUI

- Add Sensor Node as Devices on TTN Console
- Application → Device → register device


- Device ID: Enter a unique name.
- Device EUI: Enter the node's Device EUI that you got in the previous step (Step 3.1).
- App Key: Enter the node's App Key that you got in the previous step.
- App EUI: Select the node's App EUI.
- Register
Step 4: Activate your SenseCAP Sensors
Power On
The power switch is hidden inside the device. Open the device and turn on the power before installing the sensors. Here is the step-by-step instruction:
- Loosen the Sensor Probe by turning the cap counterclockwise. Use the white cap opener to make this process easier. The image below uses TH Sensor as an example and applies to all other SenseCAP sensors.

- After opening the device, turn the switch to "ON", and the LED on the lower right corner will flash, indicating that the power is on. Wait for about 10 seconds, then the LED will flash quickly for 2 seconds, indicating that the device is connected to the network.

-
After the device is connected to the network, connect the Sensor Probe back with the Sensor Node Controller by turning it clockwise. Please note that the labels on both parts should be aligned as shown in the image below, otherwise the two parts will not be attached to function properly and data will not be uploaded.
-
Check the Connection status of Sensor Node on TTN Console: when the status turn green, it is connected successfully.

Step 5: Data Checking
On the Data page, data packages are uploaded. For the format of the payload, please refer to the Decoding section. Here shows the data successfully obtained by SenseCAP LoRaWAN Soil Moisture & Temperature Sensor and SenseCAP LoRaWAN CO2 Sensor:

