SenseCAP Indicator with Home Assistant over MQTT
This guide shows how to turn the SenseCAP Indicator into a Home Assistant companion panel. After the setup, the Indicator publishes its built-in sensor readings to Home Assistant through MQTT, and Home Assistant can send switch and slider commands back to the Indicator screen.
What You Will Build
The integration uses three fixed MQTT topics:
| Direction | Topic | Purpose |
|---|---|---|
| Indicator to Home Assistant | indicator/sensor | Publishes temperature, humidity, CO2, and tVOC readings |
| Home Assistant to Indicator | indicator/switch/set | Sends switch and slider commands |
| Indicator to Home Assistant | indicator/switch/state | Publishes the current switch and slider state |
On the Home Assistant side, you will create four sensor entities, six switch entities, and two number entities. On the Indicator side, you will configure Wi-Fi and the MQTT broker, then use the screen as a local control panel.
Prerequisites
- SenseCAP Indicator D1 or compatible SenseCAP Indicator hardware
- A running Home Assistant instance
- An MQTT broker reachable from both Home Assistant and the Indicator
- ESP-IDF v5.4.x installed if you plan to build the firmware from source
- A USB cable for flashing and serial monitoring
Before continuing, read the SenseCAP Indicator user guide if you are not familiar with the board.
1. Prepare Home Assistant
If you already have Home Assistant and an MQTT broker, you can skip to Step 3: Build and Flash the Firmware.
Home Assistant OS is the simplest path because it supports Add-ons, including the Mosquitto broker and File editor.
Home Assistant can run in several installation modes. If you use Home Assistant Container, Add-ons are not available, so you need to run an MQTT broker such as Mosquitto or EMQX separately.
- Home Assistant Green
- Home Assistant Yellow
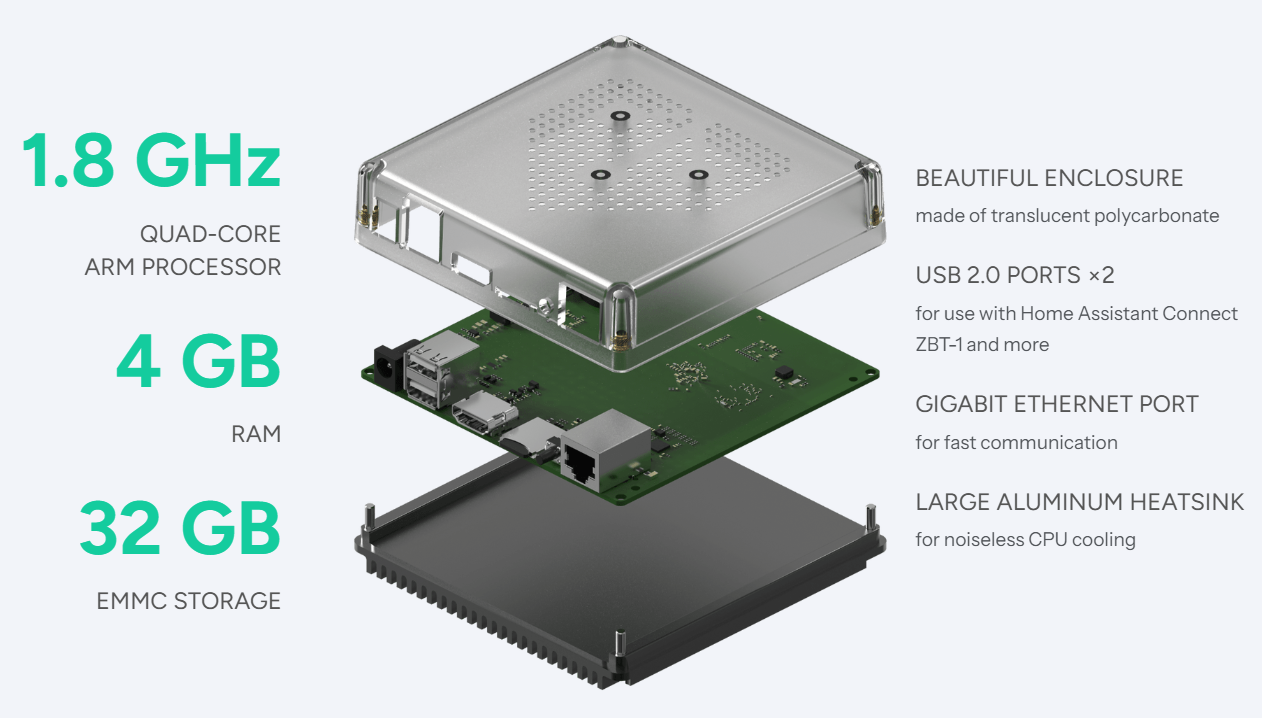
Home Assistant Green is a plug-and-play way to start using Home Assistant.
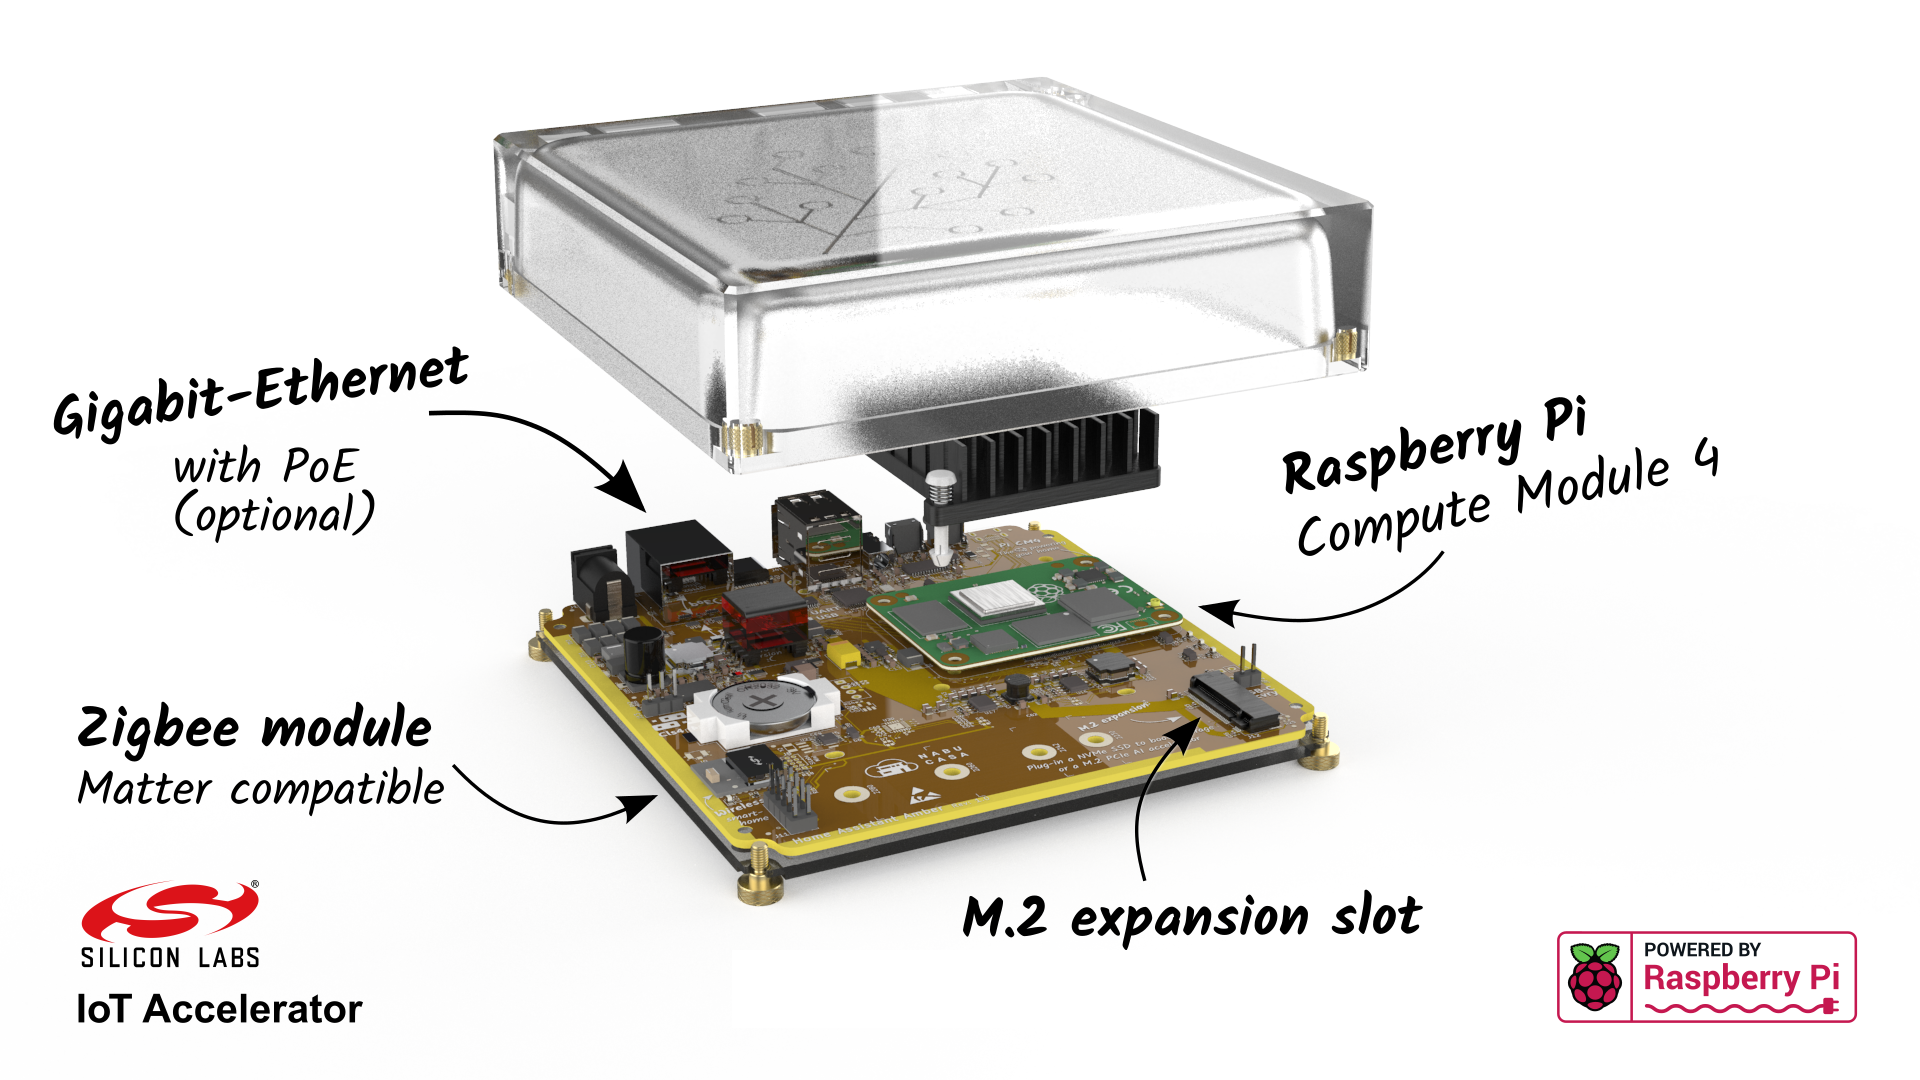
Home Assistant Yellow is a Raspberry Pi Compute Module 4 based Home Assistant hub.
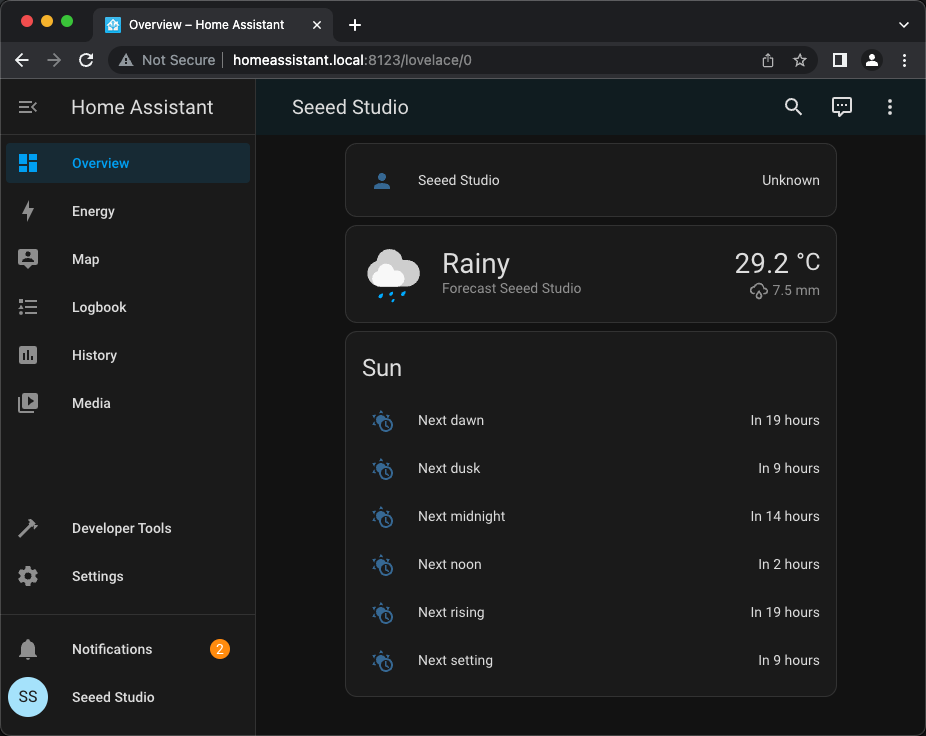
Follow the official Home Assistant installation guide for your device. When onboarding is complete, you should reach the Home Assistant dashboard.
2. Install Mosquitto and Enable MQTT
Install Add-ons
In Home Assistant OS, install two Add-ons:
- Mosquitto broker for MQTT messaging
- File editor for editing
configuration.yamlfrom the Home Assistant web UI
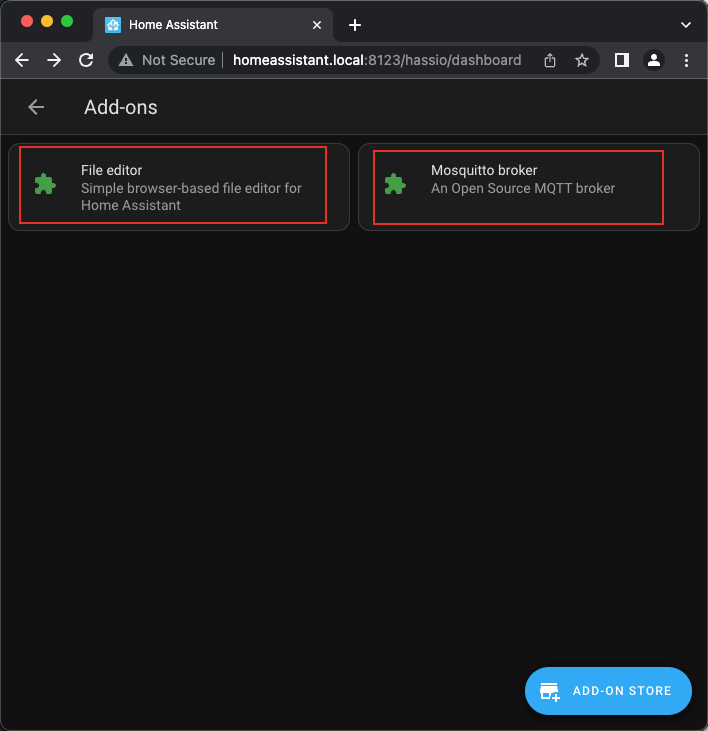
Go to Settings > Add-ons > Add-on Store, then install both Add-ons.
 |  |
 |  |
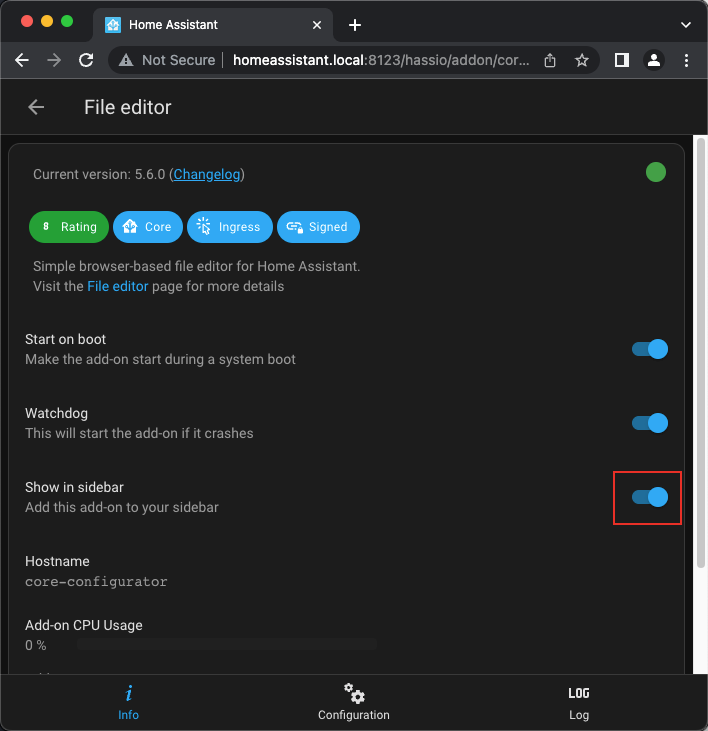
For convenience, enable Show in sidebar for File editor.
After installation, you should see both Add-ons.
Enable the MQTT Integration
Go to Settings > Devices & services > Integrations, search for MQTT, and follow the setup flow.
 |  |
If Home Assistant does not discover your broker automatically, enter the broker host manually. This is common when you use an external broker instead of the Mosquitto Add-on.
Create MQTT Credentials
If your MQTT broker requires authentication, create a username and password for the Indicator. In the Mosquitto broker Add-on, add a user and keep the credentials nearby; you will enter them on the Indicator later.
 |  |
3. Build and Flash the Firmware
The current Home Assistant firmware is maintained in the sensecap-indicator-ha repository.
git clone https://github.com/Love4yzp/sensecap-indicator-ha
cd sensecap-indicator-ha
Install ESP-IDF v5.4.x and export IDF_PATH in your shell. Then build, flash, and open the serial monitor:
./dev build
./dev flash
./dev monitor
To exit the serial monitor, press Ctrl-].
./dev flash auto-detects the serial port. If you need to specify a port, run ./dev flash -p /dev/ttyUSB0 or use the matching serial device name for your operating system.
Manual ESP-IDF commands
If you prefer to call ESP-IDF directly:
. "$IDF_PATH/export.sh"
idf.py build
idf.py -p /dev/ttyUSB0 -b 460800 flash monitor
The ESP32-S3 firmware uses ESP-IDF v5.4.x and LVGL 9. Keep the project sdkconfig.defaults settings, especially CONFIG_LV_MEM_CUSTOM=y, PSRAM 120 MHz OCT mode, CPU 240 MHz, and QIO 120 MHz flash.
4. Configure Wi-Fi and MQTT on the Indicator
After flashing, configure Wi-Fi and MQTT on the Indicator touchscreen. The MQTT broker address must point to the broker used by Home Assistant.
You can also configure MQTT from the serial console:
| Command | Description |
|---|---|
mqtthelp | Print broker, topic, and payload examples |
haconfig | Print the current MQTT and Home Assistant configuration |
setmqtt -a <addr> | Set the broker address |
setmqtt -a <addr> -c <client-id> -u <user> -p <pass> | Set broker address, client ID, username, and password |
Examples:
setmqtt -a 192.168.1.10 -c indicator-01 -u mqtt_user -p mqtt_password
setmqtt --addr mqtt://192.168.1.10:1883
setmqtt --addr mqtt://broker.emqx.io
After setmqtt succeeds, the configuration is saved to non-volatile storage and the MQTT client restarts automatically.
The Indicator and Home Assistant must be able to reach the same MQTT broker. If they are on different networks or VLANs, check routing, firewall rules, and broker listener settings.
5. Add MQTT Entities to Home Assistant
Home Assistant needs entity definitions that match the firmware topics. Open File editor, choose configuration.yaml, and add the following block under the top-level mqtt: key.
 |  |  |
Do not replace your whole configuration.yaml. If you already have an mqtt: section, append the sensor, switch, and number entries inside that existing section.
MQTT entity YAML
mqtt:
  sensor:
    - unique_id: indicator_temperature
      name: "Indicator Temperature"
      state_topic: "indicator/sensor"
      suggested_display_precision: 1
      unit_of_measurement: "°C"
      value_template: "{{ value_json.temp }}"
    - unique_id: indicator_humidity
      name: "Indicator Humidity"
      state_topic: "indicator/sensor"
      unit_of_measurement: "%"
      value_template: "{{ value_json.humidity }}"
    - unique_id: indicator_co2
      name: "Indicator CO2"
      state_topic: "indicator/sensor"
      unit_of_measurement: "ppm"
      value_template: "{{ value_json.co2 }}"
    - unique_id: indicator_tvoc
      name: "Indicator tVOC"
      state_topic: "indicator/sensor"
      unit_of_measurement: ""
      value_template: "{{ value_json.tvoc }}"
  switch:
    - unique_id: indicator_switch1
      name: "Indicator Switch1"
      state_topic: "indicator/switch/state"
      command_topic: "indicator/switch/set"
      value_template: "{{ value_json.switch1 }}"
      payload_on: '{"switch1":1}'
      payload_off: '{"switch1":0}'
      state_on: 1
      state_off: 0
    - unique_id: indicator_switch2
      name: "Indicator Switch2"
      state_topic: "indicator/switch/state"
      command_topic: "indicator/switch/set"
      value_template: "{{ value_json.switch2 }}"
      payload_on: '{"switch2":1}'
      payload_off: '{"switch2":0}'
      state_on: 1
      state_off: 0
    - unique_id: indicator_switch3
      name: "Indicator Switch3"
      state_topic: "indicator/switch/state"
      command_topic: "indicator/switch/set"
      value_template: "{{ value_json.switch3 }}"
      payload_on: '{"switch3":1}'
      payload_off: '{"switch3":0}'
      state_on: 1
      state_off: 0
    - unique_id: indicator_switch4
      name: "Indicator Switch4"
      state_topic: "indicator/switch/state"
      command_topic: "indicator/switch/set"
      value_template: "{{ value_json.switch4 }}"
      payload_on: '{"switch4":1}'
      payload_off: '{"switch4":0}'
      state_on: 1
      state_off: 0
    - unique_id: indicator_switch6
      name: "Indicator Switch6"
      state_topic: "indicator/switch/state"
      command_topic: "indicator/switch/set"
      value_template: "{{ value_json.switch6 }}"
      payload_on: '{"switch6":1}'
      payload_off: '{"switch6":0}'
      state_on: 1
      state_off: 0
    - unique_id: indicator_switch7
      name: "Indicator Switch7"
      state_topic: "indicator/switch/state"
      command_topic: "indicator/switch/set"
      value_template: "{{ value_json.switch7 }}"
      payload_on: '{"switch7":1}'
      payload_off: '{"switch7":0}'
      state_on: 1
      state_off: 0
  number:
    - unique_id: indicator_switch5
      name: "Indicator Switch5"
      state_topic: "indicator/switch/state"
      command_topic: "indicator/switch/set"
      command_template: '{"switch5": {{ value }} }'
      value_template: "{{ value_json.switch5 }}"
    - unique_id: indicator_switch8
      name: "Indicator Switch8"
      state_topic: "indicator/switch/state"
      command_topic: "indicator/switch/set"
      command_template: '{"switch8": {{ value }} }'
      value_template: "{{ value_json.switch8 }}"
Save the file, then go to Developer Tools > YAML and reload the YAML configuration.
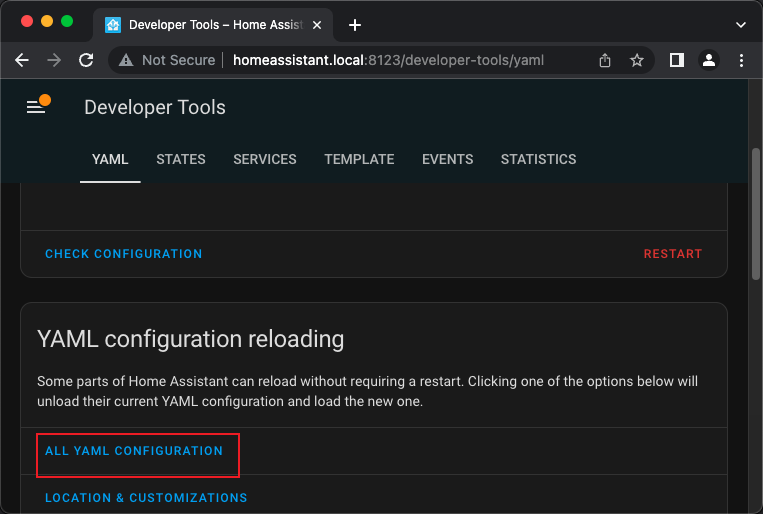
If the entities do not appear, use Check configuration first. If the configuration is valid but entities still do not appear, restart Home Assistant and confirm that the Indicator is publishing to indicator/sensor.
6. Create a Dashboard
You can add the new entities to any dashboard. To keep the Indicator separate, create a dedicated dashboard from Settings > Dashboards.
 |  |
Open the dashboard, choose Edit Dashboard, then use the Raw configuration editor.
 |  |
Dashboard YAML
This YAML is for the Lovelace dashboard Raw configuration editor. Do not paste it into configuration.yaml.
views:
  - title: Indicator device
    icon: ''
    badges: []
    cards:
      - graph: line
        type: sensor
        detail: 1
        icon: mdi:molecule-co2
        unit: ppm
        entity: sensor.indicator_co2
      - graph: line
        type: sensor
        entity: sensor.indicator_temperature
        detail: 1
        icon: mdi:coolant-temperature
      - graph: line
        type: sensor
        detail: 1
        entity: sensor.indicator_humidity
      - graph: line
        type: sensor
        entity: sensor.indicator_tvoc
        detail: 1
        icon: mdi:air-filter
      - type: entities
        entities:
          - entity: switch.indicator_switch1
          - entity: switch.indicator_switch2
          - entity: switch.indicator_switch3
          - entity: switch.indicator_switch4
          - entity: number.indicator_switch5
          - entity: switch.indicator_switch6
          - entity: switch.indicator_switch7
          - entity: number.indicator_switch8
        title: Indicator control
        show_header_toggle: false
        state_color: true
Save the dashboard configuration.
 |  |
You should now see the Indicator sensor readings and controls in Home Assistant.

MQTT Protocol Reference
Use this section when you want to debug MQTT traffic or build your own Home Assistant cards.
| Topic | Example payload |
|---|---|
indicator/sensor | {"temp":"23.5","humidity":"45","co2":"450","tvoc":"100"} |
indicator/switch/set | {"switch1":1,"switch5":50} |
indicator/switch/state | {"switch1":1,"switch2":0} |
Sensor keys:
| Key | Meaning |
|---|---|
temp | Temperature |
humidity | Relative humidity |
co2 | CO2 concentration |
tvoc | Total volatile organic compounds |
Control keys:
| Key | Home Assistant entity type | Range |
|---|---|---|
switch1 to switch4, switch6, switch7 | switch | 0 or 1 |
switch5, switch8 | number | Integer value |
Troubleshooting
| Symptom | What to check |
|---|---|
| Home Assistant does not show entities | Confirm that the YAML was added under mqtt:, then reload YAML or restart Home Assistant |
| Sensor values stay unknown | Confirm that the Indicator is connected to Wi-Fi and publishing to indicator/sensor |
| Controls do not update the Indicator | Confirm that Home Assistant publishes to indicator/switch/set and that the Indicator is connected to the same broker |
| MQTT login fails | Re-enter the broker address, username, and password on the Indicator or with setmqtt |
| Serial command is unclear | Run mqtthelp in the serial console |
For Developers
The firmware uses a dual-MCU design:
| MCU | Role |
|---|---|
| ESP32-S3 | Display, touch, Wi-Fi, MQTT, Home Assistant logic, settings, and console |
| RP2040 | Built-in and Grove sensor acquisition, relayed to the ESP32-S3 over UART |
The ESP32-S3 firmware is built with ESP-IDF v5.4.x and LVGL 9. Runtime domains are organized as model/view slices: model code owns state, NVS, MQTT, and sensor parsing; view code owns LVGL objects and touchscreen callbacks.
Useful developer commands:
python3 scripts/dev_check.py --skip-build
python3 scripts/dev_check.py
./dev build
The PC simulator can help when iterating on UI layout without flashing hardware:
cmake -S sim -B sim/build && cmake --build sim/build -j4
./sim/build/sensecap_sim
Resources
- sensecap-indicator-ha firmware repository
- SenseCAP Indicator user guide
- Home Assistant installation guide
- Home Assistant MQTT integration
- ESP-IDF v5.4 Get Started Guide
- SenseCAP Indicator SDK and examples
Tech Support
Need help with your SenseCAP Indicator? Visit the Seeed Official Discord Channel or start a discussion in the SenseCAP Indicator SDK GitHub discussions.