使用 XIAO ESP32S3(Sense)的蓝牙功能

Seeed Studio XIAO ESP32S3是一款功能强大的开发板,支持蓝牙5、BLE和Mesh网络,是需要无线连接的各种物联网应用的理想选择。凭借其卓越的射频性能,XIAO ESP32S3可以在各种距离上提供可靠和高速的无线通信,使其成为短程和远程无线应用的通用解决方案。在本教程中,我们将重点介绍XIAO ESP32S3蓝牙功能的基本功能,例如如何扫描附近的蓝牙设备,如何建立蓝牙连接,以及如何通过蓝牙连接发送和接收数据。
入门
天线的安装
在XIAO ESP32S3正面的左下角,有一个单独的“WiFi/BT天线连接器”。为了获得更好的WiFi/蓝牙信号,您需要取出包装内的天线并将其安装在连接器上。
天线的安装有一个小技巧,如果你直接用力按压,你会发现很难按压,你的手指会受伤!安装天线的正确方法是先将天线连接器的一侧放入连接器块中,然后在另一侧向下压一点,天线就安装好了。
拆下天线也是这样,不要用蛮力直接拉天线,一侧用力提起,天线很容易取下。

如果您没有安装天线,则可能无法使用蓝牙功能。
如果你有条件,我建议你使用大天线,这样会得到更好的体验。
蓝牙低能耗(BLE)使用
蓝牙低能耗,简称BLE,是蓝牙的一种节能变体。BLE的主要应用是短距离传输少量数据(低带宽)。与始终打开的蓝牙不同,BLE始终处于睡眠模式,除非启动连接。
由于其特性,BLE适用于需要定期交换硬币单元上运行的少量数据的应用程序。例如,BLE在医疗保健、健身、跟踪、信标、安全和家庭自动化行业非常有用。
这使得它消耗的功率非常低。BLE的功耗大约是蓝牙的100倍(具体取决于使用情况)。
关于XIAO ESP32S3的BLE部分,我们将在以下四个部分介绍它的使用。
- 一些基本概念 -- 我们将首先了解BLE中可能经常使用的一些概念,以帮助我们理解BLE程序的执行过程和思维。
- BLE扫描仪 -- 本节将介绍如何搜索附近的蓝牙设备并将其打印到串行监视器中。
- BLE服务器/客户端 -- 本节将解释如何使用XIAO ESP32S3作为服务器和客户端来发送和接收指定的数据消息。它还将用于从手机接收或发送信息给Xiao。
- BLE传感器数据交换 -- 这是完整教程的最后一节,我们将通过一个传感器示例来解释如何通过BLE发送传感器数据。
一些基本概念
服务器和客户端
对于蓝牙低能耗,有两种类型的设备:服务器和客户端。XIAO ESP32S3既可以充当客户端,也可以充当服务器。
服务器宣传它的存在,因此其他设备可以找到它,并包含客户端可以读取的数据。客户端扫描附近的设备,当它找到要查找的服务器时,它会建立连接并侦听传入的数据。这称为点对点通信。

属性
属性实际上是一段数据。每个蓝牙设备都用来提供服务,服务是一个数据集合,集合可以称为数据库,数据库中的每个条目都是一个属性,所以在这里我将属性转换为数据条目。您可以将蓝牙设备想象成一个表,表中的每一行都是一个属性。

GATT协议
当两个蓝牙设备建立连接时,它们需要一个协议来确定如何通信。GATT(Generic Attribute Profile,通用属性配置文件)是一种定义如何在蓝牙设备之间传输数据的协议。
在GATT协议中,设备的功能和属性被组织成称为服务、特性和描述符的结构。服务表示由设备提供的一组相关功能和特征。每个服务可以包括多个特征,这些特征定义了服务的特定属性或行为,例如传感器数据或控制命令。每个特征都有一个唯一的标识符和一个值,可以通过读取或写入来进行通信。描述符用于描述特征的元数据,如特征值的格式和访问权限。
通过使用GATT协议,蓝牙设备可以在不同的应用场景中进行通信,例如传输传感器数据或控制远程设备。
BLE特性
ATT,全名属性协议。最后,ATT由一组ATT命令组成,即请求和响应命令,ATT也是蓝牙空包的最上层,也就是说,ATT是我们分析蓝牙包最多的地方。
ATT命令,正式名称为ATT PDU(协议数据单元)。它包括4类:读、写、通知和指示。这些命令可以分为两种类型:如果它需要一个响应,那么它后面会有一个请求;相反,如果它只需要ACK而不需要响应,那么它后面就不会有请求。
服务和特性在GATT层中定义。服务方提供服务,服务是数据,数据是属性,服务和特征是数据的逻辑呈现,或者说用户能看到的数据最终转化为服务和特征。
让我们从移动的角度来看看服务和特性是什么样子的。nRFConnect是一个非常直观地向我们展示每个数据包应该是什么样子的应用程序。

正如您所看到的,在蓝牙规范中,每个特定的蓝牙应用程序由多个服务组成,每个服务由多个特征组成。特征由UUID、属性和值组成。

属性用于描述对特性的操作类型和权限,例如它是否支持读取、写入、通知等。这类似于ATT PDU中包含的四个类别。

UUID
每个服务、特征和描述符都有一个UUID(通用唯一标识符)。UUID是一个唯一的128位(16字节)数字。例如:
ea094cbd-3695-4205-b32d-70c1dea93c35
中指定的所有类型、服务和配置文件都有缩短的UUID SIG (蓝牙技术联盟). 但是,如果您的应用程序需要自己的UUID,您可以使用 UUID生成器网站。
BLE扫描仪
创建XIAO ESP32S3 BLE扫描仪非常简单。以下是创建扫描仪的示例程序。
#include <BLEDevice.h>
#include <BLEUtils.h>
#include <BLEScan.h>
#include <BLEAdvertisedDevice.h>

int scanTime = 5; //In seconds
BLEScan* pBLEScan;

class MyAdvertisedDeviceCallbacks: public BLEAdvertisedDeviceCallbacks {
    void onResult(BLEAdvertisedDevice advertisedDevice) {
      Serial.printf("Advertised Device: %s \n", advertisedDevice.toString().c_str());
    }
};

void setup() {
  Serial.begin(115200);
  Serial.println("Scanning...");

  BLEDevice::init("");
  pBLEScan = BLEDevice::getScan(); //create new scan
  pBLEScan->setAdvertisedDeviceCallbacks(new MyAdvertisedDeviceCallbacks());
  pBLEScan->setActiveScan(true); //active scan uses more power, but get results faster
  pBLEScan->setInterval(100);
  pBLEScan->setWindow(99);  // less or equal setInterval value
}

void loop() {
  // put your main code here, to run repeatedly:
  BLEScanResults foundDevices = pBLEScan->start(scanTime, false);
  Serial.print("Devices found: ");
  Serial.println(foundDevices.getCount());
  Serial.println("Scan done!");
  pBLEScan->clearResults();   // delete results fromBLEScan buffer to release memory
  delay(10000);
}
如果您已经升级了您的ESP32开发板到版本3.0.0以上,您需要更改一些代码以兼容它。
BLEScanResults foundDevices = pBLEScan->start(scanTime, false);修改为BLEScanResults* foundDevices = pBLEScan->start(scanTime, false);Serial.println(foundDevices.getCount());修改为Serial.println(foundDevices->getCount());
现在您可以选择XIAO ESP32S3主板并上传程序。如果程序运行顺利,打开串行监视器,将波特率设置为115200,可以看到以下结果。

该程序打印出扫描的蓝牙设备的名称、MAC地址、制造商数据和信号。
程序注释
它首先导入BLE功能所需的库。
然后定义一个名为 MyAdvertisedDeviceCallbacks 继承自 BLEAdvertisedDeviceCallbacks 类. 它有一个名为 onResult 当在扫描期间发现广告的蓝牙设备时调用。该功能使用 Serial.printf 作用。此类可用于在扫描期间处理蓝牙设备信息。
class MyAdvertisedDeviceCallbacks: public BLEAdvertisedDeviceCallbacks {
    void onResult(BLEAdvertisedDevice advertisedDevice) {
      Serial.printf("Advertised Device: %s \n", advertisedDevice.toString().c_str());
    }
};
在 Setup 功能中,我们使用指定的参数设置BLE扫描,包括扫描间隔和窗口值。它还初始化BLE设备,并设置回调函数来处理扫描过程中发现的广告设备。
BLEDevice::init("");
pBLEScan = BLEDevice::getScan();
pBLEScan->setAdvertisedDeviceCallbacks(new MyAdvertisedDeviceCallbacks());
pBLEScan->setActiveScan(true);
pBLEScan->setInterval(100);
pBLEScan->setWindow(99);
最后, loop 函数使用指定的扫描时间和阻塞标志启动BLE扫描。然后,它将找到的设备数量打印到串行端口,并清除结果缓冲区以释放内存。
BLEScanResults foundDevices = pBLEScan->start(scanTime, false);
Serial.print("Devices found: ");
Serial.println(foundDevices.getCount());
Serial.println("Scan done!");
pBLEScan->clearResults();
BLE服务器/客户端
如前所述,XIAO ESP32S3既可以充当服务器,也可以充当客户端。让我们来看看作为服务器的程序以及如何使用它。将以下程序上传到XIAO后,它将作为服务器向所有连接到XIAO的蓝牙设备发送“Hello World”消息。
//Server Code
#include <BLEDevice.h>
#include <BLEUtils.h>
#include <BLEServer.h>

#define SERVICE_UUID        "4fafc201-1fb5-459e-8fcc-c5c9c331914b"
#define CHARACTERISTIC_UUID "beb5483e-36e1-4688-b7f5-ea07361b26a8"

void setup() {
  Serial.begin(115200);
  Serial.println("Starting BLE work!");

  BLEDevice::init("XIAO_ESP32S3");
  BLEServer *pServer = BLEDevice::createServer();
  BLEService *pService = pServer->createService(SERVICE_UUID);
  BLECharacteristic *pCharacteristic = pService->createCharacteristic(
                                         CHARACTERISTIC_UUID,
                                         BLECharacteristic::PROPERTY_READ |
                                         BLECharacteristic::PROPERTY_WRITE
                                       );

  pCharacteristic->setValue("Hello World");
  pService->start();
  // BLEAdvertising *pAdvertising = pServer->getAdvertising();  // this still is working for backward compatibility
  BLEAdvertising *pAdvertising = BLEDevice::getAdvertising();
  pAdvertising->addServiceUUID(SERVICE_UUID);
  pAdvertising->setScanResponse(true);
  pAdvertising->setMinPreferred(0x06);  // functions that help with iPhone connections issue
  pAdvertising->setMinPreferred(0x12);
  BLEDevice::startAdvertising();
  Serial.println("Characteristic defined! Now you can read it in your phone!");
}

void loop() {
  // put your main code here, to run repeatedly:
  delay(2000);
}
同时,您可以在主要的移动应用商店中搜索并下载nRF Connect应用程序,该应用程序允许您的手机搜索并连接到蓝牙设备。
- Android: nRF Connect
- IOS: nRF Connect
下载软件后,按照以下步骤搜索并连接XIAO ESP32S3,您将看到广告中的“Hello World”。
 |  |  |  |
如果您想使用另一个XIAO ESP32S3作为客户端来接收来自服务器的消息,那么您可以对客户端XIAO使用以下过程。
// Client Code
#include "BLEDevice.h"
//#include "BLEScan.h"

// The remote service we wish to connect to.
static BLEUUID serviceUUID("4fafc201-1fb5-459e-8fcc-c5c9c331914b");
// The characteristic of the remote service we are interested in.
static BLEUUID    charUUID("beb5483e-36e1-4688-b7f5-ea07361b26a8");

static boolean doConnect = false;
static boolean connected = false;
static boolean doScan = false;
static BLERemoteCharacteristic* pRemoteCharacteristic;
static BLEAdvertisedDevice* myDevice;

static void notifyCallback(
  BLERemoteCharacteristic* pBLERemoteCharacteristic,
  uint8_t* pData,
  size_t length,
  bool isNotify) {
    Serial.print("Notify callback for characteristic ");
    Serial.print(pBLERemoteCharacteristic->getUUID().toString().c_str());
    Serial.print(" of data length ");
    Serial.println(length);
    Serial.print("data: ");
    Serial.write(pData, length);
    Serial.println();
}

class MyClientCallback : public BLEClientCallbacks {
  void onConnect(BLEClient* pclient) {
  }

  void onDisconnect(BLEClient* pclient) {
    connected = false;
    Serial.println("onDisconnect");
  }
};

bool connectToServer() {
    Serial.print("Forming a connection to ");
    Serial.println(myDevice->getAddress().toString().c_str());

    BLEClient*  pClient  = BLEDevice::createClient();
    Serial.println(" - Created client");

    pClient->setClientCallbacks(new MyClientCallback());

    // Connect to the remove BLE Server.
    pClient->connect(myDevice);  // if you pass BLEAdvertisedDevice instead of address, it will be recognized type of peer device address (public or private)
    Serial.println(" - Connected to server");
    pClient->setMTU(517); //set client to request maximum MTU from server (default is 23 otherwise)

    // Obtain a reference to the service we are after in the remote BLE server.
    BLERemoteService* pRemoteService = pClient->getService(serviceUUID);
    if (pRemoteService == nullptr) {
      Serial.print("Failed to find our service UUID: ");
      Serial.println(serviceUUID.toString().c_str());
      pClient->disconnect();
      return false;
    }
    Serial.println(" - Found our service");

    // Obtain a reference to the characteristic in the service of the remote BLE server.
    pRemoteCharacteristic = pRemoteService->getCharacteristic(charUUID);
    if (pRemoteCharacteristic == nullptr) {
      Serial.print("Failed to find our characteristic UUID: ");
      Serial.println(charUUID.toString().c_str());
      pClient->disconnect();
      return false;
    }
    Serial.println(" - Found our characteristic");

    // Read the value of the characteristic.
    if(pRemoteCharacteristic->canRead()) {
      std::string value = pRemoteCharacteristic->readValue();
      Serial.print("The characteristic value was: ");
      Serial.println(value.c_str());
    }

    if(pRemoteCharacteristic->canNotify())
      pRemoteCharacteristic->registerForNotify(notifyCallback);

    connected = true;
    return true;
}
/**
 * Scan for BLE servers and find the first one that advertises the service we are looking for.
 */
class MyAdvertisedDeviceCallbacks: public BLEAdvertisedDeviceCallbacks {
 /**
   * Called for each advertising BLE server.
   */
  void onResult(BLEAdvertisedDevice advertisedDevice) {
    Serial.print("BLE Advertised Device found: ");
    Serial.println(advertisedDevice.toString().c_str());

    // We have found a device, let us now see if it contains the service we are looking for.
    if (advertisedDevice.haveServiceUUID() && advertisedDevice.isAdvertisingService(serviceUUID)) {

      BLEDevice::getScan()->stop();
      myDevice = new BLEAdvertisedDevice(advertisedDevice);
      doConnect = true;
      doScan = true;

    } // Found our server
  } // onResult
}; // MyAdvertisedDeviceCallbacks

void setup() {
  Serial.begin(115200);
  Serial.println("Starting Arduino BLE Client application...");
  BLEDevice::init("");

  // Retrieve a Scanner and set the callback we want to use to be informed when we
  // have detected a new device.  Specify that we want active scanning and start the
  // scan to run for 5 seconds.
  BLEScan* pBLEScan = BLEDevice::getScan();
  pBLEScan->setAdvertisedDeviceCallbacks(new MyAdvertisedDeviceCallbacks());
  pBLEScan->setInterval(1349);
  pBLEScan->setWindow(449);
  pBLEScan->setActiveScan(true);
  pBLEScan->start(5, false);
} // End of setup.

// This is the Arduino main loop function.
void loop() {
  // If the flag "doConnect" is true then we have scanned for and found the desired
  // BLE Server with which we wish to connect.  Now we connect to it.  Once we are
  // connected we set the connected flag to be true.
  if (doConnect == true) {
    if (connectToServer()) {
      Serial.println("We are now connected to the BLE Server.");
    } else {
      Serial.println("We have failed to connect to the server; there is nothin more we will do.");
    }
    doConnect = false;
  }

  // If we are connected to a peer BLE Server, update the characteristic each time we are reached
  // with the current time since boot.
  if (connected) {
    String newValue = "Time since boot: " + String(millis()/1000);
    Serial.println("Setting new characteristic value to \"" + newValue + "\"");

    // Set the characteristic's value to be the array of bytes that is actually a string.
    pRemoteCharacteristic->writeValue(newValue.c_str(), newValue.length());
  }else if(doScan){
    BLEDevice::getScan()->start(0);  // this is just example to start scan after disconnect, most likely there is better way to do it in arduino
  }

  delay(1000); // Delay a second between loops.
} // End of loop
如果您已经将您的ESP32开发板升级到版本3.0.0以上,您需要更改一些代码以兼容它。
- 将
std::string value = pRemoteCharacteristic->readValue();修改为String value = pRemoteCharacteristic->readValue();
上述程序将把晓变成一个客户端,并搜索附近的蓝牙设备。当蓝牙设备的UUID与您提供的UUID匹配时,它将连接到设备并获得其特征值。

程序注释
让我们快速了解一下BLE服务器示例代码是如何工作的。它首先导入BLE功能所需的库。然后,您需要为服务和特征定义一个UUID。
#define SERVICE_UUID "4fafc201-1fb5-459e-8fcc-c5c9c331914b"
#define CHARACTERISTIC_UUID "beb5483e-36e1-4688-b7f5-ea07361b26a8"
您可以保留默认的UUID,也可以转到uuidgenerator.net为您的服务和特性创建随机UUID。
然后,创建一个名为“XIAO_ESP32S3”的BLE设备。你可以把这个名字改成你喜欢的名字。在下面的行中,您将BLE设备设置为服务器。之后,使用前面定义的UUID为BLE服务器创建一个服务。
BLEServer *pServer = BLEDevice::createServer();
BLEService *pService = pServer->createService(SERVICE_UUID);
然后,设置该服务的特性。正如您所看到的,您还使用前面定义的UUID,并且需要将特性的属性作为参数传递。在这种情况下,它是:读和写。
BLECharacteristic *pCharacteristic = pService->createCharacteristic(
                                     CHARACTERISTIC_UUID,
                                     BLECharacteristic::PROPERTY_READ |
                                     BLECharacteristic::PROPERTY_WRITE
                                     );
创建特征后,可以使用“setValue()”方法设置其值。在这种情况下,我们将值设置为文本“Hello World”。您可以将此文本更改为任何您喜欢的内容。在未来的项目中,该文本可以是传感器读数,也可以是灯的状态。
最后,你可以启动服务和广告,这样其他BLE设备就可以扫描并找到这个BLE设备。
BLEAdvertising *pAdvertising = pServer->getAdvertising();
pAdvertising->start();
这只是一个关于如何创建BLE服务器的简单示例。在该代码中 loop(), 但是您可以添加新客户端连接时发生的情况 (检查 BLE_notify 一些指导的示例)。
BLE传感器数据交换
接下来,我们将来到现实世界来完成一个案例。在这种情况下,我们将让XIAO ESP32S3连接到光强度传感器,然后通过蓝牙将光传感器的值发送到另一个XIAO ESP 32S3,并将其显示在扩展板的屏幕上。
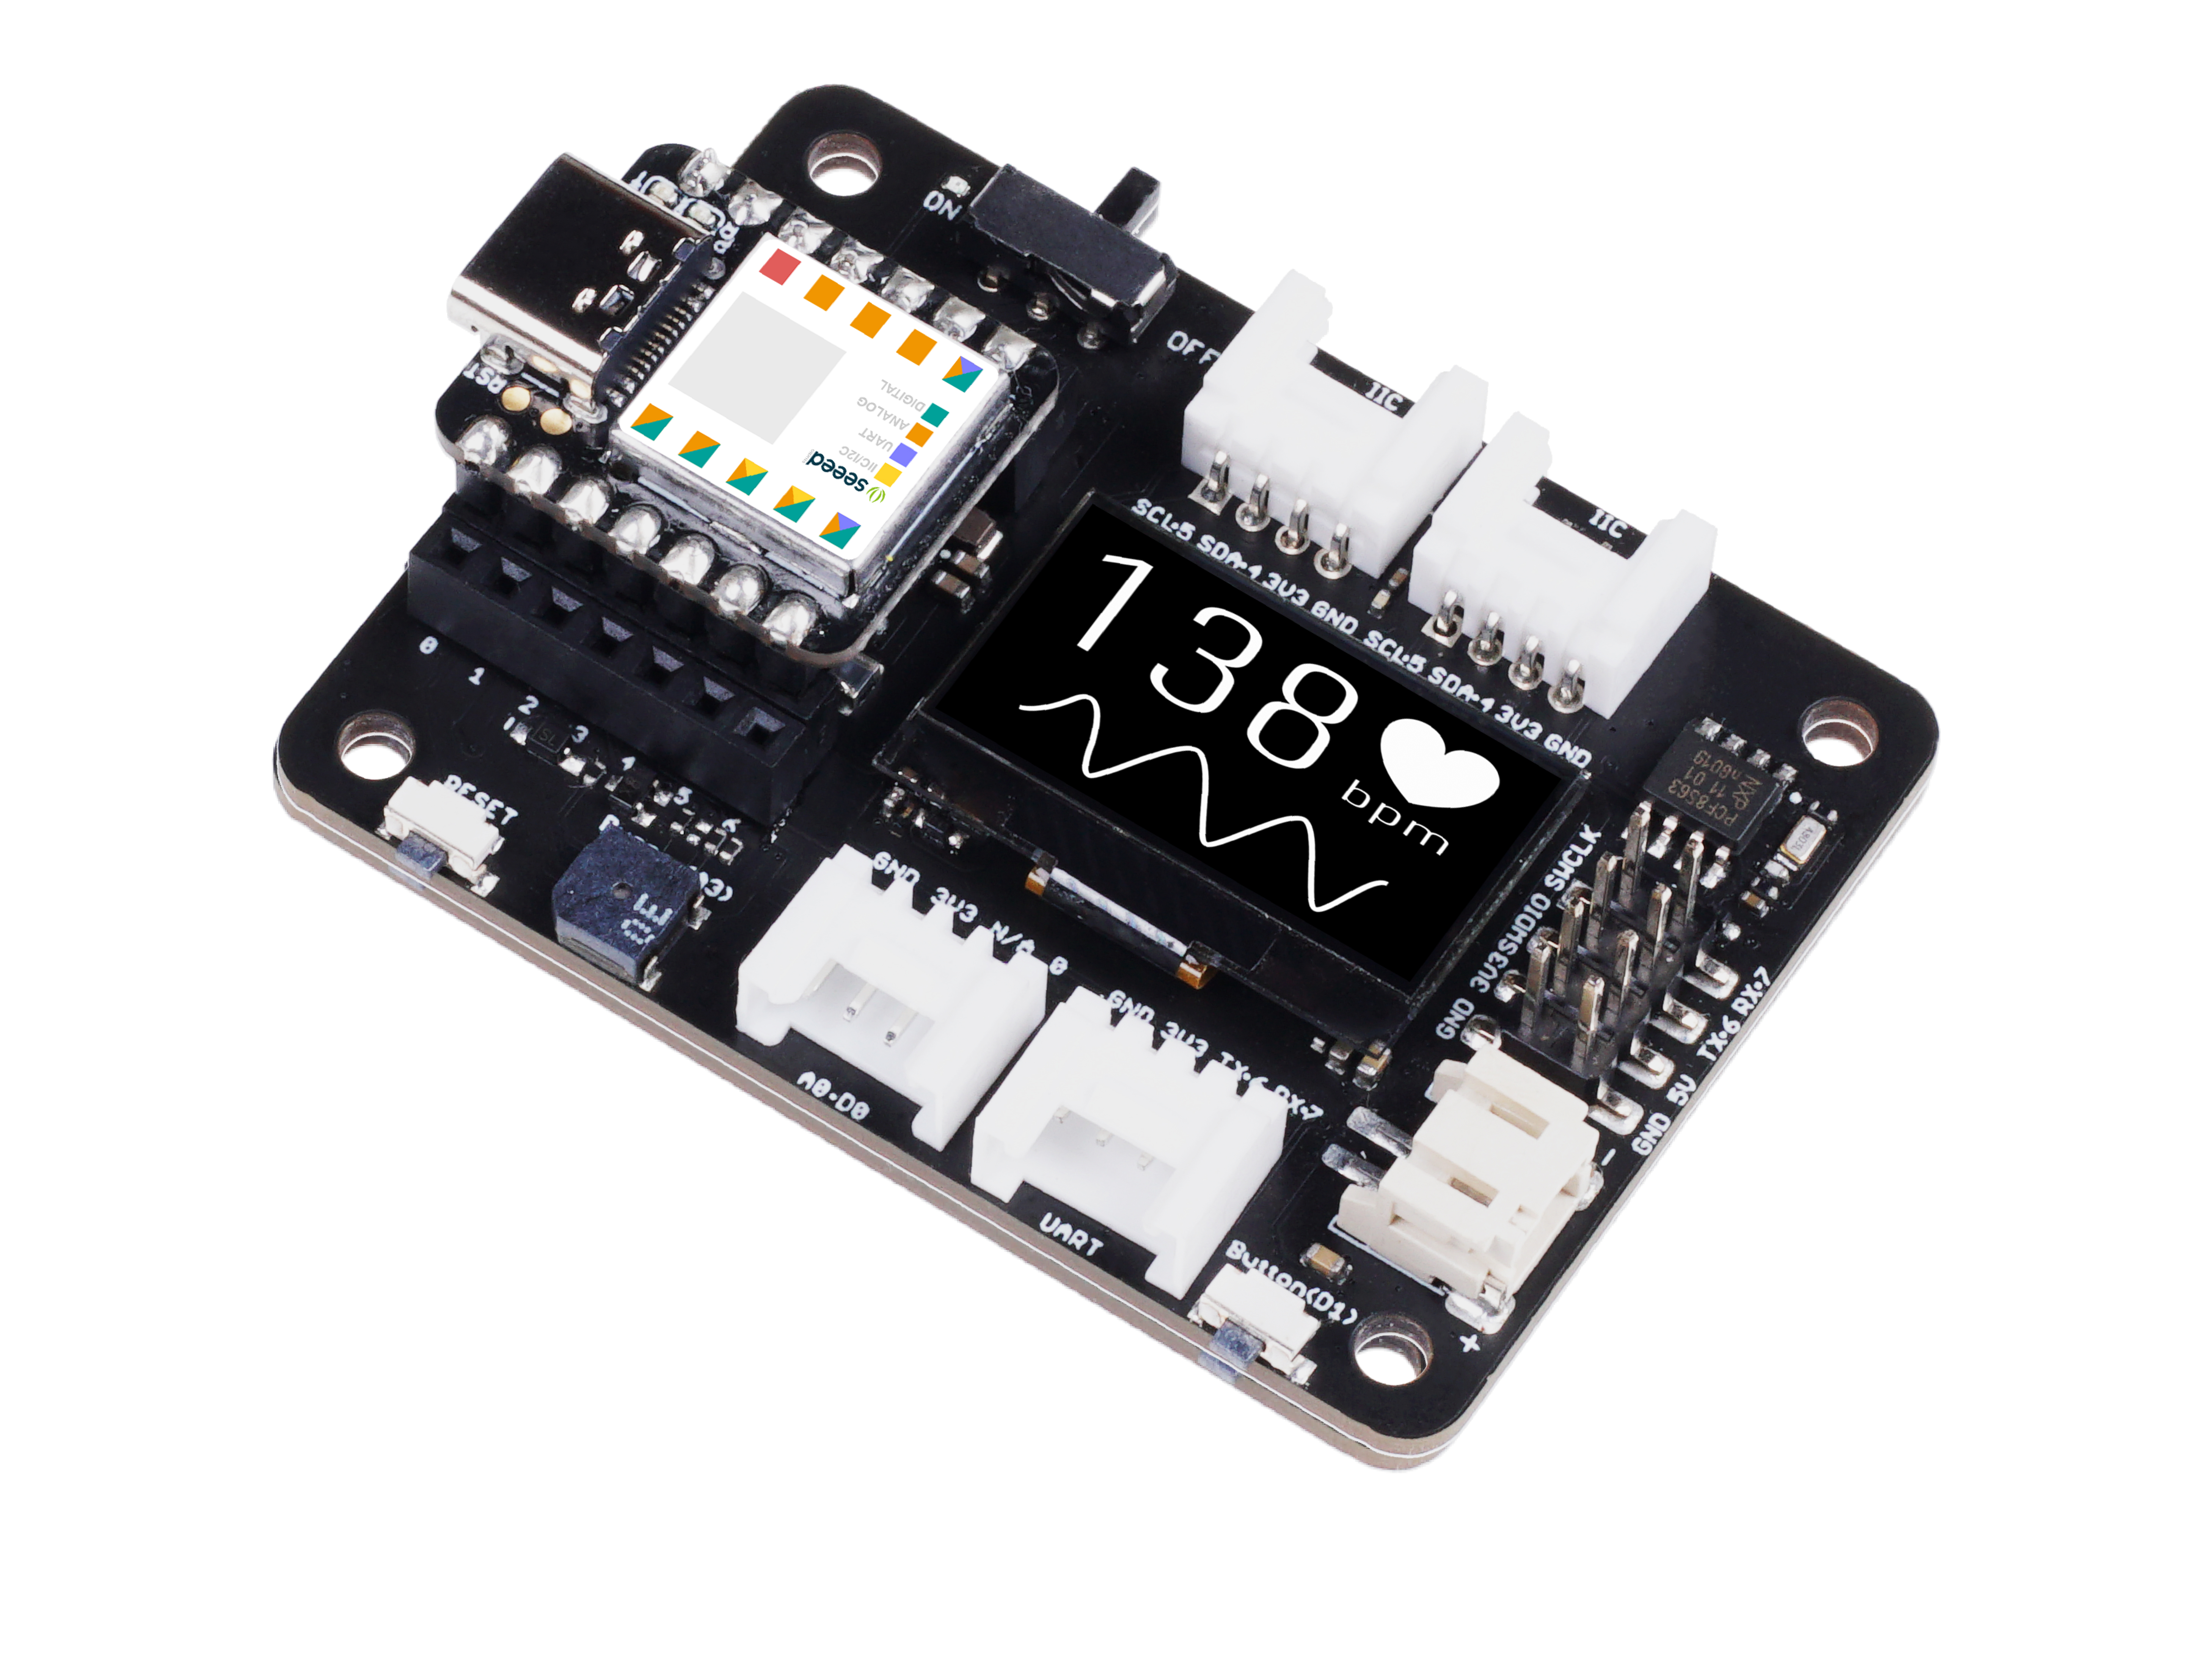
为了接线方便,我们将使用两个XIAO扩展板,示例程序仅供参考,您可以根据实际项目需求选择产品。
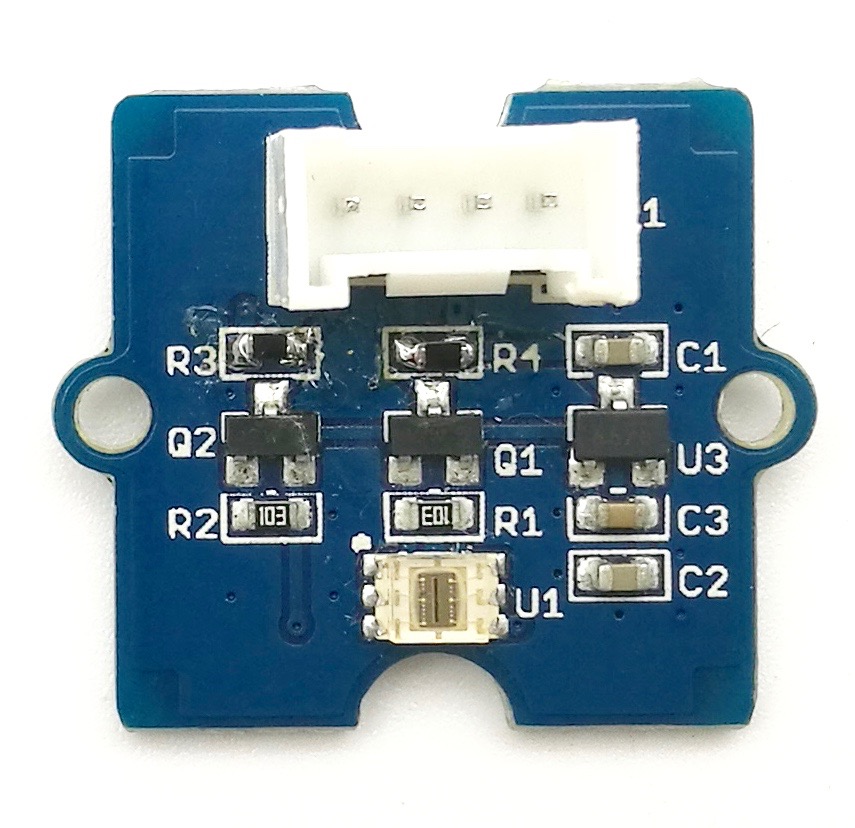
| Seeed Studio XIAO ESP32S3 | Seeed Studio XIAO ESP32S3 Sense | Seeed Studio Expansion Base for XIAO with Grove OLED | Grove - Digital Light Sensor - TSL2561 |
|---|---|---|---|
 |  |  |  |
除了上述硬件准备外,您可能还需要准备以下库,下载并将它们添加到Arduino IDE环境中。
- OLED显示器u8g2库:
- Library of Grove - Digital Light Sensor - TSL2561:
我们需要准备两个XIAO,一个作为服务器,一个为客户端。以下是作为服务器的示例程序。XIAO作为一个服务器有以下主要任务。
- 首先,从光传感器获得实时值;
- 创建蓝牙服务器;
- 通过蓝牙宣传光强值;
- 在显示器上显示实时光强和发送。
//server
#include <BLEDevice.h>
#include <BLEUtils.h>
#include <BLE2902.h>
#include <BLEServer.h>
#include <Wire.h>
#include <Digital_Light_TSL2561.h>
#include <Arduino.h>
#include <U8x8lib.h>
#include <Wire.h>

// OLEDs without Reset of the Display
U8X8_SSD1306_128X64_NONAME_HW_I2C u8x8(/* clock=*/ SCL, /* data=*/ SDA, /* reset=*/ U8X8_PIN_NONE);

//BLE Server name (the other ESP32 name running the server sketch)
#define bleServerName "XIAOESP32S3_BLE"

BLECharacteristic *pCharacteristic;
bool deviceConnected = false;

int light_val = 0;

class MyServerCallbacks: public BLEServerCallbacks {
  void onConnect(BLEServer* pServer) {
    deviceConnected = true;
  };

  void onDisconnect(BLEServer* pServer) {
    deviceConnected = false;
  }
};

void setup() {
  Serial.begin(115200);

  //OLED display setup
  u8x8.begin();
  u8x8.setFlipMode(1);

  u8x8.setFont(u8x8_font_chroma48medium8_r);
  u8x8.drawString(0, 3, "Starting...");

  Wire.begin();
  TSL2561.init();

  BLEDevice::init(bleServerName);
  BLEServer *pServer = BLEDevice::createServer();
  pServer->setCallbacks(new MyServerCallbacks());

  BLEService *pService = pServer->createService(BLEUUID((uint16_t)0x181A)); // Environmental Sensing
  pCharacteristic = pService->createCharacteristic(
    BLEUUID((uint16_t)0x2A59), // Analog Output
    BLECharacteristic::PROPERTY_NOTIFY
  );
  pCharacteristic->addDescriptor(new BLE2902());

  pService->start();
  BLEAdvertising *pAdvertising = BLEDevice::getAdvertising();
  pAdvertising->addServiceUUID(pService->getUUID());
  pAdvertising->setScanResponse(true);
  pAdvertising->setMinPreferred(0x0);
  pAdvertising->setMinPreferred(0x1F);
  BLEDevice::startAdvertising();
  u8x8.clearDisplay();
}

void loop() {
  if (deviceConnected) {
    light_val = TSL2561.readVisibleLux();
    pCharacteristic->setValue(light_val);
    pCharacteristic->notify();
    u8x8.setFont(u8x8_font_chroma48medium8_r);
    u8x8.setCursor(0, 0);
    u8x8.print("Light Value:");
    u8x8.clearLine(2);
    u8x8.setCursor(0, 2);
    u8x8.print(light_val);
    u8x8.drawString(0, 4, "Sending...");
    delay(10); // bluetooth stack will go into congestion, if too many packets are sent
  }
}
上传其中一个XIAO的程序后,如果程序运行顺利,那么您可以拿出手机,使用nRF Connect APP搜索名为XIOESP32S3_BLE的蓝牙设备,将其连接,然后单击下面显示的按钮,您将收到传感器数据信息。

在这里你会发现,我们操作软件的方式与前面的例子不太一样,因为一般来说,我们发送传感器类型的消息,我们会选择使用通知的属性来确保消息的有效性。
接下来,我们需要拿出我们的另一个XIAO,它充当客户端来收集和显示我们的数据。
//client
#include <BLEDevice.h>
#include <BLEUtils.h>
#include <BLEClient.h>
#include <BLEServer.h>
#include <Arduino.h>
#include <U8x8lib.h>
#include <Wire.h>

// OLEDs without Reset of the Display
U8X8_SSD1306_128X64_NONAME_HW_I2C u8x8(/* clock=*/ SCL, /* data=*/ SDA, /* reset=*/ U8X8_PIN_NONE);

BLEClient*  pClient;
bool doconnect = false;

//BLE Server name (the other ESP32 name running the server sketch)
#define bleServerName "XIAOESP32S3_BLE"

//Address of the peripheral device. Address will be found during scanning...
static BLEAddress *pServerAddress;

BLEUUID serviceUUID("181A"); // Environmental Sensing
BLEUUID charUUID("2A59");    // Analog Output

char light_val[1024];

//Callback function that gets called, when another device's advertisement has been received
class MyAdvertisedDeviceCallbacks: public BLEAdvertisedDeviceCallbacks {
  void onResult(BLEAdvertisedDevice advertisedDevice) {
    if (advertisedDevice.getName() == bleServerName) { //Check if the name of the advertiser matches
      advertisedDevice.getScan()->stop(); //Scan can be stopped, we found what we are looking for
      pServerAddress = new BLEAddress(advertisedDevice.getAddress()); //Address of advertiser is the one we need
      Serial.println("Device found. Connecting!");
    }
  }
};

//function that prints the latest sensor readings in the OLED display
void printReadings(){
  u8x8.setFont(u8x8_font_chroma48medium8_r);
  u8x8.setCursor(0, 0);
  u8x8.print("Light Value:");
  u8x8.drawString(0, 2, light_val);
}

void setup() {
  Serial.begin(115200);
  //OLED display setup
  u8x8.begin();
  u8x8.setFlipMode(1);

  u8x8.setFont(u8x8_font_chroma48medium8_r);
  u8x8.drawString(0, 3, "Starting...");

  Serial.println("Starting BLE client...");

  BLEDevice::init("XIAOESP32S3_Client");

  // Retrieve a Scanner and set the callback we want to use to be informed when we
  // have detected a new device.  Specify that we want active scanning and start the
  // scan to run for 30 seconds.
  BLEScan* pBLEScan = BLEDevice::getScan();
  pBLEScan->setAdvertisedDeviceCallbacks(new MyAdvertisedDeviceCallbacks());
  pBLEScan->setActiveScan(true);
  pBLEScan->start(30);

  pClient = BLEDevice::createClient();
  // Connect to the remove BLE Server.
  pClient->connect(*pServerAddress);
  Serial.println(" - Connected to server");

  // Obtain a reference to the service we are after in the remote BLE server.
  BLERemoteService* pRemoteService = pClient->getService(serviceUUID);
  if (pRemoteService == nullptr) {
    u8x8.clearDisplay();
    u8x8.drawString(0, 3, "False UUID");
    Serial.print("Failed to find our service UUID: ");
    Serial.println(serviceUUID.toString().c_str());
    return;
  }

  // Obtain a reference to the characteristics in the service of the remote BLE server.
  BLERemoteCharacteristic* pCharacteristic = pRemoteService->getCharacteristic(charUUID);
  if (pCharacteristic == nullptr) {
    u8x8.clearDisplay();
    u8x8.drawString(0, 3, "False UUID");
    Serial.print("Failed to find our characteristic UUID");
    return;
  }
  Serial.println(" - Found light value characteristics");
  u8x8.clearDisplay();
  u8x8.drawString(0, 3, "Connected!");

  pCharacteristic->registerForNotify([](BLERemoteCharacteristic* pBLERemoteCharacteristic, uint8_t* pData, size_t length, bool isNotify) {
    Serial.println("Notify received");
    Serial.print("Value: ");
    Serial.println(*pData);
    snprintf(light_val, sizeof(light_val), "%d", *pData);
  });

  doconnect = true;
  u8x8.clearDisplay();
  u8x8.drawString(0, 4, "Receiving...");
}

void loop() {
  if (doconnect) {
    BLERemoteService* pRemoteService = pClient->getService(serviceUUID);
    BLERemoteCharacteristic* pCharacteristic = pRemoteService->getCharacteristic(charUUID);
    pCharacteristic->registerForNotify([](BLERemoteCharacteristic* pBLERemoteCharacteristic, uint8_t* pData, size_t length, bool isNotify) {
      Serial.println("Notify received");
      Serial.print("Value: ");
      Serial.println(*pData);
      snprintf(light_val, sizeof(light_val), "%d", *pData);
    });
  }
  printReadings();
  delay(1000);
  u8x8.clearLine(2);
}
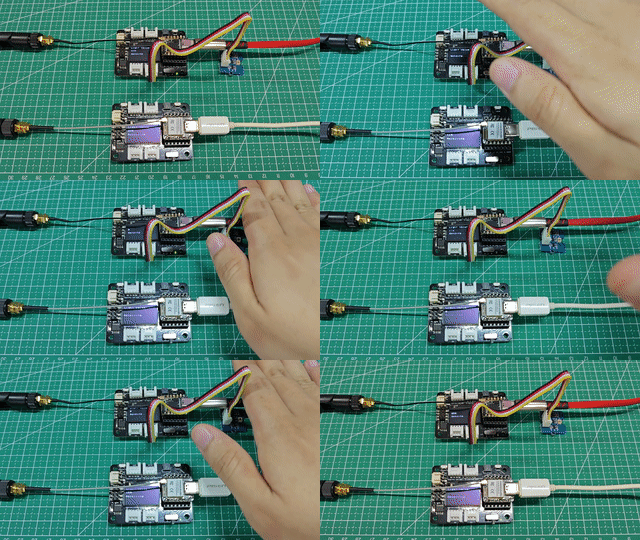
当使用上面的示例时,我们建议在使用客户端程序之前上载服务器程序并确保它已成功运行。如果程序运行顺利,您将看到以下结果。

程序注释
对于上述程序,我们将选择更重要的部分进行解释。我们将从服务器程序开始。
在程序开始时,我们定义了蓝牙服务器的名称,这个名称可以是您设置的名称,但您需要记住它,因为您需要依靠这个名称来搜索这个蓝牙设备。
#define bleServerName "XIAOESP32S3_BLE"
在本教程的前几节中,我们已经讨论过在服务器下会有Characteristic,在Characteristic下会有值和其他内容。因此,我们在制作广告时需要遵循这一原则。
BLEService *pService = pServer->createService(BLEUUID((uint16_t)0x181A)); // Environmental Sensing
  pCharacteristic = pService->createCharacteristic(
    BLEUUID((uint16_t)0x2A59), // Analog Output
    BLECharacteristic::PROPERTY_NOTIFY
  );
  pCharacteristic->addDescriptor(new BLE2902());
在上面的程序中,您可以看到 createService() 用于创建服务器。 参数是一个特定的UUID: 0x181A。在关贸总协定的规则中, 0x181A 表示环境监测类型数据,以及相同特征的UUID: 0x2A59 也有着特殊的意义。在GATT中,它表示模拟输出。这符合我们的光传感器值的情况,所以我在这里定义它。您可以在此处查看 GATT 为我们准备的一些特定 UUID 的含义。
当然,您也可以在不遵循GATT标准的情况下设置UUID,您只需要确保这两个值是唯一的,并且不会影响您的客户通过识别这些UUID来查找值的能力。你可以访问 uuidgenerator.net 为您的服务和特性创建随机UUID。
第二个参数 createCharacteristic()函数用于设置属性。 请注意,这里我们需要将其设置为PROPERTY_NOTIFY,以确保数据连续发送。
pCharacteristic->setValue(light_val);
pCharacteristic->notify();
最后,在 loop中,我们只是每隔10ms公布一次读取光传感器的值。
下一步是客户端程序,它看起来要复杂得多。
在节目开始的时候,它仍然是非常熟悉的内容。您需要确保此内容与您在服务器端配置的内容一致。
//BLE Server name (the other ESP32 name running the server sketch)
#define bleServerName "XIAOESP32S3_BLE"

BLEUUID serviceUUID("181A"); // Environmental Sensing
BLEUUID charUUID("2A59");    // Analog Output
接下来,我们编写一个回调函数,该函数的主要功能是搜索附近的蓝牙设备,然后将其与您提供的蓝牙设备名称进行比较,捕获它,并获取其MAC地址。
class MyAdvertisedDeviceCallbacks: public BLEAdvertisedDeviceCallbacks {
  void onResult(BLEAdvertisedDevice advertisedDevice) {
    if (advertisedDevice.getName() == bleServerName) { //Check if the name of the advertiser matches
      advertisedDevice.getScan()->stop(); //Scan can be stopped, we found what we are looking for
      pServerAddress = new BLEAddress(advertisedDevice.getAddress()); //Address of advertiser is the one we need
      Serial.println("Device found. Connecting!");
    }
  }
};
以下过程是在服务器中查找光强度值的关键。首先,我们需要找到我们的服务器UUID,然后在服务器下查找Characteristic的UUID,最后找到light值。这种解析方法与蓝牙的数据结构是一一对应的。
// Obtain a reference to the service we are after in the remote BLE server.
BLERemoteService* pRemoteService = pClient->getService(serviceUUID);
if (pRemoteService == nullptr) {
  Serial.print("Failed to find our service UUID: ");
  Serial.println(serviceUUID.toString().c_str());
  return;
}

// Obtain a reference to the characteristics in the service of the remote BLE server.
BLERemoteCharacteristic* pCharacteristic = pRemoteService->getCharacteristic(charUUID);
if (pCharacteristic == nullptr) {
  Serial.print("Failed to find our characteristic UUID");
  return;
}
Serial.println(" - Found light value characteristics");

pCharacteristic->registerForNotify([](BLERemoteCharacteristic* pBLERemoteCharacteristic, uint8_t* pData, size_t length, bool isNotify) {
    Serial.println("Notify received");
    Serial.print("Value: ");
    Serial.println(*pData);
  });
最后,将灯光值放置在指针pData中。
上述示例给出了单个传感器的单个值的最简单示例。如果您想通过蓝牙宣传多个传感器或多个传感器值,我们建议您阅读此处的教程示例。
故障排除
问题1: XIAO ESP32S3示例中没有BleoutSerial?
ESP32-S3芯片中没有蓝牙经典硬件。只有“老”的ESP32才能做到这一点——没有其他Espressif SoC拥有BT Classic。
技术支持和产品讨论
感谢您选择我们的产品!我们在这里为您提供不同的支持,以确保您使用我们产品的体验尽可能顺利。我们提供多种沟通渠道,以满足不同的偏好和需求。