The AI "Blink"
Familiarize the tools that we are using
SenseCraft AI Platform
Seeed Studio SenseCraft AI Platform is a browser-based AI Solution.
It empowers users to effortlessly deploy a vast library of publicly available AI models onto their edge devices provides a seamless and user-friendly experience, allowing you to deploy public AI models directly onto your edge devices with just a few clicks.
The core of it is an open source project and we have share it on the GitHub and offer the development method as well.
User Account
SenseCraft AI is an open platform that allows users to browse all public AI models and Home pages without logging in. You need to sign up and sign in only when you need to deploy a model, or share your own model.
SenseCraft AI and SenseCraft Data Platform ( original SenseCAP Cloud Platform) are both software services provided by seeed studio for users, users only need to sign up for an account on any one of the platforms, and then they can use the same account to sign in on both platforms.
Sign up
- Enter your name and valid email,and then click "get capcha"

- Get the verification code from your email and enter it on sign up page
verification code is valid for 10min, please complete the registration within 10 minutes

- Enter your password and other user information to complete your registration.

Sign in
Sign in with your registered email account

More about SenseCraft AI platform you can refer to here.
AI Models on SenseCraft AI Platform
Model list
Public AI models show all published AI models;Custom AI models show all your own uploaded AI models. The model is displayed on the list as follows
- Model inference example image
- Model Name
- Model describe
- This model task type like detection,classification,segmentation,pose, generation
- Supported Device:Device that support deployment of this model
- The username that published this model
Search model
Provides search feature based on various types of key information in the model like model name, model task, surpported device,model publisher
Favorite model
Users can favorite public models

More information about AI Models in SenseCraft AI platform you can refer to here.
Device Workspace
The SenseCraft AI platform provides an AI model zoo for users to share and download AI models, and also has a device workspace where users can view the inference results of their devices in real time and manage their devices to improve the convenience and flexibility of device management.
XIAO ESP32S3 Workspace

You can learn more through the XIAO ESP32S3 Workspace documentation.
Grove-Vision AI v2 Workspace

You can learn more through the Grove-Vision AI v2 Workspace documentation.
Nvidia Jeson Workspace

You can learn more through the Nvidia Jeson Workspace documentation.
SenseCraft AI-Jetson
SenseCraft AI-Jetson is a development toolkit and platform designed for NVIDIA Jetson Edge AI devices. Simply run the "Quickstart Script" and you will be presented with an interactive user interface to view an example application with a pre-loaded video and a pre-loaded AI model. If you want to add your own USB camera, IP camera you can simply do it in a few clicks!
In addition to the various built-in AI models we offer out-of-the-box, you can access to a large number of public models on SenseCraft AI platform and you will be able to download and deploy AI models for specific scenarios and create personalized AI solutions based on your needs. SenseCraft AI is your intelligent decision-making partner for vision ai, providing you with simple, flexible and efficient inferencing and solution building capabilities.

You can learn more through the SenseCraft AI-Jetson documentation.
The AI "Blink": Quickly Using AI
1. Get started with Face Recognition
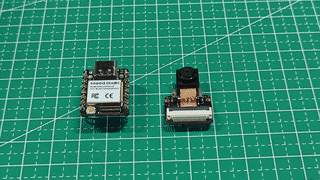
We first go to the SenseCraft AI Deployment Website then simply connect the XIAO ESP32S3 Sense to your PC via a data cable to instantly display face recognition.
Step 1. Install XIAO ESP32S3 Sense expansion board
First, we need to properly connect the XIAO ESP32S3 Sense expansion board to the XIAO. Installing the expansion board is very simple, you just need to align the connector on the expansion board with the B2B connector on the XIAO ESP32S3, press it hard and hear a "click", the installation is complete.
Step 2. Connecting the XIAO to your PC
Connect the XIAO to your PC using a data cable with data transfer function.
Step 3. Go to the SenseCraft AI Platform page and connect the XIAO
Click the button below to go to the SenseCraft AI Platform homepage.
Once we are on the homepage of SenseCraft AI Platform, we need to first need to connect the XIAO ESPS3 for that, click Connect button.

The browser will then pop up a window. We need to select the correct port for XIAO here. For Windows, this port usually starts with COM, and in case of MacOS, this port usually starts with /dev/tty. And it will have the words USB JTAG.

Clicking the Connect button will only result in an automatically identify the board and configuration information is being read.

Then we can move to Select Model button and click it to find another pop up window. Here I selected the face recognition for demo. After selecting it, click the Send button and wait few second. You will see directly the results:

You are getting it! You have successfully deployed your first ML model!
2. SenseCraft Triggers - Do a simple feedback action
That is, when we recognize our face, we let XIAO's LED light up. For that, go to Output section and Select the "Trigger action" to setup a trigger. .

Here, When the face detection have confidencet above 50% and enable a trigger.

And here the Trigger Action is "Light up the LED". Ater that, click "Send" and you can see, whenver the face detected, you can see the onboard LED is turned on.

Congratulations! You have successfully deployed the AI automated System!

ToDo
- Load and Run Face Recognition Model with SenseCraft AI Platform.
- Setup a Trigger and Control LED with SenseCraft AI Platform.