Quantum Mini Linux Development Kit
Quantum Mini Linux Dev. Kit is possibly the smallest Linux development board on the market, a highly integrated kit with quad-core CPU that can run Linux at only 40mm x 35mm, which also includes network connectivity. It is suitable for scenarios such as as a personal server, intelligent voice assistant, and for robotic development.
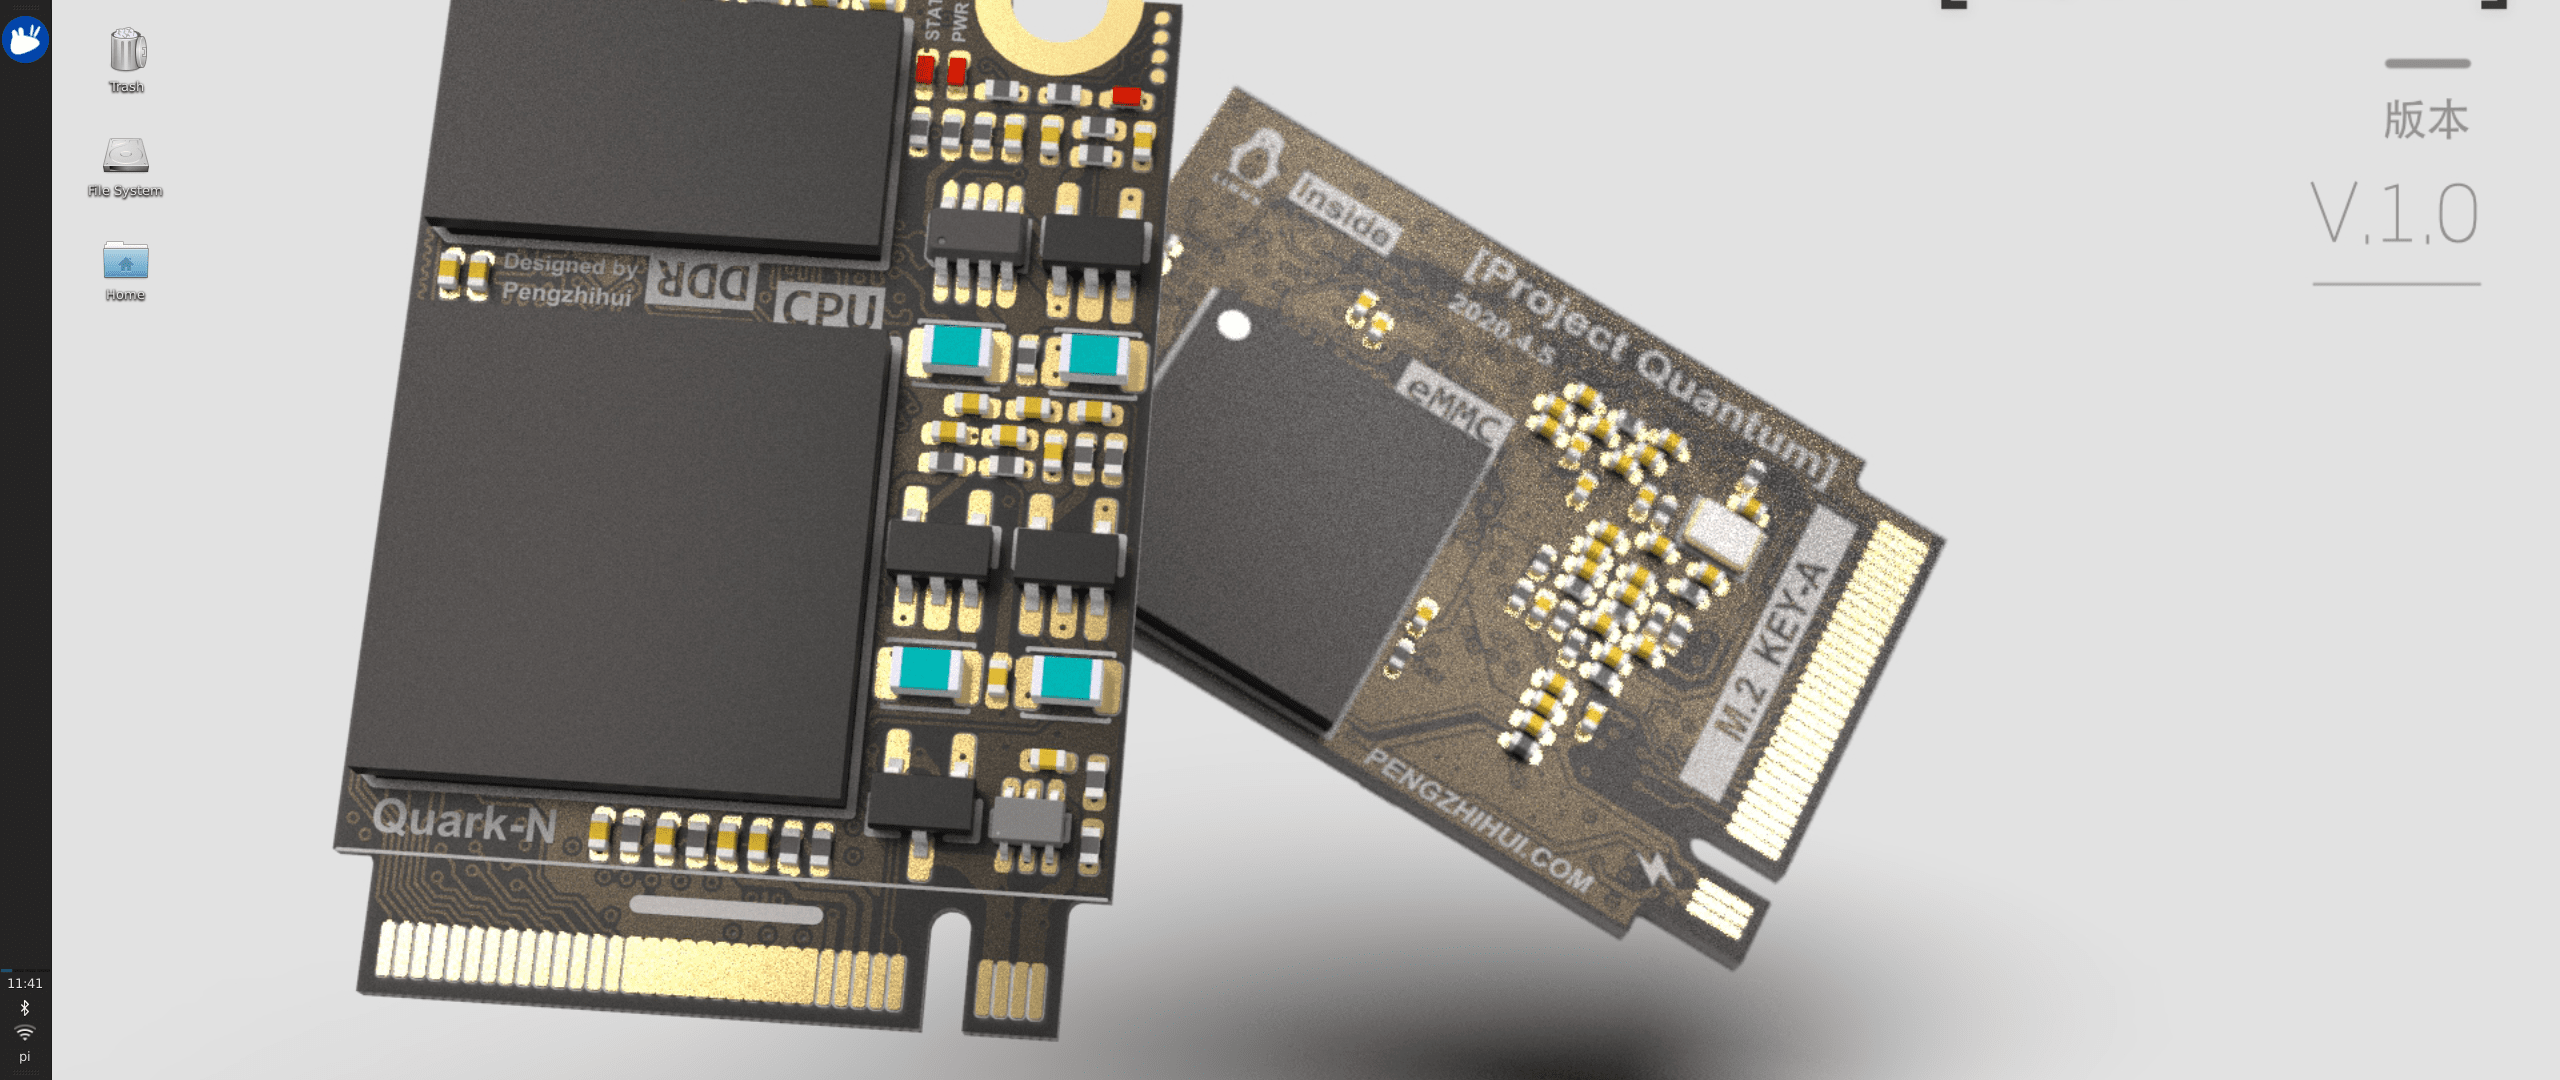
The SoM is called Quark-N, based on Allwinner H3, Quad-core Cortex-A7, and ARM Mali400 MP2 GPU. The 6-layer high-density gold PCB design integrates a complete ARM-Linux system (CPU, DDR, eMMC) in a 2x3cm space. Also, most of the GPIO is led out by the board through the M.2 Key-A golden finger interface to minimize the bottom board design difficulty. You can easily design your own base plate with two-layer boards to realize your interesting ideas.
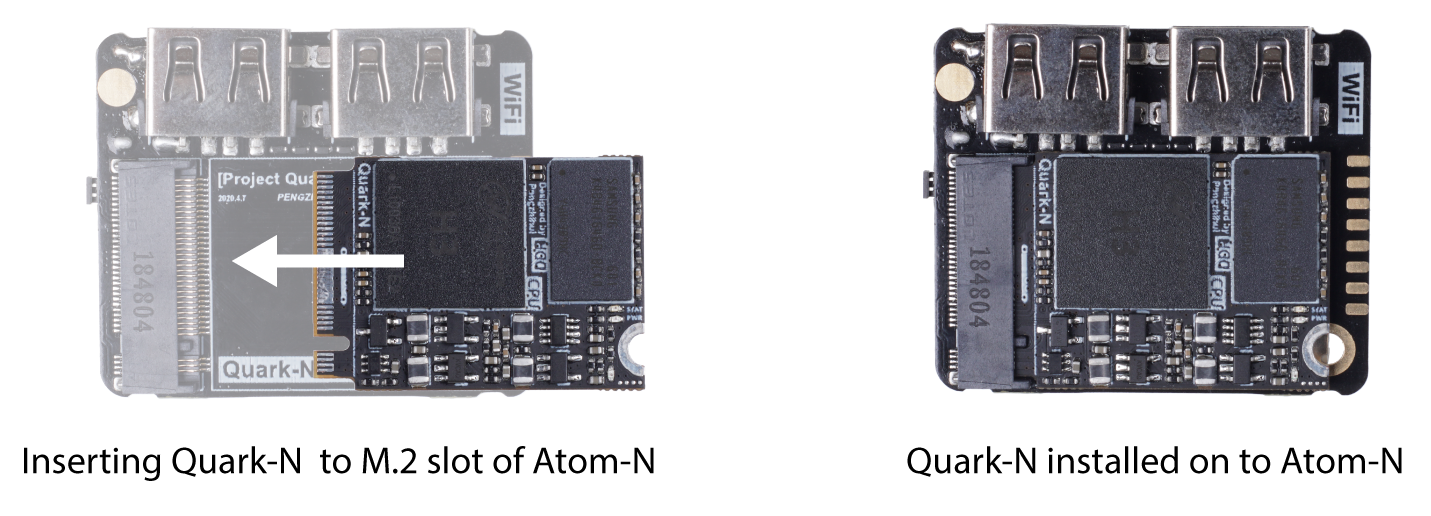
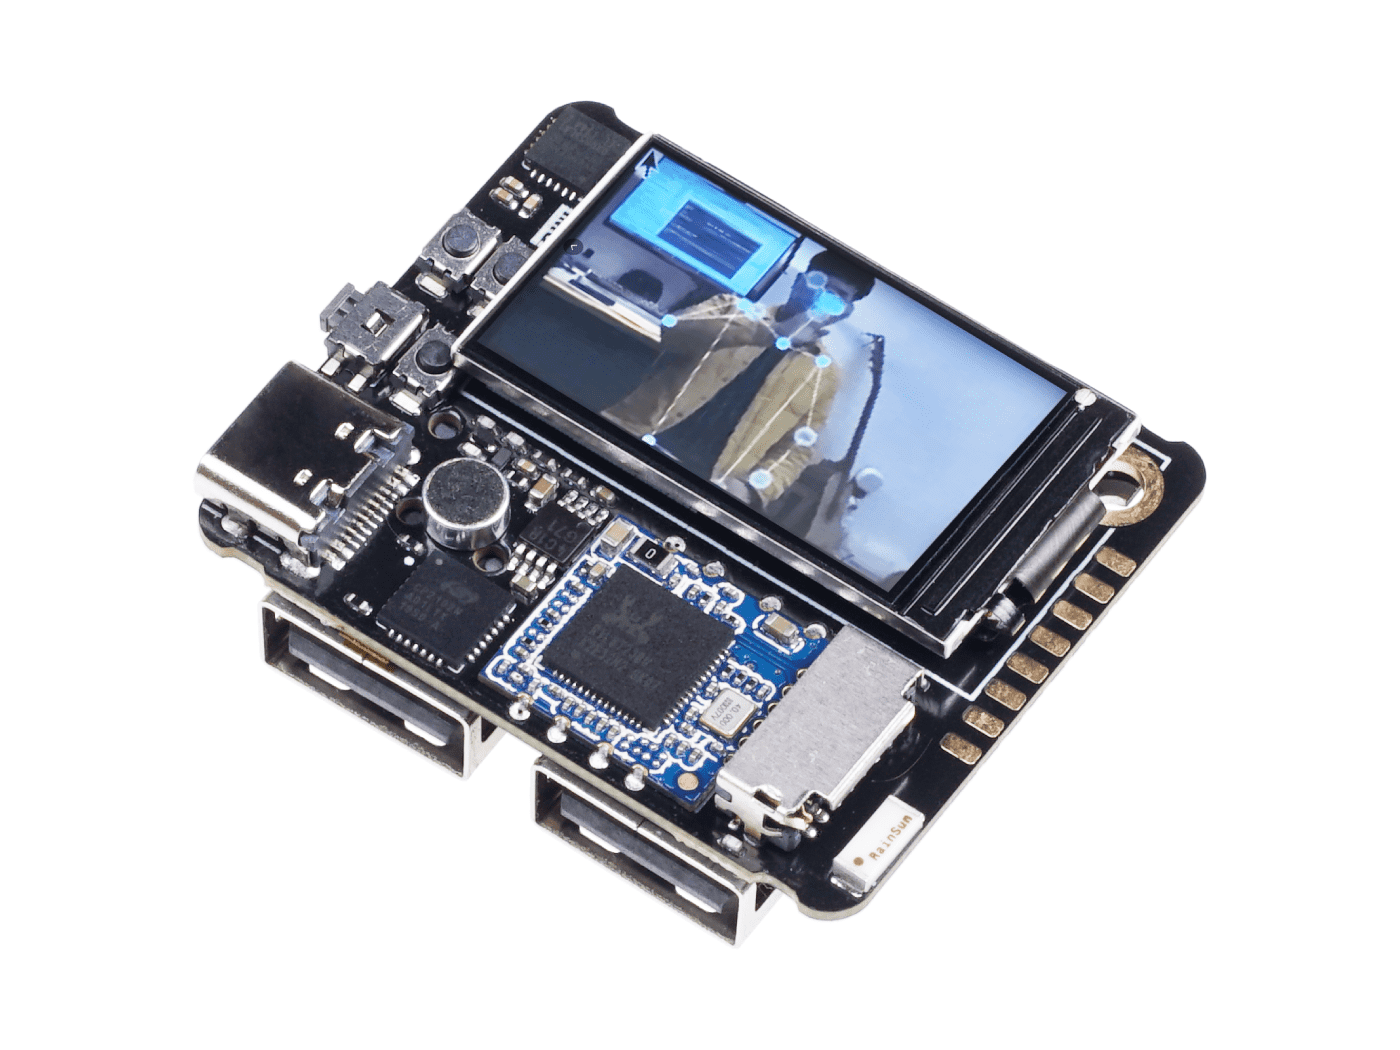
The carrier board is called Atom-N, and Quark-N is connected to Atom-N through the M.2 interface. Atom-N leads out a row of golden finger pins to realize I/O expansion, expand SPI, I2C, UART, GPIO, and other interfaces to facilitate the completion of your own design. Also, it is equipped with a microphone, MPU6050 motion sensor (accelerometer and gyroscope), onboard 4 buttons (GPIO-KEY, Uboot, Recovery, Reset), IPS display, Wi-Fi/Bluetooth connectivity which greatly expands the possibilities with this product.
Features
-
Ultra-small (31mmx22mm) and highly integrated Quad-core Cortex-A7 Linux SoM (System on Module).
-
Carrier board (40mmx35mm) with rich peripherals and interfaces: Microphone, Gyroscope, Accelerometer,4 x Buttons (GPIO-KEY, Uboot, Recovery, Reset) and a TFT display.
-
Integrates a complete ARM-Linux system for advanced development.
-
Wireless Connectivity (Wi-Fi + Bluetooth).
-
Ability to design your own baseboard due to the M.2 interface.
-
Wide range of applications such as a personal server, intelligent voice assistant, and robotic development.
-
Pre-installed xrdp Remote Desktop Server, easy monitor control without the need of HDMI cable.
Specifications
Hardware Overview

Quantum has now been updated with a new version, which adjusts the antenna type for better wireless performance compared to the old one. In addition to this it also optimizes the PCB layout by moving the fan solder joints to the top. The Uboot and Recovery buttons have also been removed.
Getting Started
Hardware Requirements
-
A Working Computer
-
A MicroSD Card (>= 16GB is recommended)
-
Keyboard and Mouse
Download the Latest System Image
- Download the Latest System Image here.
Latest Build: 2021-1-11
sha256: 8f466adf56468b05d622eba27eb7b1a11ef6d4b943272984730a73ddff7cf59a
The system image of Quantum Mini Linux dev board is modified from Nano Pi's image.
Step.1 - Prepare your Bootable MicroSD Card
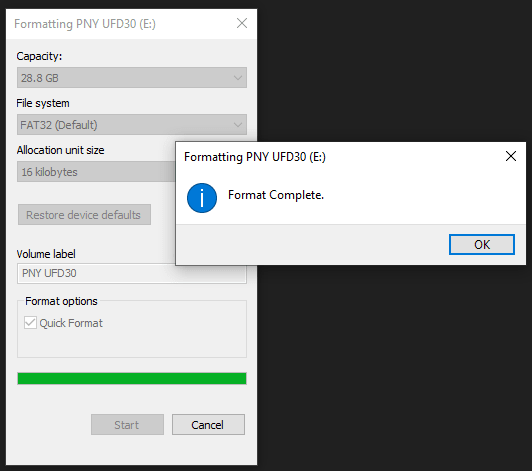
Format the MicroSD Card. If you are a Windows user, you can format the USB drive by right-clicking the USB Drive and select Format.
Note: Choose FAT32 for the File System.
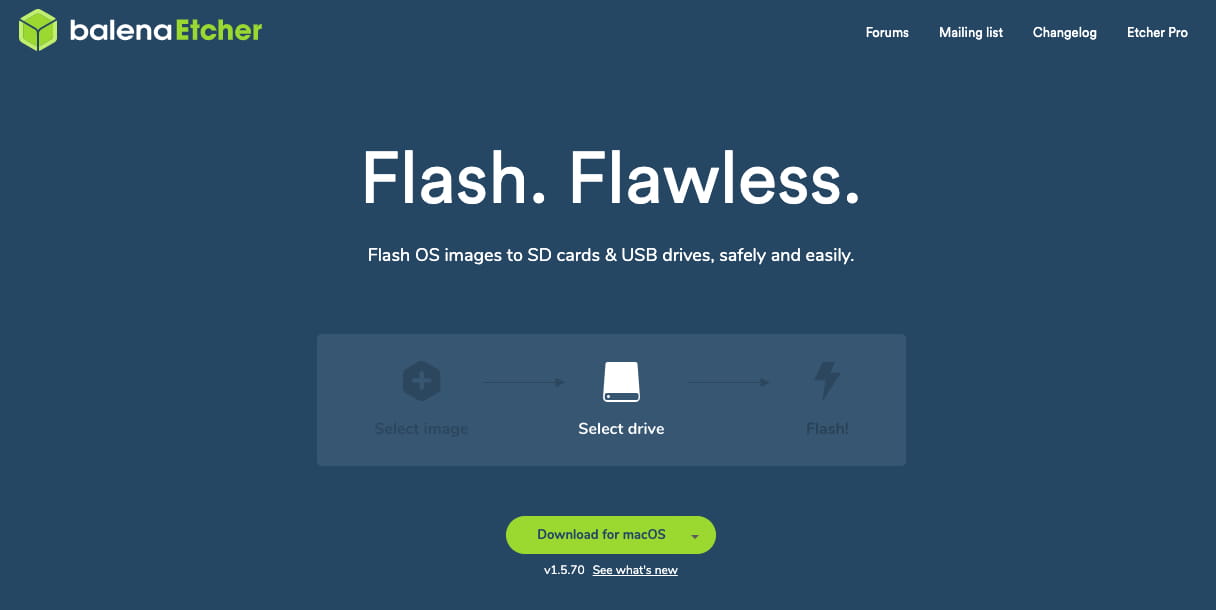
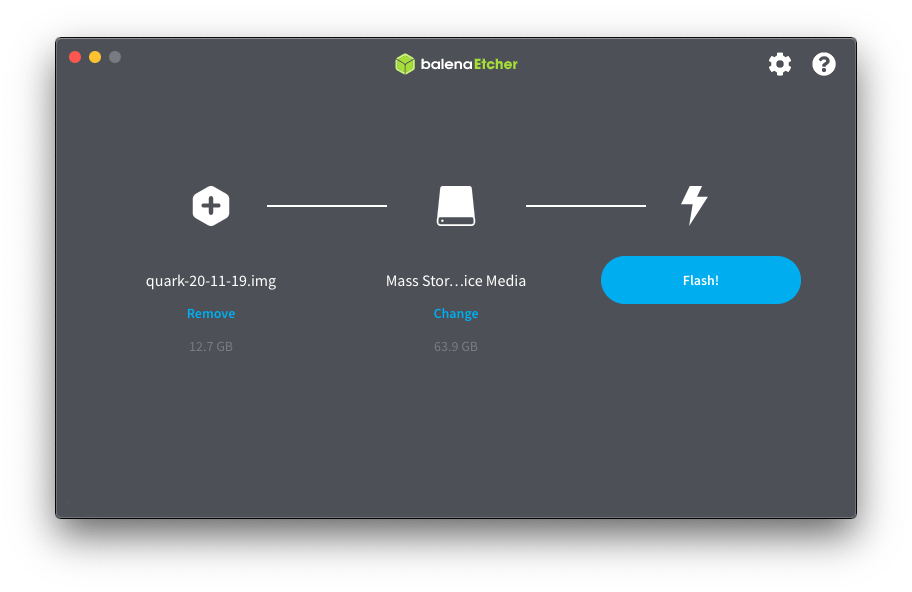
Step.2 - Download Flash Burner
Download the Open Source Flash burner balenaEtcher. Download the version according to your operating system(Windows/macOS/Linux).
Step 3 - Writing the OS Image into USB
Select the downloaded System Image, select the formatted MicroSD card and Flash! Now, the bootable MicroSD card is all set to go.
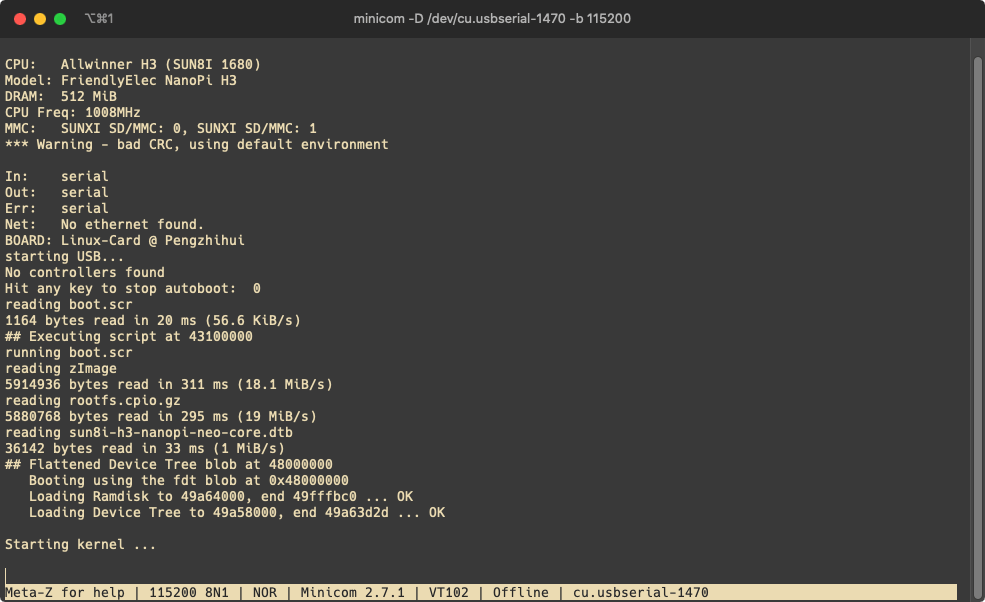
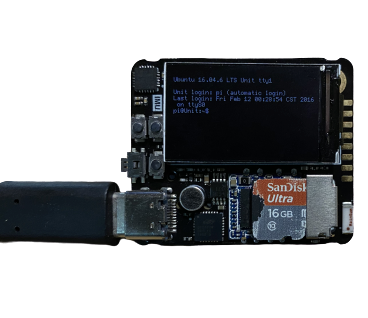
Booting into the System
Now, plug the MicroSD card to the MicroSD Slot of the Atom-N and plug in the USB Type-C for power (USB Serial direction).
And now you can open the USB serial using any type of Serial software from your PC! You should be able system status LED starts to blink on the Quark-N(SoM) and messages are printed to the Serial.
System Default Users and Password
- Normal User:
users: pi
password: quark
- Root User:
users: pi
password: quark
System Configurations
You may use npi-config to configure the settings for the system image such as users, system languages, time zone, ssh and etc.
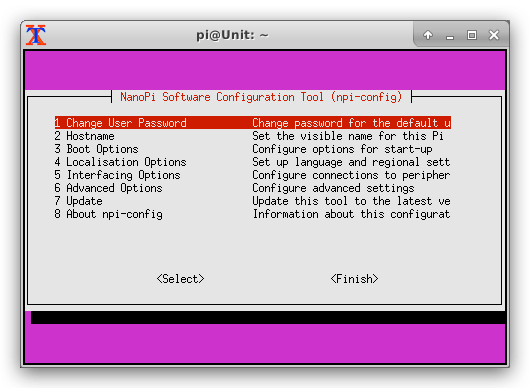
The settings by default is configured, if you don't know what you're configuring please leave it as default.
Wi-Fi
Scipt
The latest image was shipped with a python script to connect the Wi-Fi much easier, replace the SSID and PASSWORD to yours:
cd ~/WorkSpace/System/net
sudo python connect_wifi.py SSID PASSWORD
Manual Connect
Here we use NetworkManager to manager network, please follow though to connect to Wi-Fi:
- Switch to root user:
su root
- Turn on the Wi-Fi:
nmcli r wifi on
- Scan the nearby Wi-Fi:
nmcli dev wifi
- Connect to a specifc Wi-Fi:
nmcli dev wifi connect "SSID" password "PASSWORD" ifname wlan0
where change SSID and PASSWORD is your Wi-Fi credentials. Once connected, it will auto-connect the next time.
For more reference about NetworkManager, please read here.
Software Updates (Optional)
Once connected to network, it is best practice to update the software:
sudo apt-get update
Remote Desktop Connection
As mentioned earlier, the system image has the xrdp server running at default so that you can establish remote desktop connection using the Microsoft Remote Desktop(Supports Windows/macOS) within the same network.
-
Use
ifconfigto find out the ip address of the dev board. -
From the same network, type in the the dev board's ip address and log in. Now you have remote desktop control over the desktop!
Bluetooth
The system image has built-in Bluetooth driver and you may follow the following steps to get Bluetooth started:
bluetoothctl
Once within the bluetoothctl interface. run scan on to list all nearby bluetooth device:
scan on
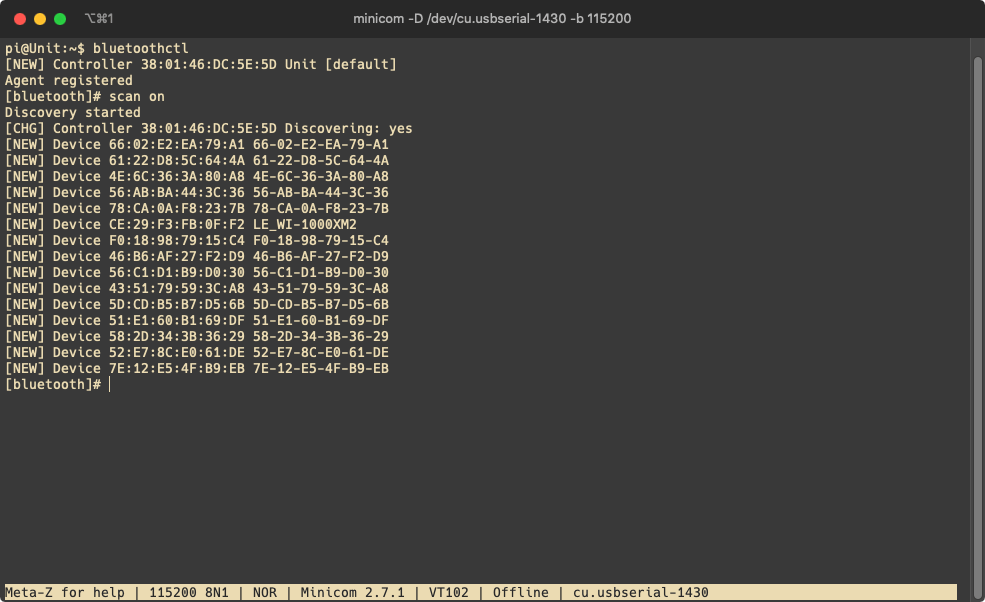
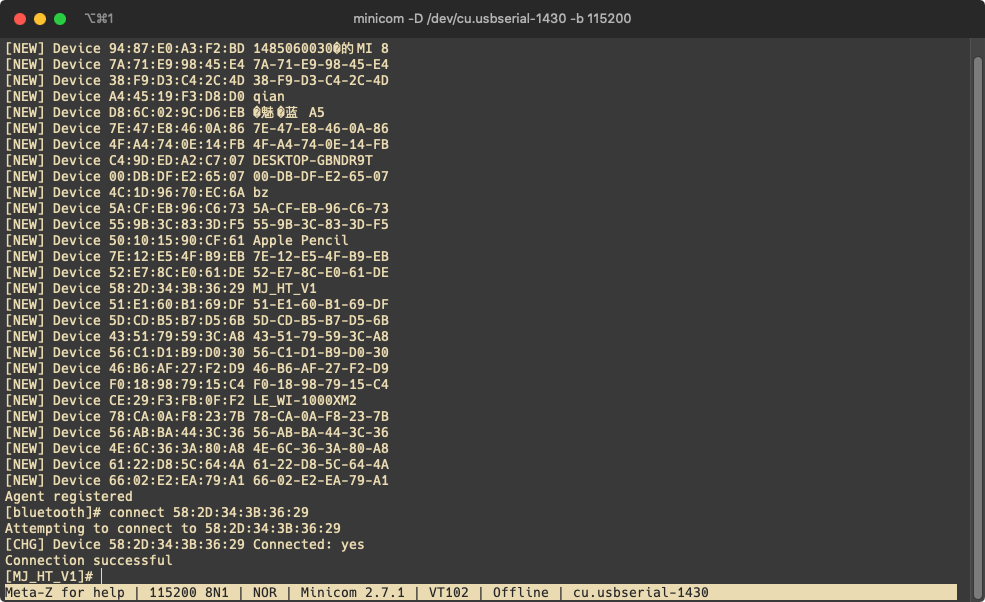
Copy the device MAC address, then connect to the device with the following command:
pair A4:xx:xx:xx:xx:30
trust A4:xx:xx:xx:xx:30
connect A4:xx:xx:xx:xx:30
Now your dev board is connected to your bluetooth device. Type quit back to the terminal. Play music on dev board, then you will hear music on your bluetooth speaker device!
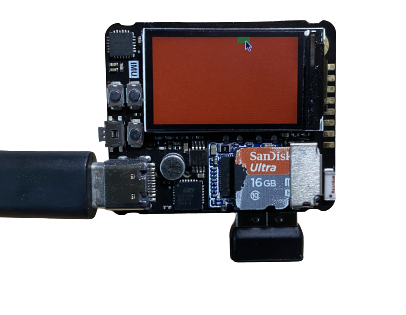
LCD
The driver for the LCD screen uses SPI to communicate with the CPU and its driver is builtin with the system image hence the reason you should be able to see the system's message log when it booted up:
-
If you connect USB keyboard and mouse to the dev board, this becomes the smallest build of a PC!
-
There is a simple pygame example that demonstrate the LCD usage from Python.
-
Navigate to the project location:
cd WorkSpace/PyGame
- Run the example:
sudo python hello_world.py
Microphone
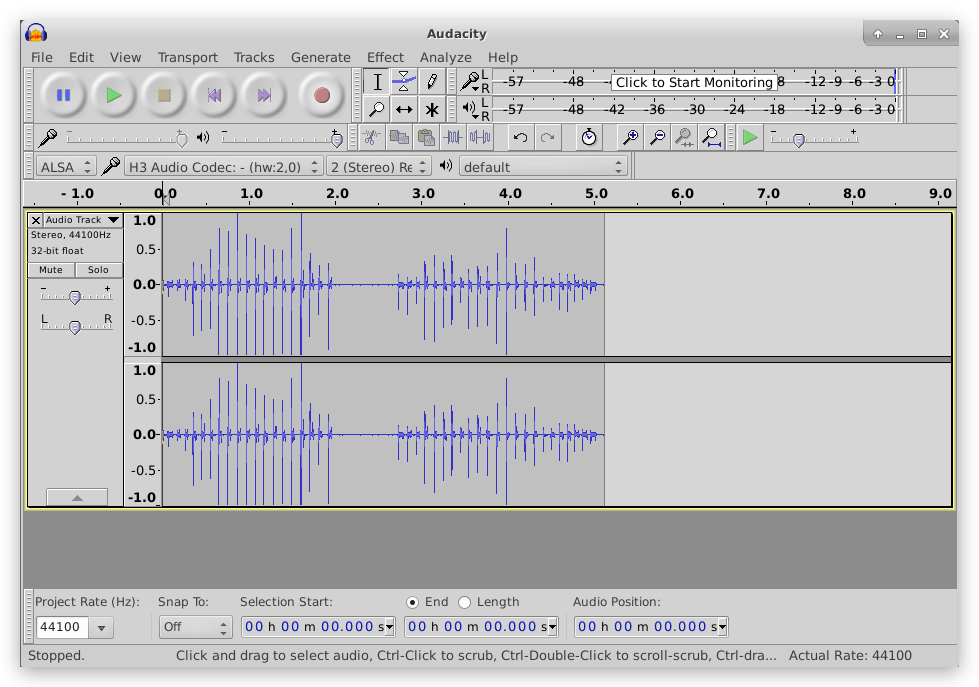
There is also a built-in microphone on the Atom-N (carrier board) which makes it Machine Learning capable! For simple testing, it is easy to use the Audacity software which is pre-installed with the image.
-
Log in the dev board using remote desktop.
-
Open the Audacity software.
-
Starts recording and talk to the microphone, you should see the sound waves!
You may also use arecord -l in terminal to find out about the microphone.
For further development based on the microphone, please check the path WorkSpace/WuKong for the examples using WuKong Robot and snowboy.
GPIO
For GPIO access, this is very convenient as linux based system and can be easily controlled using Python.
- Navigate to the project location:
cd WorkSpace/GPIO
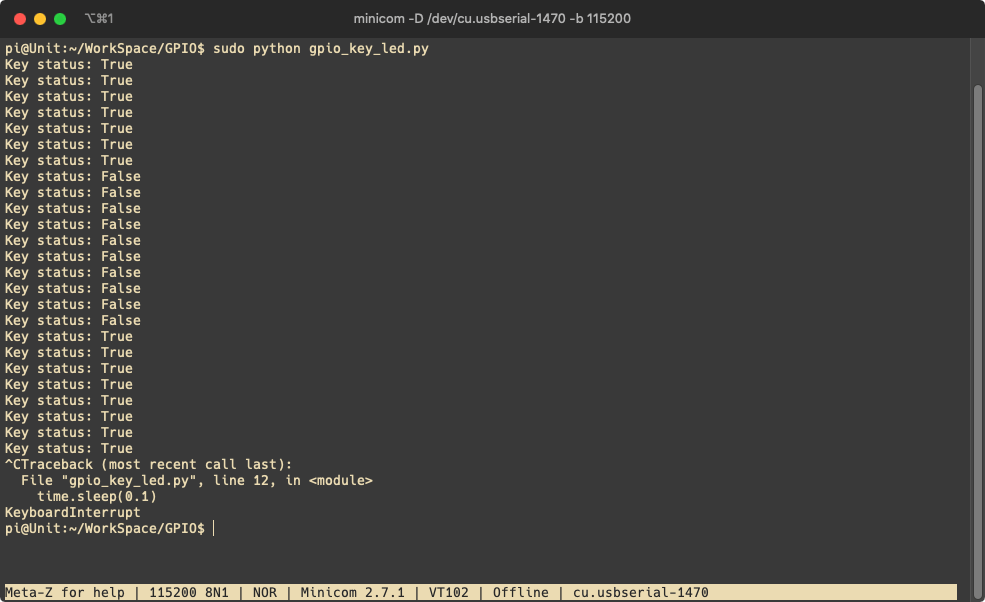
- Run the GPIO example:
sudo python gpio_key_led.py
Now you can press the user button and you should be able to see the output in serial and the LED on the Quark-N (SoM) dims!
The LED is on Quark-N(SoM) and did not lead out on the Atom-N(Carrier Board).
OpenCV
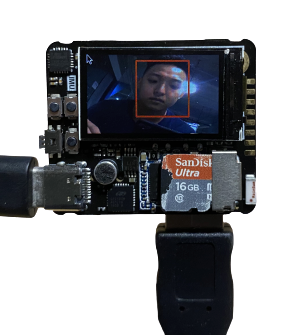
The system image has also implemented OpenCV into it and prepared a face detect demo using USB camera.
-
You will need a USB camera. Connect the USB camera to the USB port A of the dev board.
-
Navigate to the project location:
cd WorkSpace/OpenCV
- Run the demo:
python FaceDetectOnTft.py
You should see the video stream on the LCD screen of the dev board!
Others
There are also more example usages of the dev board in the WorkSpace such as TensorFlow Lite, WuKong Robot, snowboy and etc. Please navigate to the path and find out more!
FAQ
Q1: How can I install a fan to cool down the board
We are planning to release a fan and a fan holder for this product in the near future. However, for now we have released fan holder DXF files for your reference. You can install a 20x20x6mm fan to this fan holder.
The fan holder can be installed as follows:

Resources
- [ZIP] Atom Shield N AD
- [ZIP] Heat sink and Stand 3D file
- [ZIP] Fan holder
Tech Support & Product Discussion
Thank you for choosing our products! We are here to provide you with different support to ensure that your experience with our products is as smooth as possible. We offer several communication channels to cater to different preferences and needs.