Mobile Internet for Your Pi - RNDIS 4G LTE Setup
Introduction
RNDIS (Remote Network Driver Interface Specification) is a protocol that allows USB-connected devices, like the Quectel EG25-G 4G module, to act as network interfaces. By enabling RNDIS on a Raspberry Pi, the 4G module can provide cellular internet connectivity to the Pi. This setup is widely used in IoT applications, such as creating portable internet routers, IoT gateways, and remote monitoring systems. The Raspberry Pi communicates with the 4G module using AT commands to configure features like RNDIS mode, GNSS, and SMS. This approach simplifies internet access in scenarios where traditional wired or Wi-Fi connections are unavailable.
Hardware Preparation
| Raspberry Pi 5 | Raspberry Pi 4G LTE CAT4 HAT |
|---|---|
 |  |
The Hardware Setup

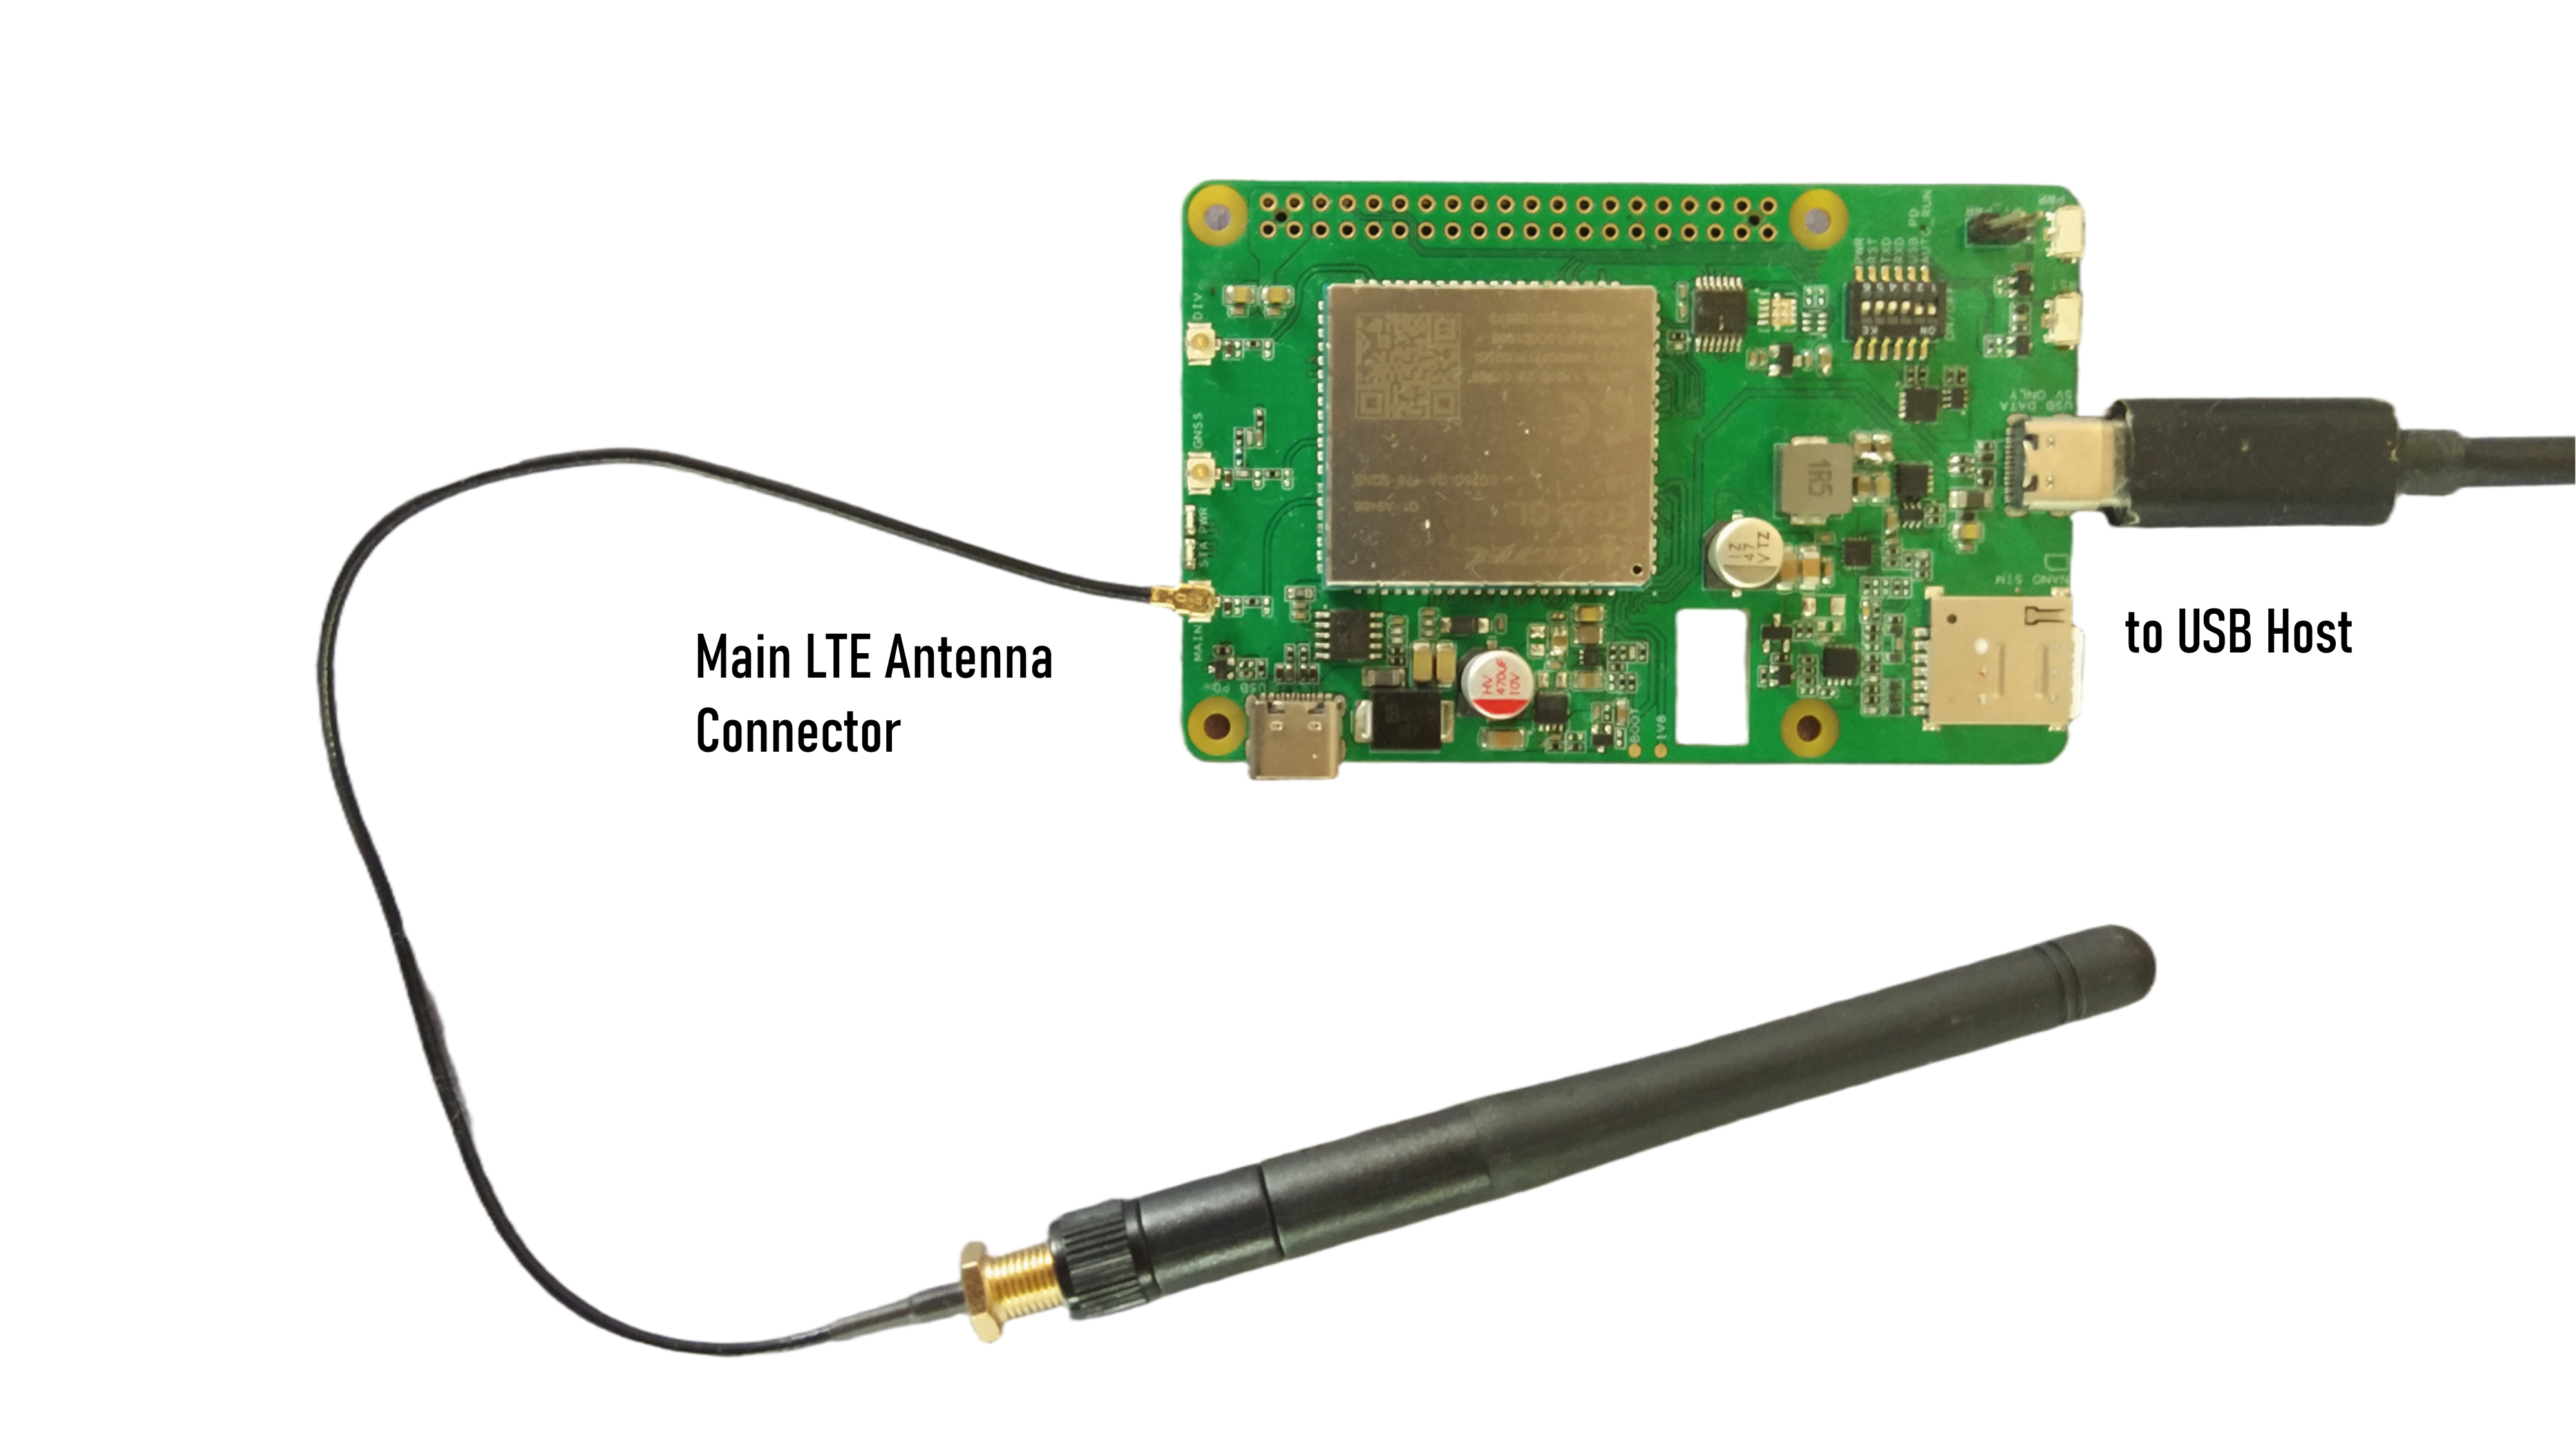
Setting up a Raspberry Pi for networking via RNDIS (Remote Network Driver Interface Specification) using AT commands involves using Quectel Module.
If the necessary drivers for communicating with AT commands are not installed, you will need to install them.
Network Configuration
Step 1 : Open Minicom on Raspberry Pi
sudo minicom -D /dev/ttyUSB2
AT
Step 2 : Enable RNDIS Mode
AT+QCFG="usbnet",1
Step 3: Verify the mode
AT+QCFG="usbnet"?
It should return usbnet,1, indicating RNDIS is active.
Step 4: Check Network Interfaces
ifconfig
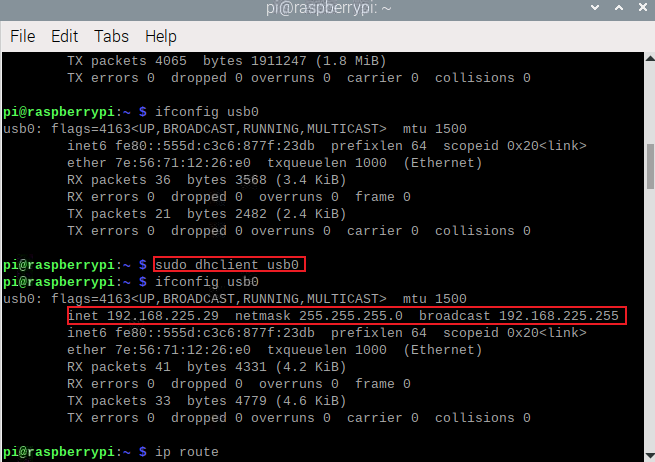
You should see a new interface, usb0 or eth1, which is the RNDIS network interface. In this case it is usb0.
Step 5: To configure the network interface for internet access, use DHCP:
sudo dhclient usb0
sudo ip link set usb0 up

Step 6: Ensure that your routing is set up correctly for internet access:
sudo ip route add default via 192.168.225.1 dev usb0
Change the gateway according to your usb0 IP.
Step 7: Add DNS entries for name resolution.
Edit the /etc/resolv.conf file to use Google's DNS:
sudo nano /etc/resolv.conf
Step 8: Add these 2 lines and save
nameserver 8.8.8.8
nameserver 8.8.4.4
Step 9: Make DNS settings persistent
sudo nano /etc/NetworkManager/NetworkManager.conf
Step 10: Add on [main] and save
dns=none
Step 11: Restart NetworkManager
sudo systemctl restart NetworkManager
Step 12: Test the Connection
ping -I usb0 8.8.8.8
nslookup google.com
Once successfully connected to the mobile network using the 4G LTE HAT, the possibilities are truly limitless. You can establish MQTT connections for IoT messaging, communicate seamlessly with cloud services for data processing, or set up an FTP server for remote file transfers. This setup transforms your Raspberry Pi into a powerful, portable gateway for diverse applications in IoT, automation, and beyond.
Tech Support & Product Discussion
Thank you for choosing our products! We are here to provide you with different support to ensure that your experience with our products is as smooth as possible. We offer several communication channels to cater to different preferences and needs.