EdgeBox RPi 200 with N3uron
What is N3uron?
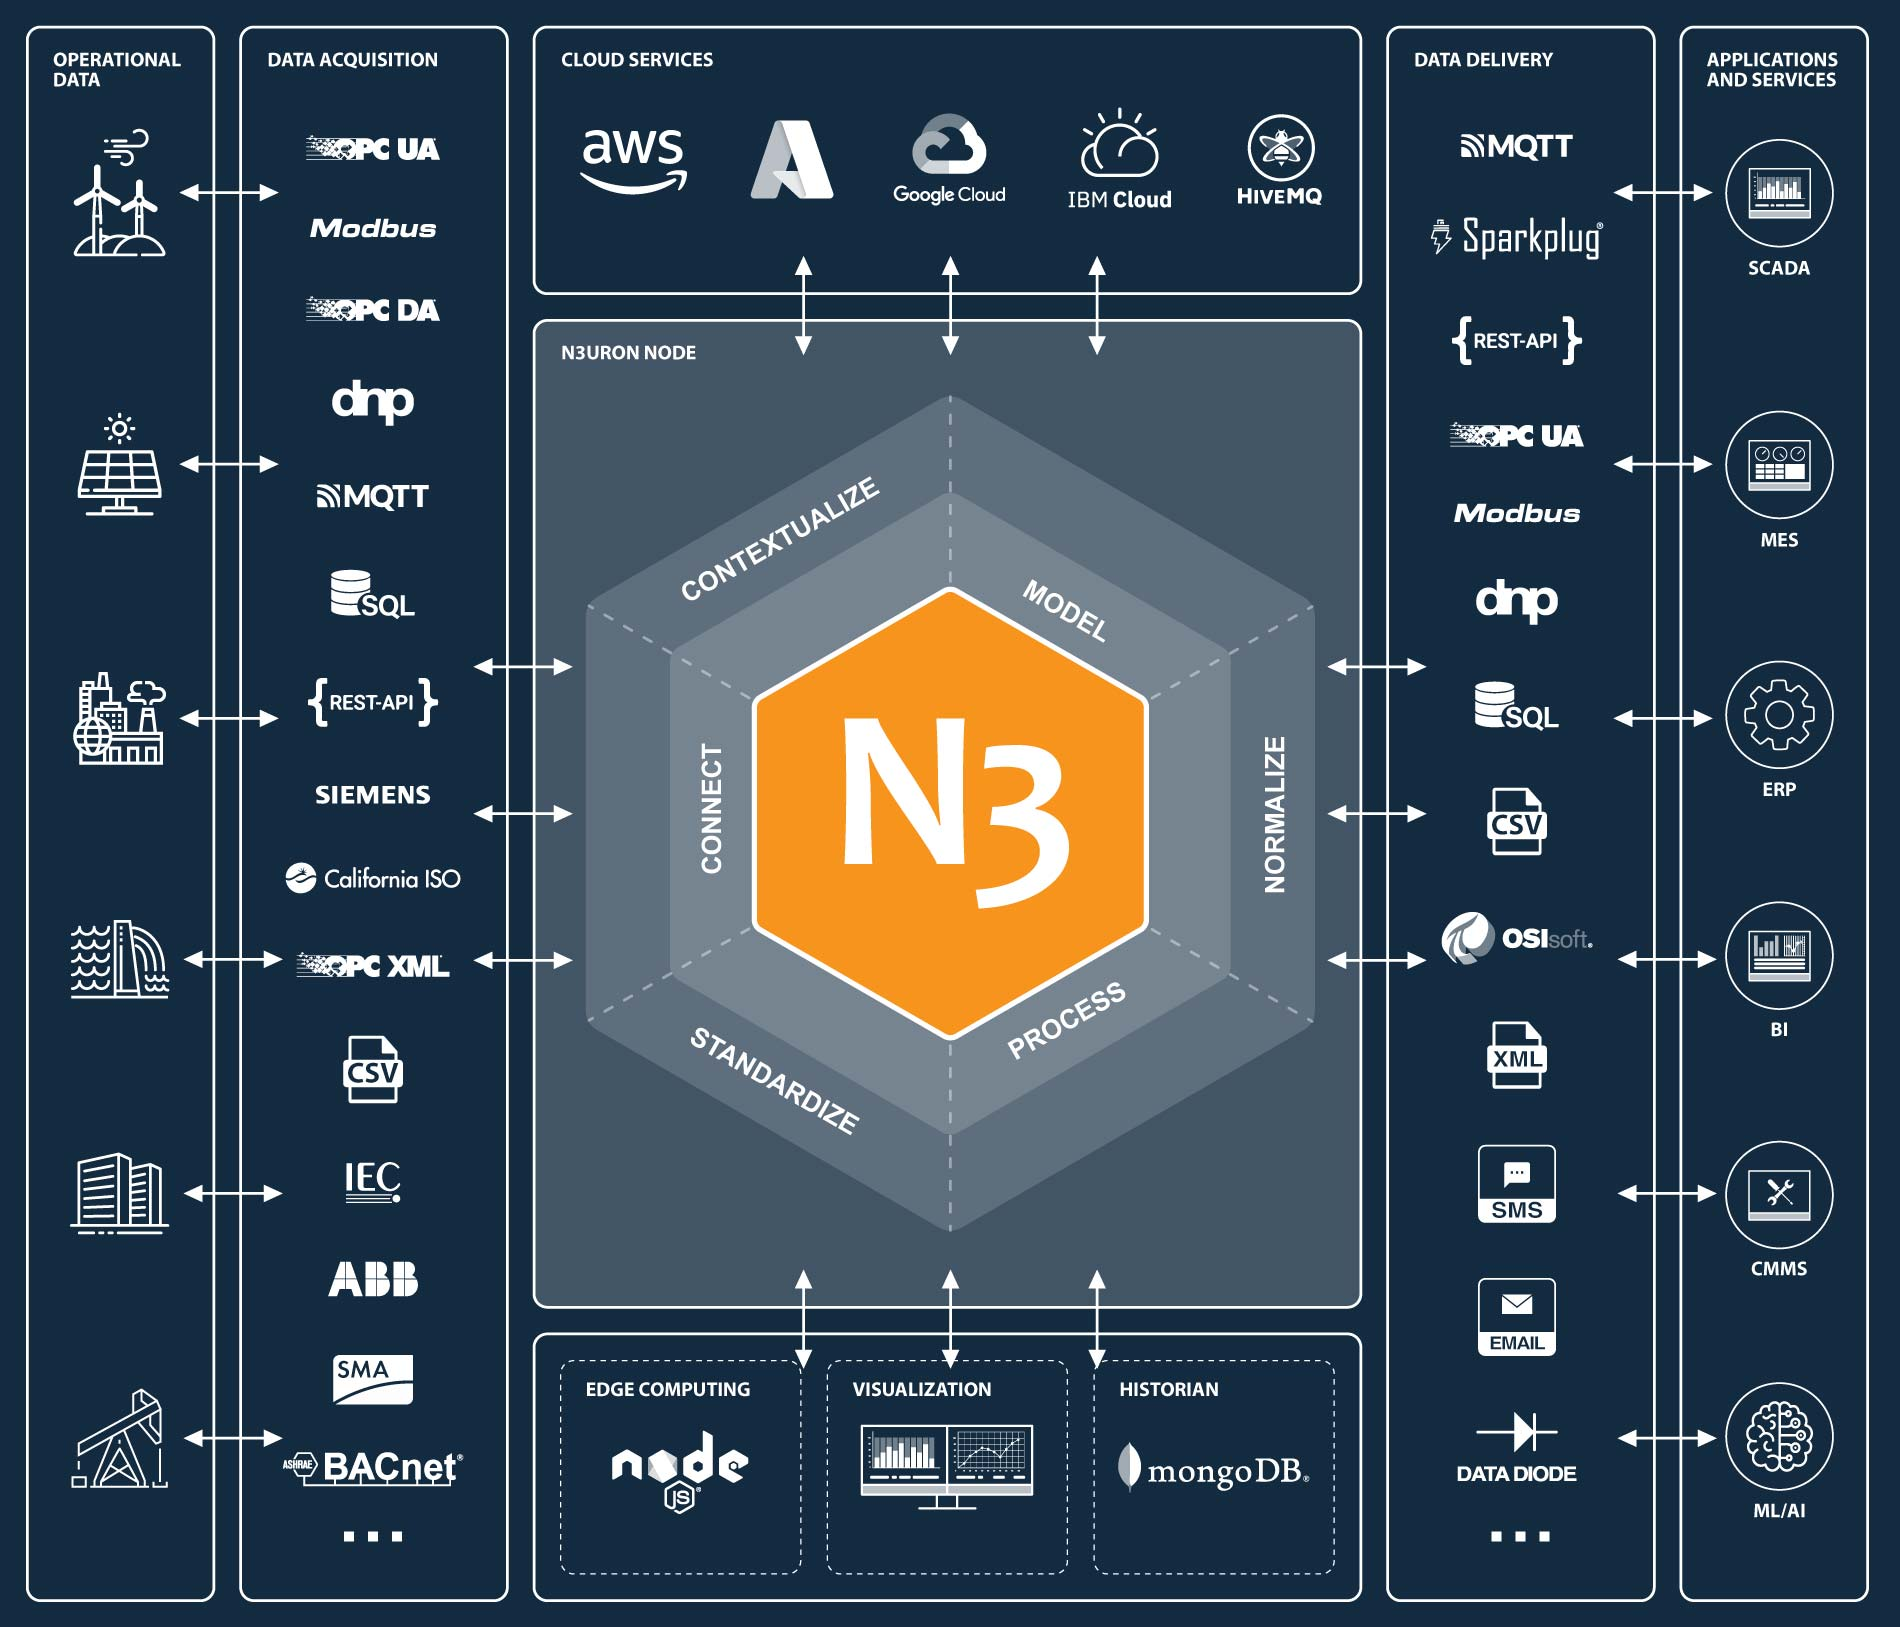
N3uron is a complete Industrial Edge Platform for IIoT & DataOps that enables seamless integration between the industrial plant floor and third-party applications, whether on-premise or in the cloud. With N3uron, you can easily create bidirectional data pipelines between OT and IT systems and decouple devices from applications by consolidating, modeling, processing and visualizing all your operational data in a single source of truth and ultimately making all this data available across the entire organization.
-
Modular: It is fully modular, with nearly fifty modules, users can stack as required to meet their project needs, acquiring only the ones strictly necessary for their applications.
-
Cross-platform: N3uron can run on most versions of Windows and Linux distributions as well as on ARM architectures like Raspberry Pi.
-
Unlimited license: N3uron boasts an unlimited licensing model, offering unrestricted usage in terms of tags, users, devices, and connections, all at an affordable price.
-
Web-based: Once installed all you need to access the node is a web browser.
-
Rapid deployment and development: N3uron can be installed in less than a minute, and its development environment facilitates quick data model creation, especially when utilizing templates.
-
Extremely efficient: A single node can easily manage several hundred thousand tags, while maintaining low hardware requirements.
-
Scalable and versatile architecture: From its inception, N3uron was conceived to seamlessly deploy distributed architectures with several hundred or thousand nodes. Users can connect multiple nodes quickly using N3uron Links, effortlessly scaling their architecture to suit their needs.
Edgebox-RPI-200

EdgeBox-RPI-200 series are all-in-one Raspberry Pi-based industrial edge computing controllers, combining multiple industrial purposes. Designed as high-scalability and rugged industrial hardware, mounted with rich IO resources and supported by the great Raspberry Pi industrial software ecosystem, it is an ideal choice for smart automation and Industrial Internet of Things(IIoT) solutions.
Prerequisites
Hardware
Software
Installation
N3uron can be easily installed with our one-step automated installation script, simply run the following command in your EdgeBox terminal:
sudo curl -fsSL https://get.n3uron.com/install.sh | sudo bash
In a few seconds you’ll have N3uron installed, up and running.
If you prefer a manual installation take a look at our Knowledge Base section for more information.
Usage
N3uron was designed with a microservice-oriented architecture in which each module runs as an independent process and Bootstrap is the core service that manages the rest of the processes. By default the WebUI module is automatically activated, making it accessible as soon as the installation is complete, additional functionalities are enabled creating new module instances.
Each module requires a valid license to run in production mode. If a module doesn’t find a valid license, it will run in demo mode for two hours. In order to restart the demo period, the module must be restarted.
Let’s see a step-by-step example of how N3uron facilitates data collection through the OPC UA Client and how this data can be seamlessly published to an MQTT Broker using the MQTT Client module, enabling continuous data pushing via MQTT.
Configure OPC UA Client
- Step 1 : Please open your favourite browser on a different machine on the local network to access the N3uron WebUI, use the Edgebox-RPI-200's IP address and the port that was configured for the WebUI (by default 8003 for HTTP or 8443 for HTTPS).
Default N3uron WebUI users.
| Full access | Read-only access | |
|---|---|---|
| User: | admin | user |
| Password: | n3uron | n3uron |
- Step 2 : Open the N3uron WebUI and navigate to Config→Modules, click on the menu and then create a New Module, we’ll name it OpcUaClient.
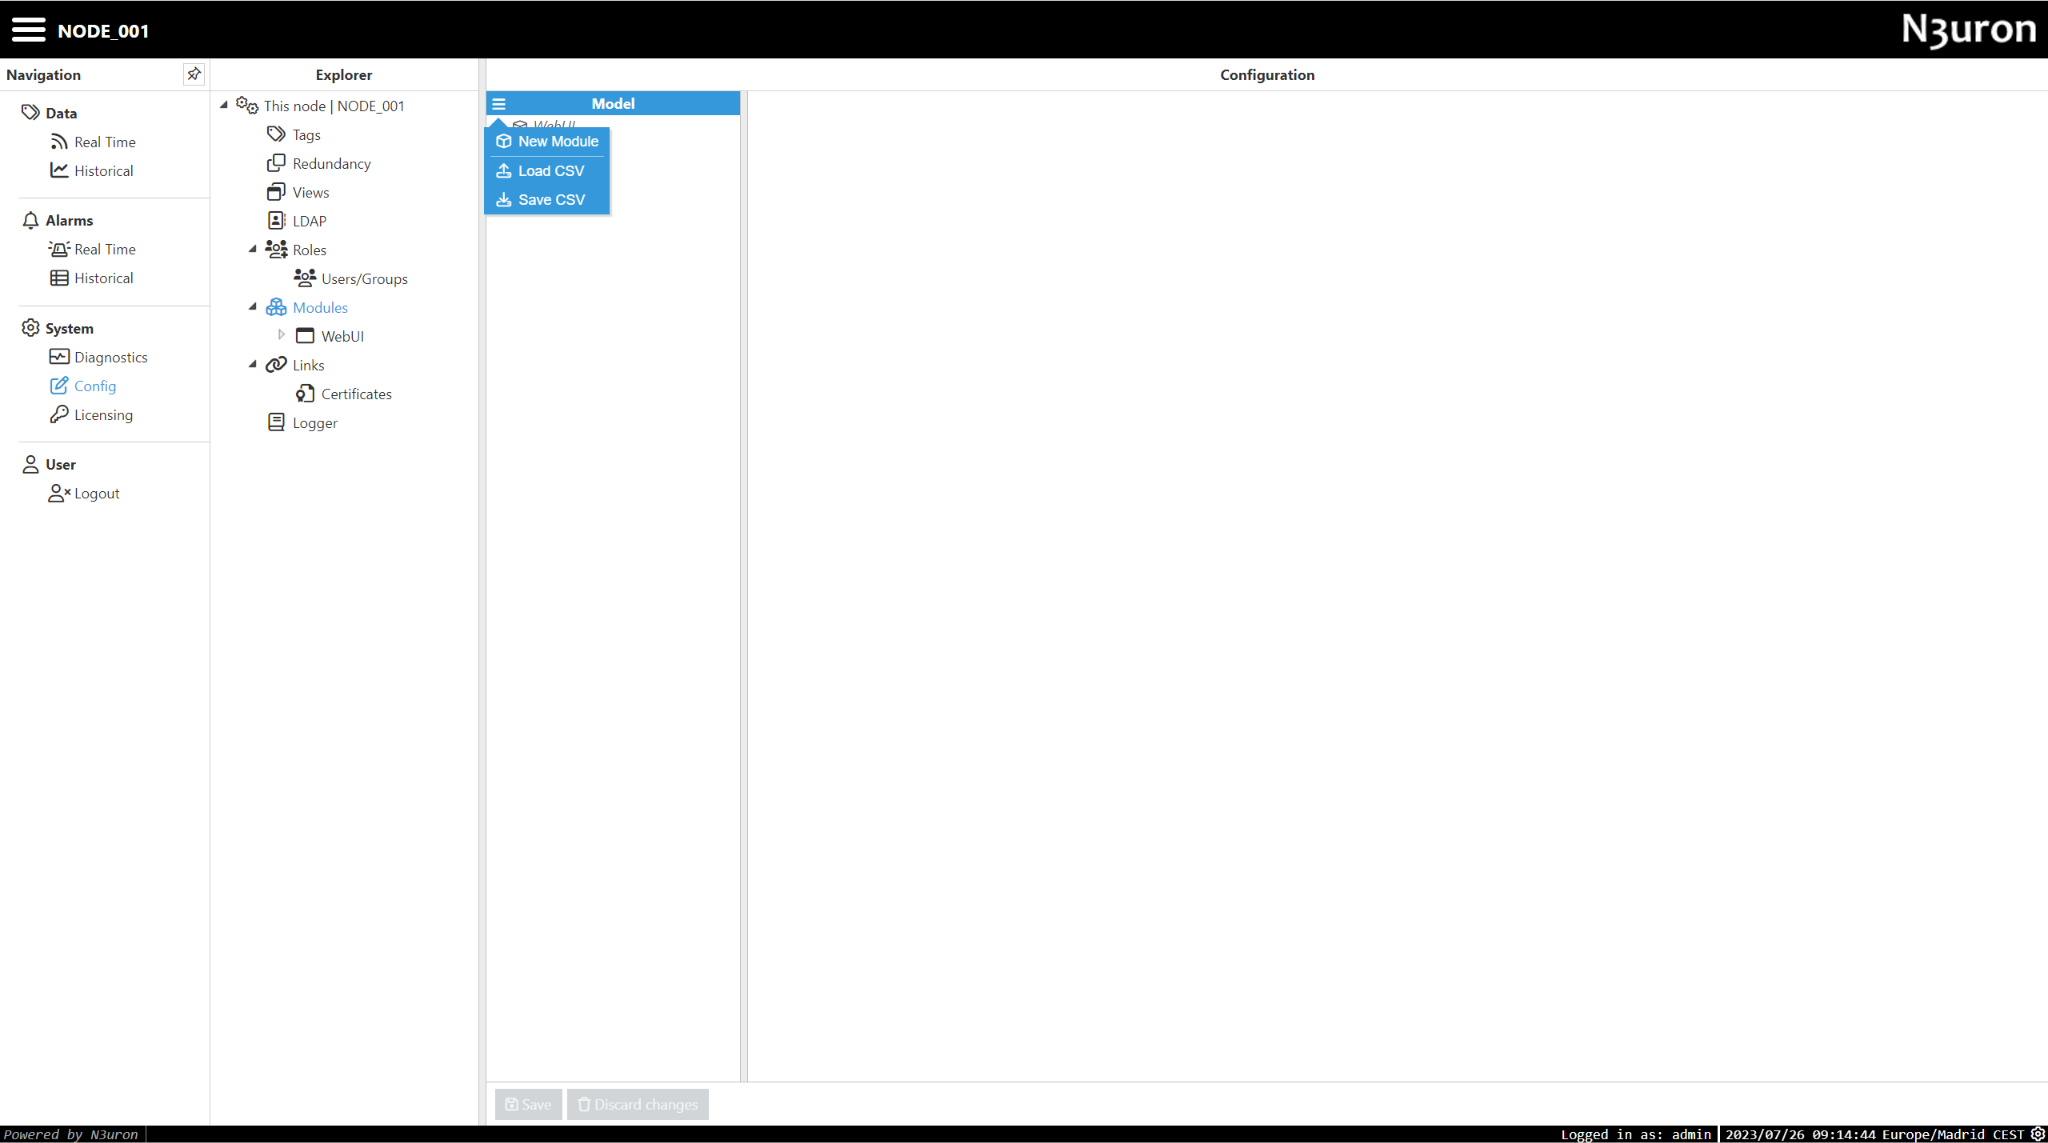
- Step 3: Select OpcUaClient as the module type, then, click on the Save button below to instantiate the module.

- Step 4: The newly created module will appear under Modules, navigate to its configuration and create a New Client, we’ll name it DataSim.
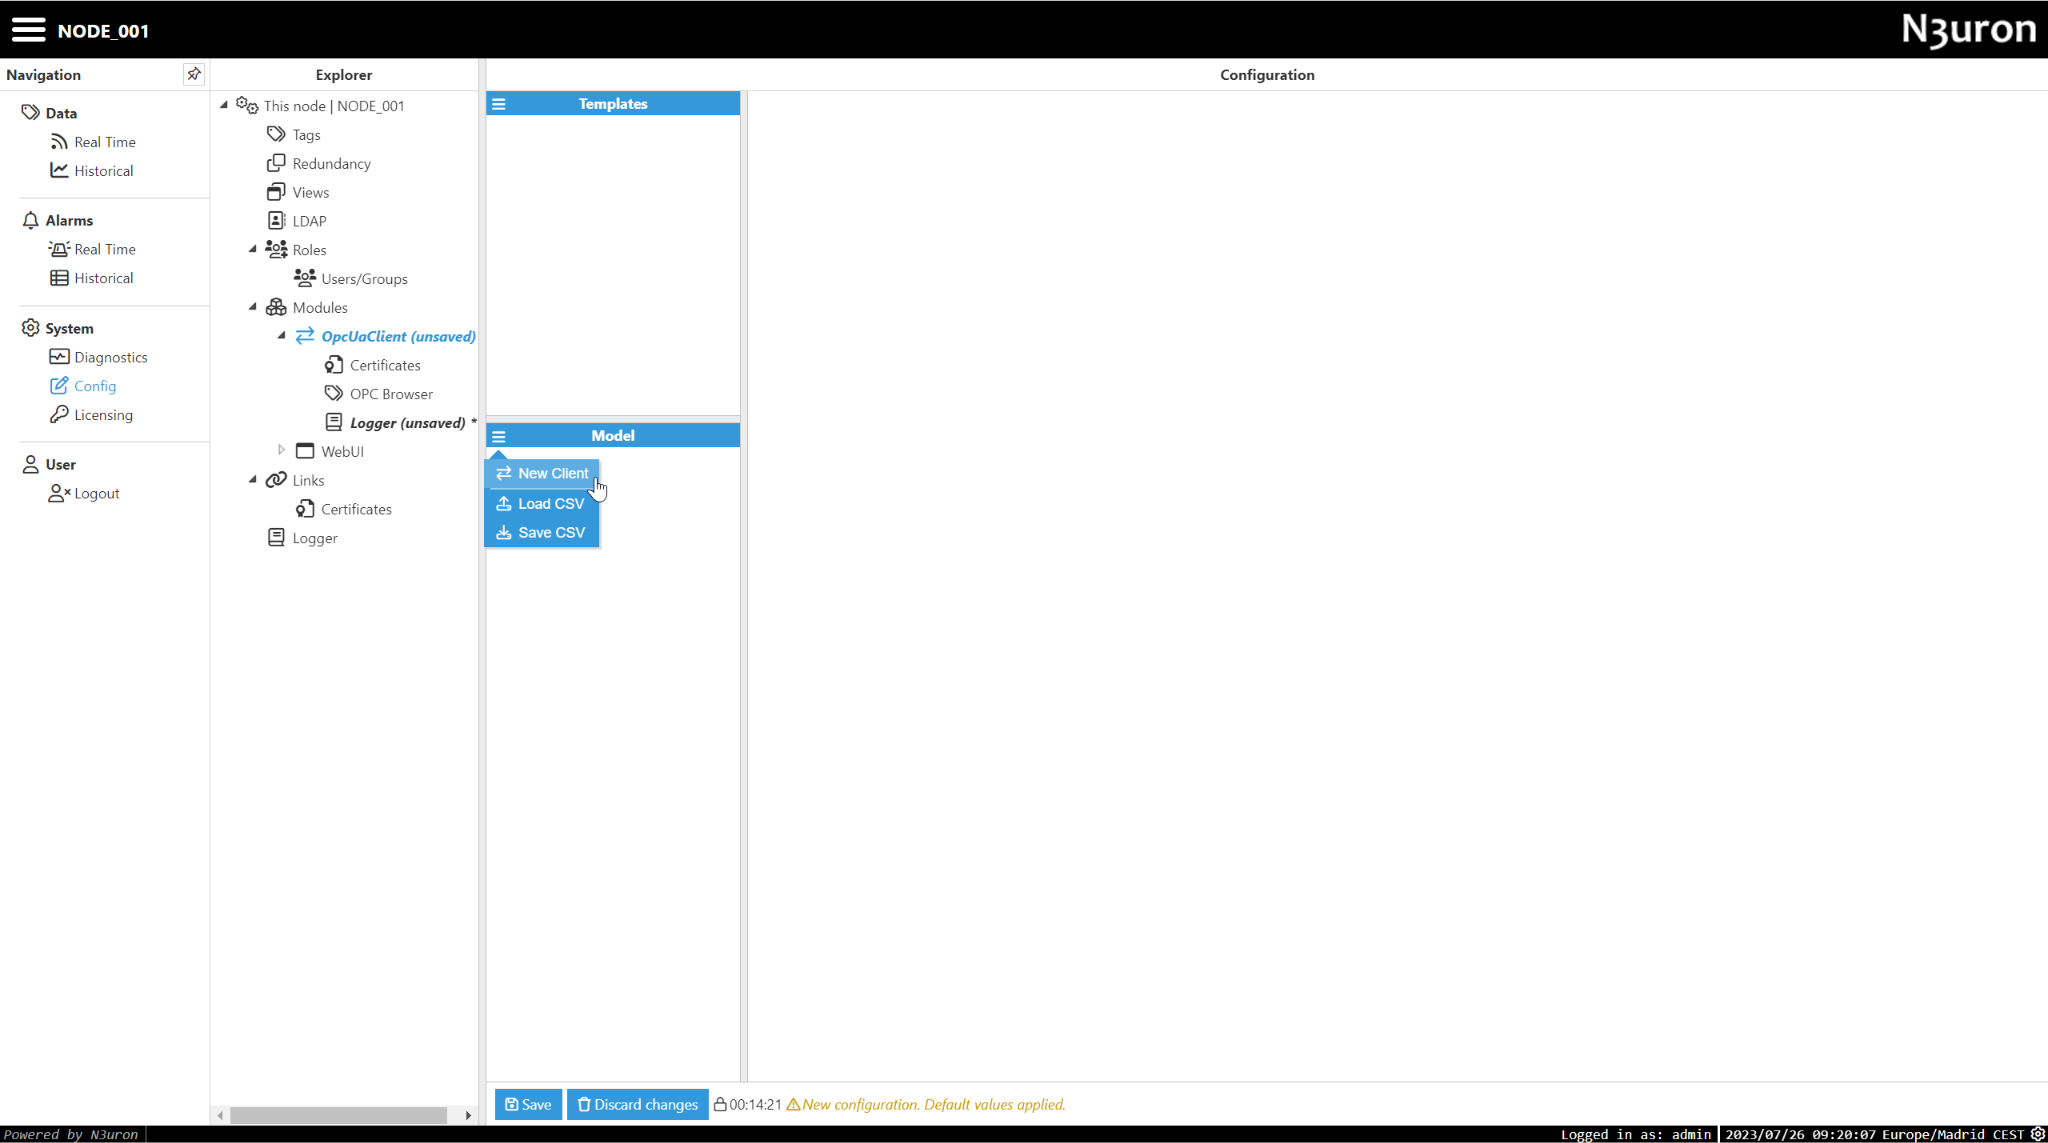
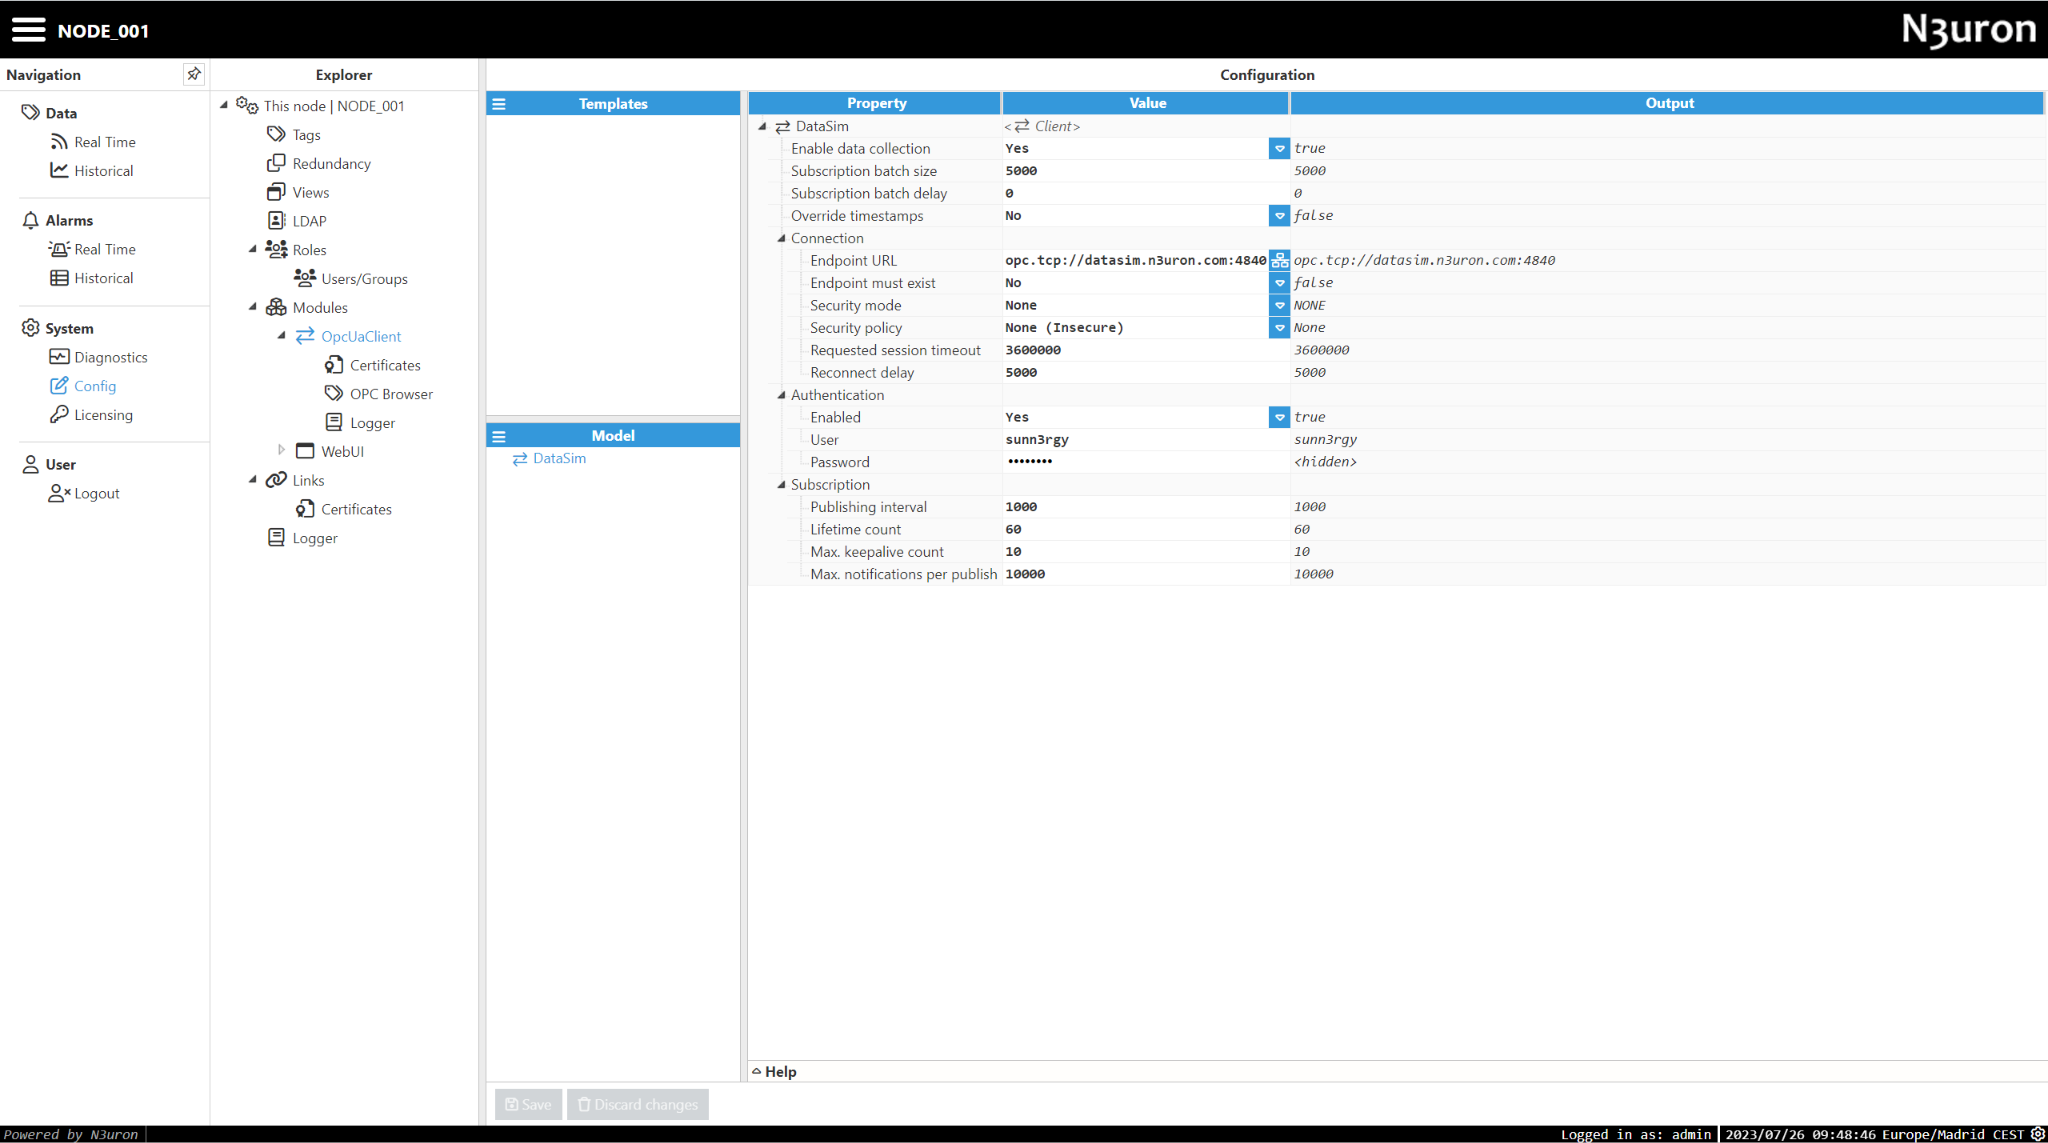
- Step 5: Configure the OPC UA Client to connect to our DataSim endpoint as follows:
Endpoint URL: opc.tcp://datasim.n3uron.com:4840
Security Mode: None
Security Policy: None

Authentication:
 Enabled: Yes
 User: sunn3rgy
 Password: n3uron
Click on Save to apply changes and reload the module.
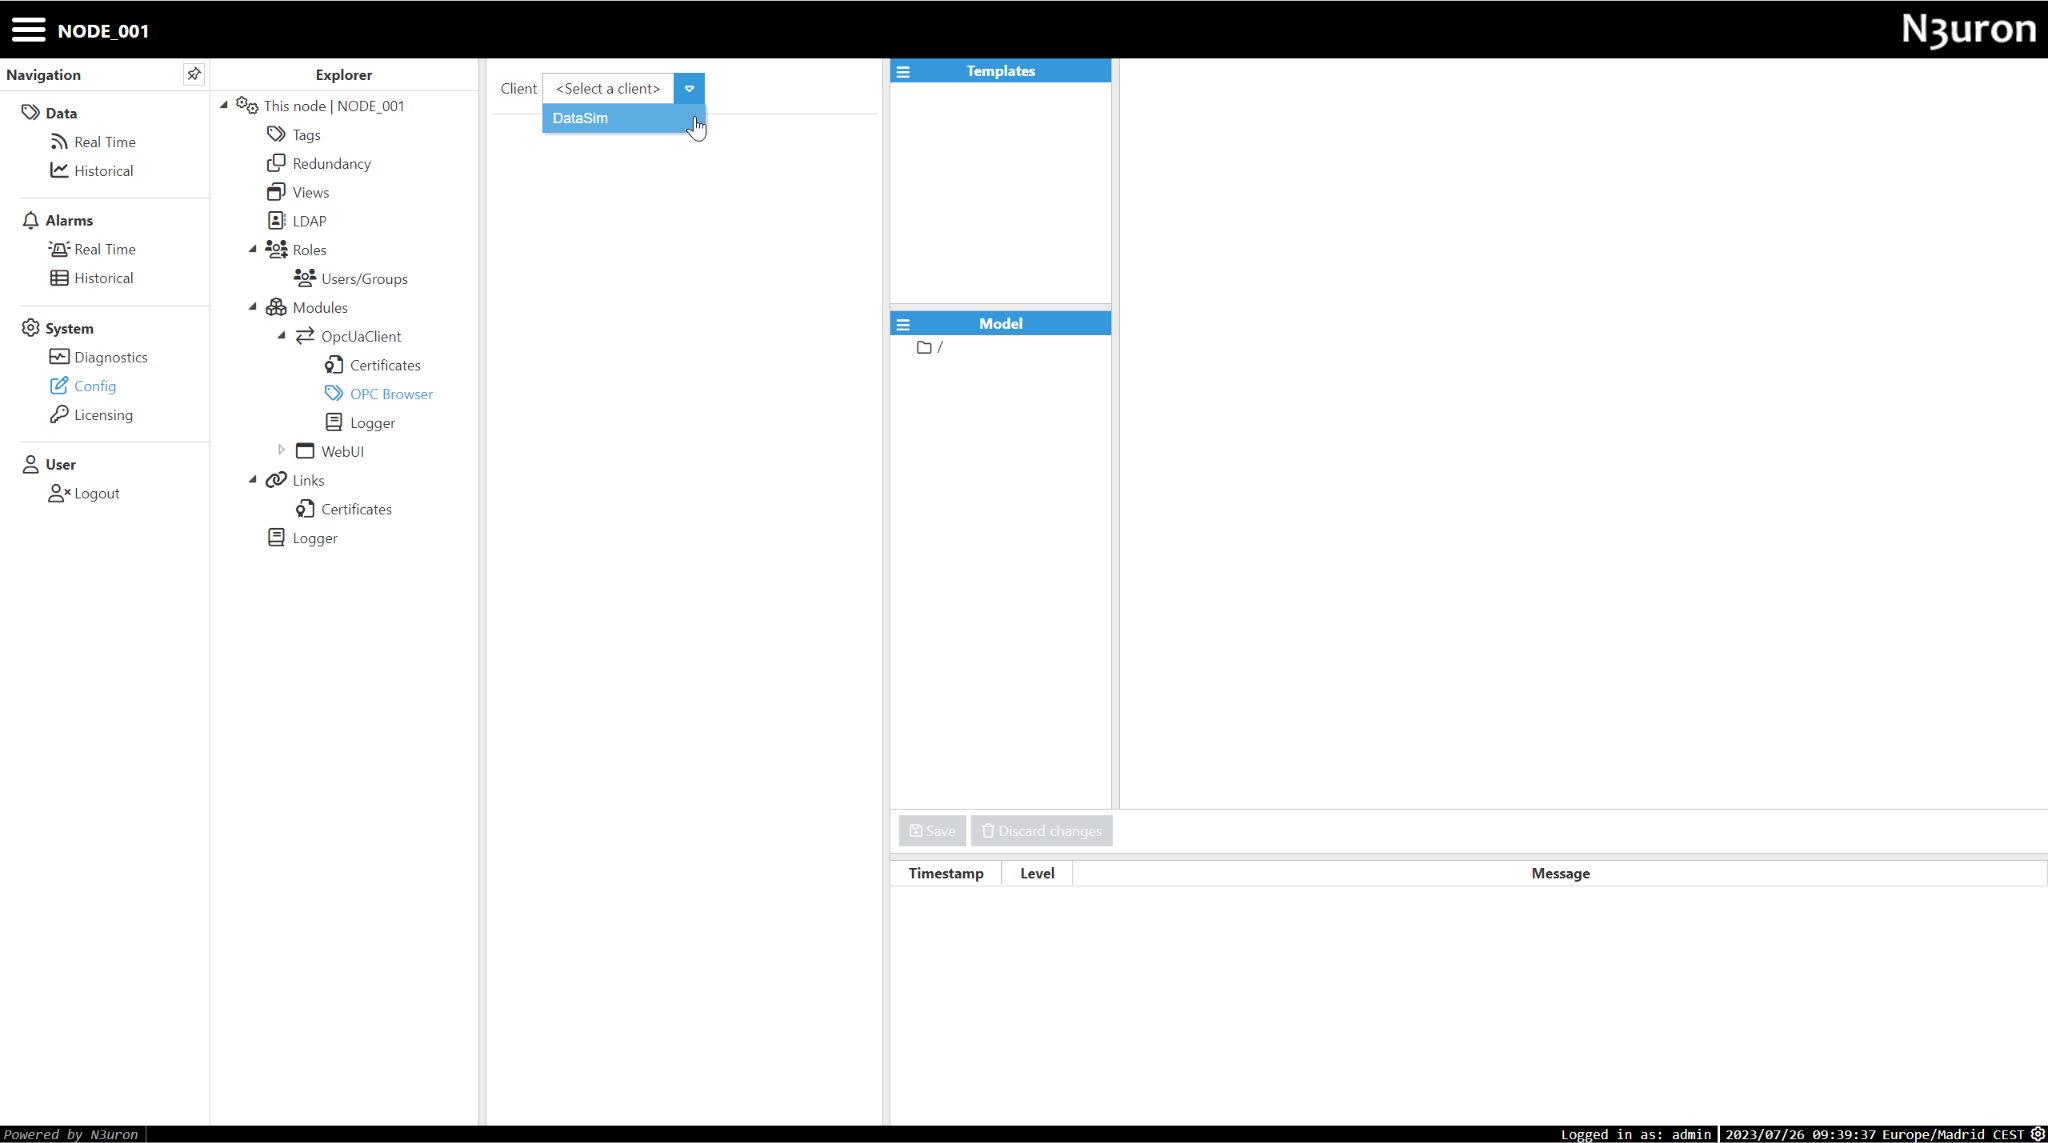
- Step 5: Navigate to the OPC Browser section inside the module and select the previously created DataSim client.
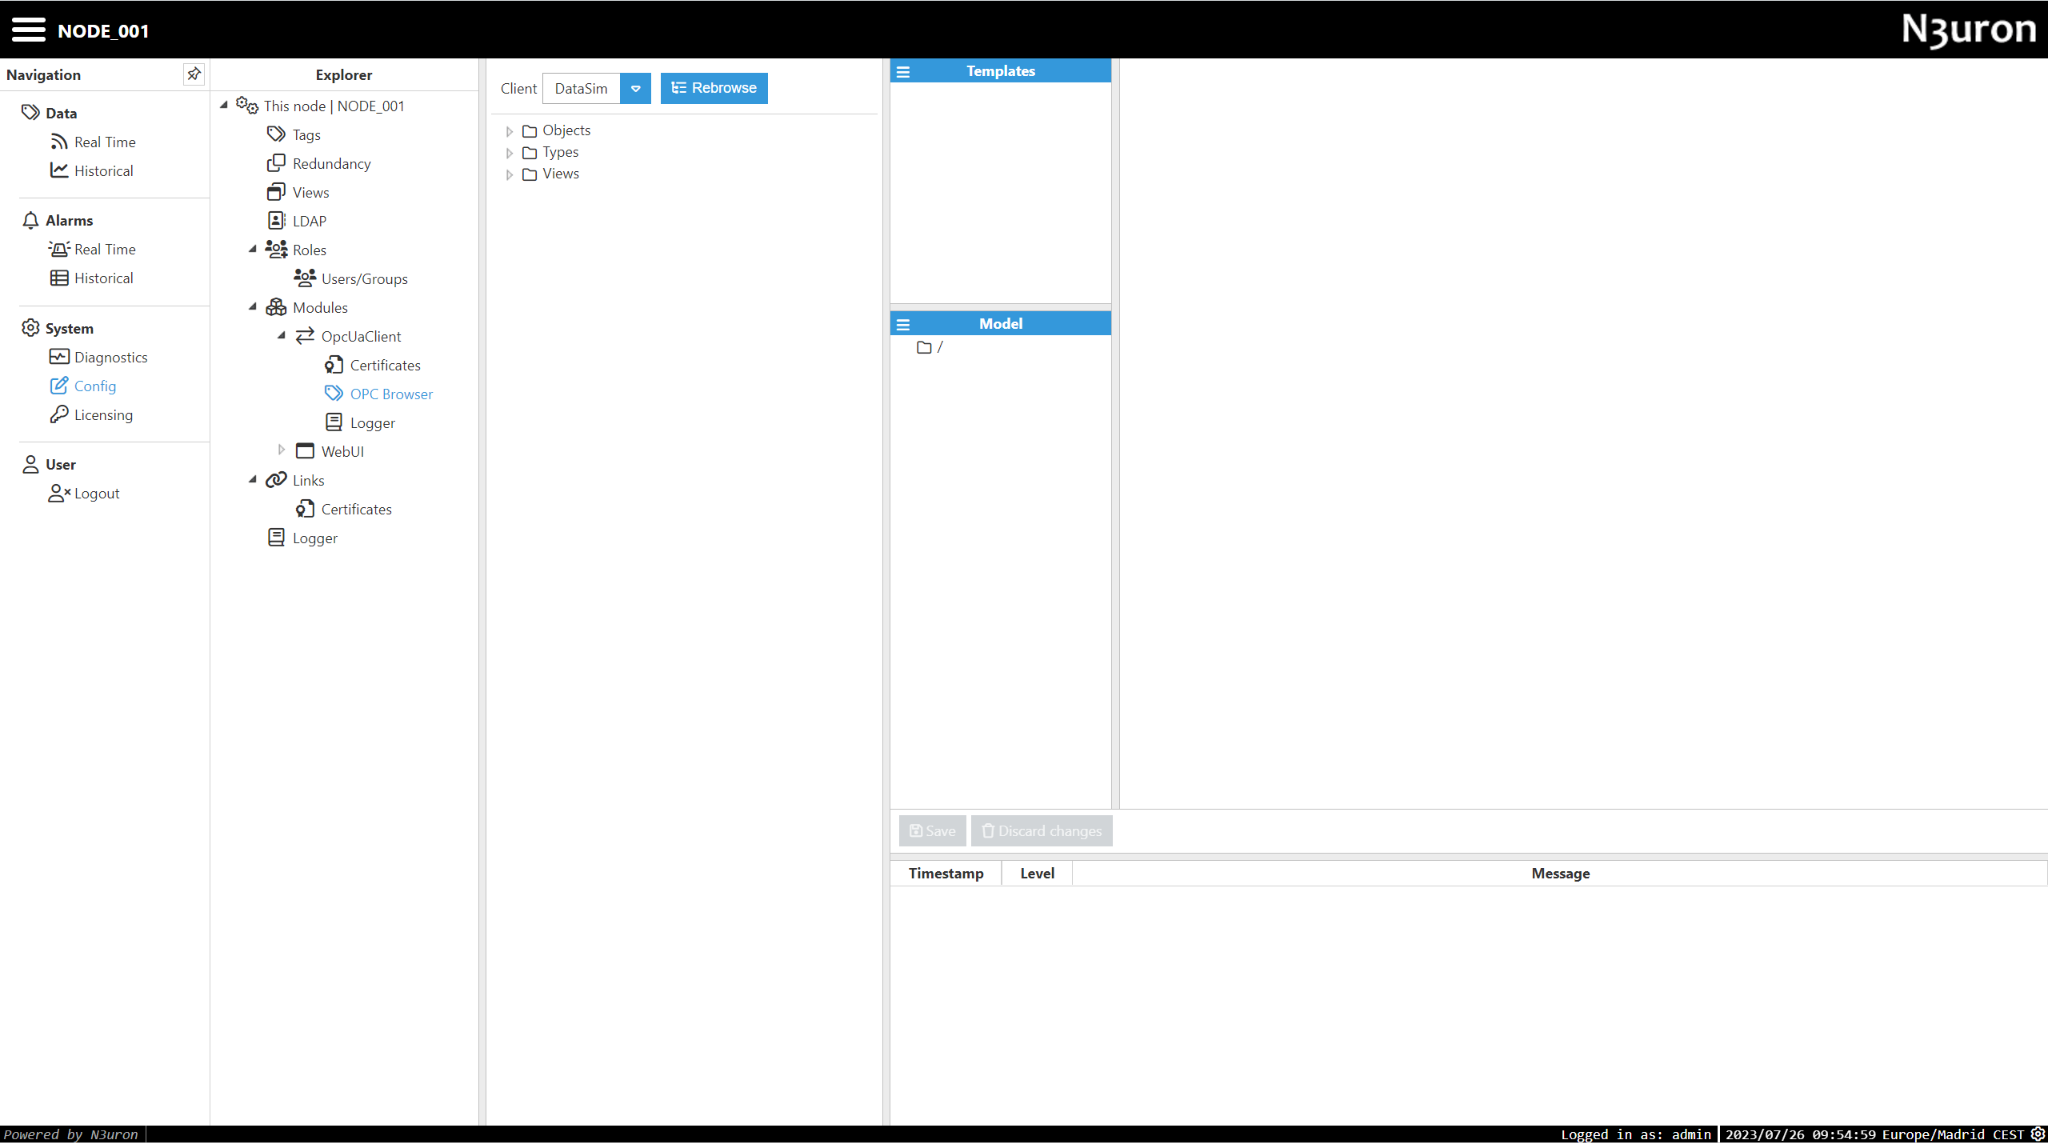
Create a tag
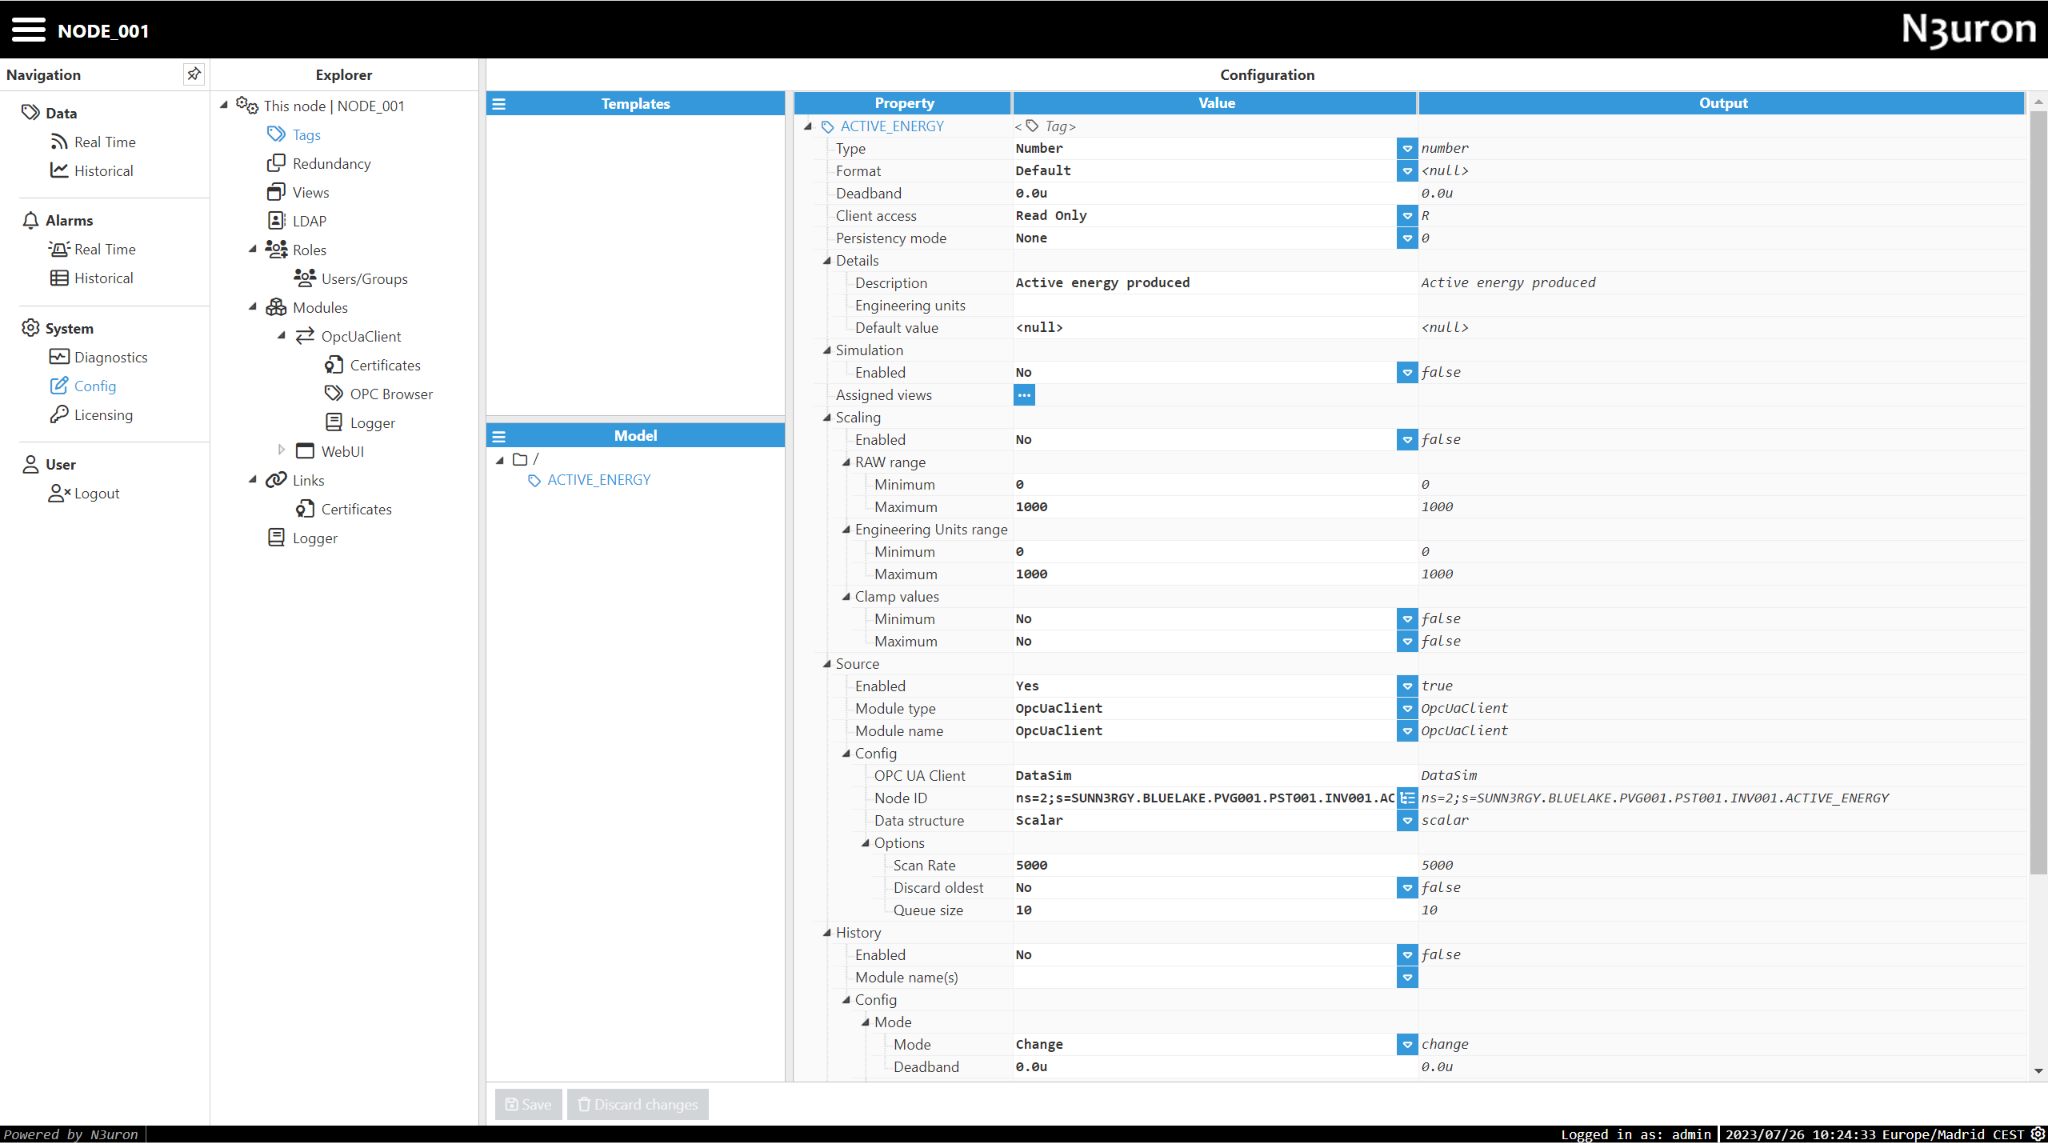
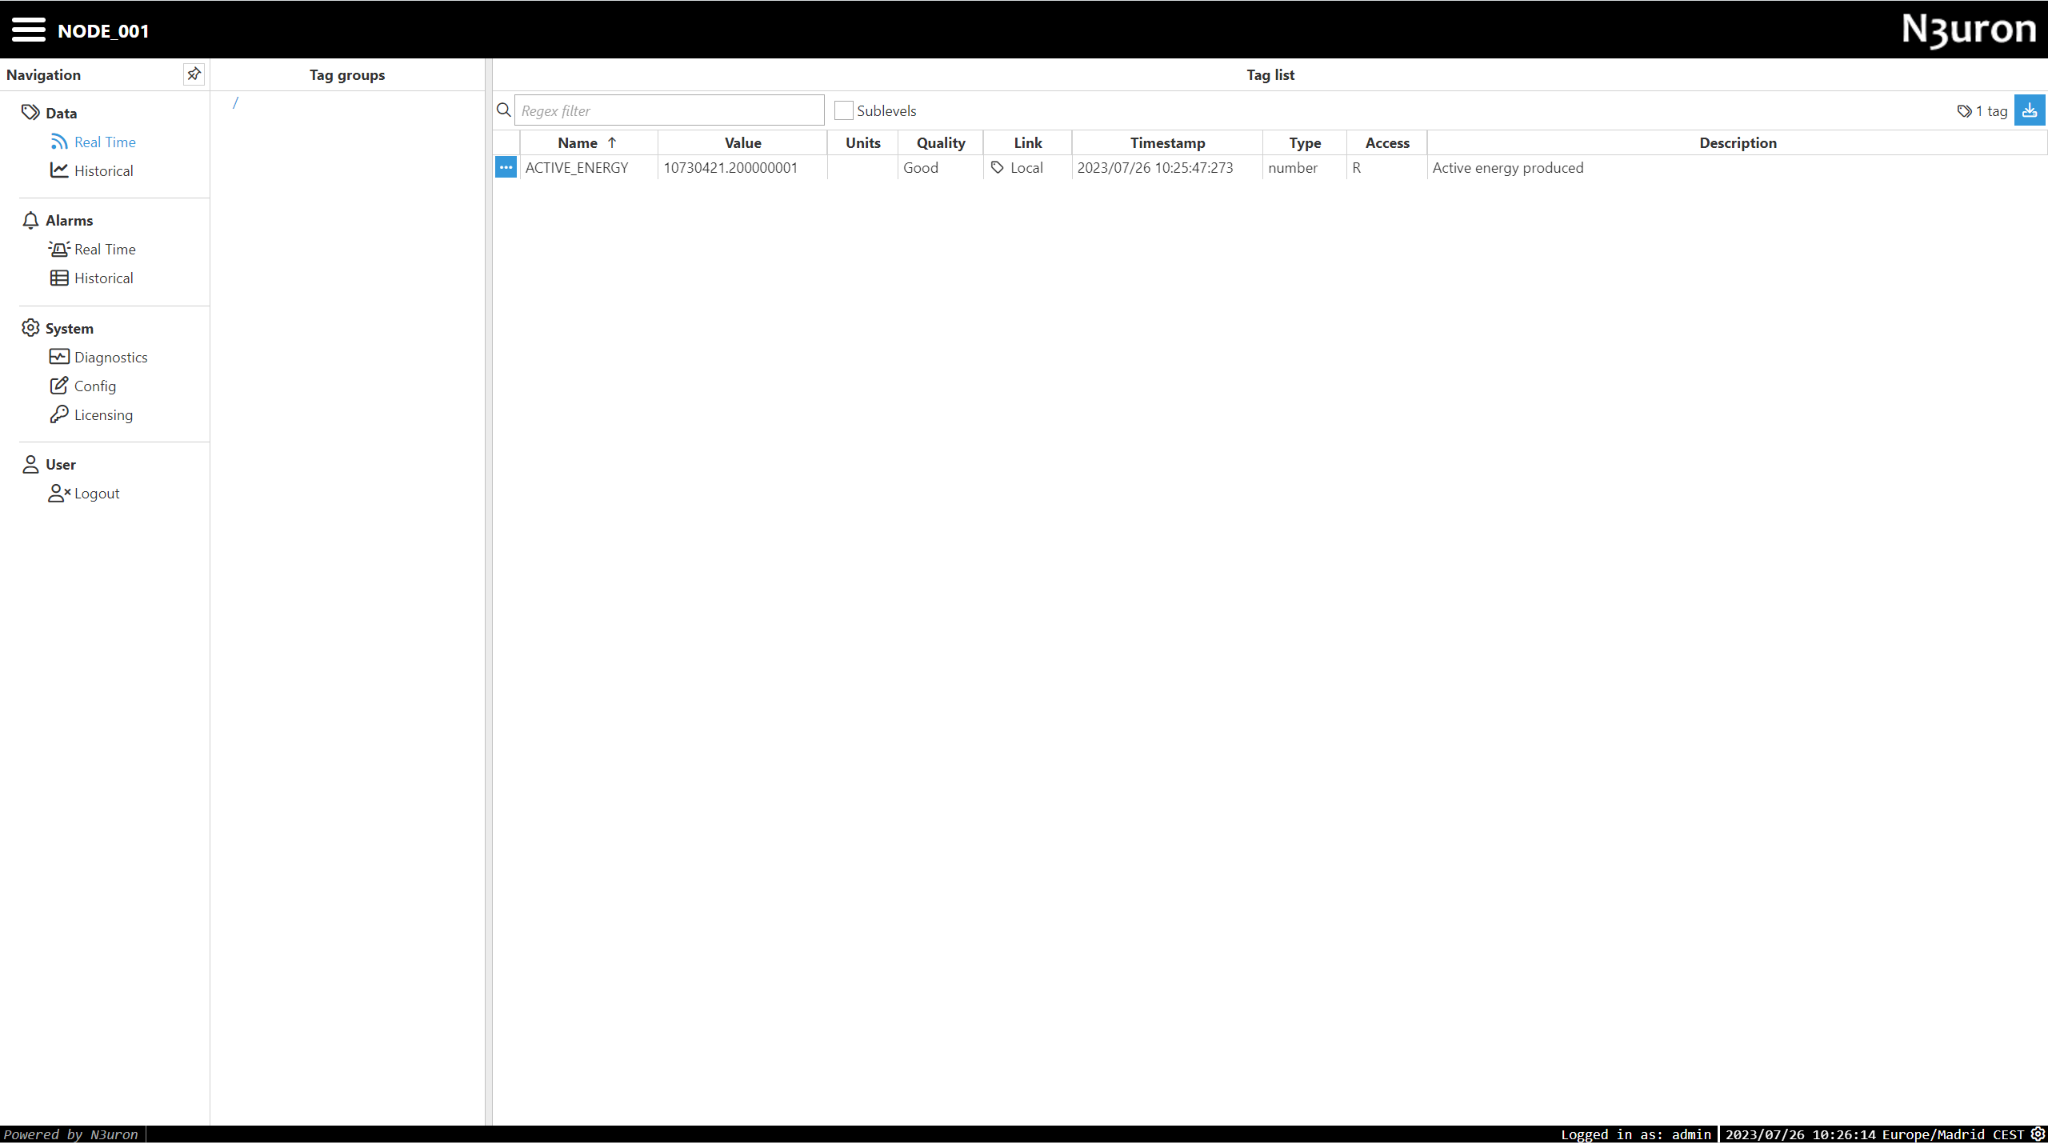
- Step 1: Drag and drop the desired object from the browser to the data model section.
- Step 2: Now you can find the newly created tag in Config→Tags and view its value in the Real Time section.
Create a template
Templates offer the ability to leverage object-oriented data design principles in N3uron. Allowing users to dramatically reduce the amount of time invested in deploying a new project.
By creating and using Templates, users can generate new instances to rapidly build complex data structures and communication configurations. Any changes to the template definition are then inherited by all instances, drastically saving time when making routing changes.
Just drag and drop the desired object into the templates section and start building your template using custom properties, inheritance and more.

Configure MQTT Client
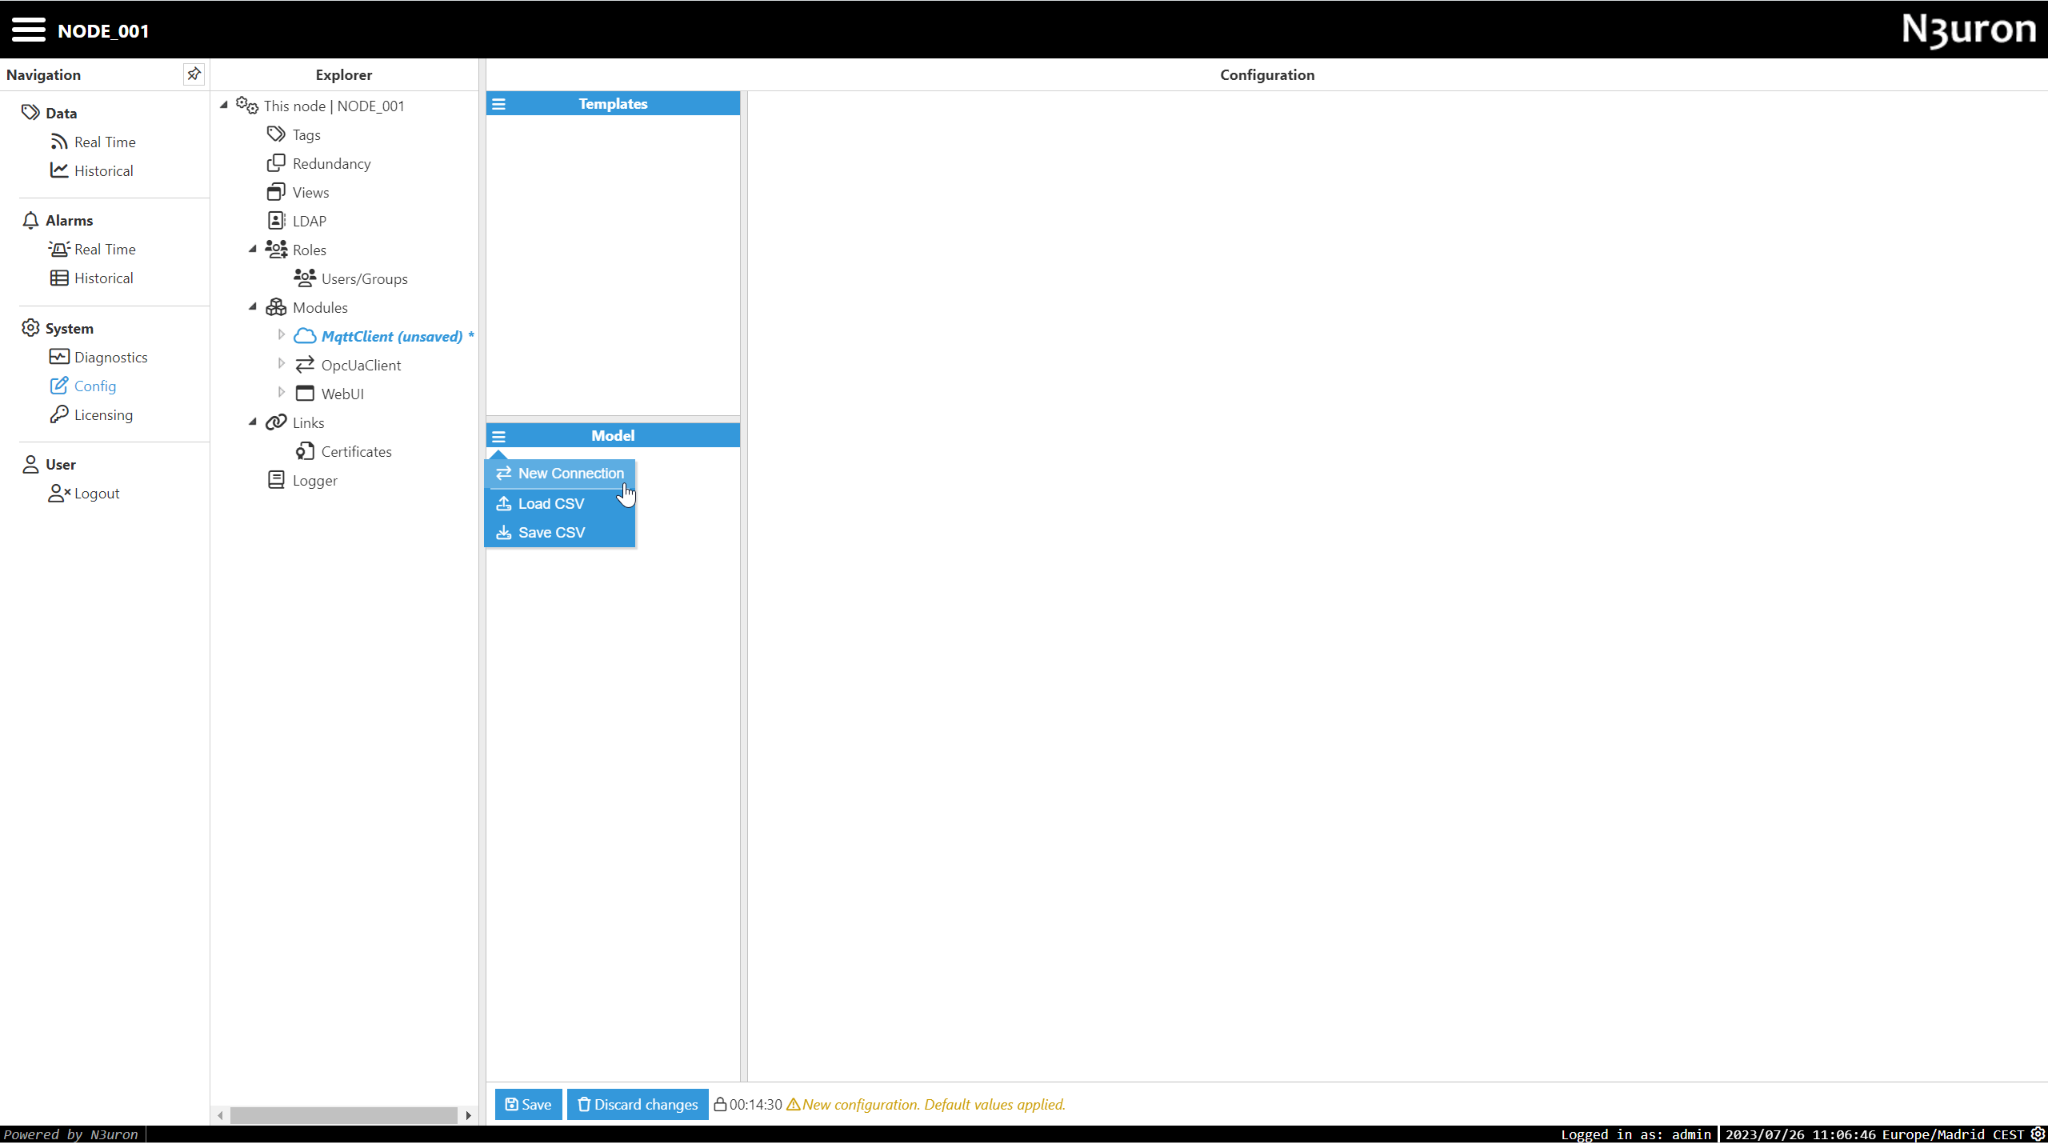
Step 1: Go to Config→Modules, click on the menu and then create a New Module named MqttClient.

- Step 2: Select MqttClient as the module type, then click Save.

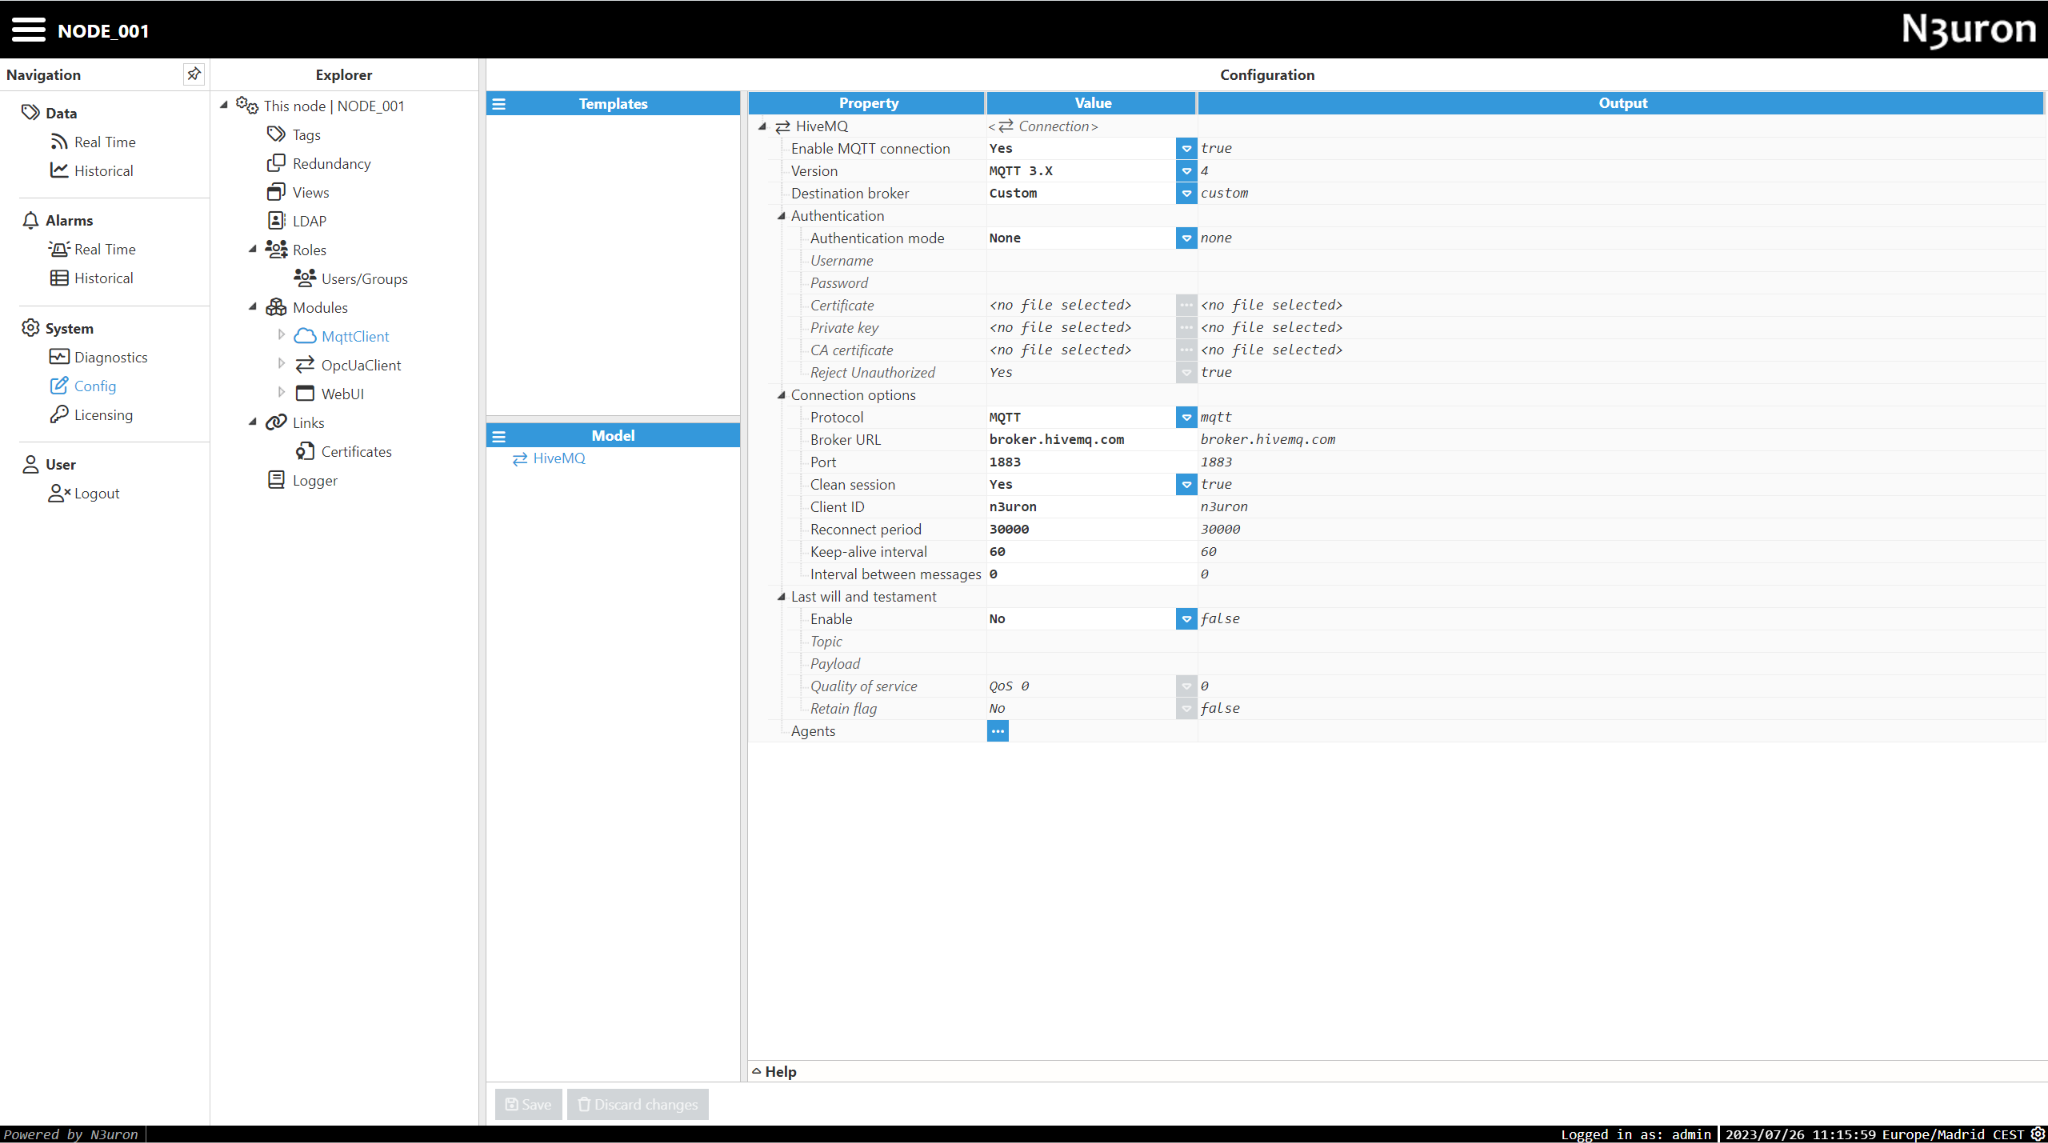
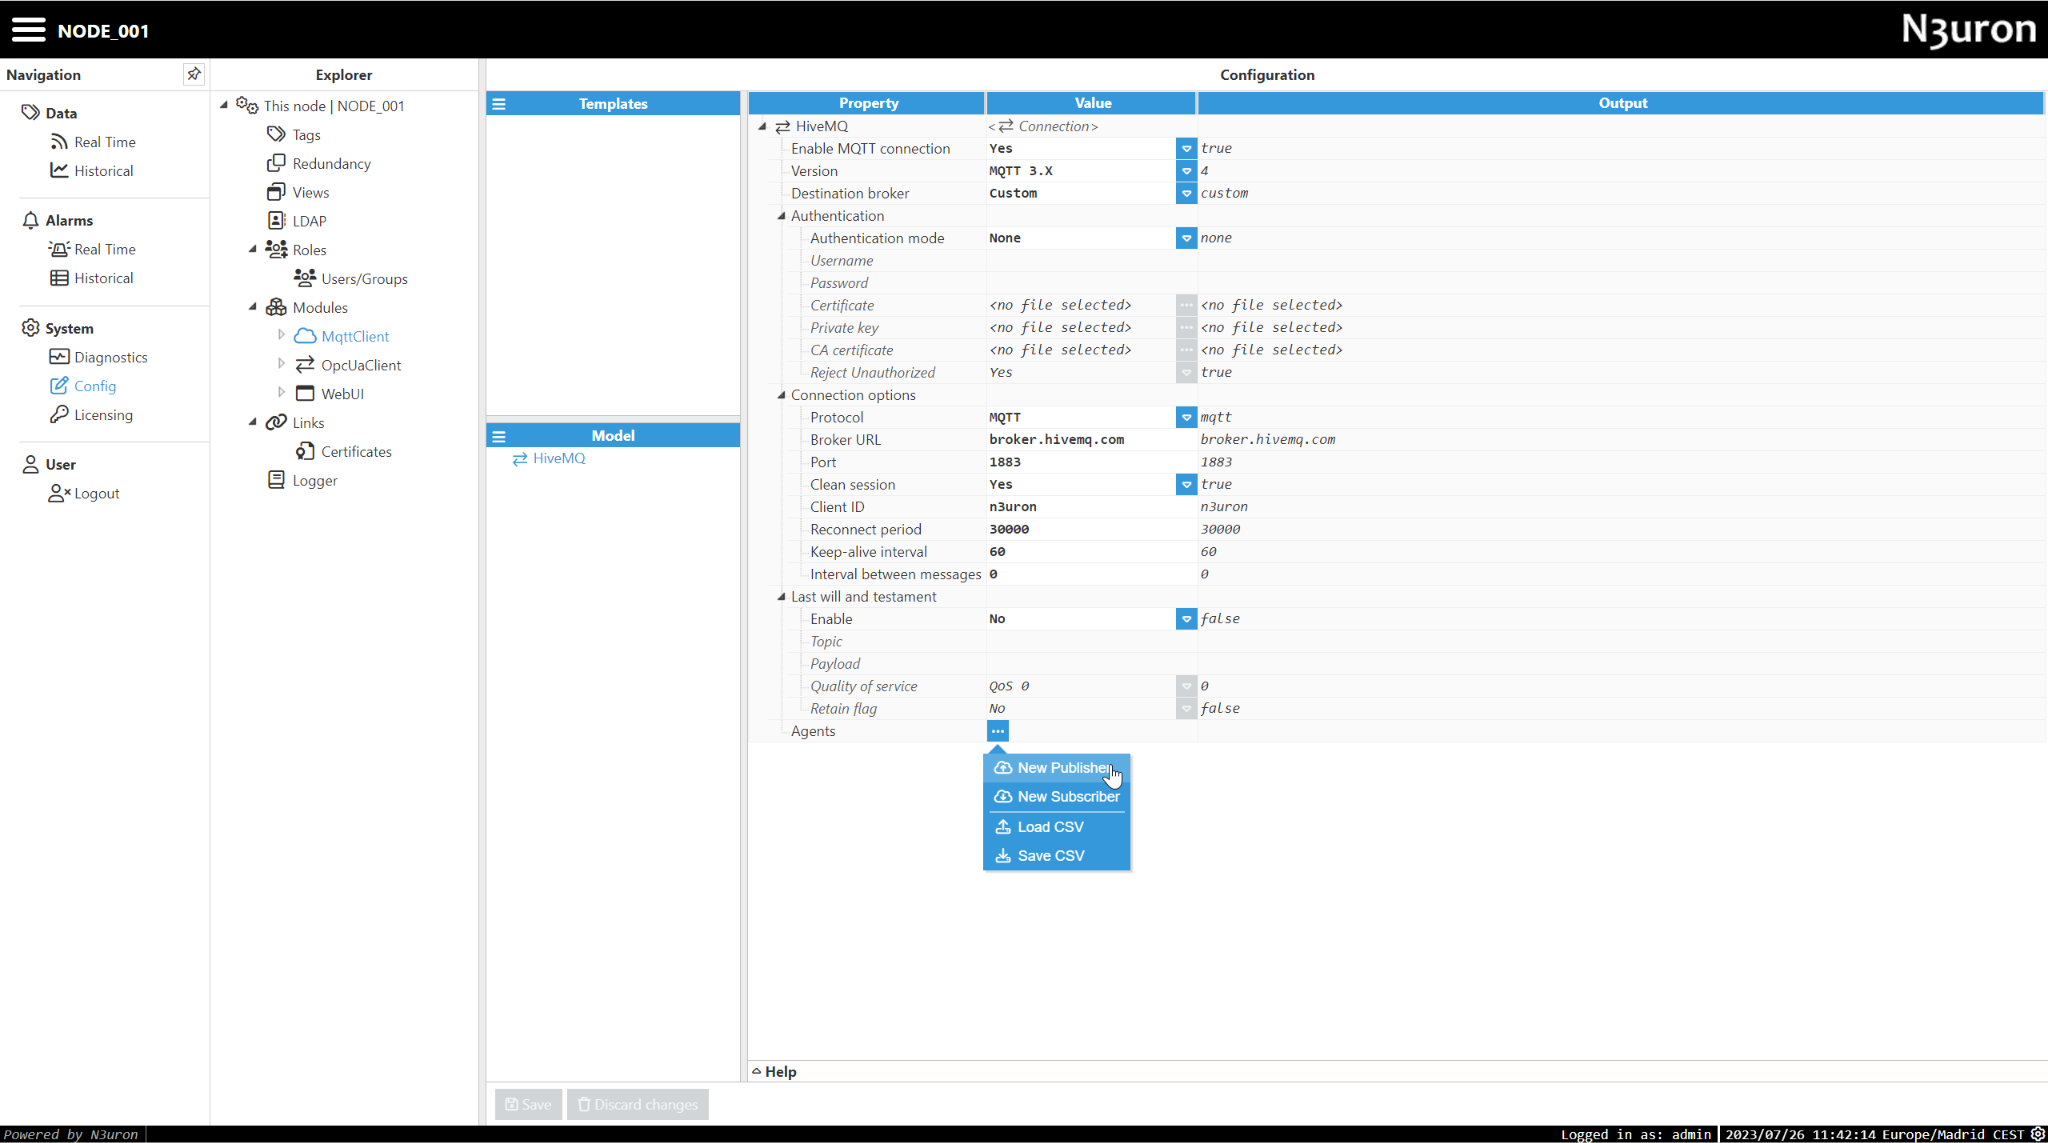
- Step 3: Navigate to the new module and create a New Connection named HiveMQ.
- Step 4: Configure the connection to use the public HiveMQ broker:
Broker URL: broker.hivemq.com
Port: 1883
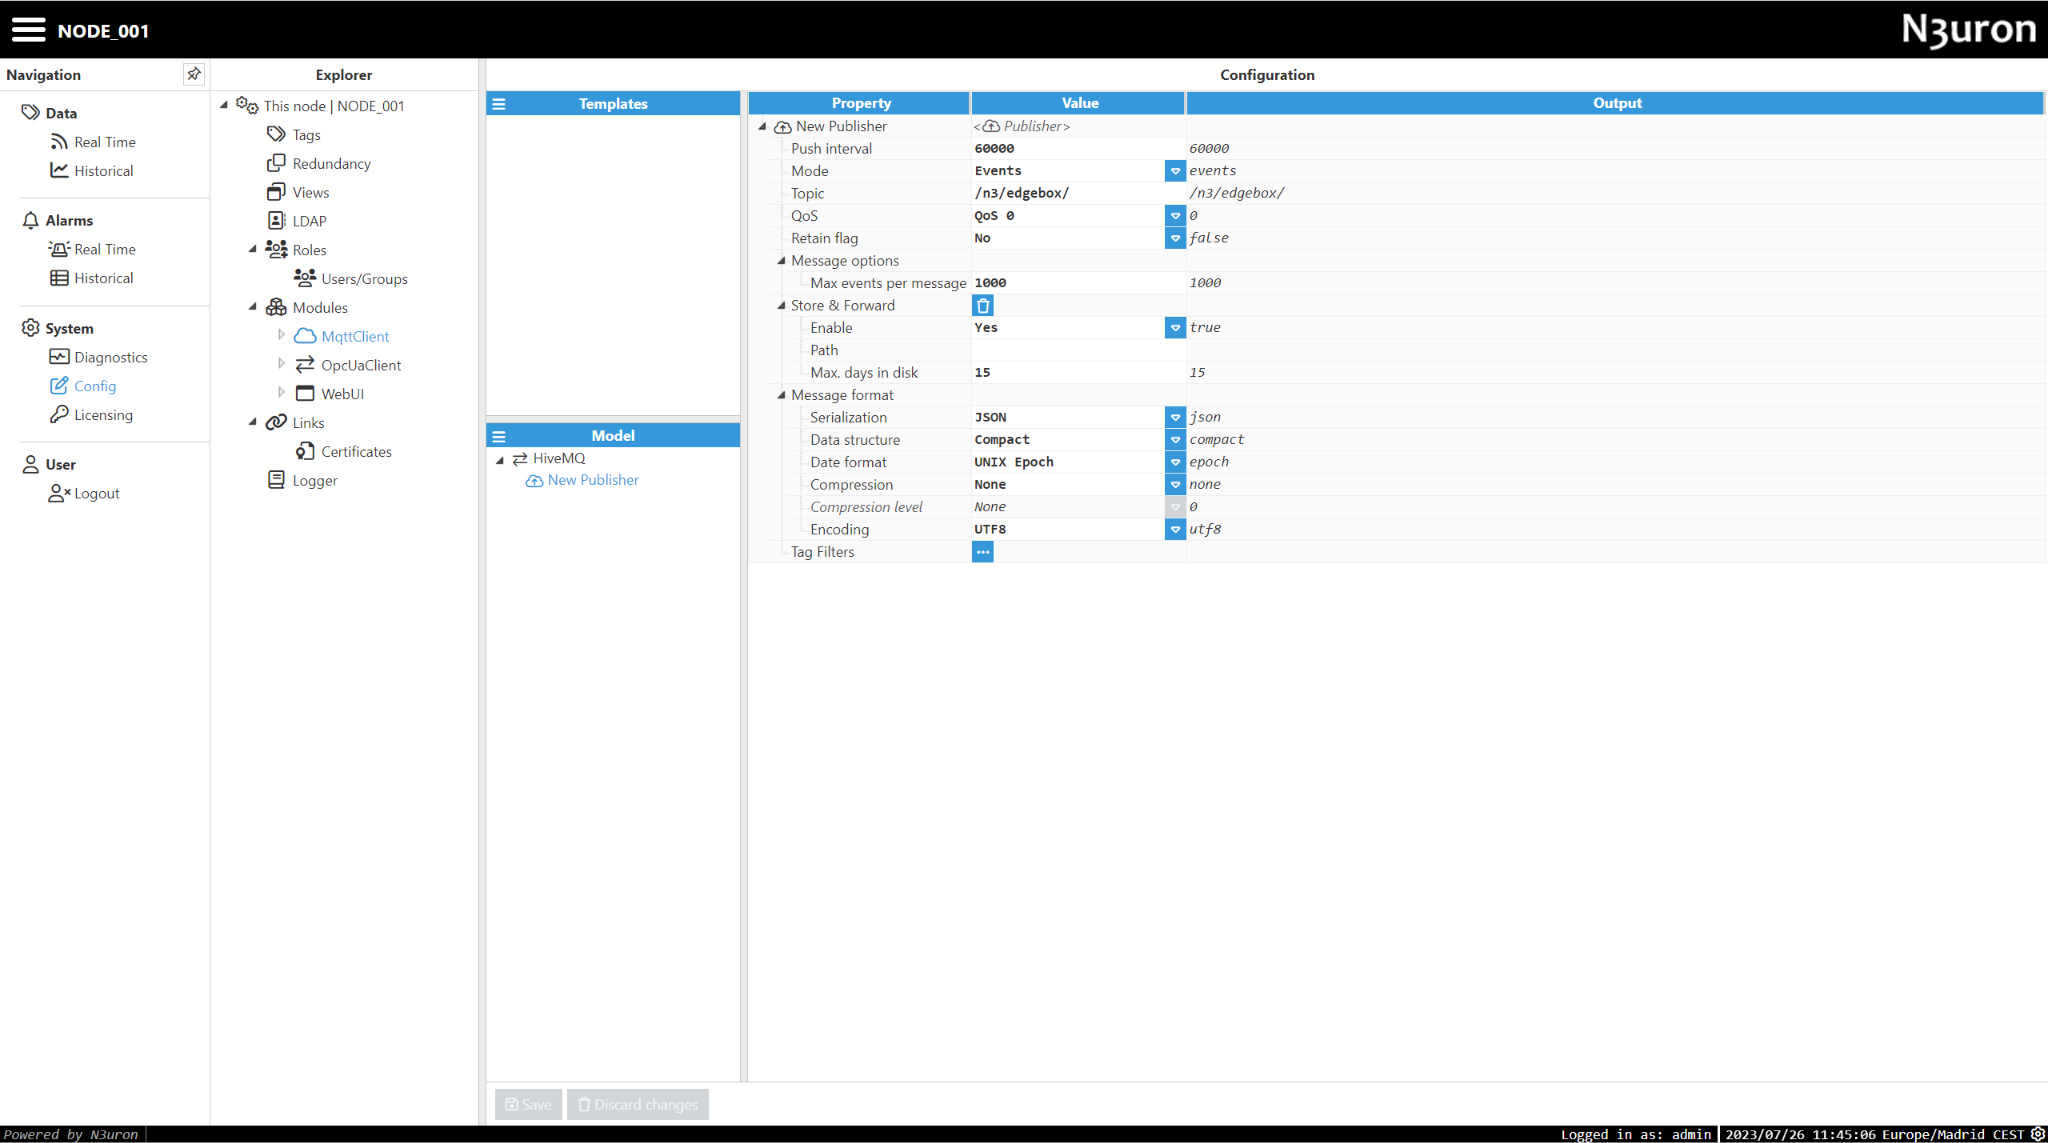
- Step 5: Create a New Publisher and set a destination topic, for example “/n3/edgebox”.
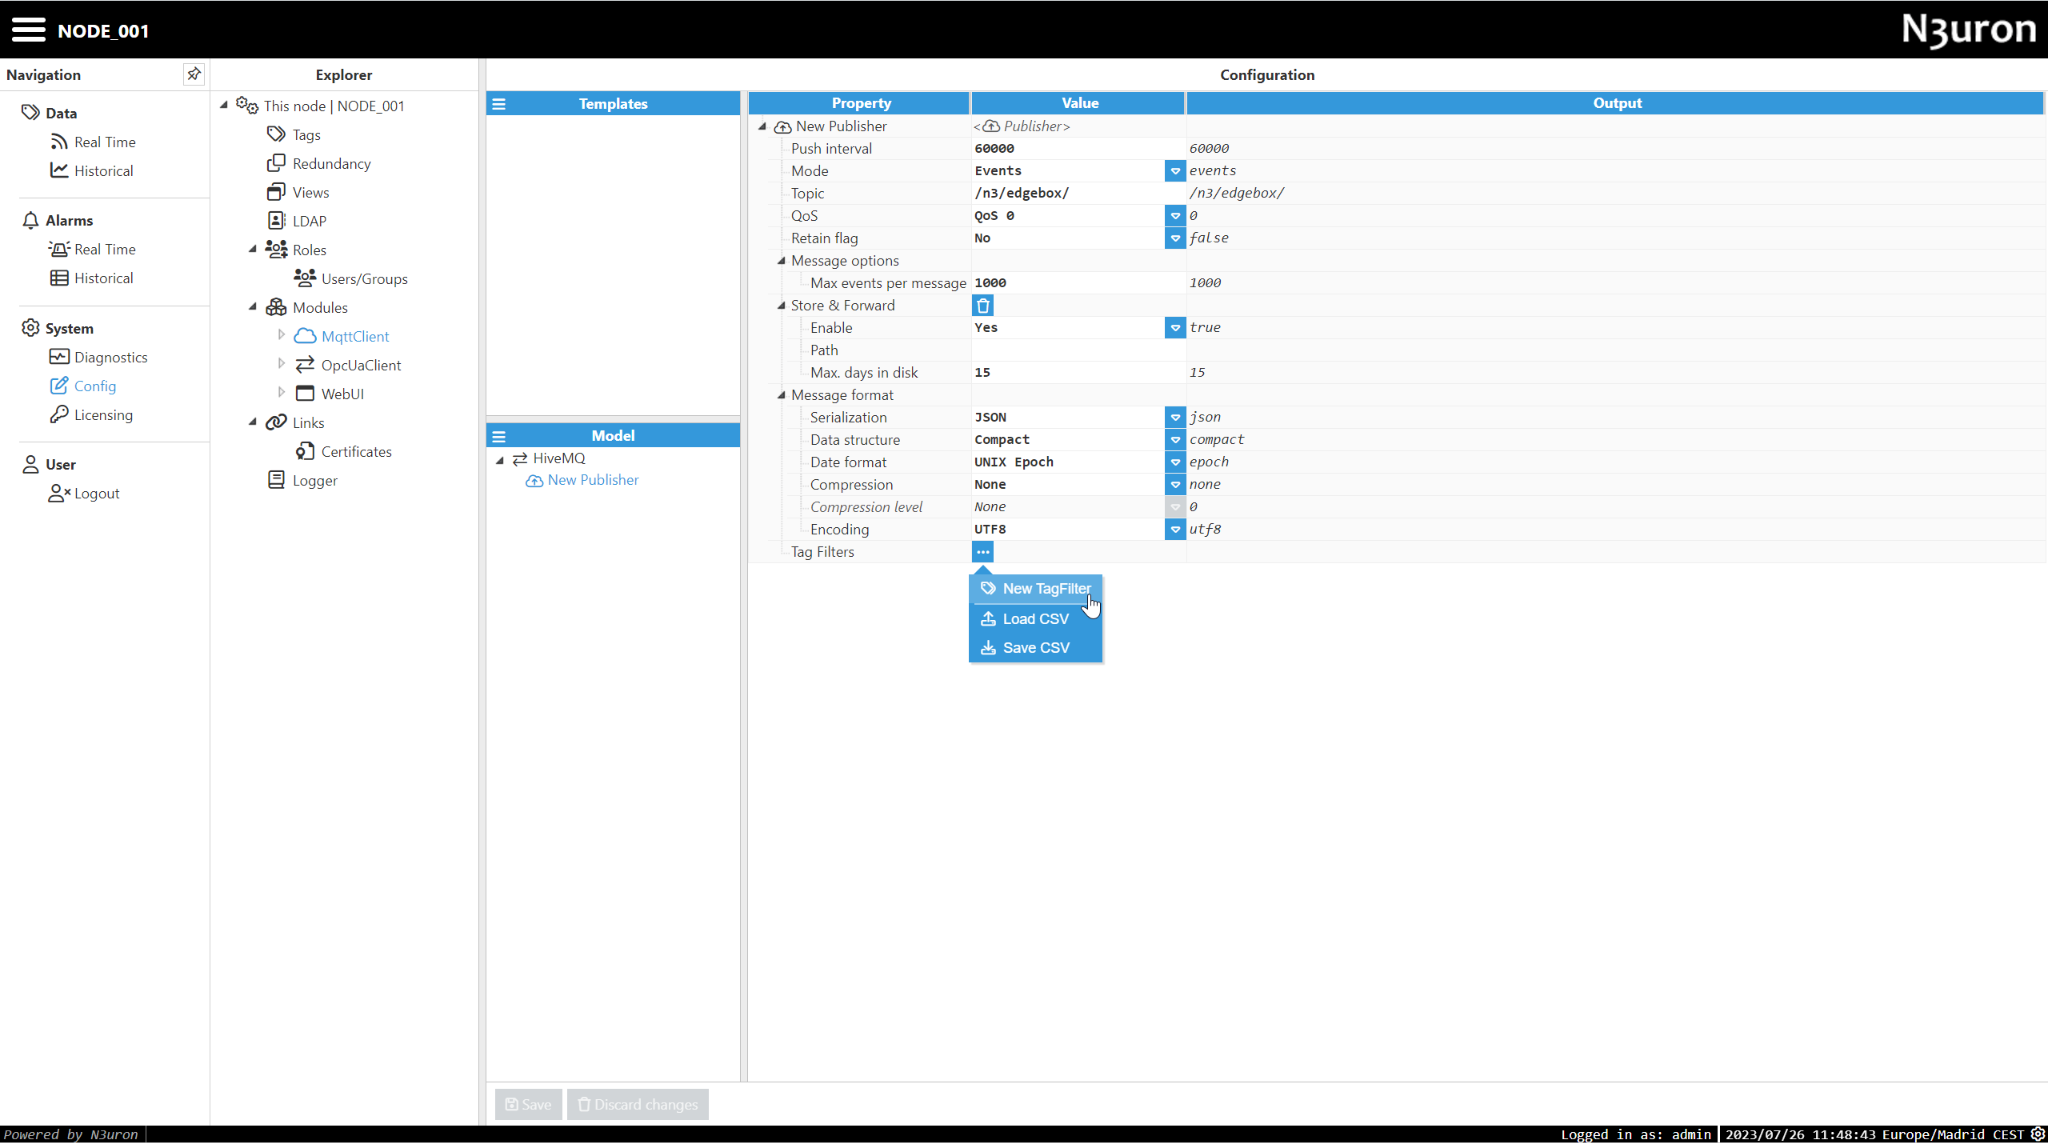
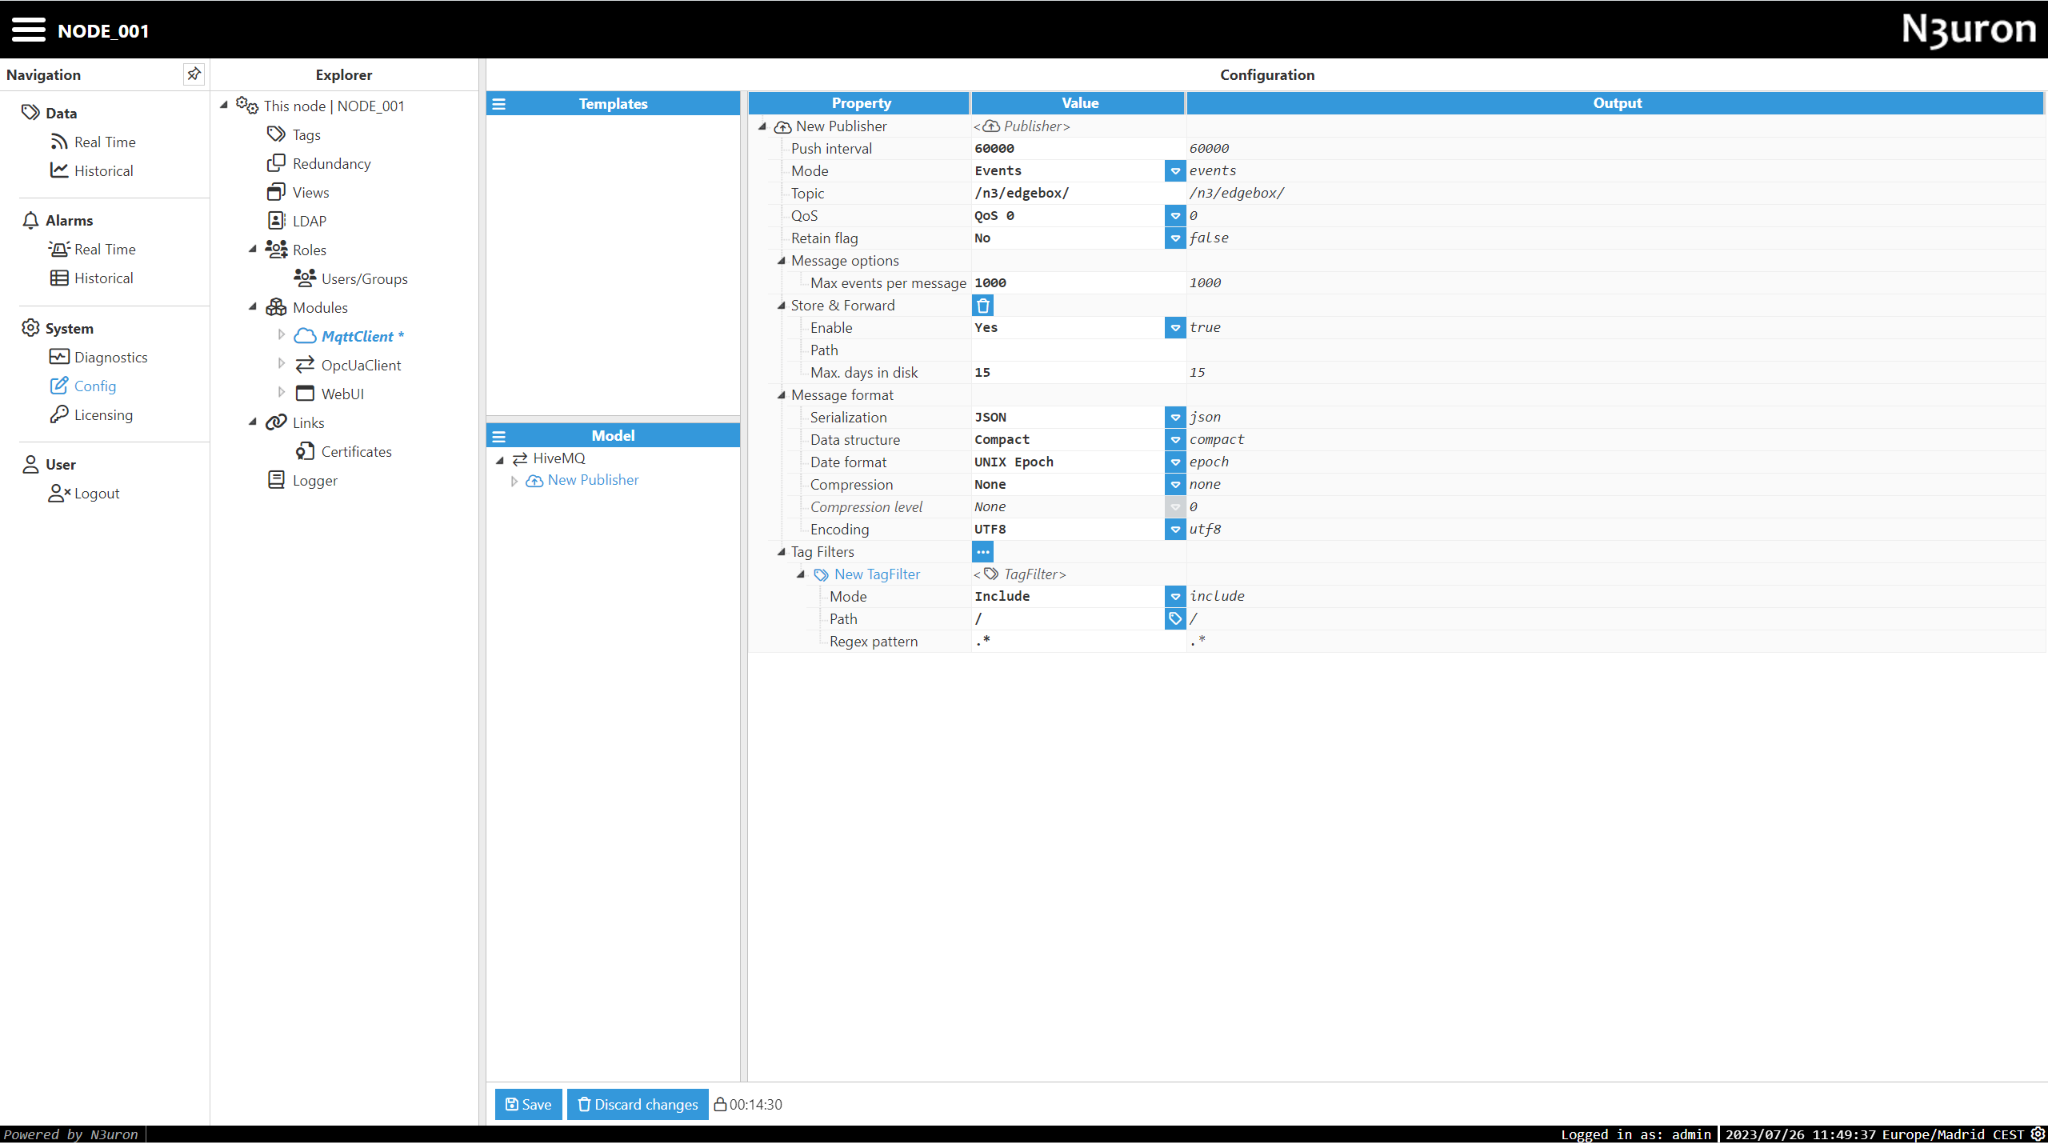
- Step 6: Create a Tag Filter to match all tags in this node, the Tag Filter is how we tell the module which tags should be published to the broker. Click on Save to apply all the changes and reload the module.
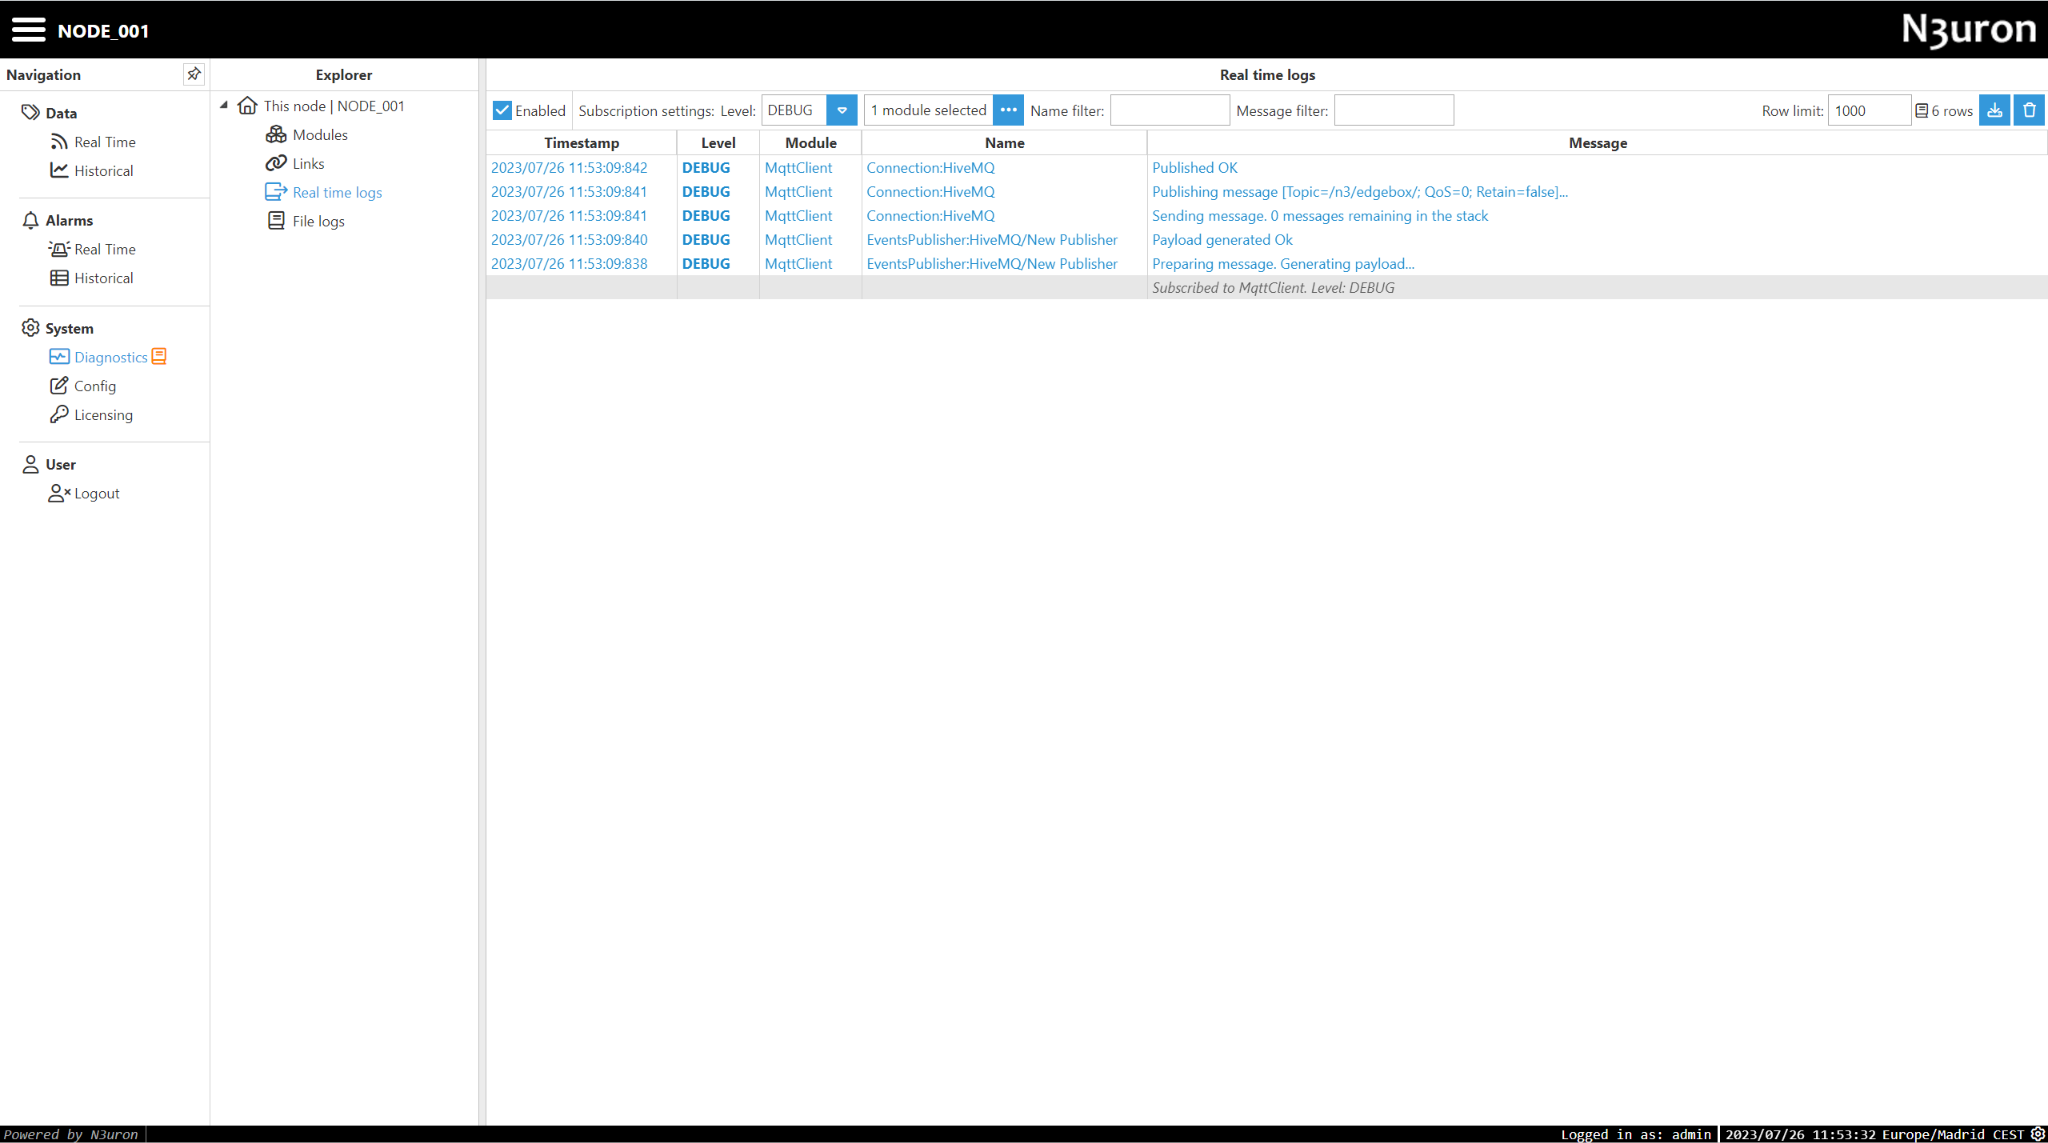
- Step 7: Head to Diagnostics and enable the Real-Time logs for the MqttClient module, wait to see the logs emitted by the module every time it publishes new data to the broker.
Instantiate a WebVision module
Step 1: Open N3uron and navigate to the Config menu.
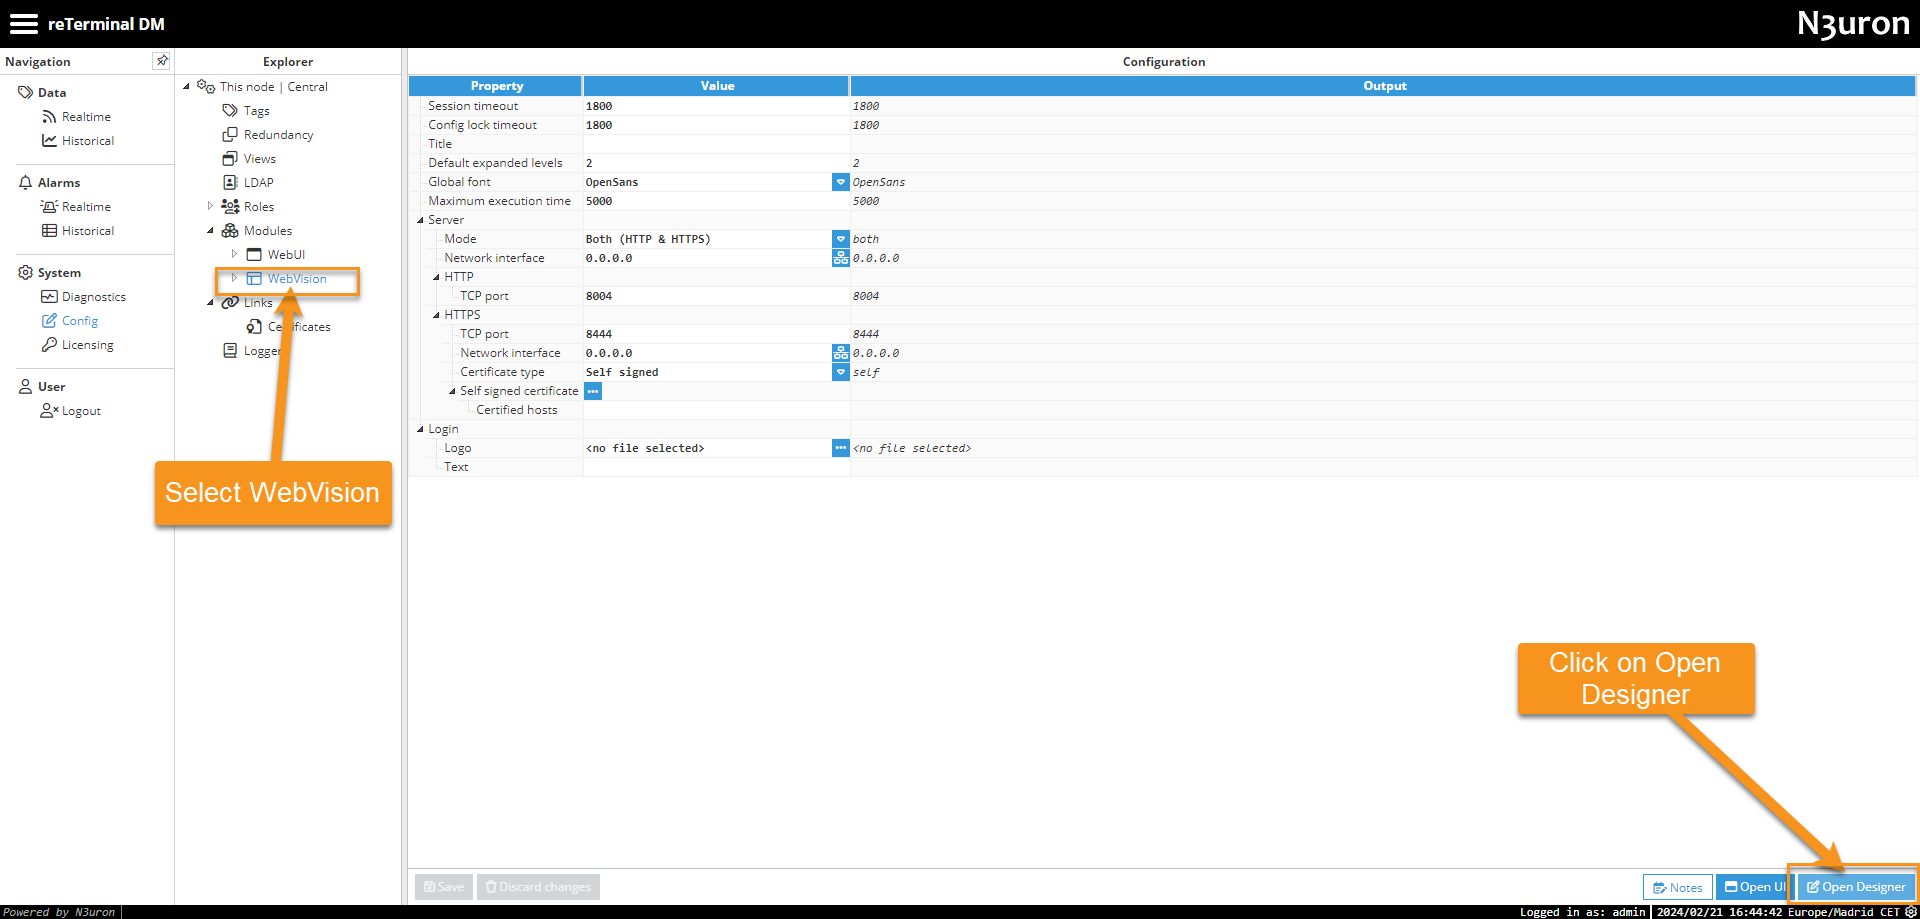
Step 2: Click on Modules, then create a new module. This instance can be given any name (except names with special characters like ‘.’, ‘/’, etc.), although users are recommended to name instances in a similar way to the name of the module being instantiated for easy identification. In this example, the WebVision module has been selected and has also been named WebVision.

Step 3: Navigate to the main configuration of WebVision and choose the appropriate server settings. The default settings should suffice for most use cases. For further details, please refer to the following link: WebVision Initial Configuration.

Step 4: Once the WebVision module has been instantiated, the first step is to assign permissions to the roles previously created in the Roles section of WebUI. By default, two roles exist: Administrator for administrative access and User for regular access. You can add users to these roles or create new ones as needed. Once roles are established, set permissions for Designer and Viewer roles accordingly. Additionally, establish a Tag filter path for each role. Tag filter path access determines which tags from the tag model will be accessible for visualization by the corresponding role. In this case, we will assign the complete path of the tag model to both roles.
- Administrator:
- Designer: Edit
- Viewer: View
- TagFilterPath:
- Mode: Include
- Path: /
- Regex pattern: .*
- User:
- Designer: None
- Viewer: View
- TagFilterPath:
- Mode: Include
- Path: /
- Regex pattern: .*
-
Useful Links
Step 5: To test our initial WebVision screen, let's create a tag. Go to the WebUI, select Config, and then click on Tag. In the Model section, click on the menu and choose New Tag. Name it TestTag, for instance, select the type as Number, grant it Read-Write permission, initialize it to 0 (optional) and then save the settings.
Step 6: Next, navigate to WebVision in the Config section and click on Open Designer. Log in using your Administrator credentials.
Step 7: In the Templates section, create a new Container named Main. Then, designate this container as the startup. This will set Main as our initial WebVision screen. It will appear with an asterisk symbol (*) beside it.
Step 8: Change the background color of the Main container.
Step 9: Inside the Main container, navigate to Components and add a new component. For this example, select the Gauge component.
Step 10: Within the Gauge component, select the tag that will provide the values displayed on the gauge component.
Step 11: Next, navigate to WebVision in the Config section and click on Open UI. Log in using your Administrator credentials.

Step 12: To test our simple design, navigate to the WebUI and select Data > Realtime. Change the value of TestTag. Afterwards, return to the WebVision UI and verify if the value displayed by the Gauge component has been updated.
There is much to explore about WebVision to enhance your Edge Box experience. For further details, please refer to our Knowledge Base on WebVision.
What you've seen is just the beginning. Embrace the limitless possibilities offered by its impressive array of nearly 50 modules. Dare to dream big, innovate, and take your projects to new heights with N3uron's cutting-edge features. For a deeper dive into this powerful platform, visit https://n3uron.com/ and embark on an exciting journey of discovery!