Grove - RGB LED Matrix w/Driver
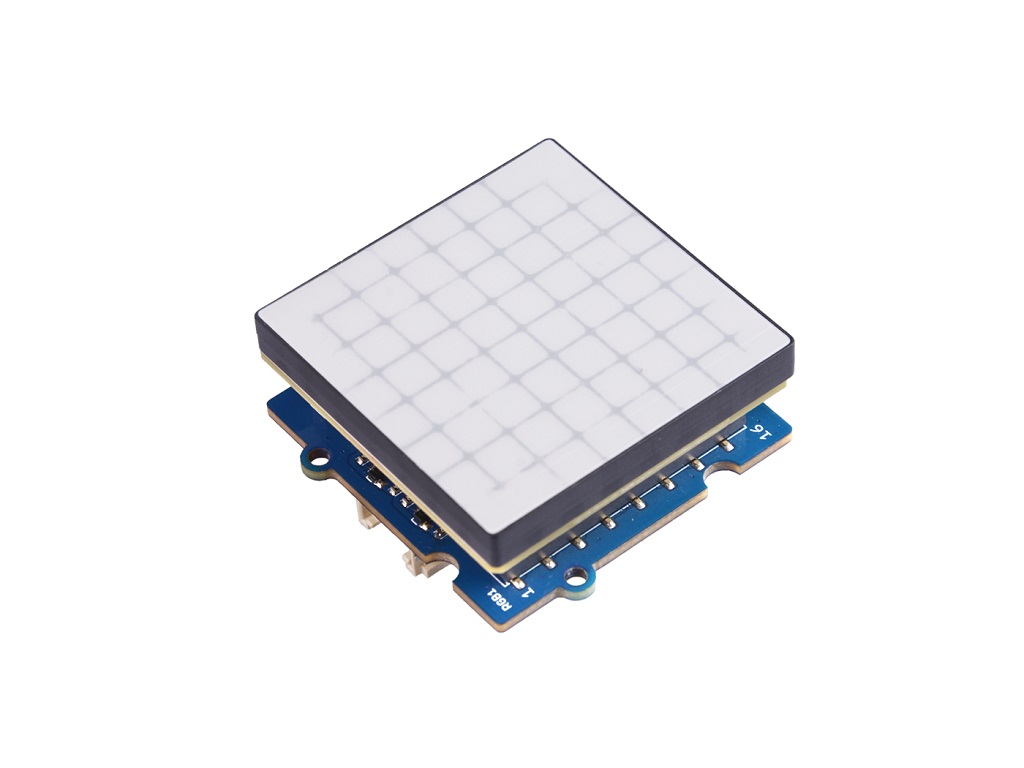
8x8 RGB LED Matrix is awesome for simple image display, 64 pixel leds and 255 colors for each pixel means almost infinite possibilities. However, the complicated wiring of the matrix is daunting. Now we present the Grove - RGB LED Matrix w/Driver for you, leave all the complex and variable wireing and soldering behind, just one single grove connector to control the RGB 8x8 LED matrix easily. Amazing? Try it yourself and you will love it.

Version
| Product Version | Changes | Released Date |
|---|---|---|
| Grove - RGB LED Stick (10 WS2813 Mini) | Initial | Dec 2018 |
Features
- 8x8 pixel, RGB 255 colors
- Build-in MCU
- ±1%(typ.) LED Current accuracy between channels
- Support for displaying custom images
Specification
| Item | Value |
|---|---|
| Operating Voltage | 3.3V / 5V |
| Operating Temperature | -40℃ ~ +85℃ |
| Interface | I2C |
| I2C Address | 0x65 |
| size | L: 40mm W: 40mm H: 21mm |
| Weight | 17.3g |
| Package size | L: 120mm W: 100mm H: 33mm |
| Gross Weight | 28g |
Typical Applications
- Simple image display
- Toys
Hardware Overview
Pin Out


Grove Interface
We use I2C interface to control the LED matrix:
GND: connect this module to the system GND
VCC: you can use 5V for this module
SDA: I2C serial data
SCL: I2C serial clock

DC-DC Module
We use MP-2155 to provide a stable 3.3V for the the MCU and the LED driver chip.

Firmware Download Interface
Connect to the SDA and SCL pin, works as the UART when download the firmware.

LED Driver
The MY9221 is a 12-channels (R/G/B x 4) constant current APDM (Adaptive Pulse Density modulation) LED driver. Since this mudule is 8x8 matrics, so we need RGB X8 output channels, therefor, we use two MY9221.


8x8 LED Matrix
We use 64 KTR-3528RGB LEDs to form an 8x8 matrix LED
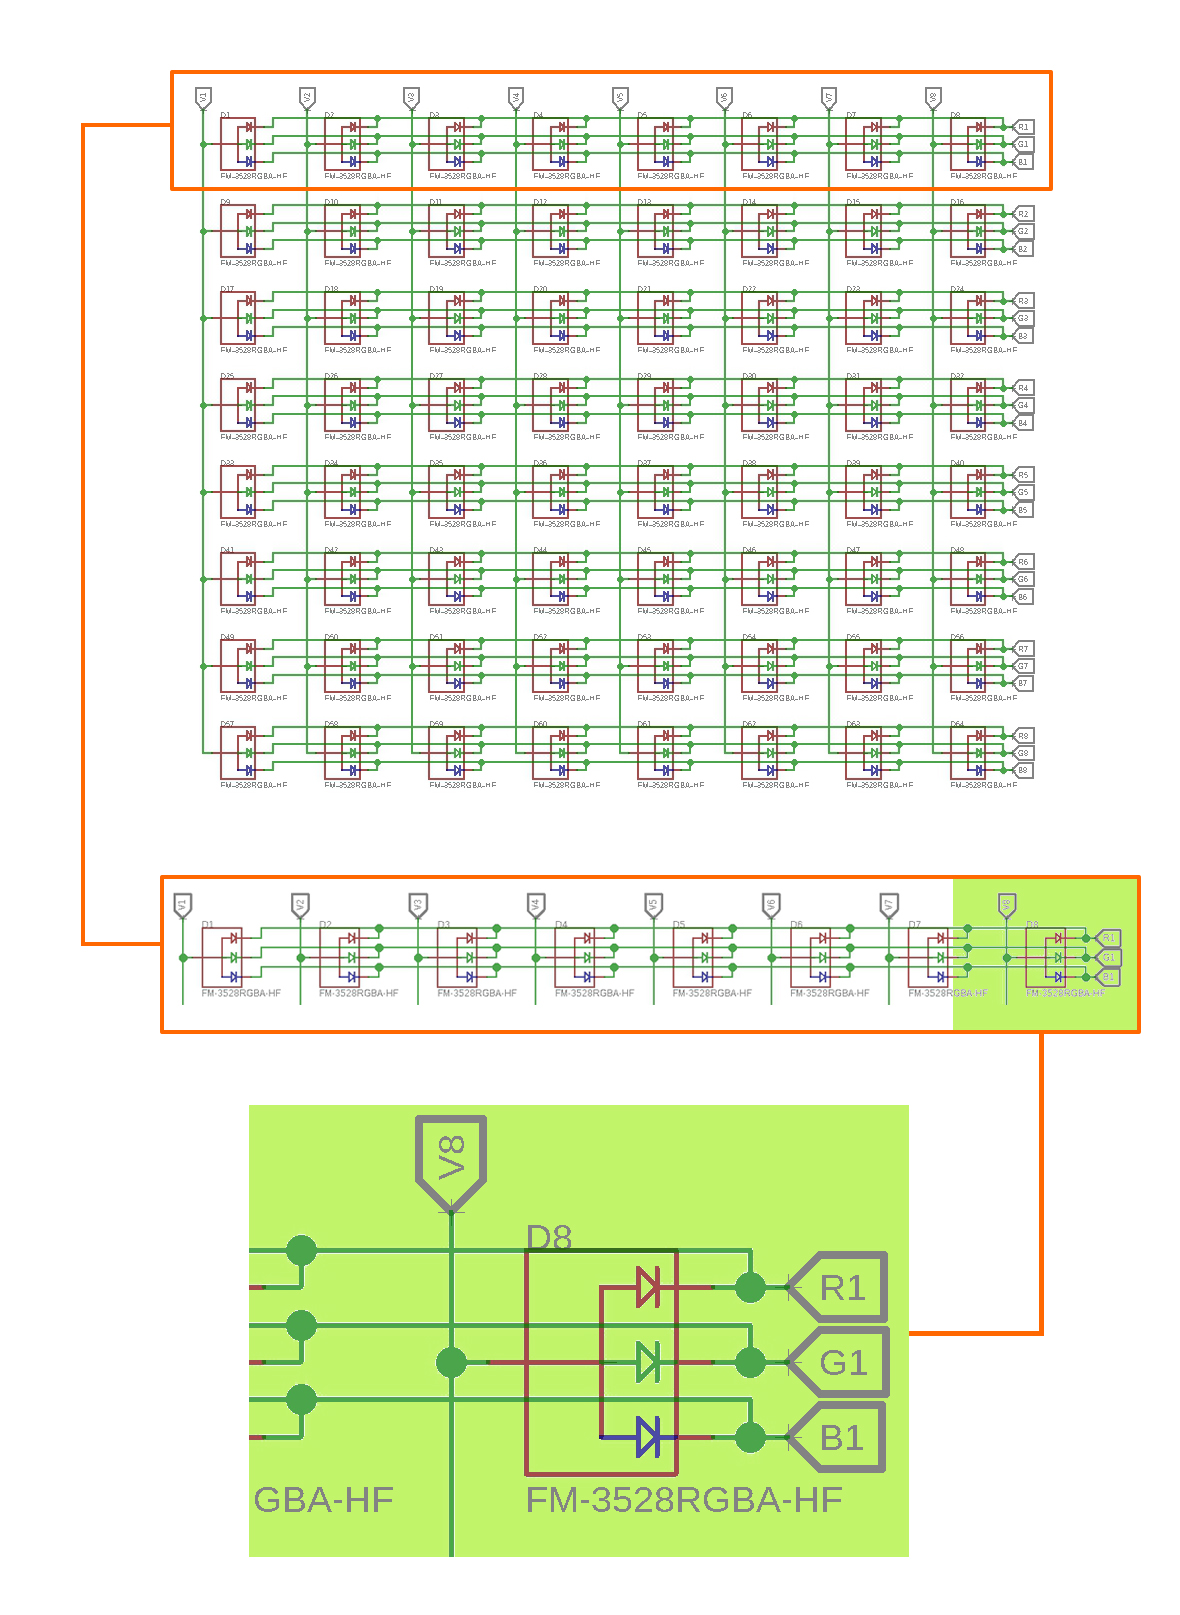
We use the V signal for column selection and the RGB signal for row selection.
We name the leds by D, D1 - D64. R1/G1/B1 - R8/G8/B8 is drive by two MY9221, V1 - V8 is controled by the 74HC183PW chip. If all the LEDs are off, the V1 -V9 should be pulled low by default, and all the RGB changle line will all be pulled high.
e.g.
D8 is in the first row, eighth column. If we want to make the D8 Green-255, then we should pull V8 high, and pull R1/B1 high, pull G1 to ground. Then only the Green led will be light up, you will see the D8 turn pure green.
Platforms Supported
| Arduino | Raspberry Pi |
|---|---|
|
|
The platforms mentioned above as supported is/are an indication of the module's hardware or theoritical compatibility. We only provide software library or code examples for Arduino platform in most cases. It is not possible to provide software library / demo code for all possible MCU platforms. Hence, users have to write their own software library.
Getting Started
Play With Arduino
Hardware
Materials required
| Seeeduino V4.2 | Base Shield | Grove - RGB LED Matrix w/Driver |
|---|---|---|
|
|
|
| Get One Now | Get One Now | Get One Now |


1 Please plug the USB cable gently, otherwise you may damage the port. Please use the USB cable with 4 wires inside, the 2 wires cable can't transfer data. If you are not sure about the wire you have, you can click here to buy
2 Each Grove module comes with a Grove cable when you buy. In case you lose the Grove cable, you can click here to buy.
1. If the you uses Arduino UNO as the motherboard, it is recommended that use the DC power supply. Otherwise, the maximum ripple of VCC may exceed 100mV. If you use Seeeduino V4.2 as the motherboard, you do not need to connect DC power.
2. Hot swap is not supported.
-
Step 1. Connect the Grove - RGB LED Matrix w/Driver to port I2C of Grove-Base Shield.
-
Step 2. Plug Grove - Base Shield into Seeeduino.
-
Step 3. Connect Seeeduino to PC via a USB cable.
If we don't have Grove Base Shield, We also can directly connect this module to Seeeduino as below.
| Seeeduino | Grove Cable | Grove - RGB LED Matrix w/Driver |
|---|---|---|
| GND | Black | GND |
| 5V or 3.3V | Red | VCC |
| SDA | White | SDA |
| SCL | Yellow | SCL |
Software
If this is the first time you work with Arduino, we strongly recommend you to see Getting Started with Arduino before the start.
-
Step 1. Download the Seeed_RGB_LED_Matrix Library from Github.
-
Step 2. Refer to How to install library to install library for Arduino.
-
Step 3. Restart the Arduino IDE. Open the example, you can open it in the following three ways:
- Open it directly in the Arduino IDE via the path: File --> Examples --> Seeed_RGB_Led_Matrix --> display_emoji.

- Open it in your computer by click the display_emoji.ino which you can find in the folder XXXX\Arduino\libraries\Seeed_RGB_LED_Matrix-master\examples\display_emoji, XXXX is the location you installed the Arduino IDE.

- Or, you can just click the icon

in upper right corner of the code block to copy the following code into a new sketch in the Arduino IDE.
#include "grove_two_rgb_led_matrix.h"

#ifdef ARDUINO_SAMD_VARIANT_COMPLIANCE
#define SERIAL SerialUSB
#else
#define SERIAL Serial
#endif


#define DISPLAY_COLOR    0X11


void waitForMatrixReady()
{
    delay(1000);
}

GroveTwoRGBLedMatrixClass matrix;
void setup()
{
    Wire.begin();
    SERIAL.begin(115200);
    waitForMatrixReady();
    uint16_t VID = 0;
    VID = matrix.getDeviceVID();
    if(VID != 0x2886)
    {
        SERIAL.println("Can not detect led matrix!!!");
        while(1);
    }
    SERIAL.println("Matrix init success!!!");

}

void loop()
{
    for(int i=0;i<35;i++)
    {
        matrix.displayEmoji(i,5000,true);
        delay(5000);
    }
}
The library file may be updated. This code may not be applicable to the updated library file, so we recommend that you use the first two methods.
- Step 4. Upload the demo. If you do not know how to upload the code, please check How to upload code.
If every thing goes well, now you can see the LED matrix show:

DIY
Now let's talk about diy.
In this version firmware if you want to diy your own image with UNO serial you need to modify the file of arduino. If you use mega or lotus, the change will not be needed.
Locate the arduino setup folder xxxxx\Arduino\hardware\arduino\avr\libraries\Wire\src, open the Wire.h file
change
#define BUFFER_LENGTH 32
into
#define BUFFER_LENGTH 128
Then locate the arduino setup folder xxxxx\Arduino\hardware\arduino\avr\libraries\Wire\src\utility, open the twi.h file.
change
#define TWI_BUFFER_LENGTH 32
into
#define TWI_BUFFER_LENGTH 128
Let's begin DIY.
-
Step 1. Download the image editor, it's a zip file, unzip it.
-
Step 2. Find the index.html in the folder doc-->doc, double click to open it.

-
Step 3. Create your own images, when you finish one, click Insert in the control panel, the you can edit anothor one, when you finish all the image sequence you can copy the code in the code zone.
-
Step 4. Replace the following code block line 9 unit64_t example[] with your own code.
#include "grove_two_rgb_led_matrix.h"

#ifdef ARDUINO_SAMD_VARIANT_COMPLIANCE
#define SERIAL SerialUSB
#else
#define SERIAL Serial
#endif

uint64_t example[] = {

  0xffff5e5e5e5effff,
  0xff5effffffff5eff,
  0x5eff5effff5eff5e,
  0x5effffffffffff5e,
  0x5eff5effff5eff5e,
  0x5effff5e5effff5e,
  0xff5effffffff5eff,
  0xffff5e5e5e5effff,

  0xffff29292929ffff,
  0xff29ffffffff29ff,
  0x29ff29ffff29ff29,
  0x29ffffffffffff29,
  0x29ff29292929ff29,
  0x29ffffffffffff29,
  0xff29ffffffff29ff,
  0xffff29292929ffff,

  0xffff00000000ffff,
  0xff00ffffffff00ff,
  0x00ff00ffff00ff00,
  0x00ffffffffffff00,
  0x00ffff0000ffff00,
  0x00ff00ffff00ff00,
  0xff00ffffffff00ff,
  0xffff00000000ffff
};

void waitForMatrixReady()
{
    delay(1000);
}

GroveTwoRGBLedMatrixClass matrix;
void setup()
{
    Wire.begin();
    SERIAL.begin(115200);
    waitForMatrixReady();
    uint16_t VID = 0;
    VID = matrix.getDeviceVID();
    if(VID != 0x2886)
    {
        SERIAL.println("Can not detect led matrix!!!");
        while(1);
    }
    SERIAL.println("Matrix init success!!!");

}

void loop()
{
 for (int i=0;i<3;i++) {
        matrix.displayFrames(example+i*8, 200, false, 1);
        delay(500);
    }
}
If every thing goes well, now you can see the LED matrix show:

Schematic Online Viewer
Resources
-
[PDF] Datasheet MY9221
-
[PDF] Datasheet MP2155
Tech Support & Product Discussion
Thank you for choosing our products! We are here to provide you with different support to ensure that your experience with our products is as smooth as possible. We offer several communication channels to cater to different preferences and needs.