How to Run a Local LLM Text-to-Image on reComputer
Introduction
A Text-to-image model is a type of artificial intelligence (AI) model that generates images from a textual description. These models take textual input, like sentences or paragraphs describing a scene and produce an image based on that description.
These models are trained on large datasets containing pairs of text descriptions and corresponding images, learning to understand the relationships between textual and visual information.
Text-to-image models have made significant progress in recent years, but generating high-quality and diverse images that accurately match textual descriptions remains a challenging task in AI research.
Overview
On this tutorial, we're going to explore several ways to deploy and run a local LLM text-to-image:
- Create the virtual environment (both TensorFlow and PyTorch)
- 1.1. Create an example with Keras Stable Diffusion
- 1.2. Create an example using one of the models available at Hugging Face
- 1.3. Create a small Python API that we will use to generate images by calling the API for both Keras and Hugging Face
- Using a Nvidia container.
Troubleshooting
Before we start, here's some steps that we can take in order to have more memory available to us.
-
Disable the Desktop GUI. We can use the Jetson though SSH. We can save around ~800MB of memory.
-
Disable ZRAM and use Swap.
You can find those tips in the Nvidia Jetson AI Lab and how to implement them.
Requirements
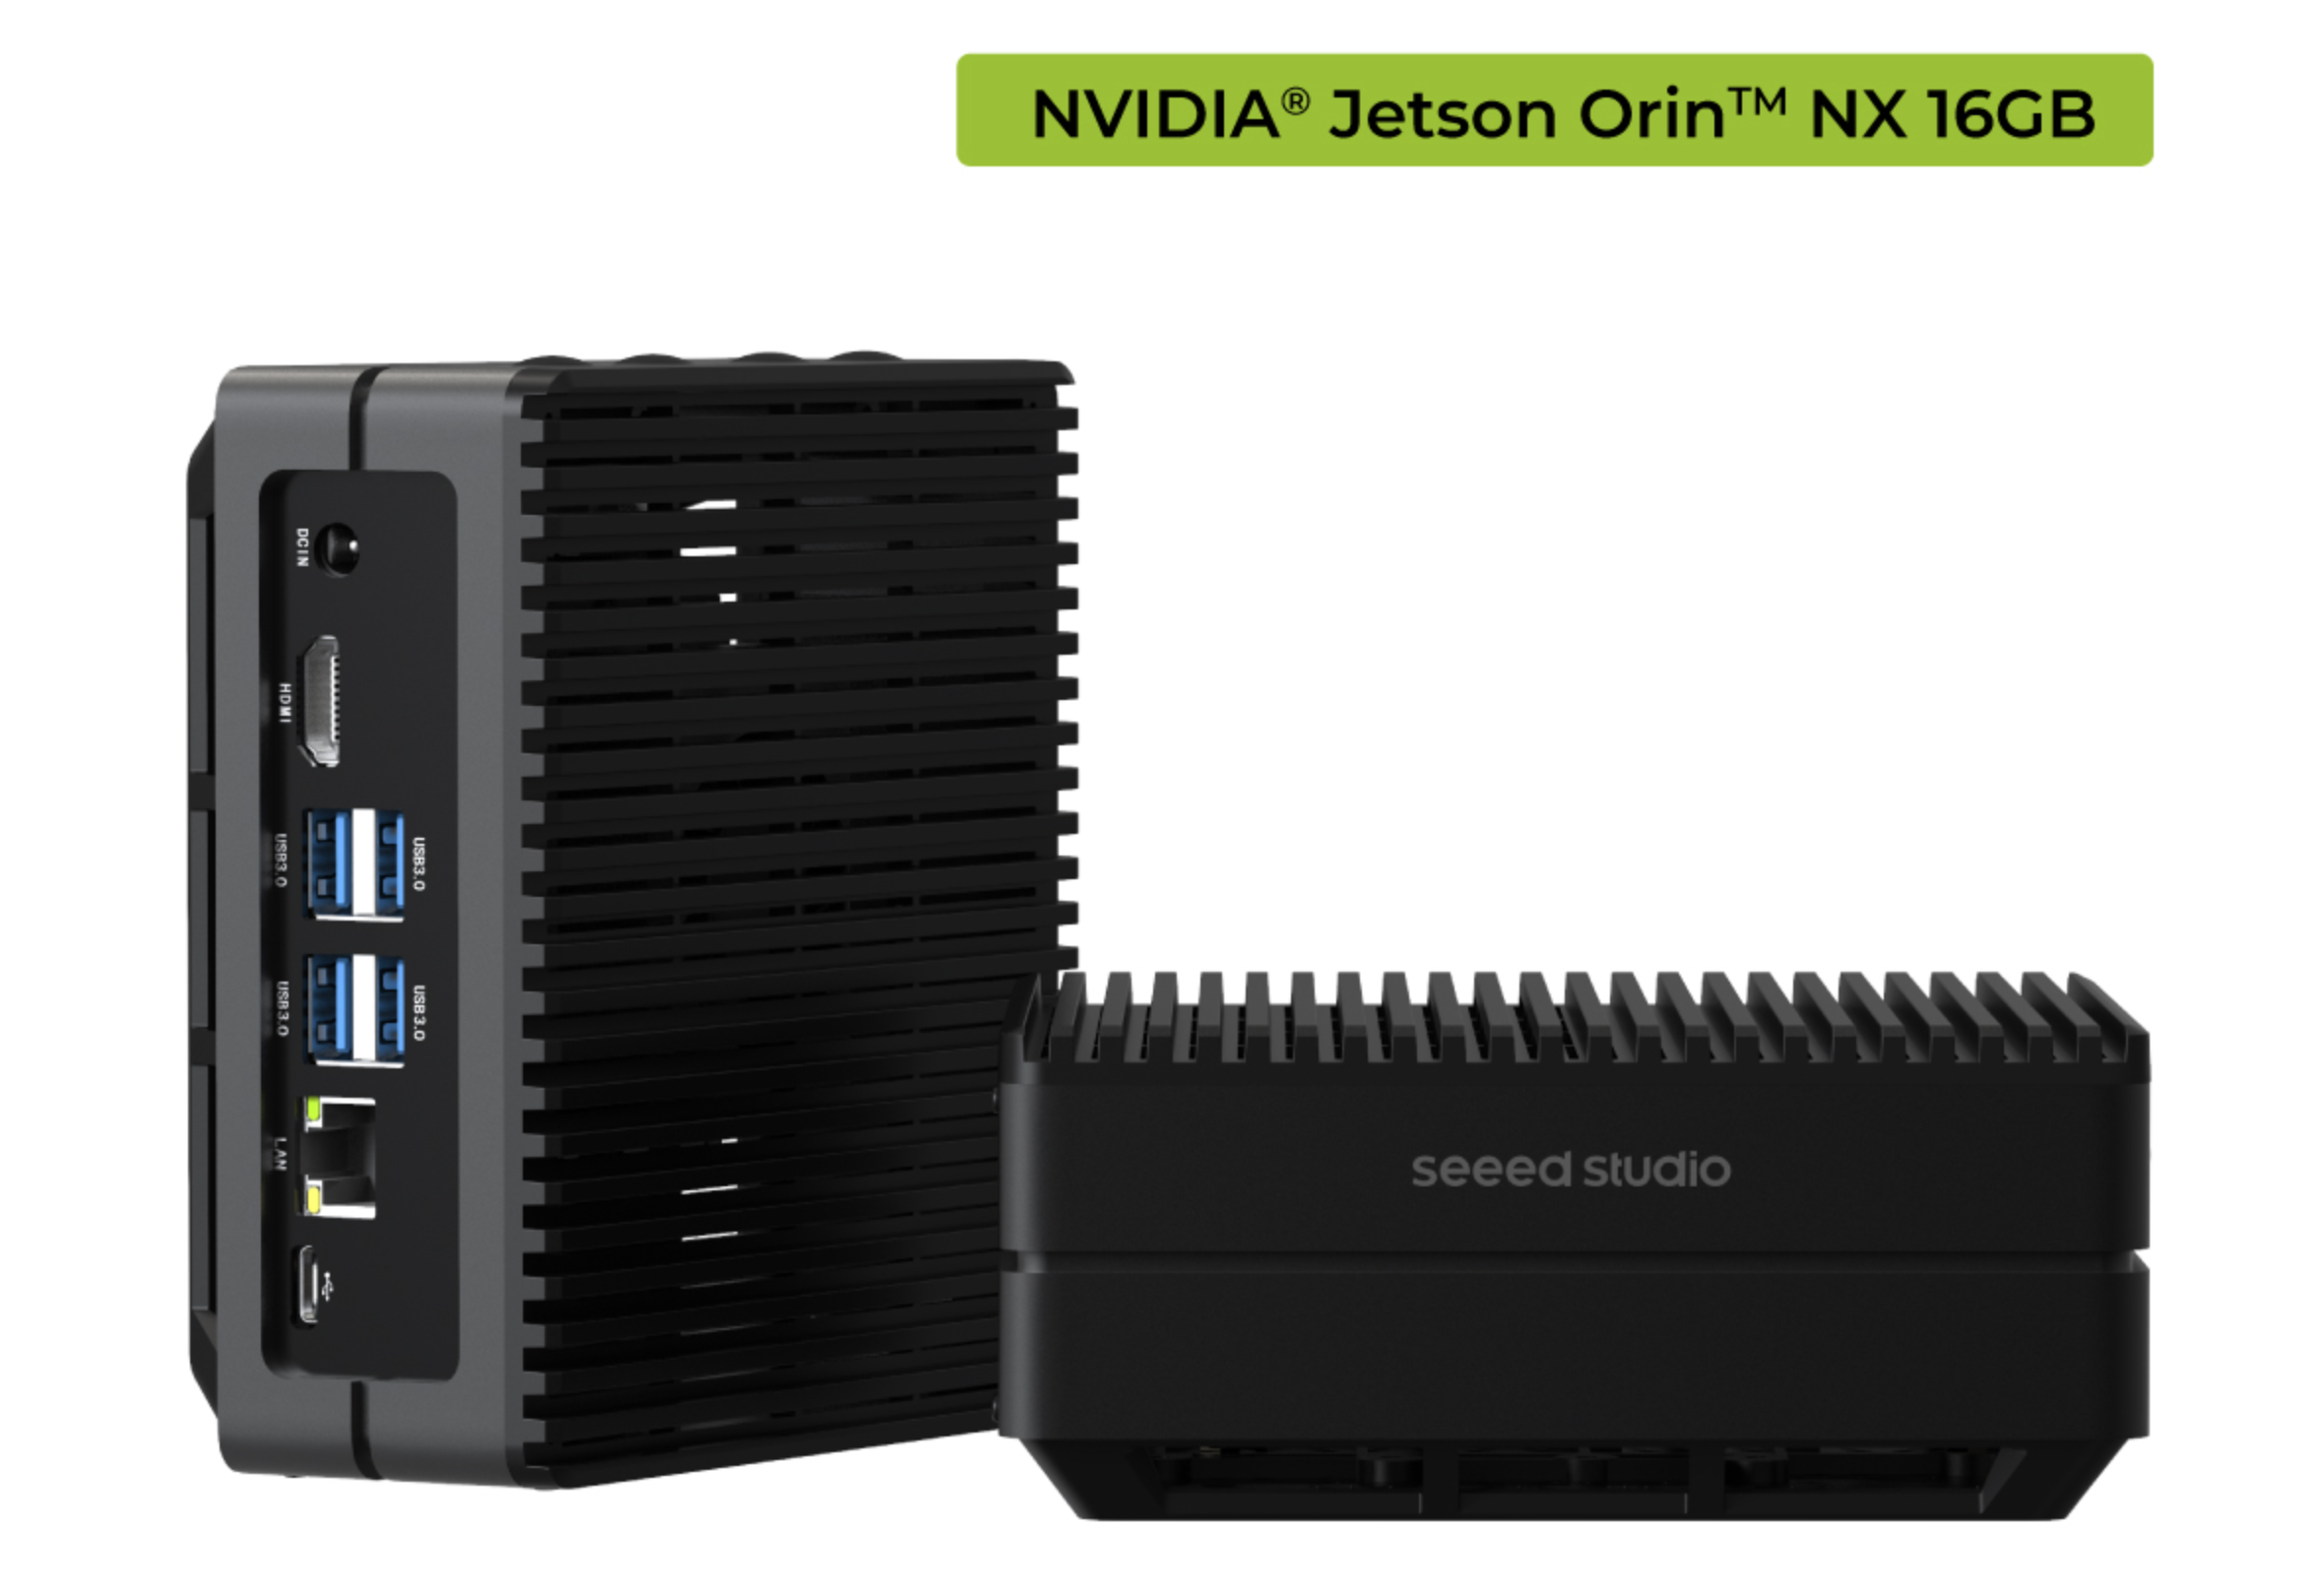
For this tutorial, we're going to need a Nvidia Jetson Orin NX 16GB.
And we're going to need to make sure that TensorFlow and PyTorch are installed - but I'm going through that here.
Step 1 - Create the virtual environments
Keras can use TensorFlow or PyTorch as backends. Hugging Face will mostly use PyTorch
Let's install TensorFlow and PyTorch.
The instructions on how to install TensorFlow and PyTorch for the Jetson Orin NX are in the Nvidia Website.
We can install TensorFlow and PyTorch globally or on a virtual Environment. We're be using a virtual environment.
By using a Virtual Environment we don't run the risk of mixing projects or packages versions.
This is the best way, although the Nvidia site prefers the global method.
TensorFlow
Create the virtual Environment (I'm using the name kerasStableEnvironment because I'm going to use it for the keras example. Use other name if you want.)
sudo apt install python3.8-venv
python -m venv kerasStableEnvironment
After creating it, activate the virtual environment
source kerasStableEnvironment/bin/activate
When active, you'll see the name of it before the prompt

Enter the virtual enviroment
cd kerasStableEnvironment
Upgrade PIP and install some dependencies
pip install -U pip
pip install -U numpy grpcio absl-py py-cpuinfo psutil portpicker six mock requests gast h5py astor termcolor protobuf keras-applications keras-preprocessing wrapt google-pasta setuptools testresources
Install TensorFlow for Jetpack 5.1.1
To find what JetPack version we have, issue the following command:
dpkg -l | grep -i jetpack
and the result should show the jetpack version:

pip install --extra-index-url https://developer.download.nvidia.com/compute/redist/jp/v511 tensorflow==2.12.0+nv23.05
If you have another JetPack version, check Nvidia Website for the correct URL.
Now, let's check TensorFlow installation
python -c "import tensorflow as tf; print(tf.config.list_physical_devices('GPU'))"
This should return the following line:
[PhysicalDevice(name='/physical_device:GPU:0', device_type='GPU')]
PyTorch
Let's install some dependencies
sudo apt install libopenblas-dev
Now, install PyTorch for JetPack 5.1.1
pip install --no-cache https://developer.download.nvidia.com/compute/redist/jp/v511/pytorch/torch-2.0.0+nv23.05-cp38-cp38-linux_aarch64.whl
To check the installation and if CUDA is available
python -c "import torch; print(torch.cuda.is_available())"
It should return True
Now that we have both TensorFlow and PyTorch installed, let's install Keras and create an image
1.1 Keras
After installing PyTorch and Tensorflow, we're now ready to start creating images from text prompts. Be sure that you're still on the virtual environment.
KerasCV has an implementation (along several others) of Stability.ai texto-to-image model, Stable Diffusion.
By using the KerasCV implementation, we can use some the performance advantages, like XLA compilation and mixed precision support.
You can read more on Keras Website
Install keras and dependencies. We're going for this versions because they work with the TensorFlow (or PyTorch) versions that we have installed.
pip install keras-cv==0.5.1
pip install keras==2.12.0
pip install Pillow
Open your preferred editor and type the following example
vi generate_image.py
import keras_cv
import keras
from PIL import Image
keras.mixed_precision.set_global_policy("mixed_float16")
model = keras_cv.models.StableDiffusion (
img_width=512, # we can choose another size, but has to be a mutiple of 128
img_height=512, # the same above
jit_compile=True
)
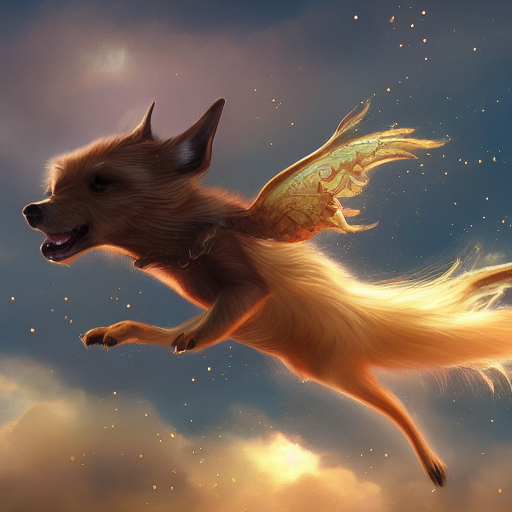
prompt = "a cute magical flying dog, fantasy art, golden color, high quality, highly detailed, elegant, sharp focus, concept art, character concepts, digital painting, mystery, adventure"
image = model.text_to_image (prompt,
num_steps = 25, #image quality
batch_size = 1 # how many images to generate at once
)
Image.fromarray(image[0]).save("keras_generate_image.png")
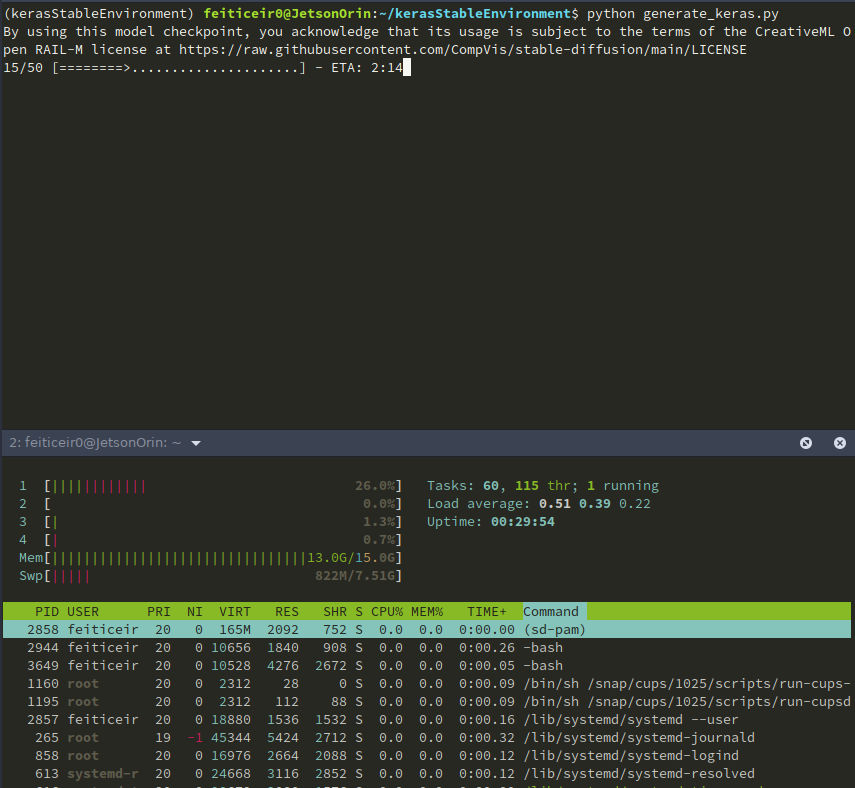
While running the script, here are some statistics
And after a while, here's the result
Step 1.2 - Hugging Face
Hugging Face is like the Github for Machine Learning. It lets developers built, deploy, share and train their ML models.
Hugging Face is also known for their Transformers Python library, which eases the process of downloading and training ML models.
Let's use some of the models available. Head to Hugging Face and choose to see the models.
On the left side, you have filters that allow us to choose what type of models we want to see.
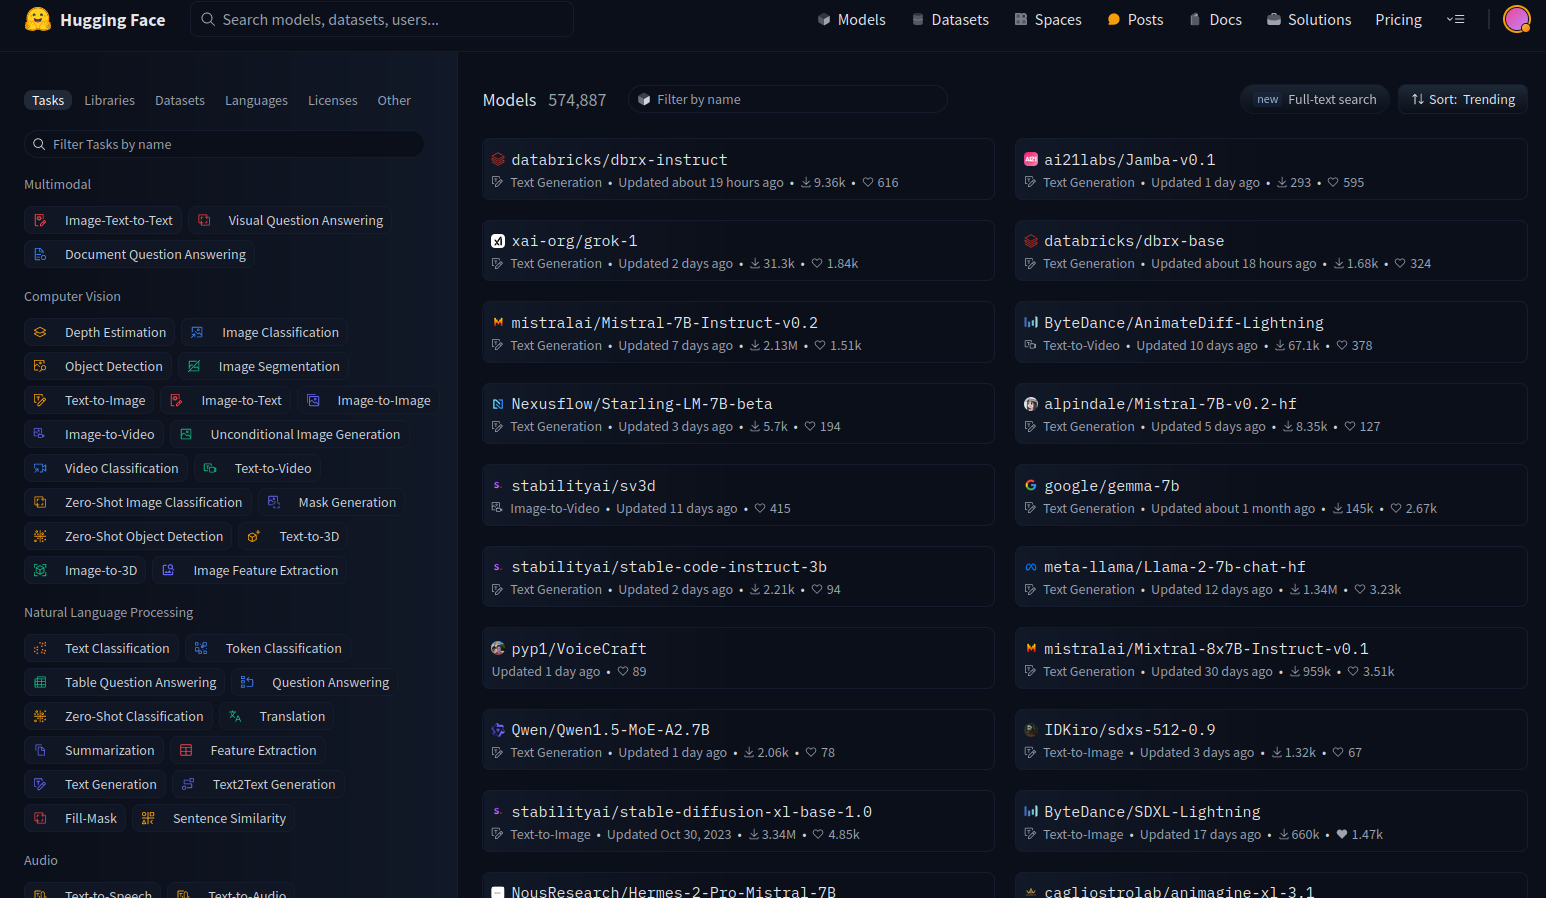
There are a lot of models available, but we're going to concentrate on the text-to-image models.
Virtual environment
Create a Virtual Environment, like we did above, so we can use Hugging Face without messing packages versions or installing packages we don't need.
python -m venv huggingfaceTesting
source huggingfaceTesting/bin/activate
After creating the virtual environment, let's enter it. Install PyTorch using the instructions above.
cd huggingfaceTesting
Model
Hugging Face has a lot of text-to-image models. Although theoretically they should work with our Jetson, they don't.
stable-diffusion-v1-5
I'm going to test the stable-diffusion-v1-5 from Runaway.
On the model card, they have all the information necessary to work with the model .
We're going to use Hugging Face diffusers library. Inside the virtual environment (and with it activated) install the dependencies.
pip install diffusers transformers accelerate
Now that we have all the dependencies installed, let's try the model. Using your favorite editor, copy the following code (also available in the model card page):
from diffusers import StableDiffusionPipeline
import torch
model_id = "runwayml/stable-diffusion-v1-5"
pipe = StableDiffusionPipeline.from_pretrained(model_id, torch_dtype=torch.float16)
pipe = pipe.to("cuda")
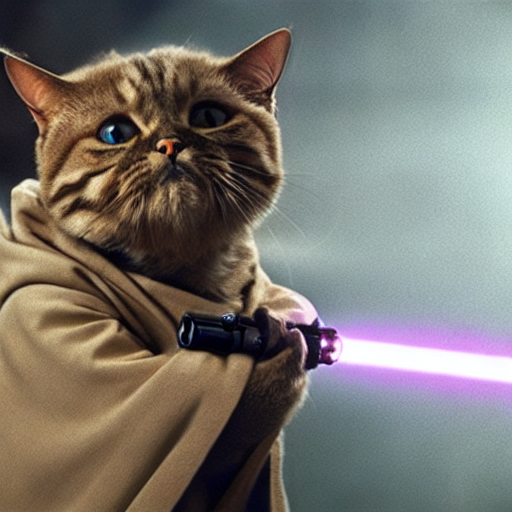
prompt = "a master jedi cat in star wars holding a lightsaber, wearing a jedi cloak hood, dramatic, cinematic lighting"
image = pipe(prompt).images[0]
image.save("cat_jedi.png")
Let's try the model.
python stableDiffusion.py
Remember: This takes a lot of space. The model's checkpoints are being downloaded. This will be done just one time.

After a while, here's the result
SDXL-Turbo
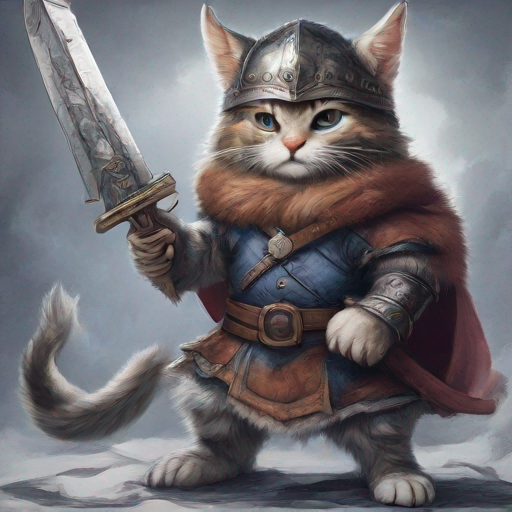
Here's another model we can try. SDXL Turbo from Stability AI. Copy the following code
from diffusers import AutoPipelineForText2Image
import torch

pipe = AutoPipelineForText2Image.from_pretrained("stabilityai/sdxl-turbo", torch_dtype=torch.float16, variant="fp16")
pipe.to("cuda")

prompt = "full body, cat dressed as a Viking, with weapon in his paws, battle coloring, glow hyper-detail, hyper-realism, cinematic"

image = pipe(prompt=prompt, num_inference_steps=1, guidance_scale=0.0).images[0]
image.save("sdxl-turbo.png")
This prompt was taken from a Medium article written by Daria Wind
This one is really fast generating an image. Takes almost 30s, from running the script until it exits. Here's the result
We can also try other models, like models trained specifically for anime or cyberpunk.
There will be some models that will not work. It can be because of several factors - memory, available CPUs or even Swap memory.
Step 1.3 - Create a small API
Let's now crete a small API with Flask to use to generate an image given a prompt and return it to the caller.
Imagine that you have the Jetson running and want to be able to generate an image by calling a API - your personal LLM image-to-text.
There are already projects that do this (like the one we're going to see later), but nothing beats doing it yourself.
Let's create a new Virtual Environment
python -m venv imageAPIGenerator
Activate the environment and enter it
source  imageAPIGenerator/bin/activate
cd imageAPIGenerator
We're going go use Flask for this. FlasK is web application framework written in Python. It's small enough for our purpose.
Install Flask.
pip install Flask
After installing it, let's install all the other dependencies that we need. Just for demonstration purposes, we're going to use Keras, because it has the least dependencies.
Install TensorFlow. Follow the instructions above. Next, install Keras.
pip install keras-cv==0.5.1
pip install keras==2.12.0
pip install Pillow
Now, let's start to write our application.
vi app.py
For those who don't know what Flask is or does, let's try a small example.
from flask import Flask

app = Flask (__name__)


@app.route("/generate_image")
def generate_image_api():
    return "<h2>Hello World !</h2>"


if __name__ == "__main__":
    app.run(host='',port=8080)
To run, execute the python script:
python app.py
You should see the following:

Now, open a browser and try to access your Jetson device with the 8080 port.


What we did was importing the Flask class
import Flask
We next created an instance of the Flask class
app = Flask(__name__)
We next create a route decorator to tell Flask what URL will trigger our function
@app.route("/generate_image")
When using generate_image in the URL, we will trigger our function
def generate_image_api():
    return "<h2>Hello World !</h2>"
We can also use curl to access our API
curl http://192.168.2.230:8080/generate_image

Now that we know how to create a API, let's dive into it and write it.
vi app.py
And paste the code
from flask import Flask, request, send_file
import random, string
import keras_cv
import keras
from PIL import Image

#define APP
app = Flask (__name__)


#option for keras
keras.mixed_precision.set_global_policy("mixed_float16")

# generate custom filename
def generate_random_string(size):
    """Generate a random string of specified size."""
    return ''.join(random.choices(string.ascii_letters + string.digits, k=size))


"""
    This is the function that will generate the image
    and save it using a random created filename
"""
def generate_image(prompt):

    model = keras_cv.models.StableDiffusion (
        img_width=512,  # we can choose another size, but has to be a mutiple of 128
        img_height=512, # the same above
        jit_compile=True
    )

    image = model.text_to_image (prompt,
            num_steps = 25,
            batch_size = 1
    )

    # image filename
    filename = generate_random_string(10) + ".png"
    Image.fromarray(image[0]).save(filename)
    return filename # return filename to send it to client


#define routes
# Use this to get the prompt. we're going to receive it using GET
@app.route("/generate_image", methods=["GET"])
def generate_image_api():
    # get the prompt
    prompt = request.args.get("prompt")
    if not prompt:
        # let's define a default prompt
        prompt = "A cinematic shot of a baby racoon wearing an intricate italian priest robe."

    image_name = generate_image(prompt)
    return send_file(image_name, mimetype='image/png')


if __name__ == "__main__":
    app.run(host='0.0.0.0',port=8080)
REMEMBER: This is not code ready for the Internet. We don't have any security measures whatsoever.
Let's run it.
In a browser, type in the URL http://jetsonIP:8080/generate_image and wait.
If we don't give it a prompt, it will use the default one we've set.
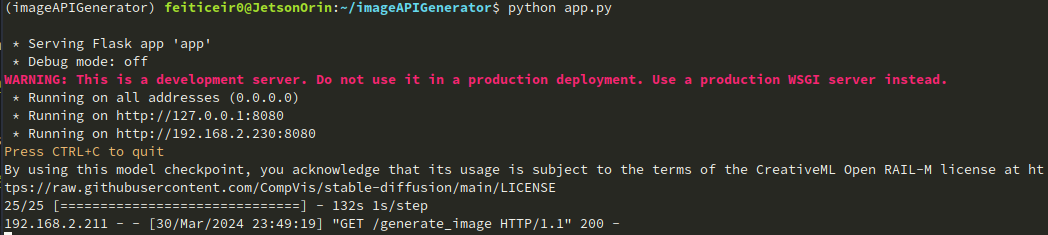
In the CLI, you can see the image being generated

And in the browser, after a while, we can see the image
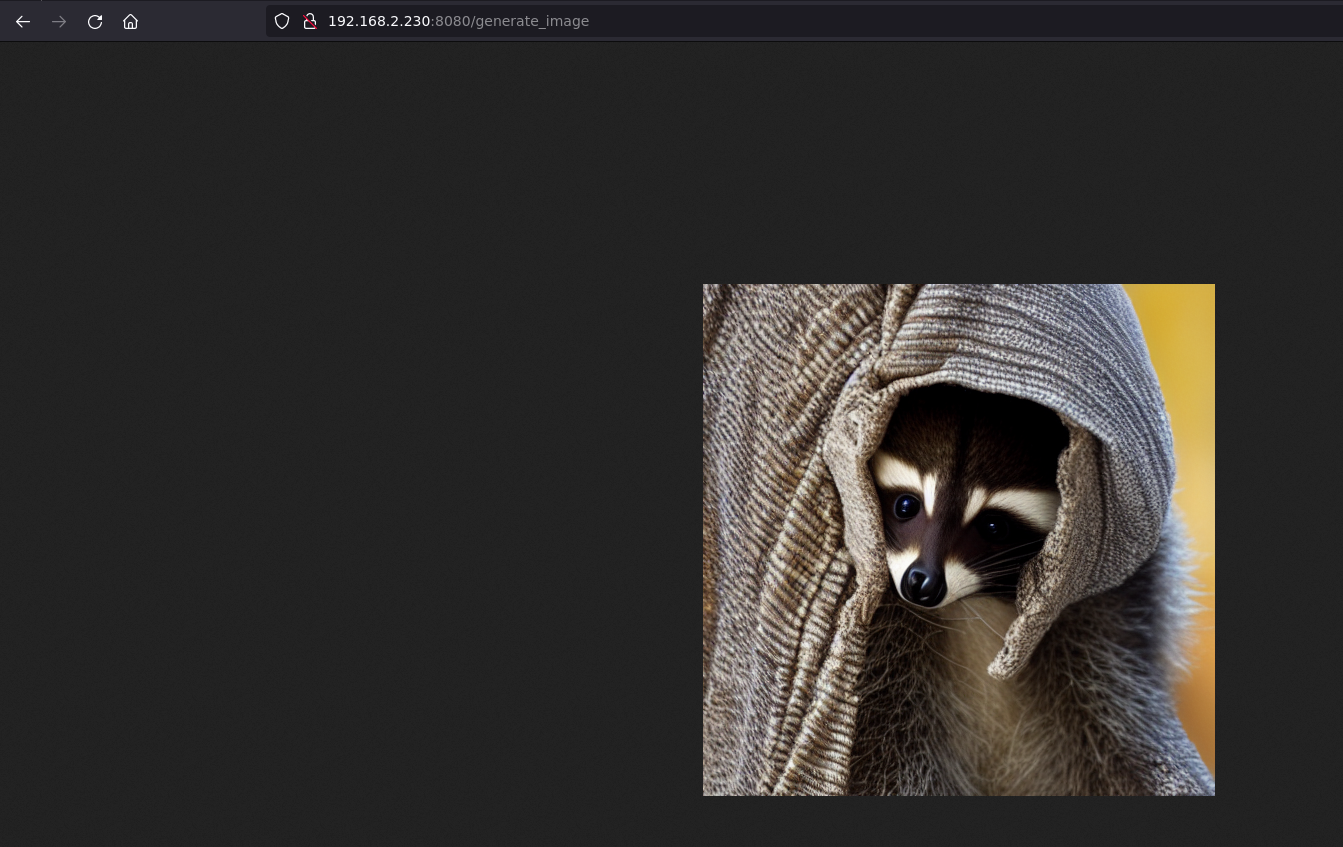
We can also see the image has been sent
We can also use curl to get the image and save it.
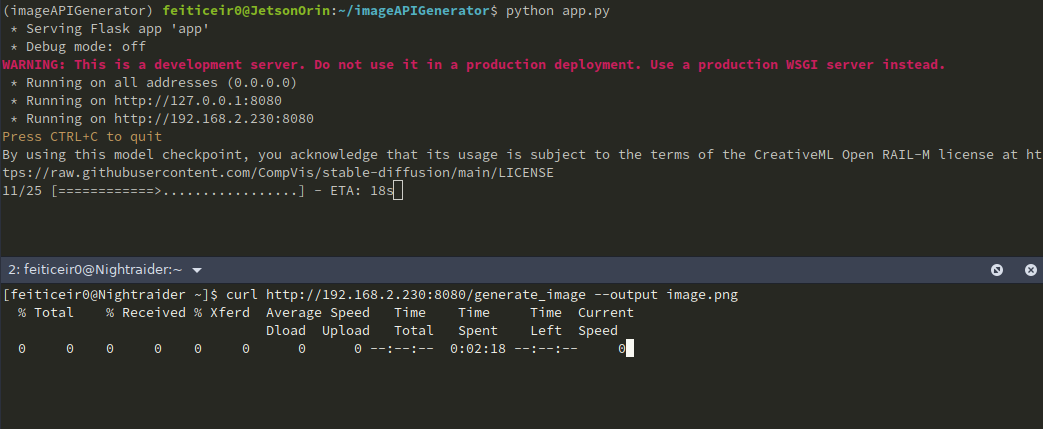
If we want to give it a prompt (as we should), the URL will look like http://jetsonIP:8080/generate_image?prompt=<your_prompt>
We can expand this example to build a better page, like having some text boxes for user input, a nice background, etc. But this is for another project.
Step 2 - Nvidia LLM
Stable Diffusion v1.5
We can use the Jetson Containers project to run stable-diffusion-webui using AUTOMATIC1111. Jetson Containers project is run by Dusty Franklin, a NVIDIA employee.
NVIDIA has the NVIDIA Jetson Generative AI Lab project that has a lot of tutorials on Machine Learning.
We're going to use Stable Diffusion tutorial for this.
Let's clone the github repository, enter the repository and install dependencies
git clone https://github.com/dusty-nv/jetson-containers
cd jetson-containers/
sudo apt update; sudo apt install -y python3-pip
pip3 install -r requirements.txt
Now that we have everything we need, let's run the container with the stable-diffusion-webui autotag
./run.sh $(./autotag stable-diffusion-webui)
It will start to run the container.
After a while, it will say that there's a compatible container and if we want to proceed.
Found compatible container dustynv/stable-diffusion-webui:r35.3.1 (2024-02-02, 7.3GB) - would you like to pull it? [Y/n]
It will start downloading the container.
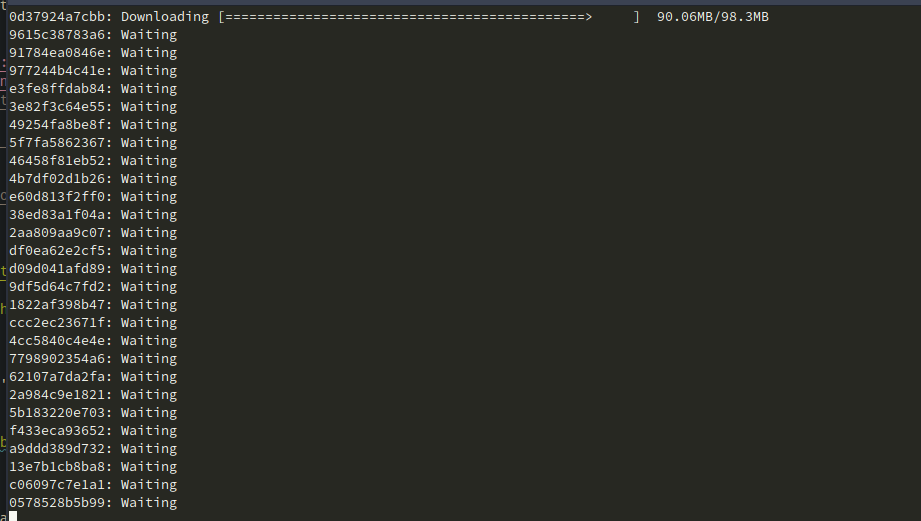
After finishing, it will download the model and run the server on port 7860.
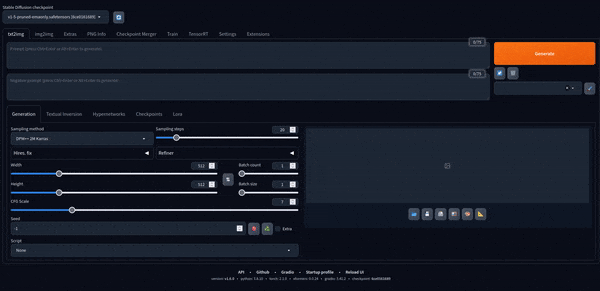
Here for me it didn't work at first. No checkpoint would appear to choose from, no matter how many times I would press the refresh button.

I found out that I had 100% space occupied.
feiticeir0@JetsonOrin:~$ df -h
Filesystem      Size  Used Avail Use% Mounted on
/dev/nvme0n1p1   79G   79G     0 100% /
none            7,4G     0  7,4G   0% /dev
tmpfs           7,6G     0  7,6G   0% /dev/shm
tmpfs           1,6G   19M  1,5G   2% /run
tmpfs           5,0M  4,0K  5,0M   1% /run/lock
tmpfs           7,6G     0  7,6G   0% /sys/fs/cgroup
/dev/loop0      162M  162M     0 100% /snap/chromium/2797
/dev/loop2      128K  128K     0 100% /snap/bare/5
/dev/loop1       70M   70M     0 100% /snap/core22/1125
/dev/loop3       65M   65M     0 100% /snap/cups/1025
/dev/loop4       92M   92M     0 100% /snap/gtk-common-themes/1535
/dev/loop6      162M  162M     0 100% /snap/chromium/2807
/dev/loop5      483M  483M     0 100% /snap/gnome-42-2204/174
/dev/loop7       35M   35M     0 100% /snap/snapd/21185
tmpfs           1,6G  4,0K  1,6G   1% /run/user/1000
I've been testing other models and they occupied all the space. If this happens to you, just go to your home directory, to the hidden cache directory and delete the huggingface directory.
cd ~/.cache
rm -rf huggingface
Now you should have space available. Or just get a new drive, with more space. :)
Now the model is being downloaded.

And we have a checkpoint
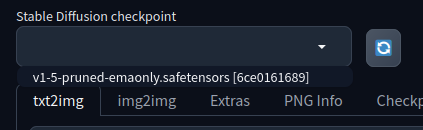
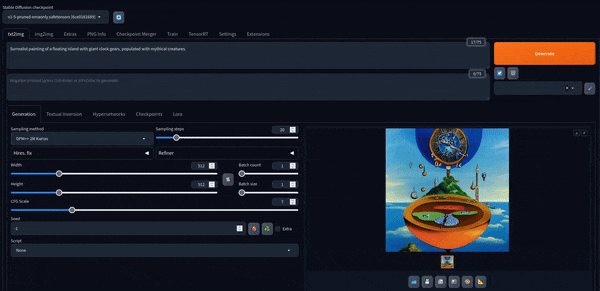
Open your browser and head to your Jetson IP address and port to run the AUTOMATIC1111's Stable Diffusion webgui
Now we can play with it. Here's some images created with the default model.
Stable Diffusion XL
AUTOMATIC1111 supports other models. Let's try with Stable Diffusion XL. It has 6.6 billion parameters.
To add another model, and to be easier to download it, let's define some variables, change permissions and download the models. This is an example from NVIDIA's Tutorial.
CONTAINERS_DIR=<where_jetson-containers_is_located>
MODEL_DIR=$CONTAINERS_DIR/data/models/stable-diffusion/models/Stable-diffusion/
sudo chown -R $USER $MODEL_DIR
Now, download the model
wget -P $MODEL_DIR https://huggingface.co/stabilityai/stable-diffusion-xl-base-1.0/resolve/main/sd_xl_base_1.0.safetensors
wget -P $MODEL_DIR https://huggingface.co/stabilityai/stable-diffusion-xl-refiner-1.0/resolve/main/sd_xl_refiner_1.0.safetensors
With the models downloaded, let's refresh the checkpoints drop-down if you have the container running, or launch the container again.
Now we have two more models available to us.

This is an example generated with the XL model, with the following prompt:
A Portrait, fashionable model wearing futuristic clothing, in a cyberpunk roof-top environment, with a neon-lit city background, backlit by vibrant city glow, fashion photography
Try it. Remember that, it may not work with some options selected.
Adding other models
We can also add a lot of more models. Besides Hugging Face, Civitai is another hub with more models to choose from. Civitai has some NSFW models, so consider yourself warned.
Select the one you want, download the checkpoints and place them in the models directory
/home/<user>/<jetson-containers-location>/data/models/stable-diffusion/models/Stable-diffusion/
I'm going to download and try a model named DreamShaper XL.
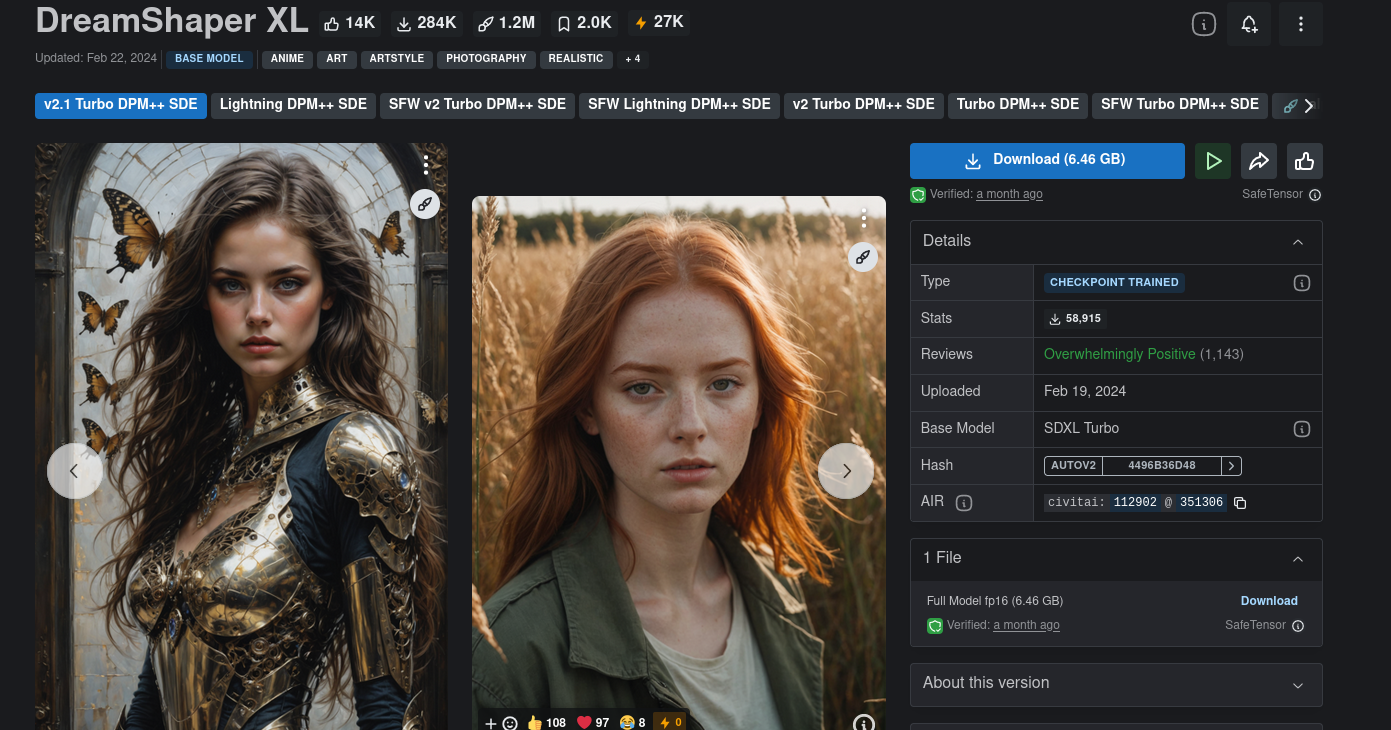
Remember that some models may not work.
You need to play with the settings and read the model card to know what settings may work best (if at all).
For example, this model card says that the sampling steps should be 4-8, sampling method should be DPM++ SDE Karras, etc...
Download the model checkpoint and add it to the above directory.
After refreshing , you should have the model ready to select. When selecting, AUTOMATIC1111 will optimize the model.
If it gets getting killed or an error appears, get more space. It was happening to me and after getting more space, everything worked out.
Using the following prompt
holding a staff, orbstaff
<lora:orbstaff:0.60>, ,(by Gabriel Isak and Adam Elsheimer:1.20), (by Jon Whitcomb and Bayard Wu and Malcolm Liepke0.80),8k , professional fashion shot
from this image, without the negative prompt, I got the following result
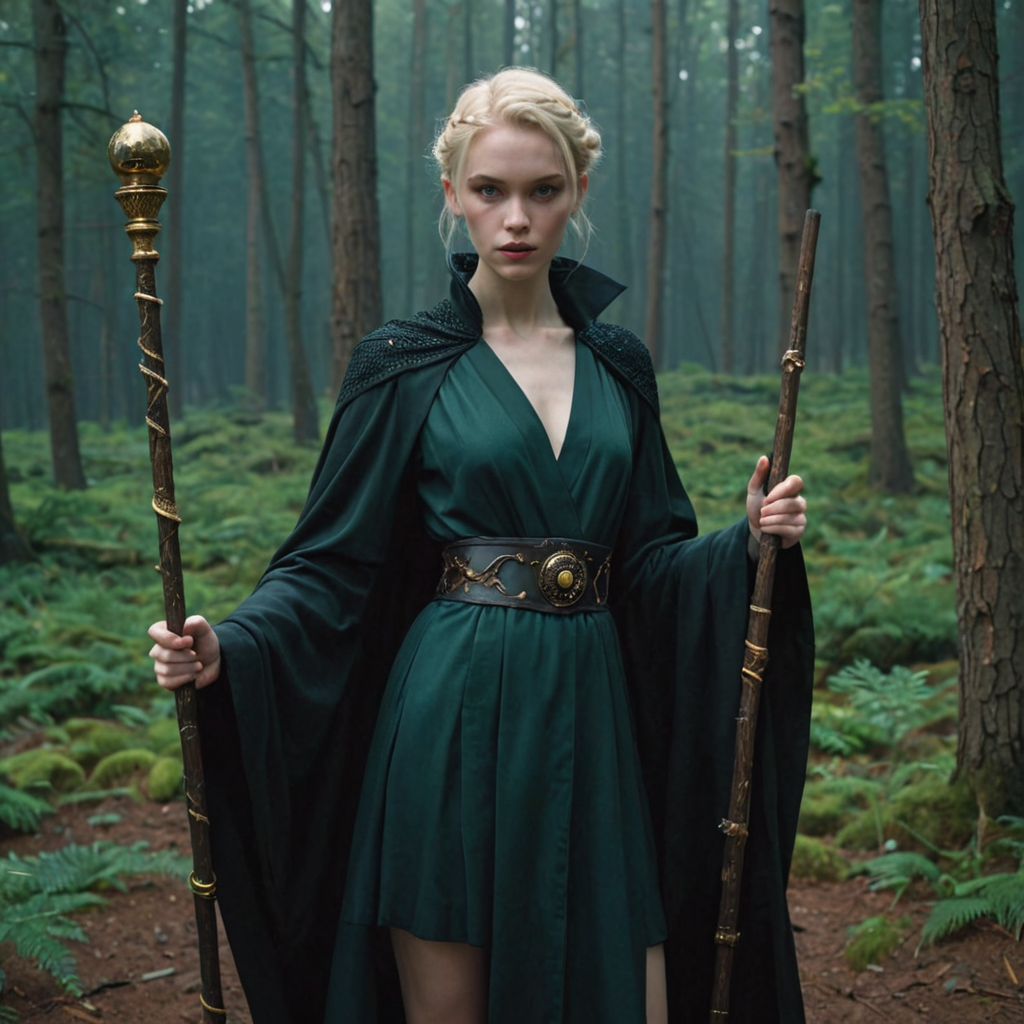
with these settings:

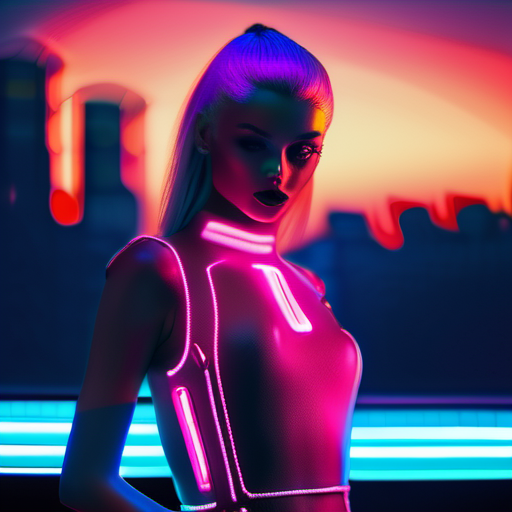
Remeber the prompt above for the cyberpunk girl using the Stable Diffusion XL model?
Here's a new image, with the same prompt, generated with DreamShaper XL with the same settings above
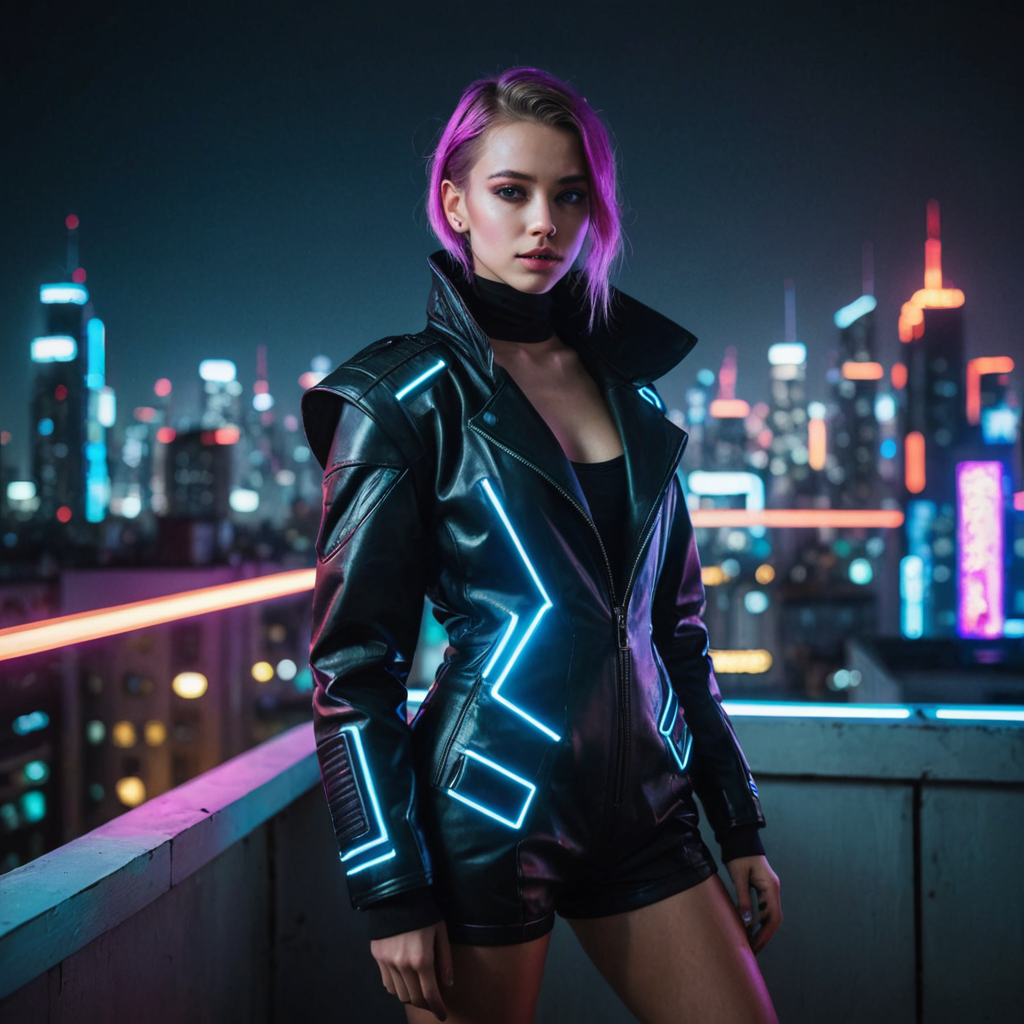
As you can see, wonderful images can be created, granting that you know the parameters to tune. :)
I've learned that bigger images tend to produce better results.
Hope you've learn how to generate images using the Nvidia Jetson NX 16GB and how to use it as a server to generate images on demand.
✨ Contributor Project
- This project is supported by the Seeed Studio Contributor Project.
- Thanks Bruno's efforts and your work will be exhibited.
Tech Support & Product Discussion
Thank you for choosing our products! We are here to provide you with different support to ensure that your experience with our products is as smooth as possible. We offer several communication channels to cater to different preferences and needs.