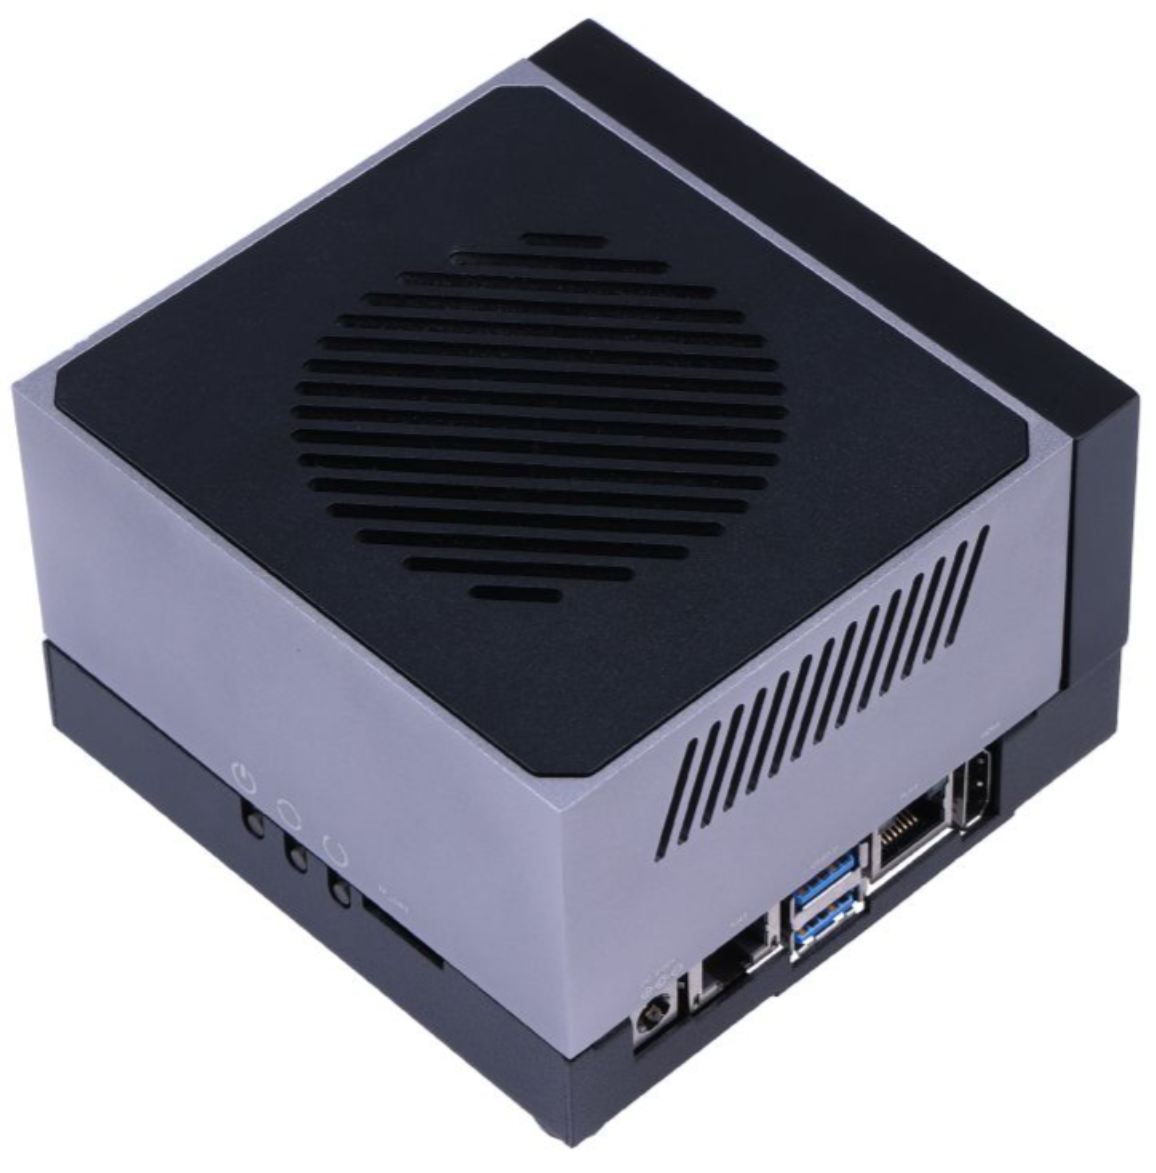
NVIDIA® Jetson AGX Orin 32GB H01 Kit
Please note, the following updates were made to the product on November 25, 2024:
- The 5V power supply scheme has been changed (the power IC was replaced from ONNCP3020ADR2G to TI TPS53015DGS, and the peripheral components have been adjusted accordingly), which resolves the issue of device rebooting when using certain USB devices with high dynamic current.
- The board layout has been optimized to enlarge the slot for the fan cable to accommodate the fan wiring.
- To stabilize accessory supply, the WiFi module model has been changed from 8265.NGW to BL-M8822CP1, and the software drivers have been updated accordingly.
This wiki will guide you how to install JetPack to Jetson AGX Orin 32GB H01 Kit.
Prerequisites
- Ubuntu Host PC (native or VM using VMware Workstation Player).
- Jetson AGX Orin H01 Kit.
- USB Type-C data transmission cable
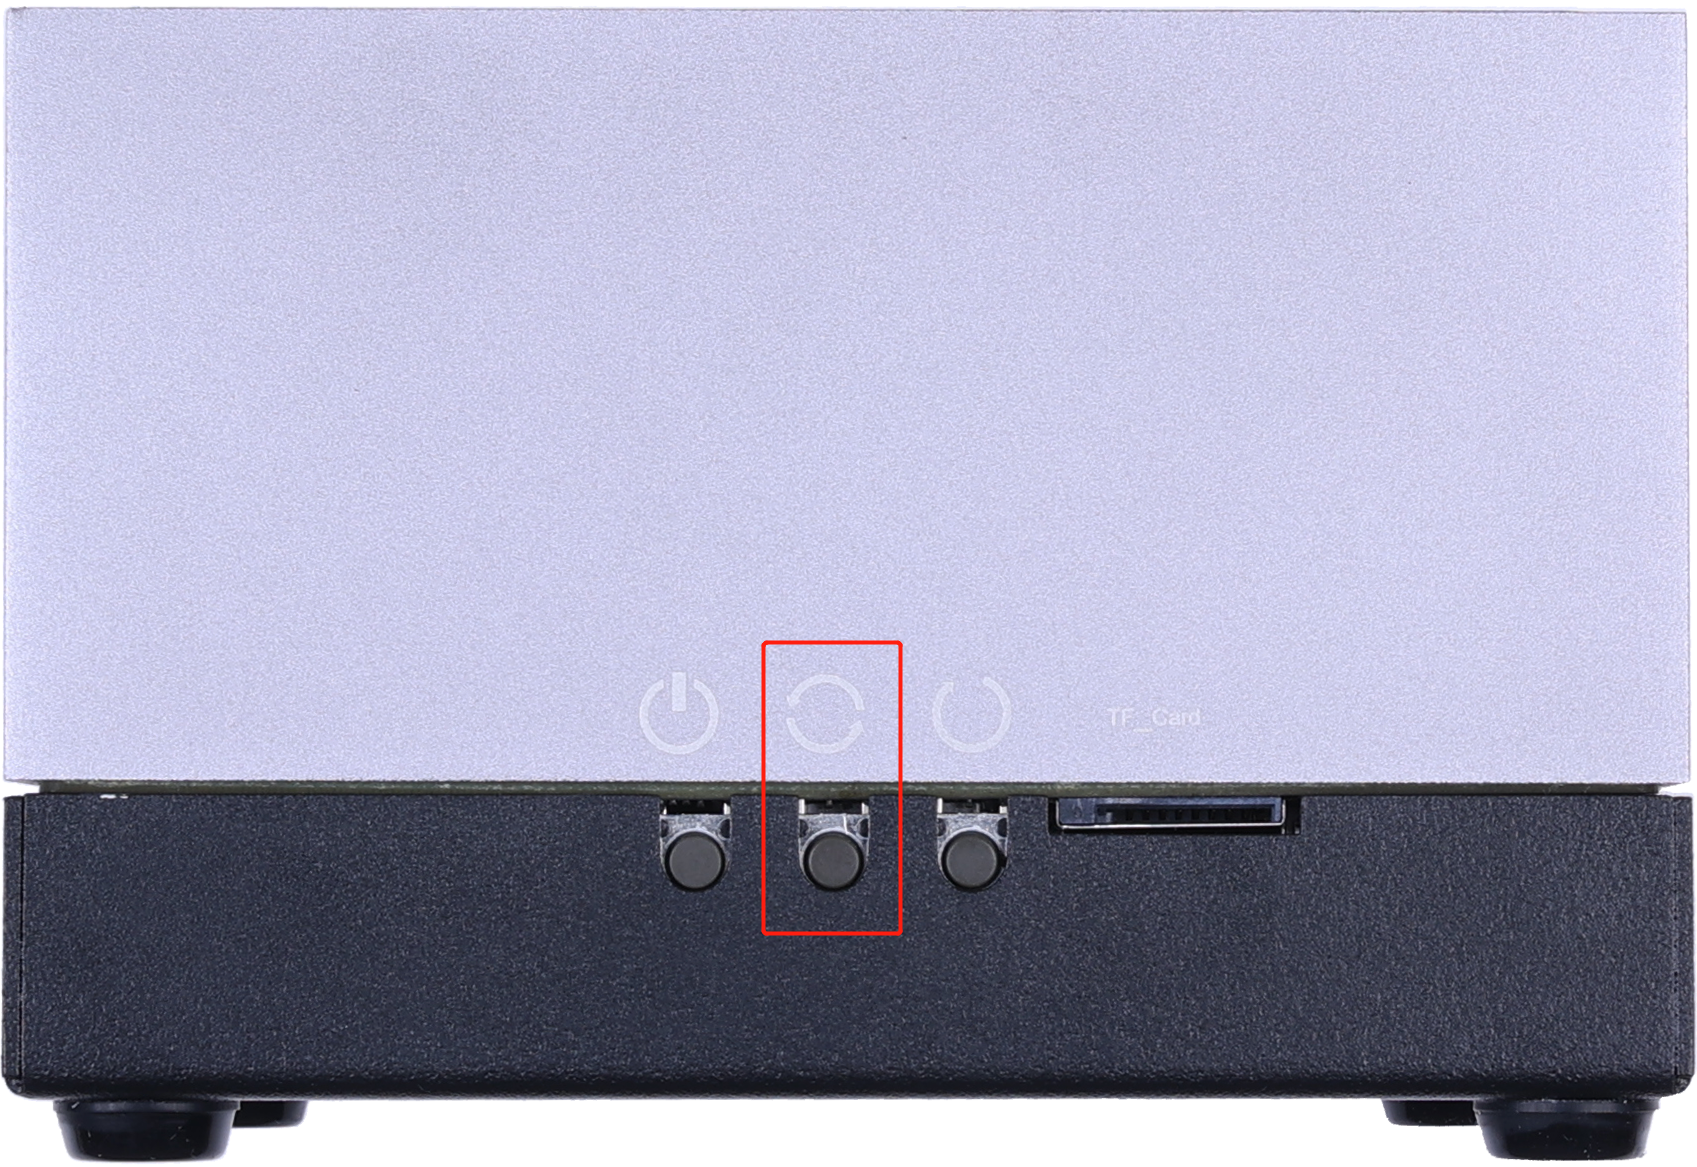
Enter Force Recovery Mode
- Step 1: There is a recovery button on the board, which is in the middle of the three buttons as shown in the below picture. Hold the recovery button and then connect the board to the power supply to enter force recovery mode.
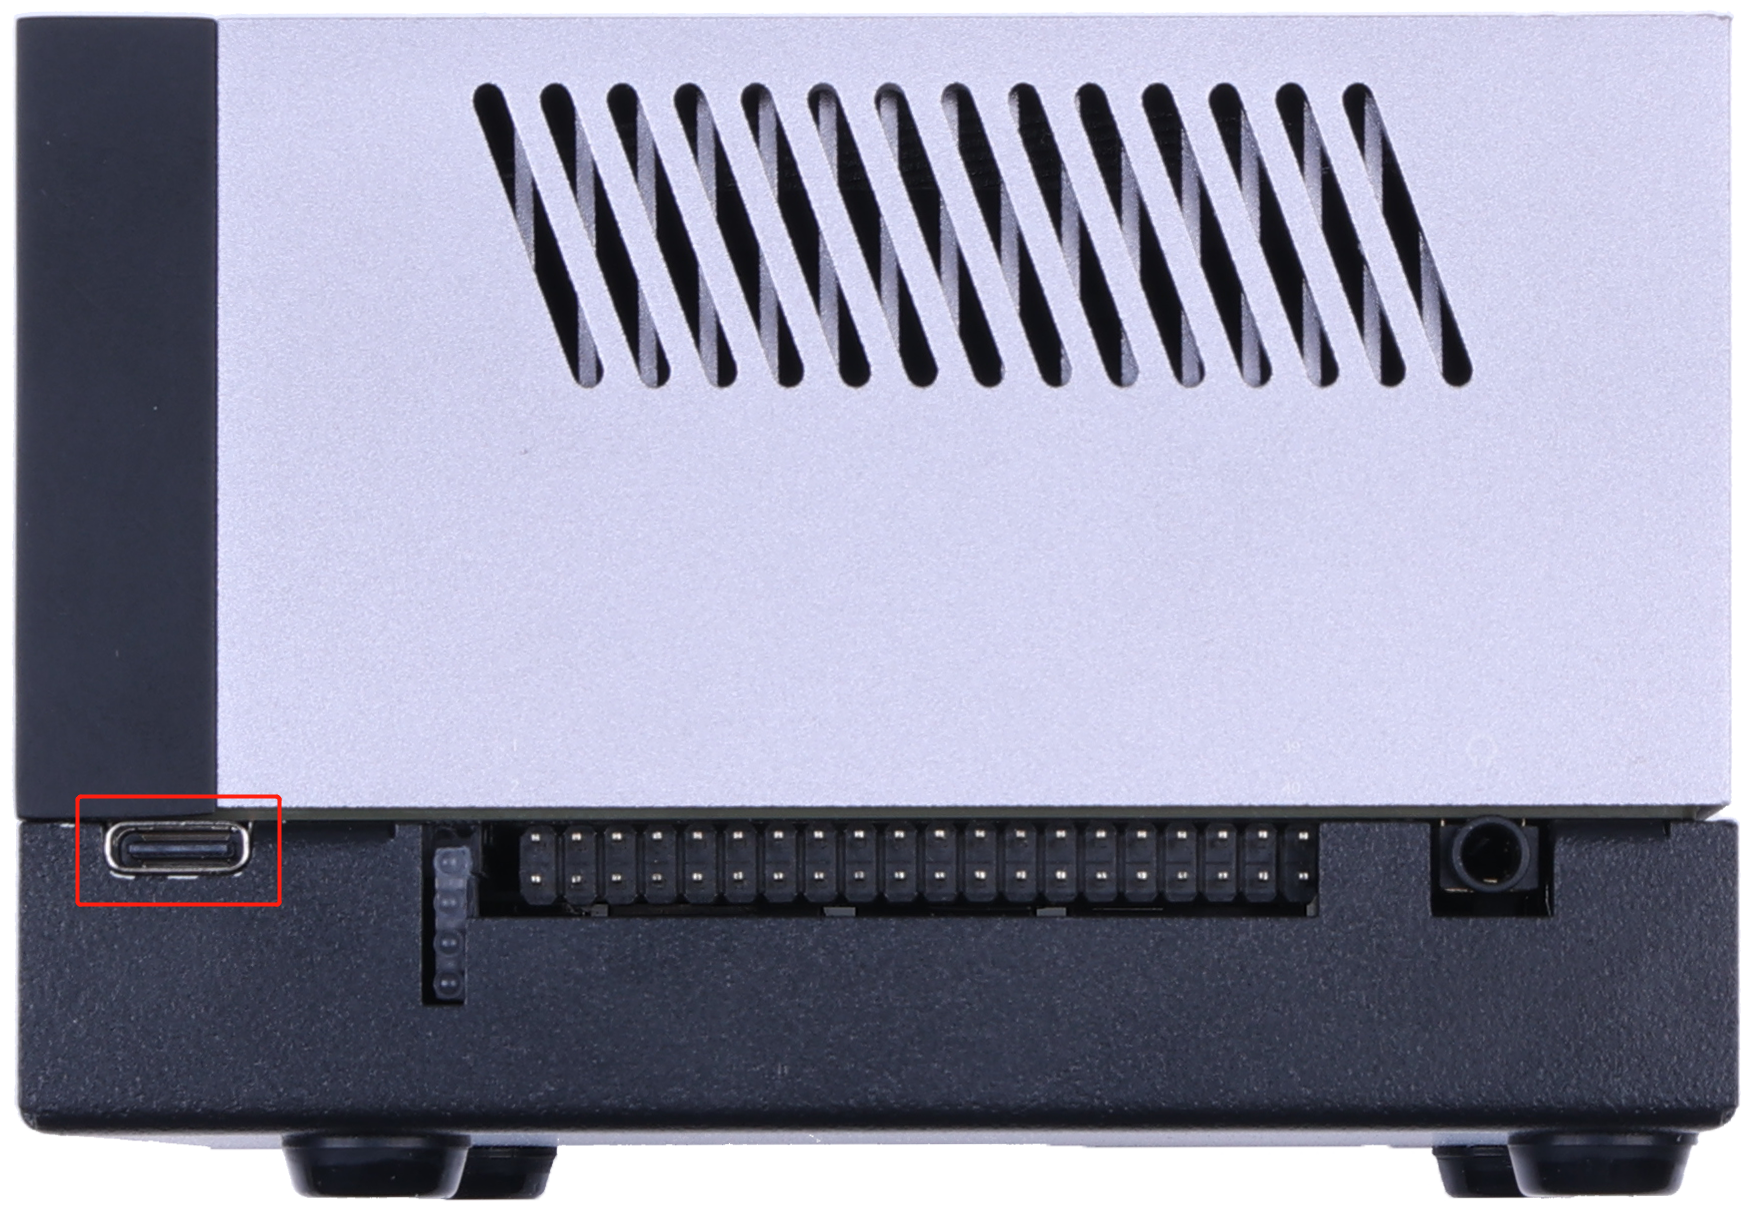
- Step 2: Connect Jetson AGX Orin 32GB H01 Kit with the Ubuntu host PC with a USB Type-C data transmission cable.
- Step 3: Use the
lsusbcommand on the Ubuntu host machine to verify that the device has entered recovery mode.
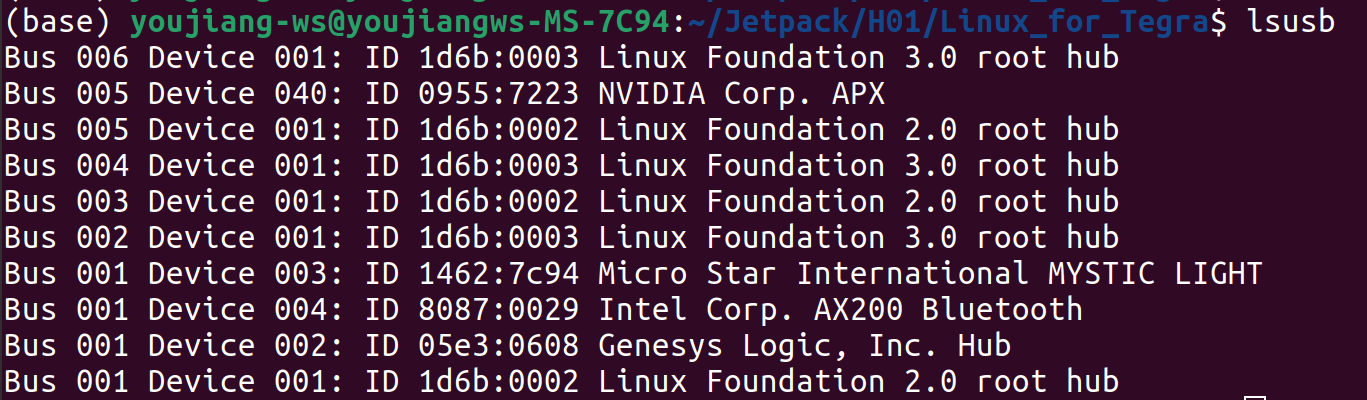
If 0955:7223 NVIDIA Corp. appears in the logs, it indicates that the device has entered recovery mode.
Download the peripheral drivers
First of all, you need to install the peripheral drivers for this board. These are needed for some hardware peripherals to function on the board. Click the below links to download the drivers according to the JetPack version
| JetPack Version | L4T Version | Driver Download Link | L4T Download Link |
|---|---|---|---|
| 5.0.2 | 35.1 | Download | Download |
| 5.1.1 | 35.3.1 | Download | Download |
| 5.1.4 | 35.6.0 | Download | Download |
| 6.0 | 36.3 | Download | Download |
| 6.1 | 36.4 | Download | Download |
| 6.2 | 36.4.3 | Download | Download |
| 7.2 | 39.2.0 | Download | Download |
Flash to Jetson
NVIDIA® Jetson AGX Orin 32GB H01 Kit comes pre-installed with the JetPack 5.1.4 operating system. The default username and password are user: nvidia / password: nvidia. Upon receiving the device, you can directly log into the system and start using it without the need to reflash the system.
If your system becomes corrupted, you can refer to the steps below to reflash the system.
- JP5.0.2/JP5.1.1
- JP5.1.4
- JP6.0
- JP6.1
- JP6.2
- JP7.2
Here we will use: NVIDIA L4T 35.1 to install Jetpack 5.0.2 or NVIDIA L4T 35.3.1 to install Jetpack 5.1.1 on the Jetson AGX Orin 32GB H01 Kit.
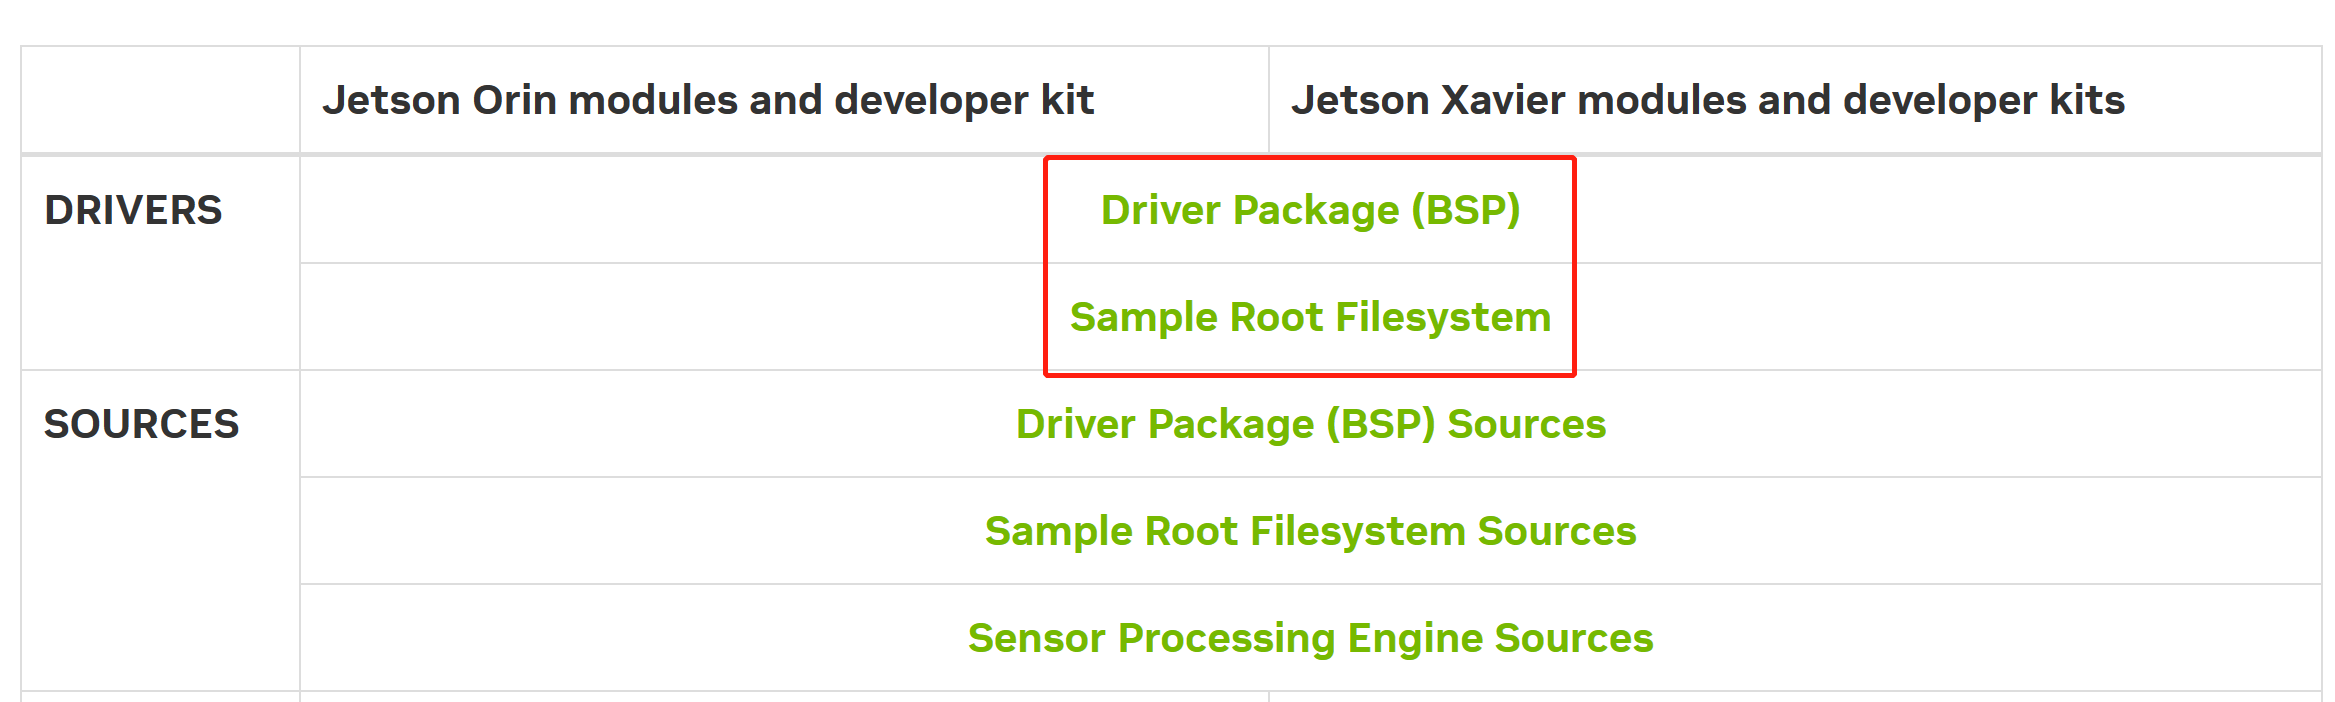
- Step 1: Download appropriate NVIDIA drivers on the host PC. The required drivers are shown below:
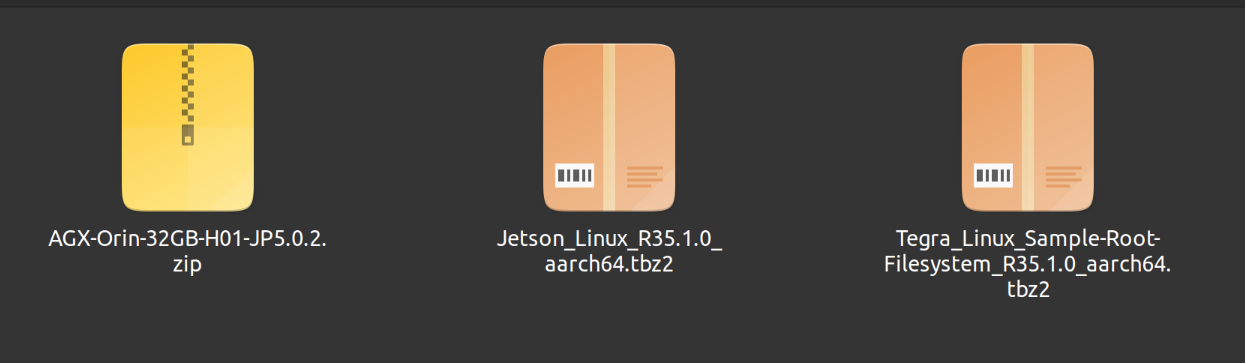
- Step 2: Move the downloaded peripheral drivers from before into the same folder with NVIDIA drivers. Now you will see three compressed files in the same folder.
- Step 3: Extract Jetson_Linux_R35.1.0_aarch64.tbz2 and Tegra_Linux_Sample-Root-Filesystem_R35.1.0_aarch64.tbz2 by navigating to the folder containing these files and apply the changes
cd <directory_where_the_files_are_located>
tar xf Jetson_Linux_R35.1.0_aarch64.tbz2
cd Linux_for_tegra/rootfs
sudo tar xfp ../../Tegra_Linux_Sample-Root-Filesystem_R35.1.0_aarch64.tbz2
cd ..
sudo ./apply_binaries.sh
- Step 4: Extract AGX-Orin-32GB-H01-JP5.0.2.zip. Here we additionally install the unzip package which is needed to decompress the .zip file
cd ..
sudo apt install unzip
unzip AGX-Orin-32GB-H01-JP5.0.2.zip
Here it will ask whether to replace the files. Type A and press ENTER to replace the necessary files

- Step 5: Flash the system to the eMMC
cd Linux_for_Tegra
sudo ./flash.sh jetson‐agx‐orin‐devkit mmcblk0p1
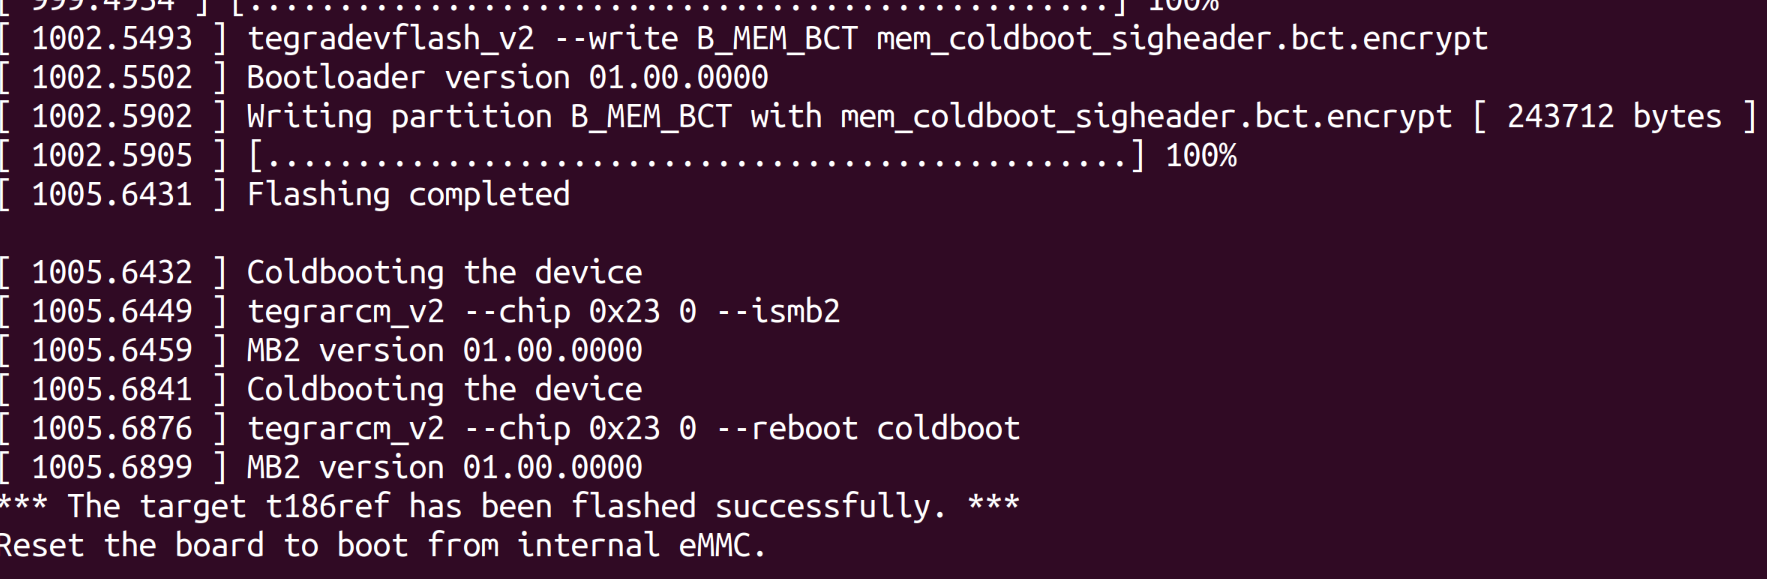
You will see the following output if the flashing process is successful
Encountered Errors
- ERROR: failed to read rcm_state on AGX Orin and NX Orin for Jetpack 5.1.1
- There is PCN changes on Jetson AGX Orin made by NVidia, but it's not Seeed's PCN changes.
- Beside materials mentioned in Wiki, please download Overlay_PCN210361_PCN210100_r35.3.1.tbz2 at bottom of the page Jetson Linux 35.3.1.
- After extracting Jetson_Linux and before applying binaries, please extract Overlay_PCN210361_PCN210100_r35.3.1.tbz2. Then copy all files, folders to Linux_For_Tegra (merge, not skip).
- Then continue remaining steps in guidances.
Here we will use: NVIDIA L4T 35.6.0 to install Jetpack 5.1.4 on the Jetson AGX Orin 32GB H01 Kit.
Enter the following command in the terminal window of the Ubuntu host machine:
wget https://developer.nvidia.com/downloads/embedded/l4t/r35_release_v6.0/release/jetson_linux_r35.6.0_aarch64.tbz2
wget https://developer.nvidia.com/downloads/embedded/l4t/r35_release_v6.0/release/tegra_linux_sample-root-filesystem_r35.6.0_aarch64.tbz2

tar xf jetson_linux_r35.6.0_aarch64.tbz2
sudo tar xpf tegra_linux_sample-root-filesystem_r35.6.0_aarch64.tbz2 -C Linux_for_Tegra/rootfs/
cd Linux_for_Tegra/
sudo ./tools/l4t_flash_prerequisites.sh
sudo ./apply_binaries.sh
sudo tar xf 605_jp514.tbz2  # Please copy 605_jp514.tbz2 to the Linux_for_Tegra/ directory before execution.
Choose one of the following commands to perform the flashing operation:
(1). Flash the system to eMMC:
sudo ./flash.sh jetson-agx-orin-devkit internal
(2). Flash the system to the SSD:
sudo ./tools/kernel_flash/l4t_initrd_flash.sh --external-device nvme0n1p1 \
  -c tools/kernel_flash/flash_l4t_t234_nvme.xml \
  --showlogs --network usb0 jetson-agx-orin-devkit external
After the flashing is complete, the device will automatically reboot.
Here we will use NVIDIA L4T 36.3 to install Jetpack 6.0 on the Jetson AGX Orin 32GB H01 Kit.
- Step 1: Download the NVIDIA drivers on the host PC. The required drivers are shown below:
- Step 2: Move the downloaded peripheral drivers from before into the same folder with NVIDIA drivers. Now you will see three compressed files in the same folder.

- Step 3: Extract Jetson_Linux_R36.3.0_aarch64.tbz2 and Tegra_Linux_Sample-Root-Filesystem_R36.3.0_aarch64.tbz2 by navigating to the folder containing these files and apply the changes:
cd < directory_where_the_files_are_located >
tar xf Jetson_Linux_R36.3.0_aarch64.tbz2
sudo tar xfp Tegra_Linux_Sample-Root-Filesystem_R36.3.0_aarch64.tbz2 -C Linux_for_tegra/rootfs
cd Linux_for_tegra
sudo ./tools/l4t_flash_prerequisites.sh
sudo ./apply_binaries.sh
- Step 4: Extract AGX-Orin-H01-JP6.0.zip. Here we additionally install the unzip package which is needed to decompress the .zip file.
cd ..
sudo apt install unzip
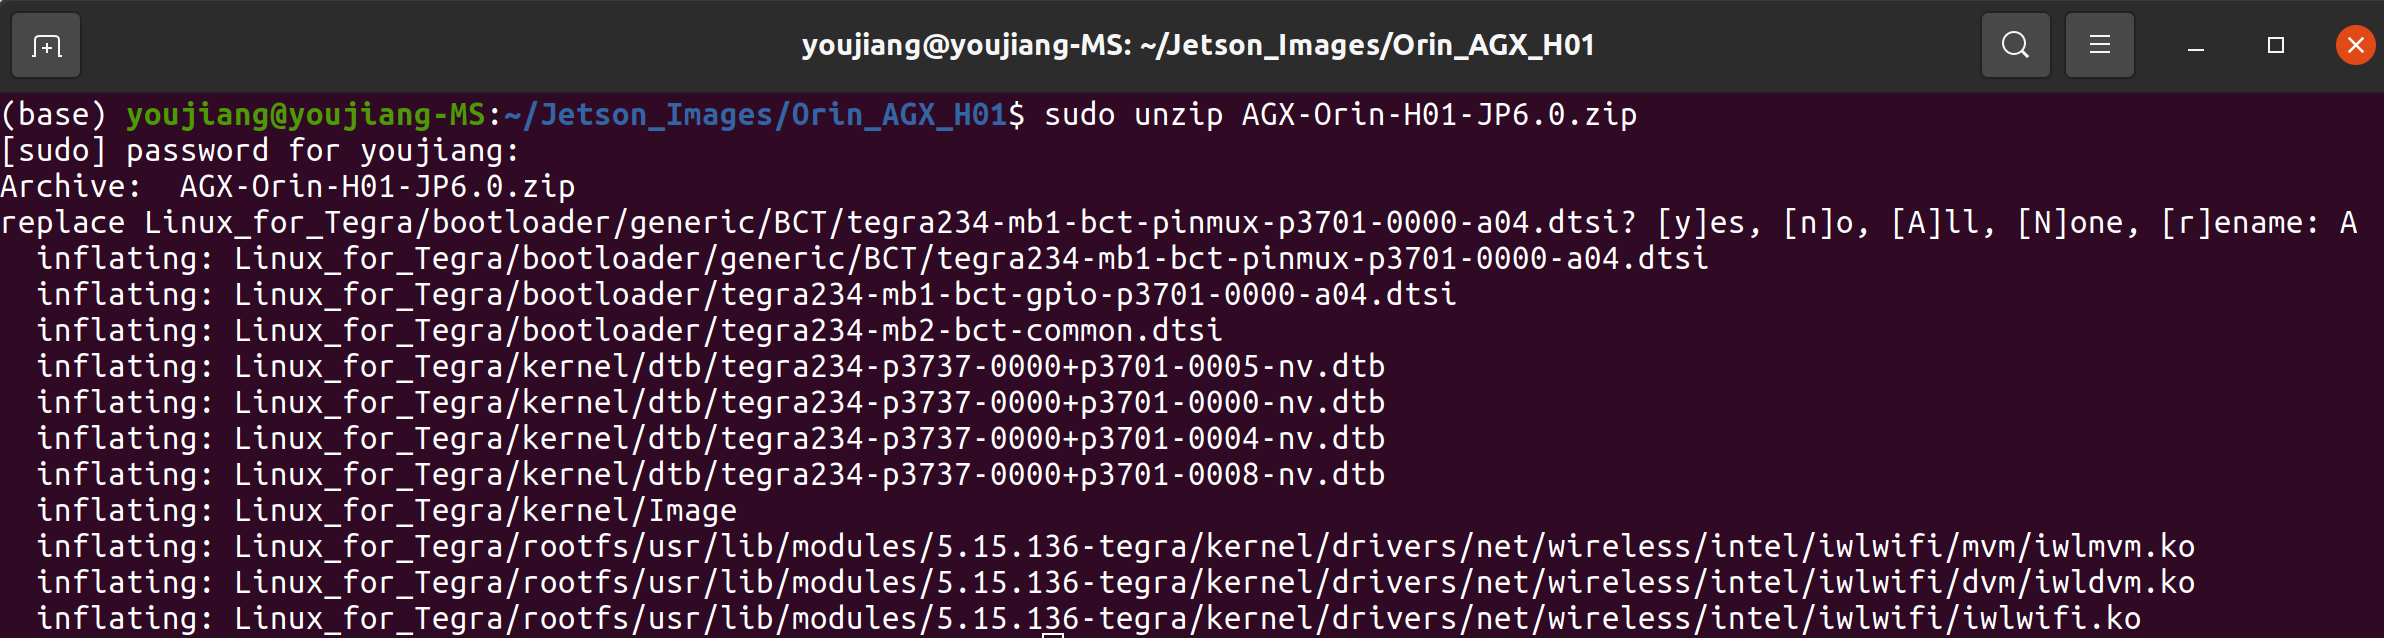
sudo unzip AGX-Orin-H01-JP6.0.zip
Here it will ask whether to replace the files. Type A and press ENTER to replace the necessary files
- Step 5: Flash the system to the eMMC
cd Linux_for_Tegra
sudo ./flash.sh jetson-agx-orin-devkit internal
You will see the following output if the flashing process is successful:

Here we will use NVIDIA L4T 36.4 to install Jetpack 6.1 on the Jetson AGX Orin 32GB H01 Kit.
- Step 1: Download the NVIDIA drivers on the Ubuntu host PC. The required drivers are shown below:
- Step 2: Move the downloaded peripheral drivers from before into the same folder with NVIDIA drivers. Now you will see three compressed files in the same folder.
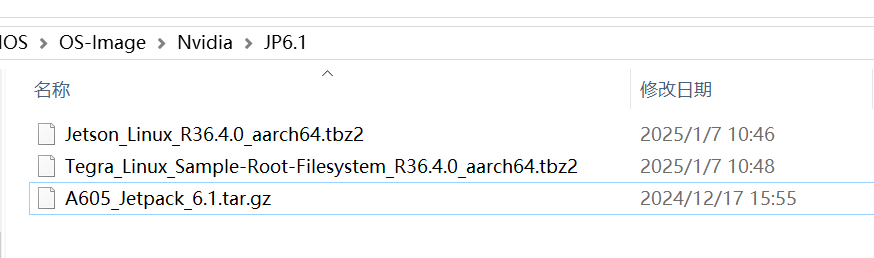
You can use the following command to verify that the downloaded file is complete.

- Step 3: Extract Jetson_Linux_R36.4.0_aarch64.tbz2 and Tegra_Linux_Sample-Root-Filesystem_R36.4.0_aarch64.tbz2 by navigating to the folder containing these files and apply the changes:
cd <path_to_files>
tar xf Jetson_Linux_R36.4.0_aarch64.tbz2
sudo tar xfp Tegra_Linux_Sample-Root-Filesystem_R36.4.0_aarch64.tbz2 -C Linux_for_tegra/rootfs
cd Linux_for_tegra
sudo ./tools/l4t_flash_prerequisites.sh
sudo ./apply_binaries.sh
- Step 4: Extract A605_Jetpack_6.1.tar.gz:
cd ..
tar xf A605_Jetpack_6.1.tar.gz
sudo cp -r 605_jetpack6.1/Linux_for_Tegra/* Linux_for_Tegra/
- Step 5: Flash the system to the eMMC:
cd Linux_for_Tegra
sudo ./flash.sh jetson-agx-orin-devkit internal
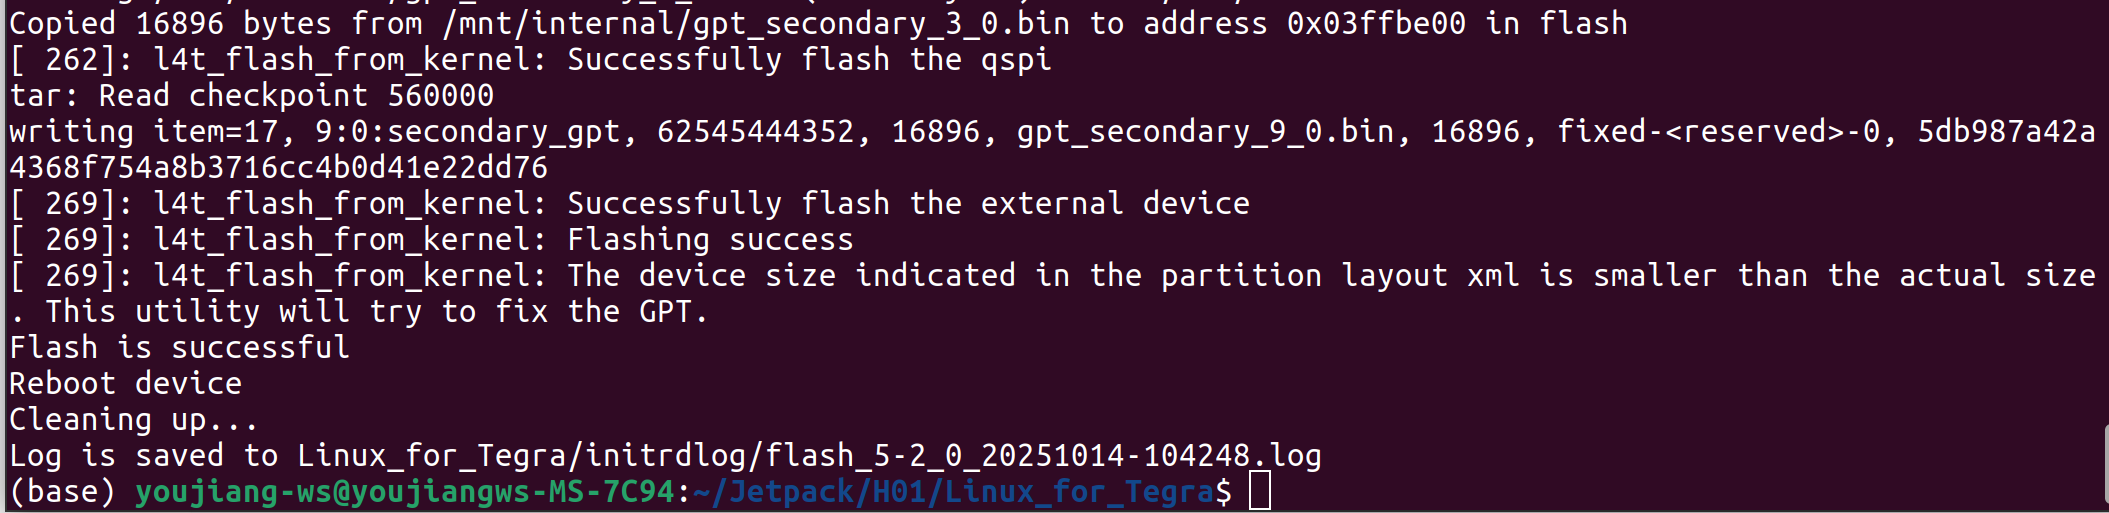
You will see the following output if the flashing process is successful:
We can also run the following command to install the system onto the SSD:
sudo ./tools/kernel_flash/l4t_initrd_flash.sh --external-device nvme0n1p1 -c tools/kernel_flash/flash_l4t_t234_nvme.xml --showlogs --network usb0 jetson-agx-orin-devkit external
Here we will use NVIDIA L4T 36.4 to install Jetpack 6.2 on the Jetson AGX Orin 32GB H01 Kit.
- Step 1: Download the NVIDIA drivers on the Ubuntu host PC. The required drivers are shown below:
- Step 2: Move the downloaded peripheral drivers from before into the same folder with NVIDIA drivers. Now you will see three compressed files in the same folder.
Similar to the flashing process of Jetpack 6.1!
You can use the following command to verify that the downloaded file is complete.
- Step 3: Extract Jetson_Linux_R36.4.3_aarch64.tbz2 and Tegra_Linux_Sample-Root-Filesystem_R36.4.3_aarch64.tbz2 by navigating to the folder containing these files and apply the changes:
cd <path_to_files>
tar xf Jetson_Linux_R36.4.3_aarch64.tbz2
sudo tar xfp Tegra_Linux_Sample-Root-Filesystem_R36.4.0_aarch64.tbz2 -C Linux_for_tegra/rootfs
cd Linux_for_tegra
sudo ./tools/l4t_flash_prerequisites.sh
sudo ./apply_binaries.sh
- Step 4: Extract 605_jp62.tar.gz:
cd ..
tar xf 605_jp62.tar.gz
sudo cp -r 605_jp62/Linux_for_Tegra/* Linux_for_Tegra/
- Step 5: Flash the system to the eMMC:
cd Linux_for_Tegra
sudo ./flash.sh jetson-agx-orin-devkit internal
You will see the following output if the flashing process is successful:
We can also run the following command to install the system onto the SSD:
sudo ./tools/kernel_flash/l4t_initrd_flash.sh --external-device nvme0n1p1 -c tools/kernel_flash/flash_l4t_t234_nvme.xml --showlogs --network usb0 jetson-agx-orin-devkit external
Here we will use NVIDIA L4T 39.2.0 to install JetPack 7.2 on the Jetson AGX Orin 32GB H01 Kit.
- Step 1: Download the NVIDIA BSP and RootFS packages on the Ubuntu host PC. The required Jetson Linux 39.2.0 files are shown below:
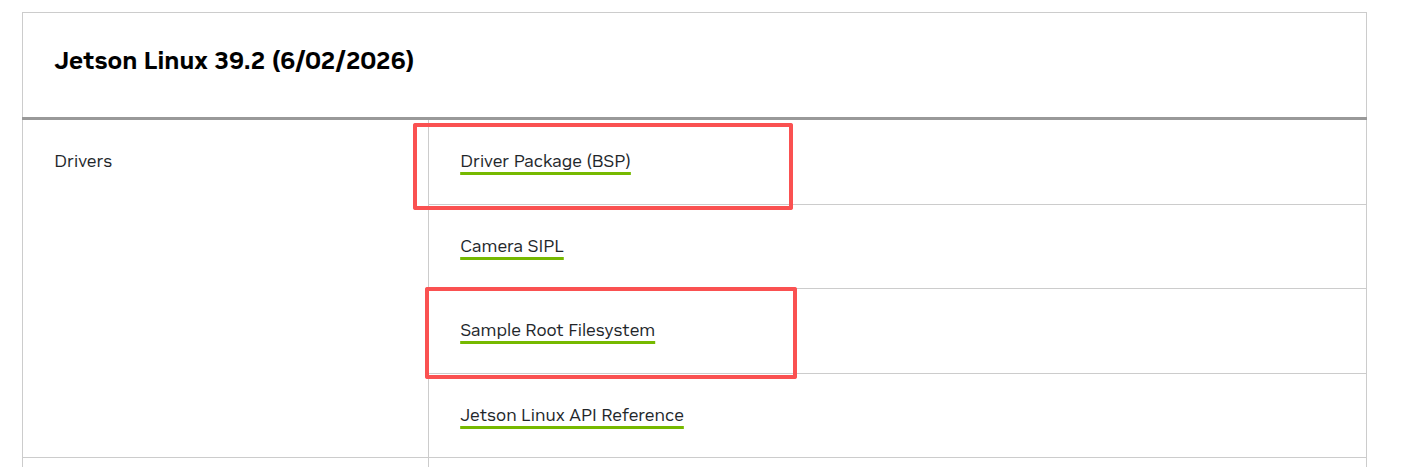
You can also download the files with the following commands:
wget https://developer.nvidia.com/downloads/embedded/L4T/r39_Release_v2.0/release/Jetson_Linux_R39.2.0_aarch64.tbz2
wget https://developer.nvidia.com/downloads/embedded/L4T/r39_Release_v2.0/release/Tegra_Linux_Sample-Root-Filesystem_R39.2.0_aarch64.tbz2
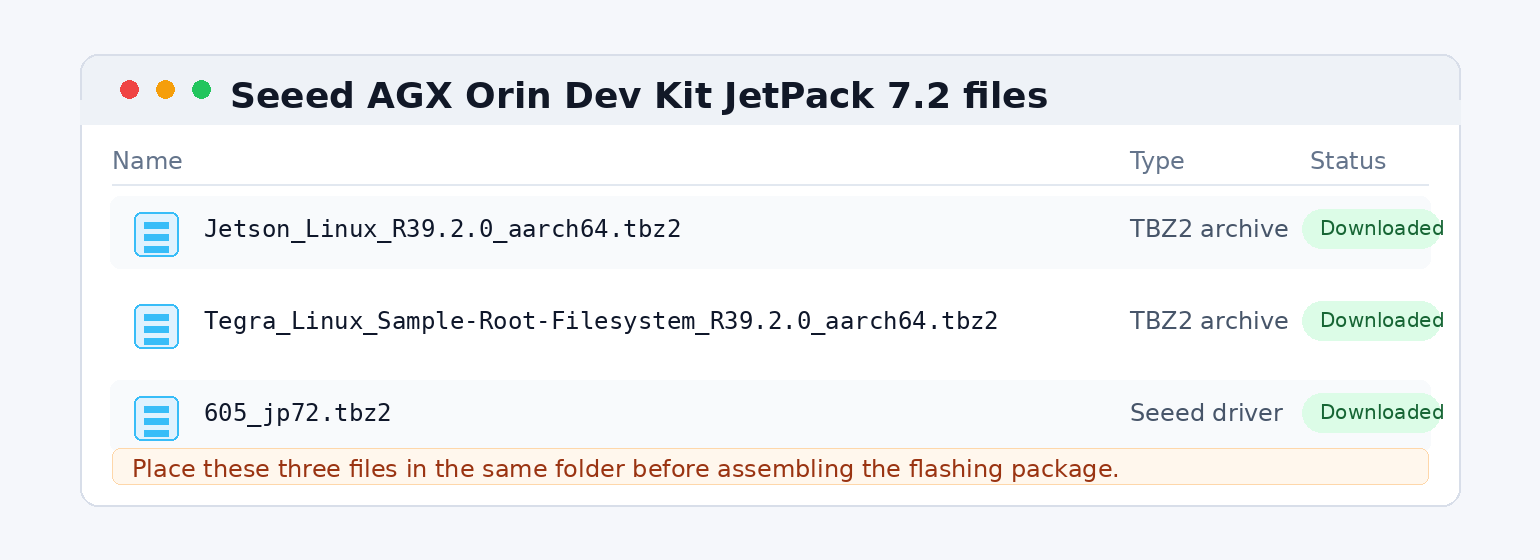
- Step 2: Download the Jetson AGX Orin 32GB H01 Kit JetPack 7.2 peripheral driver package 605_jp72.tbz2, then put it in the same folder as the NVIDIA BSP and RootFS packages. Now you will see three compressed files in the same folder.
- Step 3: Extract Jetson_Linux_R39.2.0_aarch64.tbz2 and Tegra_Linux_Sample-Root-Filesystem_R39.2.0_aarch64.tbz2, then apply the NVIDIA binaries:
cd <path_to_files>
tar xf Jetson_Linux_R39.2.0_aarch64.tbz2
sudo tar xfp Tegra_Linux_Sample-Root-Filesystem_R39.2.0_aarch64.tbz2 -C Linux_for_Tegra/rootfs/
cd Linux_for_Tegra
sudo ./tools/l4t_flash_prerequisites.sh
sudo ./apply_binaries.sh
- Step 4: Extract 605_jp72.tbz2:
cd ..
mkdir -p 605_jp72/Linux_for_Tegra
tar xf 605_jp72.tbz2 -C 605_jp72/Linux_for_Tegra/
sudo cp -r 605_jp72/Linux_for_Tegra/* Linux_for_Tegra/
- Step 5: Flash the system to the eMMC:
cd Linux_for_Tegra
sudo ./flash.sh jetson-agx-orin-devkit internal
You will see the following output if the flashing process is successful:
We can also run the following command to install the system onto the SSD:
sudo ./tools/kernel_flash/l4t_initrd_flash.sh --external-device nvme0n1p1 -c tools/kernel_flash/flash_l4t_t234_nvme.xml --showlogs --network usb0 jetson-agx-orin-devkit external
Developer Tools
Pre-installed Jetpack for fast development and edge AI integration
Jetson Software begins with NVIDIA JetPack™ SDK which provides a full development environment and includes CUDA-X accelerated libraries and other NVIDIA technologies to kickstart your development. JetPack includes the Jetson Linux Driver package which provides the Linux kernel, bootloader, NVIDIA drivers, flashing utilities, sample filesystem, and toolchains for the Jetson platform. It also includes security features, over-the-air update capabilities, and much more.
Computer Vision and embedded machine learning
- Deepstream delivers a complete streaming analytics toolkit for AI-based multi-sensor processing and video and image understanding on Jetson.
- TAO, built on TensorFlow and PyTorch, is a low-code version of the NVIDIA TAO framework that accelerates the model training
- alwaysAI: build, train, and deploy computer vision applications directly at the edge of reComputer. Get free access to 100+ pre-trained Computer Vision Models and train custom AI models in the cloud in a few clicks via enterprise subscription. Check out our wiki guide to get started with alwaysAI.
- edge impulse : the easiest embedded machine learning pipeline for deploying audio, classification, and object detection applications at the edge with zero dependencies on the cloud.
- Roboflow provides tools to convert raw images into a custom-trained computer vision model of object detection and classification and deploy the model for use in applications. See the https://docs.roboflow.com/inference/nvidia-jetson for deploying to NVIDIA Jetson with Roboflow.
- ultralytics yolo: use transfer learning to realize few-shot object detection with YOLOv5 which needs only a very few training samples. See our step-by-step wiki tutorials.
- Deep Learning: optimize your models on NVIDIA Jetson Nano. Check here at Deci of Automatically Benchmark and Optimize Runtime Performance on NVIDIA Jetson Nano and Xavier NX Devices
Speech AI
- Riva is a GPU-accelerated SDK for building Speech AI applications that are customized for your use case and deliver real-time performance.
Remote Fleet Management
Enable secure OTA and remote device management with allxon. Unlock 90 days free trial with code H4U-NMW-CPK.
Robot and ROS Development
- NVIDIA Isaac ROS GEMs are hardware-accelerated packages that make it easier for ROS developers to build high-performance solutions on NVIDIA hardware. Learn more about NVIDIA Isaac.
- Cogniteam Nimbus is a cloud-based solution that allows developers to manage autonomous robots more effectively. Nimbus platform supports NVIDIA® Jetson™ and ISAAC SDK and GEMs out-of-the-box. Check out our webinar on connecting your ROS Project to the Cloud with Nimbus.
Tech Support & Product Discussion
Thank you for choosing our products! We are here to provide you with different support to ensure that your experience with our products is as smooth as possible. We offer several communication channels to cater to different preferences and needs.