Connect Seeed Studio IoT Button To ESPHome
In this tutorial, we will show you how to connect the Seeed Studio IoT Button to Home Assistant using ESPHome. You'll learn how to set up the button to detect different press patterns (single click, double click, and long press) and trigger different actions in your smart home.
Materials Required
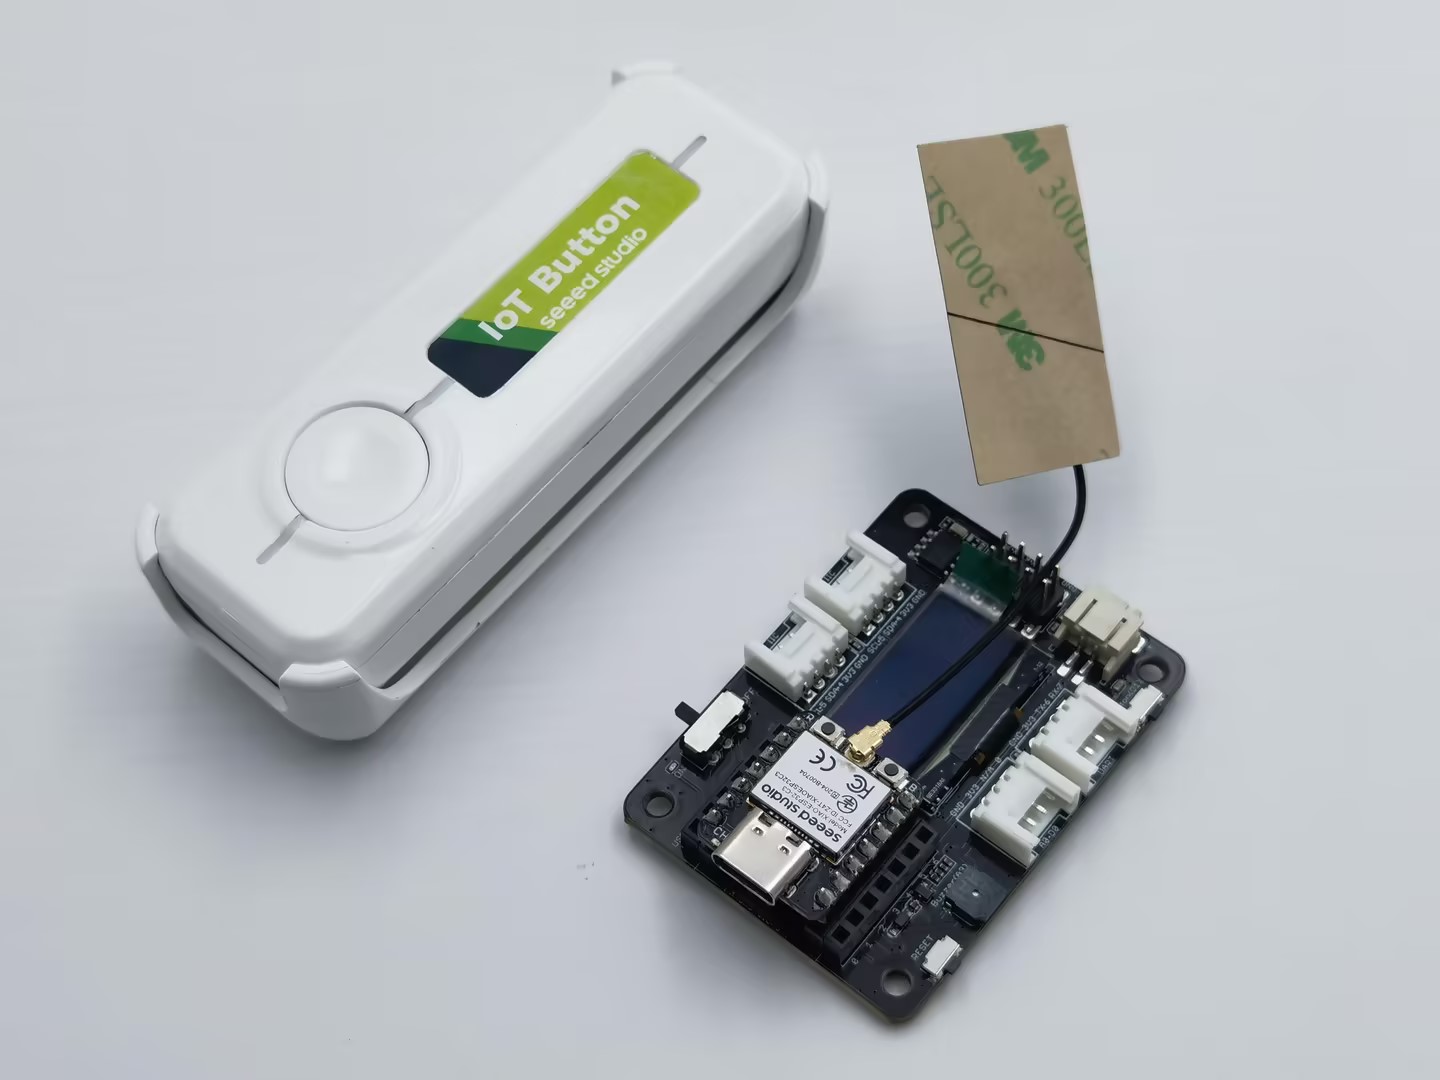
| Seeed Studio IoT Button |
|---|
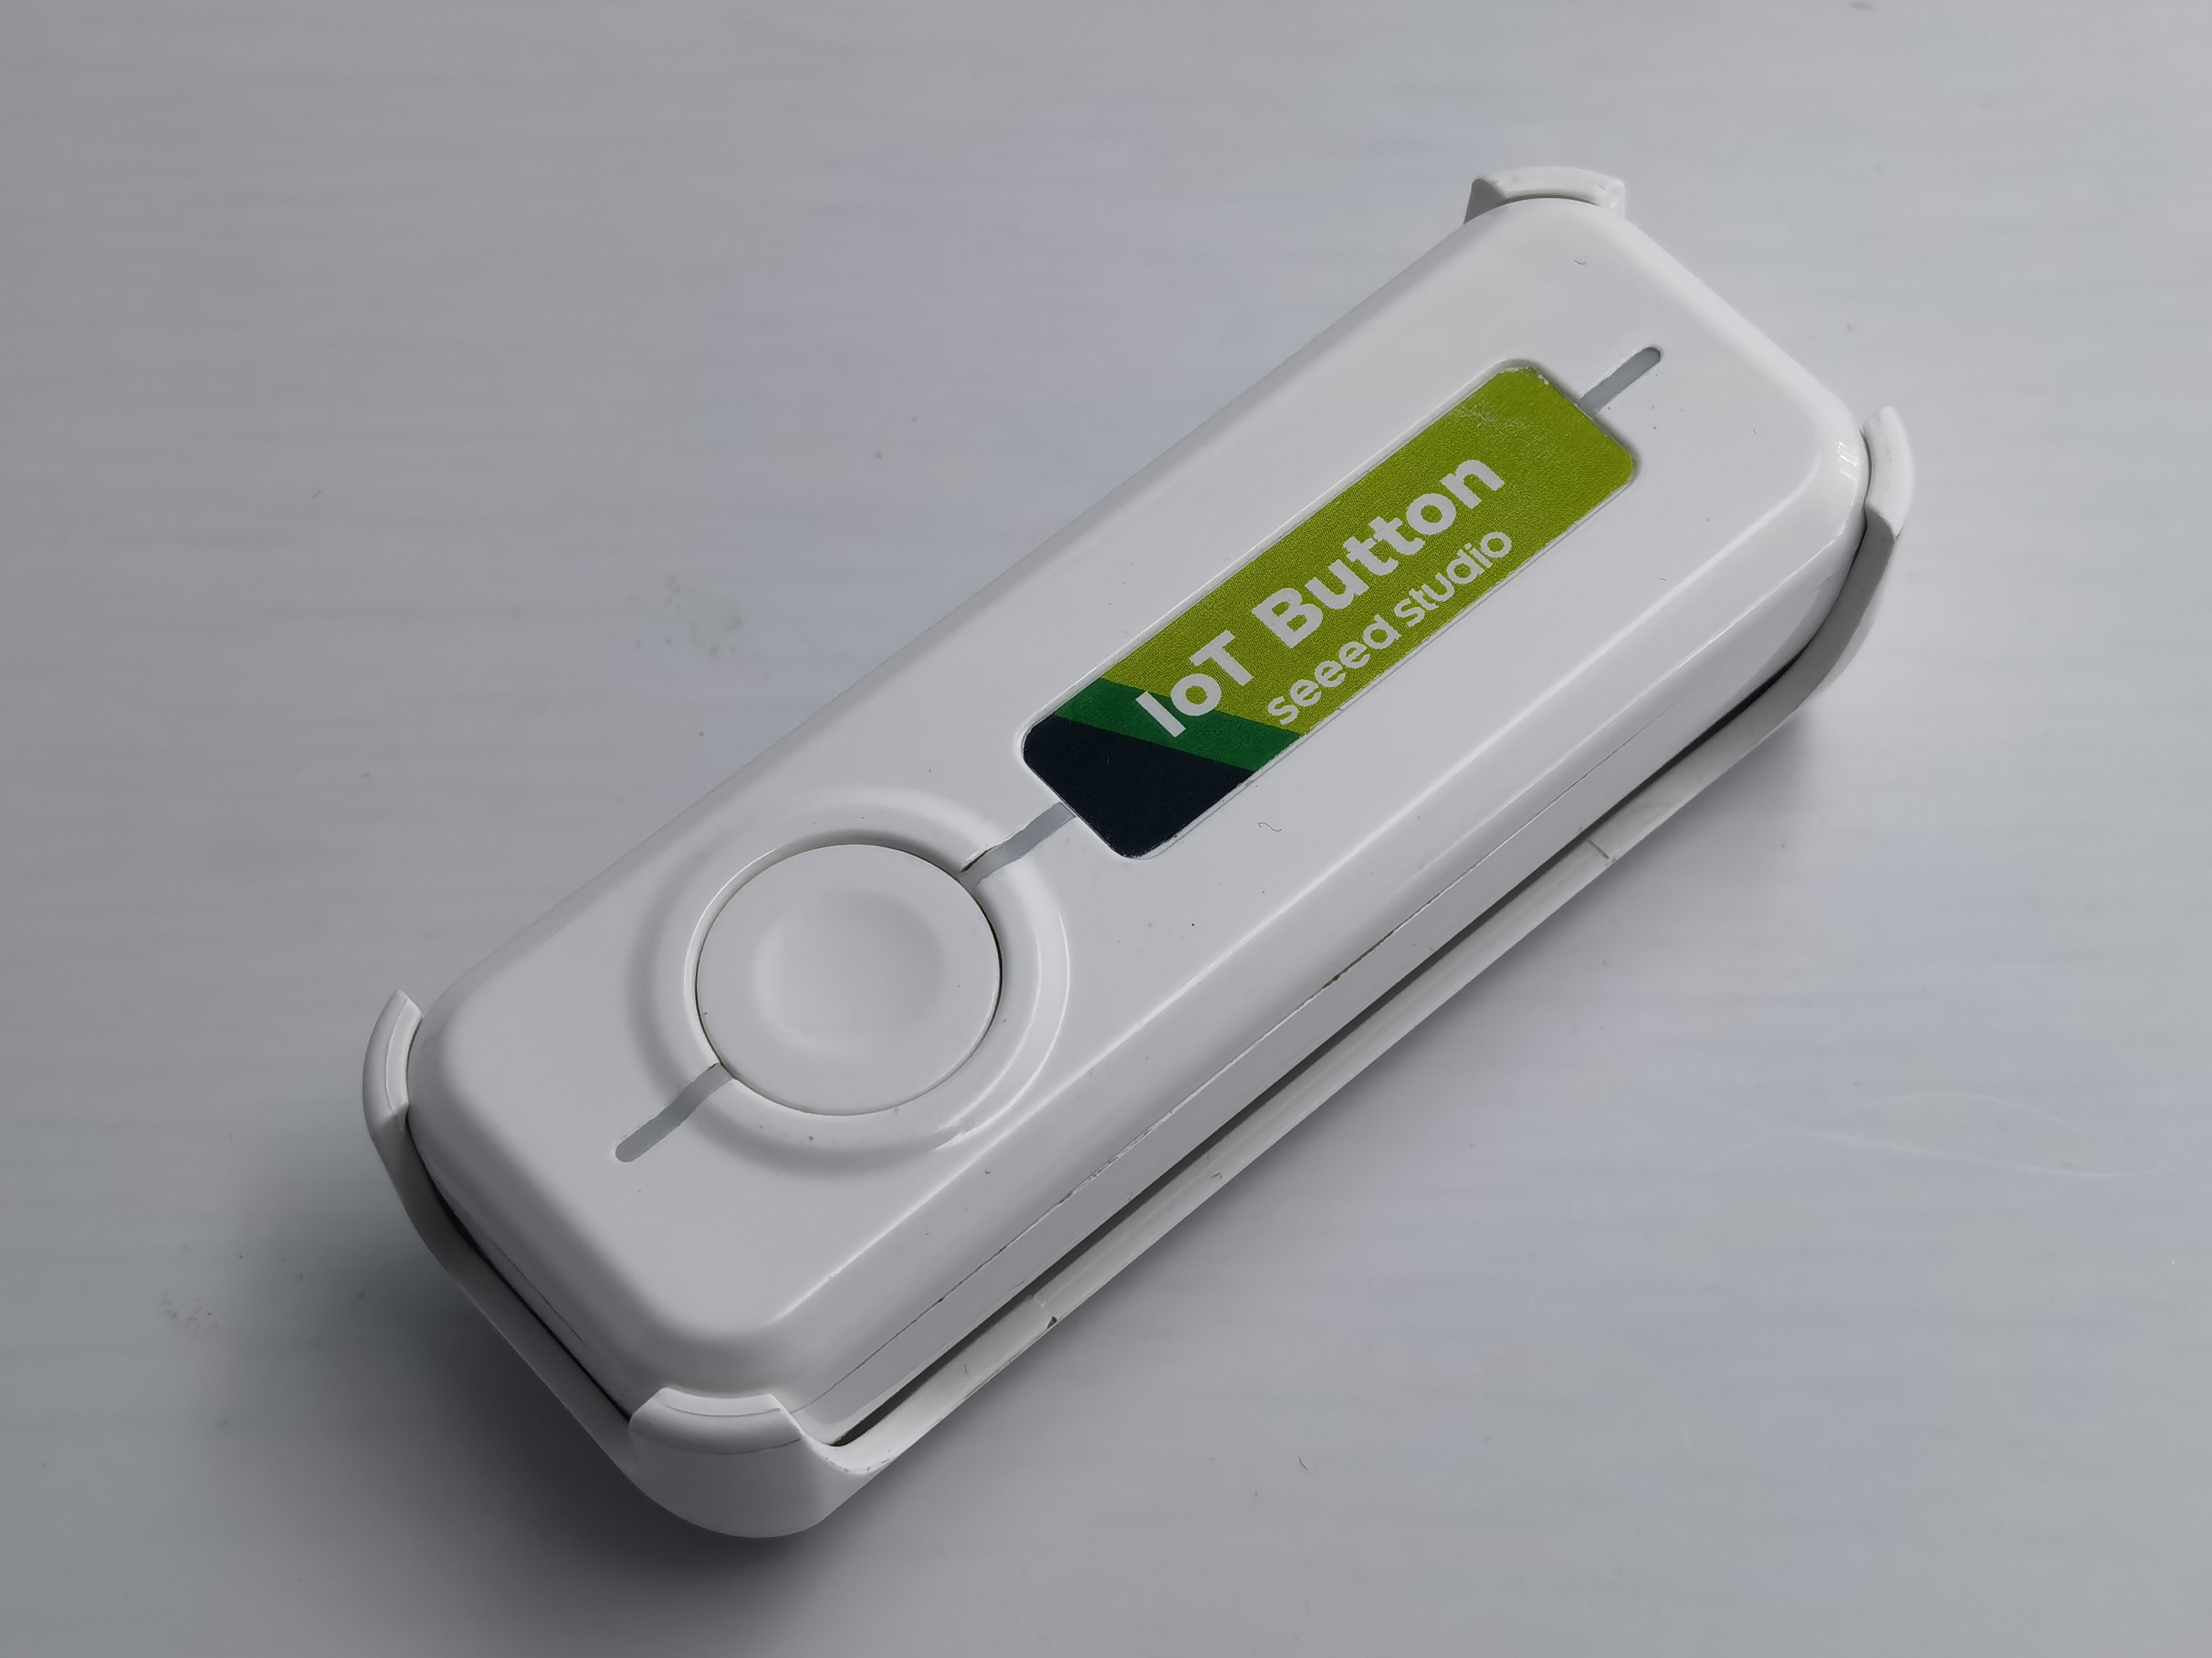 |
The Seeed Studio IoT Button is a versatile smart button with a built-in ESP32-C6 chip. It's a complete, standalone device that can be integrated with Home Assistant to control various devices and trigger automations. With its ESP32-C6 chip, it offers low power consumption and reliable connectivity without requiring any additional development boards.
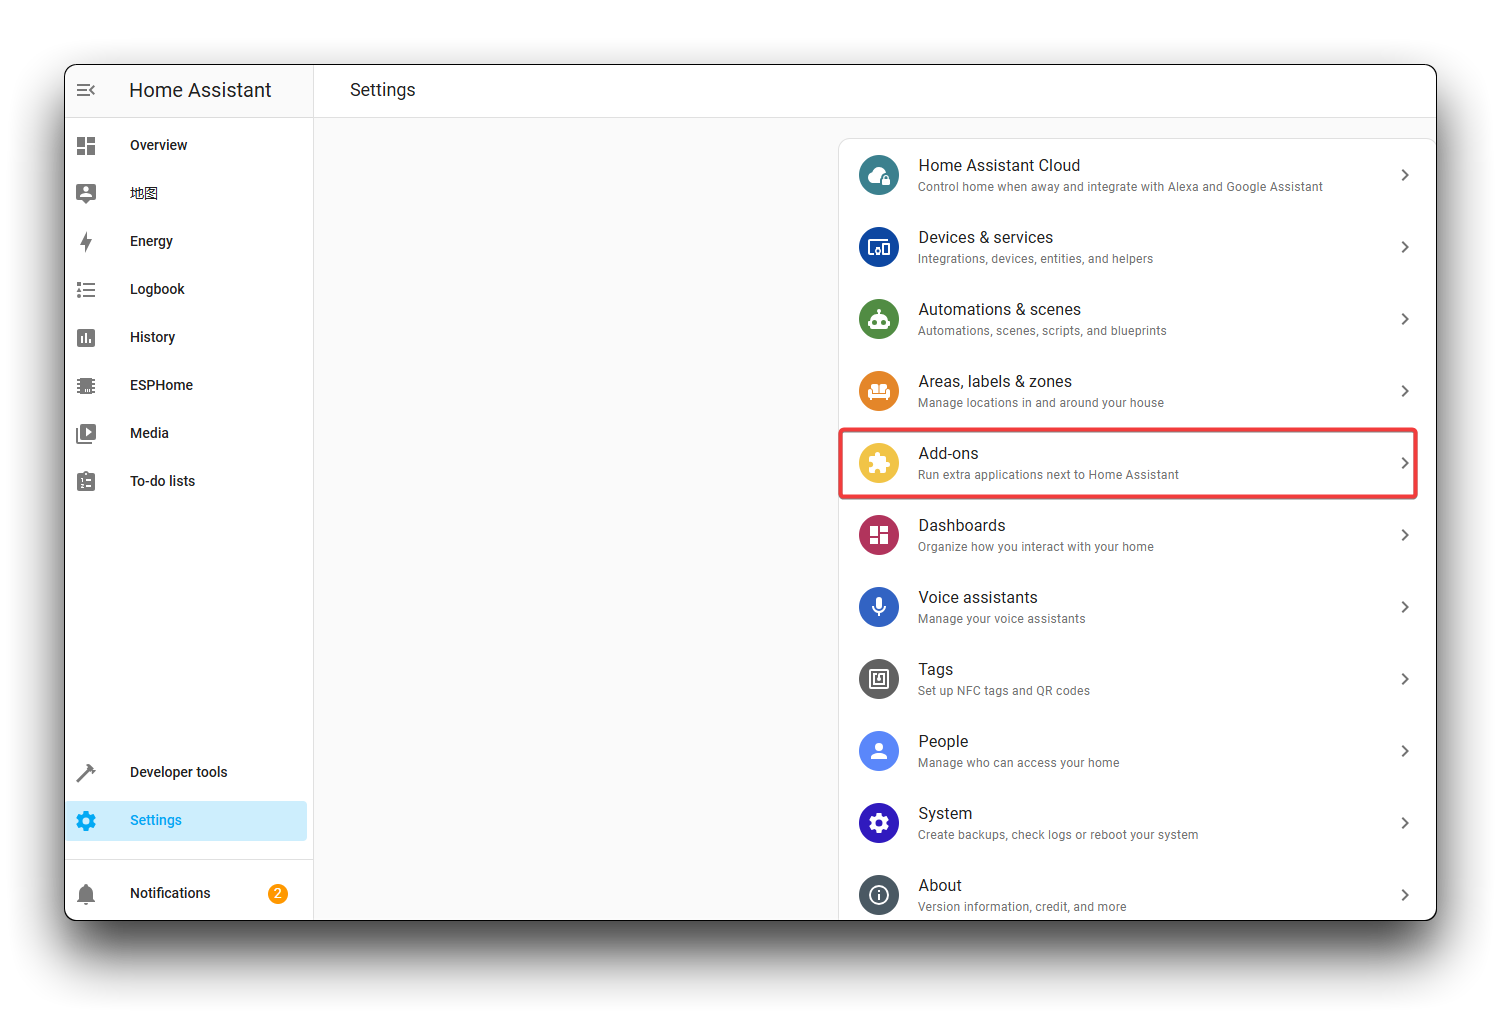
Install ESPHome on Home Assistant
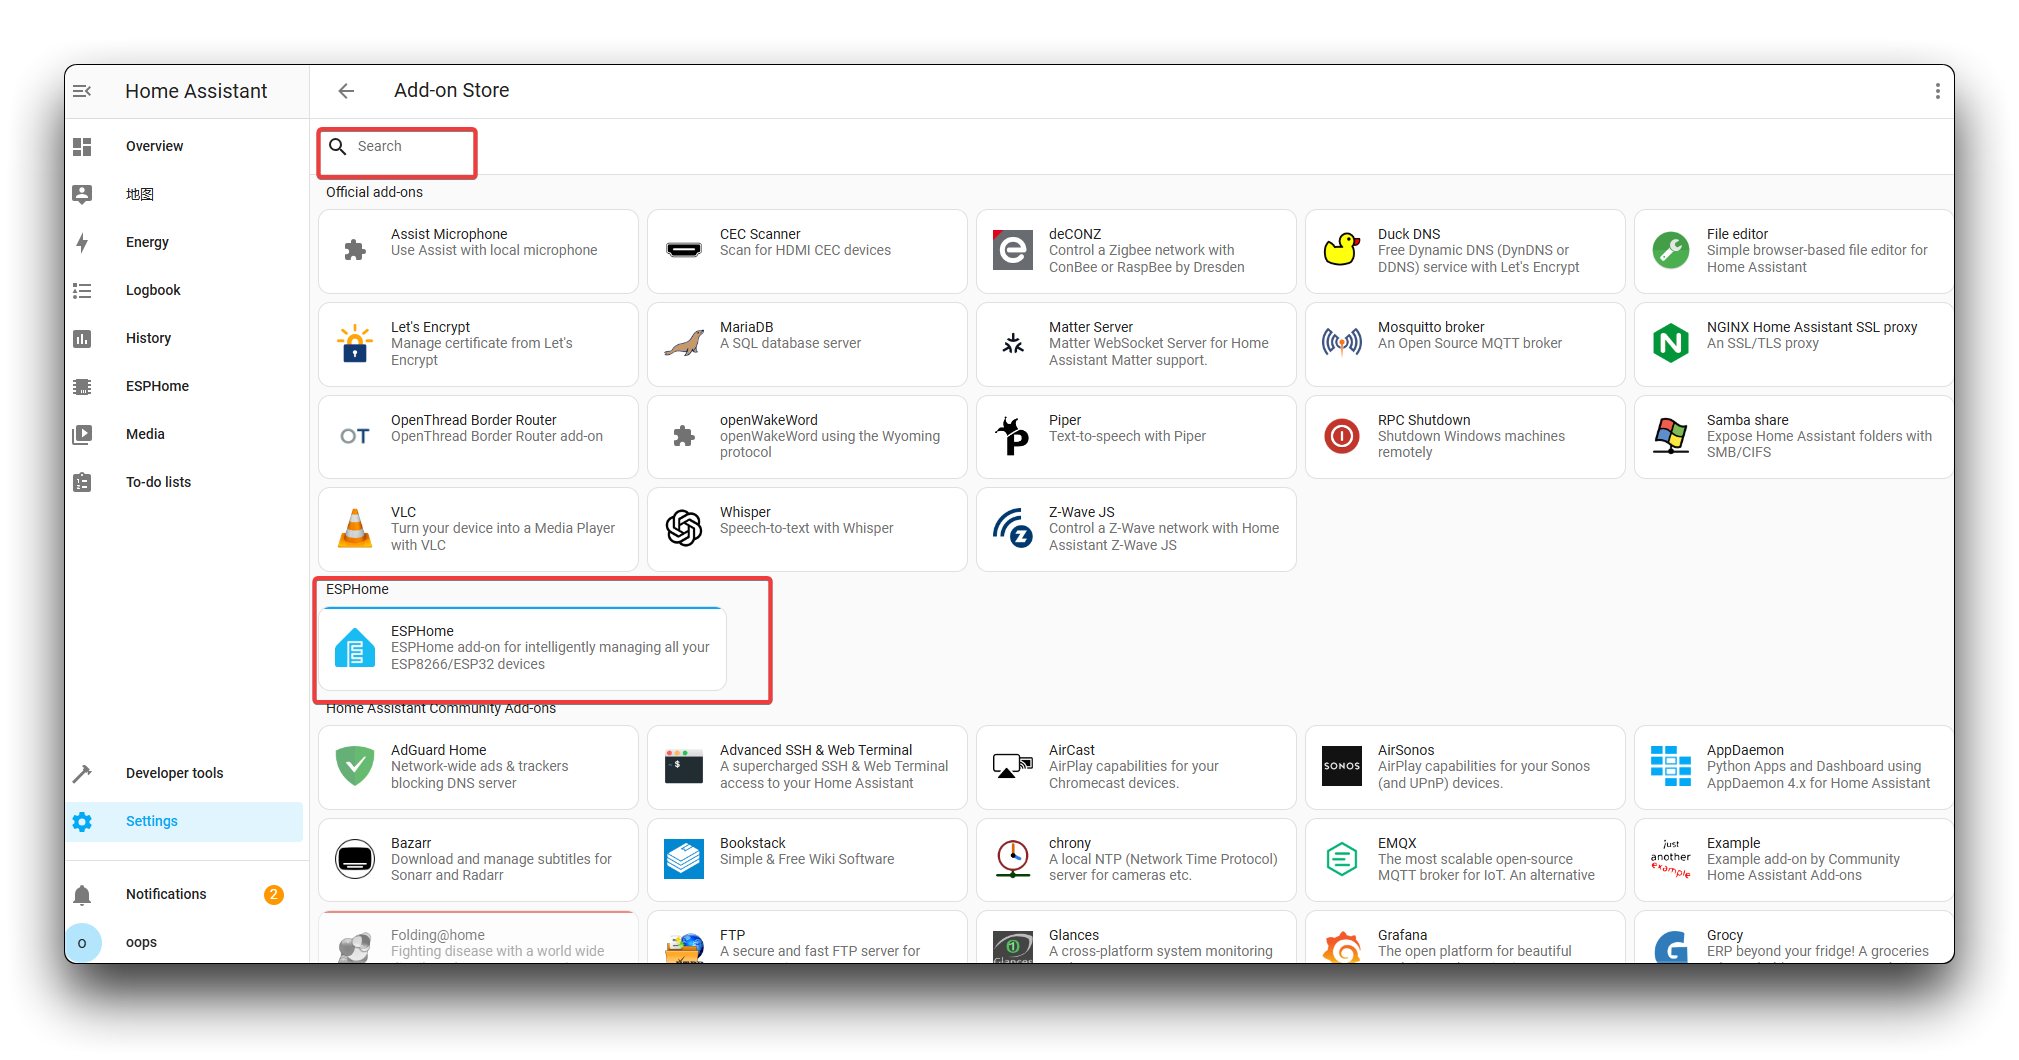
Step 1. Click Settings --> Add-on --> ADD-ON STORE.
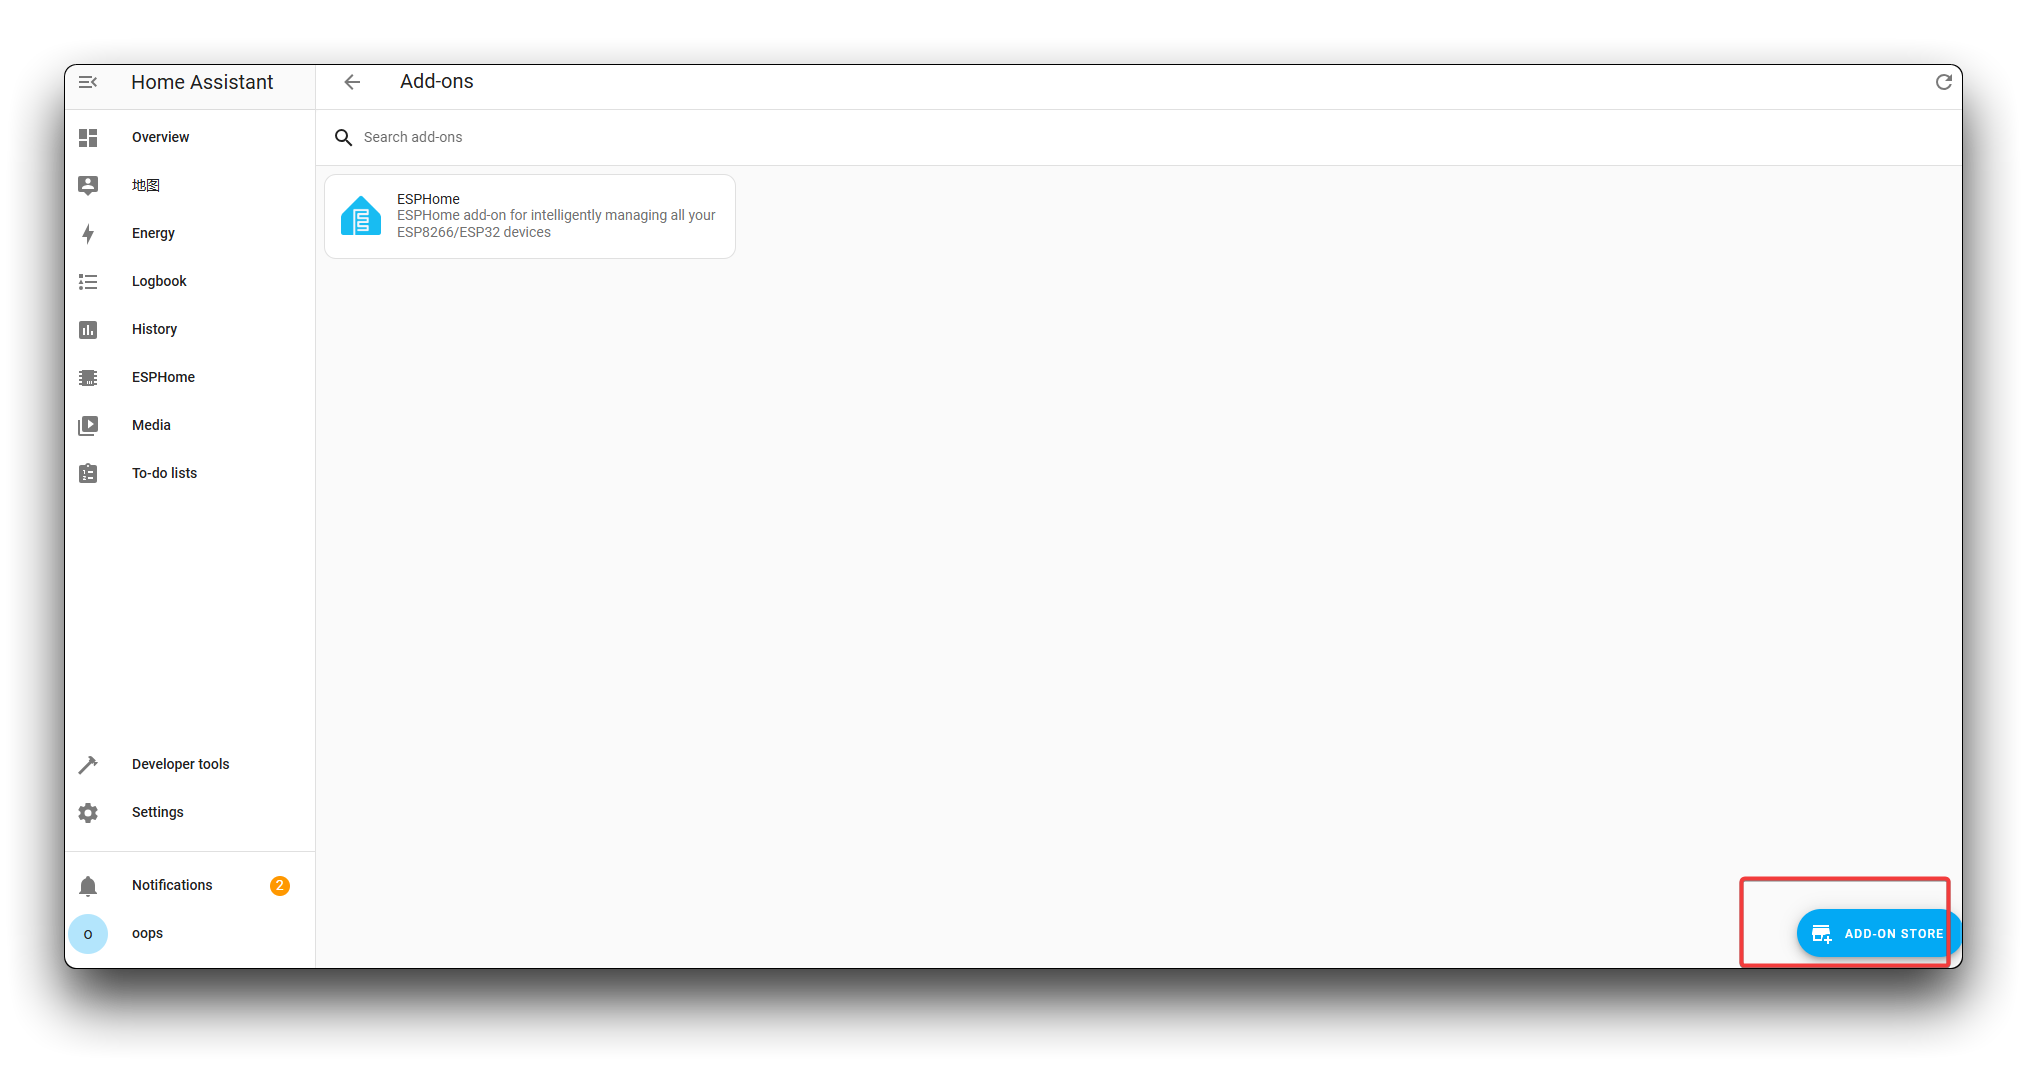
Step 2. Search ESPHome.
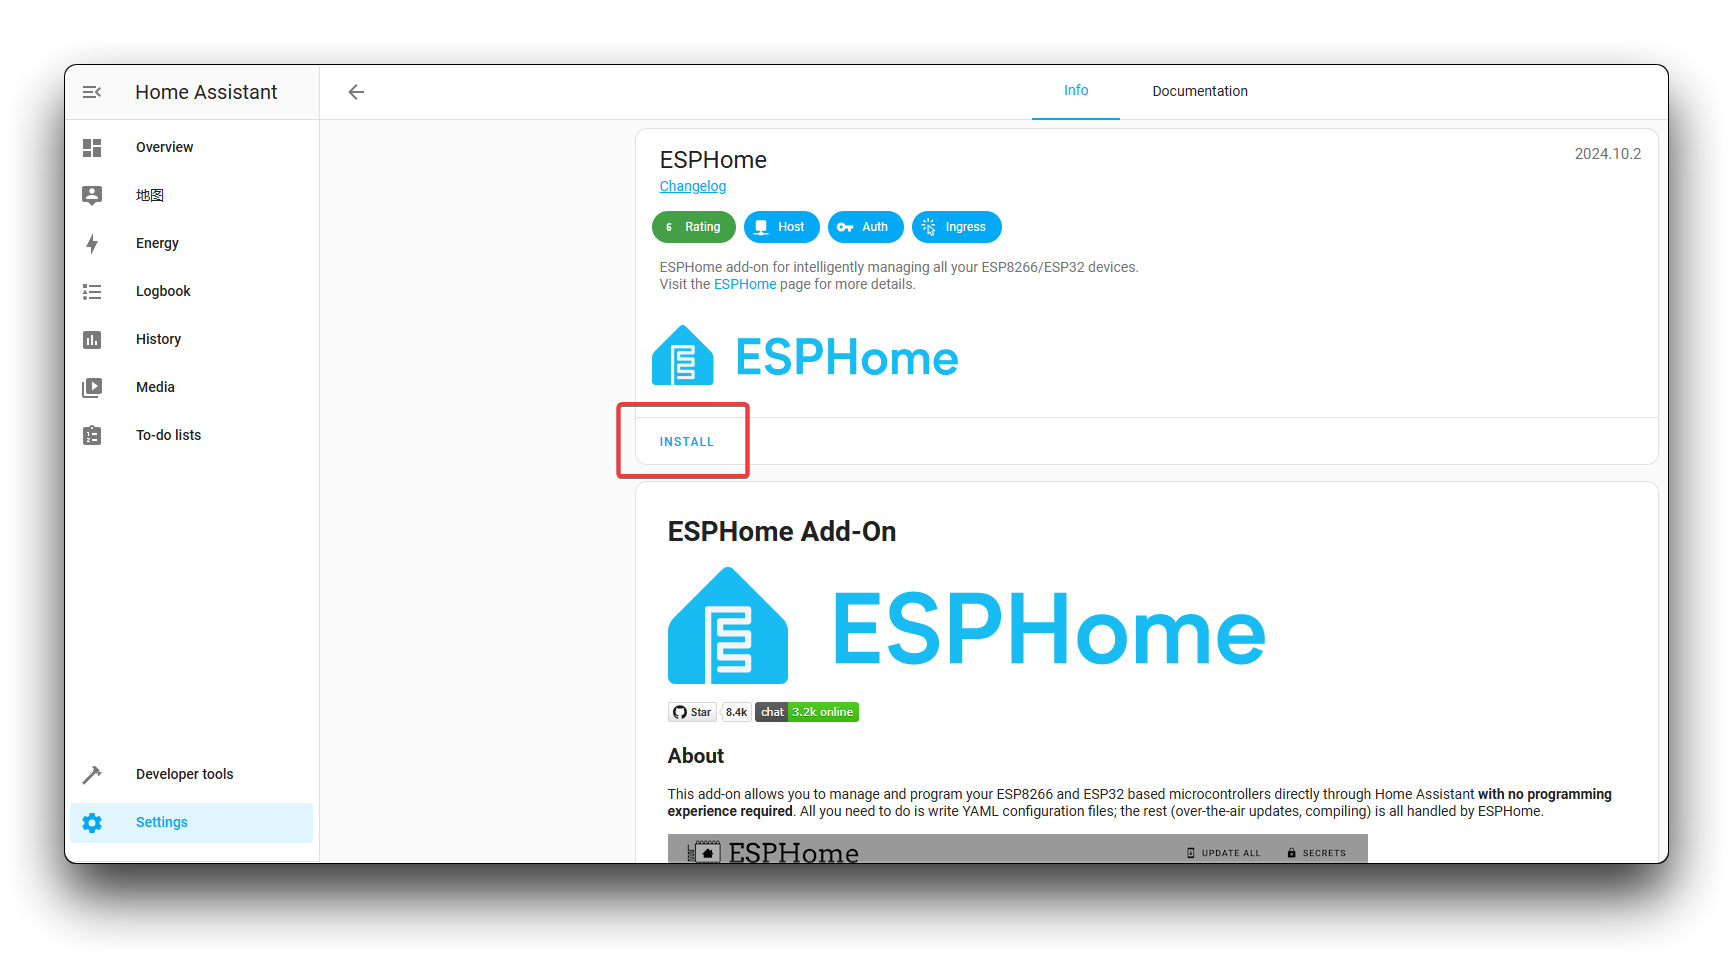
Step 3. Click INSTALL, then click START.
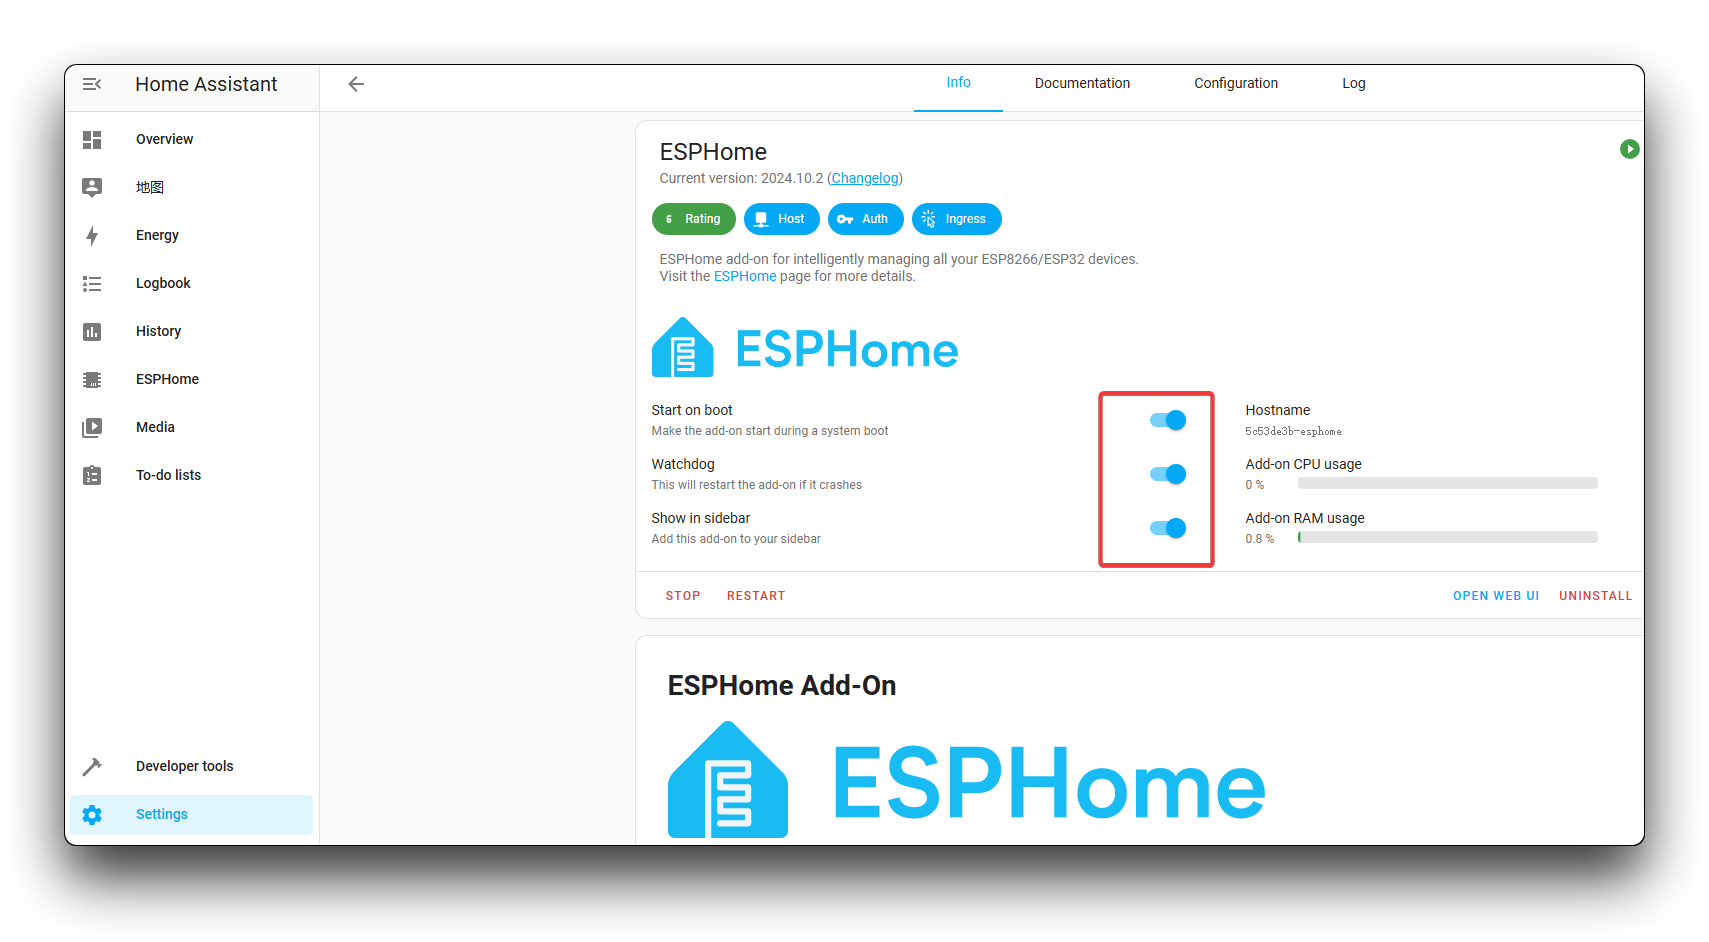
Step 4. Successful installation
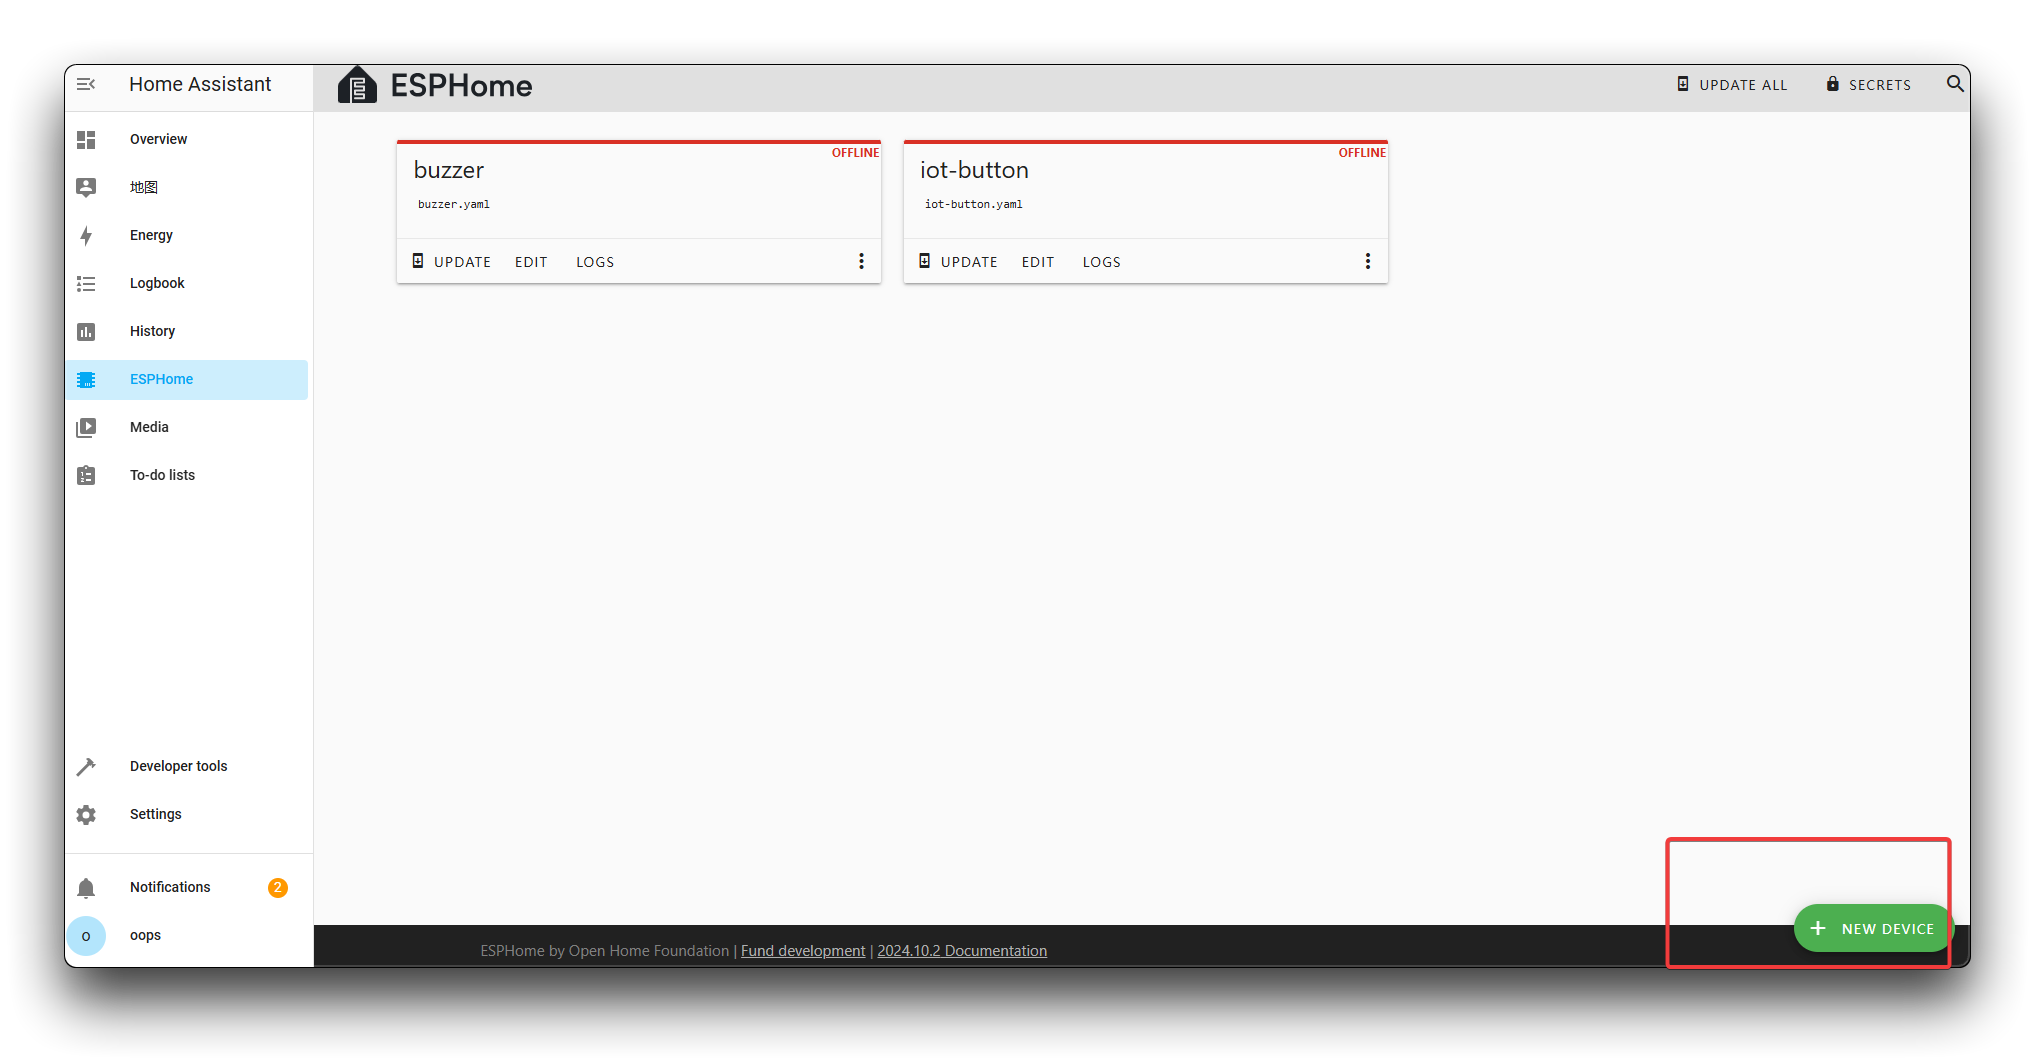
Adding the IoT Button to ESPHome
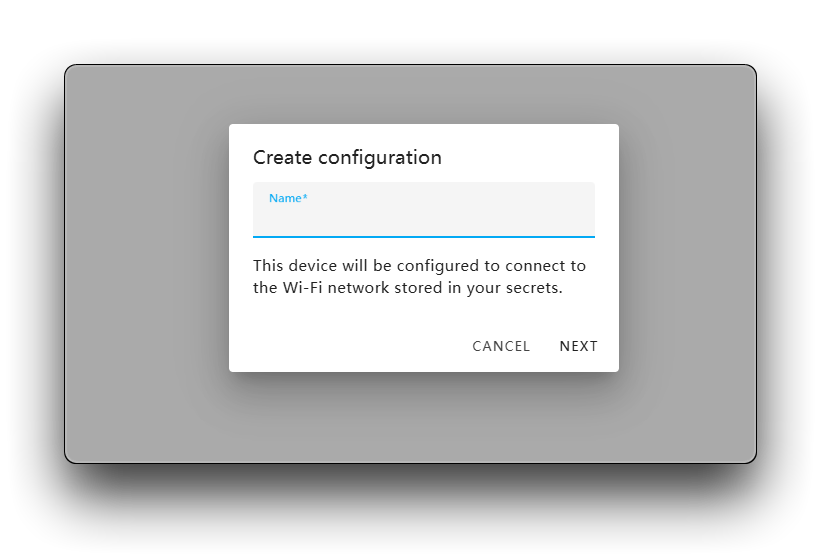
Step 5. Click +NEW DEVICE
Step 6. Click NEXT and give your device a name of your choice. We recommend using "seeedstudio-iot-button" or something similar.
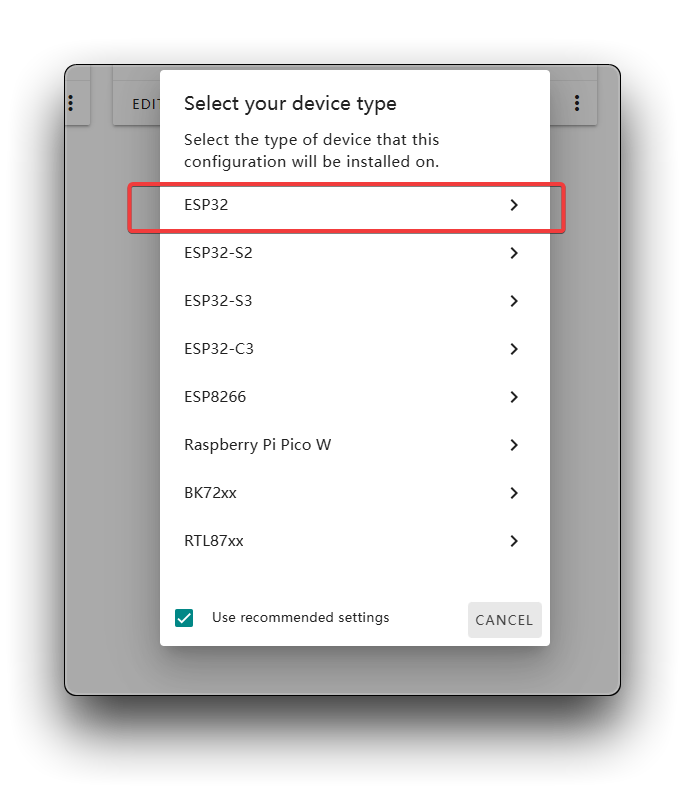
Step 7. Select your device type
For the IoT Button with its built-in ESP32-C6, select "ESP32" as the device type. We'll modify the configuration later to specify the correct ESP32 variant.
Step 8. Add device successfully, finally click SKIP.

Configuring the IoT Button
Using Web Flasher (Recommended Method)
The easiest way to get started with the IoT Button is to use the Web Flasher tool to install the pre-built ESPHome firmware directly from your browser.
Step 1: Visit the Seeed Studio IoT Button Firmware Flasher website.

Step 2: Connect your IoT Button to your computer using a USB cable.
Step 3: Click the "Install" button on the Web Flasher page.
Step 4: Select the correct USB port from the popup dialog.
Step 5: The browser will automatically download and flash the firmware to your device.
Step 6: After flashing is complete, the IoT Button will create its own WiFi network. Connect to the WiFi network named "seeedstudio-iot-button" from your computer or smartphone.
Step 7: Once connected, your device should automatically open a configuration page. If not, open a browser and navigate to http://192.168.4.1.
Step 8: On the configuration page:
- Enter your home WiFi network name (SSID) and password
- Make sure this is the same network that your Home Assistant is connected to
- Click "Save" to apply the settings
Step 9: The IoT Button will restart and connect to your home WiFi network.
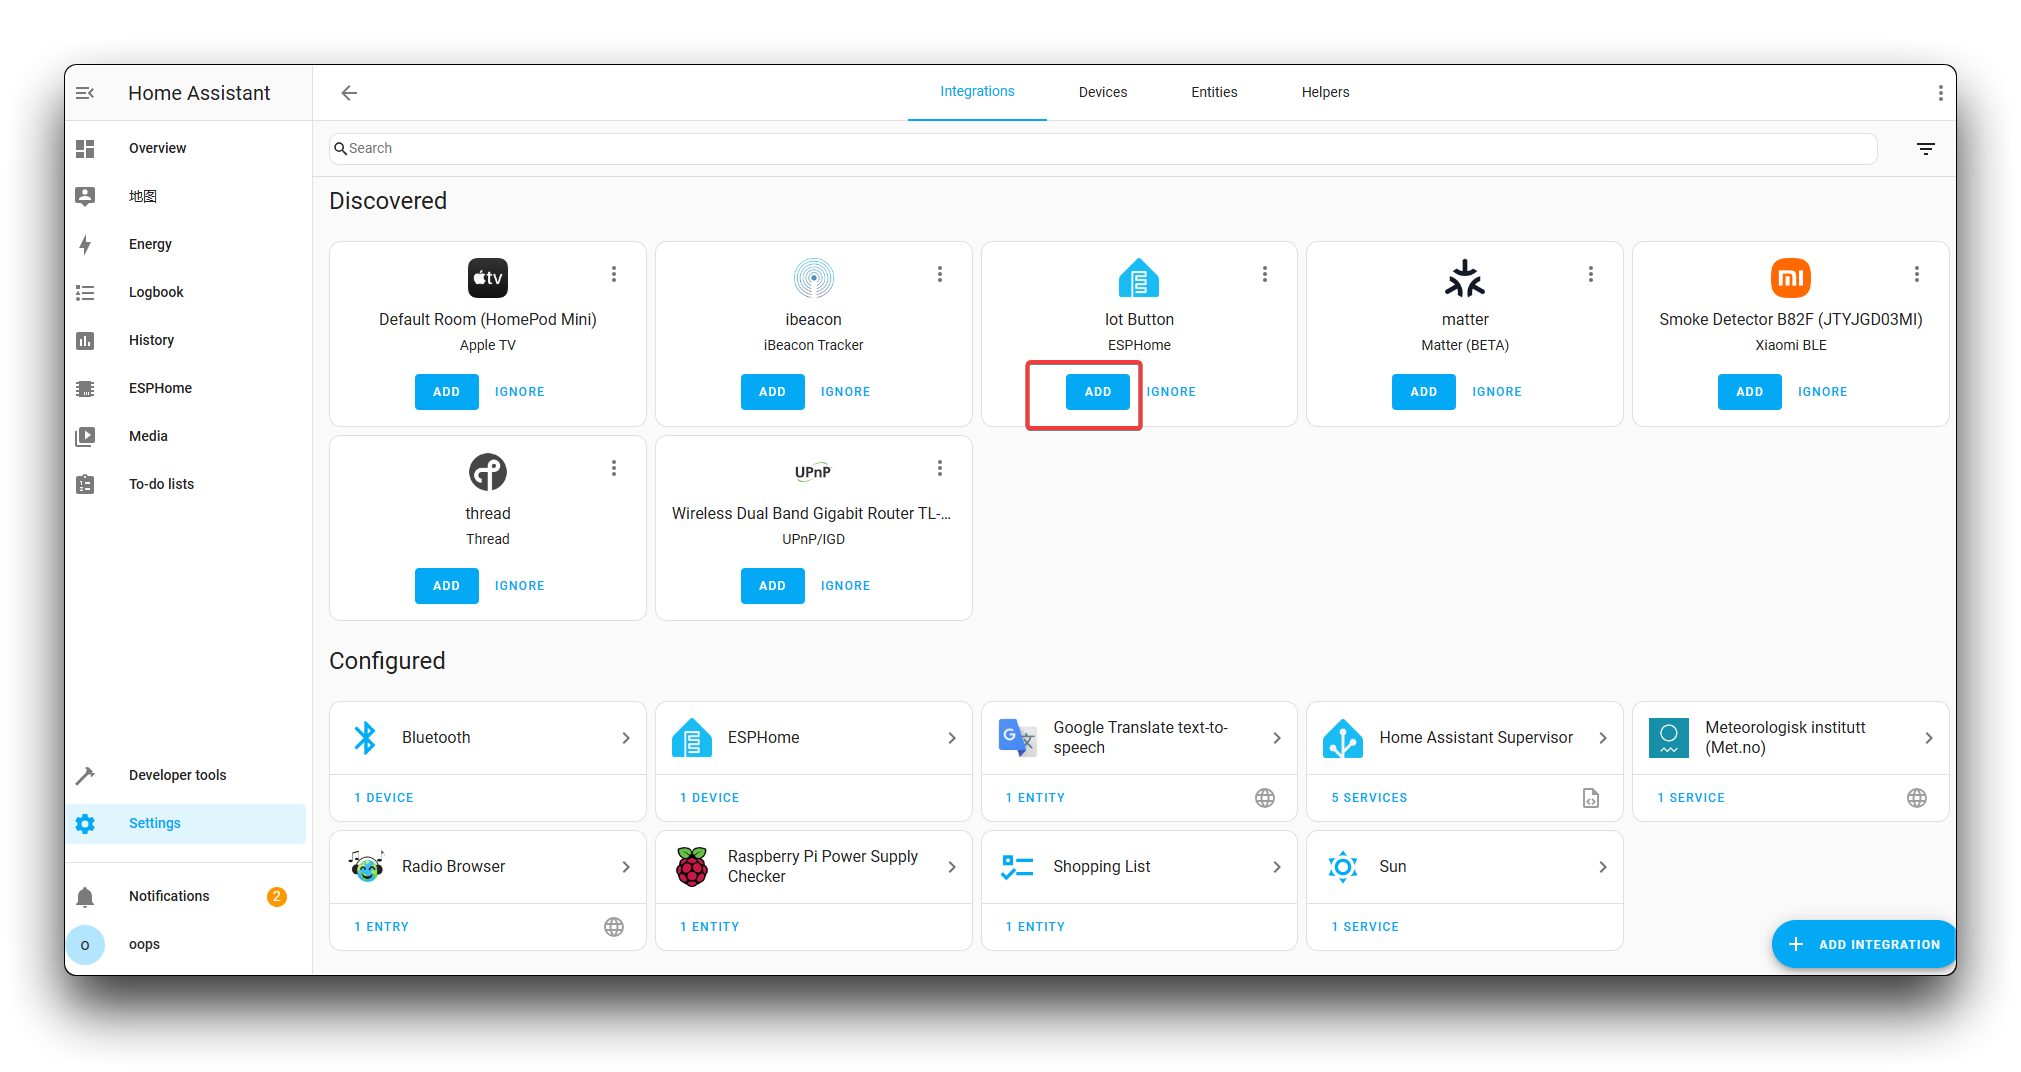
Step 10: In Home Assistant, go to Settings > Devices & Services. You should see a notification that a new ESPHome device has been discovered. Click "Configure" to add the device to Home Assistant.
Step 11: Follow the prompts to complete the setup. The IoT Button will now appear in your Home Assistant dashboard with three virtual switches corresponding to the different button actions.
Alternative Method: Using ESPHome Dashboard
If you prefer to use the ESPHome dashboard for more control over the configuration, follow the steps below.
Adding the ESPHome Configuration
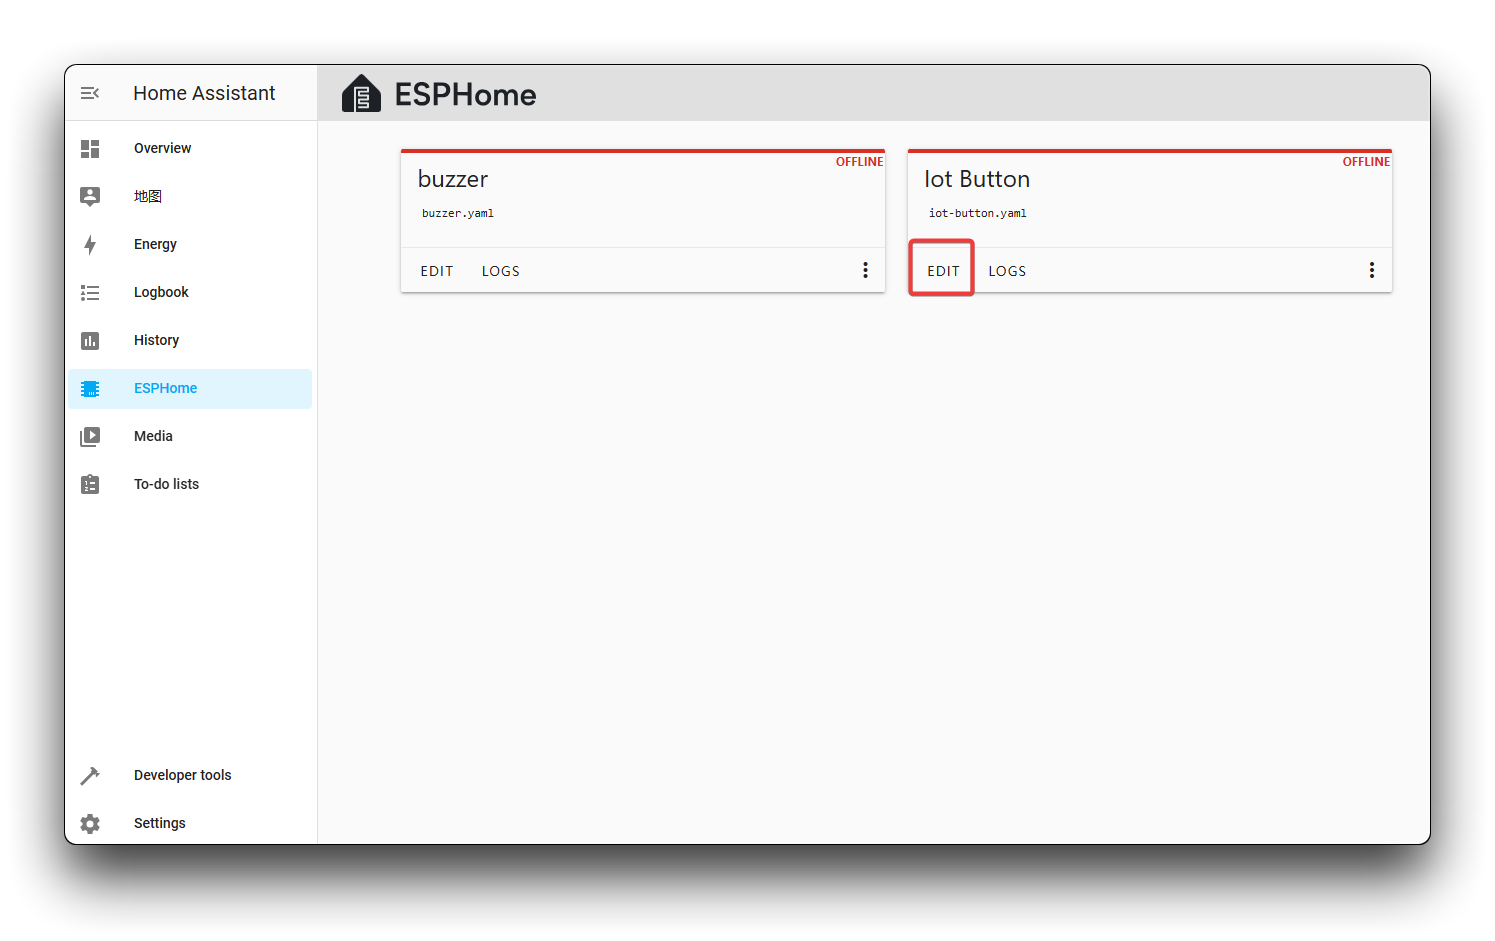
Step 1. The corresponding device card will appear on the ESPHome page, then click the EDIT.
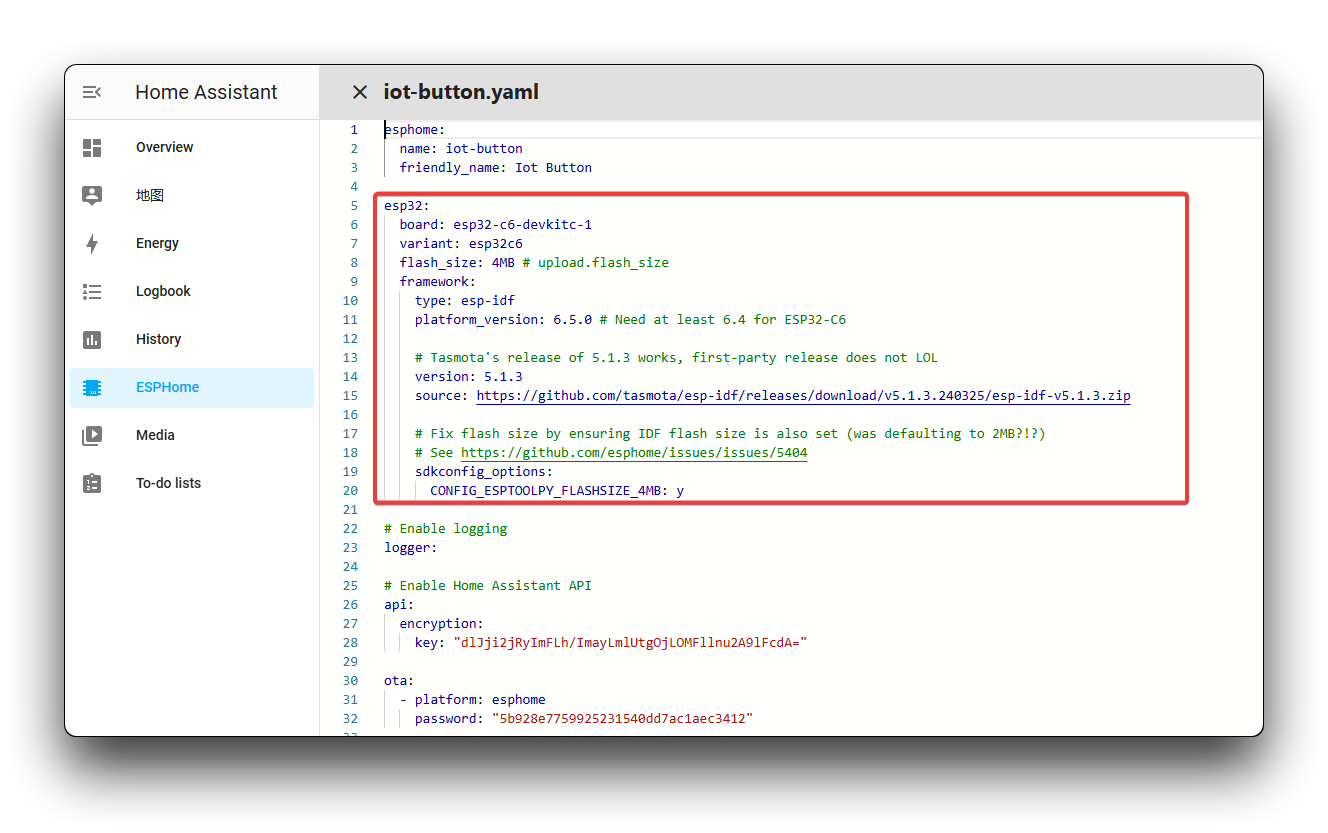
Step 2. Replace the entire configuration with the following code:
substitutions:
  name: "seeedstudio-iot-button"
  friendly_name: "Seeed Studio IoT Button"

esphome:
  name: "${name}"
  friendly_name: "${friendly_name}"
  name_add_mac_suffix: true
  project:
    name: "seeedstudio.iot_button"
    version: "1.0"
  platformio_options:
    board_upload.maximum_size: 4194304
  min_version: "2024.3.2" # Fix logger compile error on ESP32-C6 esphome#6323

esp32:
  board: esp32-c6-devkitc-1
  variant: esp32c6
  flash_size: 4MB # upload.flash_size
  framework:
    type: esp-idf

# Enable logging
logger:
  hardware_uart: USB_SERIAL_JTAG
  level: DEBUG

# Enable Home Assistant API
api:

ota:
  - platform: esphome

wifi:
  # Replace with your WiFi credentials
  ssid: "Your_WiFi_SSID"
  password: "Your_WiFi_Password"

  # Enable fallback hotspot (captive portal) in case wifi connection fails
  ap:
    ssid: "seeedstudio-iot-button"

captive_portal:

binary_sensor:
  - platform: gpio
    pin:
      number: GPIO9
      inverted: True
    name: "SeeedStudio IoT Button"
    on_multi_click:
      - timing:
          - ON for at most 200ms
          - OFF for at least 0.5s
        then:
          - logger.log: "Single Short Clicked"
          - switch.toggle: virtual_toggle_1
      - timing:
          - ON for at most 200ms
          - OFF for at most 0.5s
          - ON for at most 200ms
          - OFF for at least 0.2s
        then:
          - logger.log: "Double Clicked"
          - switch.toggle: virtual_toggle_2
      - timing:
          - ON for 1s to 2.5s
          - OFF for at least 0.5s
        then:
          - logger.log: "Long Press"
          - switch.toggle: virtual_toggle_3

switch:
  - platform: template
    name: "Switch 1"
    id: virtual_toggle_1
    optimistic: true
    turn_on_action:
      - logger.log: "Single Short Clicked"
      - logger.log: "Switch 1 turned ON"
      # Add your switch-on action
    turn_off_action:
      - logger.log: "Single Short Clicked"
      - logger.log: "Switch 1 turned OFF"
      # Add your closing action

  - platform: template
    name: "Switch 2"
    id: virtual_toggle_2
    optimistic: true
    turn_on_action:
      - logger.log: "Double Clicked"
      - logger.log: "Switch 2 turned ON"
      # Add your switch-on action
    turn_off_action:
      - logger.log: "Double Clicked"
      - logger.log: "Switch 2 turned OFF"
      # Add your closing action

  - platform: template
    name: "Switch 3"
    id: virtual_toggle_3
    optimistic: true
    turn_on_action:
      - logger.log: "Long Press"
      - logger.log: "Switch 3 turned ON"
      # Add your switch-on action
    turn_off_action:
      - logger.log: "Long Press"
      - logger.log: "Switch 3 turned OFF"
      # Add your closing action
Make sure to replace "Your_WiFi_SSID" and "Your_WiFi_Password" with your actual WiFi credentials. The WiFi configuration should match the network where your Home Assistant server is running to ensure proper connectivity.
Understanding the Configuration
Let's break down the key parts of this configuration:
ESP32 Configuration:
- Specifies the ESP32-C6 variant and board type for the IoT Button's built-in chip
- Sets the flash size to 4MB
- Uses the ESP-IDF framework which is required for ESP32-C6
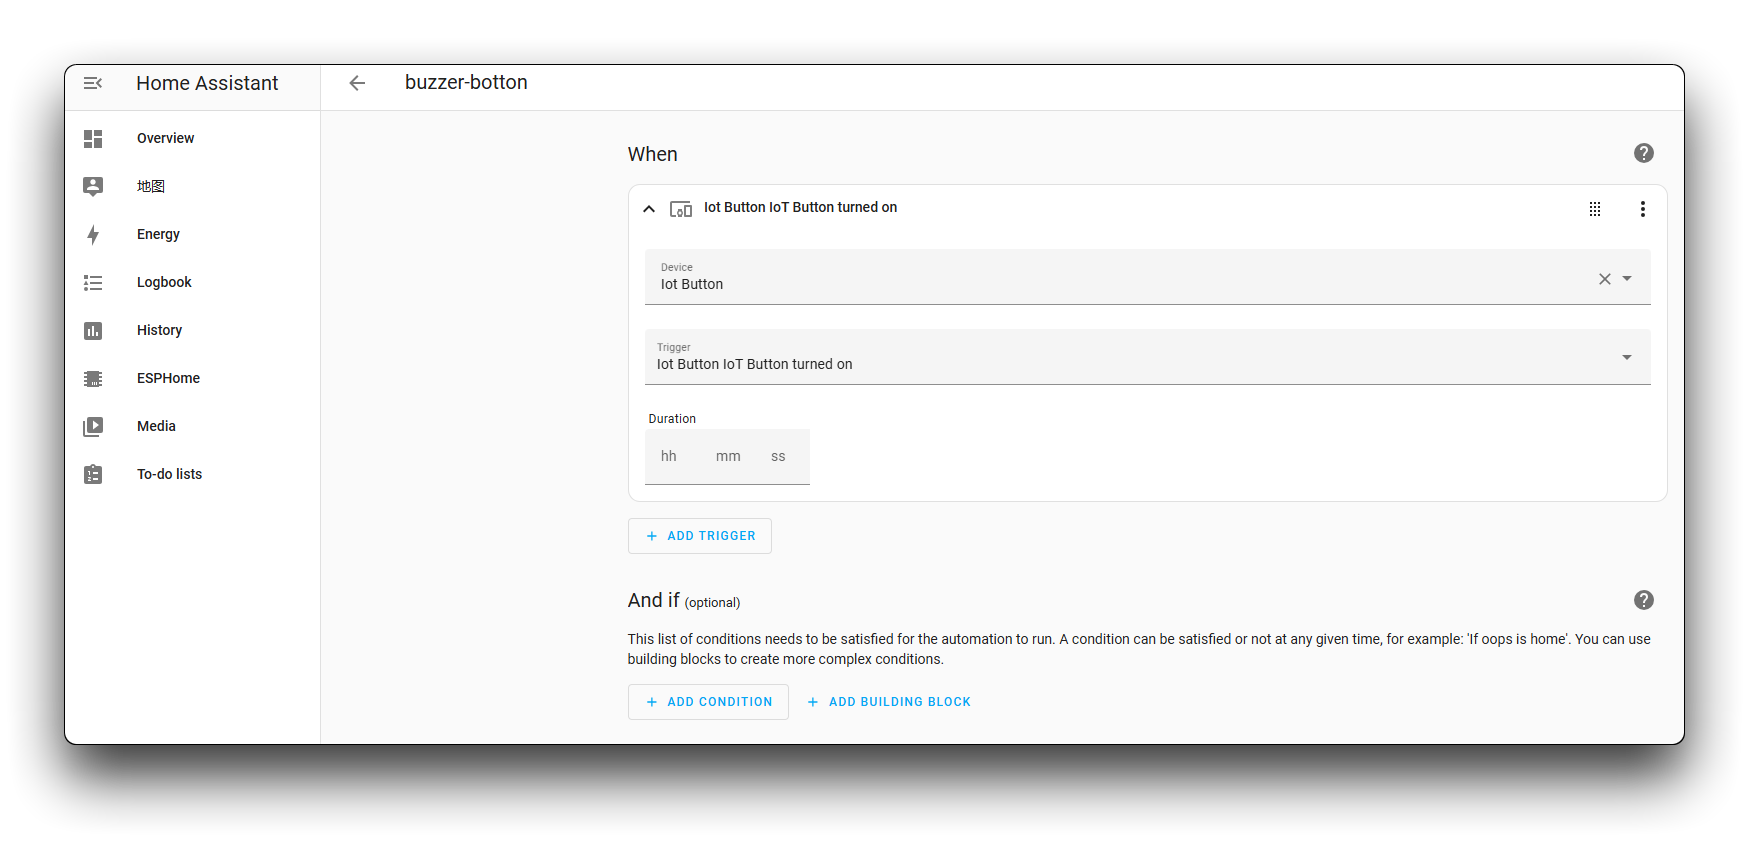
Button Configuration:
- Connects to GPIO9 where the physical button is wired internally
- Inverted: True means the pin is pulled high when not pressed and goes low when pressed
- Configures three different press patterns:
- Single short click (press and release quickly)
- Double click (two quick presses)
- Long press (hold for 1-2.5 seconds)
Virtual Switches:
- Creates three template switches that will appear in Home Assistant
- Each switch corresponds to a different button press pattern
- These switches can be used in automations to control other devices
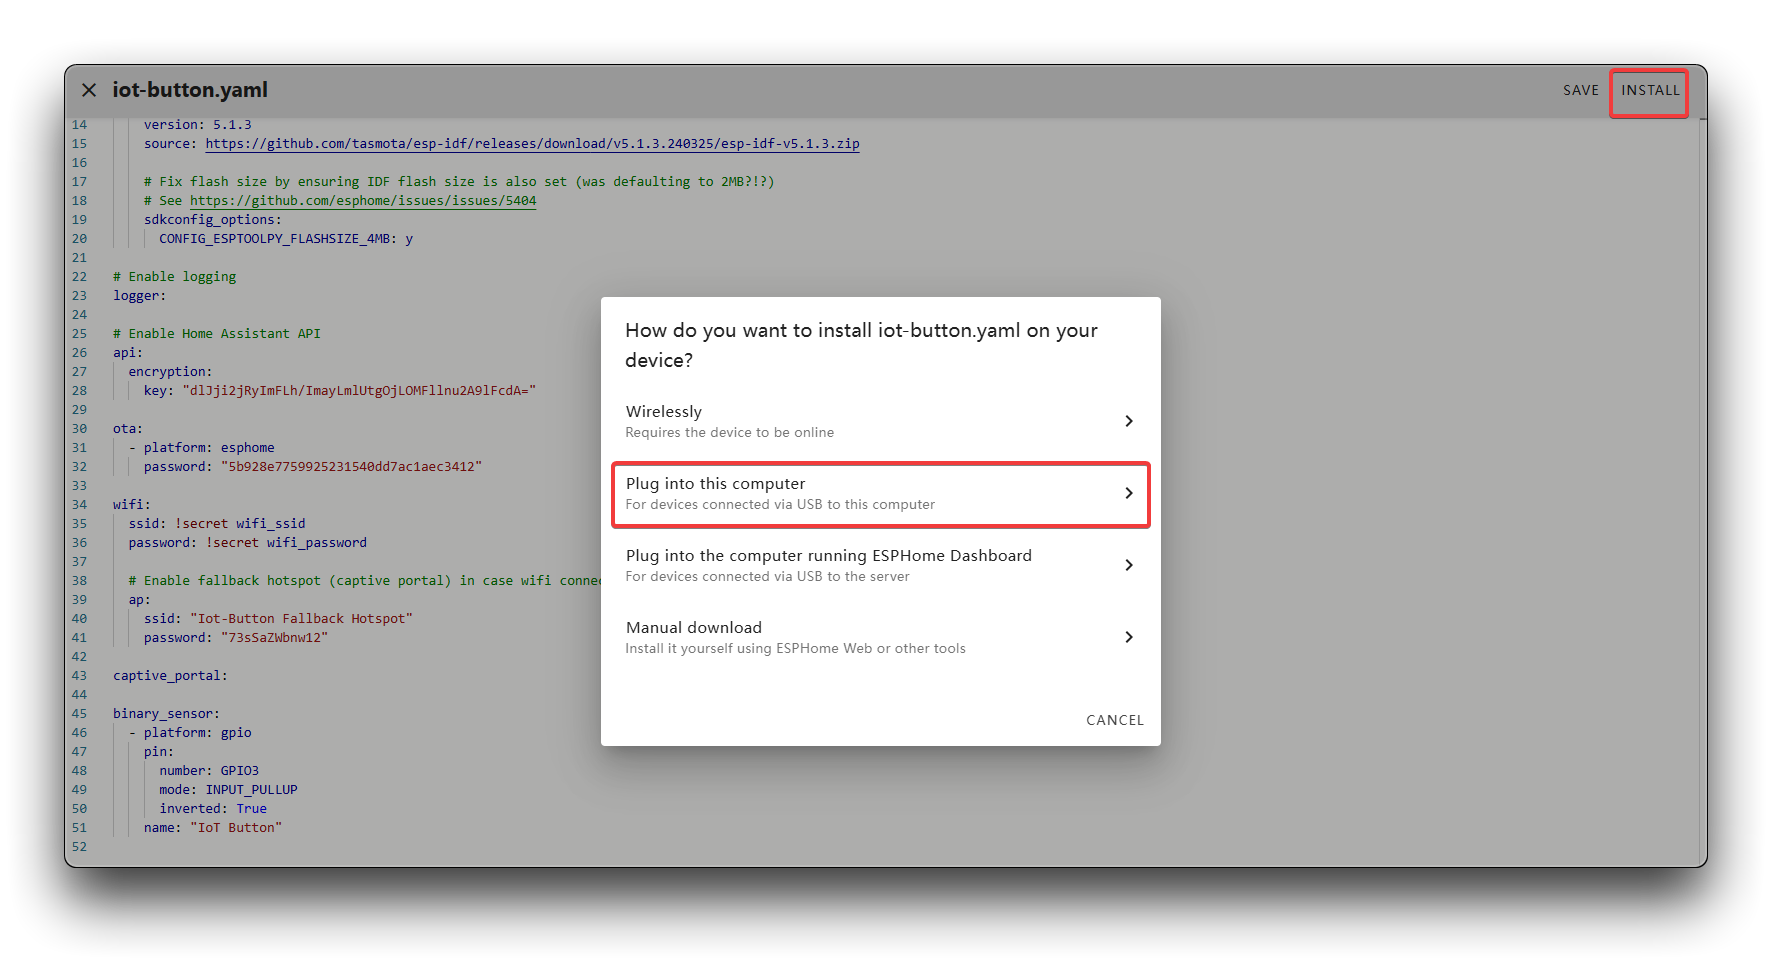
Step 3. After completing the configuration, click on INSTALL in the upper right corner and then select Plug into this computer.
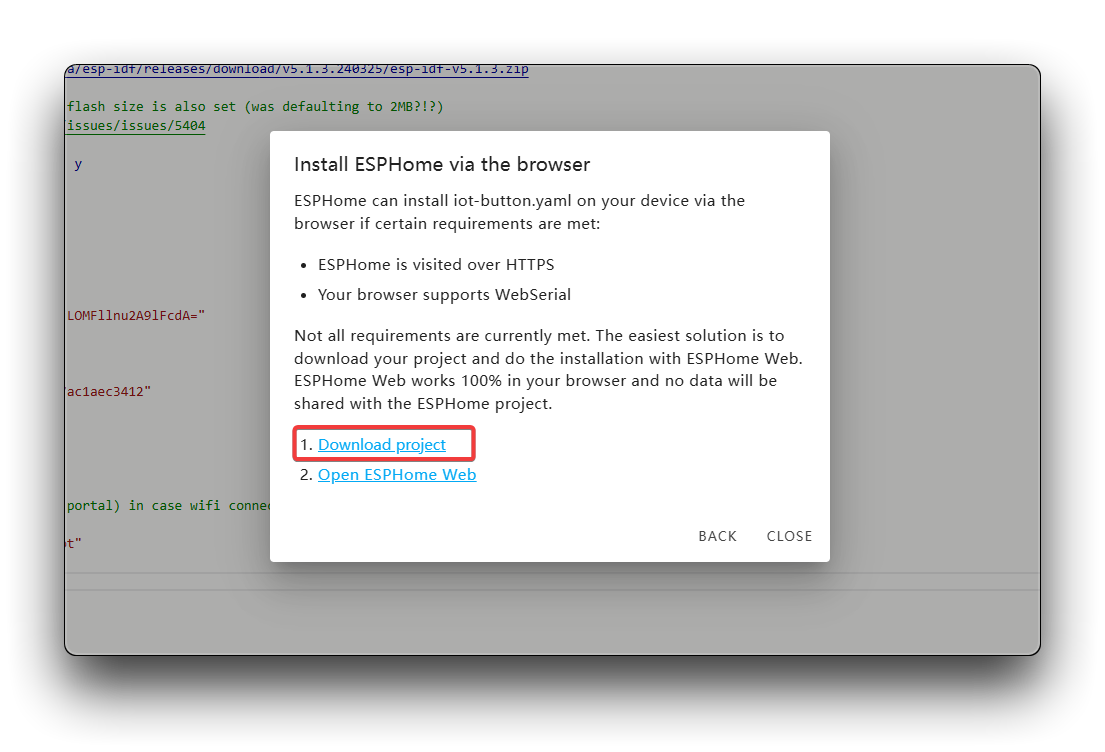
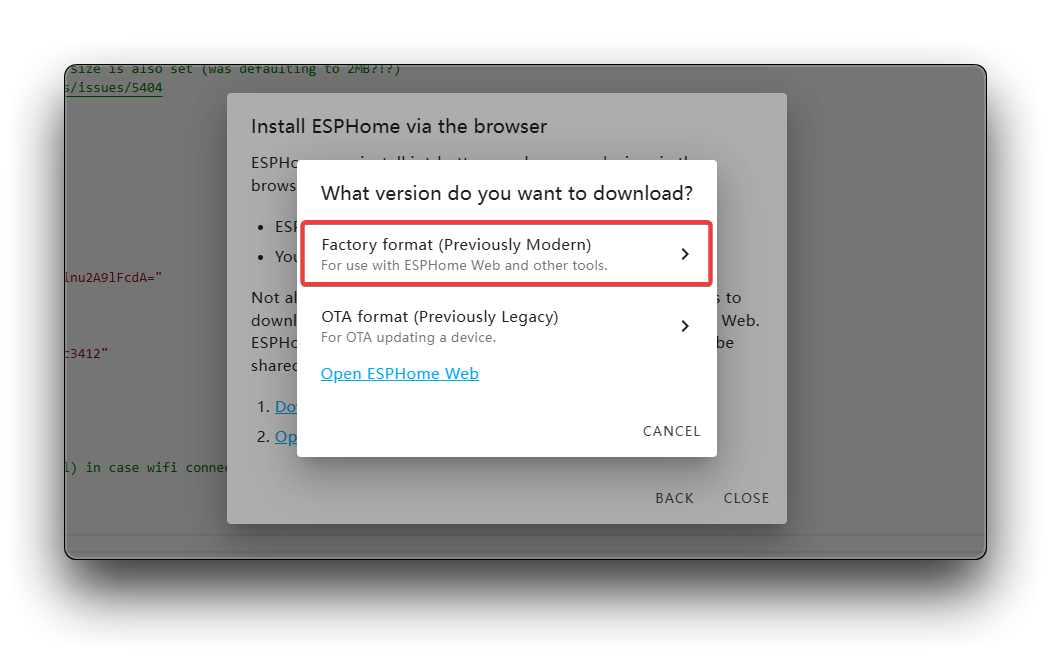
Step 4. Wait for the compilation process to complete. Then click Download project, select Factory format to download the project file, and then click Open ESPHome Web.
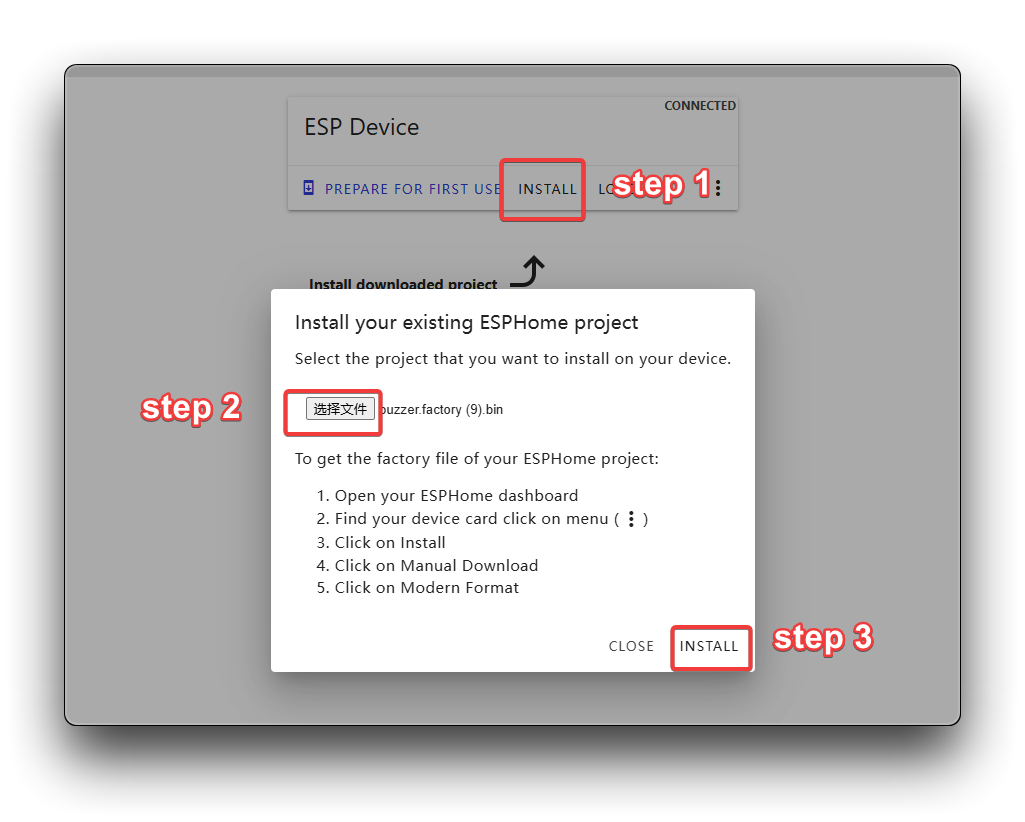
Step 5. Connect the IoT Button to your computer via USB. Click CONNECT and select the correct serial port.

Step 6. Click INSTALL to flash the firmware to your IoT Button.
Step 7. If all goes well, you will see a successful installation message.

Adding the IoT Button to Home Assistant
Step 16. Go back to Home Assistant. Click on Settings and then select Devices & services.
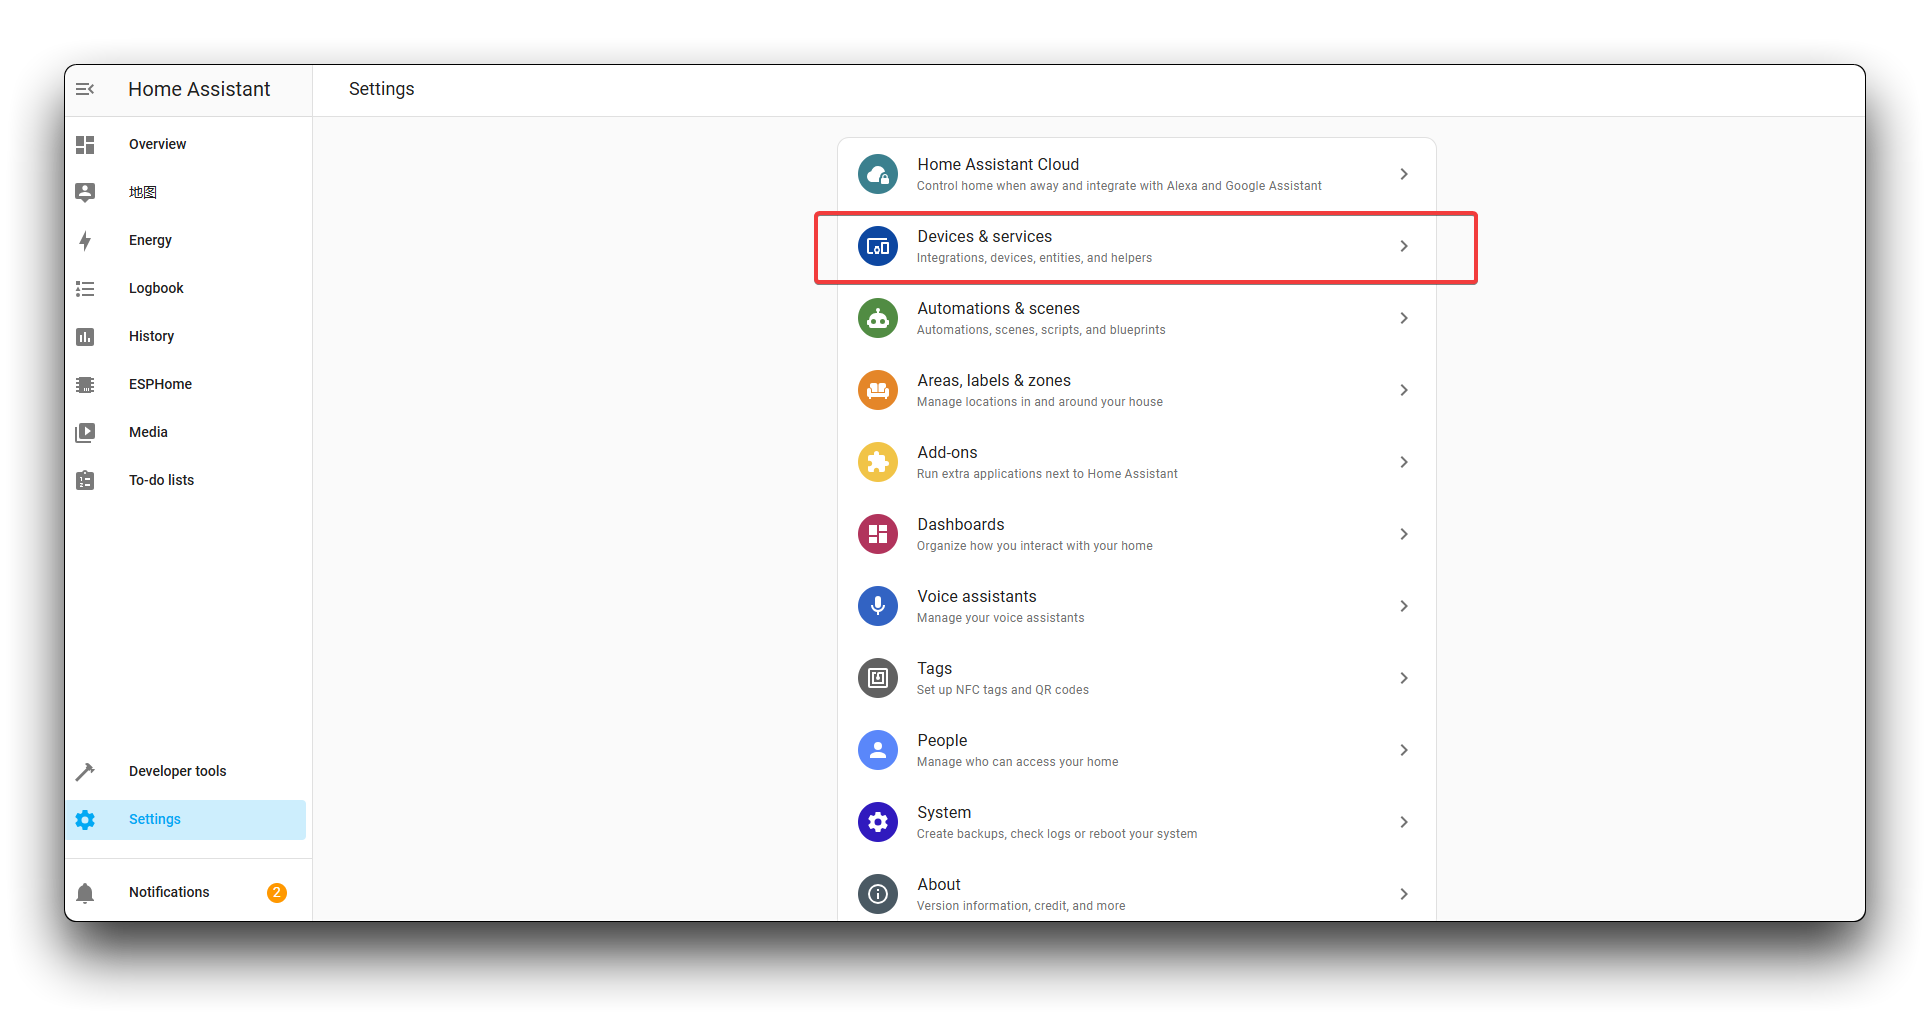
Step 17. You should see a notification about a new device discovered. Click on CONFIGURE.
Step 18. Follow the prompts to add the IoT Button to Home Assistant. You can select which area the device belongs to and click FINISH.
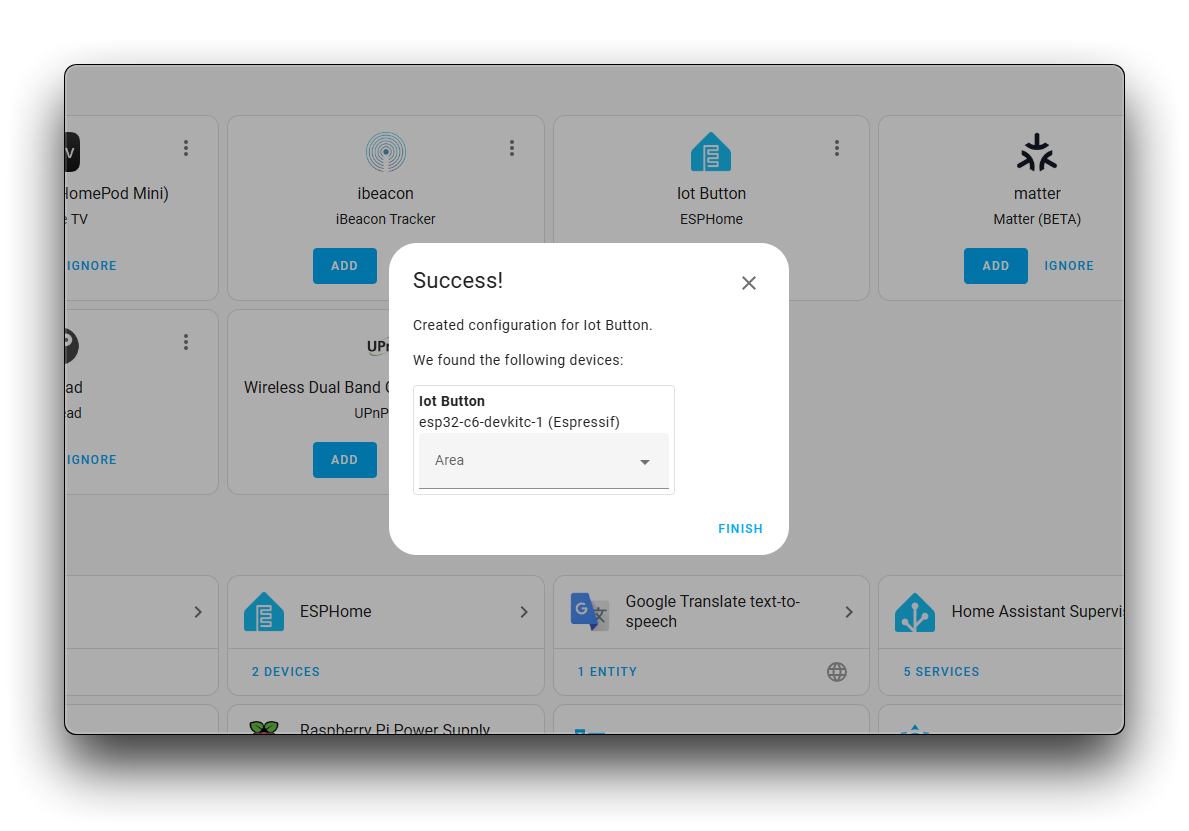
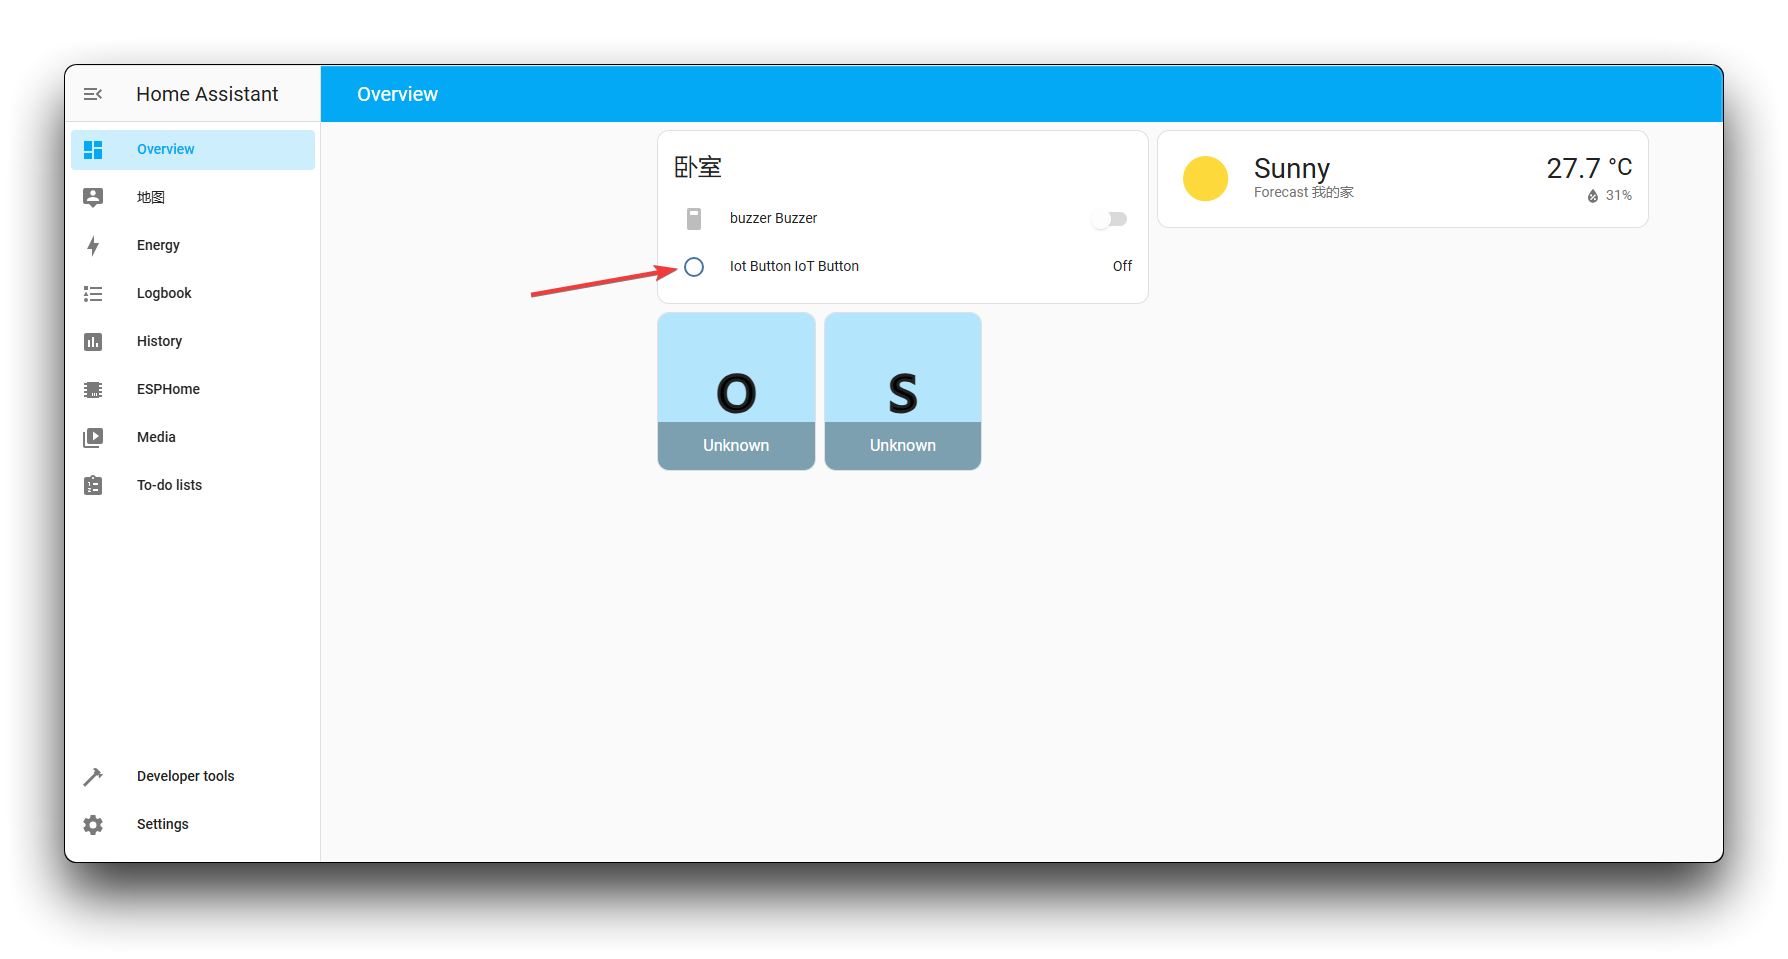
Step 19. The IoT Button and its three virtual switches will now appear in your Home Assistant dashboard.
Creating Automations with the IoT Button
Now that your IoT Button is set up, you can create automations to control devices in your smart home. Let's create a simple automation that turns on a light when you press the button.
Step 20. In Home Assistant, go to Settings > Automations & scenes.

Step 21. Click CREATE AUTOMATION.
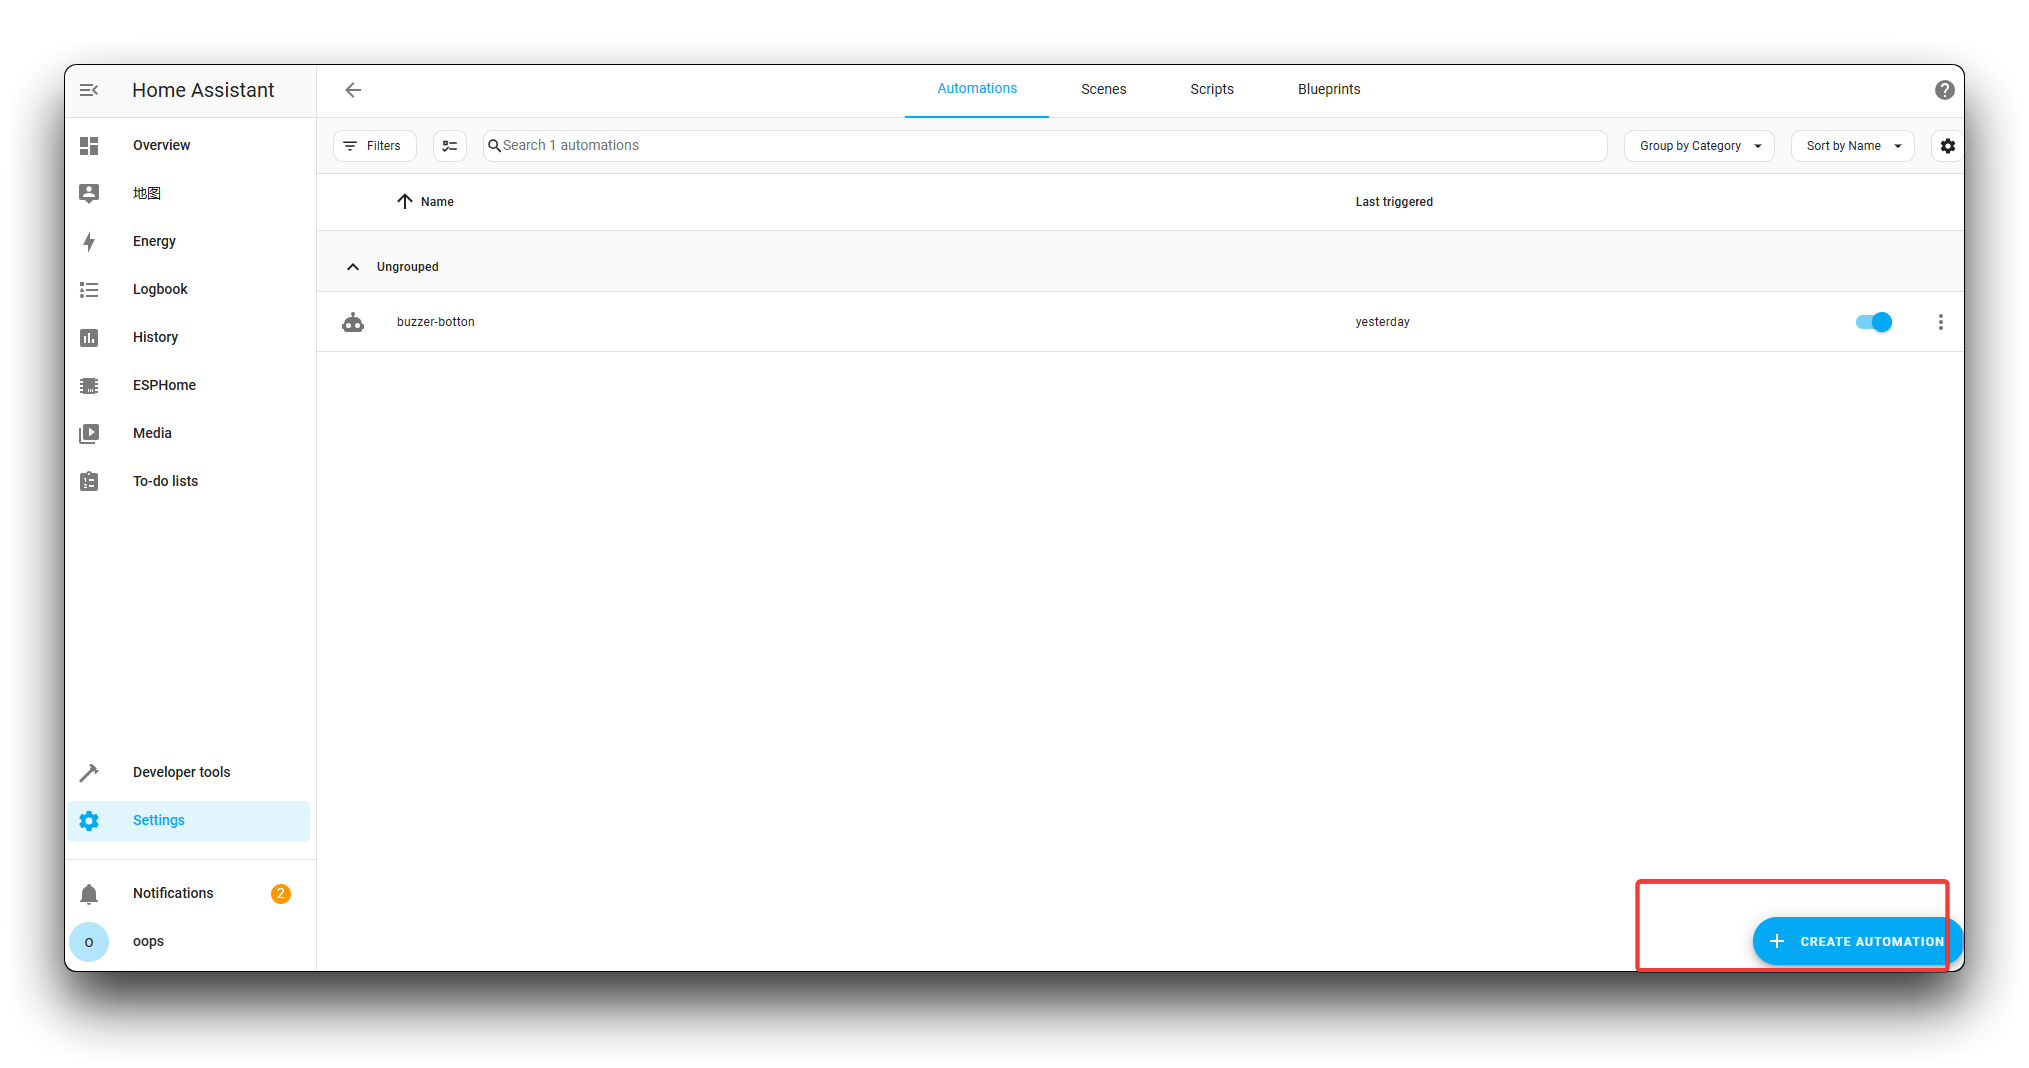
Step 22. Set up your automation:
- Name: Give your automation a descriptive name, like "IoT Button Single Press - Turn On Light"
- Trigger: Select "State" as the trigger type
- Entity: Select "Switch 1" (for single press)
- From: "off"
- To: "on"
- Action: Choose the device you want to control
- For example, select a light and set it to turn on
Step 23. Click SAVE to create the automation.
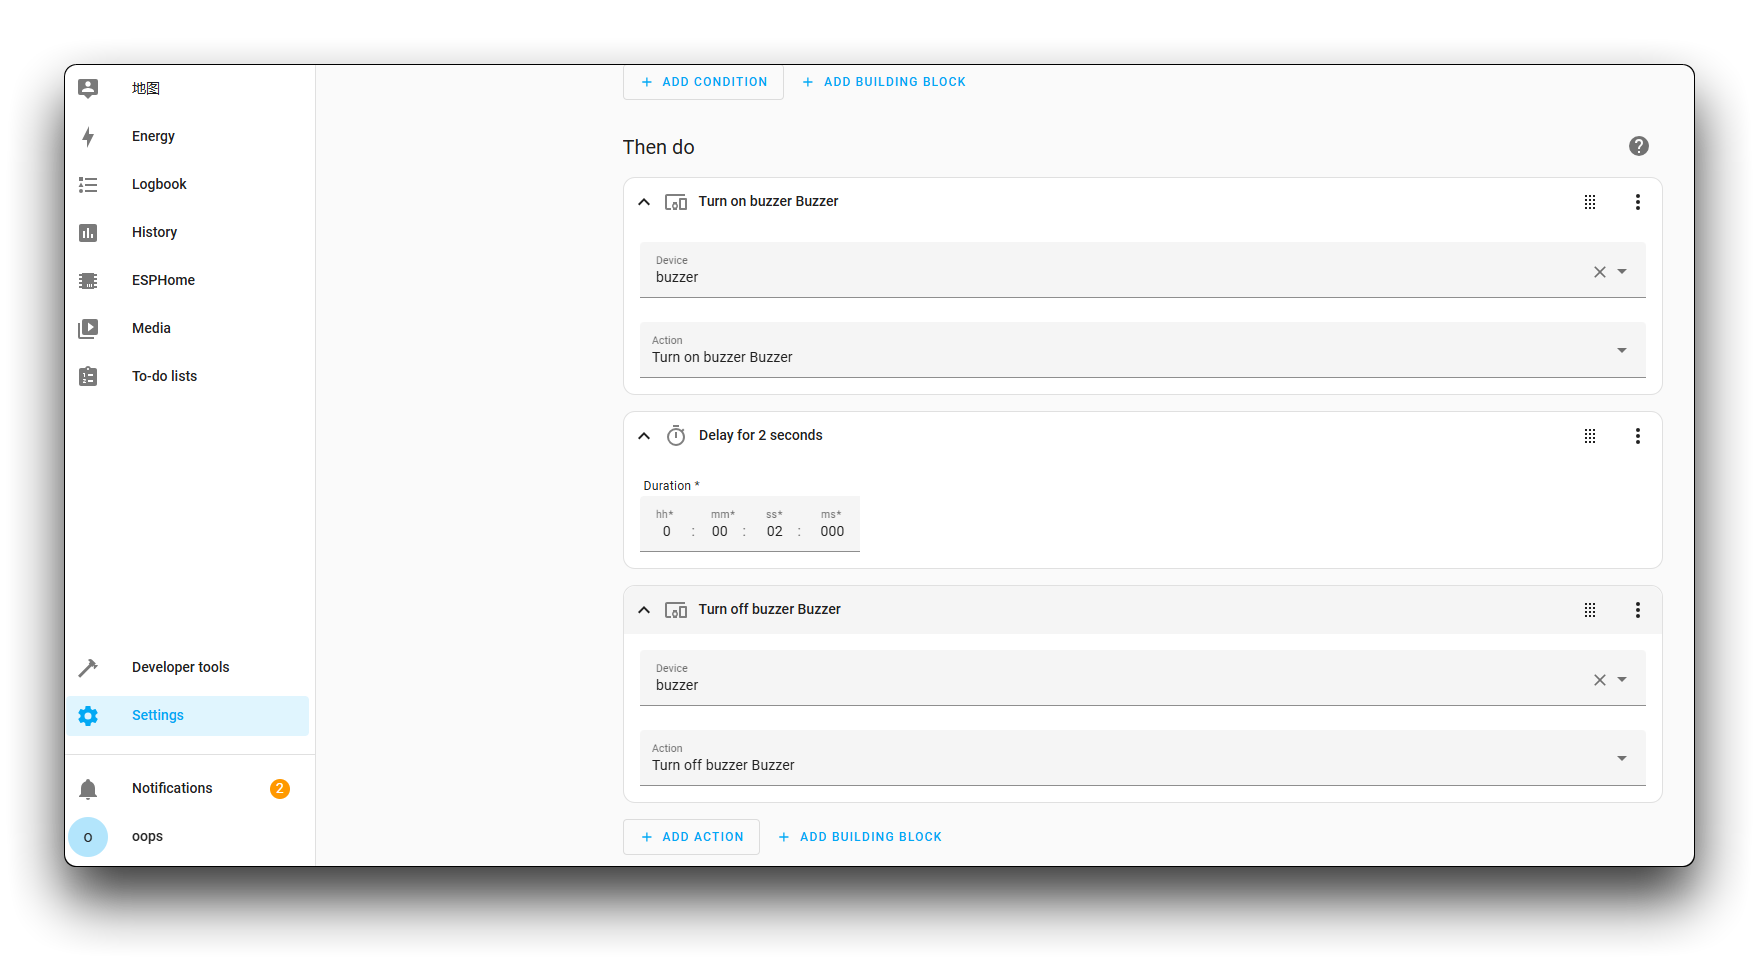
Advanced Usage: Controlling Different Devices with Different Press Patterns
One of the powerful features of the IoT Button configuration is the ability to detect different press patterns. Here are some ideas for using each pattern:
Single Press (Switch 1):
- Turn on/off lights in the current room
- Toggle a frequently used device
Double Press (Switch 2):
- Activate a scene (e.g., "Movie Night" that dims lights and turns on the TV)
- Control a group of devices simultaneously
Long Press (Switch 3):
- Activate security features (arm/disarm alarm)
- Trigger emergency routines
- Power off multiple devices at once
To set up these advanced automations, create additional automations following the steps above, but select the appropriate switch (Switch 1, 2, or 3) as the trigger and configure the desired actions.
Troubleshooting
If you encounter issues with your IoT Button, here are some common troubleshooting steps:
Button not connecting to WiFi:
- Verify your WiFi credentials in the ESPHome configuration
- Ensure your WiFi network is 2.4GHz (ESP32-C6 supports both 2.4GHz and 5GHz, but 2.4GHz typically has better range)
Button not appearing in Home Assistant:
- Check that the button and Home Assistant are on the same network
- Restart the ESPHome add-on and Home Assistant
Button presses not detected:
- Verify the GPIO pin configuration (GPIO9 for the standard IoT Button)
- Check the logs in ESPHome to see if button presses are being detected
Automations not triggering:
- Verify that the automation is enabled
- Check that the trigger conditions match exactly (state changes from "off" to "on")
Tech Support & Product Discussion
Thank you for choosing our products! We are here to provide you with different support to ensure that your experience with our products is as smooth as possible. We offer several communication channels to cater to different preferences and needs.