Train and deploy a custom classification model with YOLOv8
Introduction
On this guide we will explain how to train and deploy a custom classification model with YOLOv8
Overview
We wil create a virtual environment where we will install YOLOv8, download a classification model from roboflow, train it and deploy it.
Image Classification
Image classification is the simplest task of computer vision and involves classifying an image into one of predefined classes. What we get as an output is single class label and a confidence score.
Image classification is useful when we don't need to know the location of the object in the image and we just need to know what class the image belongs to.
Materials Requirements
Hardware Setup
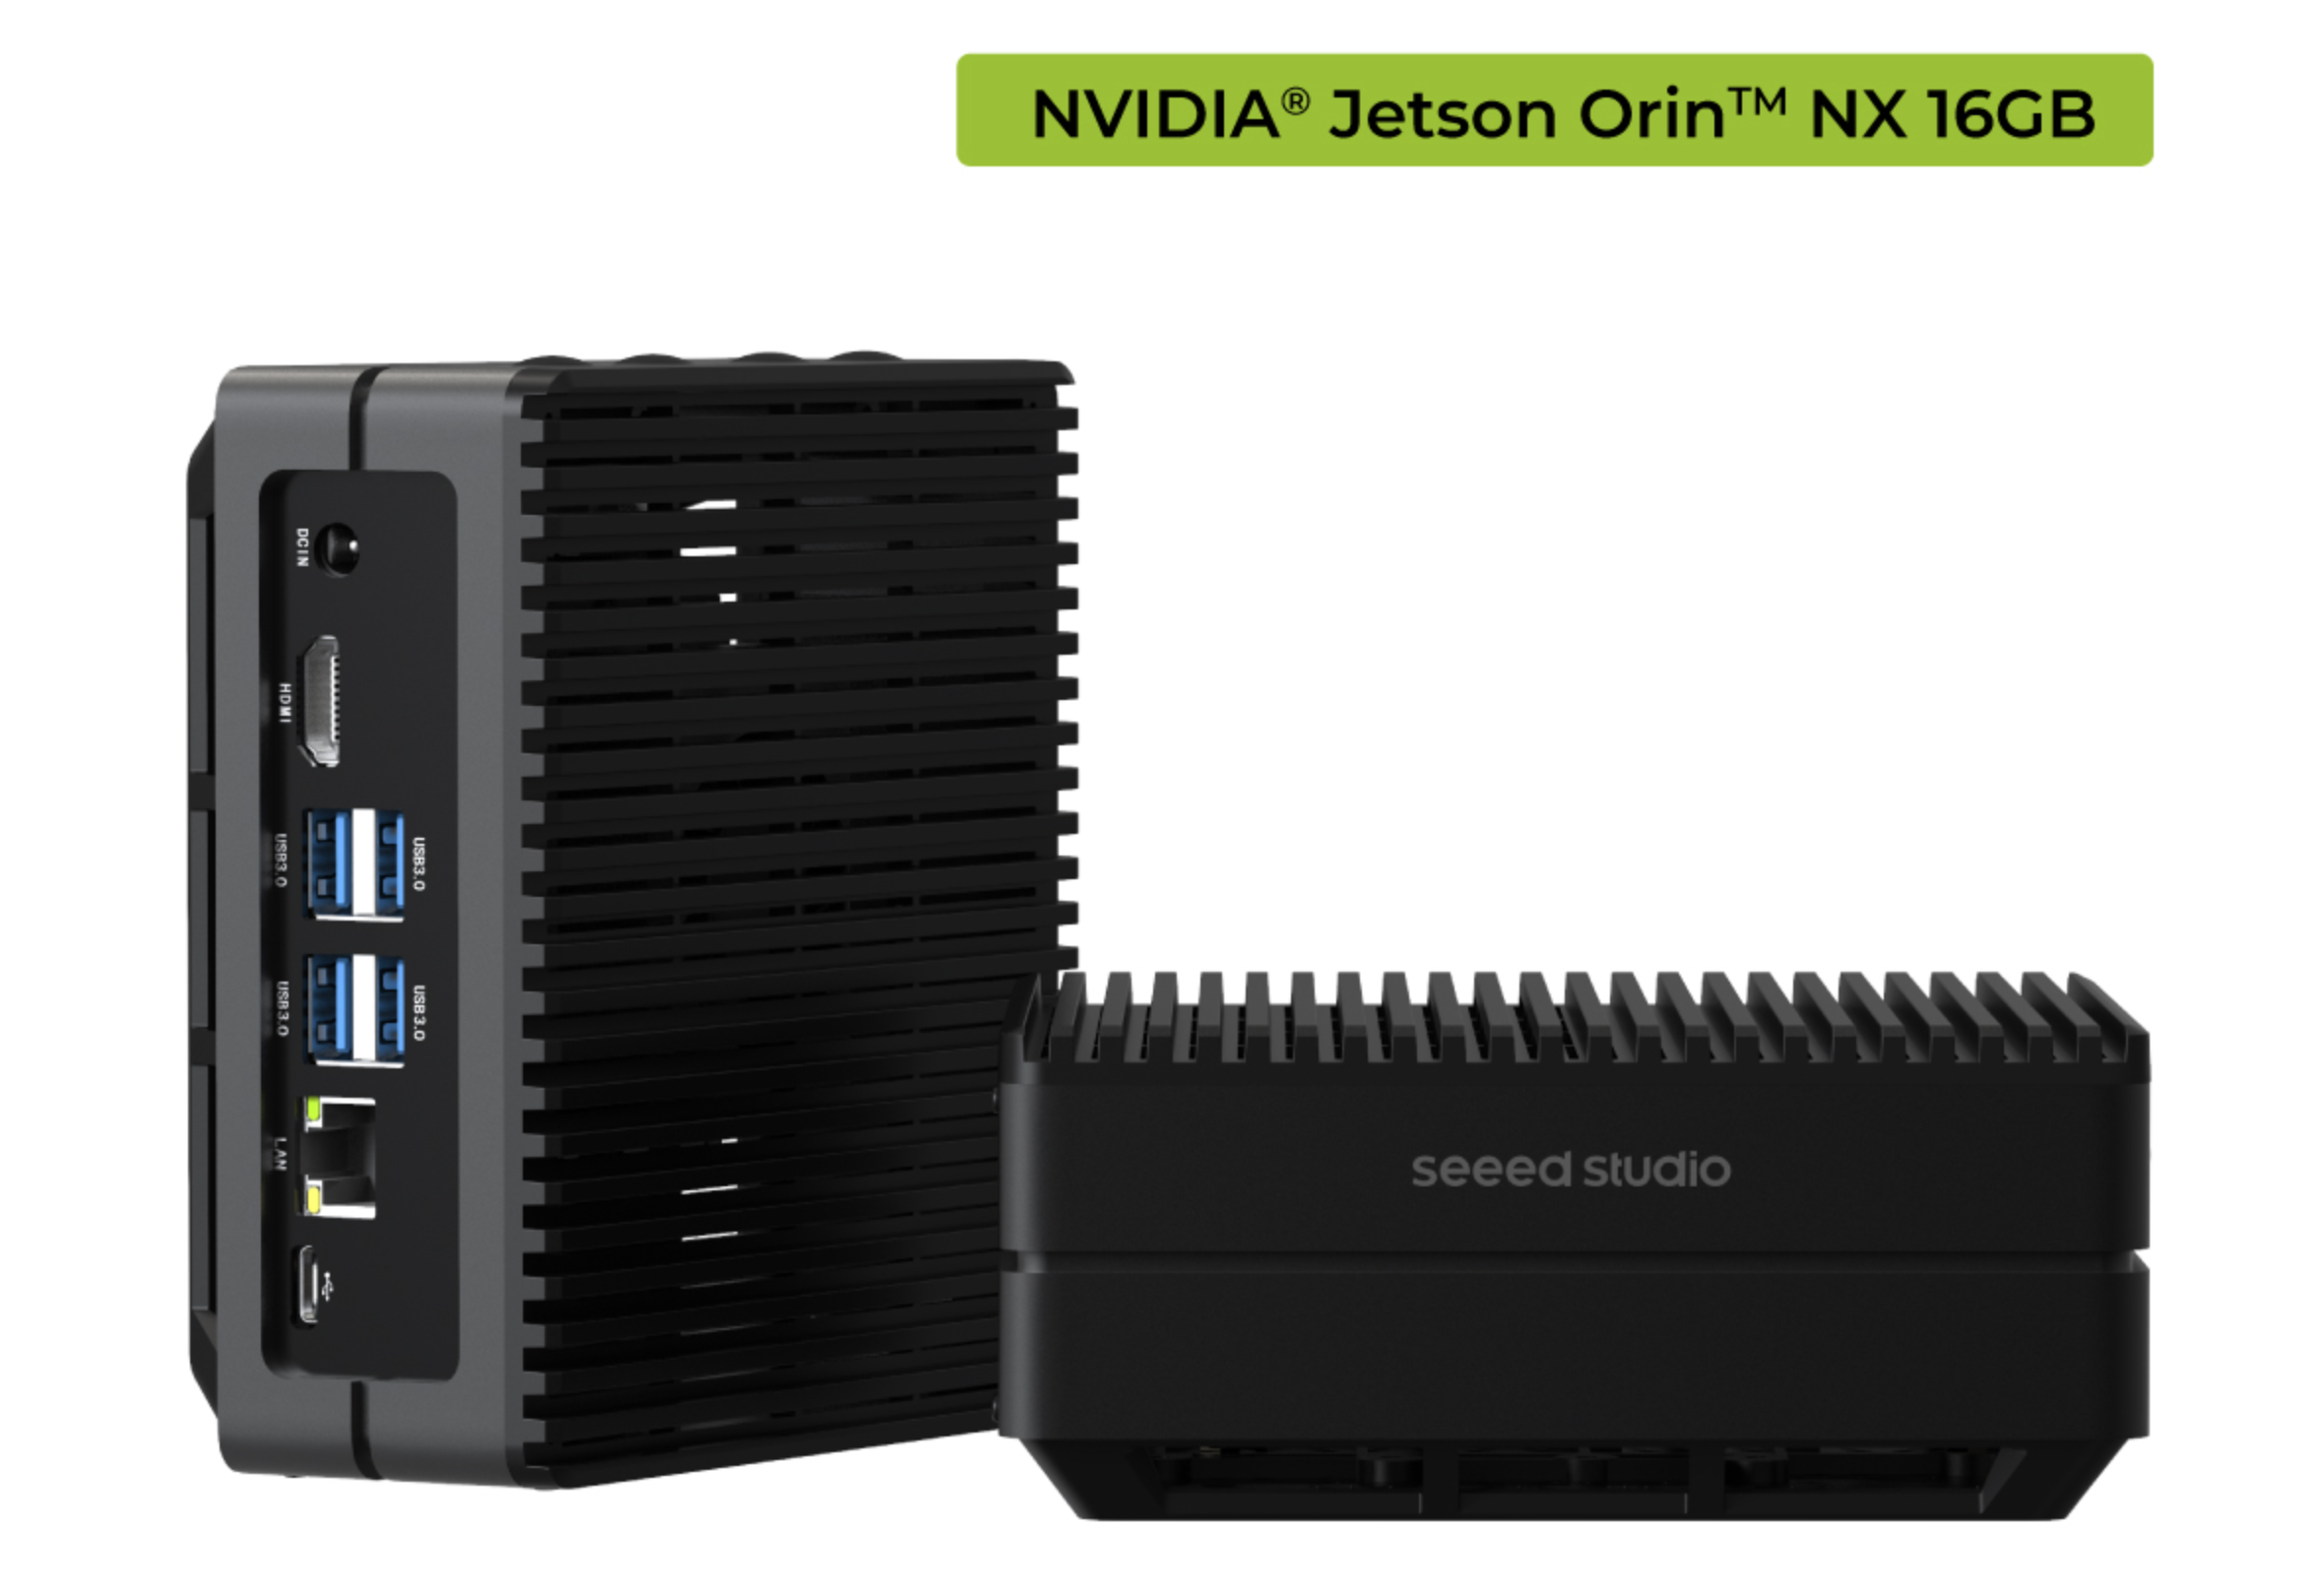
For this tutorial, we're going to need a Nvidia Jetson Orin NX 16GB.
Software Setup
- JetPack 6.0 installed in the reComputer
- a Roboflow account to download the dataset
Preparing the reComputer
The reComputer J4012 from Seeed Studio is a Jetson Orin NX 16GB. It's a powerfull machine, but the Tegra Linux comes with a lot of things and, boots to graphical mode. Let's change that.
I'm going to run the examples and programing remotly using VScode and a SSH terminal with X forwarding enable. X forwarding is an option with SSH that can run some graphical applications on our side of the connection, instead of the remote computer.
If you're going to connect to your reComputer with monitor, keyboard and mouse, skip the next step.
Change boot mode
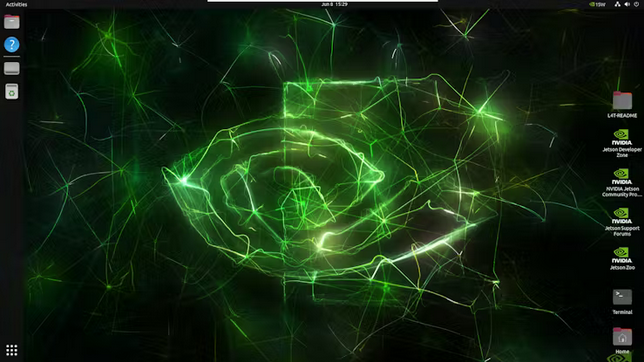
It's all good, but we aren't going to need graphics and, in idle mode, it's consuming around 1.5GB of memory.

We're going to make it boot to the command line instead.
sudo systemctl set-default multi-user
As of now, our reComputer upon boot will boot to the CLI. If you want you can reboot now or just we can go into CLI with one command.
sudo systemctl isolate multi-user
We've now passed from using 1.5GB of memory to 700MB. Every memory byte counts when using Machine Learning.
Change power mode
By default, our reComputer should be running on level 2 - 15W . When training, or even infering a ML model, if we can run at full power, it should be better.
Let's learn how to change it.
In the file /etc/nvpmodel.conf, we have the power modes available.
< POWER_MODEL ID=0 NAME=MAXN >
< POWER_MODEL ID=1 NAME=10W >
< POWER_MODEL ID=2 NAME=15W >
< POWER_MODEL ID=3 NAME=25W >
We can then use sudo nvpmodel -m <power model number> to change the power mode. And, according to this thread post, the settings are kept even after reboots.
To see what power level are we on now,
sudo nvpmodel -q

Let's select the max power mode for the training of our model
sudo nvpmodel -m 0

After a reboot, we can confirm that we're running full power

Training the model
For the model training, we're going to use YOLOv8. Bellow are the steps needed to install it with CUDA support. We're also going to need a roboflow account.
The model
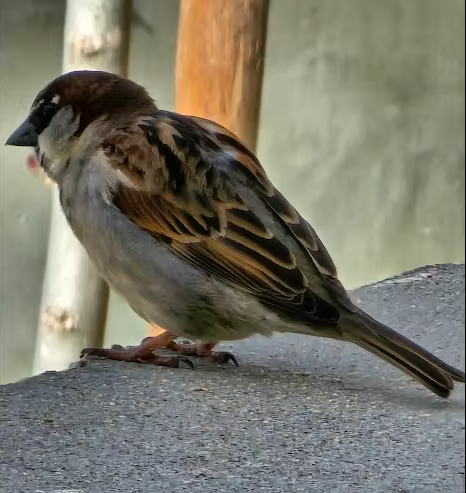
I'm going to create a model to classify birds. This is part of a project for a Smart Bird Feeder that I'm going to place at my garden and I want to know what birds are those that are feeding there.
Because this is a classification task, we don't need to know the position of the bird in the photo.
You can use another dataset of your choice, as long as it is a Classification dataset or model
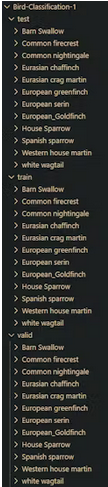
I have procured 12 classes of birds that I know live in my area and are common near me and created a classification dataset in Roboflow.
The classes of birds that I'm going to try to identify are:
- Barn Swallow
- Common Firecrest
- Common Nightingale
- Eurasian Chaffinch
- Eurasian Crag Martin
- European Goldfinch
- European Greenfinch
- European Serin
- House Sparrow
- Spanish Sparrow
- Western House Martin
- white Wagtail
Choose your dataset and download it from roboflow. Once you've selected your dataset, select "Download Dataset". - You need an account for that.

Next, select Folder Structure on the Format and select show download code.
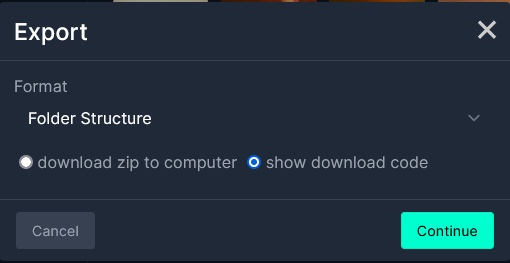
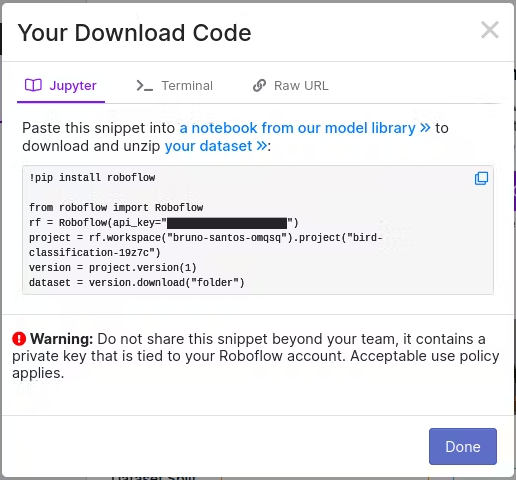
Next, select Jupyter if you're going to use a Jupyter Notebook or Terminal if your're planing on doing this in the terminal.
I've select Jupyter, to use this in a Jupyter notebook. Copy the code.
Creating the environment
We're going to create a virtual environment, install PyTorch and install YOLOv8. Per YOLOv8 documentation tip, it's better to install PyTorch first and then ultralytics.
Also, I'm installing jupyterlab packages to use with VSCode. The notebook is attached to this tutorial.
Let's install some dependencies first.
NOTE: Because we're going to use YOLOv8, we need to do some steps that normally we wouldn't need.
Just installing Torch following the NVIDIA deep learning documentation is enough to have Torch with CUDA support.
If we install PyTorch normally with PIP, it would not have CUDA support.
Dependencies
sudo apt install libopenblas-dev cuda-toolkit libcudnn8 tensorrt python3-libnvinfer nvidia-l4t-dla-compiler
Create the Python virtual environment
python -m venv birdClassificationModel
If you get an error, is because the package python3-venv is not installed. Let's install it and repeat the above command.
sudo apt install python3-venv
Activate the virtual environment
source birdClassificationModel/bin/activate
You can confirm is active because the name of it is placed before your prompt.
YOLOv8
Before, and to follow on the documentation tip, let's first install PyTorch.
I'm using JetPack 6.0 , that comes with NVIDIA Jetson Linux 36.3 and CUDA 12.2. Let's upgrade PIP first
pip install -U pip
Installing Torch to be able to use it with YOLOv8, we need to follow the steps in the NVIDIA forums.
This will be done with the virtual environment active, so that it is installed in it. Download Torch version 2.3 from NVIDIA
wget https://nvidia.box.com/shared/static/mp164asf3sceb570wvjsrezk1p4ftj8t.whl -O torch-2.3.0-cp310-cp310-linux_aarch64.whl
sudo apt-get install python3-pip libopenblas-base libopenmpi-dev libomp-dev
pip3 install 'Cython<3'
pip install numpy torch-2.3.0-cp310-cp310-linux_aarch64.whl
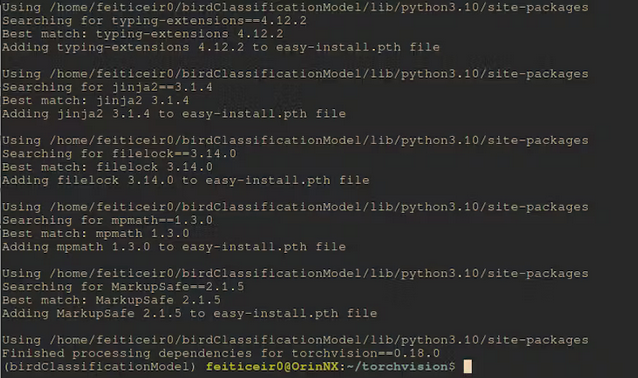
After this, let's compile torchvision. If we install it from the wheels, it will not have CUDA support.
The branch version is for the Torch version installed. You can see more details in the forum page.
Remember, you need to have the virtual environment active so this will all be installed in it.
sudo apt-get install libjpeg-dev zlib1g-dev libpython3-dev libopenblas-dev libavcodec-dev libavformat-dev libswscale-dev
git clone --branch v0.18.0 https://github.com/pytorch/vision torchvision
cd torchvision/
export BUILD_VERSION=0.18.0
python setup.py install
After a while, it will be compiled and installed.
After installing, let's see if Cuda is available.

From the command line
python -c "import torch;print (torch.cuda.is_available())"
This should return True
Install YOLOv8
Now that we have PyTorch installed with CUDA support, when we install YOLOv8, it will use the installed version instead of trying to install a new package (albeit being the same version) without the CUDA support.
pip install ultralytics
Let's install roboflow and jupyterlab
pip install roboflow jupyterlab
Now, let's download the dataset. If you're using the notebook, just replace the code there.
rf = Roboflow(api_key="<your_api_key>")
project = rf.workspace("bruno-santos-omqsq").project("bird-classification-19z7c")
version = project.version(1)
dataset = version.download("folder")
After downloading the model, we now have a set of three directories (test, train, valid), each one with a certain number of images from each class. Each image from each class is in its own directory. Because this is for image classification, we don't need to label the images. YOLOv8 will know the classes, not only from the configuration file we'll create later, but also from the directories.
Train
Usually a dataset has the images and the labels (or annotations) with the object coordinates. Since this is a classification task, we don't need any of that. Just that the images be in each directory that's the name of the class.
Preparing the config file
We still need a config file for YOLOv8 to recognize the classses.
This file should be placed inside the dataset directory, with .yaml extension. The name is not important.
cd <dataset_directory>
vi birdClassificationModel.yaml
Insert the following text in the file
train: train/
valid: valid/
test: test/

# number of classes
nc: 12

# class names

names: ["Barn Swallow","Common Firecrest","Common Nightingale","Eurasian Chaffinch","Eurasian Crag Martin","European Goldfinch","European Greenfinch","European Serin","House Sparrow","Spanish Sparrow","Western House Martin","white Wagtail"]
For the classification, we're going to use one of pre-trained models already available from Ultralytics.
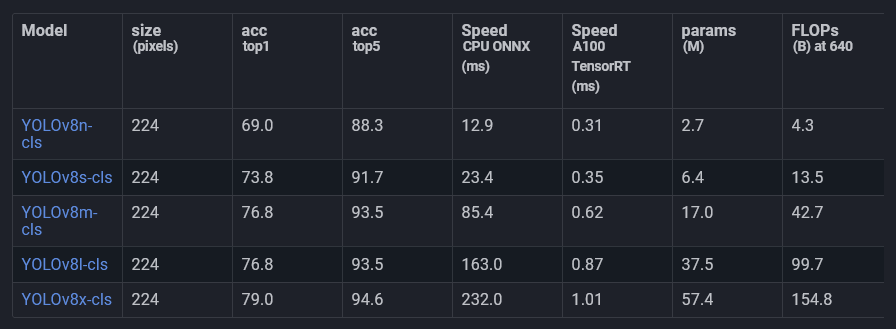
This models have been trained on ImageNet and are fine tuned for classification. We're going to use it and train it on our data.
This is what's know as transfer learning.
I'm going to use the model YOLOv8l-cls. Probably others will work fine too, but because we don't need real time, its a trade off on speed and accuracy.
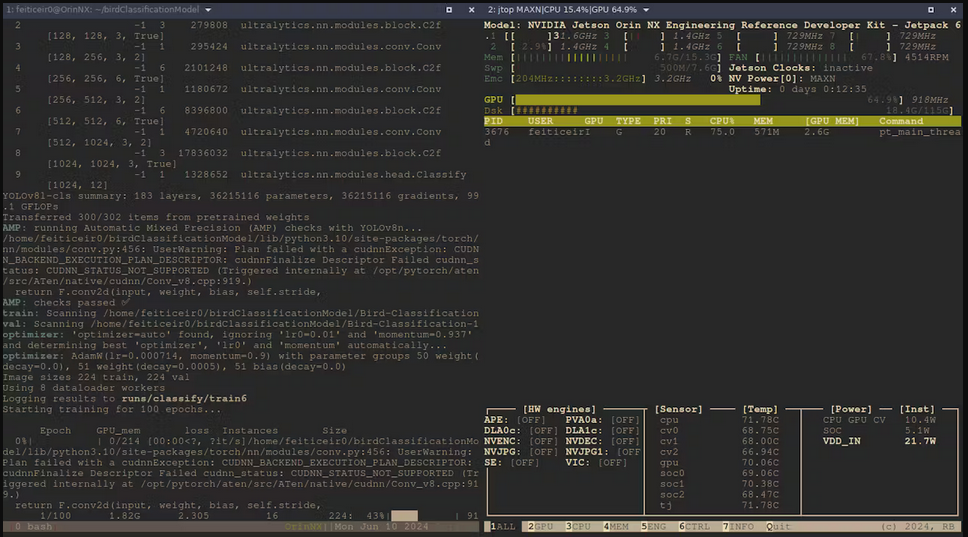
Let's then train the model, using YOLOv8 CLI interface
yolo task=classify mode=train model=yolov8l-cls.pt data=Bird-Classification-1 epochs=100
- task=classify : We're going to classify images
- mode=train : We're training the model
- model=yolov8l-cls.pt : We're using a pre-trained model on classification
- data=Bird-Classification-1 : the directory where our dataset is located
- epochs=100 : for how long we're training the model.
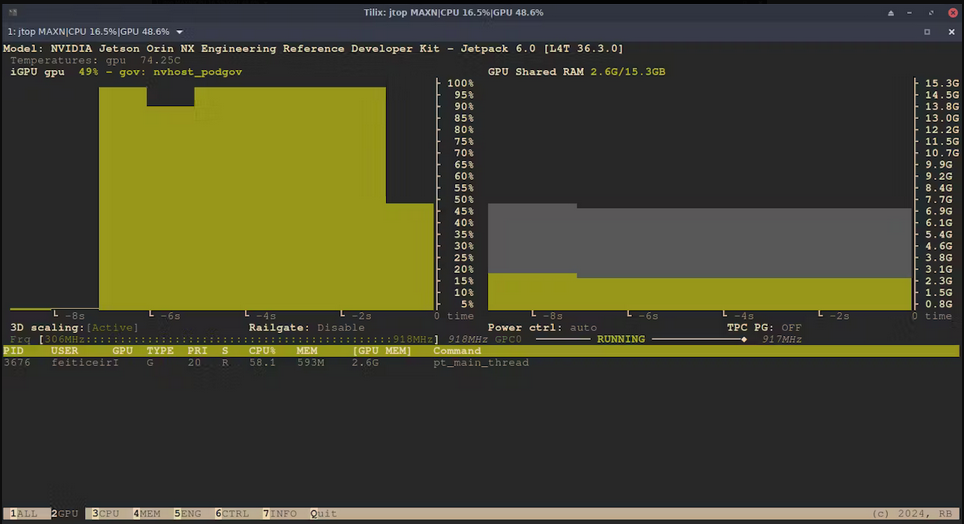
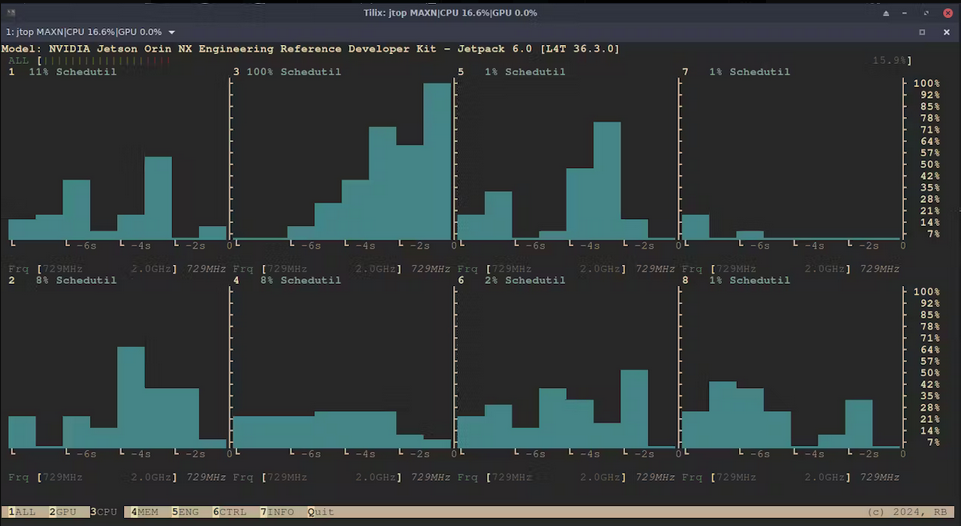
Now that's it's running, here's some statistics using jtop (tegra-stats)
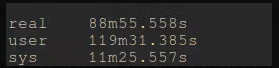
After a couple of hours, the training is complete.
Now, let's see how the model behaves. Let's test it.
yolo task=classify mode=predict model='./runs/classify/train6/weights/best.pt' source=Bird-Classification-1/test/**/*.jpg
This will make yolo to go into the test directories and try to predict each
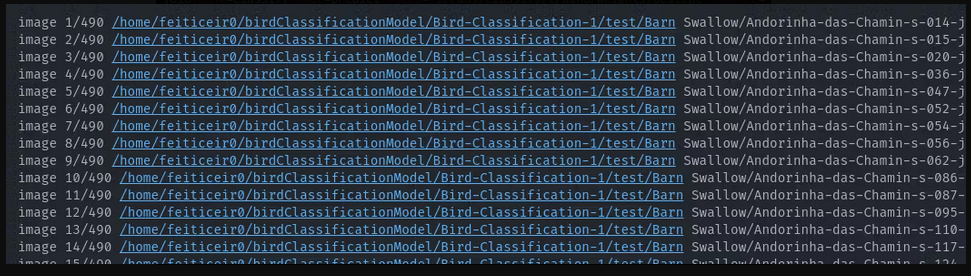
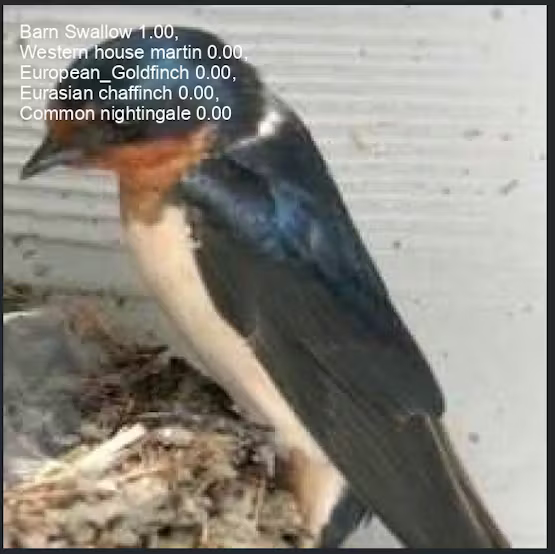
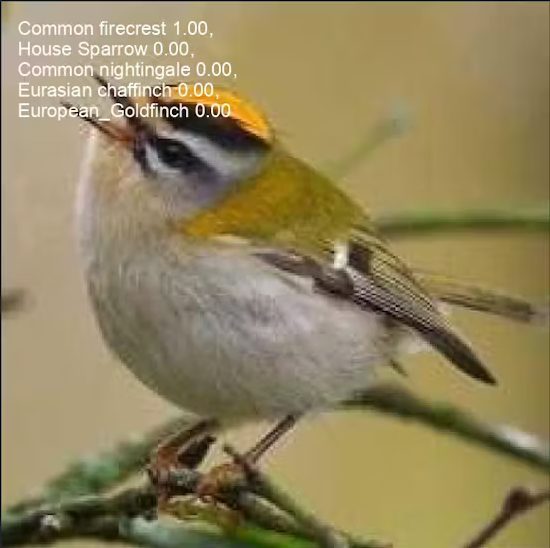
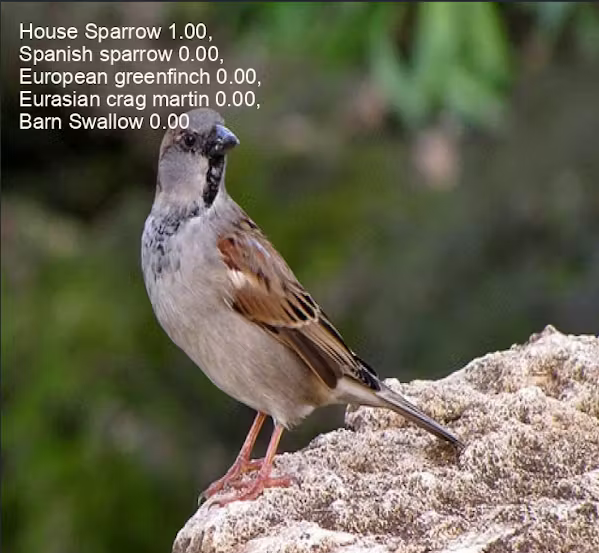
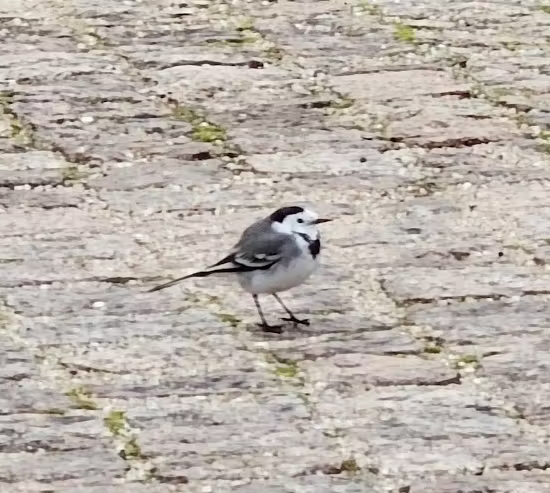
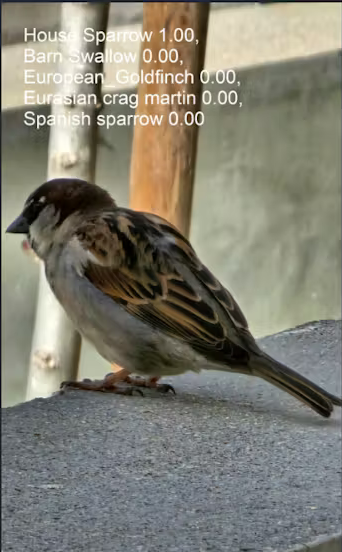
The results are all correct. Let's try with two images that it has never seen.
yolo task=classify mode=predict model='./runs/classify/train6/weights/best.pt' source=house_sparrow.jpg
yolo task=classify mode=predict model='./runs/classify/train6/weights/best.pt' source=white_wagtail.jpg
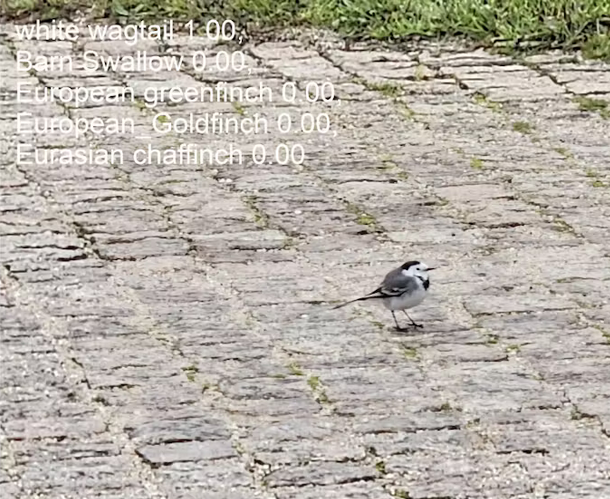
I'm going to say that these results are great
Exporting the model
We can use the model as it is for the inference, we just need to open it and use it. For faster inference times we can export it to TensorRT, since we're on a NVIDIA Jetson Orin NX, or even ONNX, for example.
Is not that we need faster inference times for this project - I'm not going to use this on real time video - but it's nice we can take advantage of the platform we're on.
Unfortunately, due to the virtual environment I was unable to export it to TensorRT. For some reason, I couldn't import tensorrt in Python, but outside the virtual environment, I had no problem with tensorrt libraries.
ONNX
We can export the model to ONNX format like this
yolo export model='./runs/classify/train6/weights/best.pt' format=onnx imgsz=640
We get a best.onnx that we can use to run inference with.
To run inference using ONNX, we need to install the onnxruntime_gpu wheel.
To install onnxruntime-gpu with JetPack 6.0, we need to download it from the Jetson Zoo.
We're going to download onnxruntime_gpu 1.18.0
Download the pip wheel for our Python version (Python-3.10)
wget https://nvidia.box.com/shared/static/48dtuob7meiw6ebgfsfqakc9vse62sg4.whl -O onnxruntime_gpu-1.18.0-cp310-cp310-linux_aarch64.whl
and then, install it
pip install onnxruntime_gpu-1.18.0-cp310-cp310-linux_aarch64.whl
Inference
photo
I've used the following code to run inference with the best.pt model and see the results
# running inference
from ultralytics import YOLO
# load the  model
bird_model = YOLO("./runs/classify/train6/weights/best.pt")
#run inference
results = bird_model("house_sparrow.jpg")[0]
# get class names
class_names = results.names
# get top class with more probability
top1 = results.probs.top1
# print the class name with the highest probability
print (f" The detected bird is: {class_names[top1]}")
That the code above does is load the model, run inference in an image and save the results to the results variable.
Because results is ultralytics.engine.results.Results object of type list with one item, which is an instance of Results. The [0] in the results variable to hold the inference result will allow us to get to the results that we want.
results = bird_model("house_sparrow.jpg")[0]
Next, we use the results to get the class names. Not that we don't know them, but like this will allow this code to work in other models too.
class_names = results.names
One of the results is a top1 variable that holds the TOP 1 class with more probabilities. That TOP1 is given by the probs list.
top1 = results.probs.top1
Next, we print the highest probability class that should be the bird species.
print (f" The detected bird is: {class_names[top1]}")
The detected bird is: House Sparrow
Camera
Now, let's use a camera to run inference.
Jetson can use a USB camera or a RPI camera. I'm going to connect a USB camera.
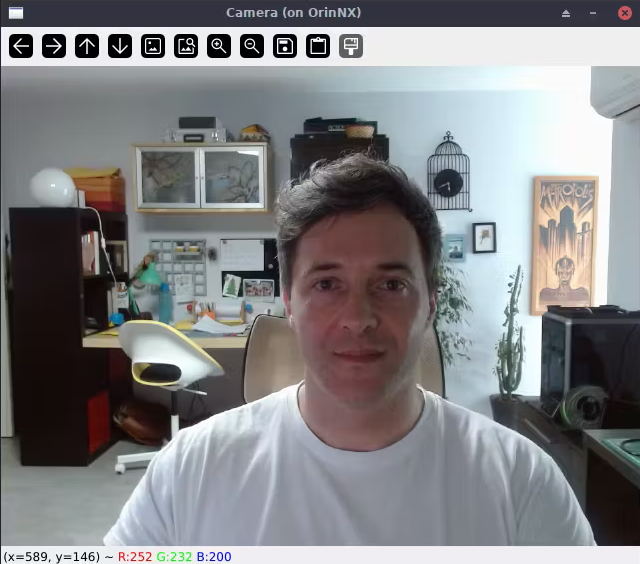
The following code will check if can display a camera feed.
#Lets test if we can use a USB camera
import cv2
cap = cv2.VideoCapture(0)
while True:
    ret, img = cap.read()
    cv2.imshow('Camera', img)
    if cv2.waitKey(1) & 0xFF == ord('q'):
        break
cap.release()
cv2.destroyAllWindows
This is me, on my desktop computer. Just use ssh -X username@jetson_ip and the X11 window will be forwarded to your desktop. This works because I'm using Linux too. I think that WSL could also work.
Now, let's try to run inference on a video feed, displaying the class with the higher probability
Here's the code
# again, save this code in a file a run it from the Jetson

import cv2
from ultralytics import YOLO
import time
#define confidence level
#only equal or above this level we say it's a class of bird
confidence = 0.95
# time when processed last frame
prev_frame = 0
# time processed current frame
cur_time = 0
# load the  model
bird_model = YOLO("./runs/classify/train6/weights/best.pt")
# cv2 font
font = cv2.FONT_HERSHEY_SIMPLEX
# open camera
cap = cv2.VideoCapture(0)
while True:
    ret, img = cap.read()
    # to display fps
    cur_frame = time.time()
    fps = 1 / (cur_frame - prev_frame)
    prev_frame = cur_frame
    fps = int(fps)
    fps = str(fps)
    cv2.putText (img, fps, (550,50), font, 1, (124,10,120), 2, cv2.LINE_AA)

    # inference current frame
    results = bird_model(img, verbose=False)[0]
    # get class names
    class_names = results.names
    # get top class with more probability
    top1 = results.probs.top1
    top1conf = results.probs.top1conf.tolist()
    # we will only show the class name if the confidence is higher than defined level
    # print the class name with the highest probability
    if (top1conf >= confidence):
        bird_class = class_names[top1]
        print (f" The detected bird is: {class_names[top1]}")
        # color is in BGR
        confid = round(top1conf,2)
        img = cv2.putText(img, bird_class, (50,50), font, 0.9, (0, 0, 255), 2, cv2.LINE_AA)
        img = cv2.putText(img, "Conf: " + str(confid), (50,80), font, 0.6, (255, 0, 255), 1, cv2.LINE_AA)
        cv2.imshow('Camera', img)
    else:
        img = cv2.imshow('Camera', img)
    if cv2.waitKey(1) & 0xFF == ord('q'):
        break
cap.release()
cv2.destroyAllWindows
Here's a video showing the inference on a video feed
✨ Contributor Project
- This project is supported by the Seeed Studio Contributor Project.
- Thanks Bruno's efforts and your work will be exhibited.
Tech Support & Product Discussion
Thank you for choosing our products! We are here to provide you with different support to ensure that your experience with our products is as smooth as possible. We offer several communication channels to cater to different preferences and needs.