Firmata Tutorial: How to Use Firmata on Arduino Compatible Boards
What is Firmata
Firmata is an intermediate protocol that connects an embedded system to a host computer, and the protocol channel uses a serial port by default. The Arduino platform is the standard reference implementation for Firmata. The Arduino IDE comes with the support for Firmata.
This could work perfectly with Odyssey-X86 with its onboard Arduino Core meaning that you can control the Arduino Core simply using Firmata protocol with different programming languages too! In this tutorial, it's based on Windows OS.
Reference: Firmata Protocols
Burning the Firmata Firmware via Arduino IDE
The Arduino IDE >= 1.6.X version comes with the Firmata firmware so we can use Arduino IDE to burn the firmata firmware into Arduino core.
You can download Arduino IDE from here.
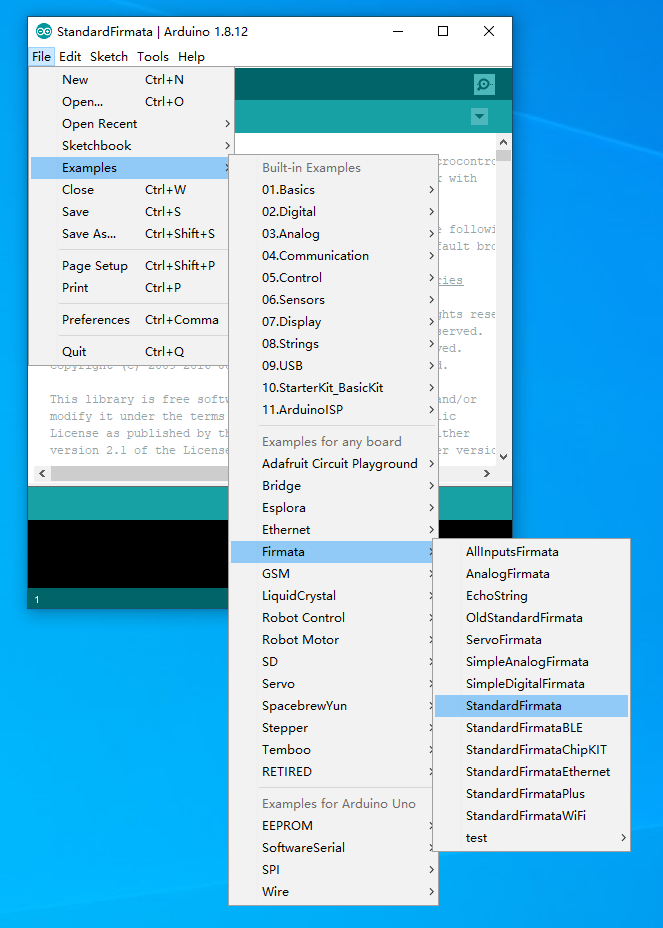
- Open Arduino IDE and navigate to
Examples->Firmata->StandardFirmata:
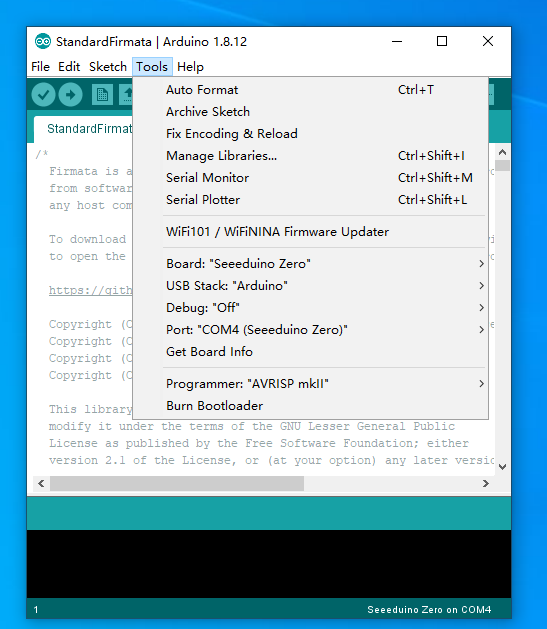
- The
StandardFirmata.inowill appear. Select the correct board and port and click Upload:
If you haven't installed the board library for Odyssey please follow this to install the board.
- Once uploaded, it should look something like this:
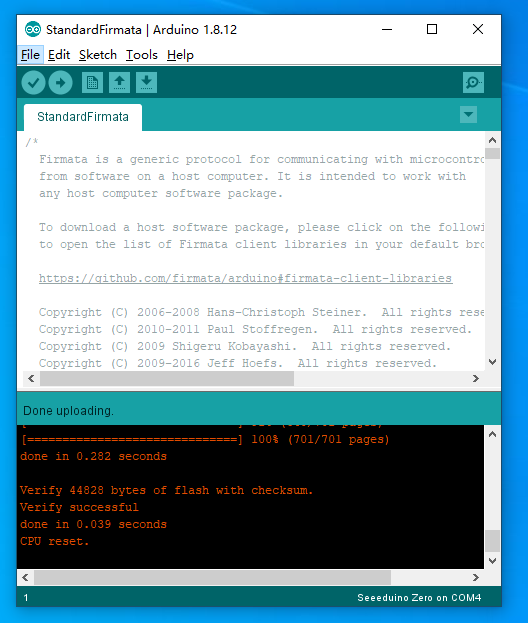
Now, the Arduino Firmata firmware is flashed into the Arduino core on Odyssey-X86!
Testing the Firmata Firmware
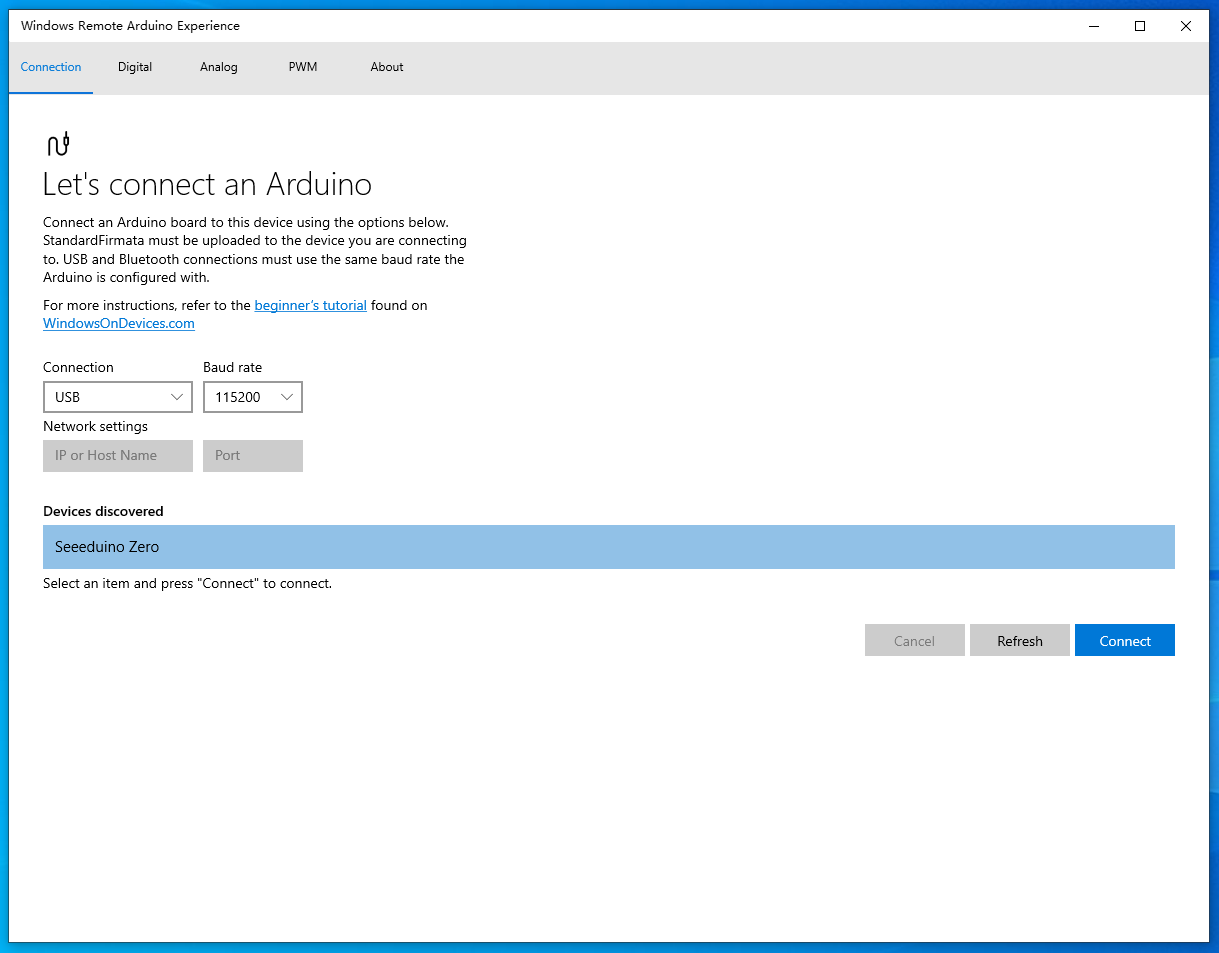
To test the Firmata firmware, you can navigate to the Microsoft Store, search and download the Windows Remote Arduino Experience. Once downloaded, you can connect to the Arduino Core by selecting the USB connection, board and baudrate:
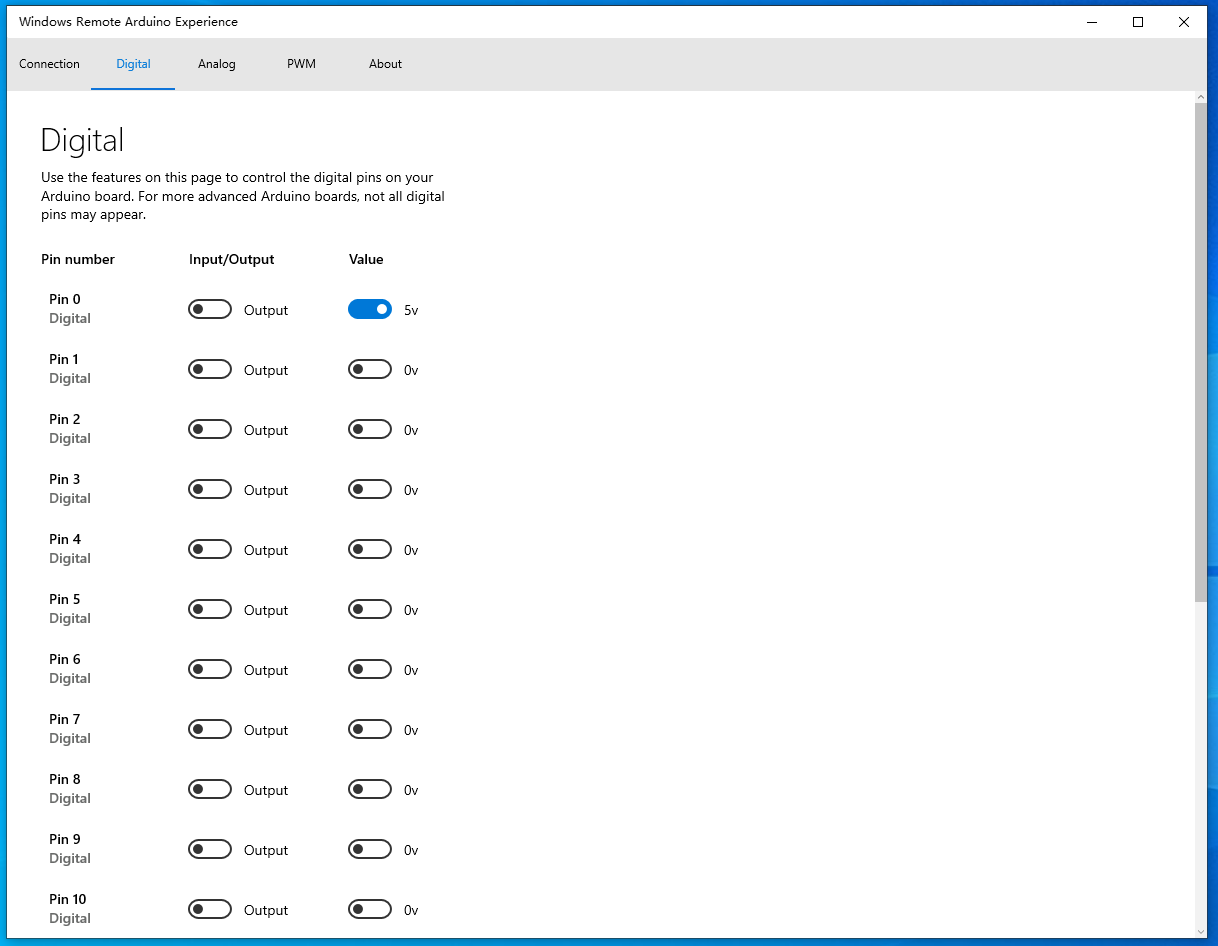
Once connected, you can connect LED to the corresponded pins to test the firmware:
Using Python to Interpret Firmata
There are libraries that implement the Firmata protocol in order to communicate (from a computer, smartphone or tablet for example) with Firmata firmware running on a microcontroller platform.
pyFirmata is a Python interface for the Firmata protocol and runs on python3.
pyFirmata Installation
Python3 is required for this.
Install with pip:
pip install pyfirmata
To Blink an LED connected on D13
Note: Change the COM4 to your Arduino USB COM.
For a simple LED module, you can use the Grove - LED module to test!
#!/usr/bin/env python3
from pyfirmata import Arduino, util
from time import sleep
board = Arduino('COM4') # Change to your port
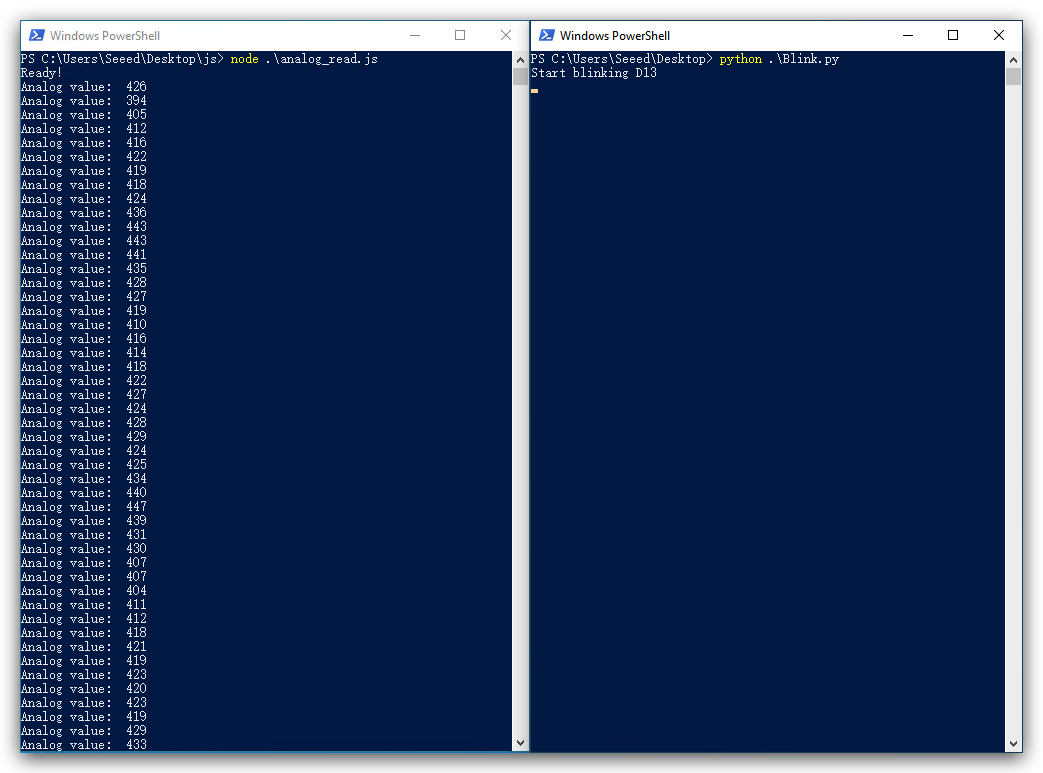
print("Start blinking D13")
while True:
board.digital[13].write(1)
sleep(1)
board.digital[13].write(0)
sleep(1)
To read Analog Signals on A0
#!/usr/bin/env python3
from pyfirmata import Arduino,util
import time
import sys

board = Arduino('COM4') # Change to your port
it = util.Iterator(board)
it.start()
board.analog[0].enable_reporting()
print ("Read Start")
for i in range(10):
    time.sleep(1)
    print(board.analog[0].read())

board.analog[0].disable_reporting()
PWM Outputs on D6
Output a PWM signal to a LED connected at D6.
#!/usr/bin/env python3
from pyfirmata import Arduino, util
from time import sleep

board = Arduino('COM4') # Change to your port
lenPin = board.get_pin('d:6:p') # PWM Pin
print("Starting to output PWM signal")
while True:
    for i in range(0, 101, 4):
        lenPin.write(i/100)
        sleep(0.05)
    sleep(1)
    for i in range(100, -1, -4):
        lenPin.write(i/100)
        sleep(0.05)
    sleep(1)
Now you can use python script (or even other languages) to control your Arduino core on Odyssey-X86, which makes it very useful in some situations where real time requirements are less important (i.e Using python to build a Web Sever, and using Arduino to control a relay).
Note: For more API reference, please visit pyFirmata API.
For more advanced python usage of Firmata, you can consider using pymata4.
Using JavaScript to Interpret Firmata
Just like using Python to control Arduino Core via the Firmata protocol, you can also choose other languages that you are familiar with to program, such as JavaScript! This is implemented by the official Firmata team and you can find out more information at firmata.js.
Getting Started with firmata.js
Make sure that node.js is installed on the PC.
- Create a new project:
mkdir js && cd js
npm init -y
npm install --save firmata # Installing firmata.js
To blink an LED connected on D13
const Board = require("firmata");
const pin = 13;

//Initialize
Board.requestPort((error, port) => {
  if (error) {
    console.log(error);
    return;
  }

  const board = new Board(port.path);
  //Waiting to connect
  board.on("ready", () => {
    console.log("Ready!");
    let state = 1;
    //Setting pins to output
    board.pinMode(pin, board.MODES.OUTPUT);
    setInterval(() => {
      console.log("State Change");
      board.digitalWrite(pin, (state ^= 1));
    }, 500);
  });
});
To read Analog Signals on A0
To test the analog signals, you can simply use the Grove - Rotary Angle Sensor!
const Board = require('firmata');
const Pin = 0;

// Initialize
Board.requestPort(function(error, port) {
    if (error) {
        console.log(error);
        return;
    }
    var board = new Board(port.path);
    // Waiting to connect
    board.on("ready", function() {
        console.log("Ready!");
        // Reading Analog values
        board.analogRead(Pin, function(value) {
            console.log("Analog value: ", value);
        });
    });
});
PWM Outputs on D6
var Board = require('firmata');
const LED = 6;

var brightness = 0;
var fadeAmount = 5;

// Initialize
Board.requestPort(function(error, port) {
    if (error) {
        console.log(error);
        return;
    }
    const board = new Board(port.path);
    // Waiting to connect
    board.on("ready", function() {
        console.log("Ready!");
        // Setting pin to PWM mode
        board.pinMode(LED, board.MODES.PWM);

        // PWM signals for LED
        function fadeLed() {
            brightness += fadeAmount;
            if (brightness == 0 || brightness == 255) {
                fadeAmount = -fadeAmount;
            }
            board.analogWrite(LED, brightness);
            setTimeout(fadeLed, 30);
        }
        console.log("Breathing");
        fadeLed();
    });
});
I2C Signals
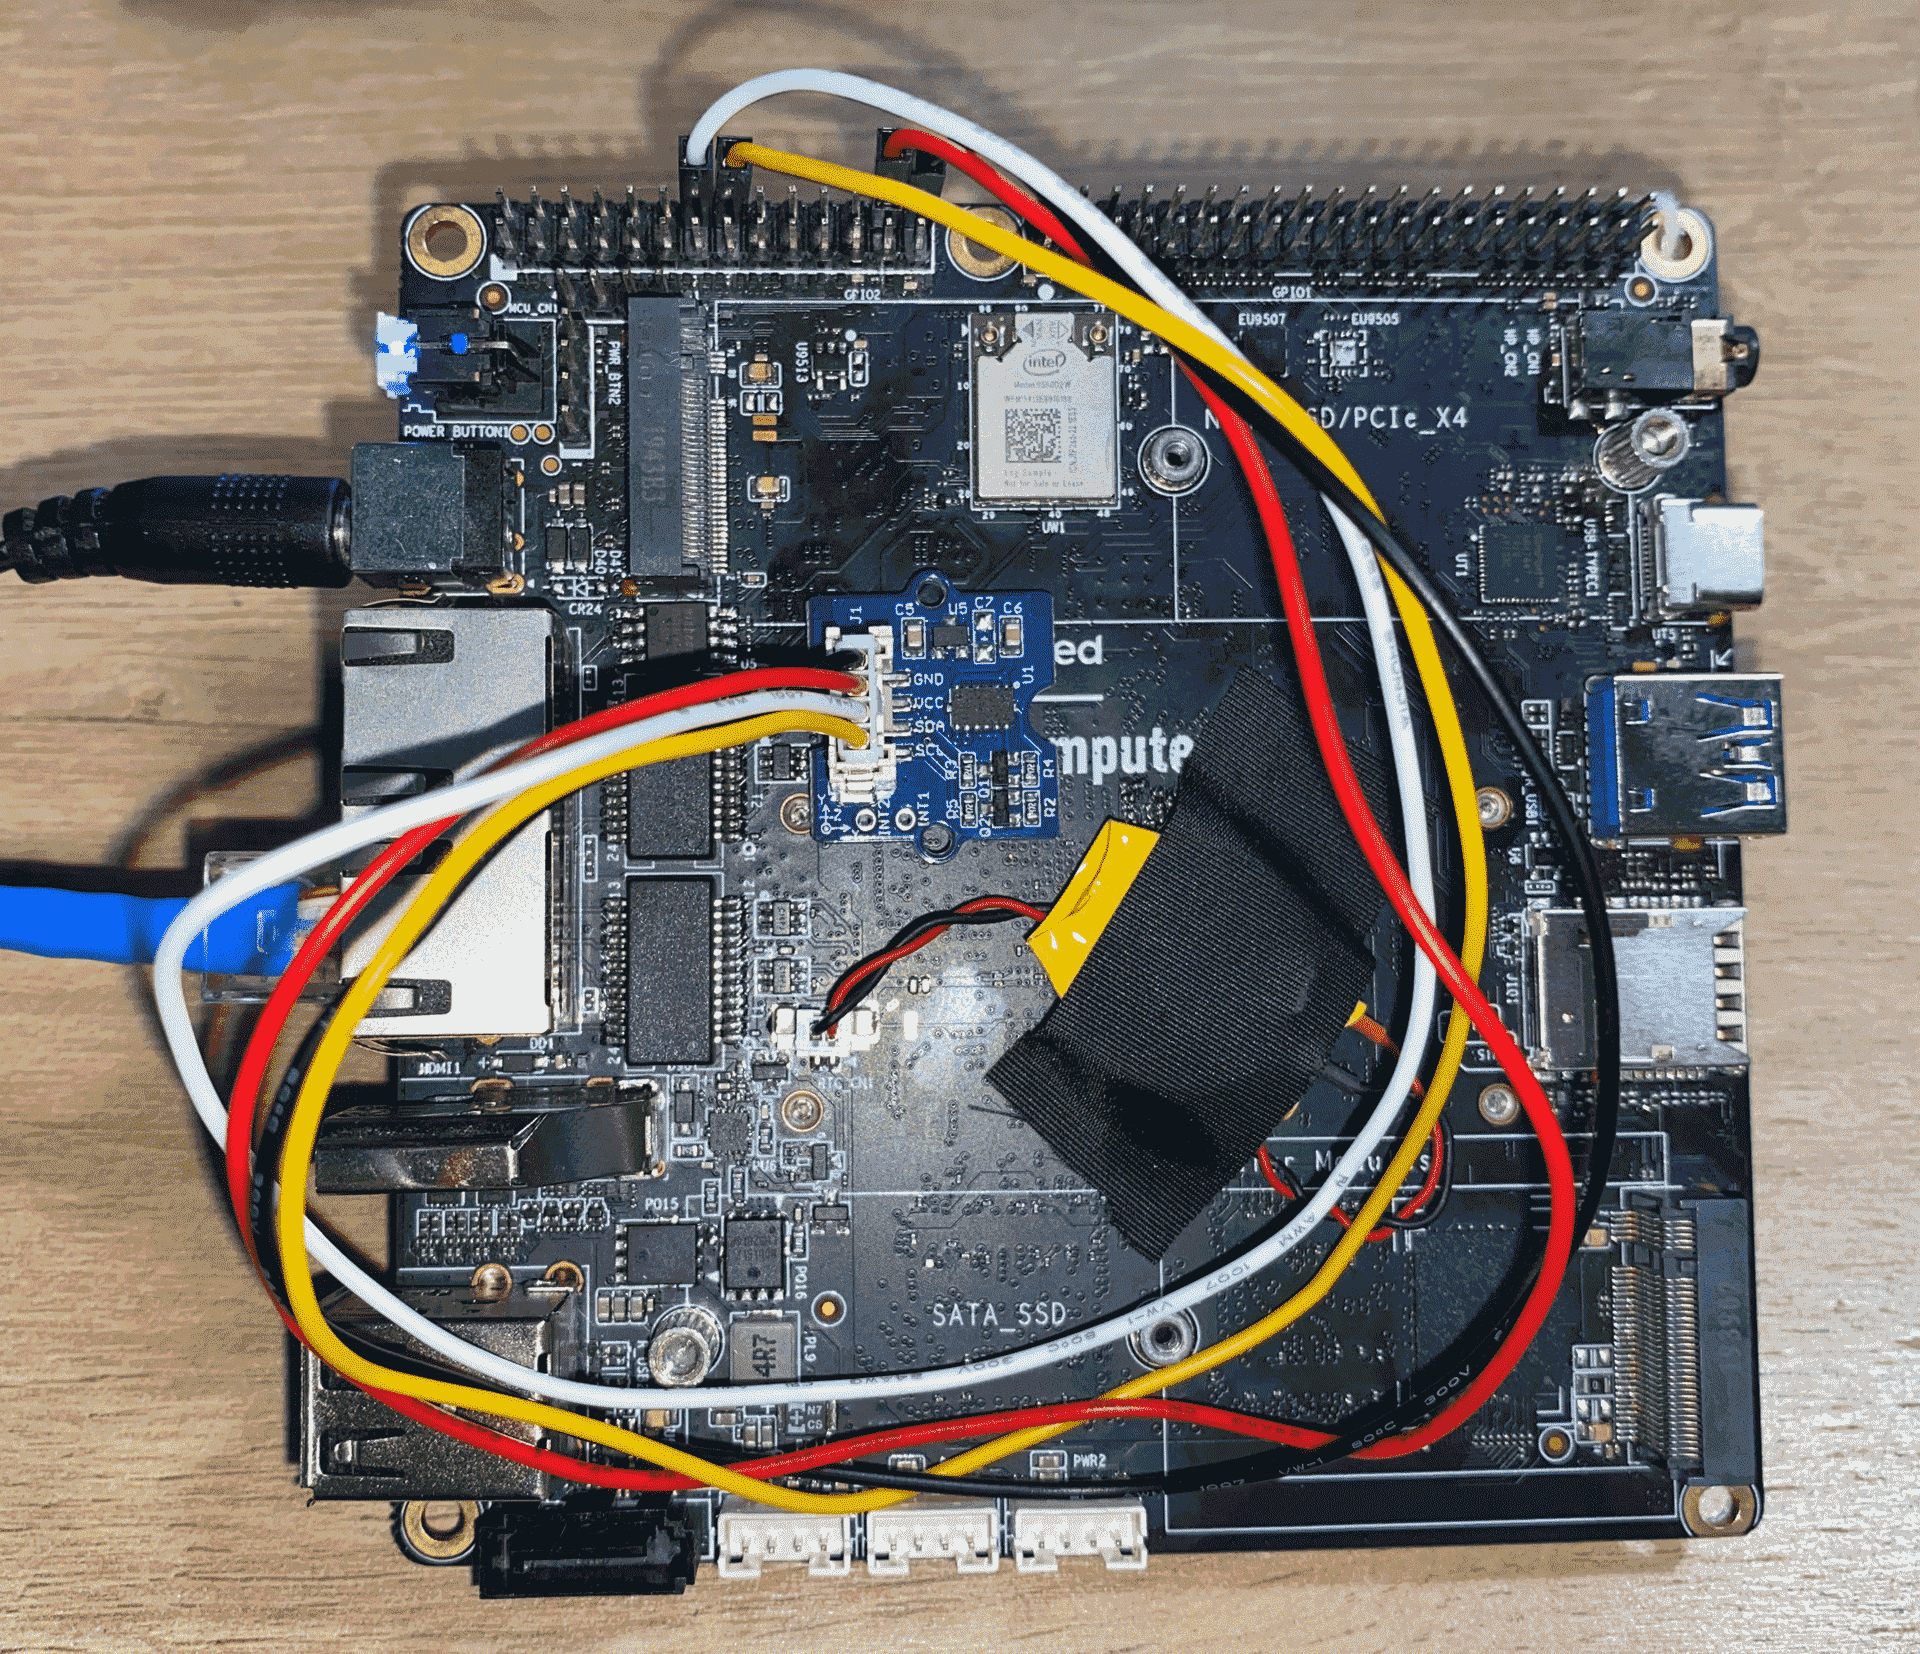
firmata.js also support I2C and UART communications, here provides an example using with Grove - 3-Axis Digital Accelerometer(ADXL345)(±16g):
- Hardware Connection:
const Board = require("firmata");

Board.requestPort((error, port) => {
  if (error) {
    console.log(error);
    return;
  }

  const register = {
    POWER: 0x2D,
    RANGE: 0x31,
    READ: 0xB2,
  };

  const board = new Board(port.path);

  board.on("ready", function() {
    console.log("Ready");

    const adxl345 = 0x53;
    const sensitivity = 0.00390625;

    // Enable I2C
    this.i2cConfig();

    // Toggle power to reset
    this.i2cWrite(adxl345, register.POWER, 0);
    this.i2cWrite(adxl345, register.POWER, 8);

    // Set range (this is 2G range)
    this.i2cWrite(adxl345, register.RANGE, 8);

    // Set register to READ position and request 6 bytes
    this.i2cRead(adxl345, register.READ, 6, data => {
      const x = (data[1] << 8) | data[0];
      const y = (data[3] << 8) | data[2];
      const z = (data[5] << 8) | data[4];

      // Wrap and clamp 16 bits;
      const X = (x >> 15 ? ((x ^ 0xFFFF) + 1) * -1 : x) * sensitivity;
      const Y = (y >> 15 ? ((y ^ 0xFFFF) + 1) * -1 : y) * sensitivity;
      const Z = (z >> 15 ? ((z ^ 0xFFFF) + 1) * -1 : z) * sensitivity;

      console.log("X: ", X);
      console.log("Y: ", Y);
      console.log("Z: ", Z);
    });
  });
});
Note: For more API reference, please visit firmata.js and check the examples.