Wio Lite W600
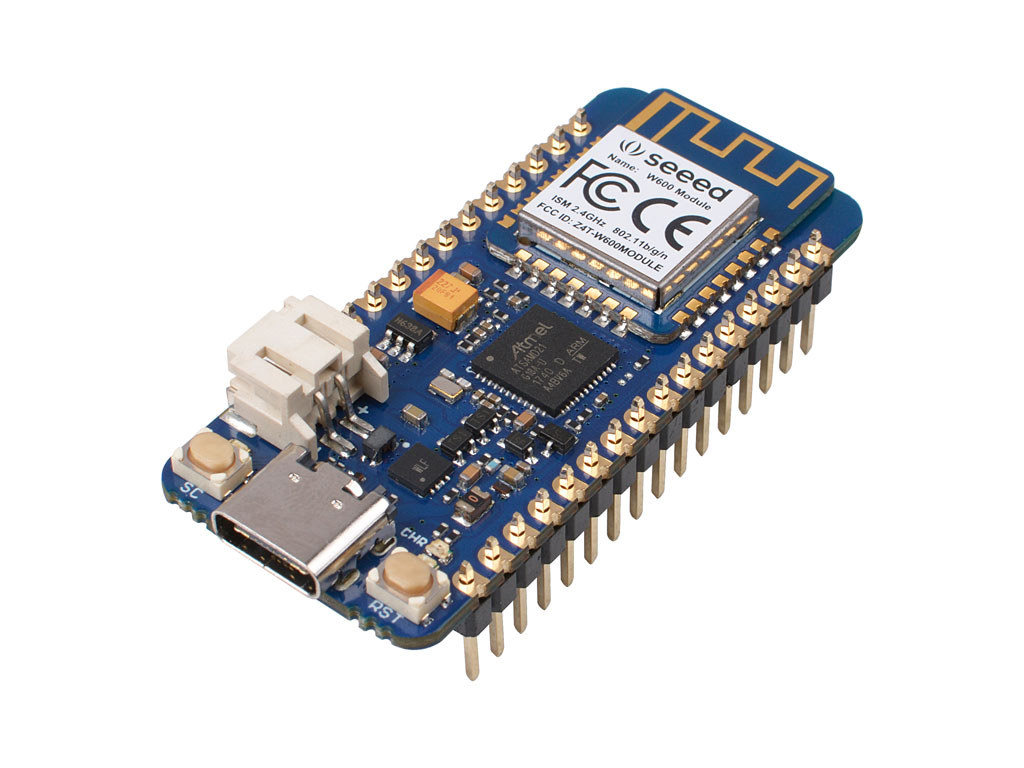
Wio Lite W600 is a cost-effective Arduino compatible board with the W600 WiFi module. The Wio Lite W600 features Atmel® | SMART™ SAM D21 ARM Cortex-M0+ based microcontroller and the W600 WiFi core is a 2.4GHz WiFi module features ARM Cortex-M3. Since the Wio Lite W600 uses SAM D21(the same chip used in Arduino Zero) as its Arduino Core, in theory, it is fully compatible with Arduino zero.
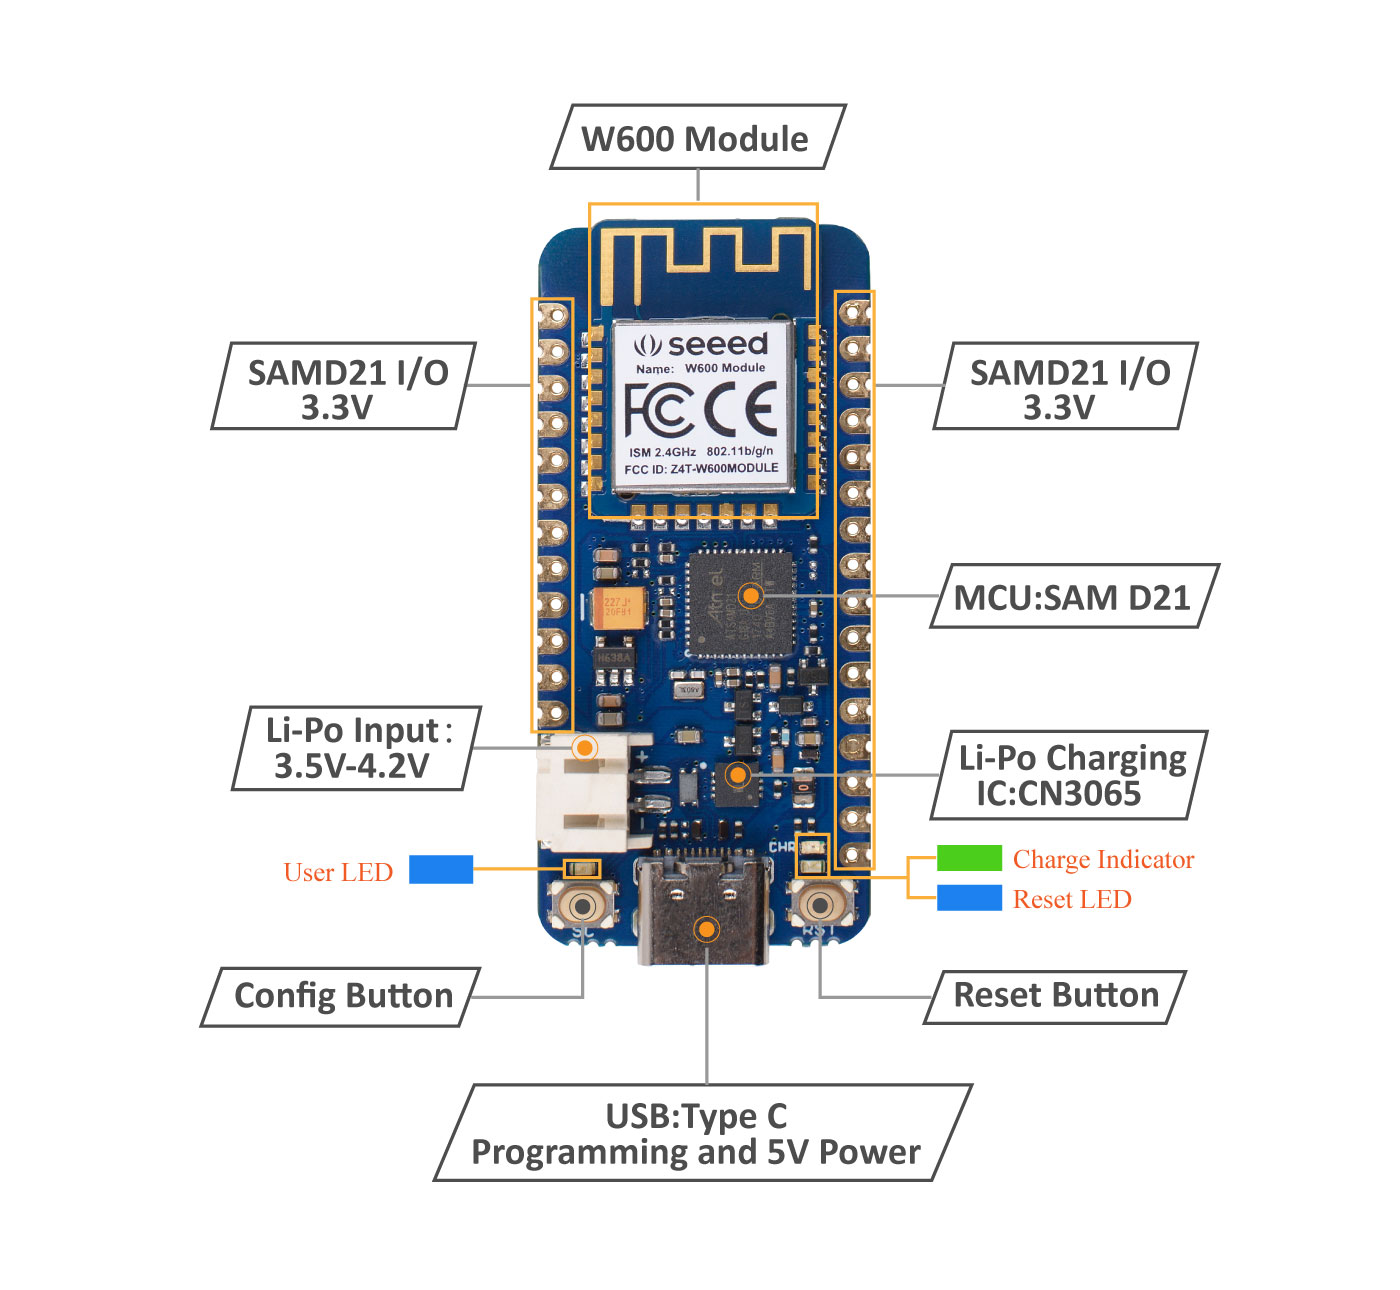
It broken out the SAM D21 pins, the I/O level of this board is 3.3V. There are 6 analog pins and 14 digital pins, and also one UART, one I2C, one ICSP port is available. You can power this board with 5V USB Type C and 3.5V~4.2V Lipo battery.
As for the WiFi core, it's our old friend - W600 Module. We've already released the W600 Module and Grove - W600, Wio Lite W600 is a new member of the W600 family. W600 Module features ARM Cortex-M3 with 1MB on-chip flash and freeRTOS kernel. It is CE/FCC certificated and supports 802.11 b/g/n.
On top of that, we've released the Grove Shield for Wio Lite at the same time. With this shield, we bring over 200 Grove sensors, actuators and displays to Wio Lite series and the Feather community.

Goodbye, complex wiring with the breadboard and annoying welding with the soldering iron.
Hello, Grove!

Feature
- Arduino Zero Compatible/ Adafruit Feather Compatible
- 2.4GHz onboard WiFi module supports 802.11 b/g/n
- Support 200+ Grove modules
- Cost-effective
Specification
| Item | Value |
|---|---|
| Microcontroller | SAM D21 |
| Maximum CPU frequency | 48 MHz |
| SRAM | 32 KB |
| Flash Memory | 256 KB |
| Power Input | USB Type C 5V Lipo Battery 3.5 V ~ 4.2 V |
| Digital I/O Pins | 14 |
| Analog Input Channels | 6 |
| DC Current per I/O Pin | 40 mA |
| IO Input Voltage | 3.3 V |
| WiFi Core | W600 |
| CPU | 32bit Embedded Cortex-M3 |
| RAM | 288 KB |
| Flash | 1 MB |
| Wi‐Fi Mode | IEEE802.11b/g/n |
| Frequency Range | 2.4~2.4835 GHz |
| Network Type | STA/AP/AP+STA/Wi‐Fi Direct |
| Network protocol | TCP/UDP/ARP/ICMP/DHCP/DNS/HTTP |
| Verification | WEP/WPA‐PSK/WPA2‐PSK |
| Encryption | WEP64/WEP128/TKIP/CCMP(AES) |
Hardware Overview
Getting Started
Hardware
Materials required
- Wio Lite W600 x1
- Computer x1
- USB typc cable x1
Some USB cables can only supply power and cannot transfer data. If you don't have a usb cable or don't know if your usb cable can transmit data, you can check seeed USB type C support USB 3.1 .
Connect the Wio Lite W600 to your computer using the USB cable.
Software
Step 1. You need to Install an Arduino Software

Launch the Arduino application
Double-click the Arduino application (arduino.exe) you have previously downloaded.
If the Arduino Software loads in a different language, you can change it in the preferences dialog. See the Arduino Software (IDE) page for details.
Step 2. Setting your Arduino IDE
Open your Arudino IDE, click on File > Preferences, and copy below url to Additional Boards Manager URLs
https://files.seeedstudio.com/arduino/package_seeeduino_boards_index.json

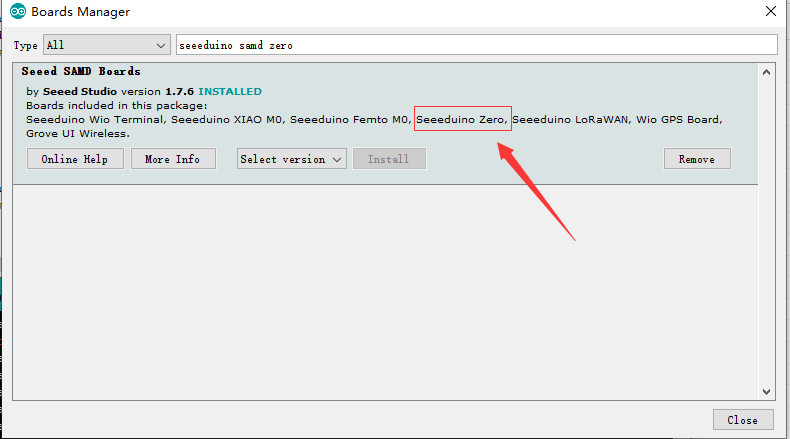
Step 3. Add the Wio Lite W600 Board to Your Arduino IDE
Please follow the Seeed Board Intallation Guide and serch the key word seeeduino_samd_zero to add the Wio Lite W600 into your Arduino IDE.
Step 4. Add the W600 Library into Your Arduino IDE
Download the W600 Library from Seeed Github. Then Refer to How to install library to install library for Arduino.
Step 5. Restart the Arduino IDE. Open the AP-Station example, you can open it in the Arduino IDE by the path: **File --> Examples -->W600_wifi-->log_data

Step 6. Modify the code with your own AP and Station. In the following picture, Wio Lite W600 work as a station to join the AP marked A and the the Wio Lite W600 will create the B AP for other devieces. You should change both AP name and password

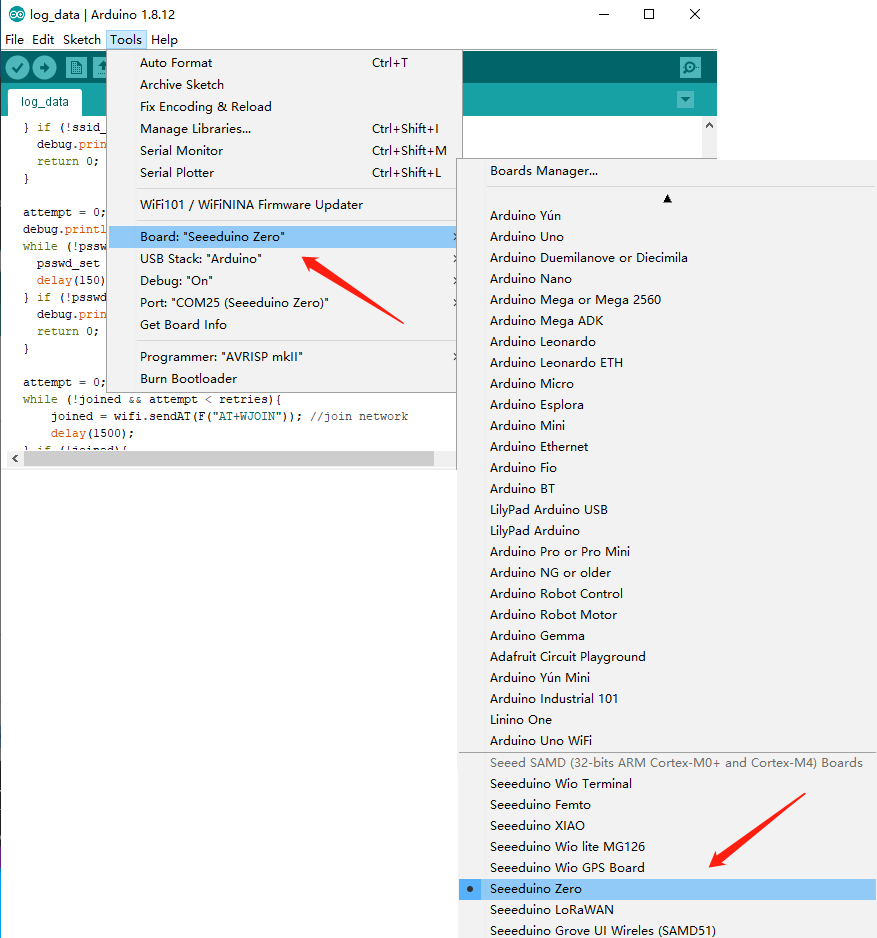
Step 7. Select your board and port
You'll need to select the entry in the Tools > Board menu that corresponds to your Arduino. Selecting a Seeeduino Zero.
Select the serial device of the Arduino board from the Tools | Serial Port menu. This is likely to be COM3 or higher (COM1 and COM2 are usually reserved for hardware serial ports). To find out, you can disconnect your Arduino board and re-open the menu; the entry that disappears should be the Arduino board. Reconnect the board and select that serial port.
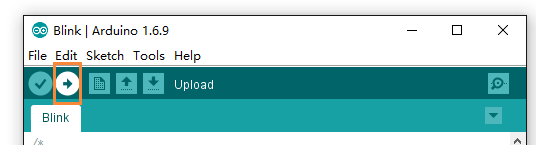
Step 8.Upload the code
Now, simply click the "Upload" button in the environment. Wait a few seconds and if the upload is successful, the message "Done uploading." will appear in the status bar.
A few seconds after the upload finishes, then the Wio Lite W600 will access the AP you set and you can use your phone to accees the AP created by Wio Lite W600
Schematic Online Viewer
Resources
- [ZIP] Wio Lite W600 Eagle file
- [PDF] W600-datasheet
Tech Support & Product Discussion
if you have any technical issue. submit the issue into our forum. Thank you for choosing our products! We are here to provide you with different support to ensure that your experience with our products is as smooth as possible. We offer several communication channels to cater to different preferences and needs.