Machine Learning with Wio Terminal - Gesture Recognition
This tutorial will demonstrates how to use Wio Terminal to set up a simple gesture recognition machine learning demo with the help of TensorFlow Lite.
This example is modified from the official demo of Arduino team together with TensorFlow Lite team. For more information and reference, please visit Get started with machine learning on Arduino. Some modifications are done to make the demo compatible with Wio Terminal.
Reference: How-to Get Started with Machine Learning on Arduino
Part List
Features
-
Machine Learning on Wio Terminal
-
Gestures Recognition
-
TensorFlow Lite
Arduino Libraries Needed
-
Install the on-board accelerator library
Seeed_Arduino_LIS3DHTR, Please visit Wio Terminal IMU for more information. -
Install the Arduino TensorFlow Lite Library, please visit Wio Terminal TensorFlow Lite for more information.
Training IMU data from the Wio Terminal
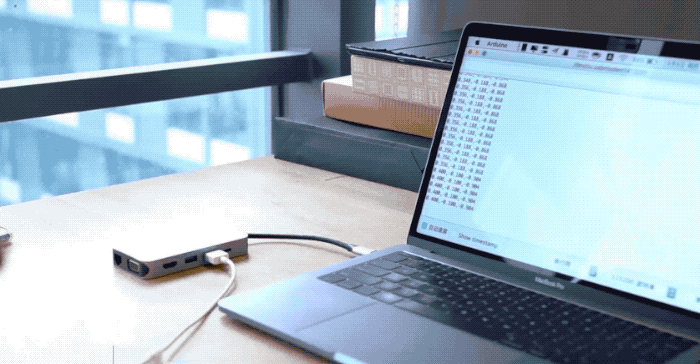
Just like other machine learning project, we will obtain some sensor data to be used for training the model later. First, we will run a simple arduino program to stream sensor data from Wio Terminal.
Copy the following code and upload the code to Wio Terminal:
#include"LIS3DHTR.h"
LIS3DHTR<TwoWire> lis;

const float accelerationThreshold = 2; // threshold of significant in G's
const int numSamples = 119;

int samplesRead = numSamples;

void setup() {
  Serial.begin(9600);
  lis.begin(Wire1);

  if (!lis) {
    Serial.println("ERROR");
    while(1);
  }

  lis.setOutputDataRate(LIS3DHTR_DATARATE_25HZ); //Data output rate
  lis.setFullScaleRange(LIS3DHTR_RANGE_2G); //Scale range set to 2g

  Serial.println("Acceleration in G's");
  Serial.println("X\tY\tZ");
}

void loop() {
  float x, y, z;

  while (samplesRead == numSamples) {
    x=lis.getAccelerationX();
    y=lis.getAccelerationY();
    z=lis.getAccelerationZ();


     float aSum = fabs(x) + fabs(y) + fabs(z);

      // check if it's above the threshold
      if (aSum >= accelerationThreshold) {
        // reset the sample read count
        samplesRead = 0;
        break;
      }
  }

  while (samplesRead < numSamples) {
    x=lis.getAccelerationX();
    y=lis.getAccelerationY();
    z=lis.getAccelerationZ();

    samplesRead++;

    Serial.print(x, 3);
    Serial.print(',');
    Serial.print(y, 3);
    Serial.print(',');
    Serial.print(z, 3);
    Serial.println();

    if (samplesRead == numSamples) {
      Serial.println();
    }
  }
}
Or download the code here and upload the code to Wio Terminal. If you open the Serial Monitor, you should be able to see IMU data.
Capturing Gestures Training Data
Capture IMU data as CSV and used for TensorFlow:
-
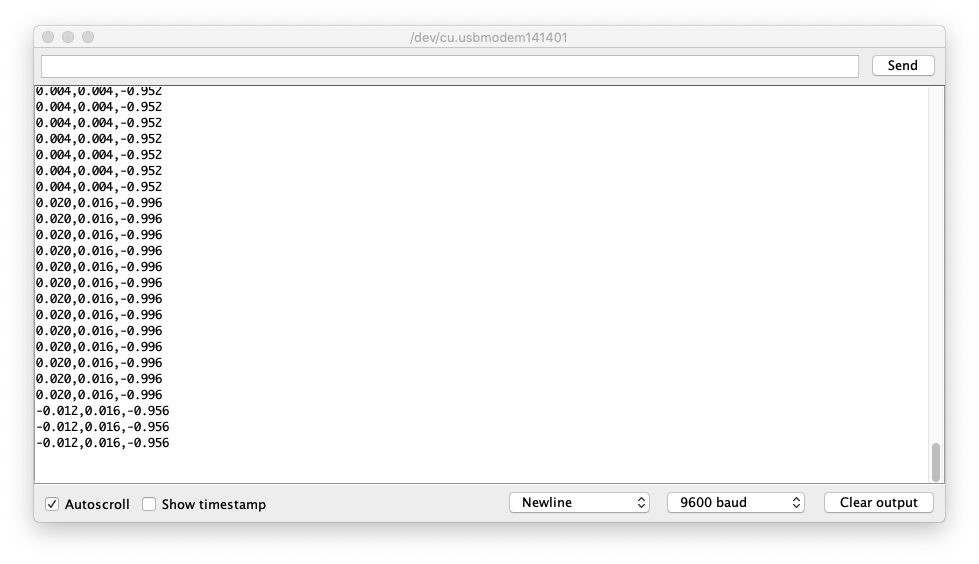
Open Serial Monitor, and pick up Wio Terminal.
-
Make a punch gesture, make sure that you've triggered the capture.
-
Repeat the same movement for at least 10 times, the more training data the better.
-
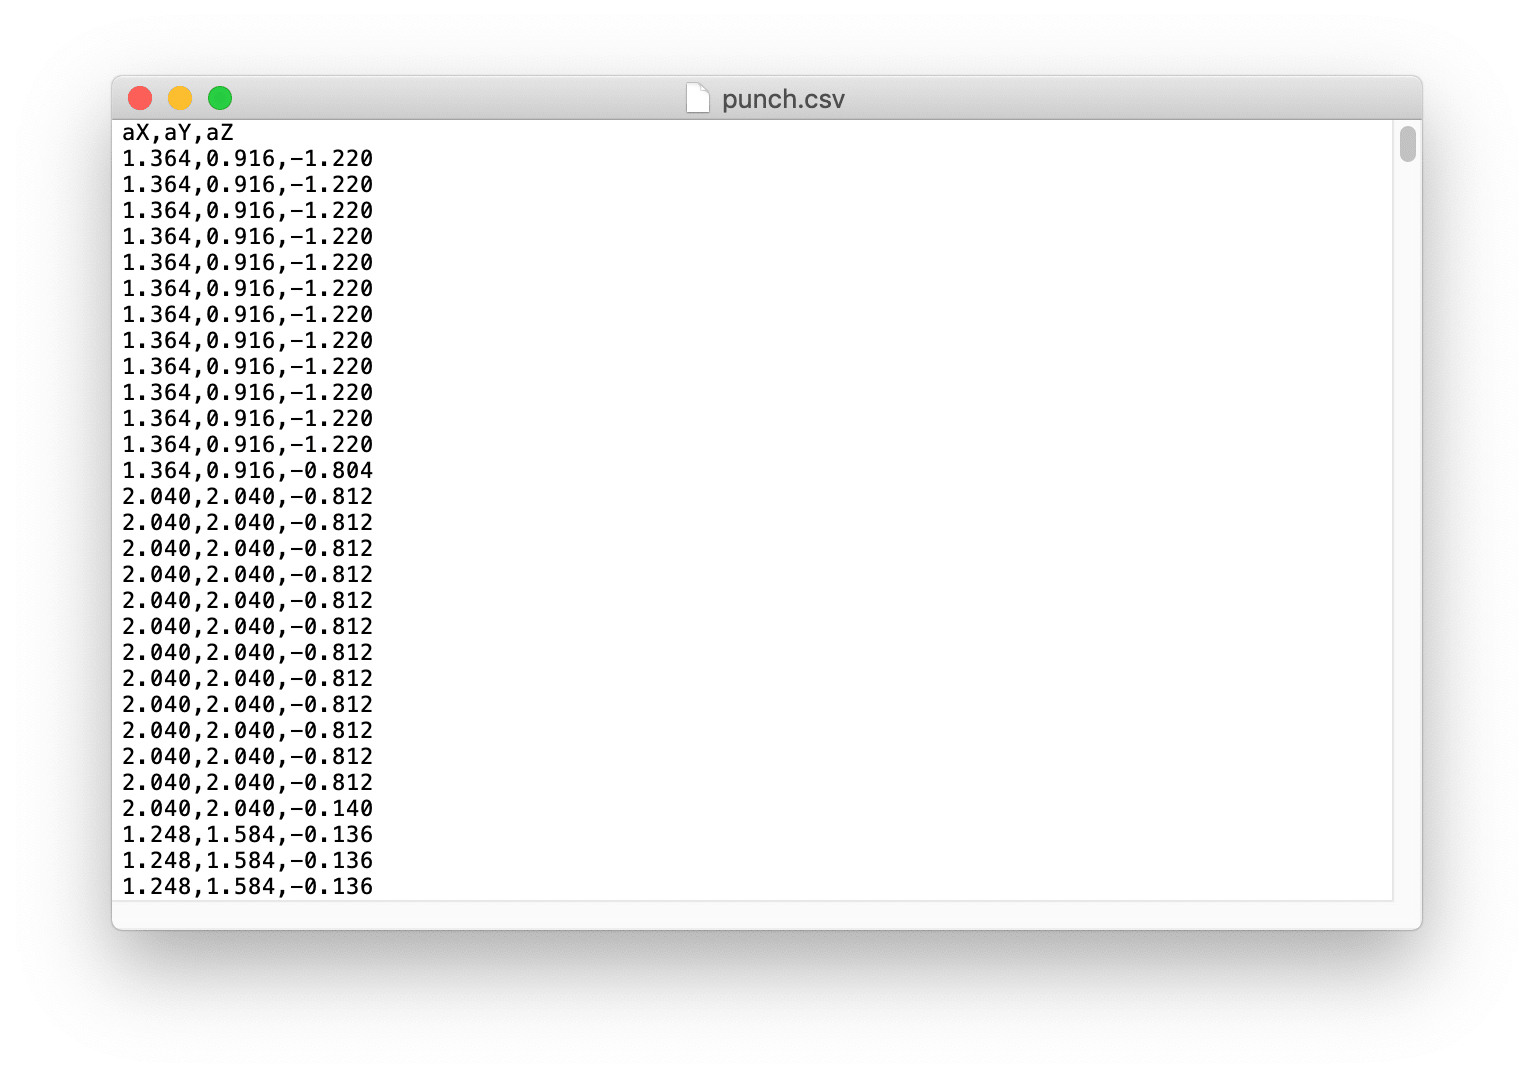
Copy and paste the data from the Serial Monitor to a new text file called
punch.csv. -
Clear and reset the Wio Terminal, and this time repeat all the steps above with a flex gesture and saved as
flex.csv.
Note: If you are using Linux or Mac, you can directly output the sensor data from Wio Terminal to a .csv file using:
cat /dev/cu.usbmodem[nnnnn] > punch.csv
Checking the .csv Files
Open the punch.csv and flex.csv and make sure that the first line of the csv files is aX,aY,aZ check below for reference:
Training Data in TensorFlow
Here we will use the Google Colab project that is created by the Arduino team. Colab provides a Jupyter notebook that allows us to run our TensorFlow training in a web browser. The colab will set up the environment, train the model and convert the model into a TensorFlow Lite mode and encode the model in an Arduino header file.
Click here to access the Google Colab project.
Modifications in Google Colab Project
Some modifications are needed in the Google Colab Project to adapt Wio Terminal:
-
No changes are needed in Setup the Python Environment.
-
No changes are needed in Upload Data.
-
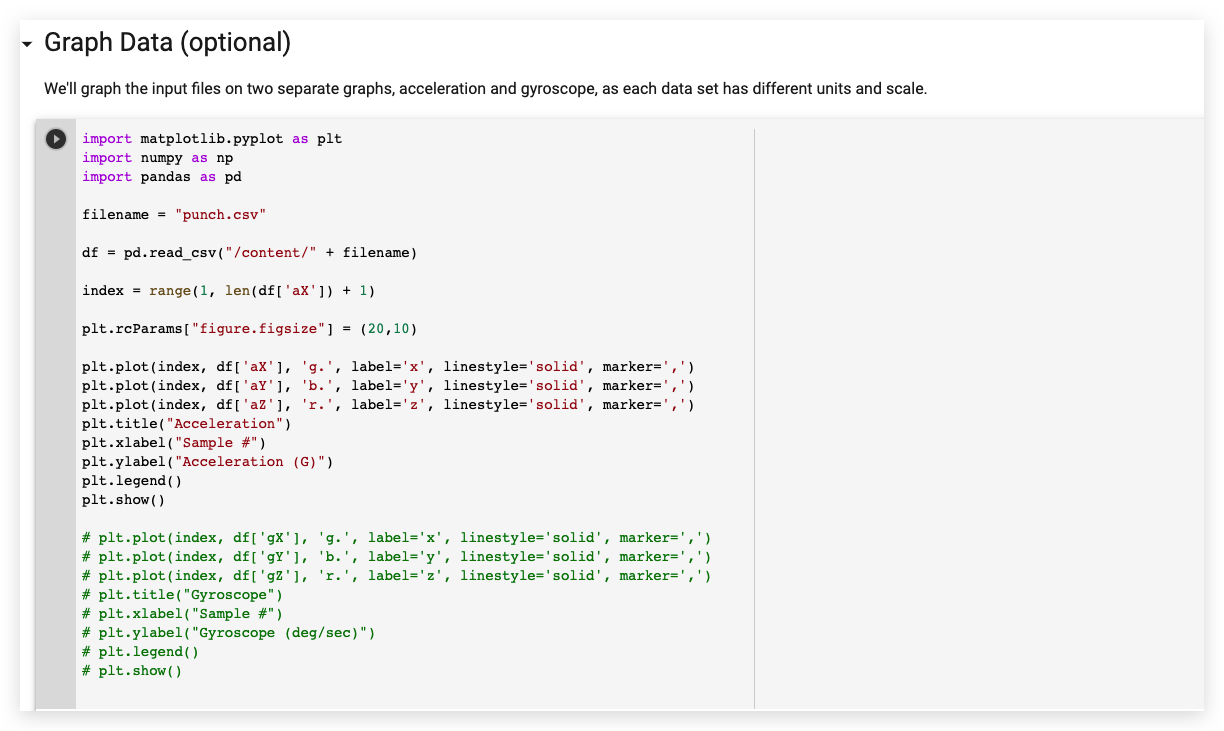
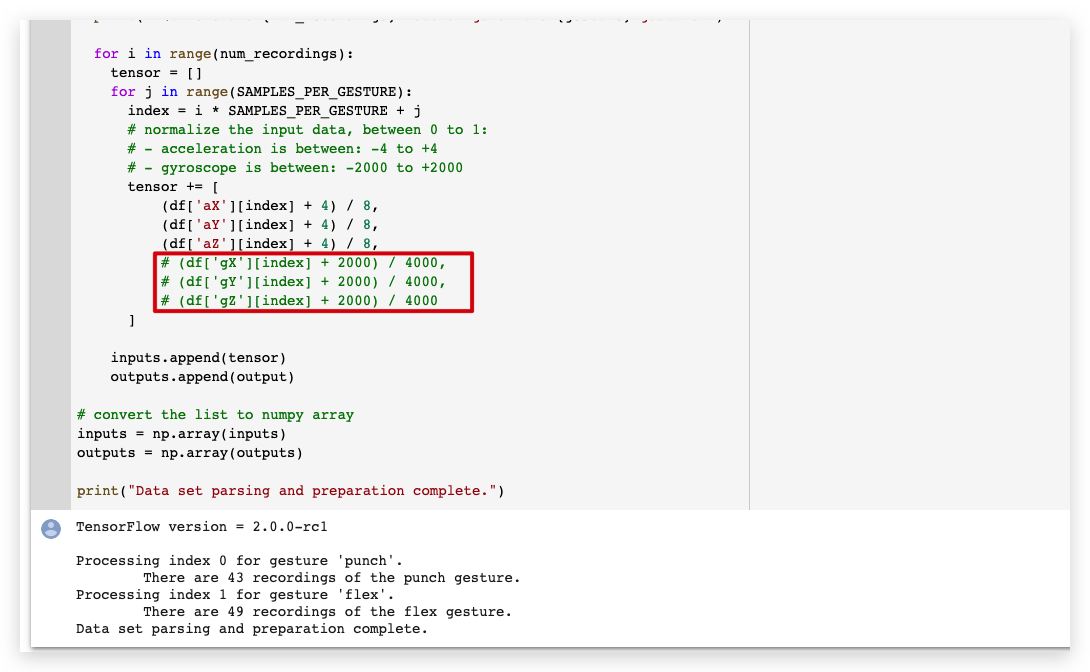
In Graph Data, comment out all the gyroscope data sections as shown:
- In Parse and prepare the data, comment out all the gyroscope data sections as shown:
-
No changes are needed in Randomize and split the input and output pairs for training.
-
No changes are needed in Build & Train the Model.
-
No changes are needed in Graph the loss.
-
No changes are needed in Graph the loss again, skipping a bit of the start.
-
No changes are needed in Graph the mean absolute error.
-
No changes are needed in Run with Test Data.
-
No changes are needed in Convert the Trained Model to Tensor Flow Lite.
-
No changes are needed in Encode the Model in an Arduino Header File.
Download the model.h files from the left panel.
Uploading the Code on Wio Terminal
- Once downloaded the model header files. Open IMU_Classifier.ino or copy the following code in Arduino IDE:
/*
  IMU Classifier
  This example uses the on-board IMU to start reading acceleration and gyroscope
  data from on-board IMU, once enough samples are read, it then uses a
  TensorFlow Lite (Micro) model to try to classify the movement as a known gesture.
  Note: The direct use of C/C++ pointers, namespaces, and dynamic memory is generally
        discouraged in Arduino examples, and in the future the TensorFlowLite library
        might change to make the sketch simpler.
  The circuit:
  - Arduino Nano 33 BLE or Arduino Nano 33 BLE Sense board.
  Created by Don Coleman, Sandeep Mistry
  Modified by Dominic Pajak, Sandeep Mistry
  This example code is in the public domain.

  Modified to adapt for Wio Terminal - Anson (Seeed Studio)
*/

#undef min
#undef max
#include <TensorFlowLite.h>
#include <tensorflow/lite/experimental/micro/kernels/all_ops_resolver.h>
#include <tensorflow/lite/experimental/micro/micro_error_reporter.h>
#include <tensorflow/lite/experimental/micro/micro_interpreter.h>
#include <tensorflow/lite/schema/schema_generated.h>
#include <tensorflow/lite/version.h>

#include "model.h"
#include"LIS3DHTR.h"
LIS3DHTR<TwoWire> lis;


const float accelerationThreshold = 2; // threshold of significant in G's
const int numSamples = 119;

int samplesRead = numSamples;

// global variables used for TensorFlow Lite (Micro)
tflite::MicroErrorReporter tflErrorReporter;

// pull in all the TFLM ops, you can remove this line and
// only pull in the TFLM ops you need, if would like to reduce
// the compiled size of the sketch.
tflite::ops::micro::AllOpsResolver tflOpsResolver;

const tflite::Model* tflModel = nullptr;
tflite::MicroInterpreter* tflInterpreter = nullptr;
TfLiteTensor* tflInputTensor = nullptr;
TfLiteTensor* tflOutputTensor = nullptr;

// Create a static memory buffer for TFLM, the size may need to
// be adjusted based on the model you are using
constexpr int tensorArenaSize = 8 * 1024;
byte tensorArena[tensorArenaSize];

// array to map gesture index to a name
const char* GESTURES[] = {
  "punch",
  "flex"
};


#define NUM_GESTURES (sizeof(GESTURES) / sizeof(GESTURES[0]))

void setup() {
  Serial.begin(9600);
//  while (!Serial);

  lis.begin(Wire1);

  // initialize the IMU
  if (!lis) {
    Serial.println("Failed to initialize IMU!");
    while (1);
  }


  // get the TFL representation of the model byte array
  tflModel = tflite::GetModel(model);
  if (tflModel->version() != TFLITE_SCHEMA_VERSION) {
    Serial.println("Model schema mismatch!");
    while (1);
  }

  // Create an interpreter to run the model
  tflInterpreter = new tflite::MicroInterpreter(tflModel, tflOpsResolver, tensorArena, tensorArenaSize, &tflErrorReporter);

  // Allocate memory for the model's input and output tensors
  tflInterpreter->AllocateTensors();

  // Get pointers for the model's input and output tensors
  tflInputTensor = tflInterpreter->input(0);
  tflOutputTensor = tflInterpreter->output(0);
}

void loop() {
  float x, y, z;

  // wait for significant motion
  while (samplesRead == numSamples) {
    x=lis.getAccelerationX();
    y=lis.getAccelerationY();
    z=lis.getAccelerationZ();

    float aSum = fabs(x) + fabs(y) + fabs(z);

      // check if it's above the threshold
      if (aSum >= accelerationThreshold) {
        // reset the sample read count
        samplesRead = 0;
        break;
      }
  }

  // check if the all the required samples have been read since
  // the last time the significant motion was detected
  while (samplesRead < numSamples) {
    // check if new acceleration AND gyroscope data is available
      // read the acceleration and gyroscope data
      x=lis.getAccelerationX();
      y=lis.getAccelerationY();
      z=lis.getAccelerationZ();


      // normalize the IMU data between 0 to 1 and store in the model's
      // input tensor
      tflInputTensor->data.f[samplesRead * 6 + 0] = (x + 4.0) / 8.0;
      tflInputTensor->data.f[samplesRead * 6 + 1] = (y + 4.0) / 8.0;
      tflInputTensor->data.f[samplesRead * 6 + 2] = (z + 4.0) / 8.0;

      samplesRead++;

      if (samplesRead == numSamples) {
        // Run inferencing
        TfLiteStatus invokeStatus = tflInterpreter->Invoke();
        if (invokeStatus != kTfLiteOk) {
          Serial.println("Invoke failed!");
          while (1);
          return;
        }

        // Loop through the output tensor values from the model
        for (int i = 0; i < NUM_GESTURES; i++) {
          Serial.print(GESTURES[i]);
          Serial.print(": ");
          Serial.println(tflOutputTensor->data.f[i], 6);
        }
        Serial.println();
      }
  }
}
-
Put the trained
model.hheader file in the same folder as the IMU_Classifier.ino file and upload the code to Wio Terminal. -
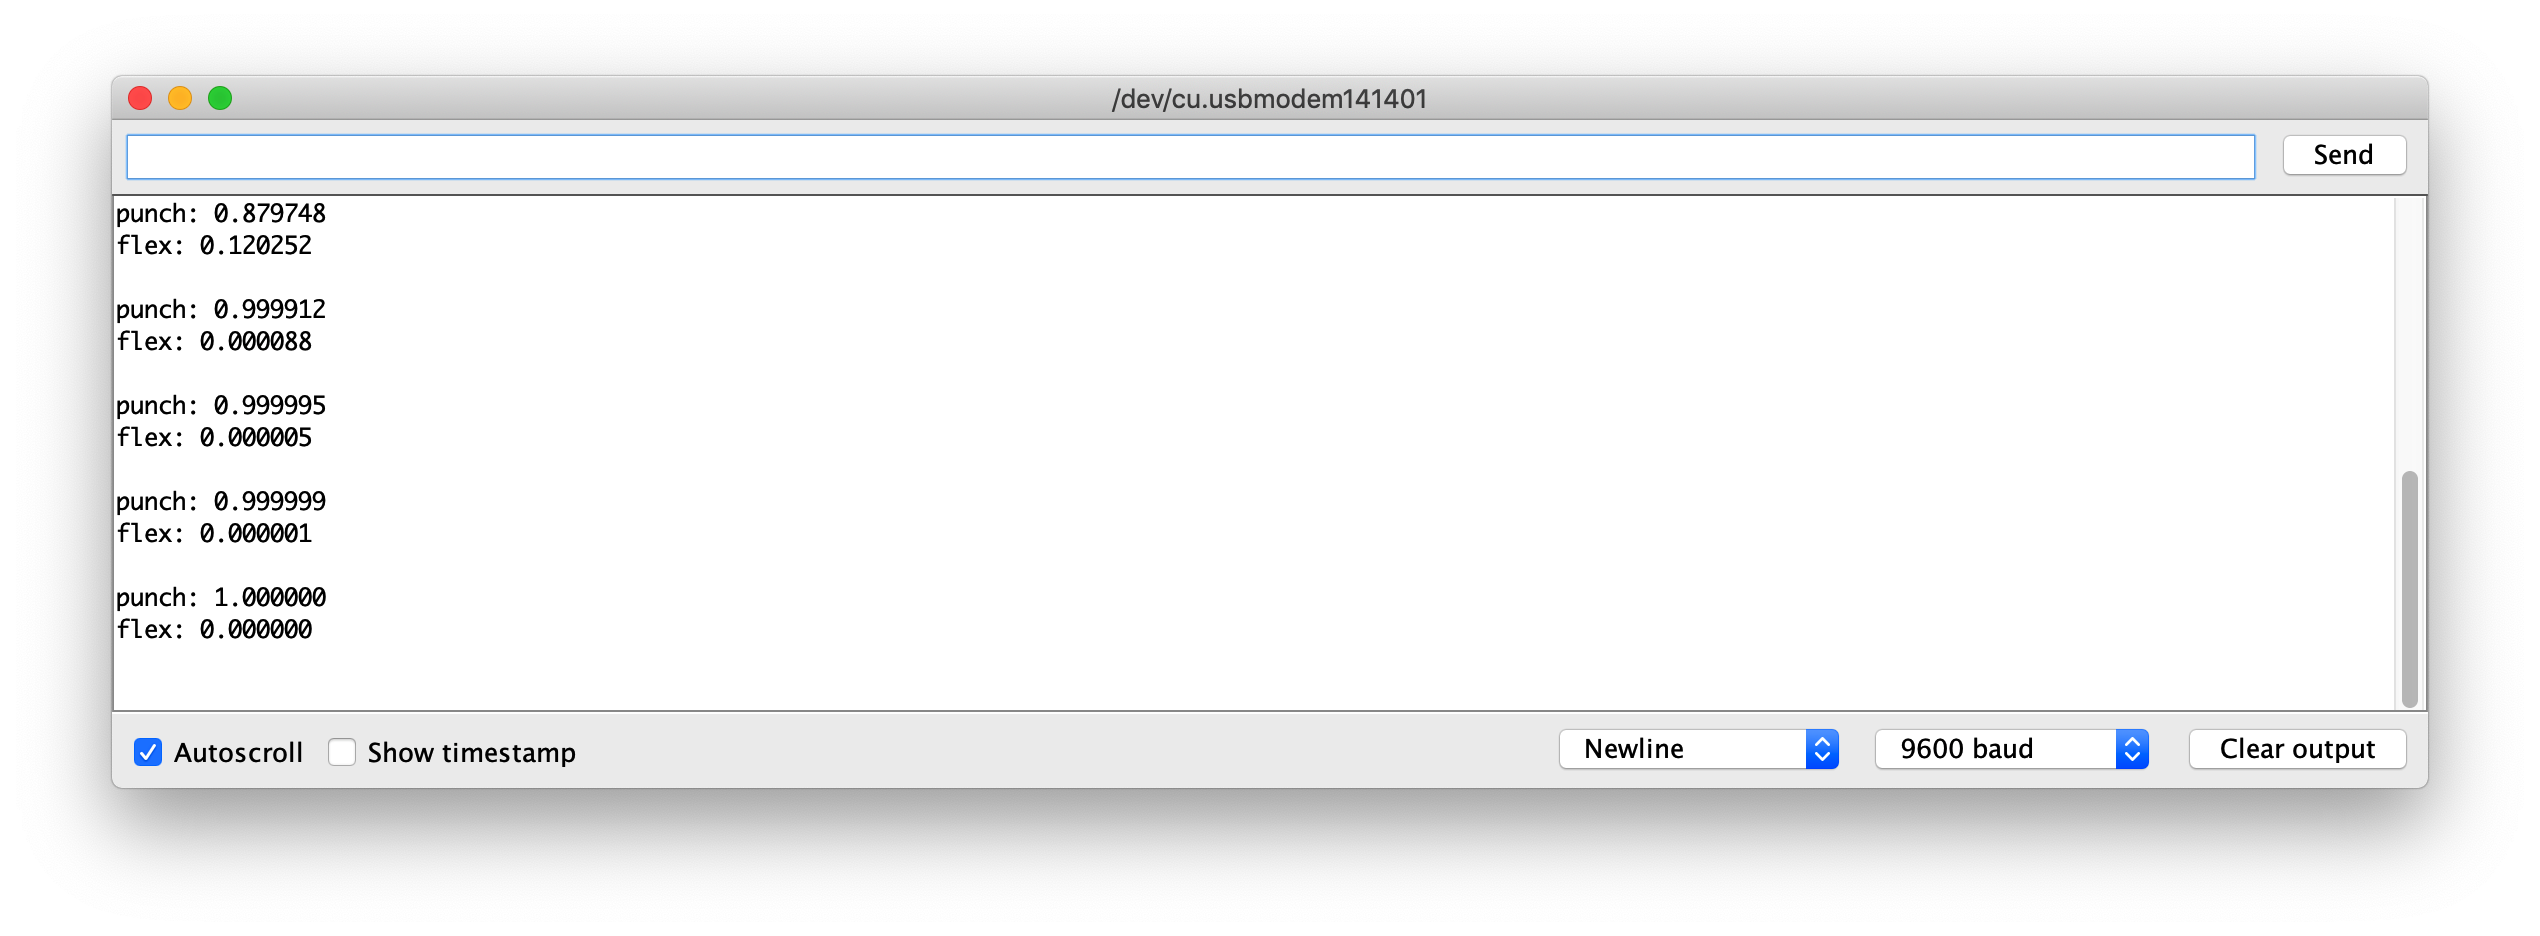
Now, open serial monitor and perform your gestures! You should see confidence of each gesture printed (0 = low confidence, 1 = high confidence).
Example Model Files
For reference, I have attached the trained-model of model.h files to download. You use this with IMU_Classifier.ino to test.
Further Development
For further development, more gestures can be trained on Wio Terminal via IMU, and to trigger different outputs! Explore with Machine Learning on Microcontroller with TensorFlow Lite!