Train and Deploy Your Own AI Model
SenseCraft AI Platform
Seeed Studio SenseCraft AI Platform is a browser-based AI Solution.
It empowers users to effortlessly train and deploy their own models onto their edge devices, providing a seamless and user-friendly experience, allowing you to train and deploy your own models directly onto your edge devices with just a few clicks.
The core of it is an open source project and we have share it on the GitHub and offer the development method as well.
Start Training the Model
We first go to the SenseCraft AI Deployment Website, then simply connect the XIAO ESP32S3 Sense to your PC via a data cable to instantly start using.
Step 1. Install XIAO ESP32S3 Sense expansion board
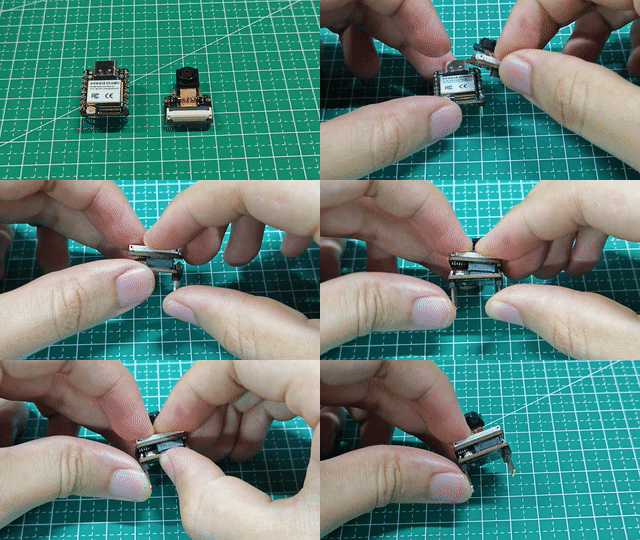
First, we need to properly connect the XIAO ESP32S3 Sense expansion board to the XIAO. Installing the expansion board is very simple, you just need to align the connector on the expansion board with the B2B connector on the XIAO ESP32S3, press it hard and hear a "click", the installation is complete.
Step 2. Connecting the XIAO to your PC
Connect the XIAO to your PC using a data cable with data transfer function.
Step 3. Go to the SenseCraft AI Platform page and connect the XIAO
Click the button below to go to the SenseCraft AI Platform homepage.
step 4. Start training the model
After entering the SenseCraft AI platform homepage, we first click Training, then select Classification Type, name your classes, and finally choose XIAO ESP32S3 Sense.

Then, based on your requirements for classification, refer to your class, and click Hold to Record.

This time, I chose the requirement for gesture recognition to classify "12345."

Capture pictures: Each one over 10 images will be fine, more are better.
After data collection is complete, we select XIAO ESP32S3 Sense in the Training section and click Start Training.

After training is complete, we can see our training results through a real-time preview.

step 5. Deploy the model
After previewing and confirming that the trained model is fine, we select Training Records, then choose the recently trained model (named “ClassTrain” and “XIAO”) and click Deploy to device.

After successfully deploying to the device, you will see the results directly:

You have successfully trained your first ML model!
If you have more time, you can try using the Output operation you've learned before.

ToDo
- Train and deploy models using the SenseCraft AI platform.
- Setup a Trigger and Control LED for your trained models with SenseCraft AI Platform.
(Optional) Federate: Transmit data wide away
In this step, we are trying to transmit our data from XIAO ESP32S3 Sense to a remote device, using Wi-Fi and MQTT, helping us see its deployment remotely.
Step 1. Setup MQTT on a device and test
As example, we are using NVIDIA Jetson reComputer J4012 for it. It supports MQTT broker installation and the most important thing is that it offers 100 TOPS AI Power, for us applying LLM locally.
The SenseCraft AI Platform is supporting Wi-Fi and MQTT connection.
First we need to install the MQTT broker(Mosquitto) and then try to setup the MQTT server.
sudo apt-get update
sudo apt-get install mosquitto
and get the Mosquitto installation done on the reComputer(Linux).
Then run the commend:
sudo service mosquitto start
to start it.
Later we can run this commend:
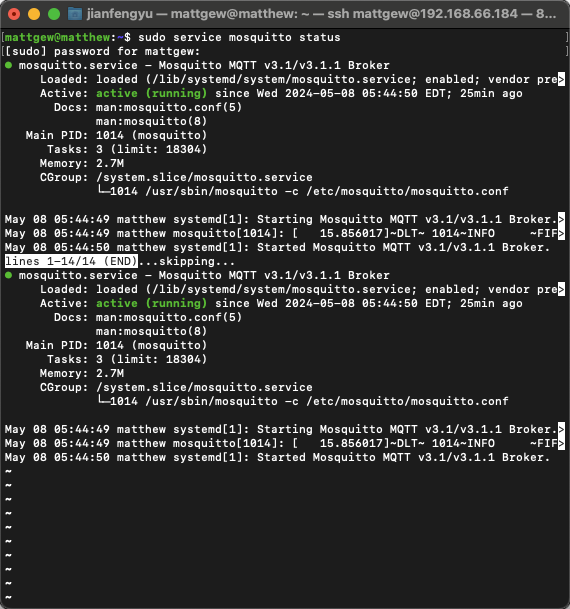
sudo service mosquitto status
to see whether it is been activited:
Testing:
For creating/subcribing a topic:
mosquitto_sub -h localhost -t "LED"
For sending/publishing some data:
mosquitto_pub -h localhost -t "LED" -m "1"
mosquitto_pub -h localhost -t "LED" -m "test"
Getting the results and it seems all good:

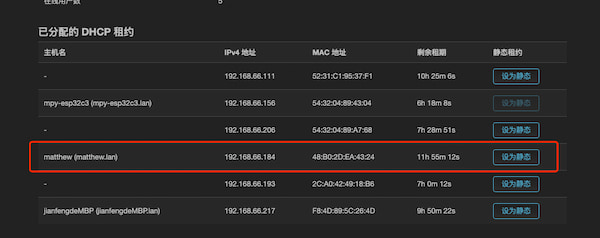
And the localhost is 192.168.66.184(as reComputer):
Step 3. Configure XIAO ESP32S3 Sense on SenseCraft AI Platform
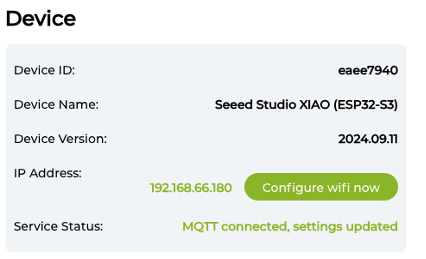
On the SenseCraft AI Platform, you can refer to the "Configuration" page:
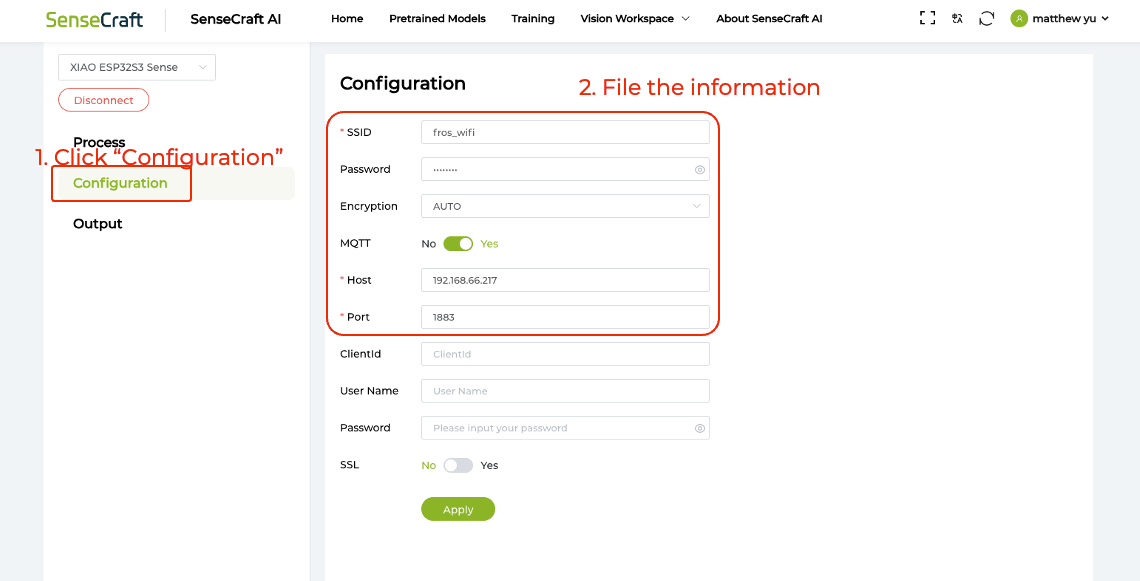
- SSID: (Wi-Fi name same as your MQTT device)
- Password: (Wi-Fi passowrd as your MQTT device)
- Encryption: AUTO
- MQTT: Yes
- Host: (IP address from your MQTT device)
- Port: 1883
In this exaple, the MQTT device is the reComputer like above.
Step 3. Receive data from XIAO ESP32S3 Sense and Display
In the receive part, you can install a client with command:
pip install python-sscma
This is an integrated client for the sscma_micro, which is a microcontroller at server for the SSCMA models.
And then receive the data using:
sscma.cli client --broker mqtt.broker.com --device device_id
In this case, mqtt.broker.com is 192.168.66.184, device_id is from XIAO ESP32S3 Sense on SenseCraft AI Platform.
