Getting Started with XIAO Soil Moisture Sensor

Introduction
The XIAO Soil Moisture Sensor is a compact, low-power environmental monitor powered by the XIAO ESP32-C6. Running on a single AA battery, it offers long-lasting operation and real-time soil condition updates. It features Pre-Calibrated Adaptive Soil Moisture Sensing for precise soil monitoring. Meanwhile, it enables dynamic monitoring intervals and instant readouts for accurate, responsive data. Fully compatible with Home Assistant, it’s ideal for smart gardening and precision agriculture—efficient, reliable, and made for sustainable plant care.
Features
1.Three-Level Soil Moisture Monitoring
- 🌿 Normal: Soil moisture is optimal, no watering needed.
- 🌤 Almost Dry: Moisture is decreasing, prepare to water soon.
- 🌵 Dry: Critically low, water immediately.
Default thresholds:
- 60% → Green to Yellow transition.
- 20% → Yellow to Red transition.

2.Plug-and-Play with Home Assistant
Preloaded with ESPHome — works out of the box with Home Assistant, letting you monitor and automate directly from your smart home dashboard.
3.Adaptive Monitoring & Instant Readout
- Automatically adjusts check intervals (8h → 1h → 15min) depending on moisture level.
- Press the button once for an instant moisture reading anytime.
4.Simple Calibration (Optional)
Quick triple-press the button to recalibrate for your specific soil: dry reading + wet reading → system adjusts automatically.
- Triple short press → Enter calibration mode:
- Red LED flashes → Within 10 seconds, insert the sensor into completely dry soil.
- Wait until the red LED stops flashing, then wait 3 seconds.
- Green LED flashes → Within 10 seconds, insert the sensor into fully wet soil.
- Wait until the green LED stops flashing, then wait 3 seconds.
- Calibration result:
- Two quick green flashes → Success.
- Two quick red flashes → Failure (likely due to swapped dry/wet readings).
Note: During calibration, initial readings may be unstable if the sensor is not inserted promptly. The system will take multiple samples, apply filtering, and average the readings for reliable calibration.

Hardware Overview

Getting Started
This section will guide you through setting up your XIAO Soil Moisture Sensor for the first time.
Materials Required
Before the tutorial content of this article begins, you may need to have the following hardware ready.
| XIAO Soil Moisture Sensor | Home Assistant Green |
|---|---|
 |  |
Home Assistant Green is the easiest and most privacy-focused way to automate your home. It offers an effortless setup and allows you to control all the smart devices with just one system, where all the data is stored locally by default. This board benefits from the thriving Home Assistant ecosystem and it will be improved every month by open source.
We recommend using Home Assistant Green as the Home Assistant host for this tutorial, or you can use any Home Assistant host with a Supervisor.
We have also written how to install Home Assistant for some of Seeed Studio products, please refer to them.
- Getting Started with Home Assistant on ODYSSEY-X86
- Getting Started with Home Assistant on reTerminal
- Getting Started with Home Assistant on LinkStar H68K/reRouter CM4
If you are not using a Seeed Studio product, you can also check and learn how to install Home Assistant for other products on the official Home Assistant website.
Step 1. Install ESPHome
If you have already installed ESPHome, you can skip this step.
Go to Settings -> Add-ons -> ADD-ON STORE


Search ESPHome and click on it. Click on INSTALL and START.
If you can't find ESPHome in the add-on store, make sure you're using a Home Assistant installation that supports add-ons (like Home Assistant OS or supervised installations). For other installation types (like Home Assistant Container), you may need to run the ESPHome Device Builder independently using Docker. See the official ESPHome documentation for more details.

And then, ESPHome Builder will appear at the sidebar.

Step 2: Preparing the Soil Moisture Sensor
By default, your device (XIAO ESP32C6) comes pre-flashed with firmware for XIAO Soil Moisture Sensor.However, if you need to modify or upgrade the default firmware, a factory YAML configuration file is available in the Resources section below. You can customize the logic as needed and flash it via Home Assistant.
To ensure accurate readings, just perform a quick calibration of the sensor before use.
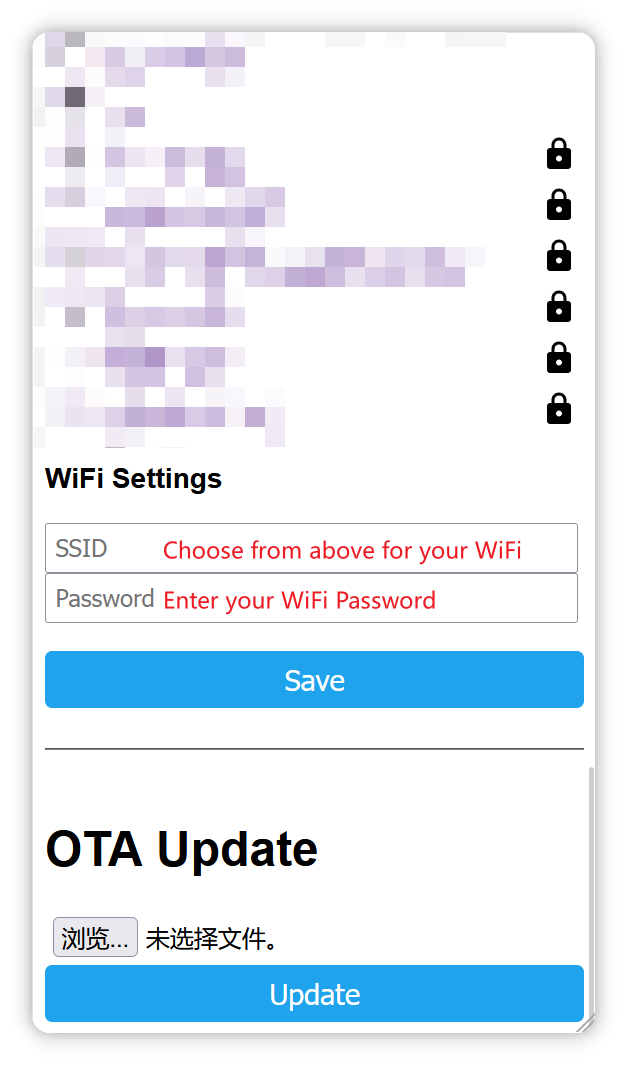
Step 3: Network Configuration
-
Enable Access Point:
- Upon powering up for the first time, the module will create a Wi-Fi network (SSID:
Xiao-Soil-Moisture-Monitor).
- Upon powering up for the first time, the module will create a Wi-Fi network (SSID:
-
Access Configuration:
- Connect to the network using a phone or PC.
- Open a browser and navigate to
http://192.168.4.1. - Enter the SSID and password of your home Wi-Fi network.
- Home Assistant Integration:
- Once connected to the home network, the module will be discoverable in Home Assistant under
Settings -> Devices & Services.
- Once connected to the home network, the module will be discoverable in Home Assistant under

This way, you can connect the module to your Home Assistant network and let Home Assistant discover it.
Step 4: Add the module device
-
Automatic Discovery:
- Ensure the ESPHome is installed in Home Assistant.
- Navigate to
Settings -> Devices & Services -> Integrationsand look for the device.
-
Manual Configuration:
- If not automatically discovered, manually add the device by specifying its IP address.
After adding the device, you will see a new sensor card named Solid_sensor on the Home Assistant Overview page, displaying both the battery measurement and the current soil moisture status.

Now that your soil sensor is up and running, go ahead and have fun monitoring your plants!

Advanced Usage
You can modify the original firmware logic and flash your customized version of the soil sensor directly through Home Assistant.
Step 1. Install ESPHome
See the installation guide in Step 1 above.
Step 2. Add a new device
Go to ESPHome and click on NEW DEVICE.

Give the device a name you like and click on NEXT.


After you create a new device, click EDIT.

Step 3. Install firmware
Here's Factory firmware:
Here’s a ready-to-use ESPHome YAML configuration for Home Assistant:
Click here to preview the full code
# ==== AUTO-SYNC START: xiao-soil-moisture-monitor/xiao-soil-moisture-monitor.yaml ====

substitutions:
  name: "xiao-soil-moisture"
  friendly_name: "XIAO Soil Moisture Monitor"

esphome:
  name: "${name}"
  friendly_name: "${friendly_name}"
  name_add_mac_suffix: true
  project:
    name: "xiao.soil-moisture-monitor"
    version: "1.0"
  on_boot:
    then:
      - output.turn_off: gpio_3_output
      - output.turn_on: gpio_14_output
      - light.turn_on:
          id: pwm_led
          brightness: 68%  # Set 68% duty cycle
      - if:
          condition:
            lambda: 'return id(wifi_net_status) == 0;'
          then:
            - logger.log: "The device has not been set to the network"
            - deep_sleep.prevent: deep_sleep_control
          else:
            - logger.log: "The device has been networked"
      - delay: 1s
      - script.execute: check_moisture_once


esp32:
  board: esp32-c6-devkitc-1
  framework:
    type: esp-idf

# LED Yellow	D10 18
# LED RED	D9  20
# LED Green	D8 19
# button	D2  2

# Battery	D0 0
# PWM out	D3 21
# Soil sensor	D1  1


output:
  - platform: gpio
    pin: GPIO18
    id: yellow_led_output

  - platform: gpio
    pin: GPIO19
    id: green_led_output

  - platform: gpio
    pin: GPIO20
    id: red_led_output

  - platform: ledc
    pin: GPIO21
    id: pwm_output
    frequency: 200kHz  # Set the frequency to 200kHz

  - platform: gpio
    pin: GPIO3
    id: gpio_3_output

  - platform: gpio
    pin: GPIO14
    id: gpio_14_output

light:
  - platform: binary
    id: yellow_led
    output: yellow_led_output

  - platform: binary
    id: green_led
    output: green_led_output

  - platform: binary
    id: red_led
    output: red_led_output

  - platform: monochromatic
    output: pwm_output
    id: pwm_led
    name: "200kHz PWM"
    internal: true
    default_transition_length: 0s


script:
  - id: red_led_blink
    mode: restart
    then:
      - repeat:
          count: 10
          then:
            - light.turn_on: red_led
            - delay: 500ms
            - light.turn_off: red_led
            - delay: 500ms

  - id: green_led_blink
    mode: restart
    then:
      - repeat:
          count: 10
          then:
            - light.turn_on: green_led
            - delay: 500ms
            - light.turn_off: green_led
            - delay: 500ms

  - id: fast_blink_green
    then:
      - repeat:
          count: 5
          then:
            - light.turn_on: green_led
            - delay: 200ms
            - light.turn_off: green_led
            - delay: 200ms

  - id: fast_blink_red
    then:
      - repeat:
          count: 5
          then:
            - light.turn_on: red_led
            - delay: 200ms
            - light.turn_off: red_led
            - delay: 200ms

  - id: red_led_blink_3_times
    then:
      - repeat:
          count: 1
          then:
            - light.turn_on: red_led
            - delay: 1000ms
            - light.turn_off: red_led
            - delay: 100ms
  - id: yellow_led_blink_3_times
    then:
      - repeat:
          count: 1
          then:
            - light.turn_on: yellow_led
            - delay: 1000ms
            - light.turn_off: yellow_led
            - delay: 100ms

  - id: green_led_blink_3_times
    then:
      - repeat:
          count: 1
          then:
            - light.turn_on: green_led
            - delay: 1000ms
            - light.turn_off: green_led
            - delay: 100ms


  - id: do_calibration
    then:
      - deep_sleep.prevent: deep_sleep_control
      - logger.log: "Starting calibration"
      - script.execute: red_led_blink
      - delay: 10s
      - script.stop: red_led_blink
      - lambda: |-
          float sum = 0;
          for (int i = 0; i < 10; i++) {
            id(soil_sensor).update();
            sum += id(soil_sensor).state;
            delay(200);
          }
          id(dry_value) = sum / 10.0;
          ESP_LOGI("calibration", "Dry value: %f", id(dry_value));

      - delay: 3s

      - script.execute: green_led_blink
      - delay: 10s
      - script.stop: green_led_blink
      - lambda: |-
          float sum = 0;
          for (int i = 0; i < 10; i++) {
            id(soil_sensor).update();
            sum += id(soil_sensor).state;
            delay(200);
          }
          id(wet_value) = sum / 10.0;
          ESP_LOGI("calibration", "Wet value: %f", id(wet_value));

      - delay: 3s

      - lambda: |-
          if (id(dry_value) > id(wet_value)) {
            ESP_LOGI("calibration", "Calibration success");
            id(fast_blink_green).execute();
          } else {
            ESP_LOGW("calibration", "Calibration failed");
            id(fast_blink_red).execute();
          }

      - delay: 3s
      - script.execute: check_moisture_once
      - delay: 3s
      - deep_sleep.enter: deep_sleep_control

  - id: check_moisture_once
    then:
      - lambda: |-
          for(int i = 0; i < 10; i++){
            id(soil_sensor).update();
            delay(200);
          }
          float moisture = id(soil_sensor).state;
          ESP_LOGI("moisture_check", "Moisture reading: %f", moisture);
          float Diff = id(dry_value) - id(wet_value);
          ESP_LOGI("moisture_check", "Diff is: %f", Diff);
          ESP_LOGI("moisture_check", "ref_dry Diff is: %f",id(dry_value) - Diff * id(ref_dry));
          ESP_LOGI("moisture_check", "ref_wet Diff is: %f",id(dry_value) - Diff * id(ref_wet));
          if (moisture >= (id(dry_value) - Diff * id(ref_dry))) {  // The drier -> the higher the voltage
            id(red_led_blink_3_times).execute();
            id(deep_sleep_control).set_sleep_duration(900000);
          } else if(moisture >  (id(dry_value) - Diff * id(ref_wet)) && moisture < (id(dry_value) - Diff * id(ref_dry))){
            id(yellow_led_blink_3_times).execute();
            id(deep_sleep_control).set_sleep_duration(3600000);
          }else{
            // moisture >  (id(dry_value) - Diff * id(ref_wet))
            id(green_led_blink_3_times).execute();
            id(deep_sleep_control).set_sleep_duration(28800000);
          }


globals:
  - id: button_press_count
    type: int
    restore_value: no
    initial_value: '0'
  - id: dry_value
    type: float
    restore_value: yes
    initial_value: '2.75'
  - id: wet_value
    type: float
    restore_value: yes
    initial_value: '1.2'
  - id: wifi_net_status
    type: int
    restore_value: yes
    initial_value: "0"
  - id: ref_dry
    type: float
    restore_value: no
    initial_value: "0.23"
  - id: ref_wet
    type: float
    restore_value: no
    initial_value: "0.58"

binary_sensor:
  - platform: gpio
    pin:
      number: GPIO2
      mode: INPUT_PULLUP
      allow_other_uses: true
    id: my_button
    on_press:
      - lambda: |-
          id(button_press_count)++;
      - delay: 1s  # Delay 1 second to see if the button is pressed 3 times in a row
      - lambda: |-
          if (id(button_press_count) == 3) {
            id(button_press_count) = 0;
            id(do_calibration).execute();  // Trigger calibration process
          } else if (id(button_press_count) == 1) {
            id(button_press_count) = 0;
            id(check_moisture_once).execute();  // Perform an ADC decision
          } else {
            id(button_press_count) = 0;
          }


# interval:
#   - interval: 10s
#     then:
#       - script.execute: check_moisture_once


# Deep sleep configuration
deep_sleep:
  id: deep_sleep_control
  run_duration: 120s
  sleep_duration: 180min
  wakeup_pin:
    number: GPIO2
    inverted: true
    allow_other_uses: true
    mode: INPUT_PULLUP

sensor:
  - platform: adc
    id: soil_sensor
    pin: GPIO1
    name: "Soil moisture measurement"
    update_interval: 4s
    internal: true
    attenuation: 12db


  - platform: adc
    pin: GPIO0
    name: "Battery measurement"
    attenuation: 12db
    # internal: true
    filters:                     # When the battery drops below 1V, it is dead.
      - lambda: |-
          if (x < 1.2) {
            return 0.0;
          }else if(x > 1.5){
            return 1.0 * 100.0;
          }else {
            return ((x - 1.2) / (1.5 - 1.2)) * 100.0;
          }
    unit_of_measurement: "%"
    update_interval: 5s
    force_update: True

  - platform: wifi_signal
    name: "wifi singnal strength"
    update_interval: 10s

# text_sensor:
#   - platform: template
#     name: "Soil Moisture Status"   # ✅ Status displayed on the HA panel
#     id: soil_status
#     # internal: true
#     lambda: |-
#       float value = id(soil_sensor).state;
#       float Diff = id(dry_value) - id(wet_value);
#       if (value >= (id(dry_value) - Diff * id(ref_dry))) {
#         //id(red_led_blink_3_times).execute();
#         return {"Dry"};
#       } else if (value > (id(dry_value) - Diff * id(ref_wet)) && value < (id(dry_value) - Diff * id(ref_dry))) {
#         //id(yellow_led_blink_3_times).execute();
#         return {"Almost Dry"};
#       } else {
#         //id(green_led_blink_3_times).execute();
#         return {"Normal Moisture"};
#       }
#     update_interval: 5s

text_sensor:
  - platform: template
    name: "Soil Moisture Status"
    id: soil_status
    lambda: |-
      float value = id(soil_sensor).state;
      float Diff = id(dry_value) - id(wet_value);
      if (value >= (id(dry_value) - Diff * id(ref_dry))) {
        return {"Dry"};
      } else if (value > (id(dry_value) - Diff * id(ref_wet)) && value < (id(dry_value) - Diff * id(ref_dry))) {
        return {"Almost Dry"};
      } else {
        return {"Normal Moisture"};
      }
    update_interval: never  # 不让自动触发上报,我们自己控制

interval:
  - interval: 5s
    then:
      - text_sensor.template.publish:
          id: soil_status
          state: !lambda |-
            return "";
      - delay: 10ms
      - text_sensor.template.publish:
          id: soil_status
          state: !lambda |-
            float value = id(soil_sensor).state;
            float Diff = id(dry_value) - id(wet_value);
            if (value >= (id(dry_value) - Diff * id(ref_dry))) {
              id(deep_sleep_control).set_sleep_duration(900000);
              return "Dry";
            } else if (value > (id(dry_value) - Diff * id(ref_wet)) && value < (id(dry_value) - Diff * id(ref_dry))) {
              id(deep_sleep_control).set_sleep_duration(3600000);
              return "Almost Dry";
            } else {
              id(deep_sleep_control).set_sleep_duration(28800000);
              return "Normal Moisture";
            }

# Enable logging
logger:

improv_serial:

# Enable Home Assistant API
api:

ota:
  - platform: esphome

wifi:
  on_connect:
    then:
      - if:
          condition:
            lambda: 'return id(wifi_net_status) == 0;'
          then:
            - logger.log: "The device has not been configured yet, but now it is successfully configured"
            - globals.set:
                id: wifi_net_status
                value: '1'
            - delay: 5s
            - deep_sleep.allow: deep_sleep_control
          else:
            - logger.log: "The device has been networked"


  on_disconnect:
    then:
      - globals.set:
          id: wifi_net_status
          value: '0'
  # Enable fallback hotspot (captive portal) in case wifi connection fails
  ap:
    ssid: "XIAO-Soil-Moisture-Monitor"

captive_portal:
# ==== AUTO-SYNC END ====
Here’s an overview of the key functions and logic used in the YAML configuration.
on_boot – Defines what happens when the device boots.
- Input parameters: None.
- Action: Turns on GPIO 14, sets PWM LED brightness, checks Wi-Fi status, and triggers the first moisture check.
scripts (red_led_blink, green_led_blink, fast_blink_green, fast_blink_red, etc.) – Predefined LED blinking patterns.
- Input parameters: None.
- Action: Blinks LEDs in various patterns to indicate status or calibration steps.
do_calibration – Runs the calibration process for dry and wet soil.
- Input parameters: None.
- Action: Blinks red LED, waits for dry reading; then blinks green LED, waits for wet reading; stores average values and confirms success or failure.
check_moisture_once – Reads and evaluates soil moisture levels.
- Input parameters: None.
- Action: Takes multiple ADC readings, averages them, compares against calibrated thresholds, decides moisture state, triggers LED and deep sleep settings accordingly.
binary_sensor (GPIO2) – Handles physical button press logic.
- Input parameters: None.
- Action: Counts button presses; single press triggers a moisture check, triple press triggers calibration.
globals – Stores system state and calibration data.
- Variables:
button_press_count: Tracks button press count.dry_value,wet_value: Stores calibrated dry/wet ADC values.wifi_net_status: Tracks Wi-Fi connection state.ref_dry,ref_wet: Reference scaling factors for threshold calculations.
deep_sleep – Manages power-saving sleep cycles.
- Input parameters: None.
- Action: Runs for 120 seconds, then sleeps for up to 180 minutes; wakes up on button press or interval.
sensor (ADC) – Reads analog values from the soil sensor and battery.
- Input parameters: None.
- Action: Measures soil moisture and battery voltage; battery is scaled to show percentage.
text_sensor – Publishes human-readable soil moisture status.
- Input parameters: None.
- Action: Displays "Dry", "Almost Dry", or "Normal Moisture" in Home Assistant.
wifi + api + ota – Manages network connection, Home Assistant integration, and over-the-air firmware updates.
- Input parameters: Wi-Fi SSID and password.
- Action: Connects the device to the network, exposes its API, and enables remote updates.
Click INSTALL to install the code to the device and you will see the following image.
- Install through browser
- Install through host
- Install through Wi-Fi
If your Home Assistant Host (Raspberry PI/Green/Yellow etc.) is far away from you, we recommend using this method. You can install it with the computer you have on hand.
First, you need to click Manual download to download the compiled firmware.

Open this website where we will upload the firmware to the ePaper panel.

Go back to ESPHome to download the firmware.

Select Factory format.

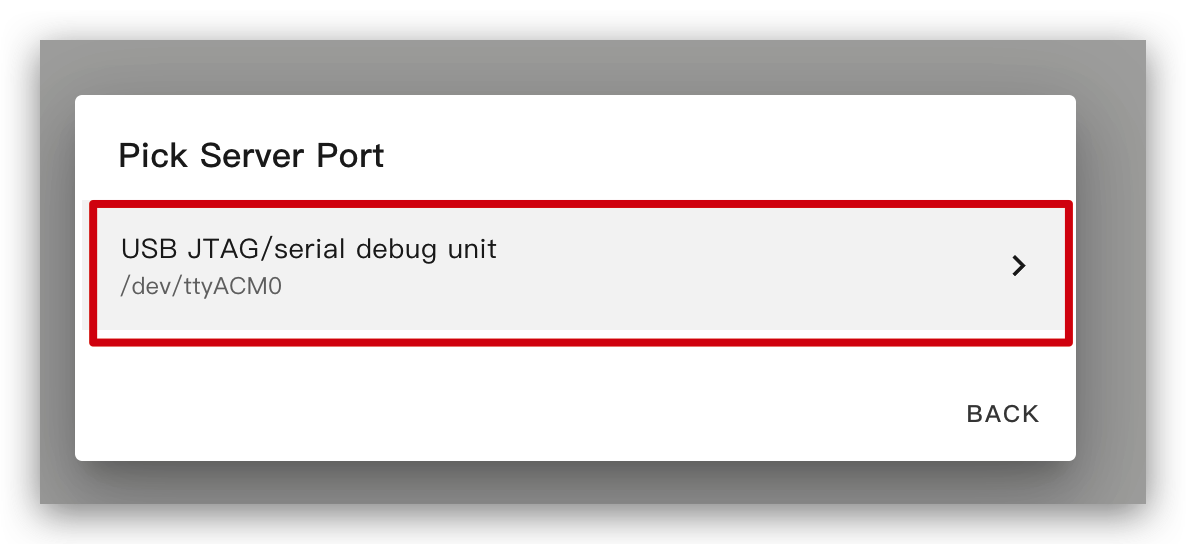
Use USB cable to connect the ePaper panel to your computer and click CONNECT.

Select usbmodemxxx(Windows is COMxxx) and click connect.

Click INSTALL and select the firmware you just downloaded.

Your firmware will be flashed shortly ~

If your Home Assistant Host (Raspberry PI/Green/Yellow etc.) is nearby, we recommend using this method as it is simpler.
Before you install the code to the device, you need to use USB cable to connect this device to your Raspberry Pi or HA Green(Yellow) etc which is running Home Assistant.
Click the options following the image to install the code to the device.

Wait a moment and you will see the feedback like the following image. It means the code is running successfully.

This is the simplest way, but on the premise that when installing the program for the first time, you should first upload the program to the ePaper Panel using the method on the left. After that, you can upload it via wifi. Also, make sure your YAML configuration includes properly configured ota and api sections with valid encryption keys for this method to work.
In this way, you don't need to connect the ePaper panel to anything, just make sure it is online.
Click the option and then the firmware will be installed to ePaper penal automatically.

Wait a moment and you will see the feedback like the following image. If it fails, it may be due to a weak signal. Please move the device closer to your router.

Reset
If the firmware needs to be reflashed, you can use the following link to restore the default firmware:
https://gadgets.seeed.cc/
Connect your device to your computer first.
Then, find XIAO Soil Moisture Monitor on the page and click Connect to proceed with reflashing.
Resources
- [PDF] XIAO Soil Moisture Sensor SCH
- [Kicad] XIAO Soil Moisture Sensor PCB
- [Yaml] XIAO Soil Moisture Sensor HA Yaml
- [Bin] XIAO Soil Moisture Sensor HA Factory Bin
- [LINK] XIAO Soil Moisture Sensor 3D file Printtables
- [LINK] XIAO Soil Moisture Sensor 3D file Thingiverse
Tech Support & Product Discussion
Thank you for choosing our products! We are here to provide you with different support to ensure that your experience with our products is as smooth as possible. We offer several communication channels to cater to different preferences and needs.