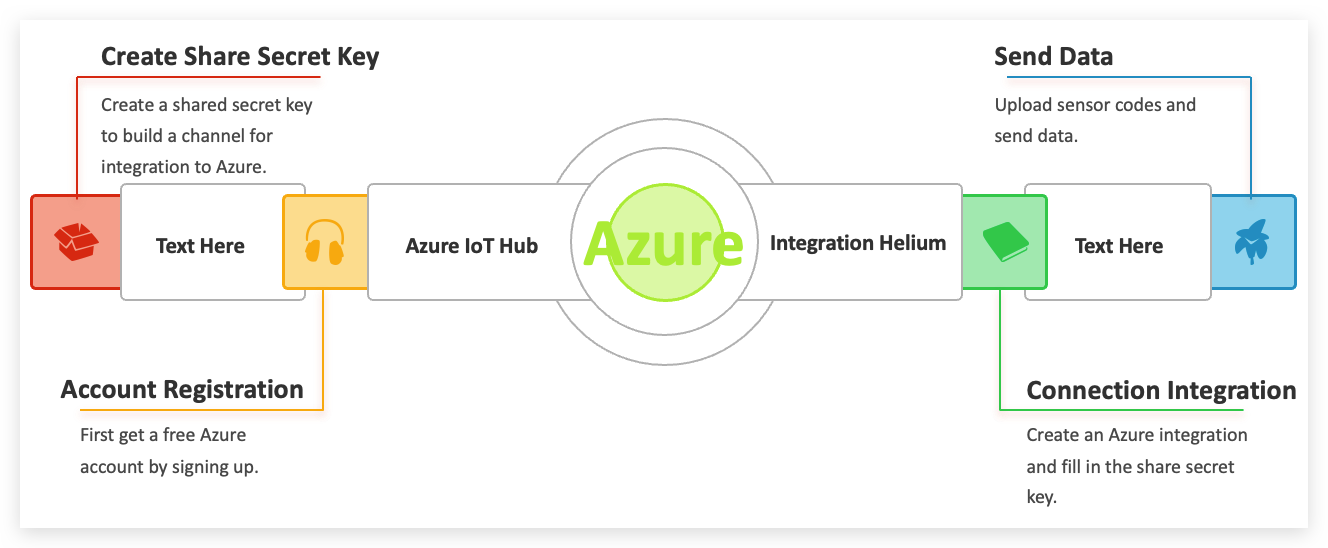
Integrate into Azure IoT Hub
The Internet of Things (IoT) is a network of physical devices that connect to and exchange data with other devices and services over the Internet or other network. There are currently over ten billion connected devices in the world and more are added every year. Anything that can be embedded with the necessary sensors and software can be connected over the internet.
Azure IoT Hub is a managed service hosted in the cloud that acts as a central message hub for communication between an IoT application and its attached devices. You can connect millions of devices and their backend solutions reliably and securely. Almost any device can be connected to an IoT hub.
Several messaging patterns are supported, including device-to-cloud telemetry, uploading files from devices, and request-reply methods to control your devices from the cloud. IoT Hub also supports monitoring to help you track device creation, device connections, and device failures.
- For more information on using Microsoft Azure IoT Hub, please refer here.
In this chapter, you’ll need to switch over to Microsoft Azure. After that, maybe you will need to sign up to get a free account. A new account registration will get you a free $200 credit, which you can fully use to complete our routines.
Create resource groups
A resource group is a container that holds related resources for an Azure solution. The resource group can include all the resources for the solution, or only those resources that you want to manage as a group. You decide how you want to allocate resources to resource groups based on what makes the most sense for your organization. Generally, add resources that share the same lifecycle to the same resource group so you can easily deploy, update, and delete them as a group.
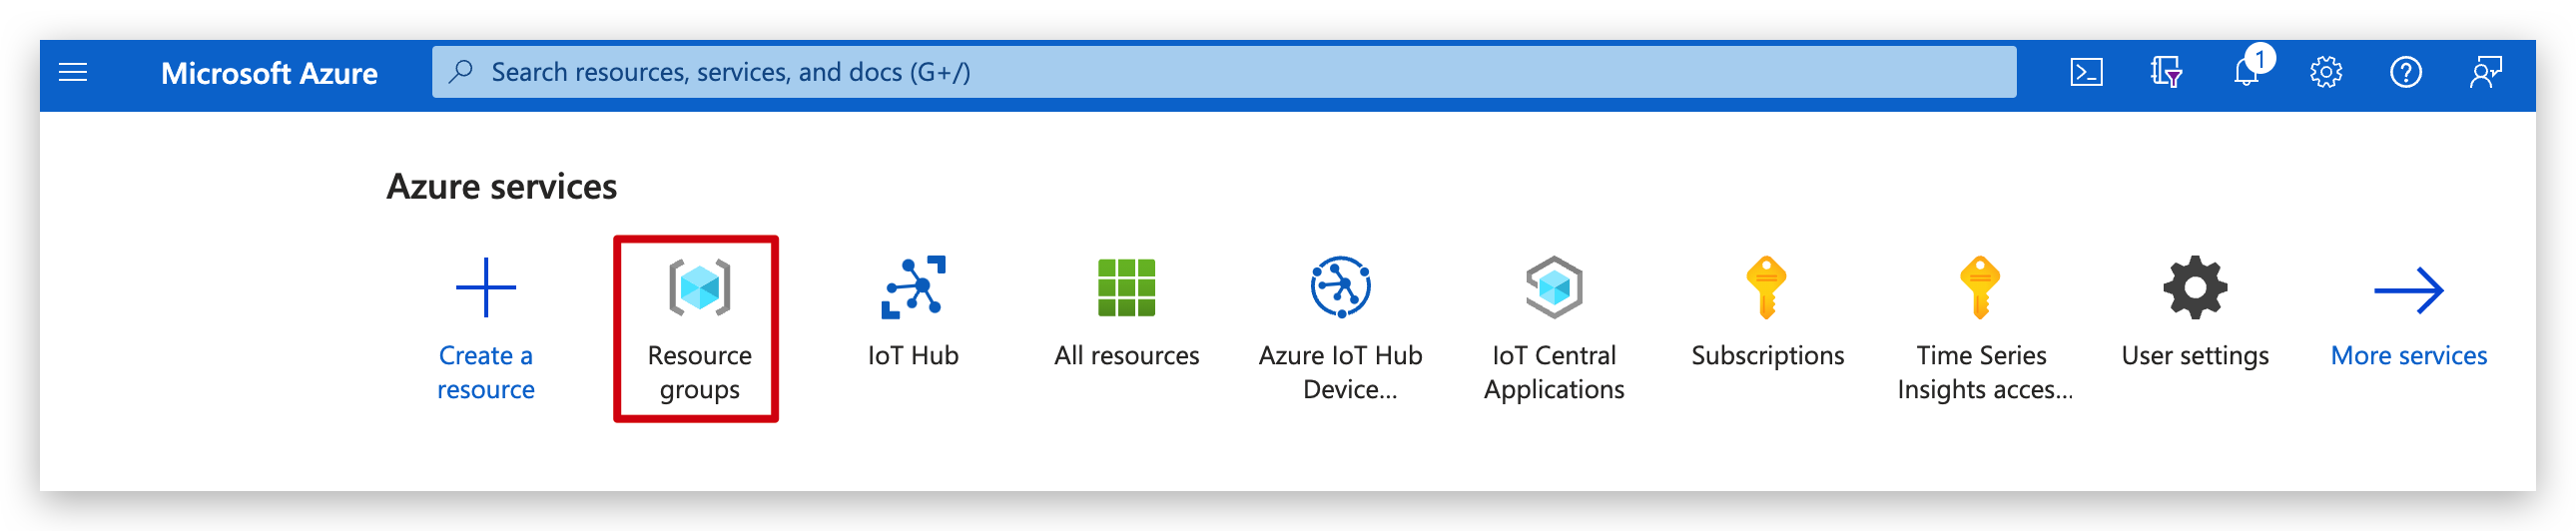
Then first, please login to Azure portal with your registered account.
Select Resource groups.
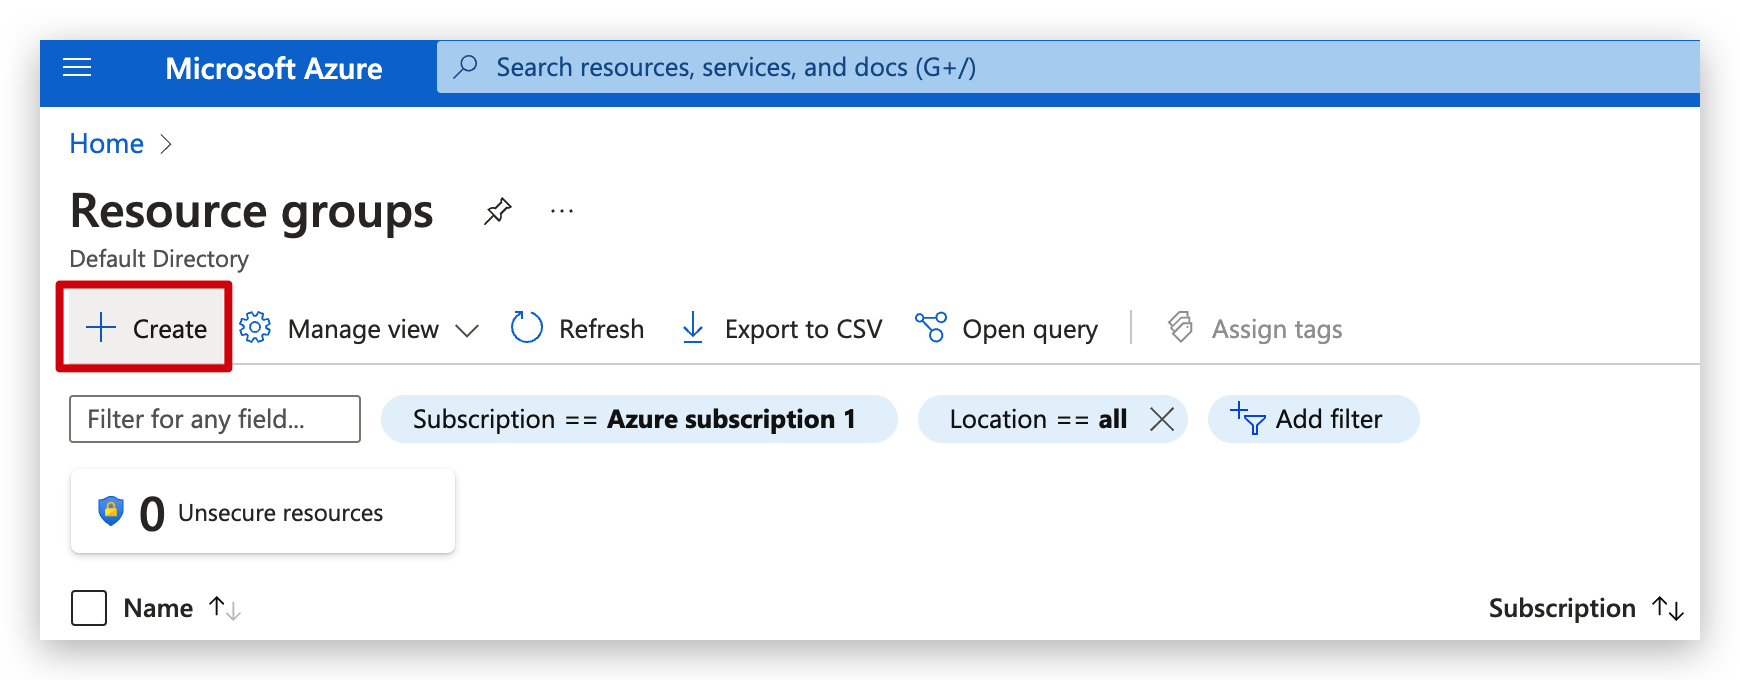
Select Create.
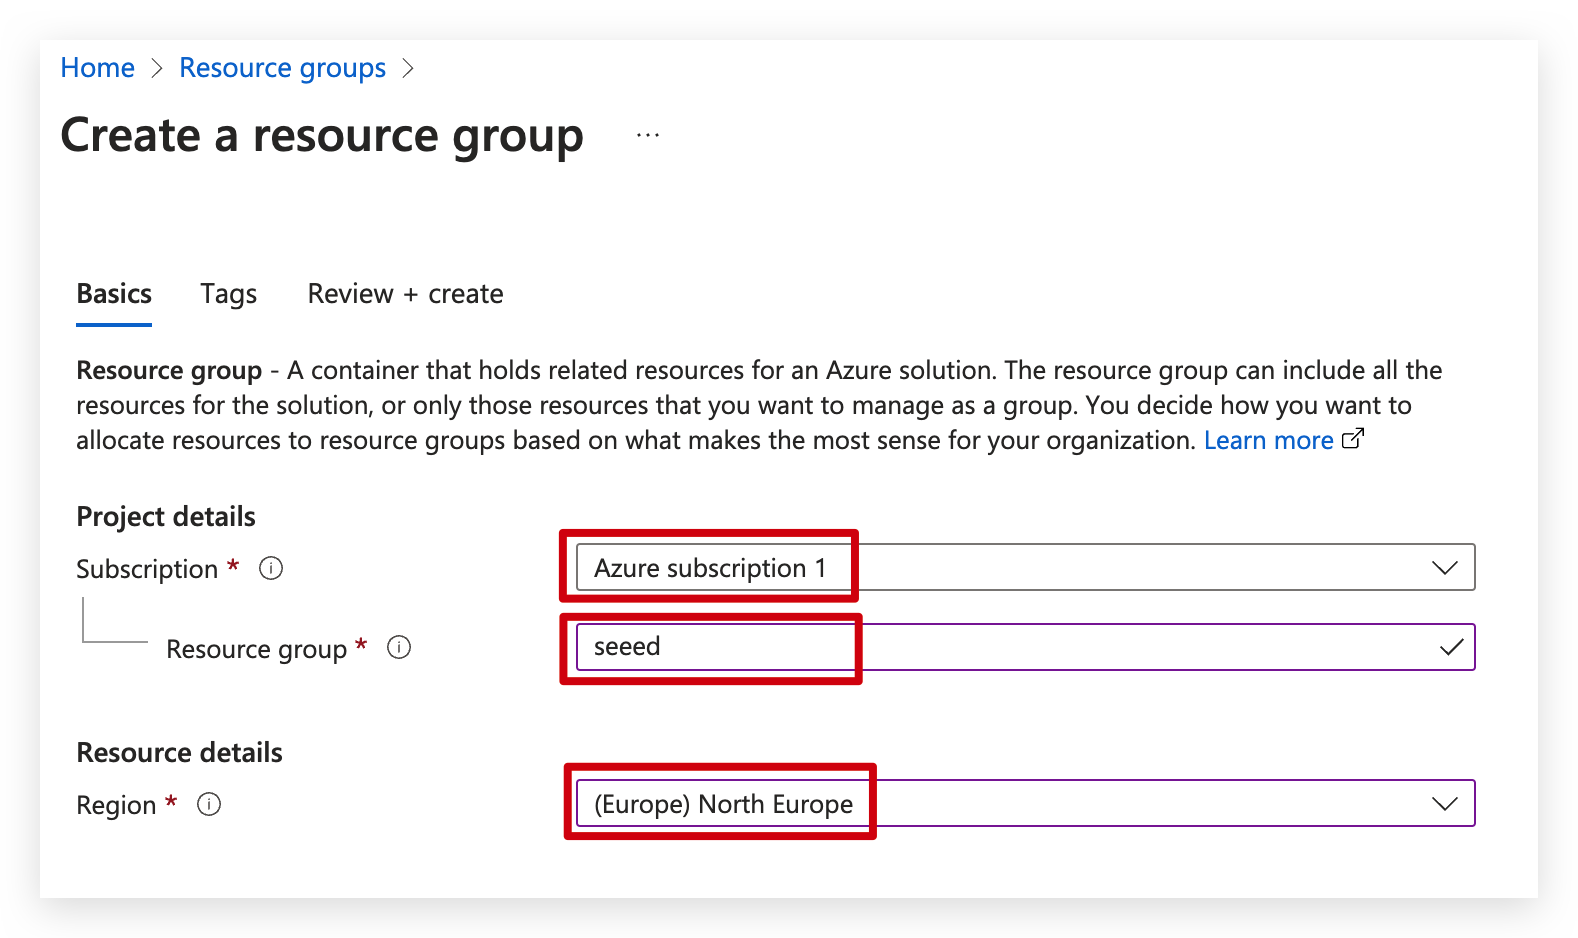
Enter the following values:
-
Subscription: Select your Azure subscription.
-
Resource group: Enter a new resource group name.
-
Region: Select an Azure location, such as North Europe.
Select Review + Create.
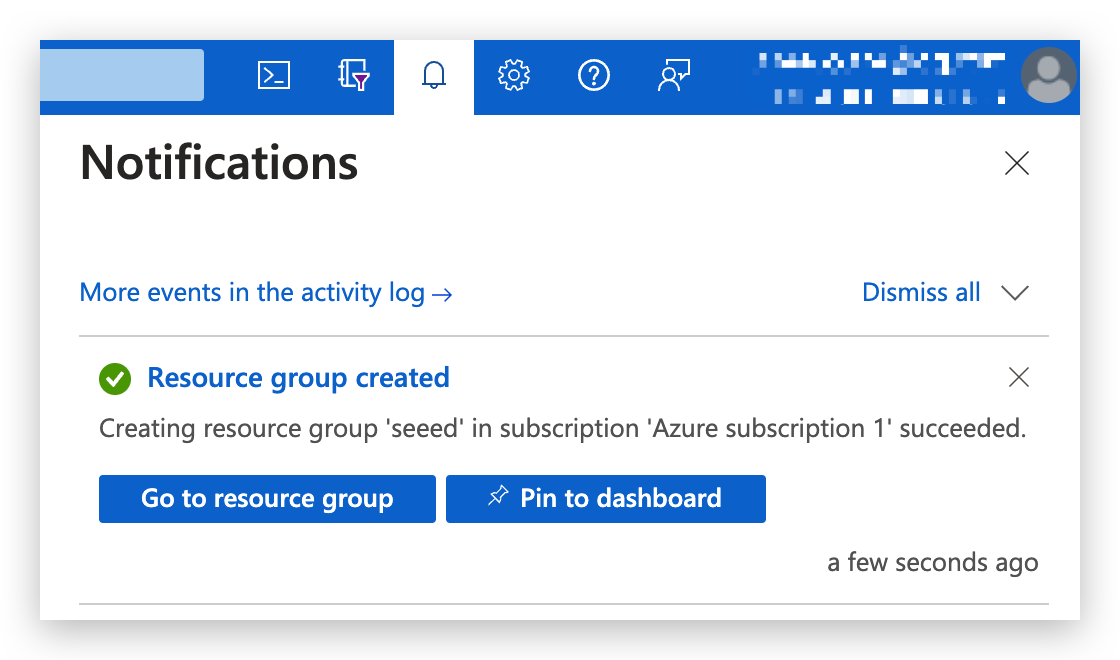
Select Create. It takes a few seconds to create a resource group.
Select Refresh from the top menu to refresh the resource group list, and then select the newly created resource group to open it. Or select Notification(the bell icon) from the top, and then select Go to resource group to open the newly created resource group.
Create a Microsoft Azure IoT Hub
This step describes how to create and manage Microsoft Azure IoT Hub using the Microsoft Azure portal. From the Microsoft Azure homepage, select the Create a resource button, and then enter IoT Hub in the Search the Marketplace field.

Select IoT Hub from the search results, and then select Create.


On the Basics tab, complete the fields as follows:
-
Subscription: Select the subscription to use for your hub.
-
Resource Group: Select a resource group or create a new one. To create a new one, select Create new and fill in the name you want to use. To use an existing resource group, select that resource group. For more information, see Manage Azure Resource Manager resource groups.
-
Region: Select the region in which you want your hub to be located. Select the location closest to you. Some features, such as IoT Hub device streams, are only available in specific regions. For these limited features, you must select one of the supported regions.
-
IoT Hub Name: Enter a name for your hub. This name must be globally unique, with a length between 3 and 50 alphanumeric characters. The name can also include the dash ('-') character.
Because the IoT hub will be publicly discoverable as a DNS endpoint, be sure to avoid entering any sensitive or personally identifiable information when you name it.
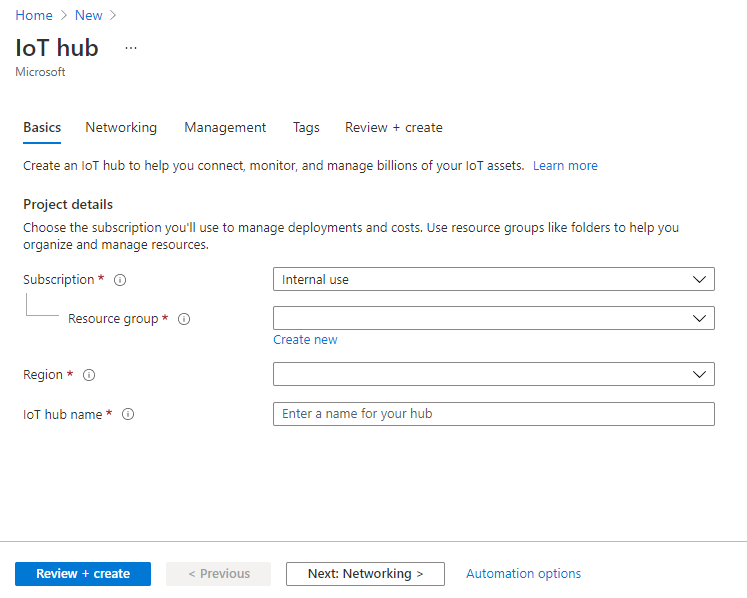
Select Next: Networking to continue creating your hub.
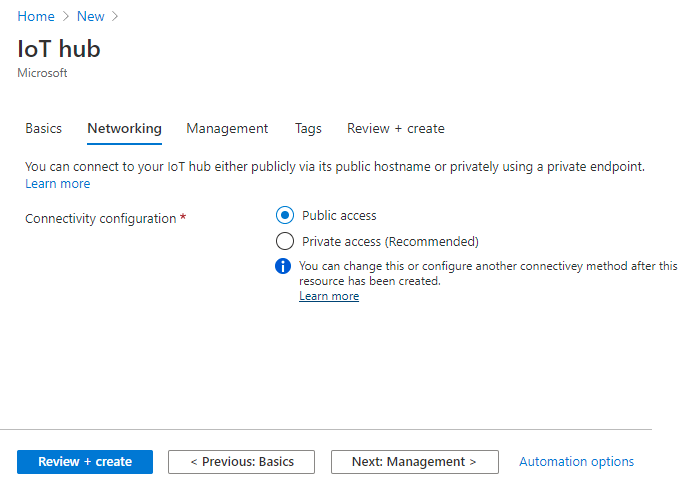
Select Next: Management to continue creating your hub.
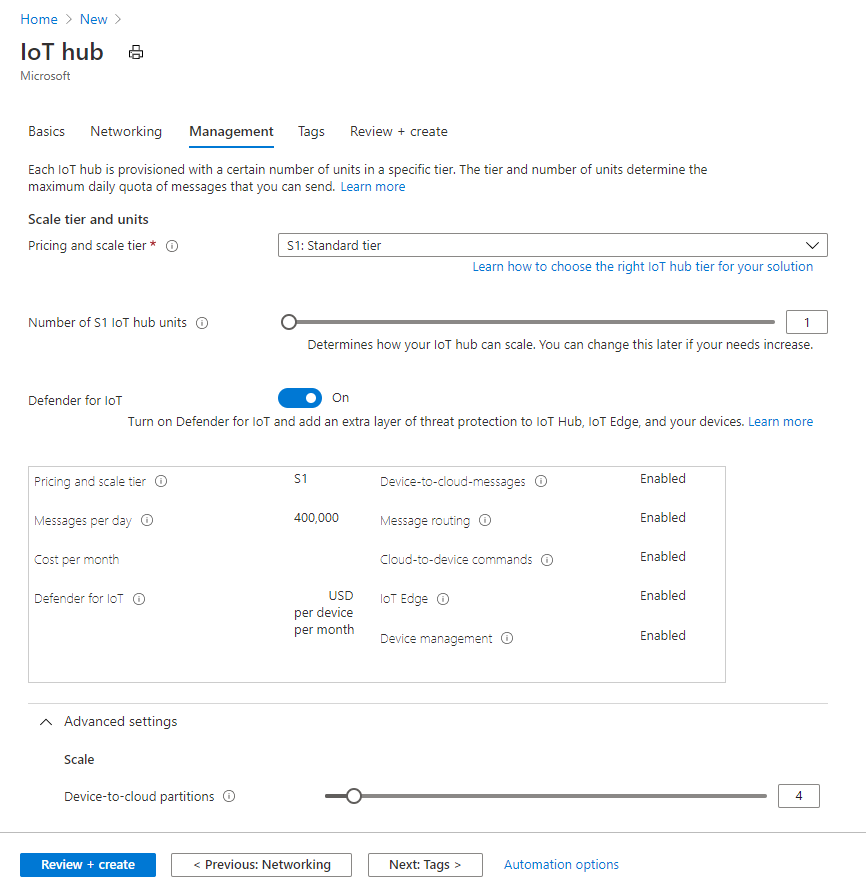
You can accept the default settings here. If desired, you can modify any of the following fields:
Choose the endpoints that devices can use to connect to your IoT hub. You can select the default setting, Public access, or choose Private access. Accept the default setting for this example.
- Pricing and scale tier
Your selected tier. You can choose from several tiers, depending on how many features you want and how many messages you send through your solution per day. The free tier is intended for testing and evaluation. It allows 500 devices to be connected to the hub and up to 8,000 messages per day. Each Azure subscription can create one IoT hub in the free tier.
If you are working through a Quickstart for IoT Hub device streams, select the free tier.
- IoT Hub units
The number of messages allowed per unit per day depends on your hub's pricing tier. For example, if you want the hub to support ingress of 700,000 messages, you choose two S1 tier units. For details about the other tier options, see Choosing the right IoT Hub tier.
- Microsoft Defender for IoT
Turn this on to add an extra layer of threat protection to IoT and your devices. This option is not available for hubs in the free tier. Learn more about security recommendations for IoT Hub in Defender for IoT.
- Role-based access control
Choose how access to the IoT hub is managed, whether shared access policies are allowed or only role-based access control is supported. For more information, see Control access to IoT Hub by using Azure Active Directory.
- Device-to-cloud partitions
This property relates the device-to-cloud messages to the number of simultaneous readers of the messages. Most hubs need only four partitions.
Select Next: Tags to continue to the next screen.
Tags are name/value pairs. You can assign the same tag to multiple resources and resource groups to categorize resources and consolidate billing. In this document, you won't be adding any tags. For more information, see Use tags to organize your Azure resources.

Select Next: Review + create to review your choices. You see something similar to this screen, but with the values you selected when creating the hub.
We leave the rest of the content as default and do not modify it.
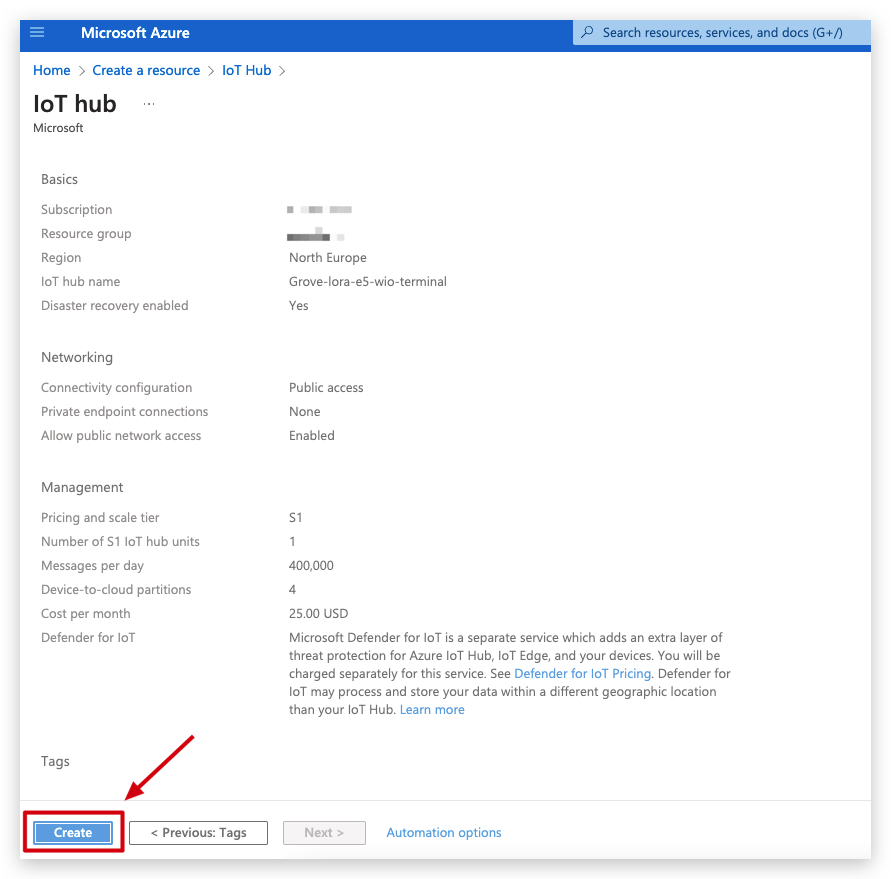
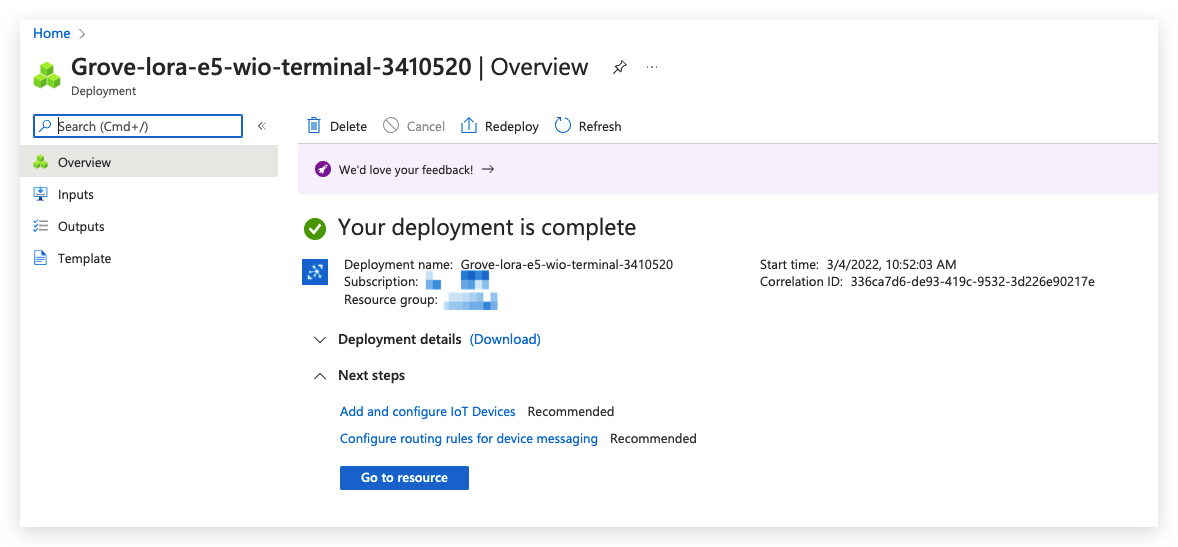
Select Create to start the deployment of your new hub. Your deployment will be in progress a few minutes while the hub is being created. Once the deployment is complete, select Go to resource to open the new hub.
You can change the settings of an existing IoT hub after it's created from the IoT Hub pane.

Create share secret key
Click Add Shared Access Policy and create a new access policy with the following permissions: Registry Read, Registry Write, Device Connect.
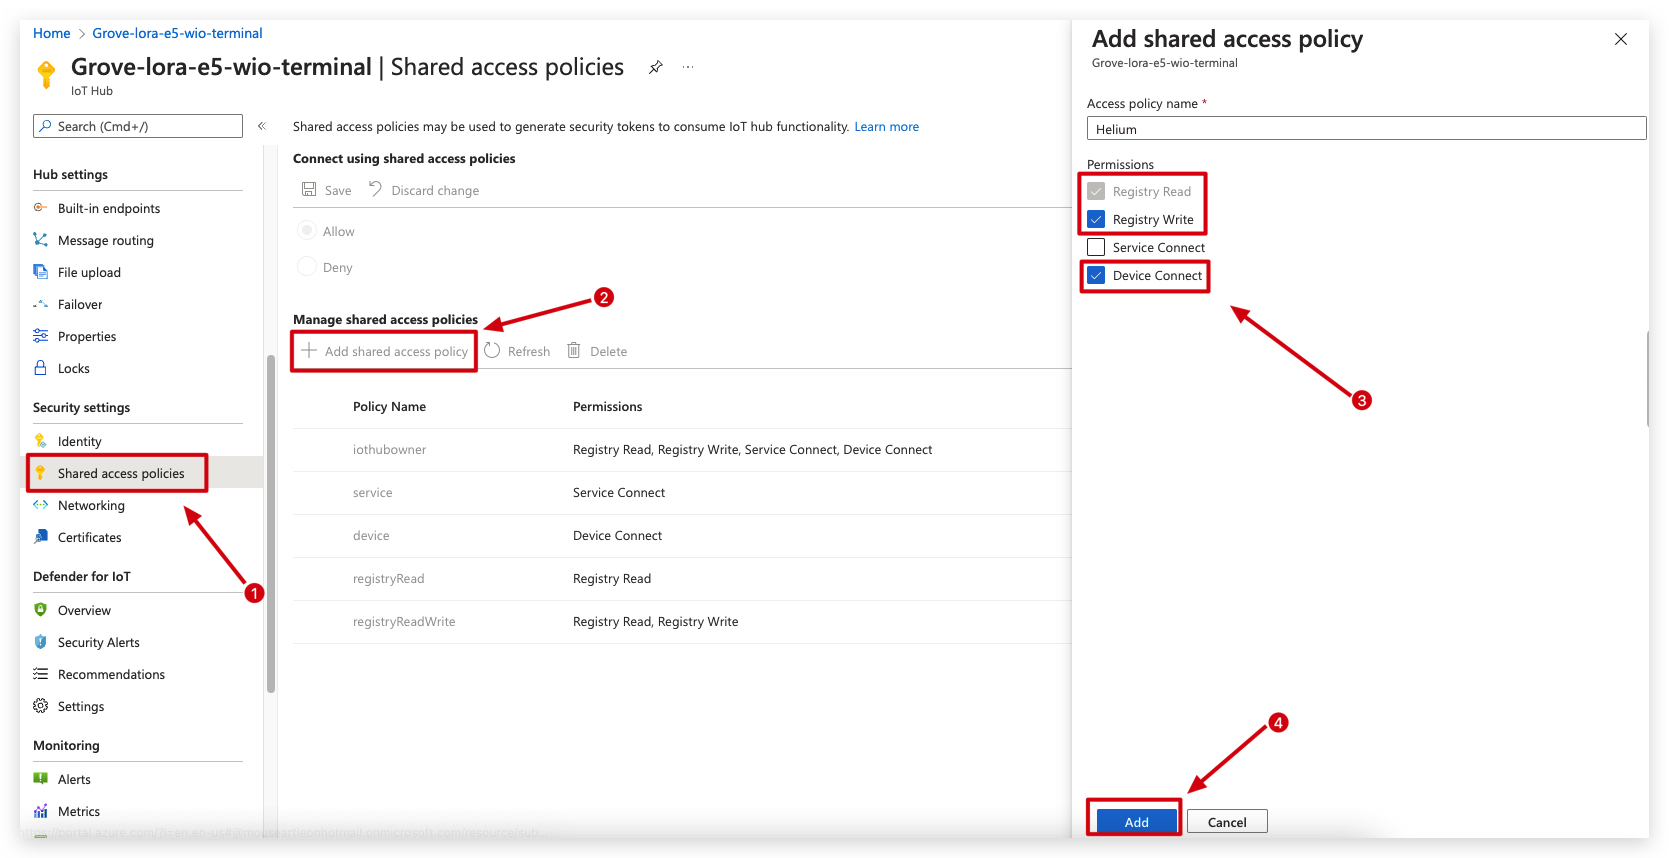
After creation, four sets of secret keys will be generated automatically, the one we need to copy is the Primary connection string.

Don't leak your Primary connection string, otherwise others can access your Azure IoT Hub at any time and get all the permissions you've set up for it.
Integration to Helium
So now we can go back to the Helium console and create the Azure to Helium integration.
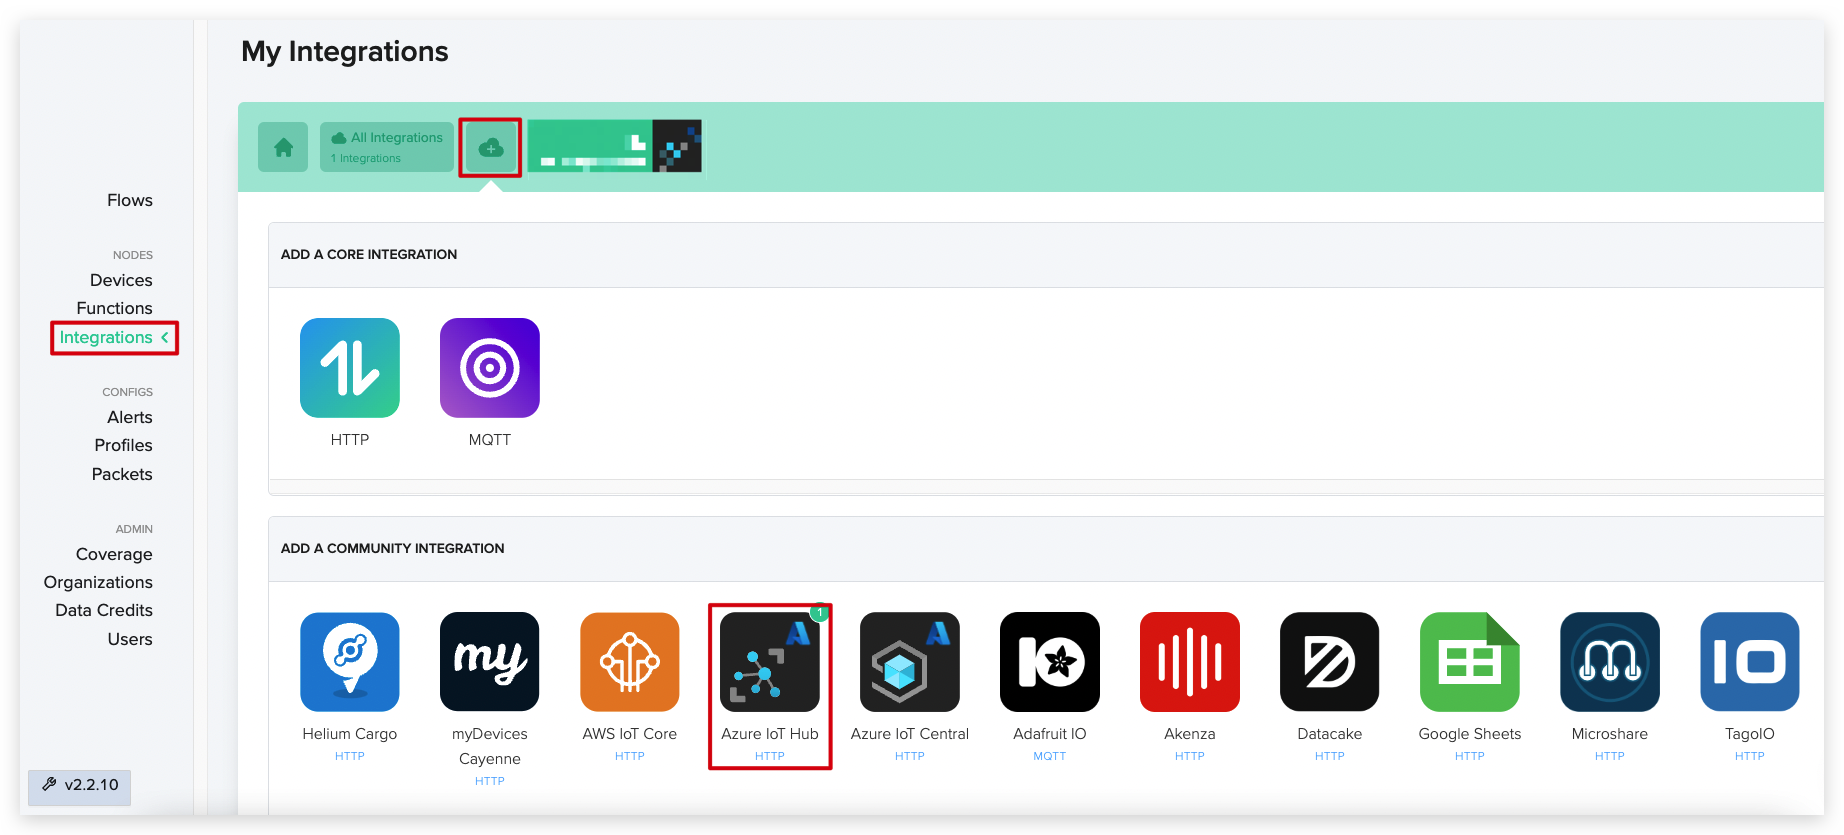
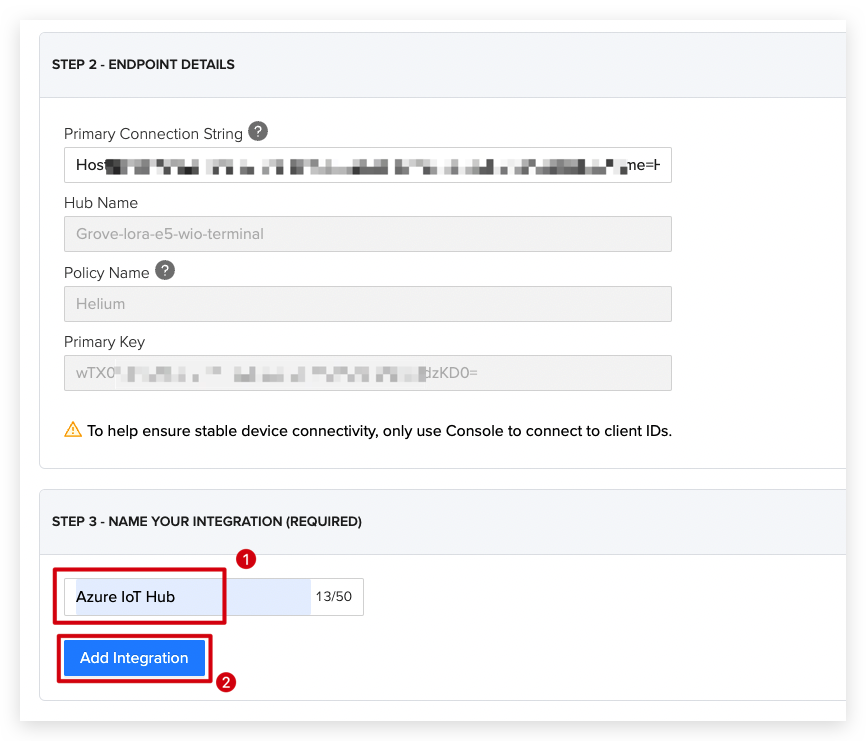
Click Add Integration in the new page.

Fill in the Primary connection string generated above on the new page and Helium will automatically generate the rest of the content.
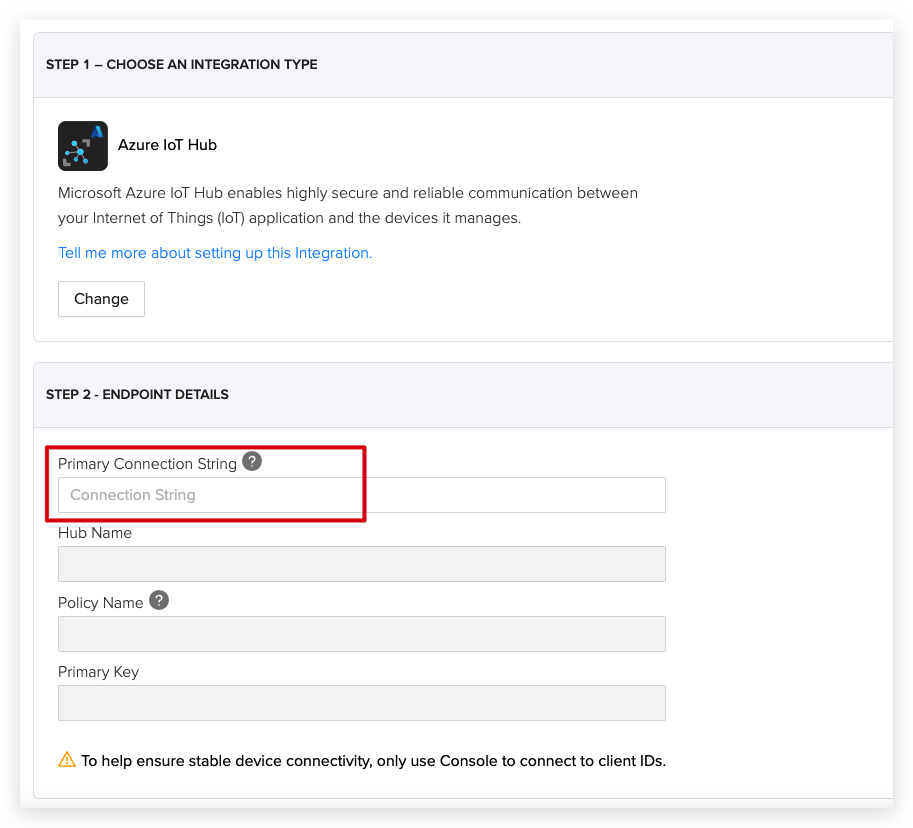
Finally, just name this integration.
Connection Integration
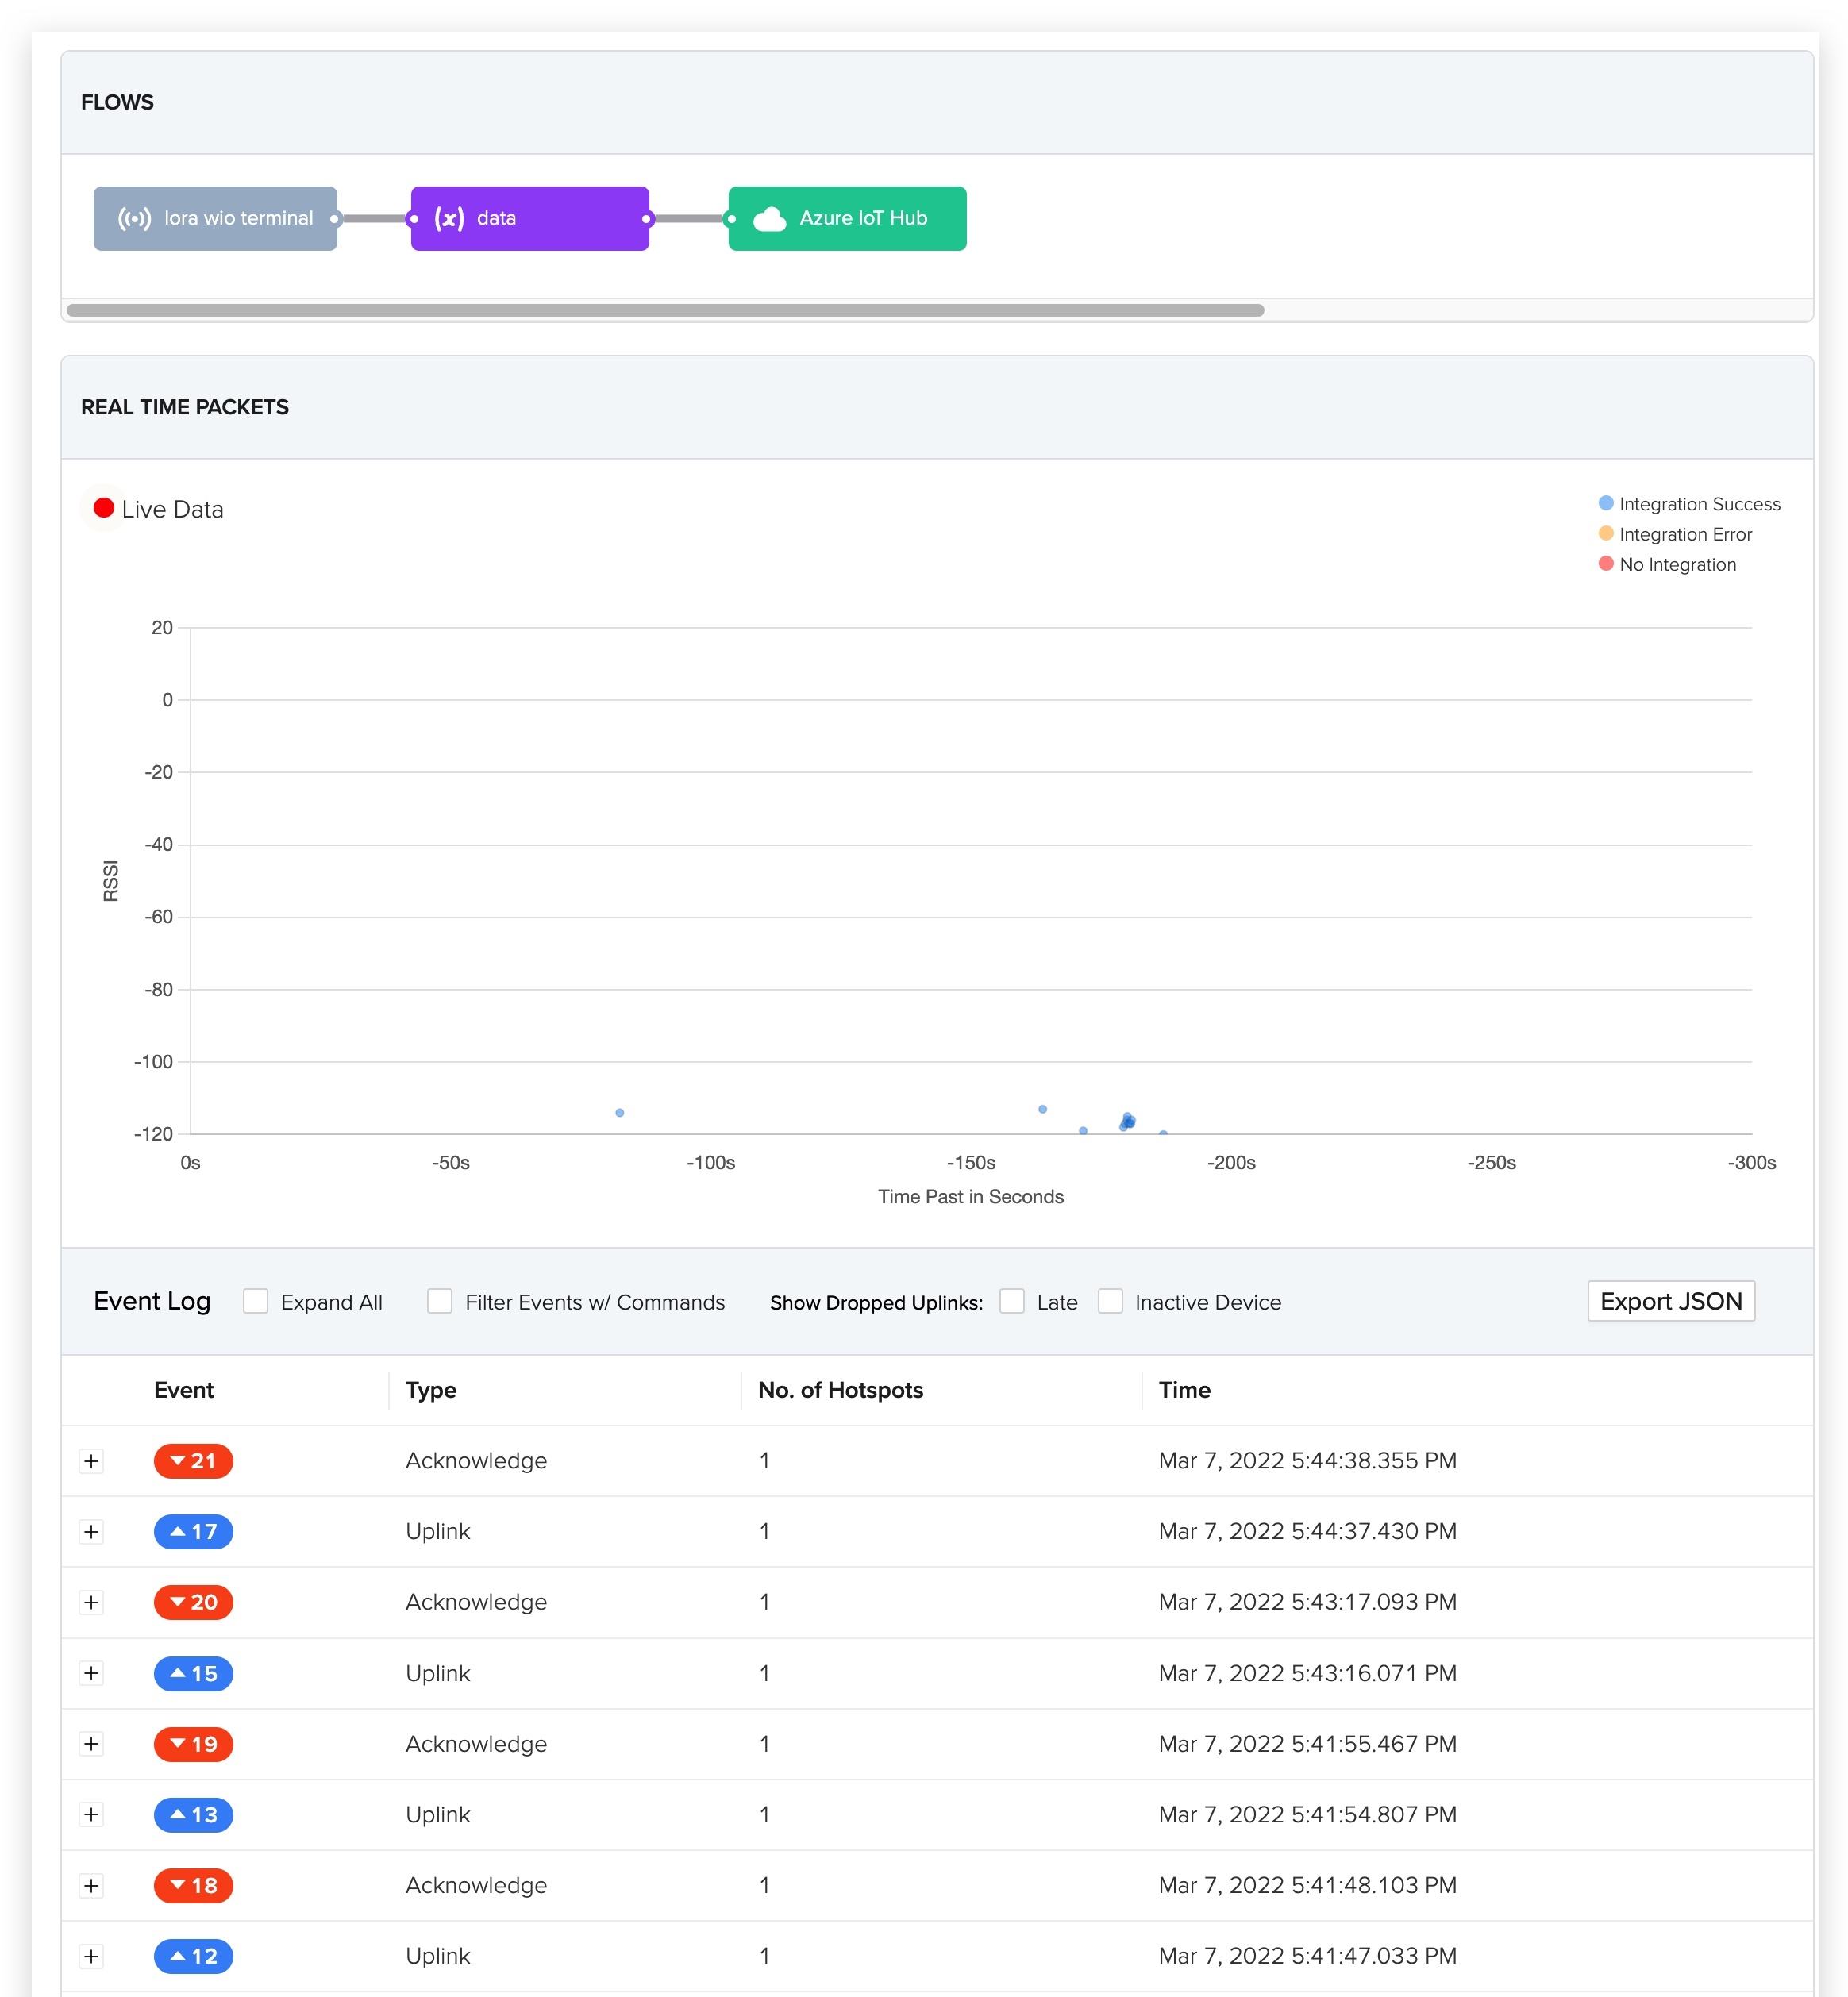
Now, use the click and drag interface in the Helium Console to connect the device to the function (Decoder) to the Azure Integration as shown previously.

At this point, follow the previous steps to upload the code again, and Wio Terminal will reconnect to Helium and upload the data.
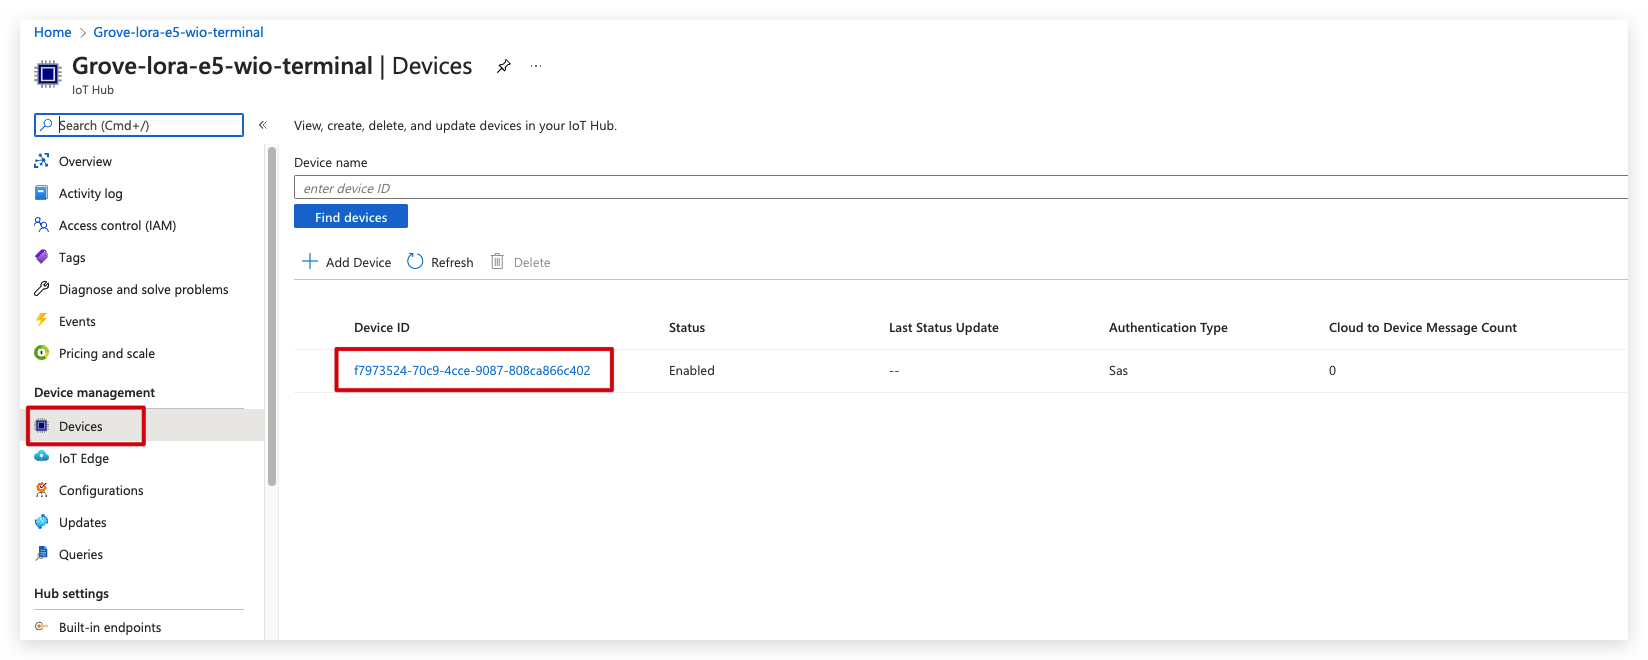
After the integration is complete and your device joins LoRaWAN® to send data to Helium all the time. A device should show up in the Device pane of Azure IoT hubs with the Device ID from the Helium Network.
We can also find out about the success of sending data by checking the data returned by the serial monitor.
When you click on “Overview” on IoT Hubs, you should also see messages flowing through IoT hubs and a device listed as “Connected”.
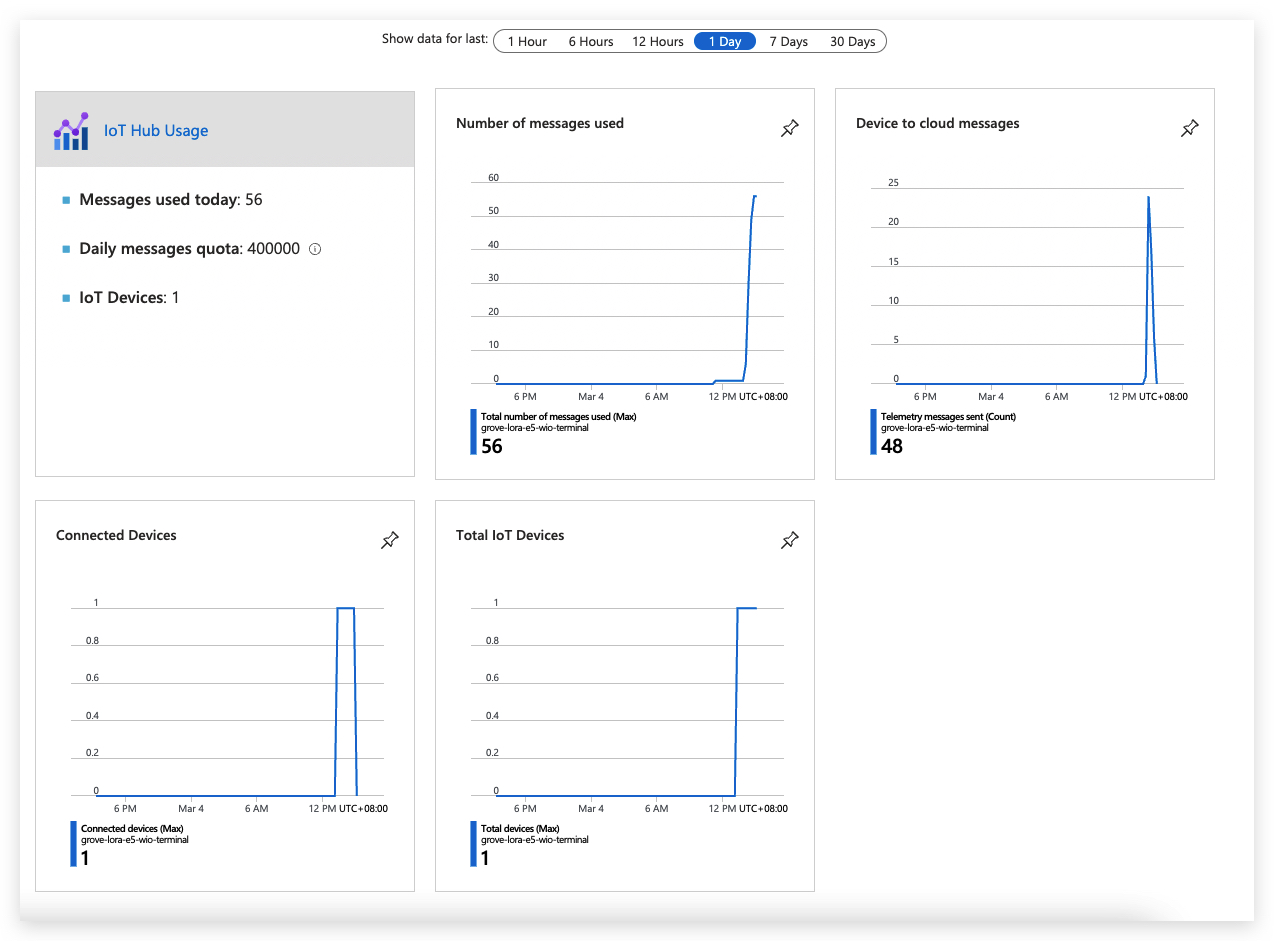
-
Number of messages used: Total number of messages used (Max).
-
Device to cloud messages: Telemetry messages sent (Count).
-
Connected Devices: Connexted devices (Max).
-
Total IoT Devices: Total devices (Max).
So at this point in the tutorial, you have completed the entire deployment of the local sensor to the Azure cloud. Next, you have the option to customize the processing of the data according to your needs, refer here.
Of course, you can also continue our tutorial content to learn how to use Microsoft's Web APP integration to complete the visualization of your data.
| Configuring Web APP Visualization This section describes how to visualize the data information received by Microsoft Azure using the free Web APP integration. Let's get started > |

Tech Support & Product Discussion
Thank you for choosing our products! We are here to provide you with different support to ensure that your experience with our products is as smooth as possible. We offer several communication channels to cater to different preferences and needs.
Statement
- The LoRa® Mark is a trademark of Semtech Corporation or its subsidiaries.
- LoRaWAN® is a mark used under license from the LoRa Alliance®.