TrueNAS Installation
This guide explains how to turn your ODYSSEY-X86 into a Network Attached Storage (NAS) by installing TruneNAS. Let's get started!
What is TrueNAS?
TrueNAS is a free and open-source network-attached storage (NAS) operating system deveoped by iXsystems. It is based on FreeBSD and Linux and uses the OpenZFS file system. It can run on almost all X86-based hardware.
TrueNAS has several editions and includes TrueNAS CORE (previously known as FreeNAS), TrueNAS Enterprise (commercial edition), and TrueNAS SCALE (Linux edition). You can visit this link to learn more about the differences between them.
TrueNAS supports clients running multiple operating systems such as Windows, macOS and Linux. It also ofers various virtualization hosts such as XenServer and VMware using the SMB, AFP, NFS, iSCSI, SSH, rsync and FTP/TFTP protocols. It also includes advanced features such as full-disk encryption and a plug-in architecture for third-party software.

Prerequisites
-
USB Flash Drive (>1GB)
-
Ethernet cable and a router with one free port
-
External storage media (If you use ODYSSEY-X86 with built-in eMMC, you can use that as well)
- NVMe SSD or
- SATA SSD or
- SATA HDD or
- Micro-SD Card or
- USB Flash Drive (>1GB)
Getting Started
Now let's go through the process of installing TrueNAS on ODYSSEY-X86. Here we will use TrueNAS Core as an example to walkthrough the steps of installation.
Flash TrueNAS image to a USB flash drive
- Step 1. Visit this link to open the download page of TrueNAS Core
Note: If you want to download TruneNAS scale, you can visit this link
- Step 2. You can either subscribe to the TrueNAS newsletter or choose to skip that step

- Step 3. Download the Stable version

- Step 4. Download and install BalenaEtcher according to your OS by visiting this link and open it

- Step 5. Connect a USB flash drive to your PC, click Flash from file, select the downloaded file from before, click Select target, choose the connected USB flash drive and click Flash

Boot TrueNAS from flash drive and install on external drive
-
Step 1. Connect the USB flash drive that we flashed the TrueNAS image before to one the of the USB ports on the ODYSSEY-X86
-
Step 2. Attach an external storage drive to install TrueNAS. ODYSSEY-X86 has a number of storage options such as:
- NVMe SSD
- SATA SSD
- SATA HDD
- Micro-SD Card
- USB Flash Drive (>1GB)

Note: Here we recommend you to choose an M.2 SSD to install TrueNAS for reliability and choose the remaining M.2 and SATA port to connect other drives for file storage
-
Step 3. Connect one end of an Ethernet cable to one of the Ethernet ports on the ODYSSEY-X86 and the other end of the cable to a router
-
Step 4. Turn on ODYSSEY-X86 and continuosly press DELETE key to enter BIOS

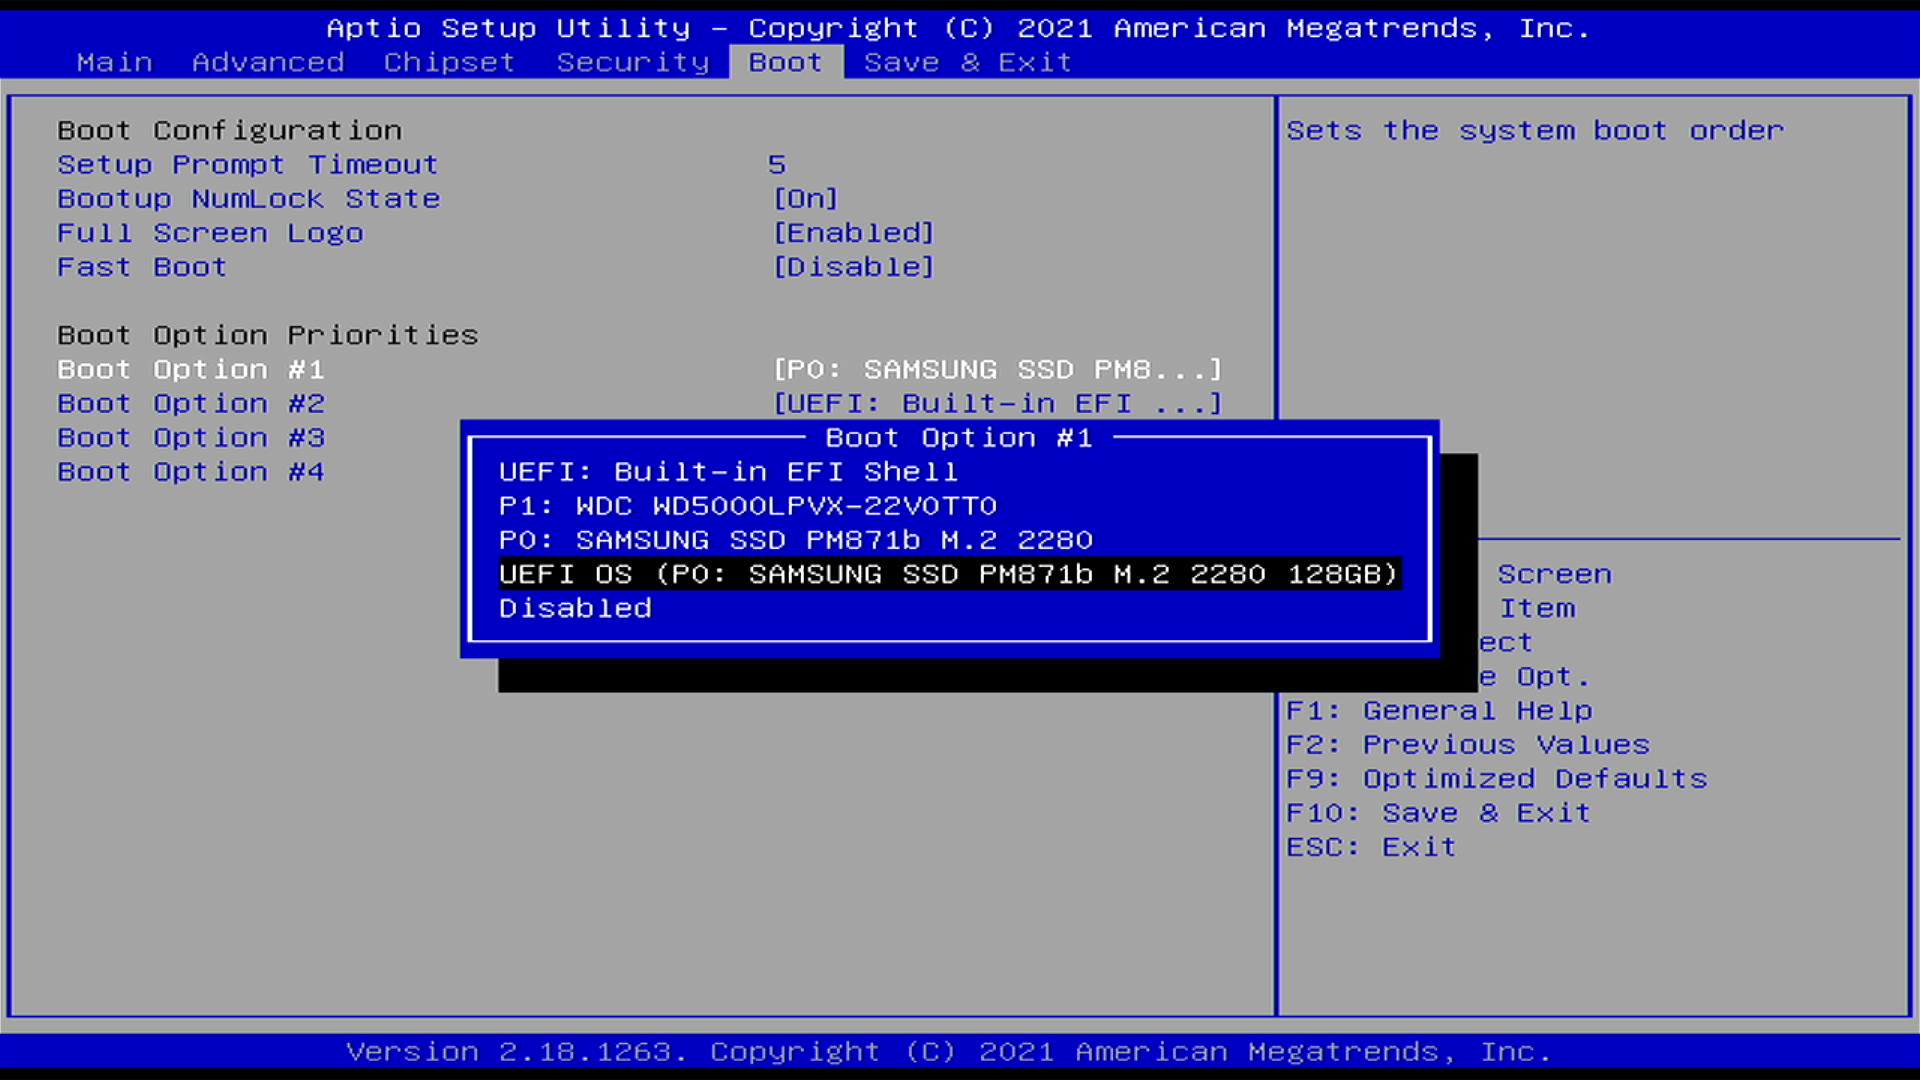
- Step 5. Go to Boot tab, select Boot Option #1 and select UEFI: USB, Partition 2

- Step 6. Go to Save & Exit tab, select Save Changes and Reset and select Yes for the pop up window

- Step 7. Once ODYSSEY-X86 boots into TrueNAS successfully, press ENTER to proceed with the Install/Upgrade option which is highlighted by default

- Step 8. Choose your desired drive to install TrueNAS by pressing SPACE after navigating using arrow keys. Press ENTER to go to next step

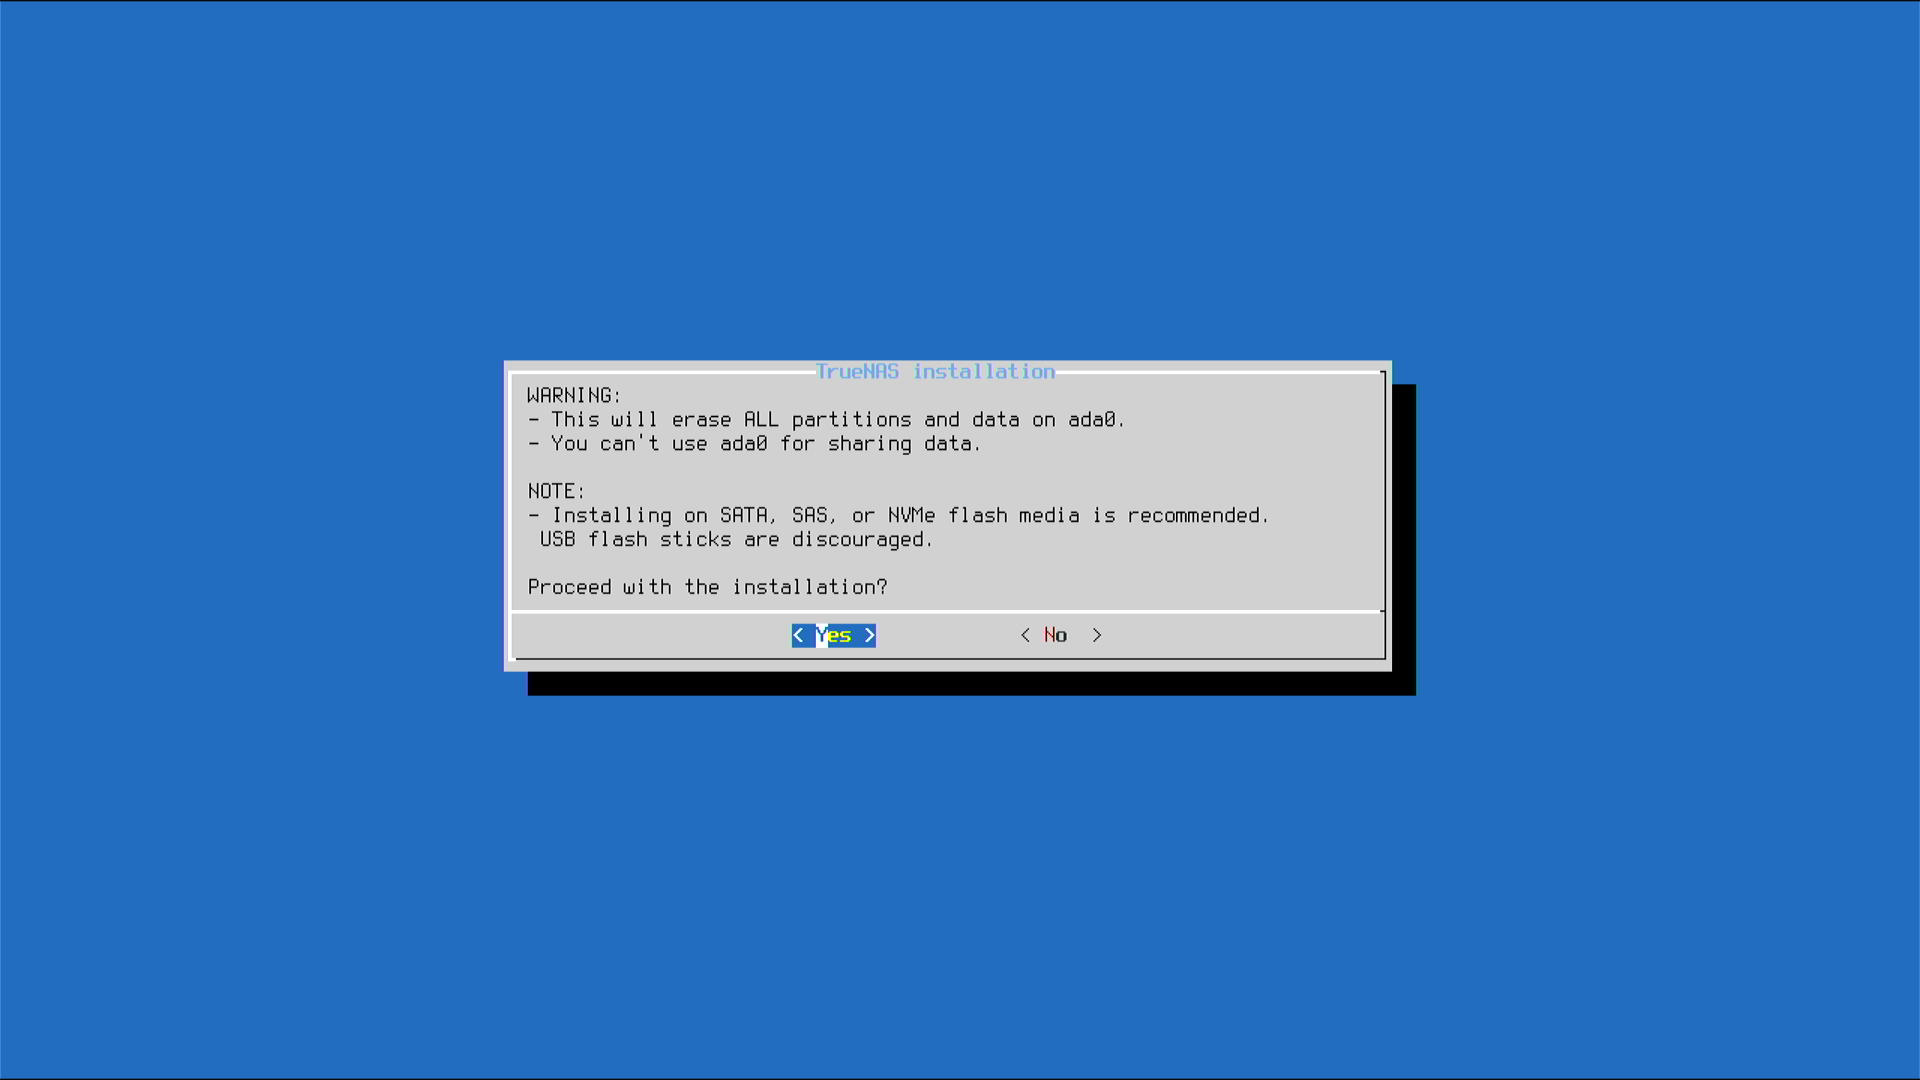
- Step 9. Press ENTER again to proceed
- Step 10. Now it will ask you to change the root password. This is recommended. Enter a password and press ENTER

- Step 11. Choose to boot via UEFI because ODYSSEY-X86 supports UEFI booting

- Step 12. Choose to Create swap for better performance

- Step 13. Once TrueNAS finishes installing, press ENTER

- Step 14. Select Reboot System and press ENTER again

- Step 15. When the system starts booting again, remove the USB Flash Drive, enter BIOS, select the connected external drive as the boot device and boot again
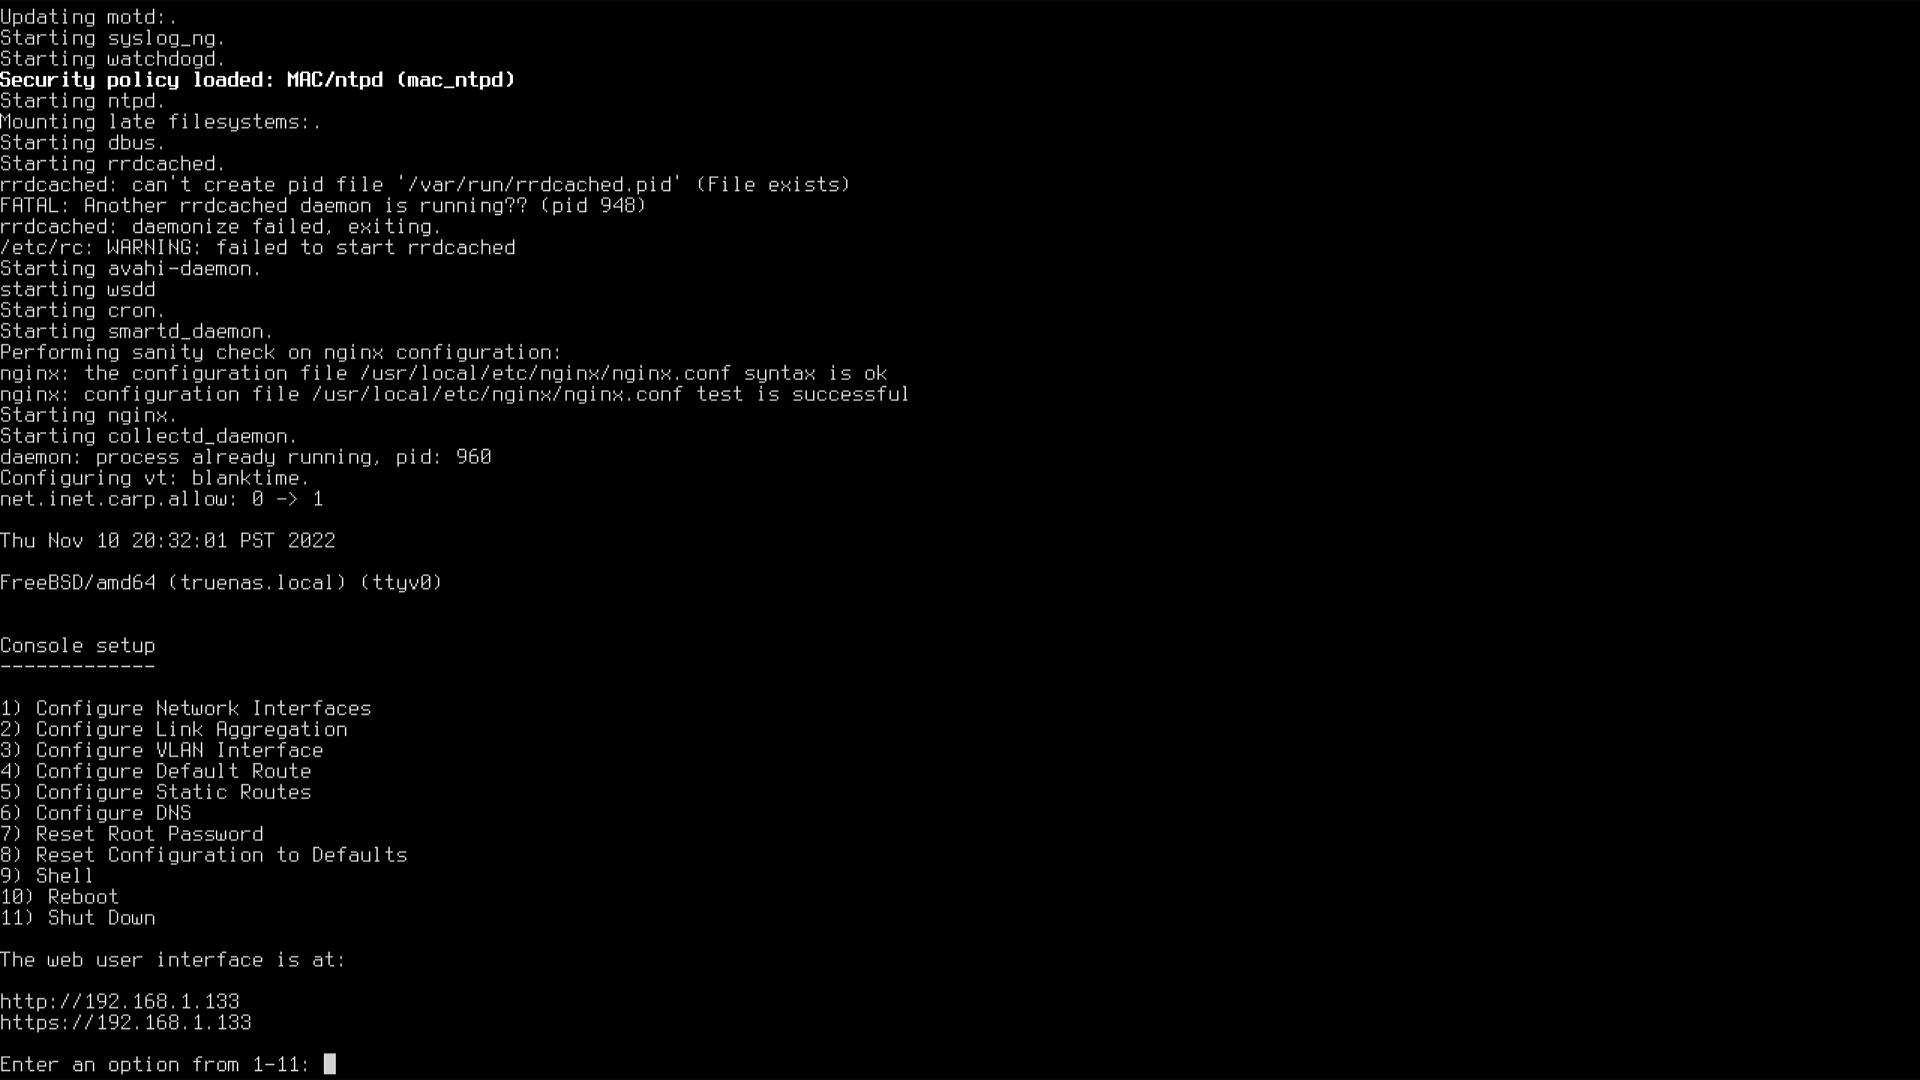
Now ODYSSEY-X86 will boot from the external drive into TrueNAS and you will see the following output if it boots successfully
Set up TrueNAS
Now we will set up the TrueNAS software
Access GUI
- Step 1. Enter the IP address shown on a browser

- Step 2. Enter username as root and the password you set before to LOG IN
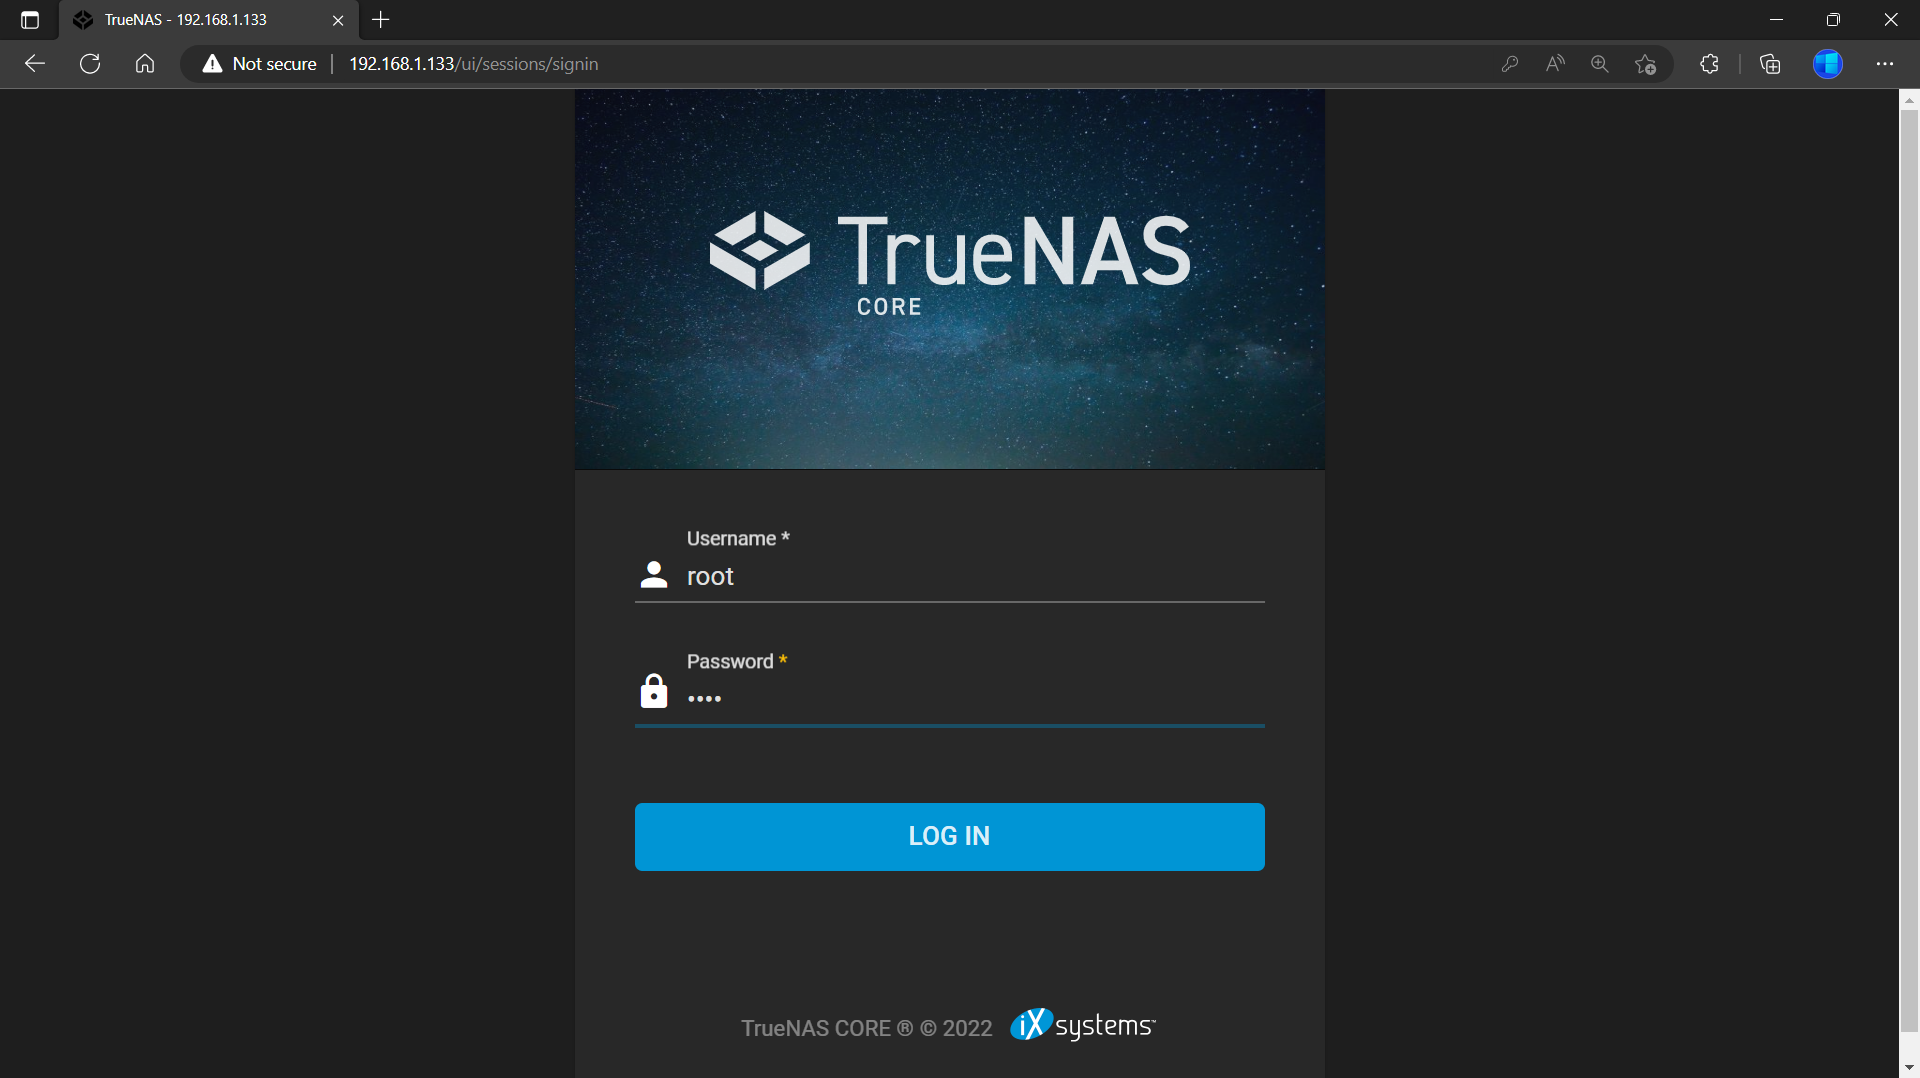
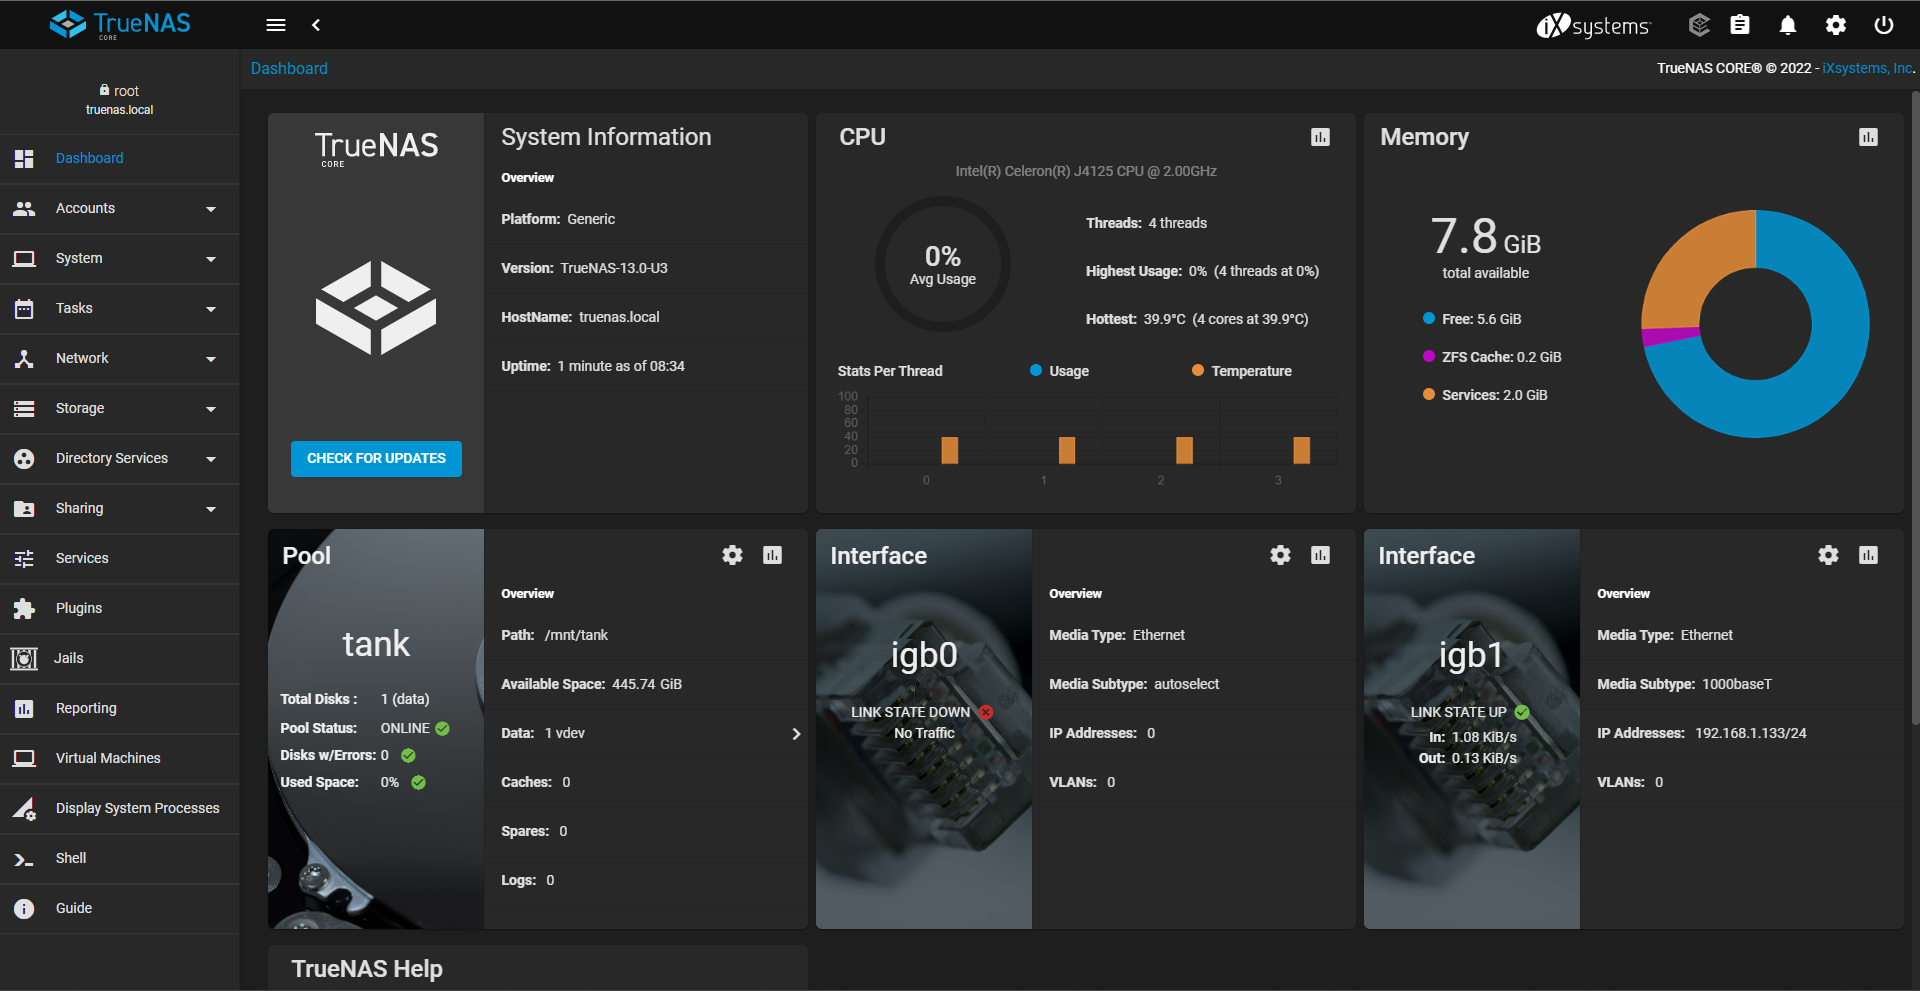
Finally you will be able brought to the TrueNAS dashboard GUI

Here you can configure a ton of settings and explore a ton of features. You can learn more by visiting TrueNAS official documentation
Set up storage pool
For this section of this wiki, we will show you how to set up a storage pool with the connected HDD
- Step 1. First we need to create a storage pool. Navigate to
Storage > Poolsand click ADD

- Step 2. Click CREATE POOL

- Step 3. Type a name for the pool

- Step 4. Select all the disks available and click the right pointing arrow to add the disks. Here we have only connected one HDD. However, you can connect multiple HDDs and all of them will be shown here.
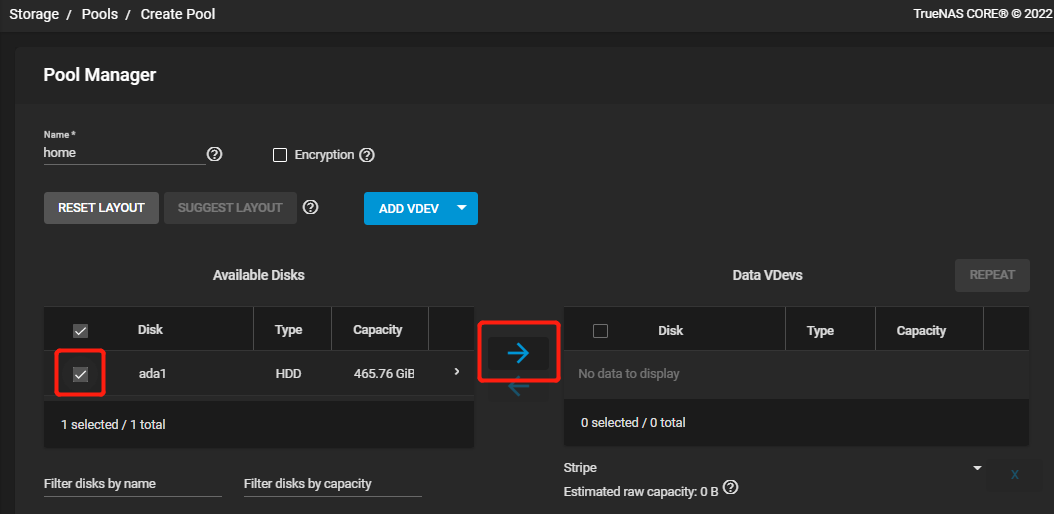

Since we have connected only one HDD, it will only allow for Stripe configuration. However, if multiple disks are connected, it will have the option of RAID which is focused on data redundancy.

- Step 5. Ignore the warnings about data loss(because of one drive) by ticking Force, then Confirm and finally click CONTINUE. If you have multiple drives connected, you will not have this warning.

- Step 6. Click CREATE

- Step 7. Tick Confirm and then click CREATE POOL

Once the pool is created, you will see the following output

Create a user account
Now we will create a new user account and attach the user account to a dataset
- Step 1. Navigate to
Accounts > Usersand click ADD

- Step 2. Type Full Name, Username and Password

- Step 3. Tick Microsoft Account and click SUBMIT

- Step 4. Navigate to Pools again, click the 3-dots next to the pool we created before and click Add Dataset
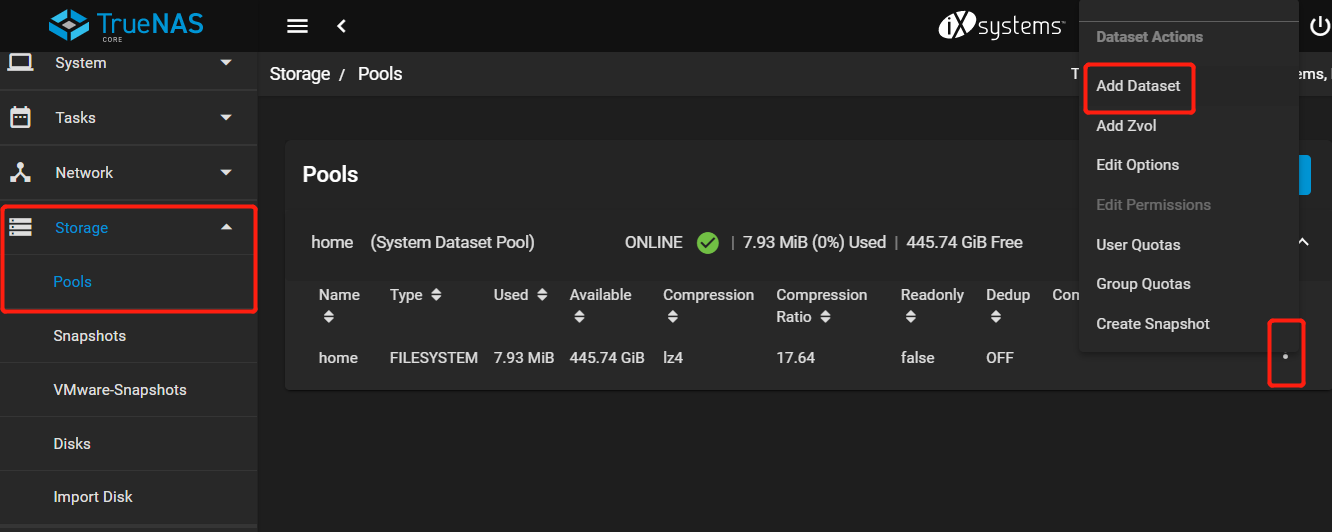
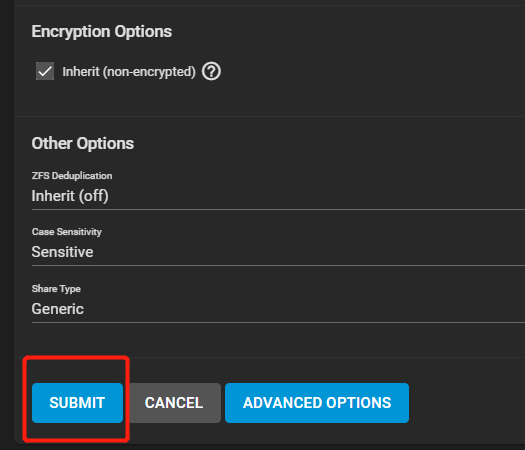
- Step 5. Give a name for the Dataset and click SUBMIT

- Step 6. Click the 3-dots next to the newly created dataset and select Edit Permissions

- Step 7. Select the previosly created username as User and Group from the drop-down menus, tick Apply User and Apply Group and finally click SAVE

Set up SMB share and access from PC
Next we will show you how to make this storage space accessible from a PC
- Step 1. Navigate to `Sharing > Windows Shares (SMB)and clickADD**

- Step 2. Select the dataset we created before at last and click SUBMIT
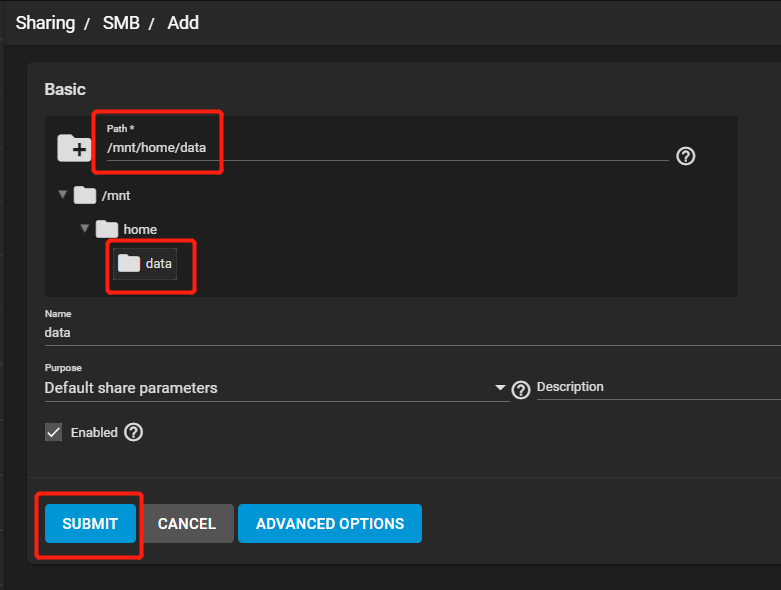
- Step 3. Click CONFIGURE NOW for the pop up window

- Step 4. Select RESTRICTED and click CONTINUE


- Step 5. Click SAVE

Now we have successfully set up the SMB share
- Step 6. Go to File Explorer on a PC, and select Map network drive from the 3-dot menu

- Step 7. Next to Folder, type the following
\\<IP_address_of_x86>\<dataset_name>
Then tick both the boxes below that and click Finish
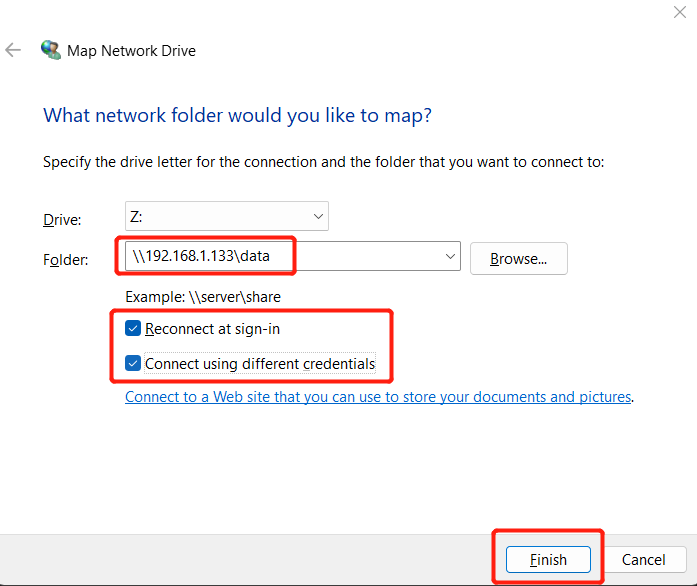
- Step 8. Enter the username and password you specified when you created a new account before, tick the box Remember my credentials and click OK

Now you will be able access this shared drive right from your PC. You can start copying files directly from your PC to this drive

Resources
- [Web Page] TrueNAS official documentation
Tech Support & Product Discussion
Thank you for choosing our products! We are here to provide you with different support to ensure that your experience with our products is as smooth as possible. We offer several communication channels to cater to different preferences and needs.