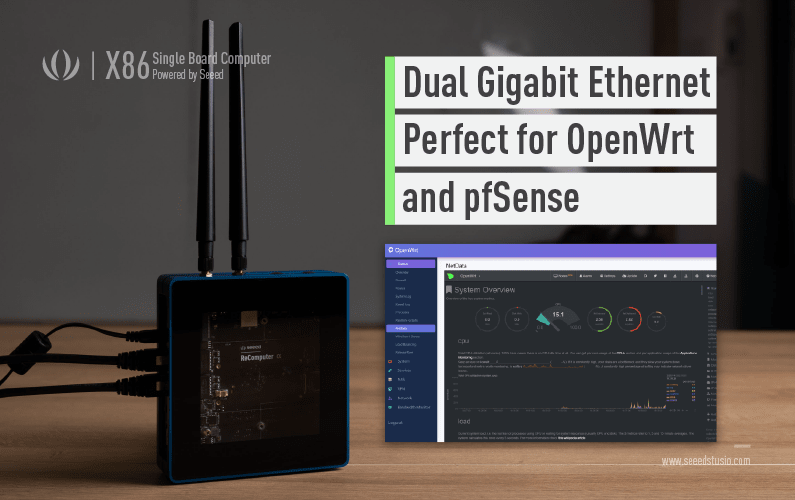
pfSense Installation
This tutorial demonstrates how to install the pfSense onto the ODYSSEY-X86J41x5.
pfSense is an open source firewall/router computer software distribution based on FreeBSD. It is installed on a physical computer or a virtual machine to make a dedicated firewall/router for a network.
For more, you also visit the official pfSense documents to get more insight!
Hardware Requirements
-
A Working Computer
-
USB Drive x 2 (less than 8GB is recommended)
-
A Monitor
-
Keyboard
-
Internet & Ethernet Cable
Download the pfSense OS Image
First, download the pfSense OS Image into your drive.
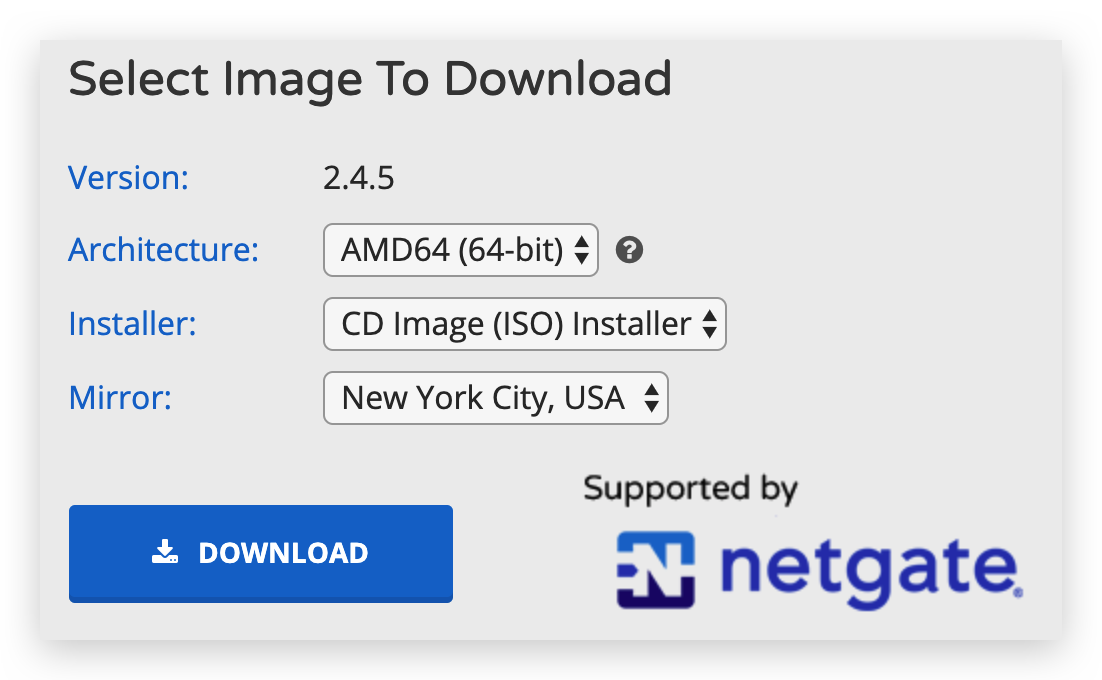
For ODYSSEY-X86J41x5, choose the settings as above and click download.
Creating a Bootable USB
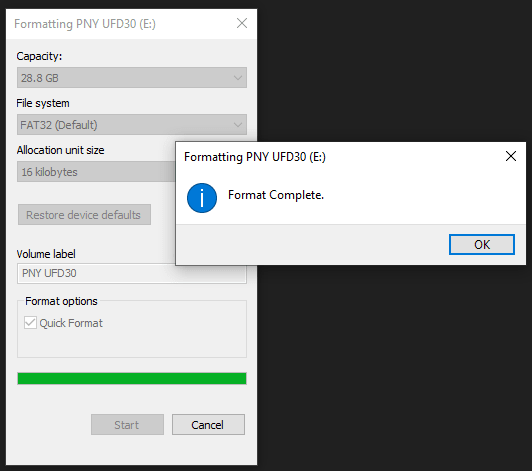
Step 1 - Prepare your Bootable USB
Format one of the USB drive. If you are a Windows user, you can format the USB drive by right-clicking the USB Drive and select Format.
Note: Choose FAT32 for the File System.
Step 2 - Download Flash Burner
Download the Open Source Flash burner balenaEtcher. Download the version according to your operating system(Windows/macOS/Linux).
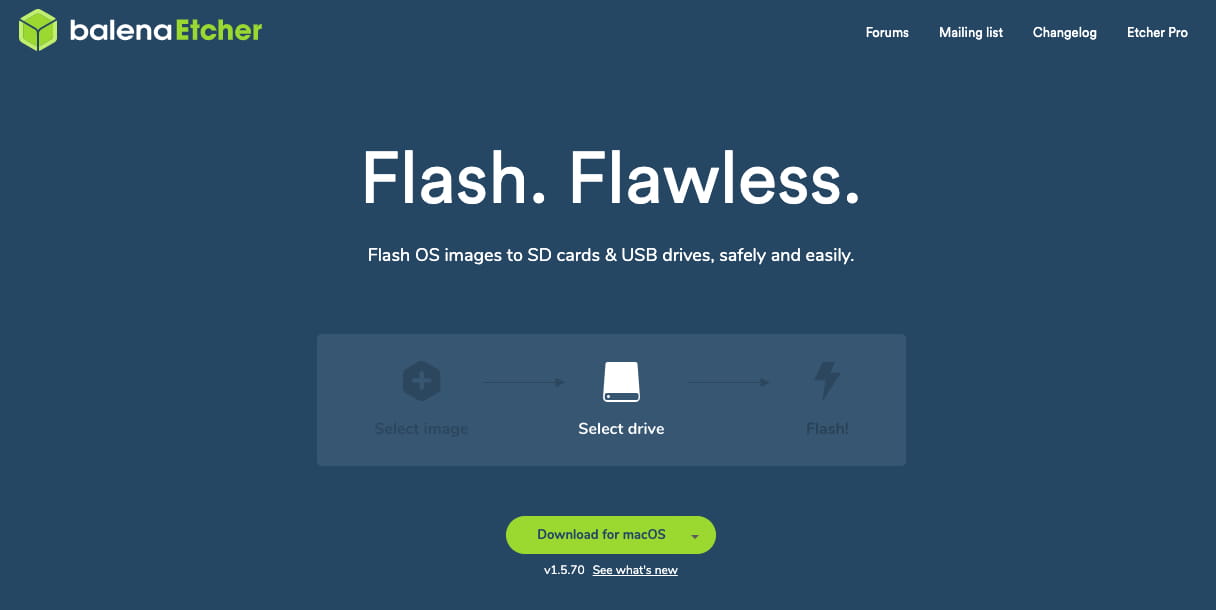
Step 3 - Writing the OS Image into USB
Select the downloaded Operating System Image, select the formatted USB Drive and Flash! Now, the bootable USB is all set to go.
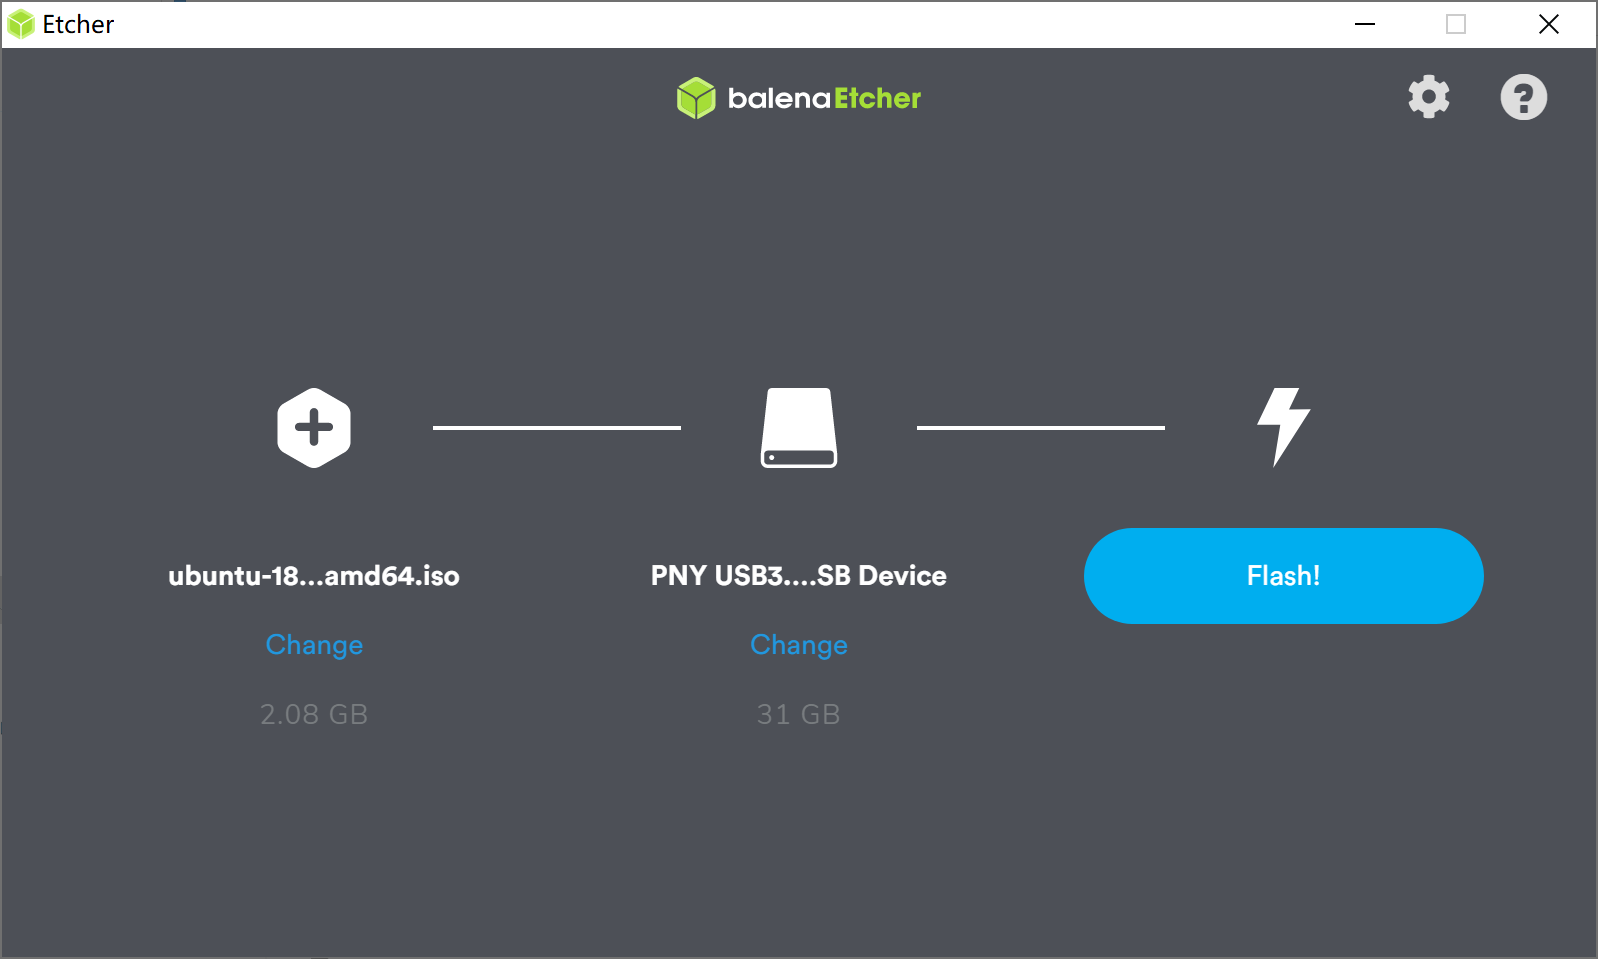
Note: If a warning states that it does not contain a partition table appear, you can simply click continue to ignore the message.
Installing the pfSense OS
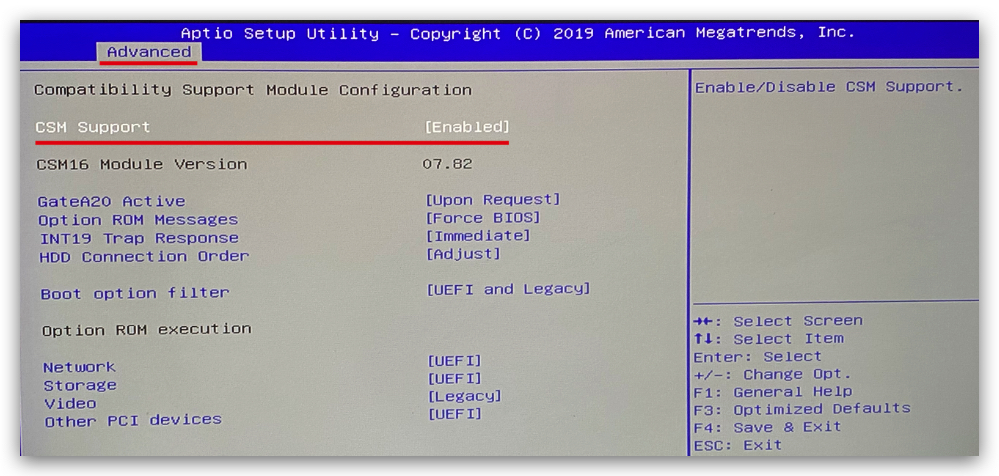
Step 1 - Enabling CSM Mode in ODYSSEY - X86J41x5
Plugin your bootable USB, Monitor and keyboard to ODYSSEY - X86J41x5, and power up. When booting up, keep pressing DEL key to enter the setup screen. Navigate to Advanced -> CSM Support and press Enter to enable it.
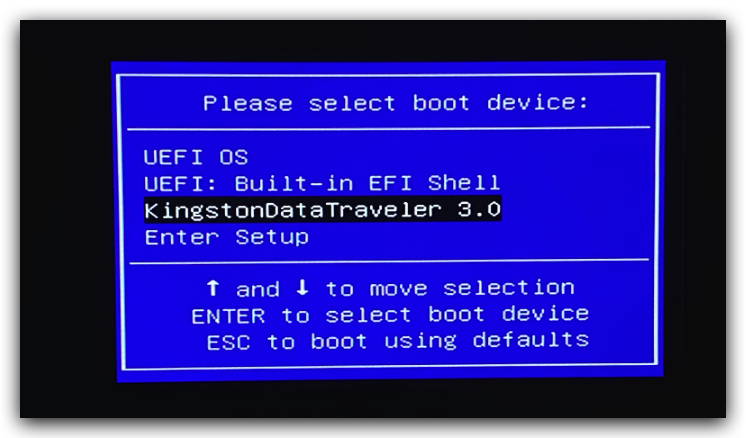
Step 2 - Install the OS
Reboot your ODYSSEY - X86J41x5 and keep pressing F7 to enter the boot manager screen. Select the bootable USB (Installer) and press Enter.
Note: Remember to choose the one that has the pfSense iso image on it.
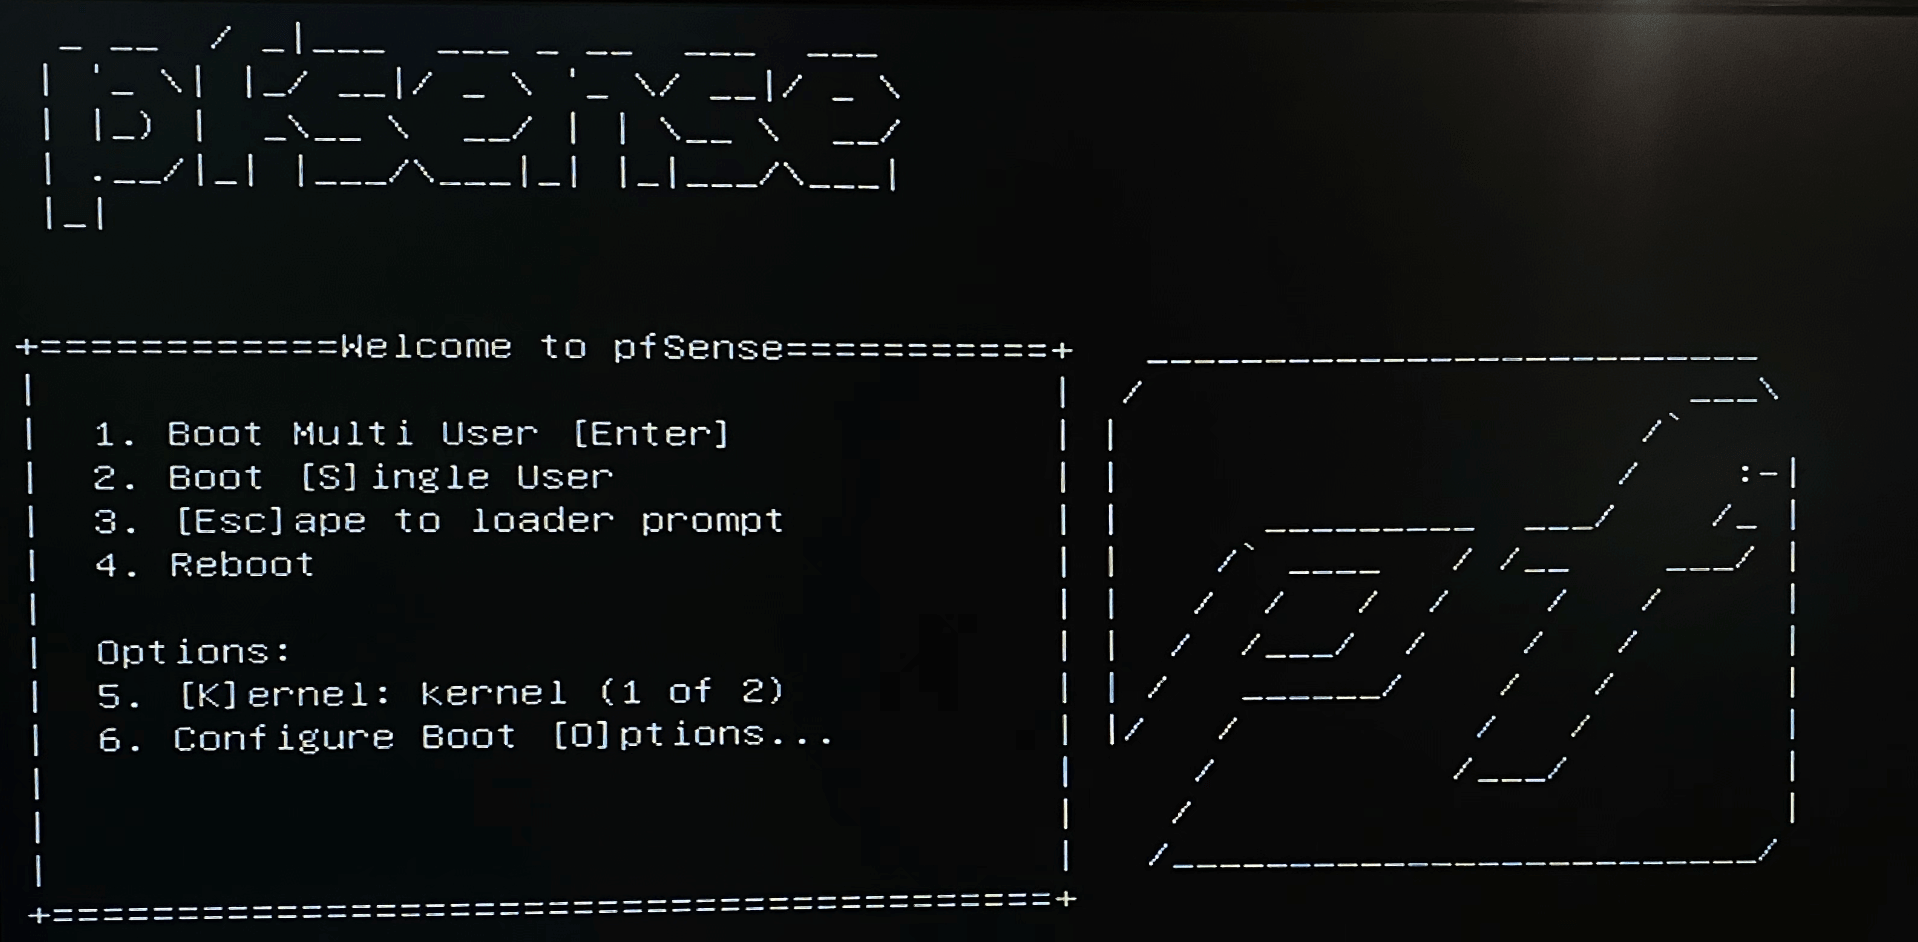
Step 3 - Installing process
A boot screen like above should appear. Press Enter to select the Boot Multi User (pfSense Installer).
Enters the Installer, and press Enter to accept.

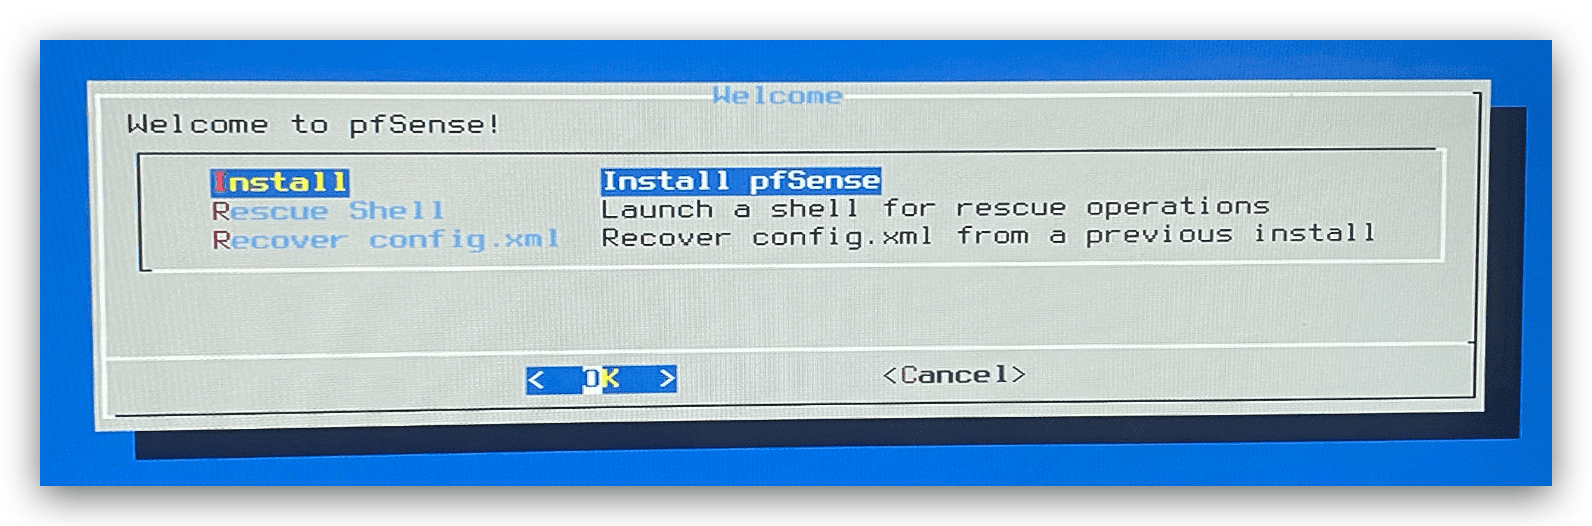
An options menu should appear as follow, select Install and press Enter.
Now, choose the correct keymap for your keyboard, or just select Continue with default keymap and press Enter.

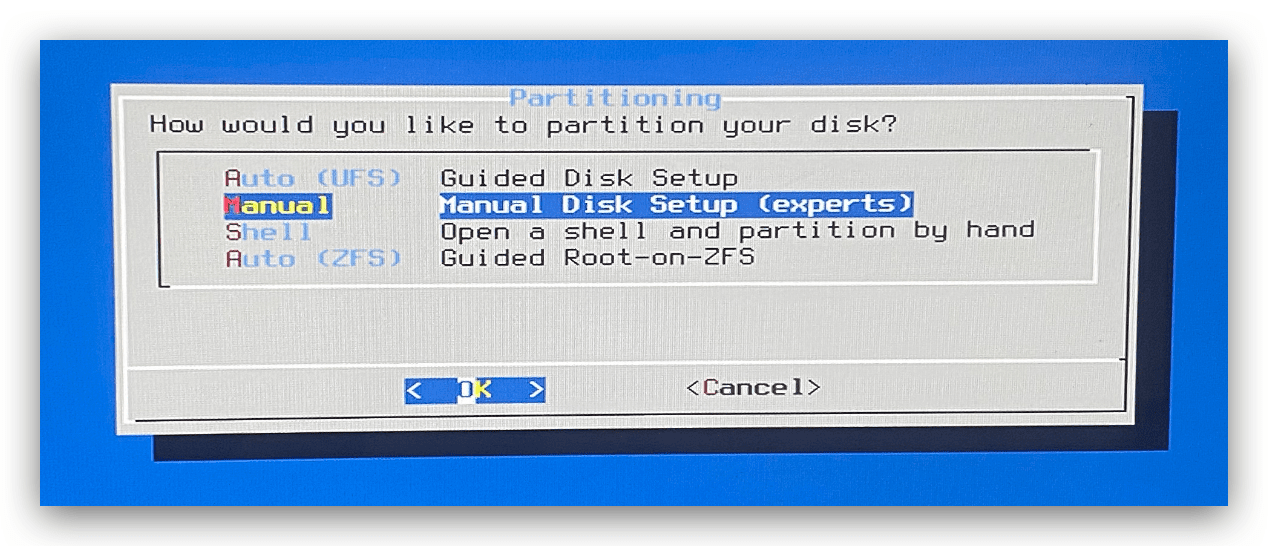
Here you can choose Auto to automatic install the pfSense on to the ODYSSEY-X86J41x5, but it's better to use Manual to choose exactly where you want to install the pfSense.
Note: In this tutorial, pfSense is installed onto a USB drive for convenience. Hence another good reason to choose Manual other than Auto.
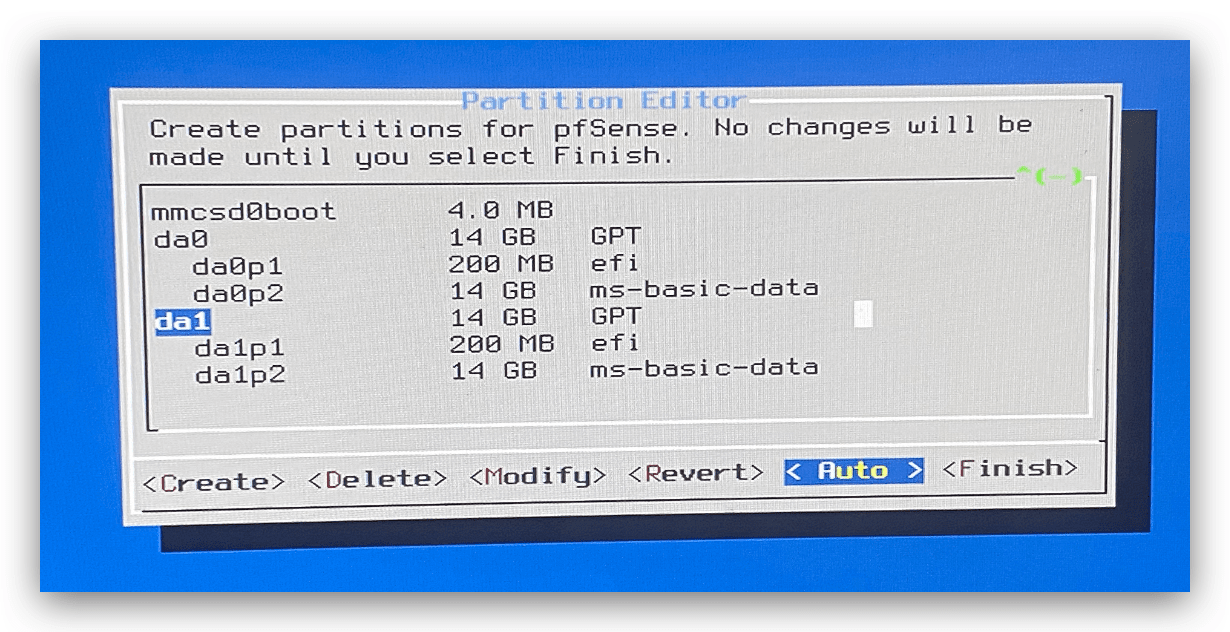
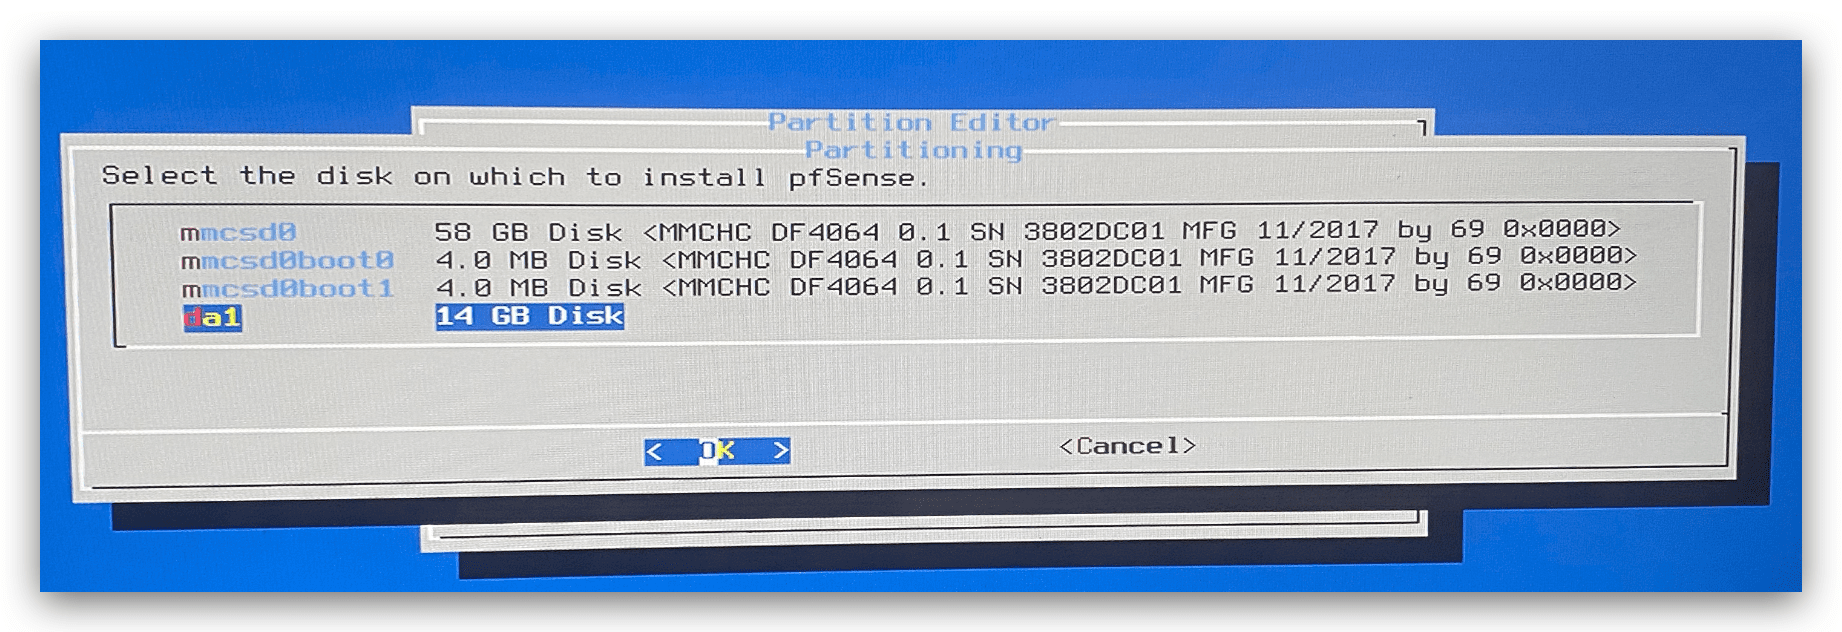
Here you can see all the hard drives as well as the partitions here. Choose the hard drive that you want to install pfSense on. Select the hard drive using arrow keys. Here, da1 is my second USB drive and will be used to install pfSense. Select Auto here to automatic partition for pfSense in this hard drive.
Under the correct hard drive, select OK.
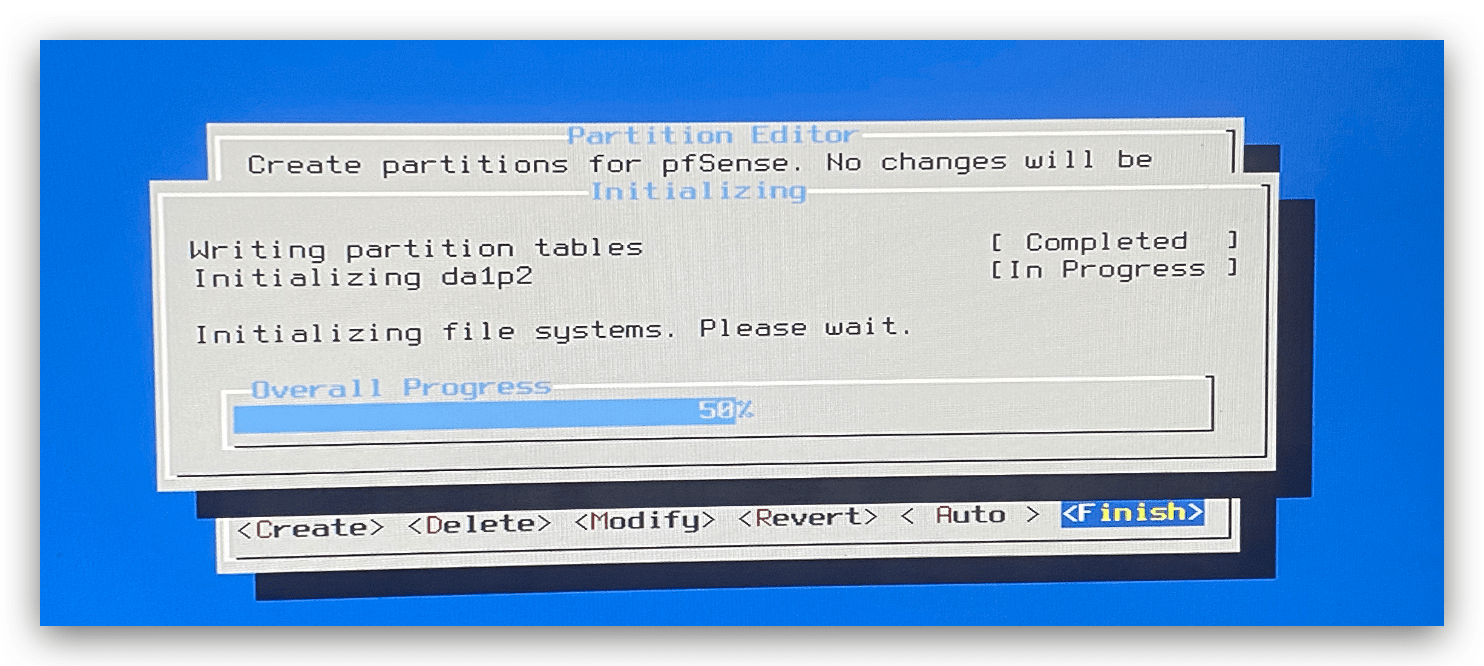
Now, the installing process will take place.
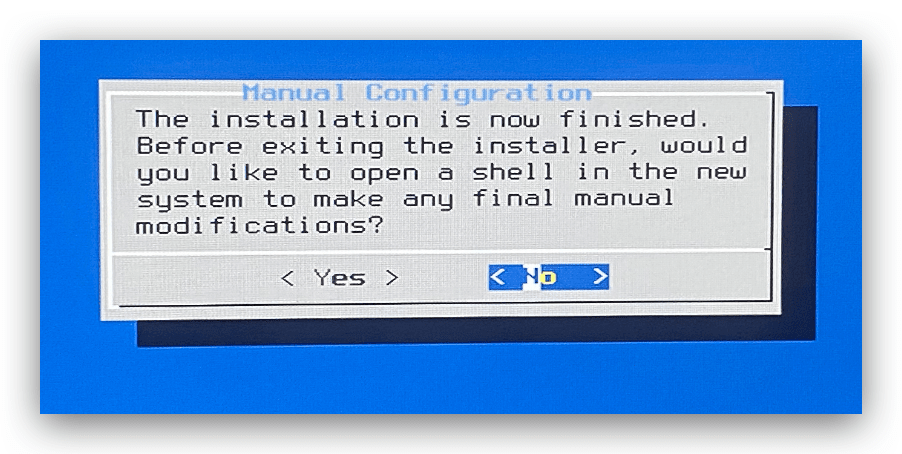
After installing, the following window will appear, select No.
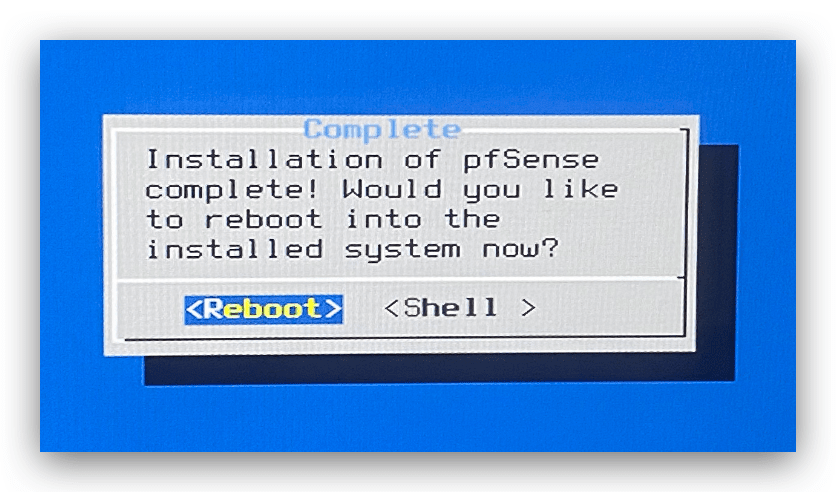
Select Reboot and pfSense is successfully installed!
Configurations of pfSense
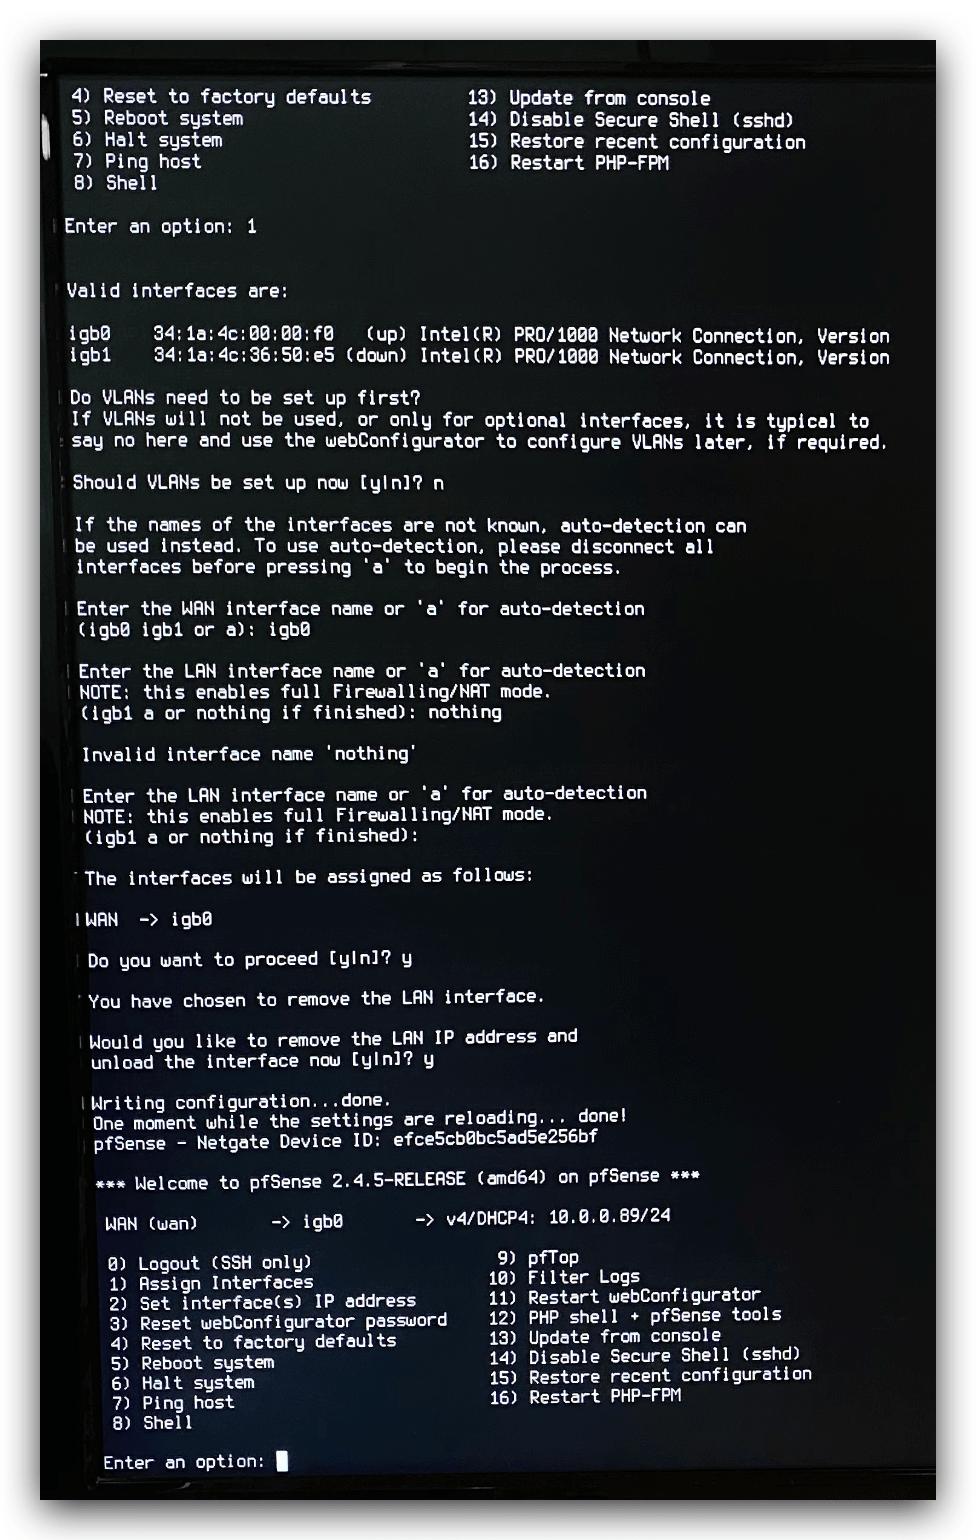
Reboot ODYSSEY-X86J41x5, and choose the correct hard drive to boot pfSense OS. Plug in the ethernet cable into one of Ethernet ports from ODYSSEY-X86J41x5. The pfSense should booted properly and shows the following screen.
Note: If you see LAN already configured, you can choose 1 to assign interfaces and choose the right port for WAN and get rid of LAN. For example, in the below picture, LAN is removed for now.
Along side with the WAN, you should see an IP assigned to the device, and this IP will be used later. Now you can try to log on the Web GUI using another PC connected in the same network!
Changing pfSense WebGUI protocol (optional)
For some reasons, pfSense use https protocol for Web GUI and may cause failure when logging to the Web GUI. If you failed to log in Web GUI, follow this to change the https protocol to http protocol.
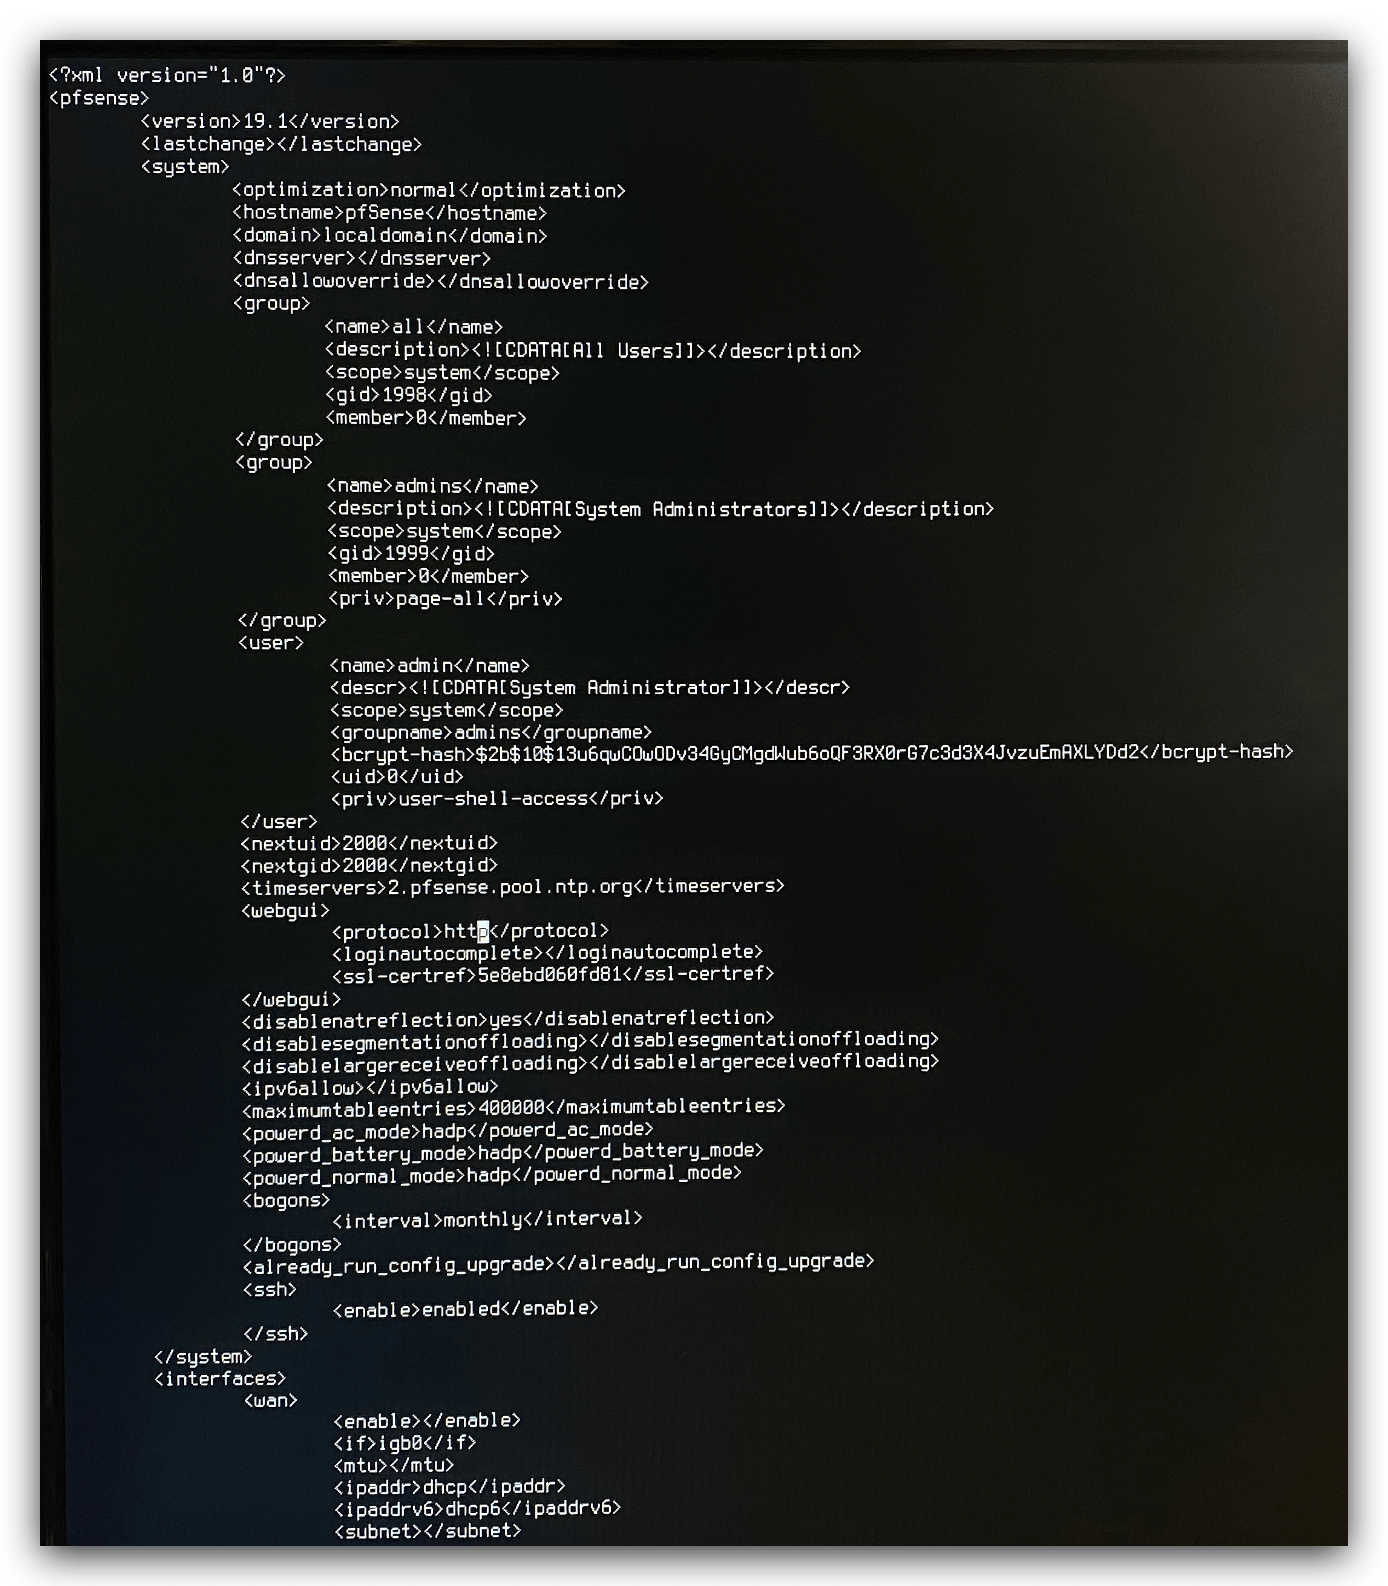
Choose 8 to enter shell in pfSense. Type the following to configure:
viconfig
A config file as shown will appear and find <webgui> session and change the https protocol to http.
Note: this is using vim editor, use x key from keyboard to delete. Then, press Esc and type :wq! to save and quit and changes.
Now, try to log in pfSense Web GUI using the IP address again.
pfSense Web GUI Configurations
Now you can log into the pfSense Web GUI from another PC using the IP address shown before.
Note: default login is admin and default passsword is pfsense
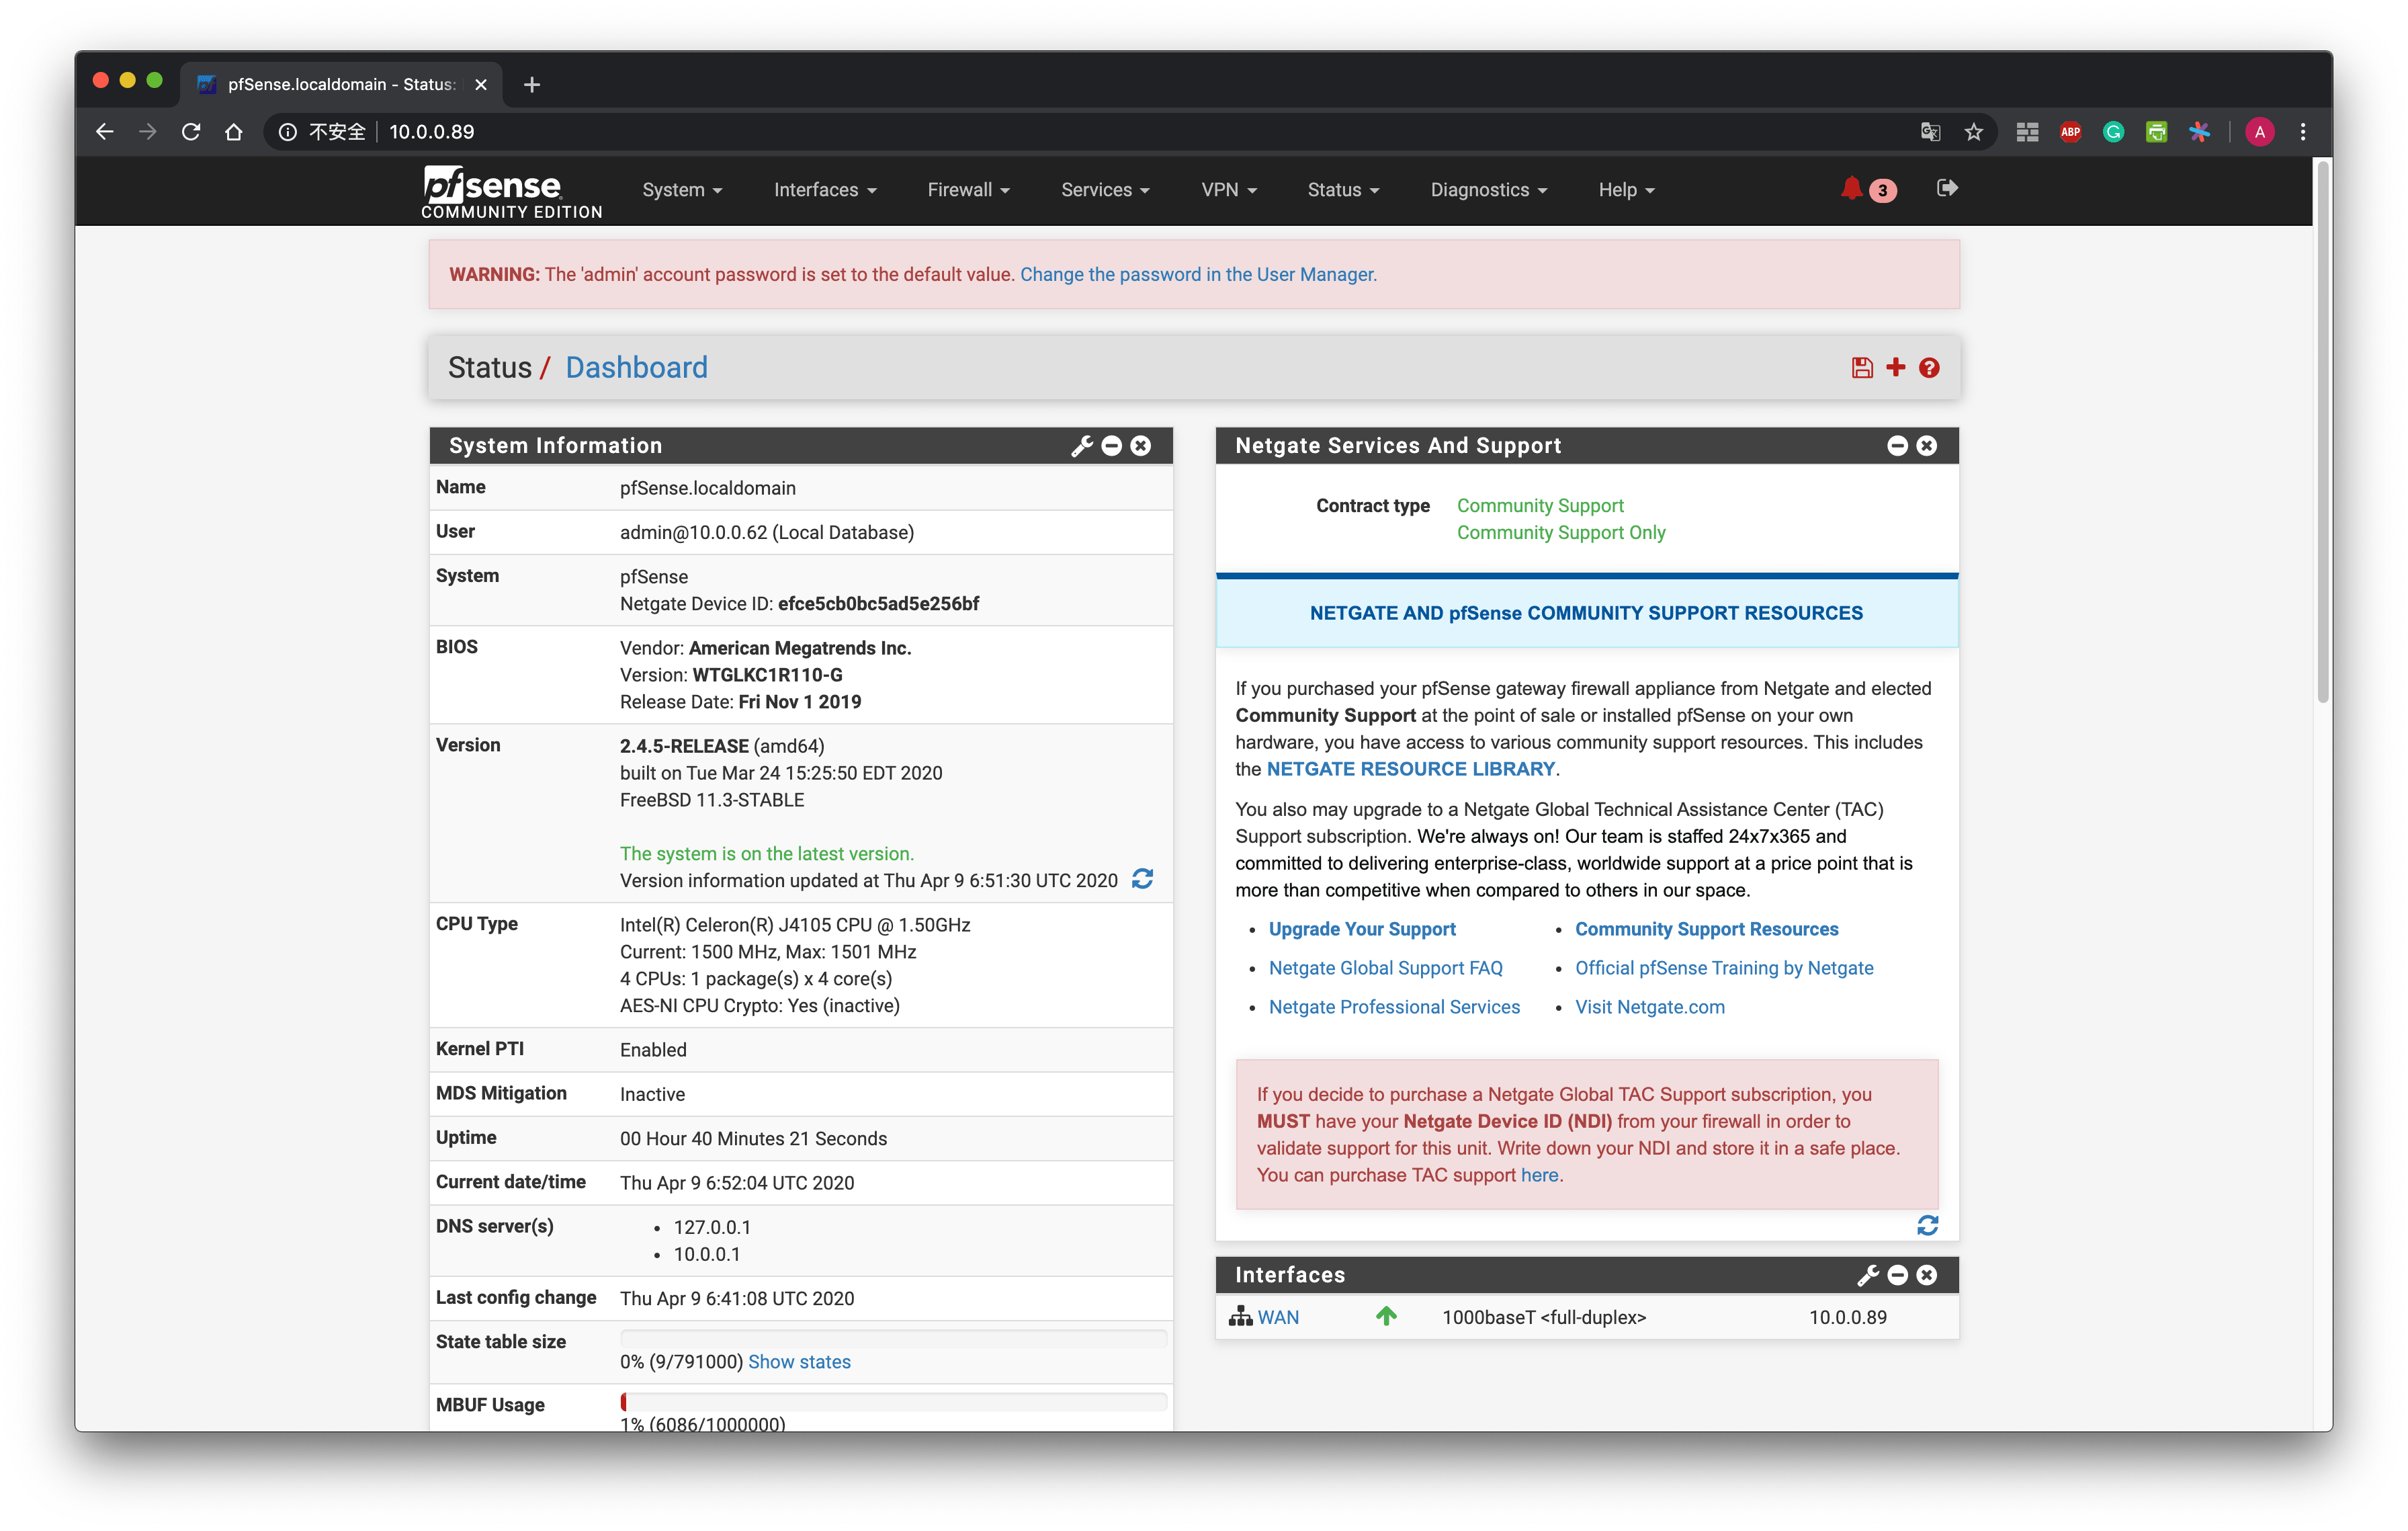
Now you can easily manage your pfSense running on ODYSSEY-X86J41x5!
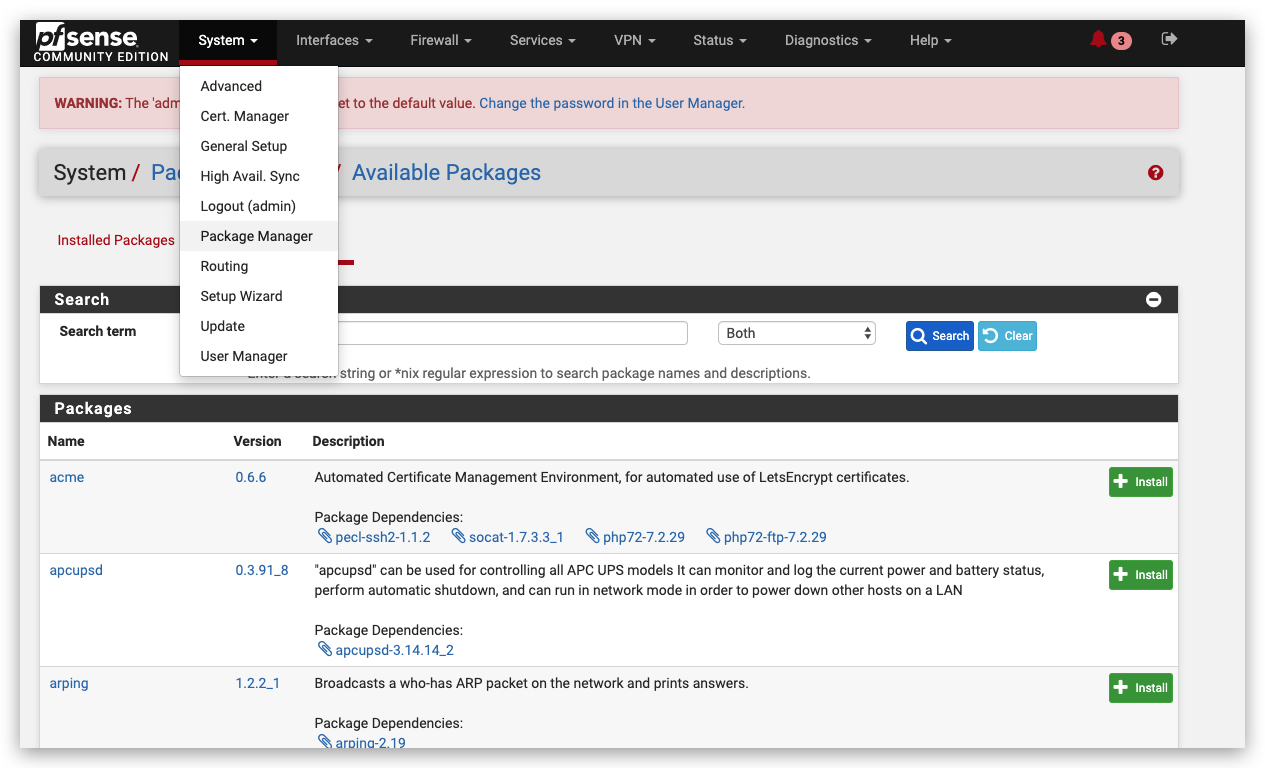
Installing packages
To install packages, you can simply navigate to System -> Package manager and search for the packages that you like!
For more about pfSense, please also visit the official pfSense Forum!
Resources
Other useful applications:
Tech Support & Product Discussion
Thank you for choosing our products! We are here to provide you with different support to ensure that your experience with our products is as smooth as possible. We offer several communication channels to cater to different preferences and needs.