OpenWRT Installation
This tutorial demonstrates how to install the open source OS for router network. With the help of OpenWrt, your ODYSSEY - X86J41x5 can turn into a router and take care of your home network!
Hardware Requirements
-
A Working Computer
-
A USB Drive(>= 8GB is recommended)
-
A Monitor
-
Keyboard and Mouse
-
Ethernet Cable x 2
Download the OpenWrt OS Image
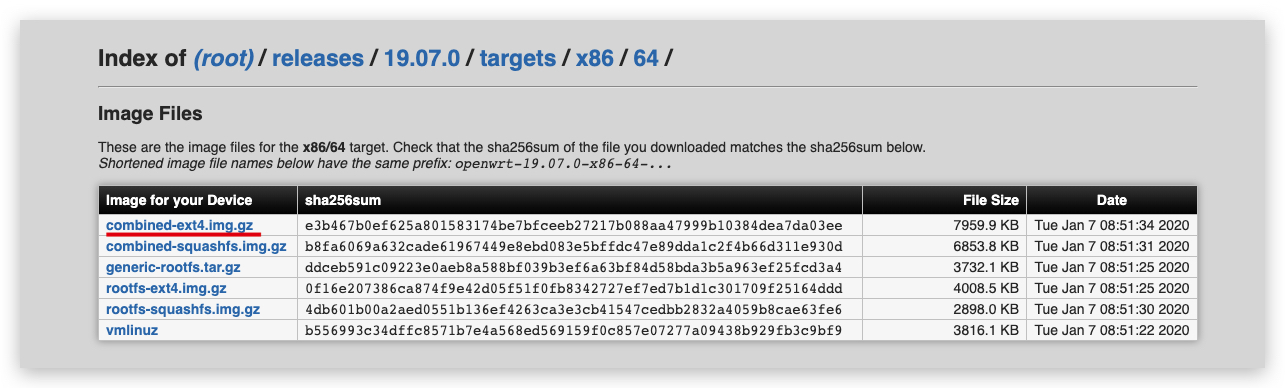
First, download the OpenWrt OS image. Choose the version you wanted, navigate to x86 -> 64 and download your required version.
In this tutorial, 19.07 version is used and click here to download.
Creating a Bootable USB
Step 1 - Prepare your Bootable USB
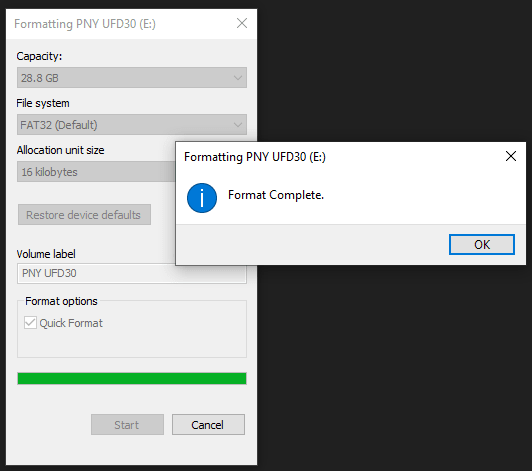
Format the USB drive. If you are a Windows user, you can format the USB drive by right-clicking the USB Drive and select Format.
Note: Choose FAT32 for the File System.
Step 2 - Download Flash Burner
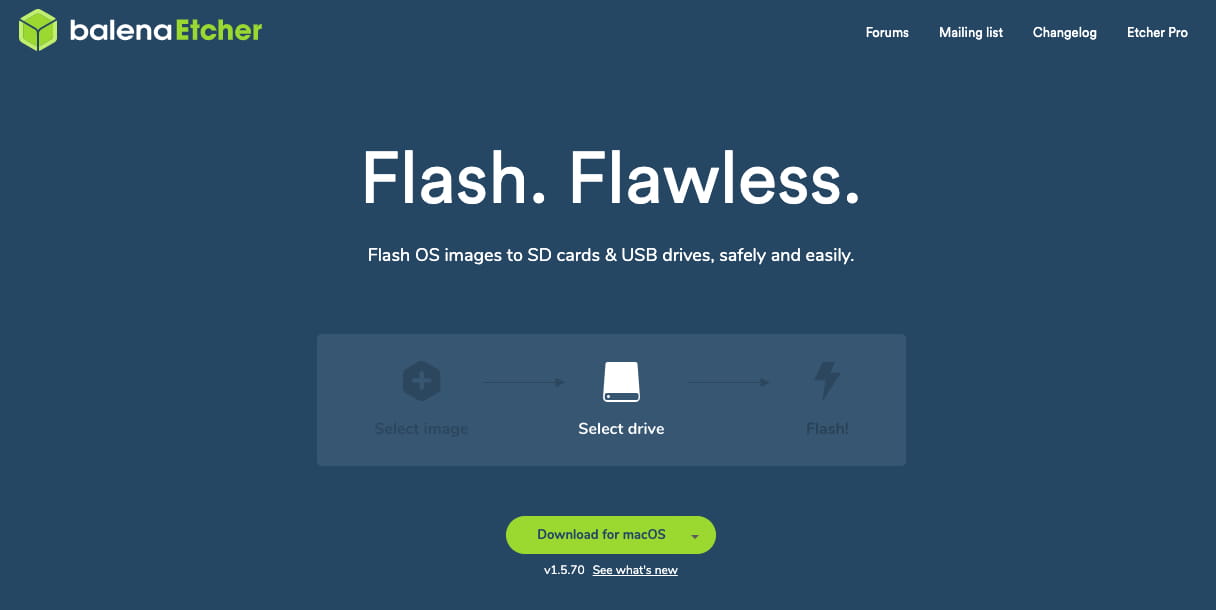
Download the Open Source Flash burner balenaEtcher. Download the version according to your operating system(Windows/macOS/Linux).
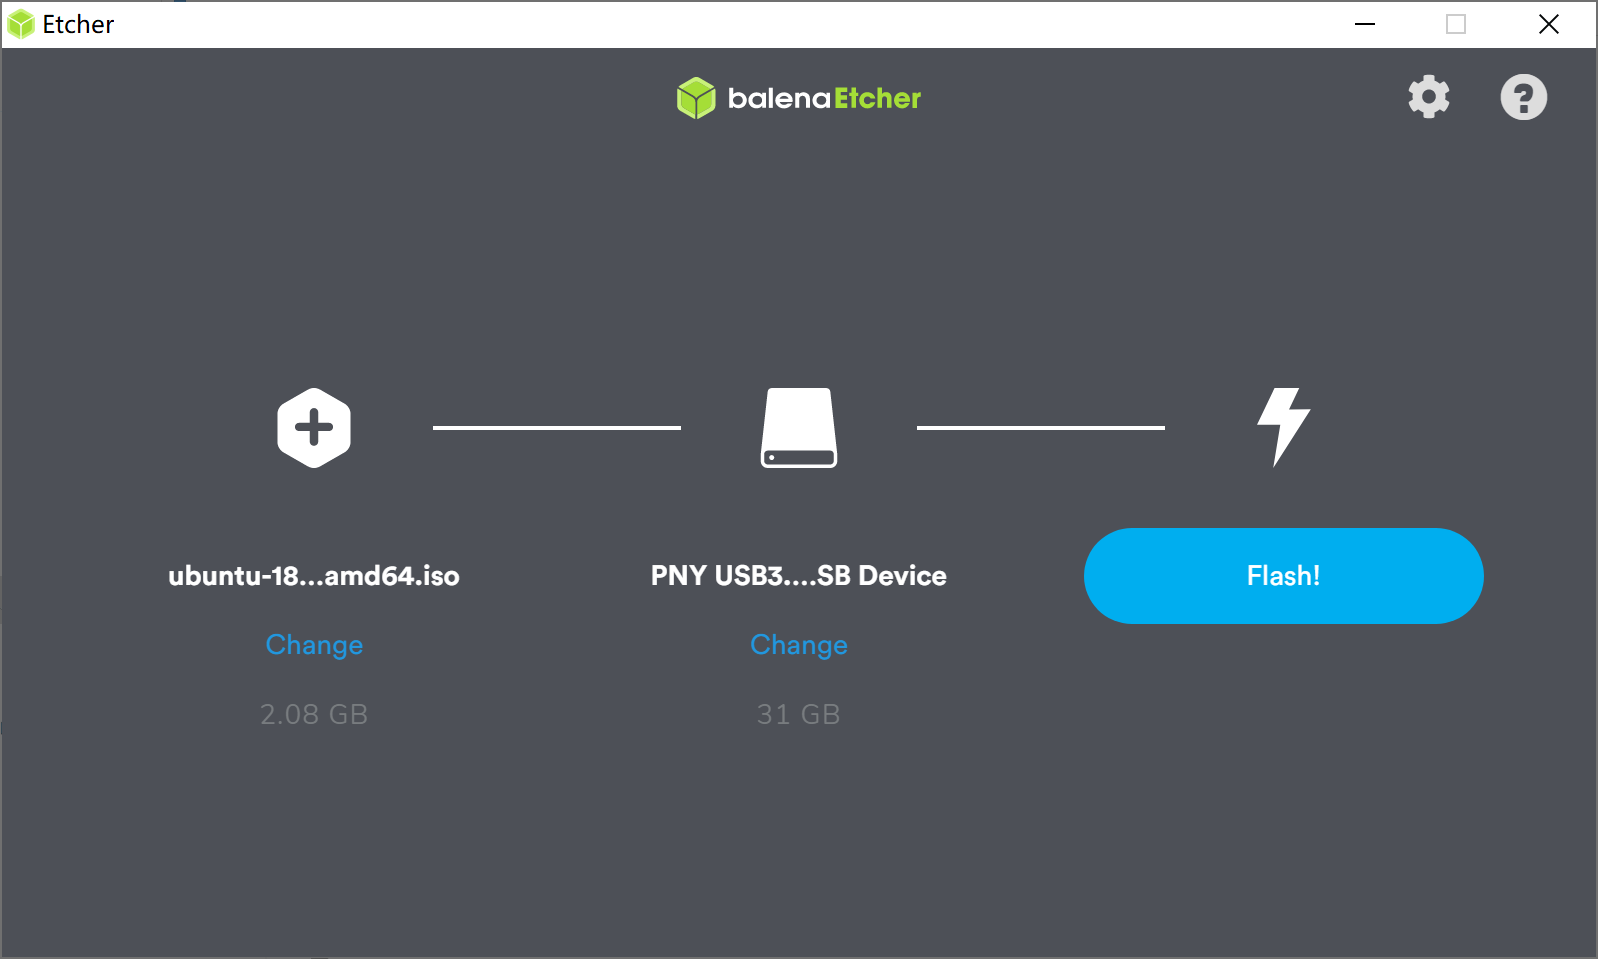
Step 3 - Writing the OS Image into USB
Select the downloaded Operating System Image, select the formatted USB Drive and Flash! Now, the bootable USB is all set to go.
Installing OpenWrt
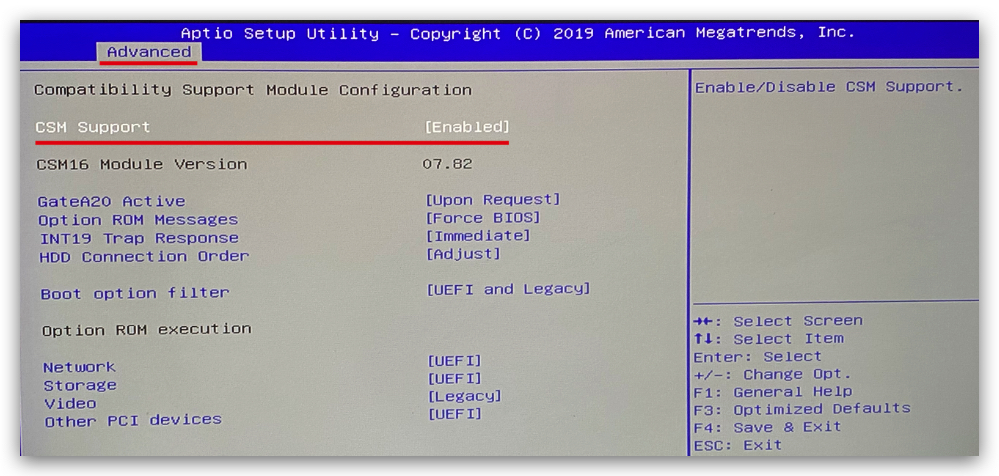
Step 1 - Enabling CSM Mode in ODYSSEY - X86J41x5
Plug in your bootable USB, Monitor and keyboard to ODYSSEY - X86J41x5, and power up. When booting up, keep pressing DEL key to enter the setup Screen. Navigate to Advanced -> CSM Support and press Enter to enable it.
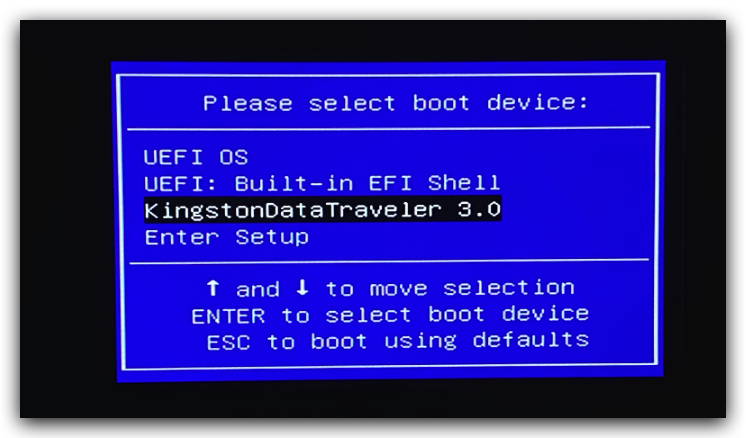
Step 2 - Install the OS
Reboot your ODYSSEY - X86J41x5 and keep pressing F7 to enter the boot manager screen. Select the bootable USB and press Enter.
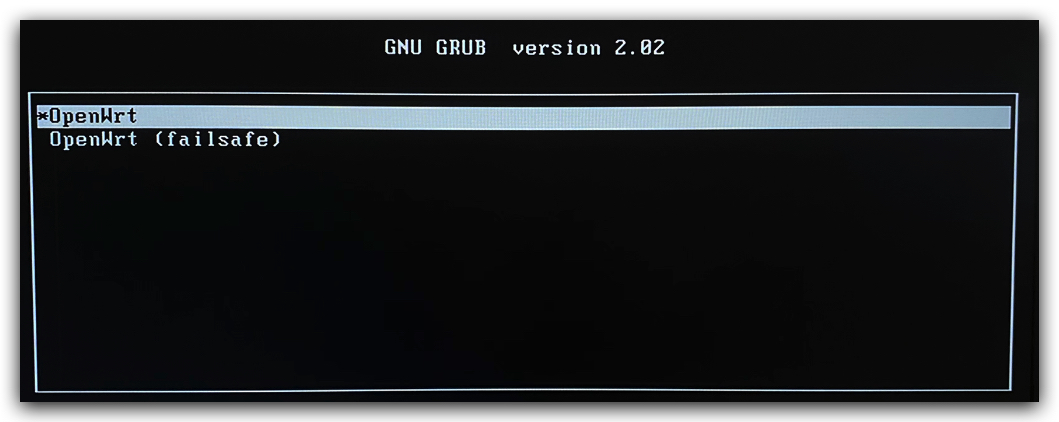
Step 3 - Installing process
Select the OpenWrt and press Enter. Follow through the installing instructions on the screen.
When it's done, press Enter and you should see the screen as follow:
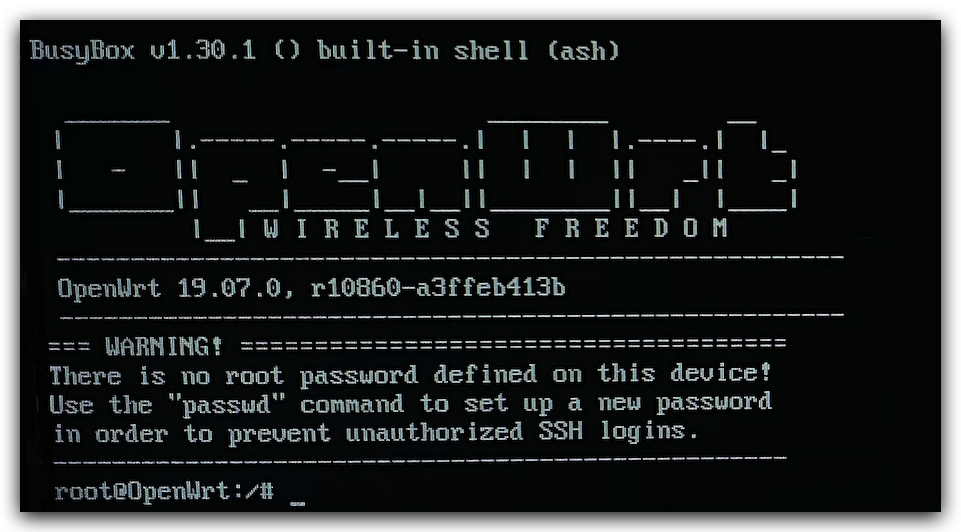
Now your OpenWrt is installed and ready to be used!
Configurations
Now, let's configure to access to the OpenWrt system from a web interface from another PC. Enter the following in the shell in OpenWrt:
vi /etc/config/network
And change the settings to as follow:
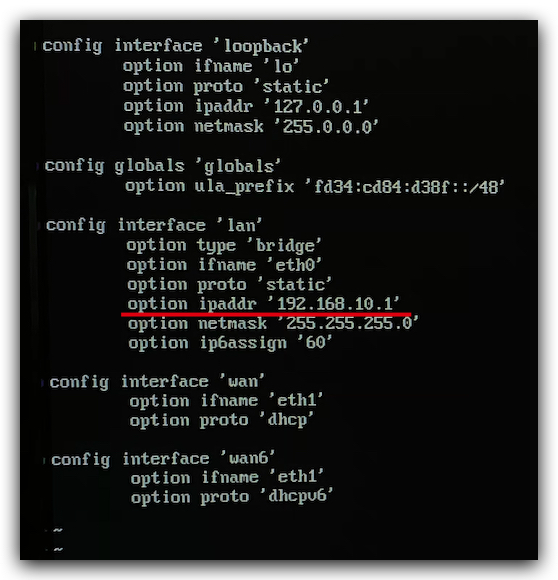
Where you change the station IP address for LAN configurations so that you can use this IP to access to router. Here the IP is changed to 192.168.10.1
Note: In vim, type i first to be insert mode so that you can edit. When done with editing, press ESC key and type :wq and enter to save and quit.
Accessing from Another PC
Now, you can access the OpenWrt from another computer via LuCI web interface. Simply, use a Ethernet cable to connect Ethernet Port that is close to the HDMI port. Connect the other ethernet cable to the other Ethernet port on ODYSSEY - X86J41x5 and to the internet(This may be varied such as PPPoE method).
Now, from your computer, type 192.168.10.1 (The IP address specified earlier) in the web browser and you should see the following screen:
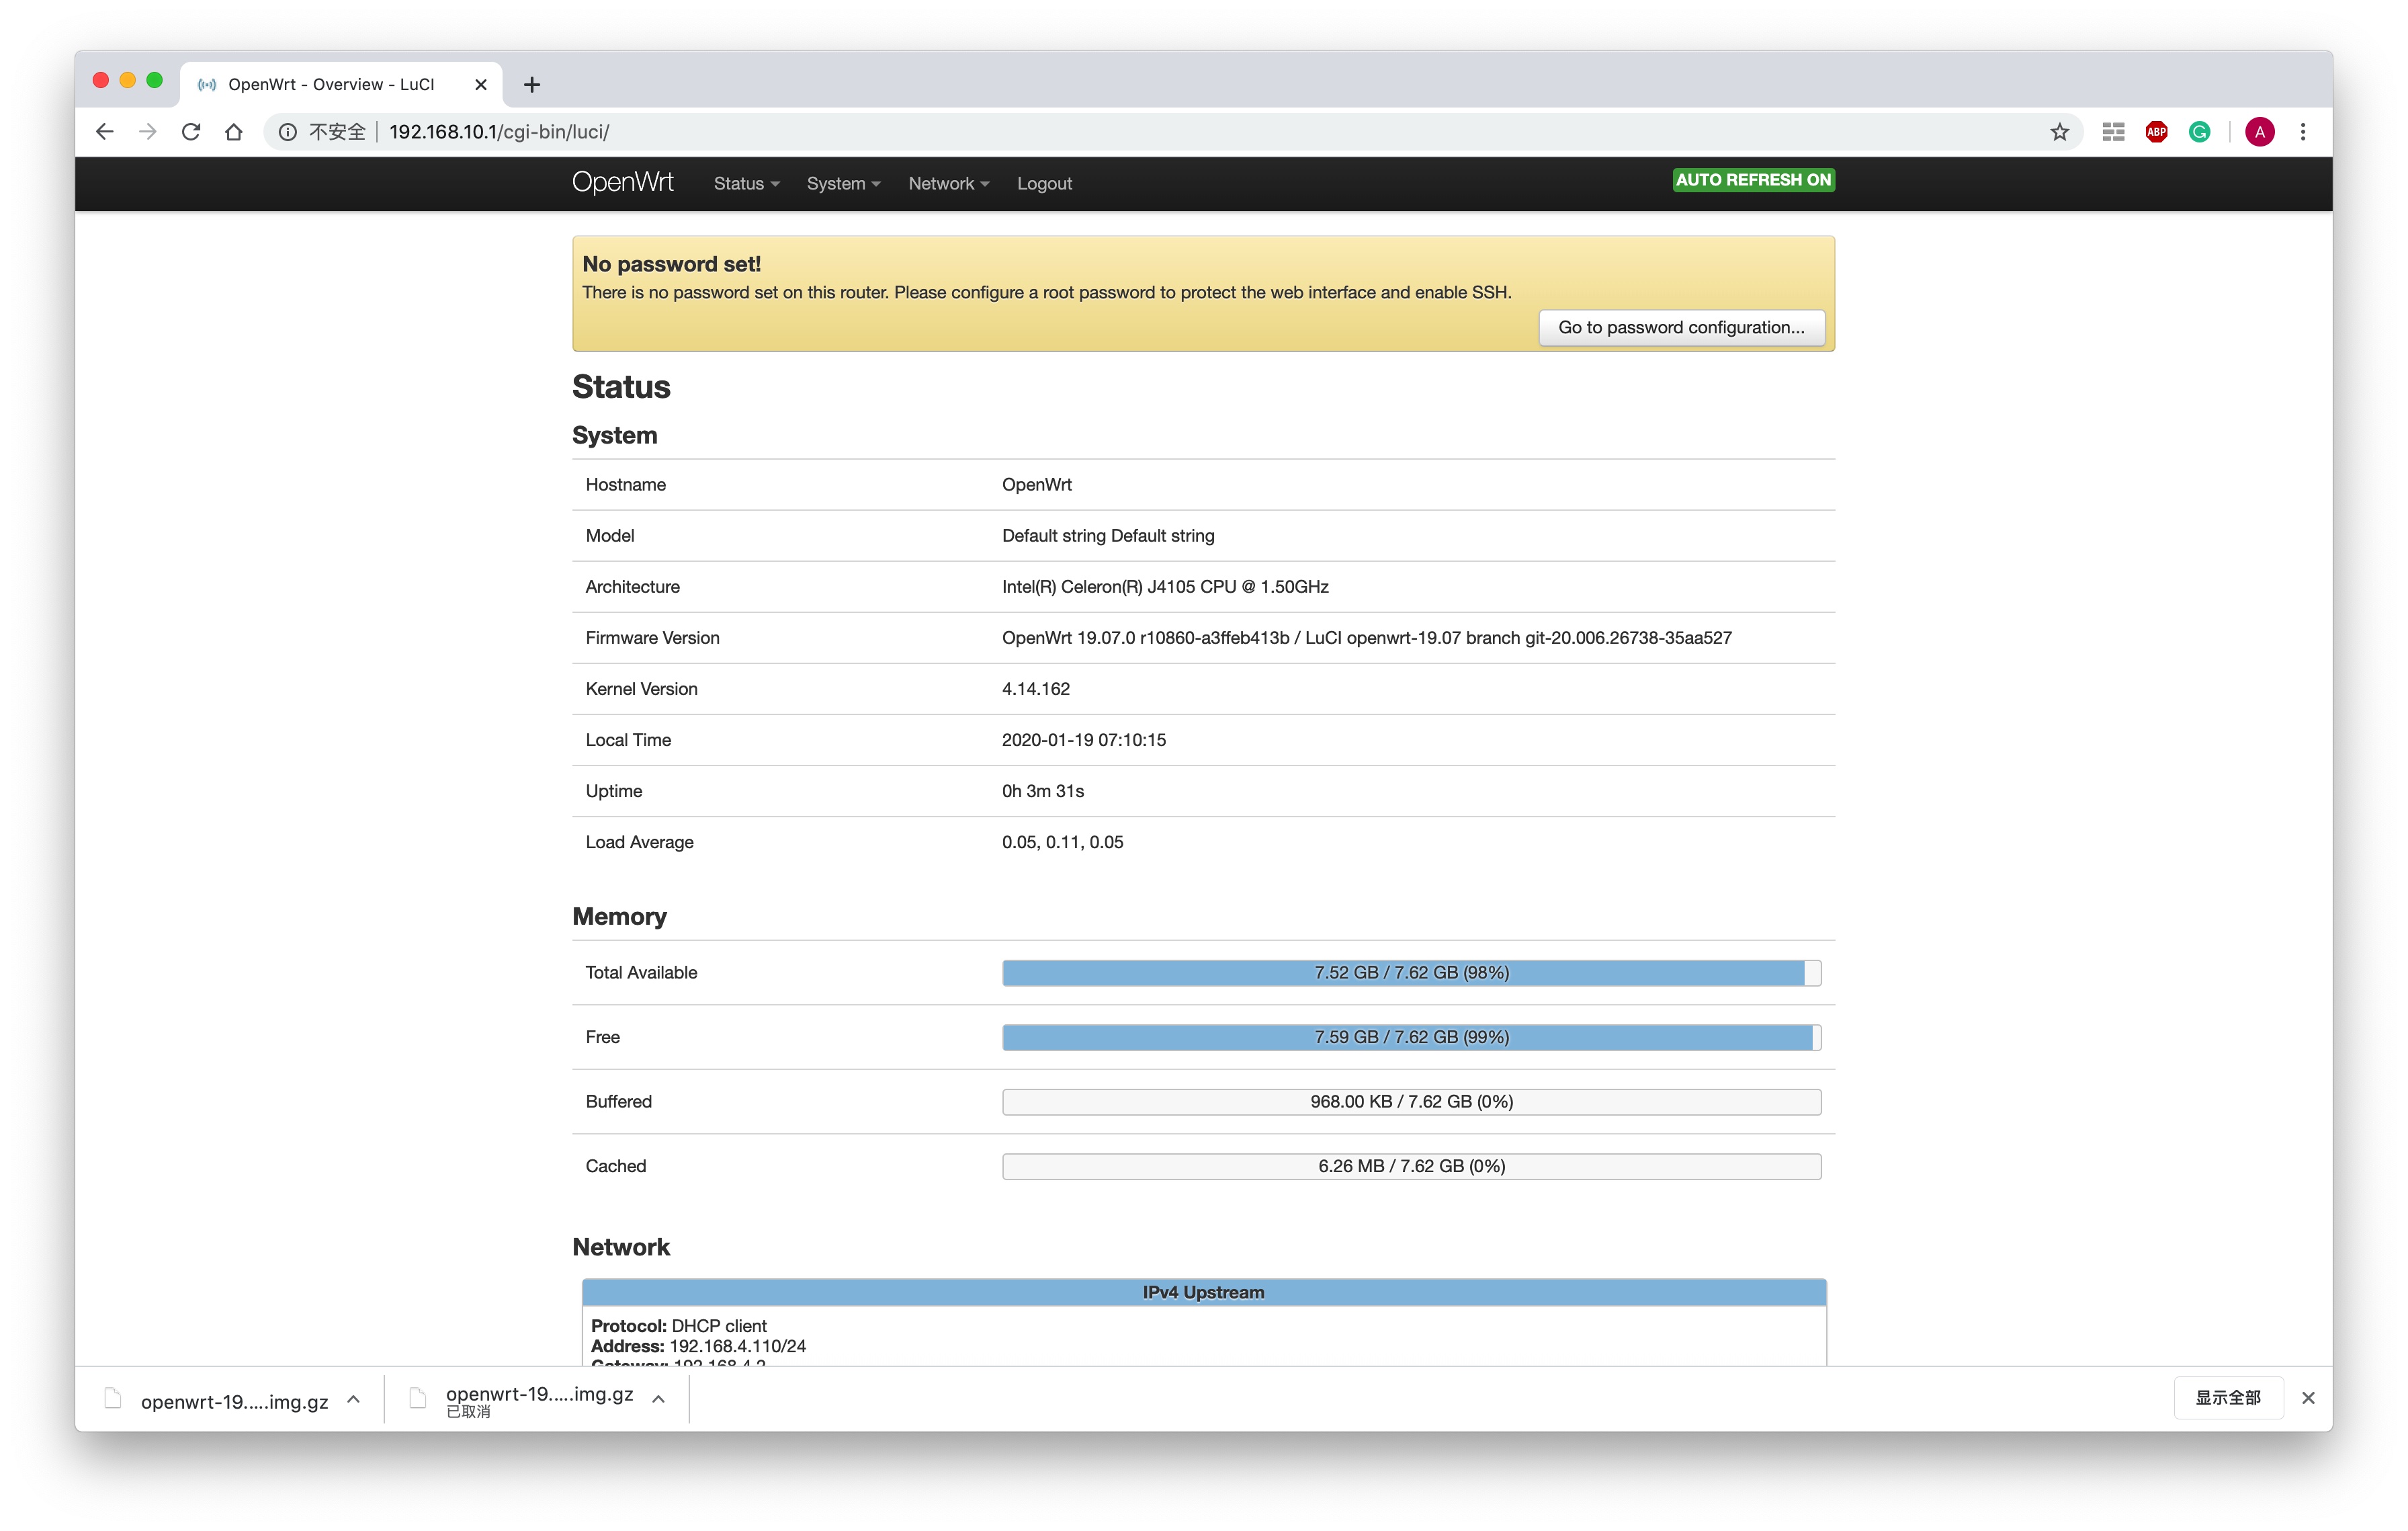
Now, you can access your OpenWrt from another PC!
Configuring LAN and WAN
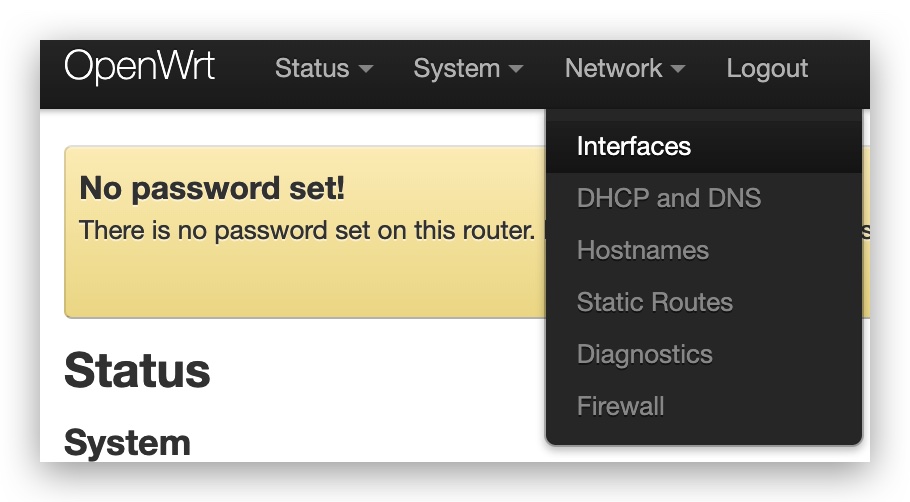
Navigate to Network -> Interfaces and configure WAN settings for internet access:
This shows the all the interfaces settings for OpenWrt. Here, simply make sure the the WAN(eth1) port is connected to the internet and is set to DHCP client Protocol as follow:
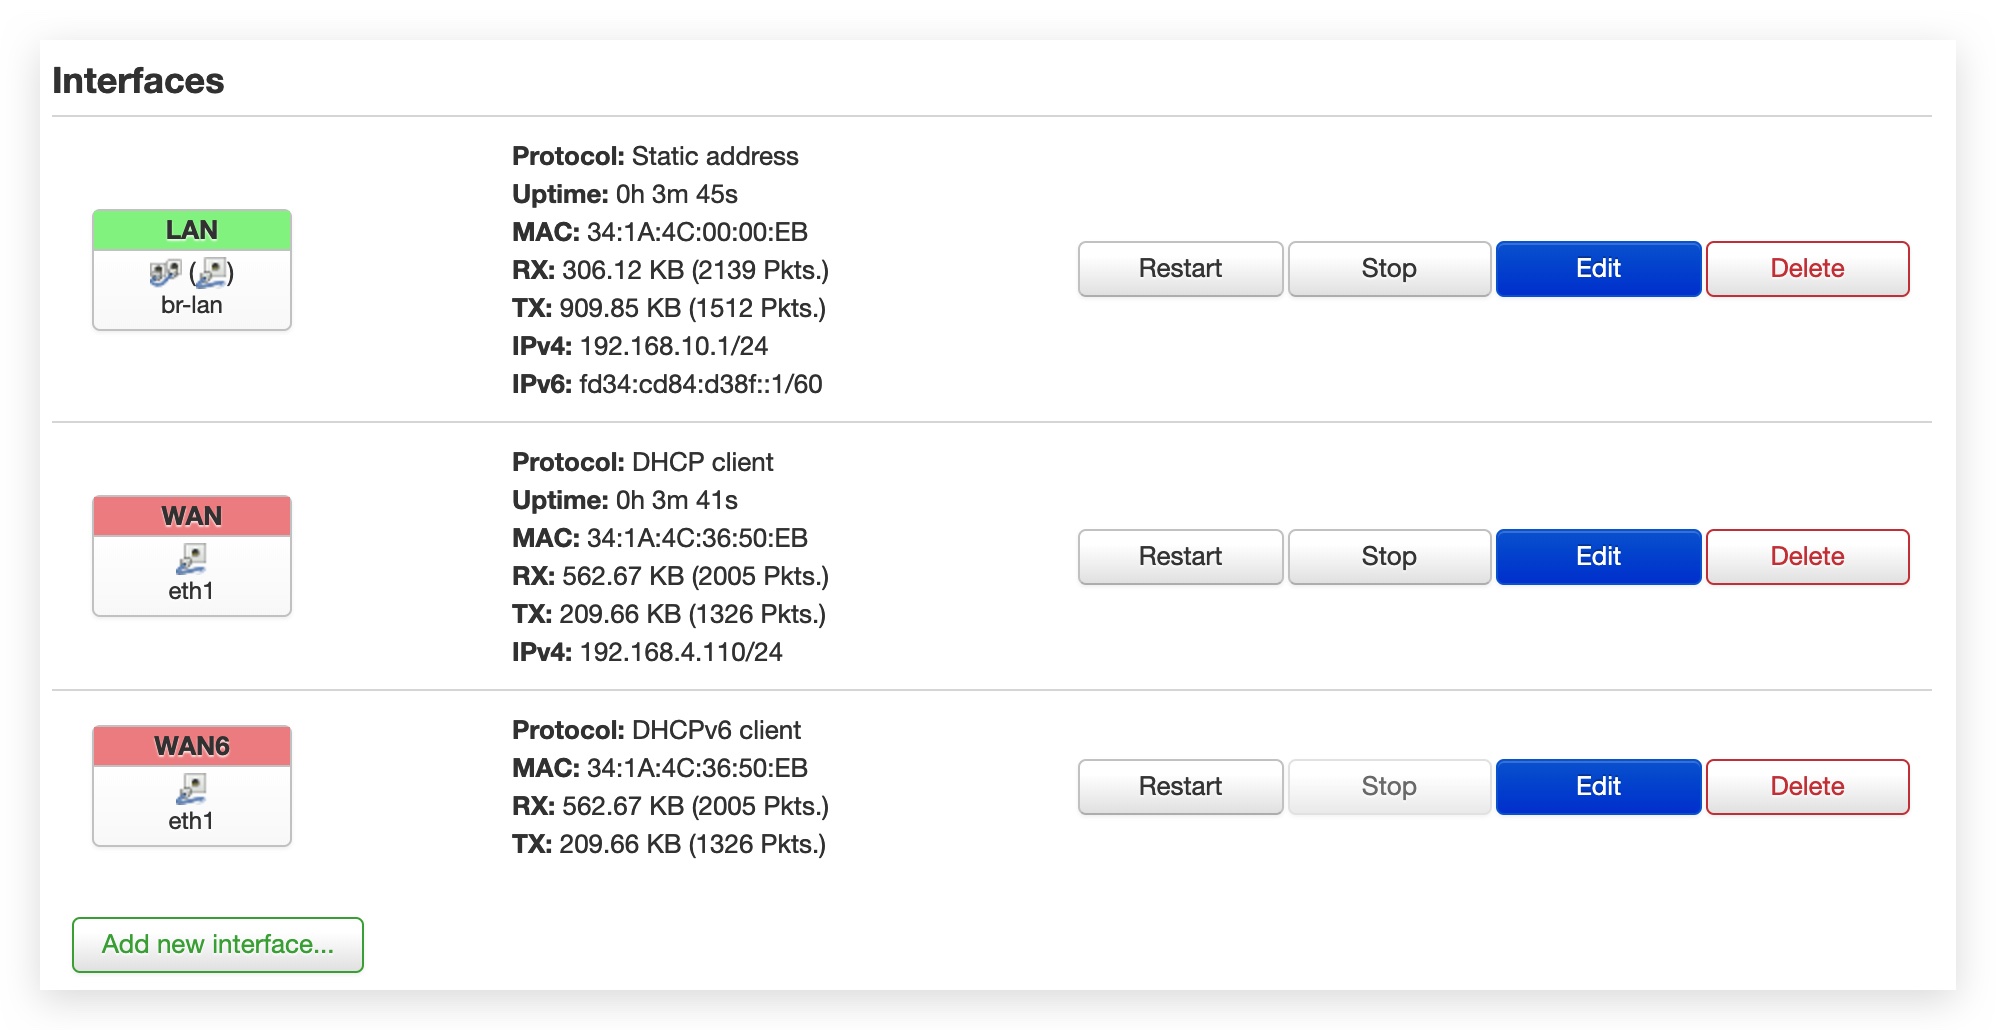
Now, your computer should access to the internet and your router is set to go!
For further development, you can start downloading and deploying all sort of applications such as Ad block, port mirroring and etc! For more, please visit OpenWrt.
Tech Support & Product Discussion
Thank you for choosing our products! We are here to provide you with different support to ensure that your experience with our products is as smooth as possible. We offer several communication channels to cater to different preferences and needs.