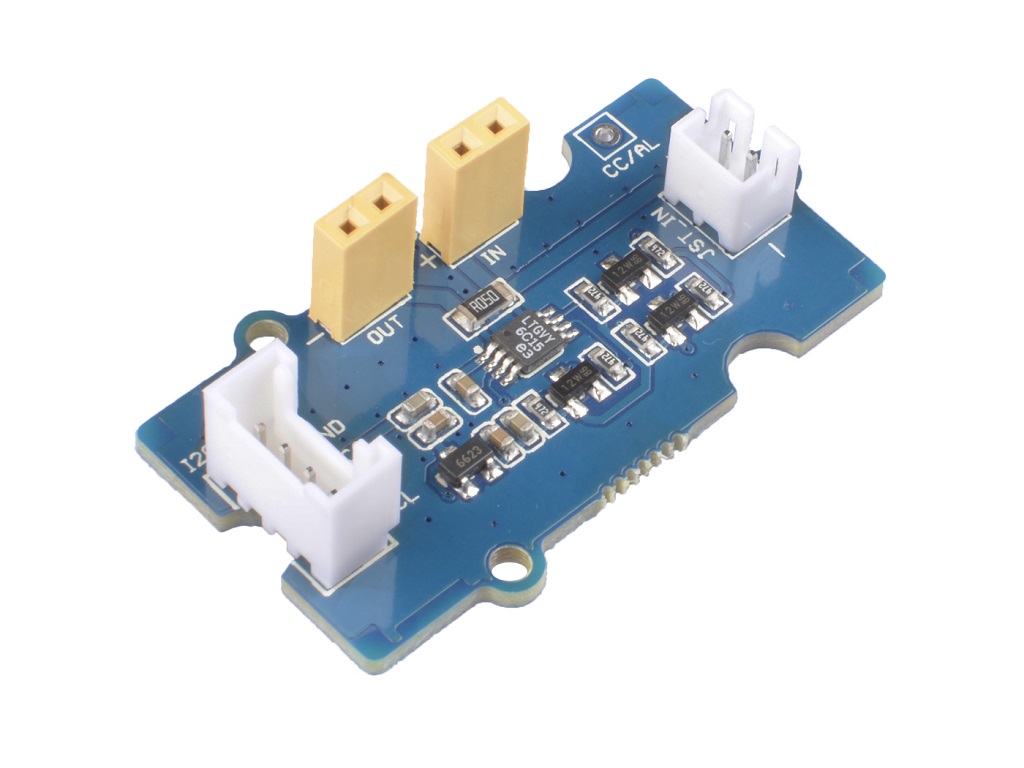
Grove - Coulomb Counter 3.3V to 5V (LTC2941)
The coulomb (symbol: C) is the International System of Units (SI) unit of electric charge.It is the charge (symbol: Q or q) transported by a constant current of one ampere in one second:1C=1A•1s. A Coulomb Counter is a device to measure the current that your devices or sensors is using.
The Grove - Coulomb Counter 3.3V to 5V (LTC2941) is based on LTC2941, its operating range is perfectly suited for single-cell Li-Ion batteries. A precision coulomb counter integrates current through a sense resistor between the battery’s positive terminal and the load or charger. This module measures the amount of amp-hours have been used, if you use a fully charged battery, you can test the amount of battery you have used, the remaining percentage, just like the remaining battery shown in your phone. Vice versa, if you are changring a battery, you can use this module to monitor the charging process.

Features
- Indicates Accumulated Battery Charge and Discharge
- High Accuracy Analog Integration
- 1% Charge Accuracy
- SMBus/I2C Interface
Specification
| Item | Value |
|---|---|
| Operating Voltage | 2.7V to 5.5V |
| Operating Temperature | 0℃ to +70℃ |
| Accuracy | ±2ppm from 0°C to +40°C |
| Interface | I2C |
| I2C Address | 0x64 |
Typical Applications
- Low Power Handheld Products
- Cellular Phones
- MP3 Player
- Cameras
- GPS
Hardware Overview
Pin Out
Overview
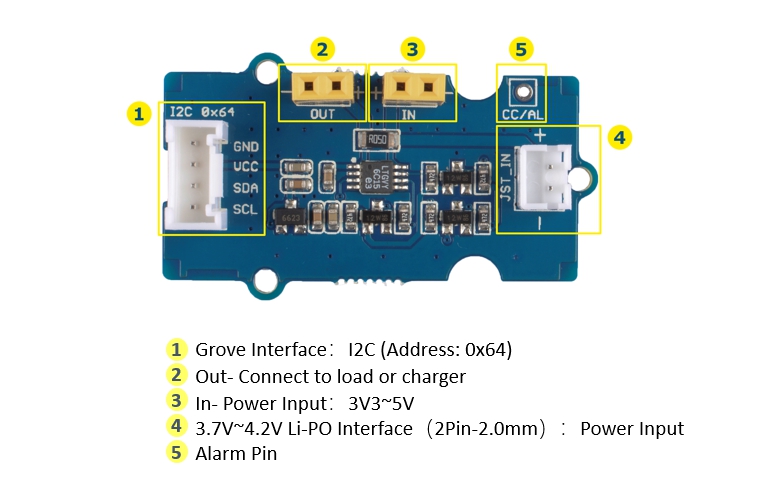
Both 3 and 4 are power input interfaces, please selecte one as the power input, do not use two at the same time, and the voltage can not exceed 5V, otherwise the module may be damaged.
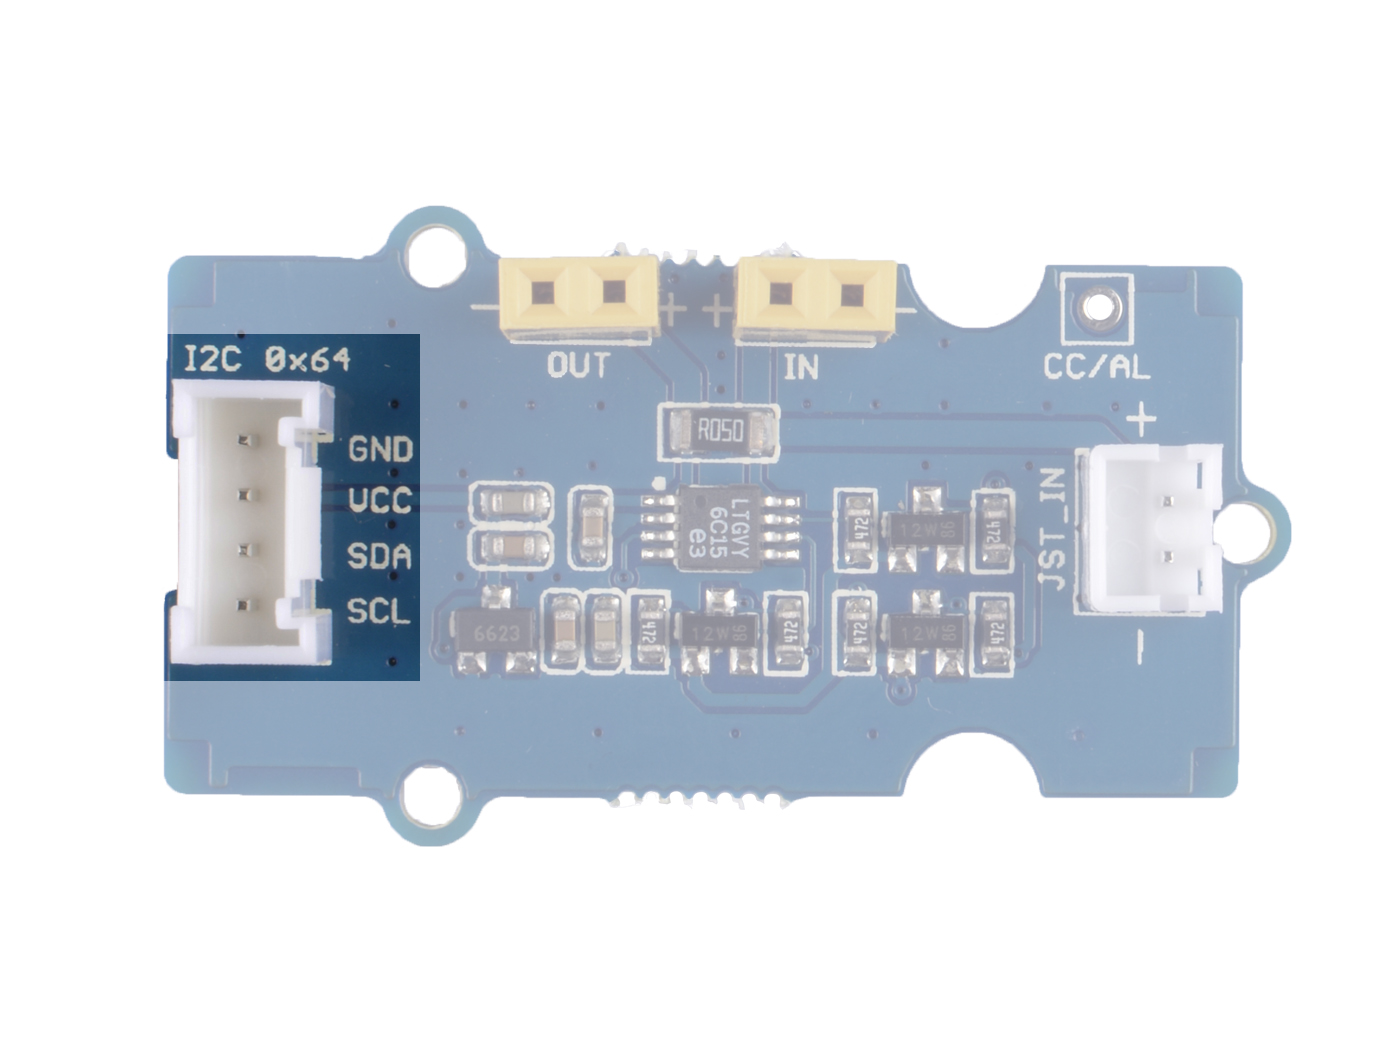
Grove Interface
This module communicate with the control board via I2C interface:
GND: Power pin, connect to the systerm GND
VCC: Power pin, connect to the 5V or 3.3V, power supply for this module. SDA: Signal pin, I2C serial data
SCL: Signal pin, I2C serial clock
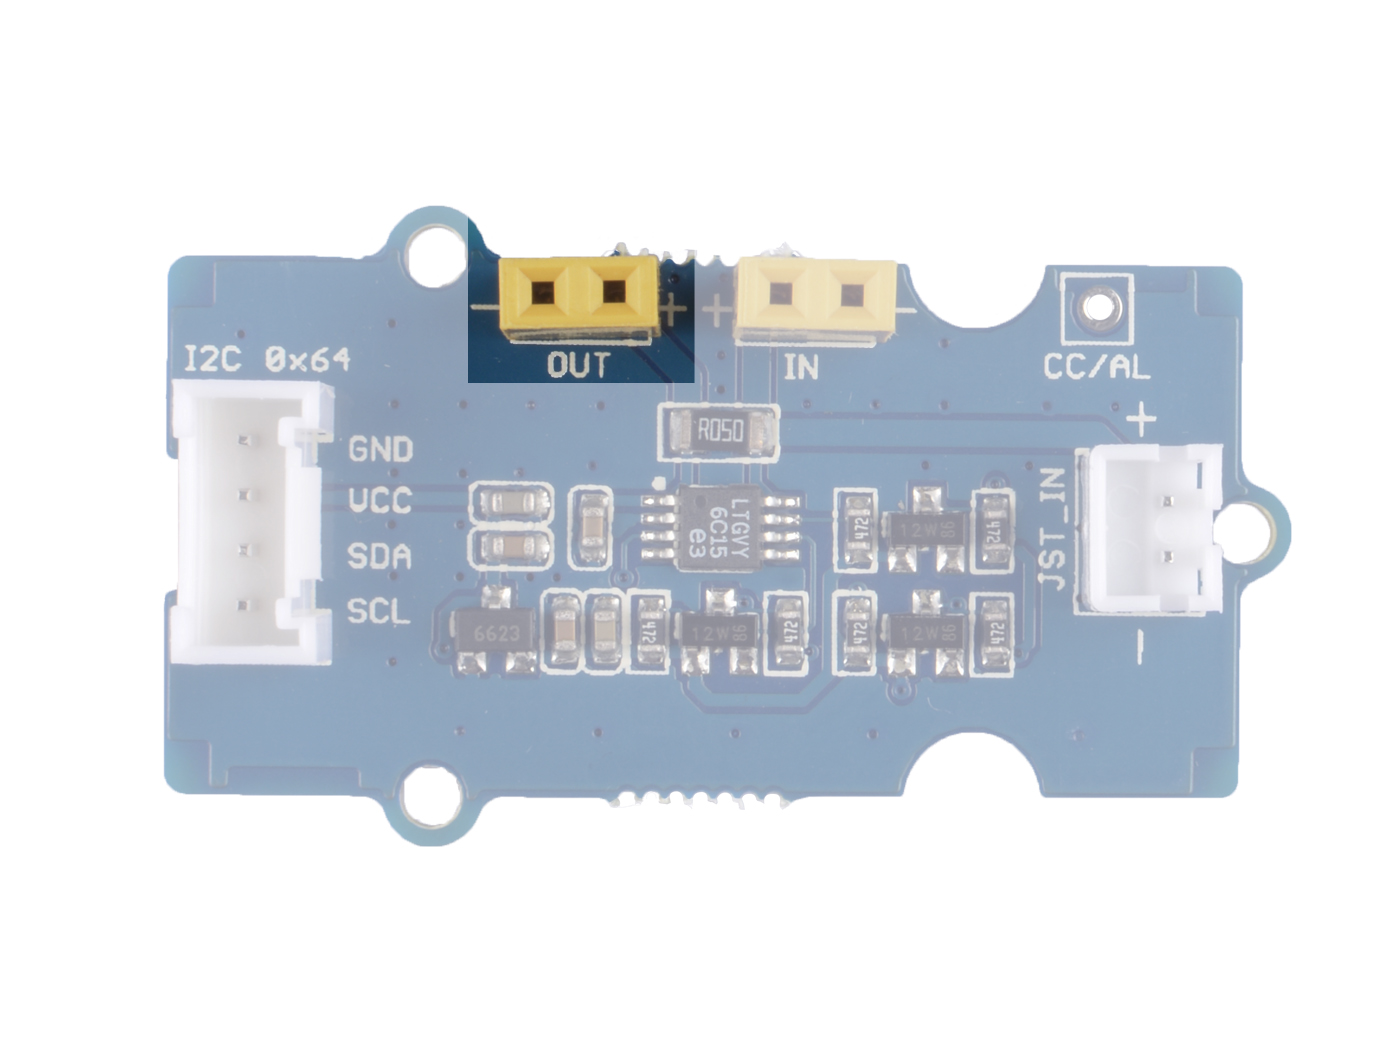
OUT
Power output, connect to the load or the charger.
+: Power output Positive electrode
-: Power output negative electrode
Do not connect directly to inductive loads, such as motors or servos, or the chip may be damaged due to ripple caused by inductive loads.
IN
Power input, power supply for the OUT
+: Power input Positive electrode
-: Power input negative electrode
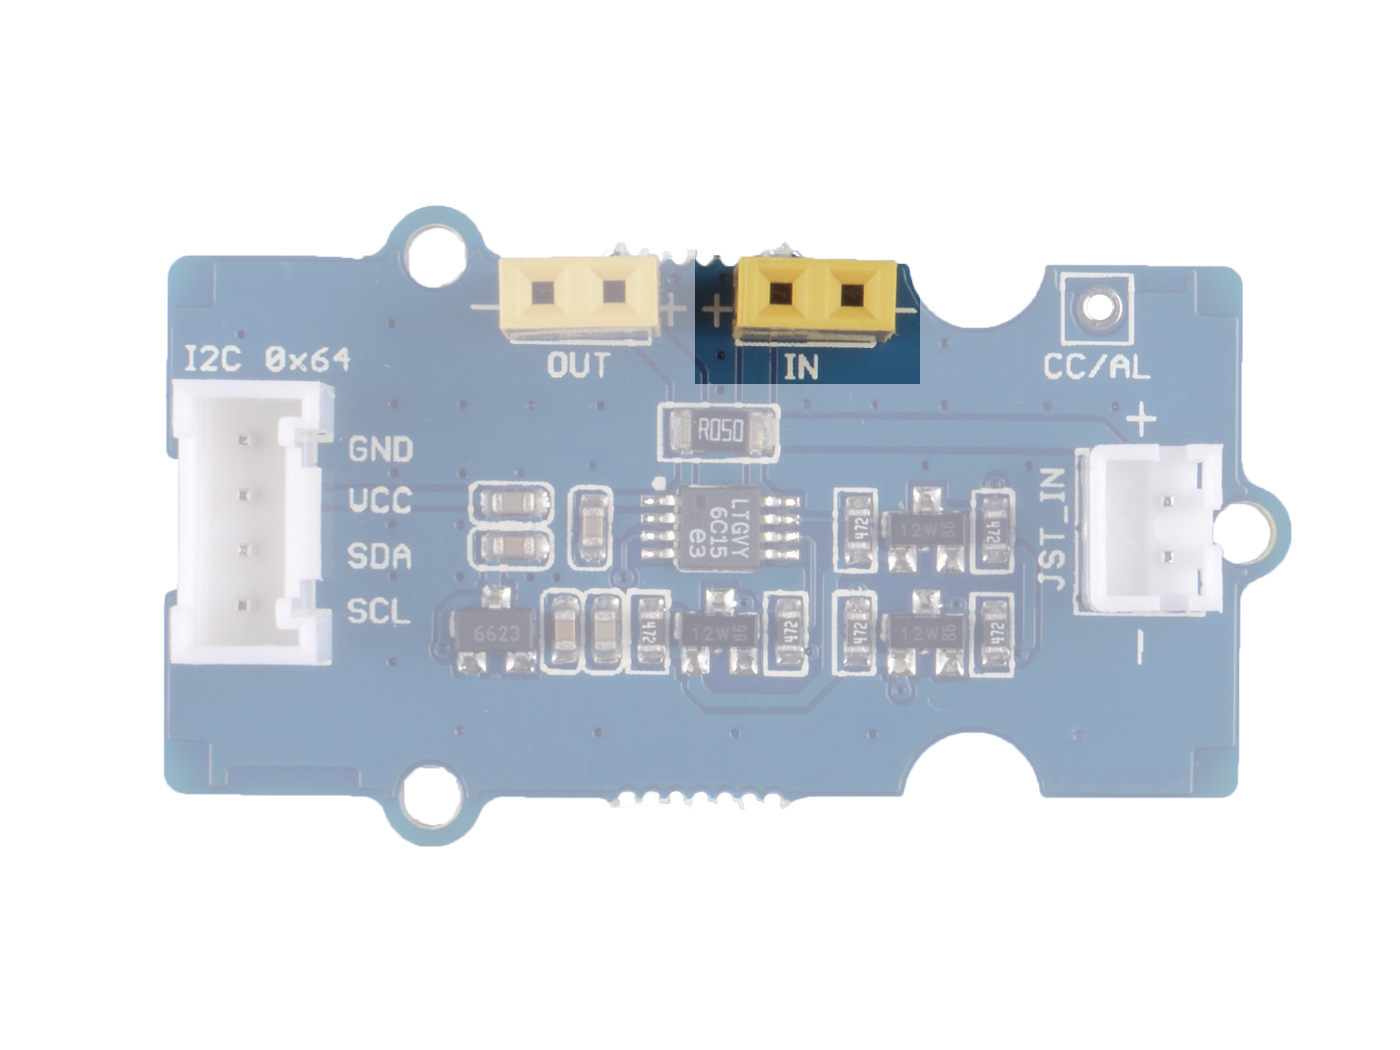
If you use the I2C Scanner to scan the device I2C ID, you have to supply 3.3v/5v to IN terminal.
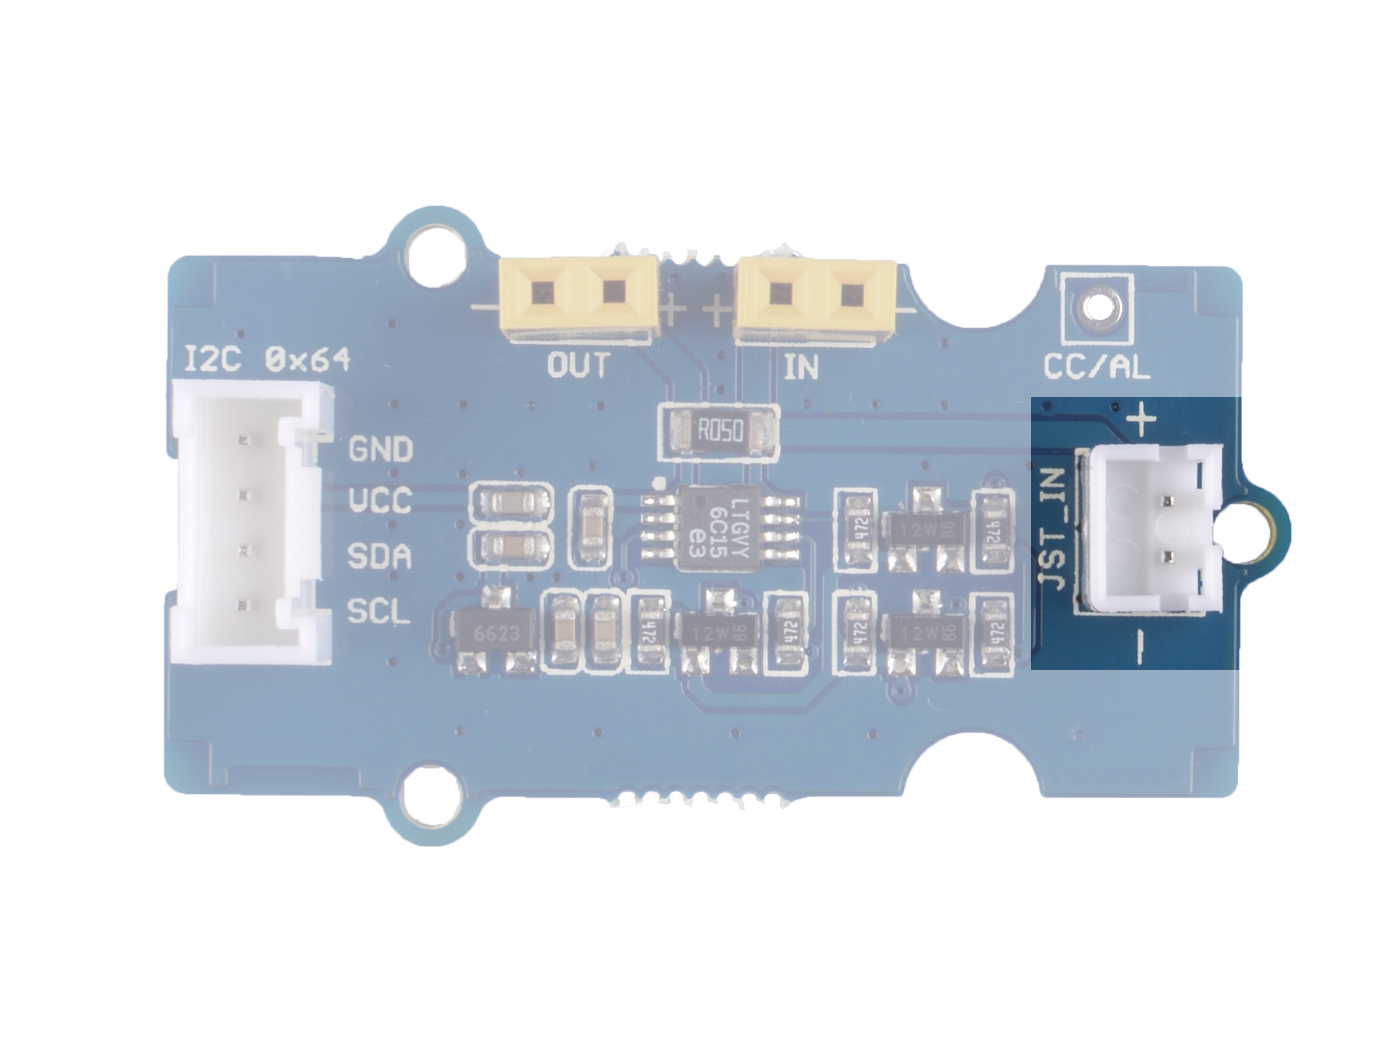
Battery Input
Battery Input, support 3.7-4.2v Li-PO battery, Jst2.0(2 pin-2.0mm), power supply for the OUT
+: Battery input Positive electrode
-: Battery input negative electrode
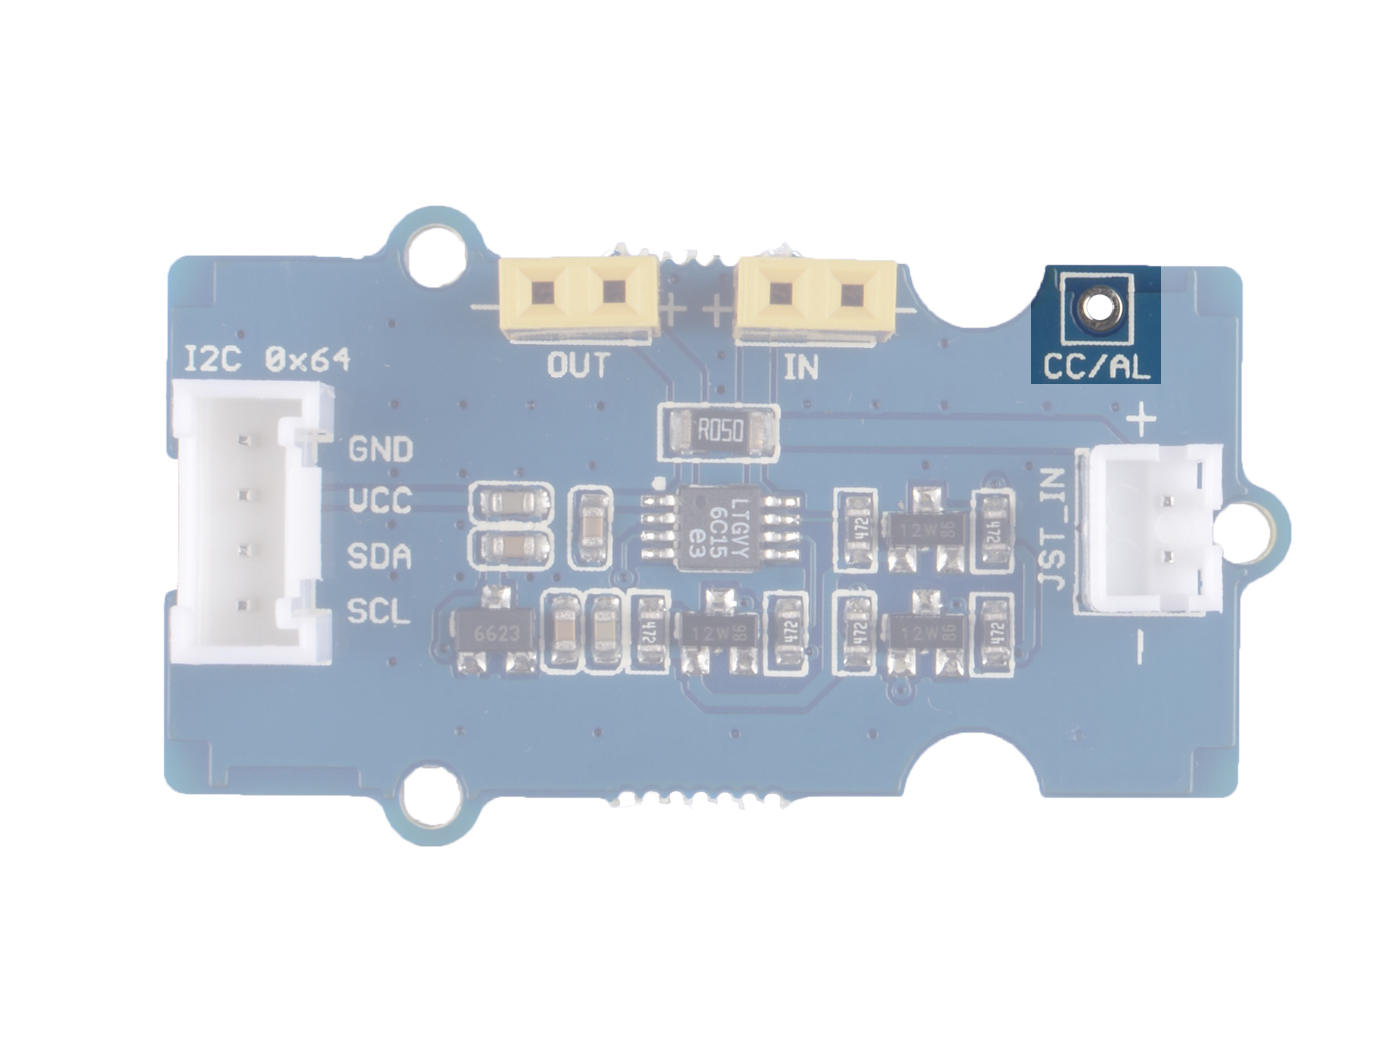
Alarm Pin
Connect to the AL/CC pin of LTC2941, alert output or charge complete input. The LTC2941 do support alert function, and we reserved the relevant hardware pins for you, however the software we provide do not support this function. So, you need to work with the software part yourself if you need this part.
Platforms Supported
| Arduino | Raspberry Pi | |||
|---|---|---|---|---|
The platforms mentioned above as supported is/are an indication of the module's software or theoritical compatibility. We only provide software library or code examples for Arduino platform in most cases. It is not possible to provide software library / demo code for all possible MCU platforms. Hence, users have to write their own software library.
Getting Started
Play With Arduino
Hardware
Materials required
| Seeeduino V4.2 | Base Shield | Grove - Coulomb Counter 3.3V to 5V (LTC2941) |
|---|---|---|
 |  |  |
| Get One Now | Get One Now | Get One Now |
1 Please plug the USB cable gently, otherwise you may damage the port. Please use the USB cable with 4 wires inside, the 2 wires cable can't transfer data. If you are not sure about the wire you have, you can click here to buy
2 Each Grove module comes with a Grove cable when you buy. In case you lose the Grove cable, you can click here to buy.
-
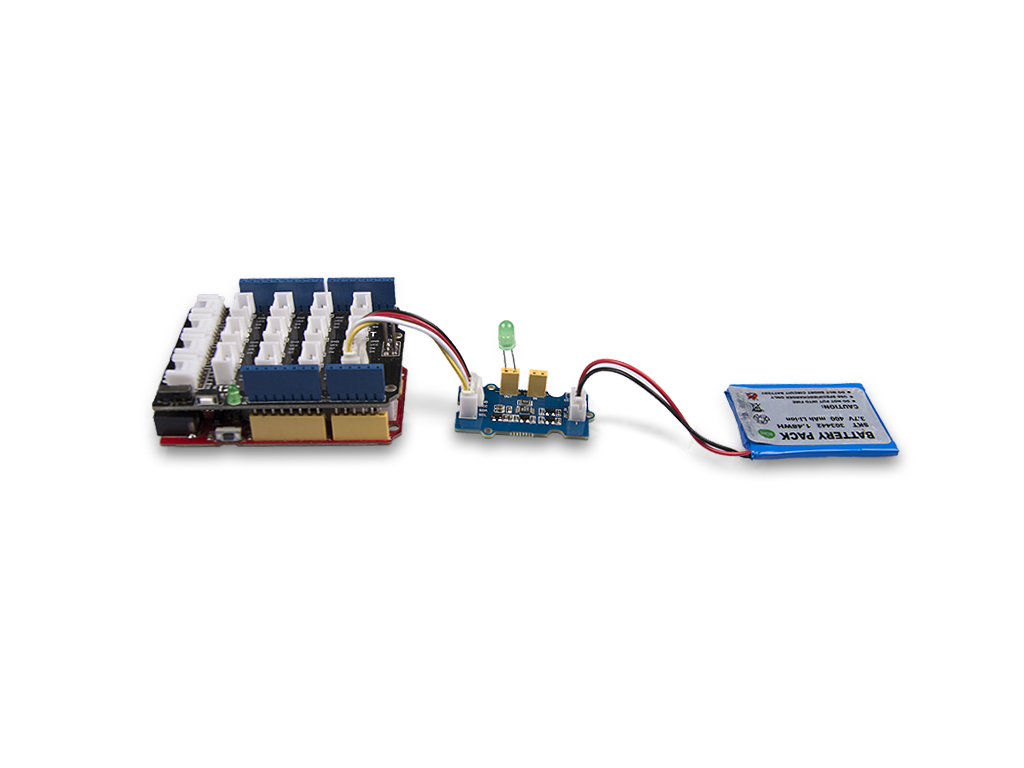
Step 1. Plug the load or charger into the port OUT.
-
Step 2. Plug the battery into the JST port or plug other power source into port IN.
-
Step 3. Plug the Grove - Coulomb Counter 3.3V to 5V (LTC2941) to port I2C of Grove-Base Shield.
-
Step 4. Plug Grove - Base Shield into Seeeduino.
-
Step 5. Connect Seeeduino to PC via a USB cable.
If we don't have Grove Base Shield, We also can directly connect this module to Seeeduino as below.
| Seeeduino | Grove Cable | Grove - Coulomb Counter 3.3V to 5V (LTC2941) |
|---|---|---|
| GND | Black | GND |
| 5V or 3.3V | Red | VCC |
| SDA | White | SDA |
| SCL | Yellow | SCL |
Software
If this is the first time you work with Arduino, we strongly recommend you to see Getting Started with Arduino before the start.
-
Step 1. Download the Seeed_LTC2941 Library from Github.
-
Step 2. Refer to How to install library to install library for Arduino.
-
Step 3. Restart the Arduino IDE. Open the example, you can open it in the following three ways:
- Open it directly in the Arduino IDE via the path: File --> Examples --> Grove - Coulomb Counter for 3.3V to 5V(LTC2941) --> battery_power.
battery_power: This demo will show you the electric charge data in the unit C and mAh, 1mAh=3.6C, as well as the remaining battery in percentage.
current_expend: This demo will show you how much power you are consuming.
- Open it in your computer by click the battery_power.ino which you can find in the folder XXXX\Arduino\libraries\Seeed_LTC2941-master\examples\battery_power, XXXX is the location you installed the Arduino IDE.

- Or, you can just click the icon
 in upper right corner of the code block to copy the following code into a new sketch in the Arduino IDE.
#include "LTC2941.h"

#ifdef ARDUINO_SAMD_VARIANT_COMPLIANCE
  #define SERIAL SerialUSB
#else
  #define SERIAL Serial
#endif

float coulomb = 0, mAh = 0, percent = 0;

void setup(void)
{
    Wire.begin();

    SERIAL.begin(115200);
    while(!SERIAL.available());

    SERIAL.println("LTC2941 Raw Data");

    ltc2941.initialize();
    ltc2941.setBatteryFullMAh(400);
}

void loop(void)
{
    coulomb = ltc2941.getCoulombs();
    mAh = ltc2941.getmAh();
    percent = ltc2941.getPercent();

    SERIAL.print(coulomb);
    SERIAL.print("C,");
    SERIAL.print(mAh);
    SERIAL.print("mAh,");
    SERIAL.print(percent);
    SERIAL.print("%");

    SERIAL.println();

    delay(1000);
}
The library file may be updated. This code may not be applicable to the updated library file, so we recommend that you use the first two methods.
-
Step 4. Upload the demo. If you do not know how to upload the code, please check How to upload code.
-
Step 5. Open the Serial Monitor of Arduino IDE by click Tool-> Serial Monitor. Or tap the
ctrl+shift+mkey at the same time. Set the baud rate to 115200.
If every thing goes well, when you open the Serial Monitor and tap any key the press the send button , it may show as below:
LTC2941 Raw Data
1439.96C,399.99mAh,100.00%
1439.96C,399.99mAh,100.00%
1439.96C,399.99mAh,100.00%
Function description
In the demo, we use a 400mAh battery, so you can see the results 1439.96mC,399.99mAh,100.00%. The percentage of remaining battery is valid only after you set the battery capacity. You can change the battery capacity at the code line 21,
ltc2941.setBatteryFullMAh(400); // set the battery capacity here
What's more, every time you re-open the serial port, or re-power the control board, the data will be reset to 100.00%. So, there still a lot work to do if you want to use it in your phone :D
Schematic Online Viewer
Resources
-
[Zip] Grove - Coulomb Counter 3.3V to 5V (LTC2941) Eagle Files
-
[Zip] Seeed LTC2941 Library
-
[PDF] Datasheet LTC2941
Project
This is the introduction Video of this product, simple demos, you can have a try.
Tech Support & Product Discussion
Thank you for choosing our products! We are here to provide you with different support to ensure that your experience with our products is as smooth as possible. We offer several communication channels to cater to different preferences and needs.