Grove - MOSFET
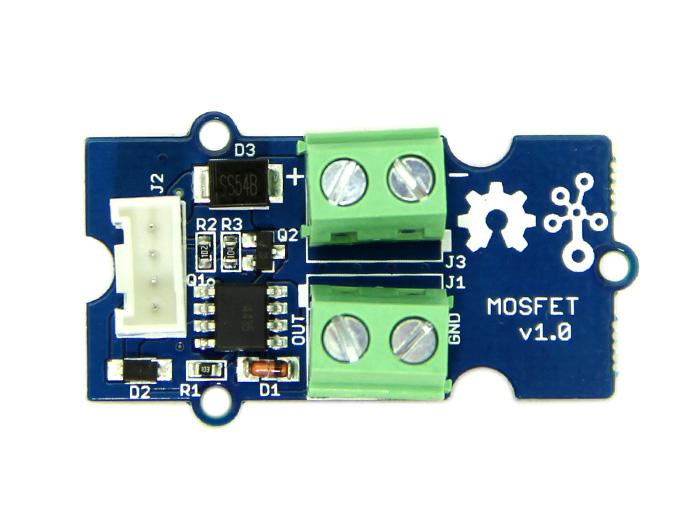
Grove – MOSFET enables you to control higher voltage project, say 15V DC, with low voltage, say 5V, on microcontroller. MOSFET is also a kind of switch, but its switching frequency can reach up to 5MHz, much faster than normal mechanical relay. There are two screw terminals on the board. One for outer power source and the other for device you want to control. Grove – MOSFET will pass the power from one end to another when closed. But if outer power source is absent, your device can still draw power from microcontroller via the Grove interface.
![]()
Version
| Product Version | Changes | Released Date |
|---|---|---|
| Grove - MOSFET V1.0 | Initial | Oct 2015 |
Specification
| Parameter | Value/Range |
|---|---|
| Working voltage | 5V |
| Vin | 5 ~ 15V |
| MOSFET Model | CJQ4435 |
More details about Grove modules please refer to Grove System
Platforms Supported
| Arduino | Raspberry Pi | |||
|---|---|---|---|---|
The platforms mentioned above as supported is/are an indication of the module's software or theoritical compatibility. We only provide software library or code examples for Arduino platform in most cases. It is not possible to provide software library / demo code for all possible MCU platforms. Hence, users have to write their own software library.
Getting Started
If this is the first time you work with Arduino, we firmly recommend you to see Getting Started with Arduino before the start.
Play With Arduino
Demonstration
Here we demonstrate how to use Grove - MOSFET to control a motor. We provide power for it with external power source, but if your controlled device needs current smaller than 300mA, Seeeduino can totally support it and no extra power source needed.、
Hardware
- Step 1. Prepare the below stuffs:
| Seeeduino V4.2 | Base Shield | Grove - MOSFET |
|---|---|---|
 |  |  |
| Get One Now | Get One Now | Get One Now |
- Step 2. Connect Grove - MOSFET to port D6 of Grove-Base Shield.
- Step 3. Plug Grove - Base Shield into Seeeduino.
- Step 4. Connect Seeeduino to PC via a USB cable.
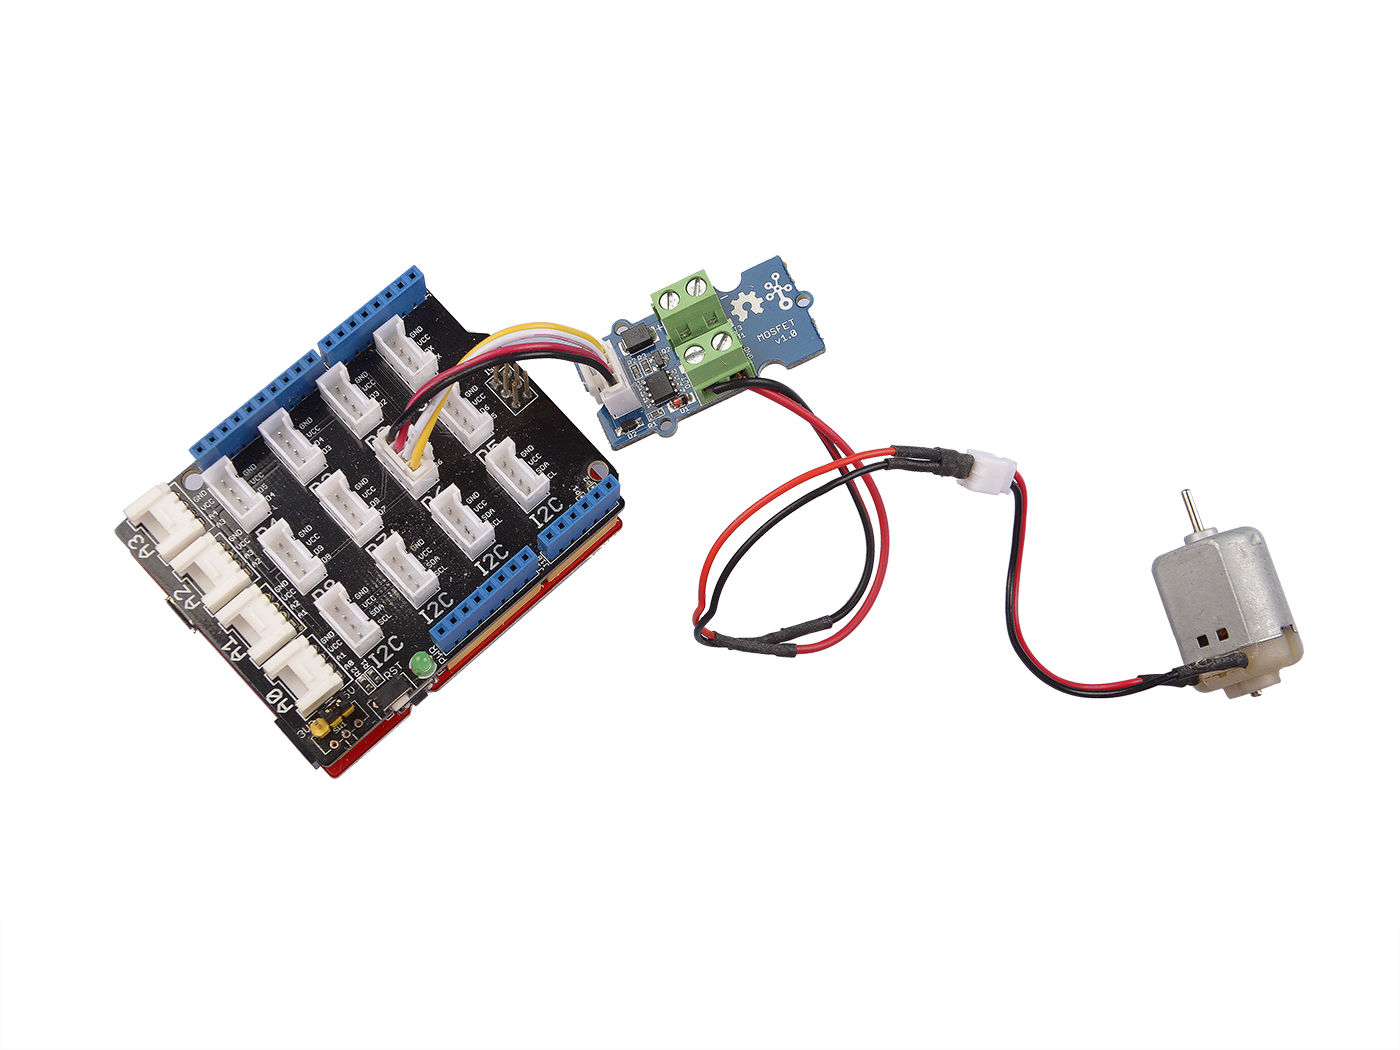
If we don't have Grove Base Shield, We also can directly connect Grove_MOSFET to Seeeduino as below.
| Seeeduino | Grove_MOSFET |
|---|---|
| 5V | Red |
| GND | Black |
| Not Conencted | White |
| D6 | Yellow |
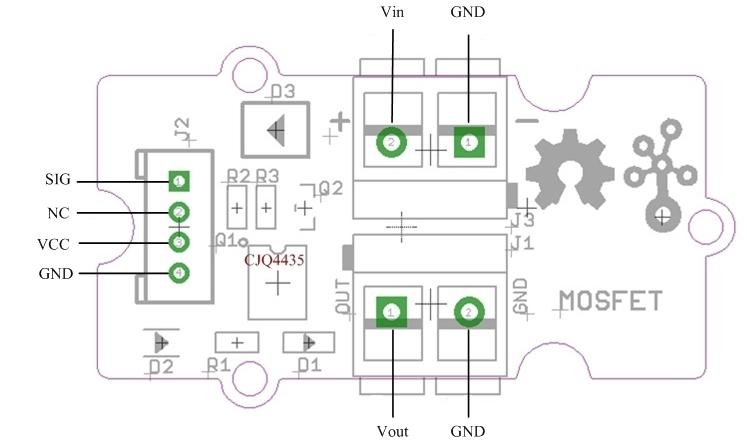
Vin: Accepts 5V ~ 15V power of which current is less than 2A.
Vout: Attach actuators here.
Software
- Step 1. Copy the code into Arduino IDE and upload. If you do not know how to upload the code, please check how to upload code.
// demo of Grove - MOSFET
// use  pwm pin 6 to control a motor

int motorPin = 6;

void setup()
{
    Serial.begin(38400);
    pinMode(motorPin, OUTPUT);
    Serial.println("Grove - MOSFET Test Demo!");
}

void loop()
{
    motorOnThenOffWithSpeed();
    motorAcceleration();
}

void motorOnThenOffWithSpeed()
{
    int onSpeed  = 200;                         // a number between 0 (stopped) and 255 (full speed)
    int onTime   = 2500;
    int offSpeed = 50;                          // a number between 0 (stopped) and 255 (full speed)
    int offTime  = 1000;
    analogWrite(motorPin, onSpeed);
    delay(onTime);
    analogWrite(motorPin, offSpeed);
    delay(offTime);
}

void motorAcceleration()
{
    int delayTime = 50;
    for(int i=0; i<256; i++)
    {
        analogWrite(motorPin, i);
        delay(delayTime);
    }

    for(int i=255; i>=0; i--)
    {
        analogWrite(motorPin, i);
        delay(delayTime);
    }
}
- Step 2. Observe the state of the motor

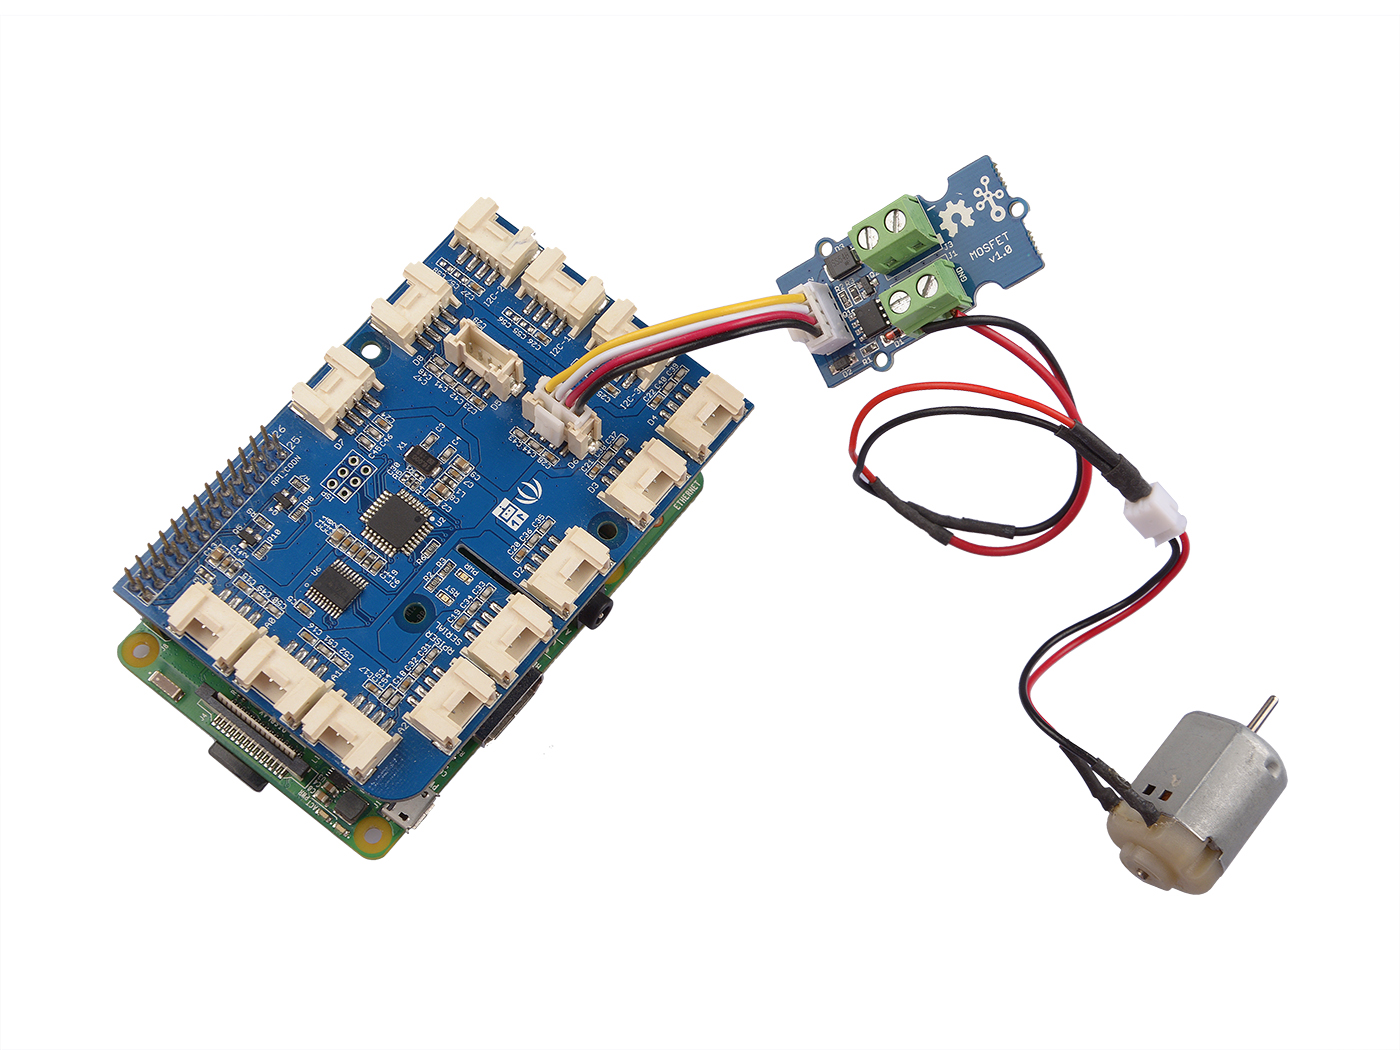
Play With Raspberry Pi
Hardware
- Step 1. Prepare the below stuffs:
| Raspberry pi | GrovePi_Plus | Grove - MOSFET |
|---|---|---|
 |  | |
| Get One Now | Get One Now | Get One Now |
- Step 2. Plug the GrovePi_Plus into Raspberry.
- Step 3. Connect Grove-MOSFET ranger to D6 port of GrovePi_Plus.
- Step 4. Connect the Raspberry to PC through USB cable.
Software
- Step 1. Navigate to the demos' directory:
cd yourpath/GrovePi/Software/Python/
- Step 2. To see the code
nano grove_mosfet.py # "Ctrl+x" to exit #
import time
import grovepi

# Connect the Grove MOSFET to digital port D6
# SIG,NC,VCC,GND
mosfet = 6

grovepi.pinMode(mosfet,"OUTPUT")
time.sleep(1)

while True:
    try:
        # Full speed
        grovepi.analogWrite(mosfet,255)
        print "full speed"
        time.sleep(2)

        # Half speed
        grovepi.analogWrite(mosfet,128)
        print "half speed"
        time.sleep(2)

        # Off
        grovepi.analogWrite(mosfet,0)
        print "off"
        time.sleep(2)

    except KeyboardInterrupt:
        grovepi.analogWrite(mosfet,0)
        break
    except IOError:
        print "Error"
- Step 3. Run the demo.
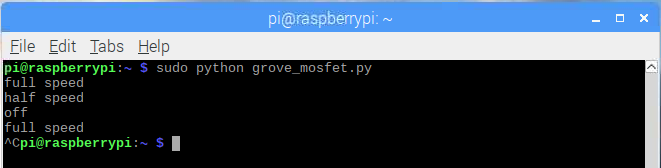
sudo python grove_mosfet.py
- Step 4. We will see the output display on terminal as below.
|
Resources
- [Eagle] Grove - MOSFET Schematic file
- [PDF] Grove - MOSFET Schematic PDF
- [Datasheet] CJQ4435 Datasheet
- [WIKI] MOSFET Wikipedia
Tech Support & Product Discussion
Thank you for choosing our products! We are here to provide you with different support to ensure that your experience with our products is as smooth as possible. We offer several communication channels to cater to different preferences and needs.